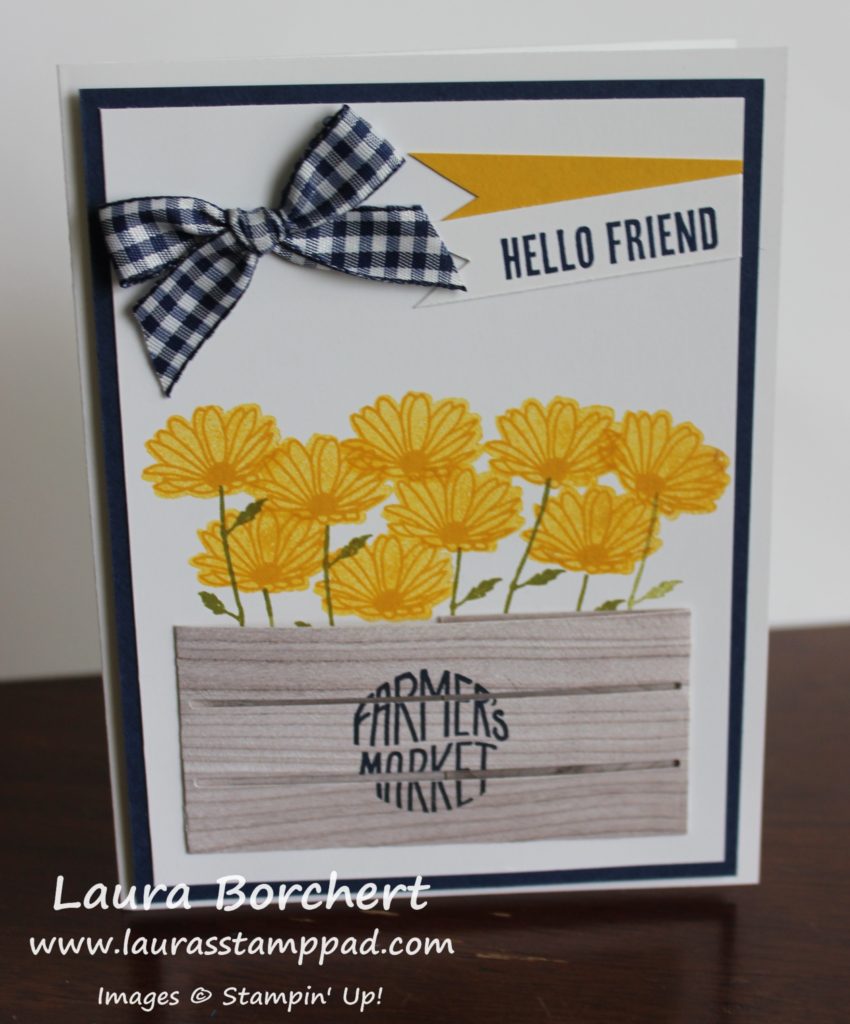
This Wooden Crate Full of Daisies is so beautiful! I love bright colored flowers. Also, this card uses up the leftover pieces from making the 3D wooden crate I showed on Tuesday. Check that out here!
Isn’t this card so rustic and fabulous?!?!?! I love the navy and yellow and that gingham ribbon!!!
I started with a Whisper White card base and layered on a piece of Night of Navy (4″ x 5-1/4″). Next I took a piece of Whisper White (3-3/4″ x 5″) and stamped the flowers from the Daisy Delight Stamp Set in Crushed Curry. I stamped the background image stamped off once and then stamped the detailed image in full strength. After I had all of the flowers placed, I added the stems in Old Olive. Some of the flowers have a hidden stem and some have a stem out front. This is all a variation to show a full crate of flowers!
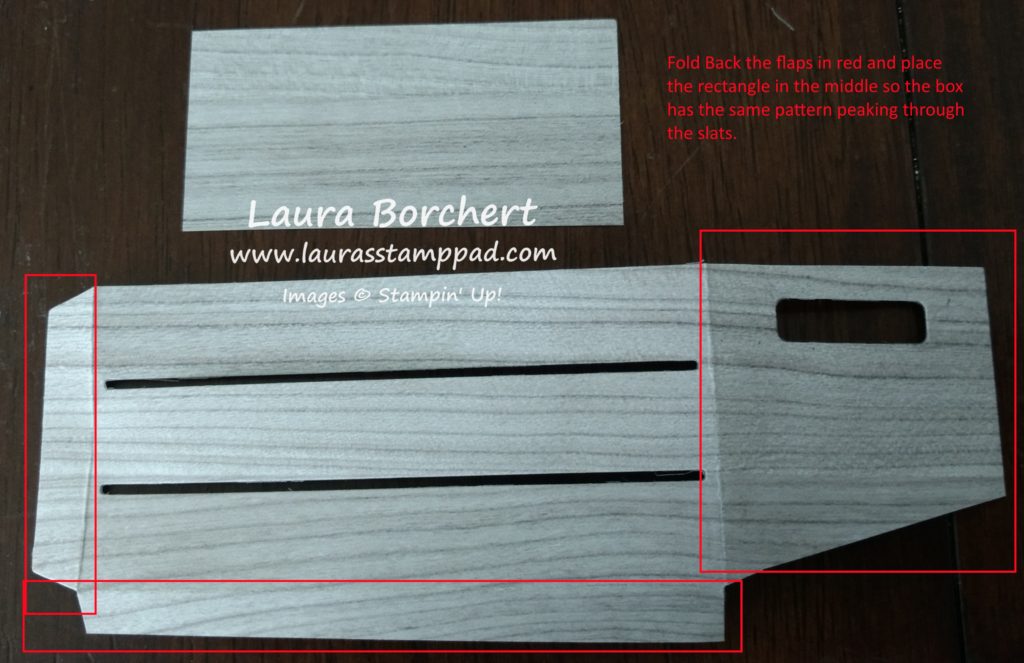
For the crate, I used the Wood Crate Framelits. I die cut out 1 crate piece with all of the top portion of the crate on the Wood Textures Designer Series Paper. That bottom rectangle does not need to be completely on the paper because it will be cut off. This is a great way to use up the rest of the designer paper after die cutting a full crate to use as a 3D box. All of the tabs in the photo above are folded back and adhered. The rectangle above was just an extra piece cut out to fill in the spots that aren’t covered by the tabs. I wanted the crate to look seamless and have the same wood color peaking through the slats rather than the white cardstock I placed it on. Now I have a flat crate for my card!
 Now it is time to assemble the card! I placed the crate over the flower stems and stamped the Farmer’s Market seal on the crate. This stamp is from the Wood Words Stamp Set. Bundle & Save 10% when you purchase the stamp set and crate framelits. Next I added this to the card front on top of the Navy cardstock. I stamped the greeting from Wood Words Stamp Set onto a strip of white. After that, I cut the banner tips and paired it with a Crushed Curry strip. Finally, I added the little bow of Night of Navy Gingham Ribbon with a Mini Glue Dot.
If you would like to see this all in action, check out the Video Tutorial below or click here! Be sure to give the video a thumbs up if you liked it and don’t forget to subscribe if you are new. If you would like a notification when I post a new video, be sure to click the bell right next to the subscribe!!!
Happy Stampin’
~Laura


So cute, Laura. Missing you and stampin with friends. Thank you for pretty card….can hardly wait til I can feel good enough to make some.
Miss you too and can’t wait till you can stamp with us again. Praying for a speedy recovery! ~Laura