Color Inspiration for the Sunflower Stamp!!!

Posted on

I have been LOVING the Painted Harvest Stamp Set and using it like every day!!! Today, I’m sharing a little color inspiration for the Sunflower Stamp because I have tried lots of them!!!

Color Inspiration for the Sunflower Stamp, www.LaurasStampPad.com

Do you prefer to keep it as the traditional yellow sunflower or branch out and use other colors?? Let me know in the comments below!

I started with an Island Indigo card base. Next, I took a piece of Very Vanilla measuring 4″ x 5-1/4″ to stamp the flowers on. I used the 2 step flower image from the Painted Harvest Stamp Set. I love how while it is a 2-Step stamp, there is no perfect way to line it up. Just stamp them together. The other bonus is that you don’t have to stamp off. Doing both at full strength is just fabulous!!! I stamped the flower in Marina Mist for the larger image and Island Indigo for the smaller more detailed one. The center was stamped in Early Espresso! For the leaves I used Old Olive and Tranquil Tide! The colors are just amazing!

To finish off the card, I added a strip of Tranquil Tide Finely Woven Ribbon across the middle and wrapping the ends to the back. Then I added this to the card front. For the greeting, I used the Stitched Shapes Framelits and Layering Circles Framelits. The greeting is from the Flourishing Phrases Stamp Set and stamped in Marina Mist Ink! I added the greeting to the front with Stampin’ Dimensionals!

Product List

Now for some more color combinations! Which one is your favorite?? I think mine is the Fresh Fig and Berry Burst combination!

Sunflower Stamp, www.LaurasStampPad.com

If you would like to see these up close, check out the Video Tutorial below or click here! Be sure to give the video a thumbs up if you liked it and don’t forget to subscribe if you are new. If you would like a notification when I post a new video, be sure to click the bell right next to the subscribe!!!

Happy Stampin’

~Laura


You Mocha Me Crazy!!!

Posted on

Happy Wednesday! Here’s a little coffee to help you through the rest of the week. I am not a coffee drinker but have fallen in love with the Coffee Cafe Bundle and this adorable little pun…..You Mocha Me Crazy!!!You Mocha Me Crazy, www.LaurasStampPad.com

So to be honest, since I’m not a coffee drinker, I looked at this Suite and thought that it was cute but not for me. Then I take a lot of customers talking about it and saying how they loved it so I had to get on board. I LOVE IT!!! See here’s the thing, I don’t drink coffee but everyone I know does…..and after all I make cards for them and not myself! 🙂

I started with a Pear Pizzazz card base. Next, I took a piece of Whisper White (4″ x 5-1/4″) to stamp on. Then I just placed a piece of the Coffee Break Designer Series Paper (1″ x 5-1/4″) at the time. I didn’t adhere it just yet….in case I messed up my stamping. Using the designer paper as a guide, I stamped the lid and whipped topping from the Coffee Cafe Stamp Set in Basic Black Ink making sure to leave room for the straw. Then I stamped the cup and the straw.

I did it this way so that my spacing worked and everything fit. If I had stamped the cup first and added all the extras on top, it might be too high for the designer paper. When stamping the straw, simply place a scrap piece of paper over the lid as a mask. The straw stripes were stamped in Pear Pizzazz.

Coffee Cup, www.LaurasStampPad.com

For the coffee part, I placed scrap paper on either side of the cup and added some Early Espresso Ink with a Sponge Dauber! Now to assemble, I officially adhered the designer paper and attached it to the card base. Next, I wrapped some Black Baker’s Twine around the card and tied it into a bow. Using the little greeting from the Coffee Cafe Stamp Set, I stamped it on scrap white and punched it out with the 1/2″ Circle Punch. I added those with Mini Stampin’ Dimensionals and a few little Rhinestones for some bling!

Product List

This card is just super cute and ready to give to a friend for a coffee date to catch up!!!

Happy Stampin’

~Laura


Technique Tuesday – Colorful Fall Leaves!!!

Posted on

Happy Tuesday!!! That means I have a fabulous technique to share with you! Aren’t these colorful Fall leaves so real looking? I love how each one comes out different and they are just so stunning!

Colorful Fall Leaves, www.LaurasStampPad.com


This technique is super fun and simple! All you need is a baby wipe and your favorite fall colors of Ink Refills!

I started with a Cajun Craze card base. Next, I took a piece of Very Vanilla measuring 4″ x 5-1/4″. I actually stamped my greeting at the end but if you are concerned about leaving enough space, you can stamp it first. The greeting was stamped in Early Espresso Ink from the Colorful Seasons Stamp Set. This stamp set is perfect for all year long. Check out these other samples I created using it here, here, and here!

Now for stamping the leaves. I took a regular baby wipe and unfolded it from all of the creases in the package. Then I folded it in half twice to create a rectangle/square. I placed mine in a clear mount stamp case but any sort of plastic surface or disposable plate would work. Then simply add drops of your favorite fall colors from Ink Refills. I used Crushed Curry, Cajun Craze, Cherry Cobbler, and Always Artichoke.

Baby Wipe Ink Pad, www.LaurasStampPad.com

This is now the ink pad that I used for stamping the large and small leaf from the Colorful Seasons Stamp Set. I stamped the images all around the left hand side, top and bottom! Once I had all the leaves I wanted, I added some Old Olive Mini Chevron Ribbon to the bottom. Using Stampin’ Dimensionals, I added it to the card front. The card at the top was done with a knot and the one below I just added a strip of the ribbon. Which do you prefer?

Fall Leaves, www.LaurasStampPad.com

This new “ink pad” that was created can stamp tons of leaves before drying out or using it all up. Mine was actually still wet and usable the next day even! Of course every time I create a new “ink pad” it comes out different. Sometimes I have more of one color and other times I have a big splotches of color. I just love that crackle look from the texture on the baby wipe and the colors blending together!

Multi-Colored Leaves, www.LaurasStampPad.com


If you would like to see this in action, check out the Video Tutorial below or click here! Be sure to give the video a thumbs up if you liked it and don’t forget to subscribe if you are new. If you would like a notification when I post a new video, be sure to click the bell right next to the subscribe!!!


Happy Stampin’

~Laura

Product List


Creating Loops of Sequins Behind Your Greeting!!!

Posted on

I have recently fallen in love with these little loops of sequins behind the greeting! It really just makes it POP and I love the little bit of bling!

Leaves of Gold, www.LaurasStampPad.com

I used the Painted Harvest Stamp Set from the Holiday Mini Catalog which is perfect for this card and SO many other fabulous ones! Stay tuned to more samples using that amazing sunflower too!

I started with an Old Olive card base! Next I took a piece of Whisper White measuring 3-3/4″ x 5″ and stamped the leaf from the Painted Harvest Stamp Set 3 times. I used Old Olive Ink for both stamped images. Since these images are textured and not solid, they really overlay perfectly! I love it! After stamping the leaves, I added the strips of the Merry Little Christmas Designer Series Paper. These strips are just 3/4″ wide and angled on each end.

Loops of Gold Sequins, www.LaurasStampPad.com

Now, it’s time for the greeting. I used the Layering Circles Framelits for the Whisper White and Gold Foil circle! I stamped the greeting from the Painted Harvest Stamp Set! After adhering the greeting to the Gold Foil circle, I flipped it over. I took a strip of the Mini Gold Sequin Trim and looped it around the backside. Using Stampin’ Dimensionals, I secured these loops in the exact spot that I wanted it. (Yes, I am an over-user of dimensionals but that’s okay!) Next I added this to the card front. Since there are always a few sequins that fall off the end, I added them around the greeting to the card front. I used the Fine Tip Glue Pen to adhere them! I just love it!!!

Product List

Happy Stampin’
~Laura

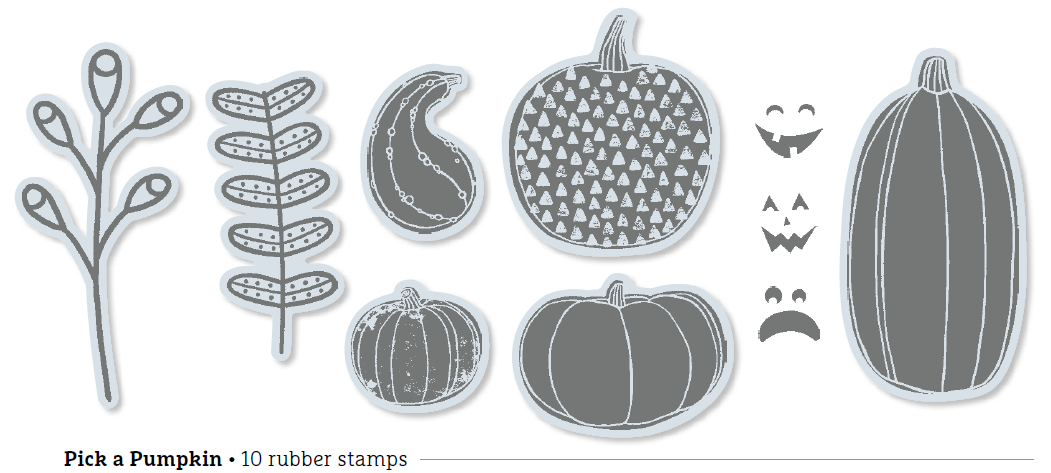
Pick A Pumpkin, www.LaurasStampPad.comDon’t forget that this stamp set – Pick A Pumpkin is the one you can earn for FREE with a $75 order! This offer is all month long. Check out all the details here!


Technique Tuesday – Treat Tubes For Every Occasion!

Posted on

Happy Tuesday!! That means I have a fabulous technique to share with you!!! Today, I’m showing you these fabulous Treat Tubes from the Holiday Mini Catalog!!!

Treat Tubes, www.LaurasStampPad.com

Here are 2 tubes that I decorated for Halloween and Christmas. Well actually that little red bow could be any occasion….like Valentine’s Day, Birthday, Baby, etc. That is what is so fun about these! They are cute, simple, and fun!

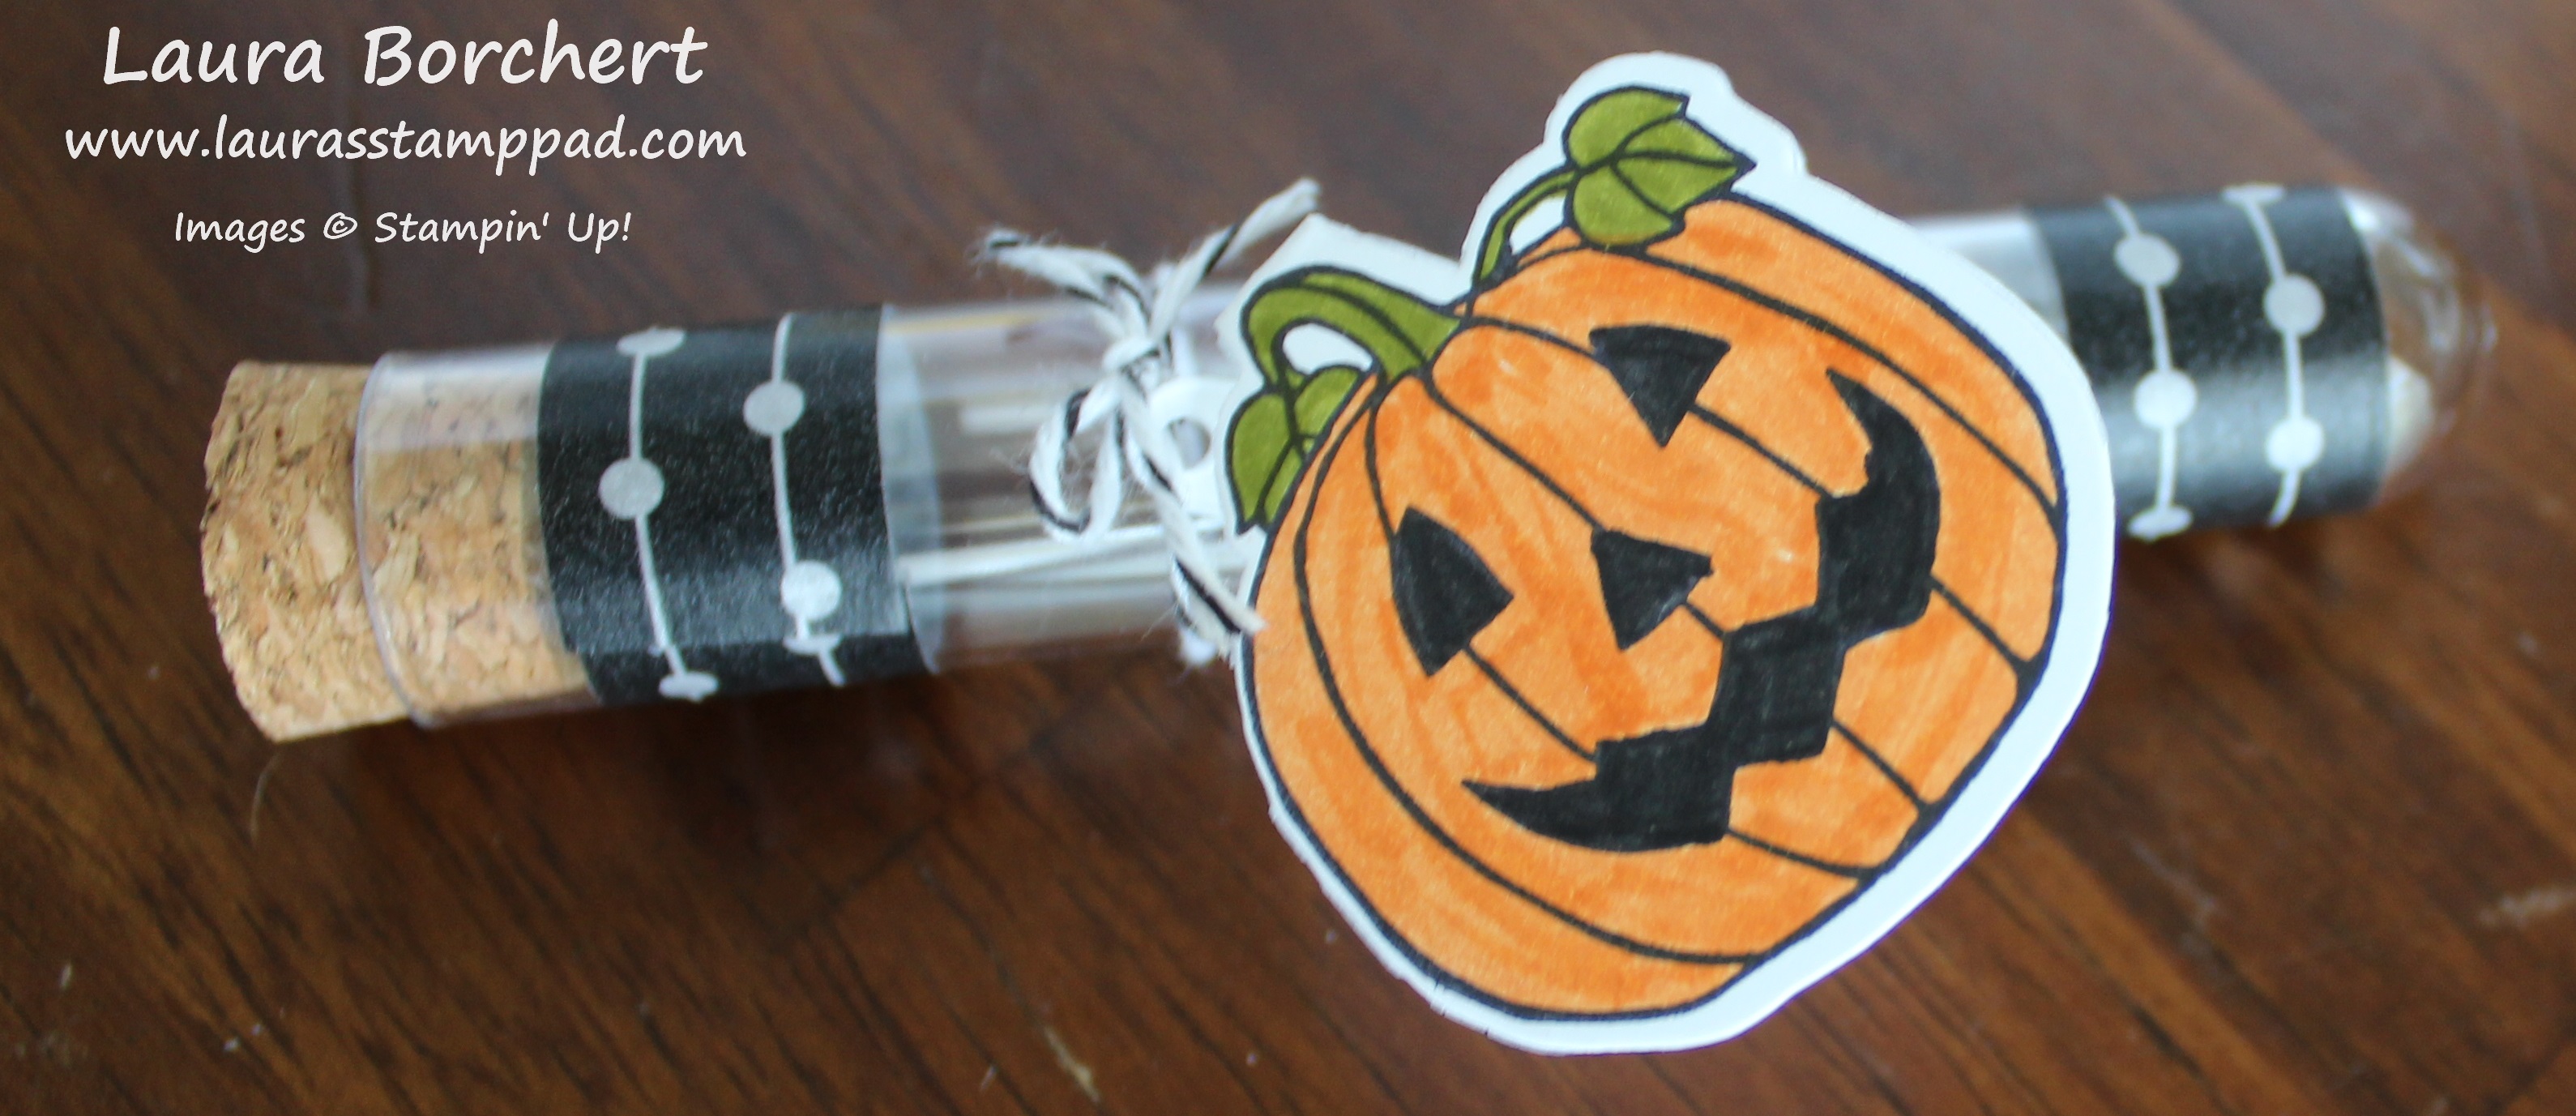
Pumpkin Test Tube, www.LaurasStampPad.com

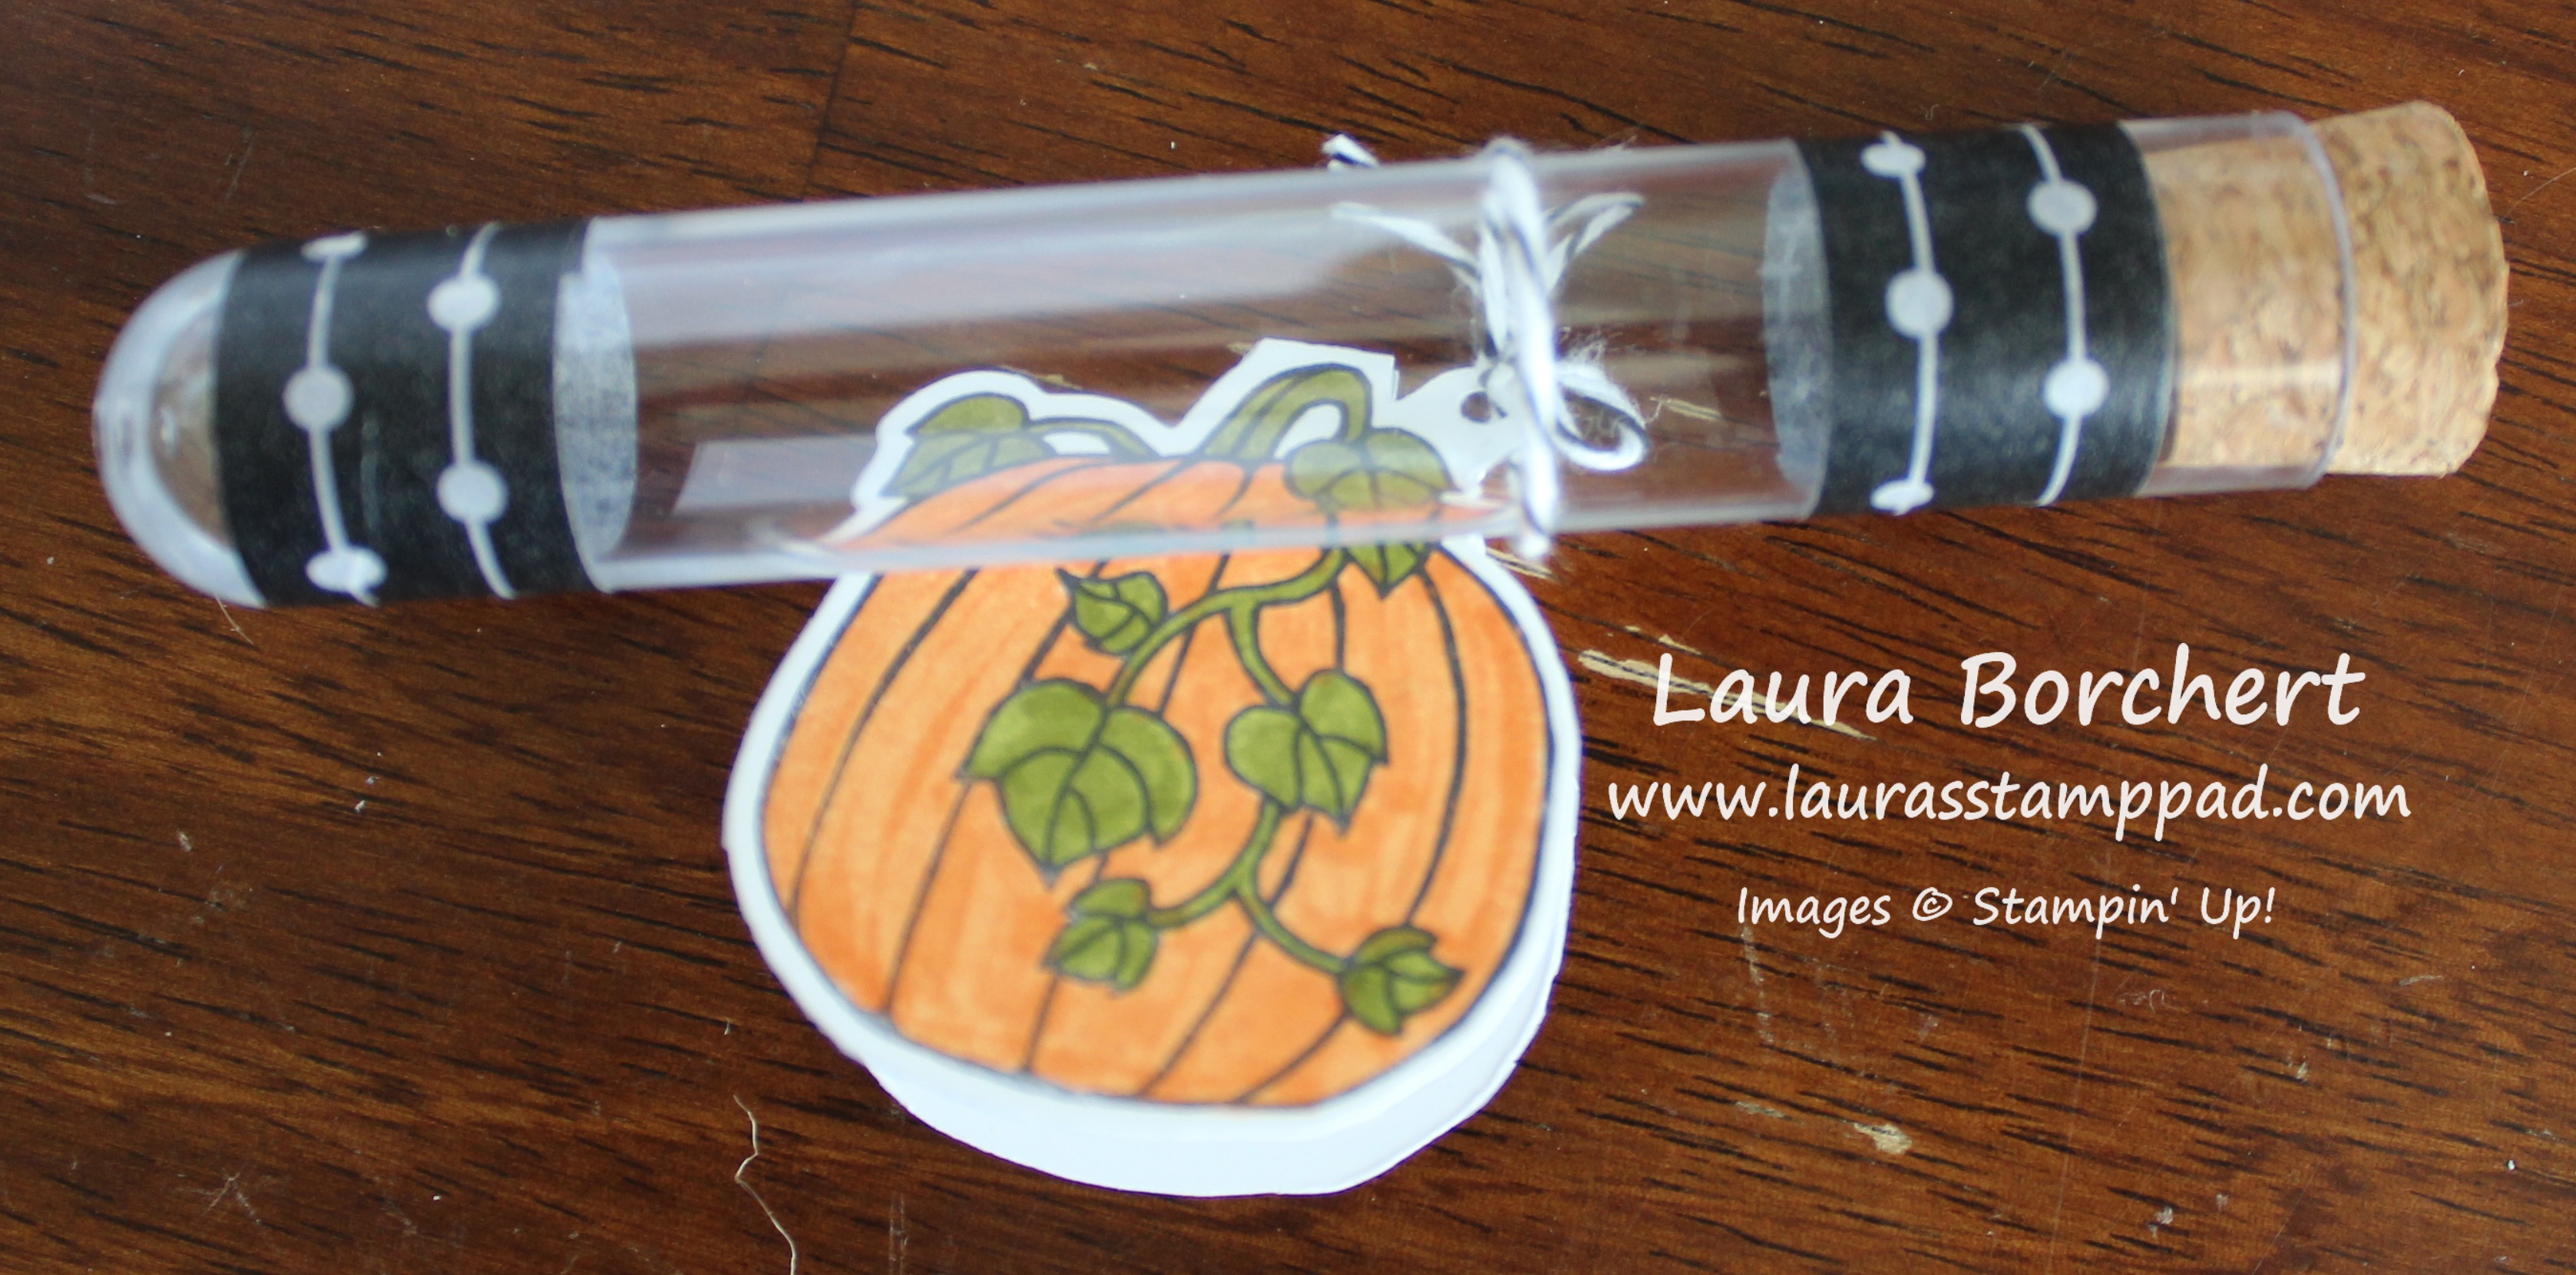
For the little Pumpkin one, I used some of the Pick A Pattern Designer Washi Tape to wrap around the top and bottom. For the tag, I used the Seasonal Chums Stamp Set and coordinating Seasonal Tags Framelits (Bundle and Save 10%). I simply stamped it in Basic Black Archival Ink so it wouldn’t bleed when I colored it with the markers. I wanted that bold, bright color so I went with markers. Pumpkin Pie, Old Olive, and Basic Black were the colors I used!

Pumpkin Tag, www.LaurasStampPad.com

I love this set because it makes perfect little tags with the hole in it to tie it on and it’s a front and back tag. Isn’t that adorable??? I used Black and White Baker’s Twine to tie it on!

Red Bow Topper, www.LaurasStampPad.com

I went super simple with this one and placed a Mini Bow on top! Adorable!!! You could always add a tag if you wished!

A few tips for the inside goodies: Candy, Tic Tacs, M&Ms, Hot Cocoa, Coffee Beans, Single Serving Drink Packets (coffee, tea, lemonade, etc.), Bath Salts, Candles/Balloons/Confetti, Spice Mix, Glitter, Oats & Glitter for Reindeer Food, Marshmallows inside tied to a Hot Cocoa Packet. Let me know in the comments if you have any other great ideas!!!

If you would like to see these in action and lots of other Gift Packaging ideas, check out the Video Tutorial below. I will be posting more items from the video on here tomorrow so stay tuned! Be sure to give the video a thumbs up if you liked it and don’t forget to subscribe if you are new. If you would like a notification when I post a new video, be sure to click the bell right next to the subscribe!!!

Happy Stampin’

~Laura

Product List


Pumpkin Spinner Card!!!

Posted on

Last week I shared with you the Reindeer Spinner Card for Christmas but today I’m sharing this Pumpkin Spinner Card!!!

Pumpkin Spinner Card, www.LaurasStampPad.com

You can check out all the instructions for this card as well as seeing a Video Tutorial by clicking here!!! I figured I wouldn’t explain it all again but I will let you know the colors and dimensions as this one is a bit different!

I started with a Pumpkin Pie card base (5-1/2″ x 8-1/2″) and layered on a piece of Very Vanilla (4-1/8″ x 5-3/8″). For the next layer, I used Cajun Crazy (3-1/2″ x 4-1/2″) and a piece of the Painted Autumn Designer Paper (3-1/8″ x 4-3/8″). There is a smaller border showing on this card with each layer. This can be modified to whichever you prefer!

Painted Autumn Designer Paper, www.LaurasStampPad.com

Now for the little pumpkin spinner part, I stamped it from the Seasonal Chums Stamp Set! This is a fun set the Holiday Mini Catalog. Next, I colored the pumpkin with Watercolor Pencils and a Blender Pen. Using the coordinating Seasonal Tags Framelits, I die cut them out (Bundle & Save 10%). Since I don’t need the tag portion, I snipped off the string hole and the fold. Now there is a front and back pumpkin. I added Fast Fuse to the back of both. Next, I placed some Copper Metallic Thread down the center and pressed it between the 2 pumpkins.

Inside Spinner Card, www.LaurasStampPad.com

For the inside on this one I really struggled with deciding what I wanted to use. I bet I spent 10 minutes contemplating using a solid cardstock or another pattern from the Painted Harvest Designer Series Paper. I settled with Soft Sky cardstock! Love it!!! Again, be sure to check out the Video Tutorial I did so you can see it all in action! Be sure to wind it up before sending it out! Then when the recipient opens the card, the little pumpkin will spin around and around!!!

Product List

Happy Stampin’

~Laura

Pick A Pumpkin, www.LaurasStampPad.comDon’t forget that this stamp set – Pick A Pumpkin is the one you can earn for FREE with a $75 order! This offer is all month long. Check out all the details here!


Watercolor Christmas Project Kit!!!

Posted on

The Watercolor Christmas Project Kit from the Holiday Mini Catalog is simple and adorable! If you want to send out hand made cards but you are just too busy this time of year, this kit is for you!

Watercolor Christmas Project Kit, www.LaurasStampPad.com

There are 20 total cards in this kit in 4 different designs. I love the gold foil envelopes as well!!! A little tip for the envelope liners is to score the lip before putting it in the envelope. When I stuck it in and just folded the lip, the foil creased all over and didn’t look as nice. I simply placed the liner in my Stampin’ Trimmer and scored it, placed it in the envelope and added a bit of adhesive to the lip to hold them together. They turned out much nicer this way!

Season Of Cheer, www.LaurasStampPad.com

I think this one is my favorite….it’s a hard decision! I love that swirl of Gold Mini Sequin Trim! This card was simple with stamping the greeting on the bottom and added the layers. I secured the sequin trim with Stampin’ Dimensionals and added it to the card front!!!

Christmas Kit, www.LaurasStampPad.com

I love the Emerald Envy stripes on this card! There were a few gold sequins that fell off when I cut the strips so I added them around the greeting with the Fine Tip Glue Pen. This was also because I had a little boo boo ink spot to cover up! 🙂 It really makes the greeting POP and I kind of wish I did it to the other one too!

Merriest Christmas Wishes, www.LaurasStampPad.comI love the little holly berries on this one. Of course, I used the Fine Tip Glue Pen for all of the “randomly placed sequins” (aka in the same spots as the photo instructions)!

Holiday Wreath, www.LaurasStampPad.com

This kit has definitely given me some more ideas on how to use sequin trim. Look how just a little strip makes that greeting stand out. I love it!!!

Product List

Of course there are actually 5 of each design for a total of 20 cards but I just showed off 2 of each! I think this is a great kit for quick and simple holiday cards. This time of year can be crazy so enjoy stamping without the fuss and pick up the Watercolor Christmas Project Kit!

If you would like to see this all in action, check out the Video Tutorial below or click here! Be sure to give the video a thumbs up if you liked it and don’t forget to subscribe if you are new. If you would like a notification when I post a new video, be sure to click the bell right next to the subscribe!!!

Happy Stampin’

~Laura


Technique Tuesday – Spinner Cards!!!

Posted on

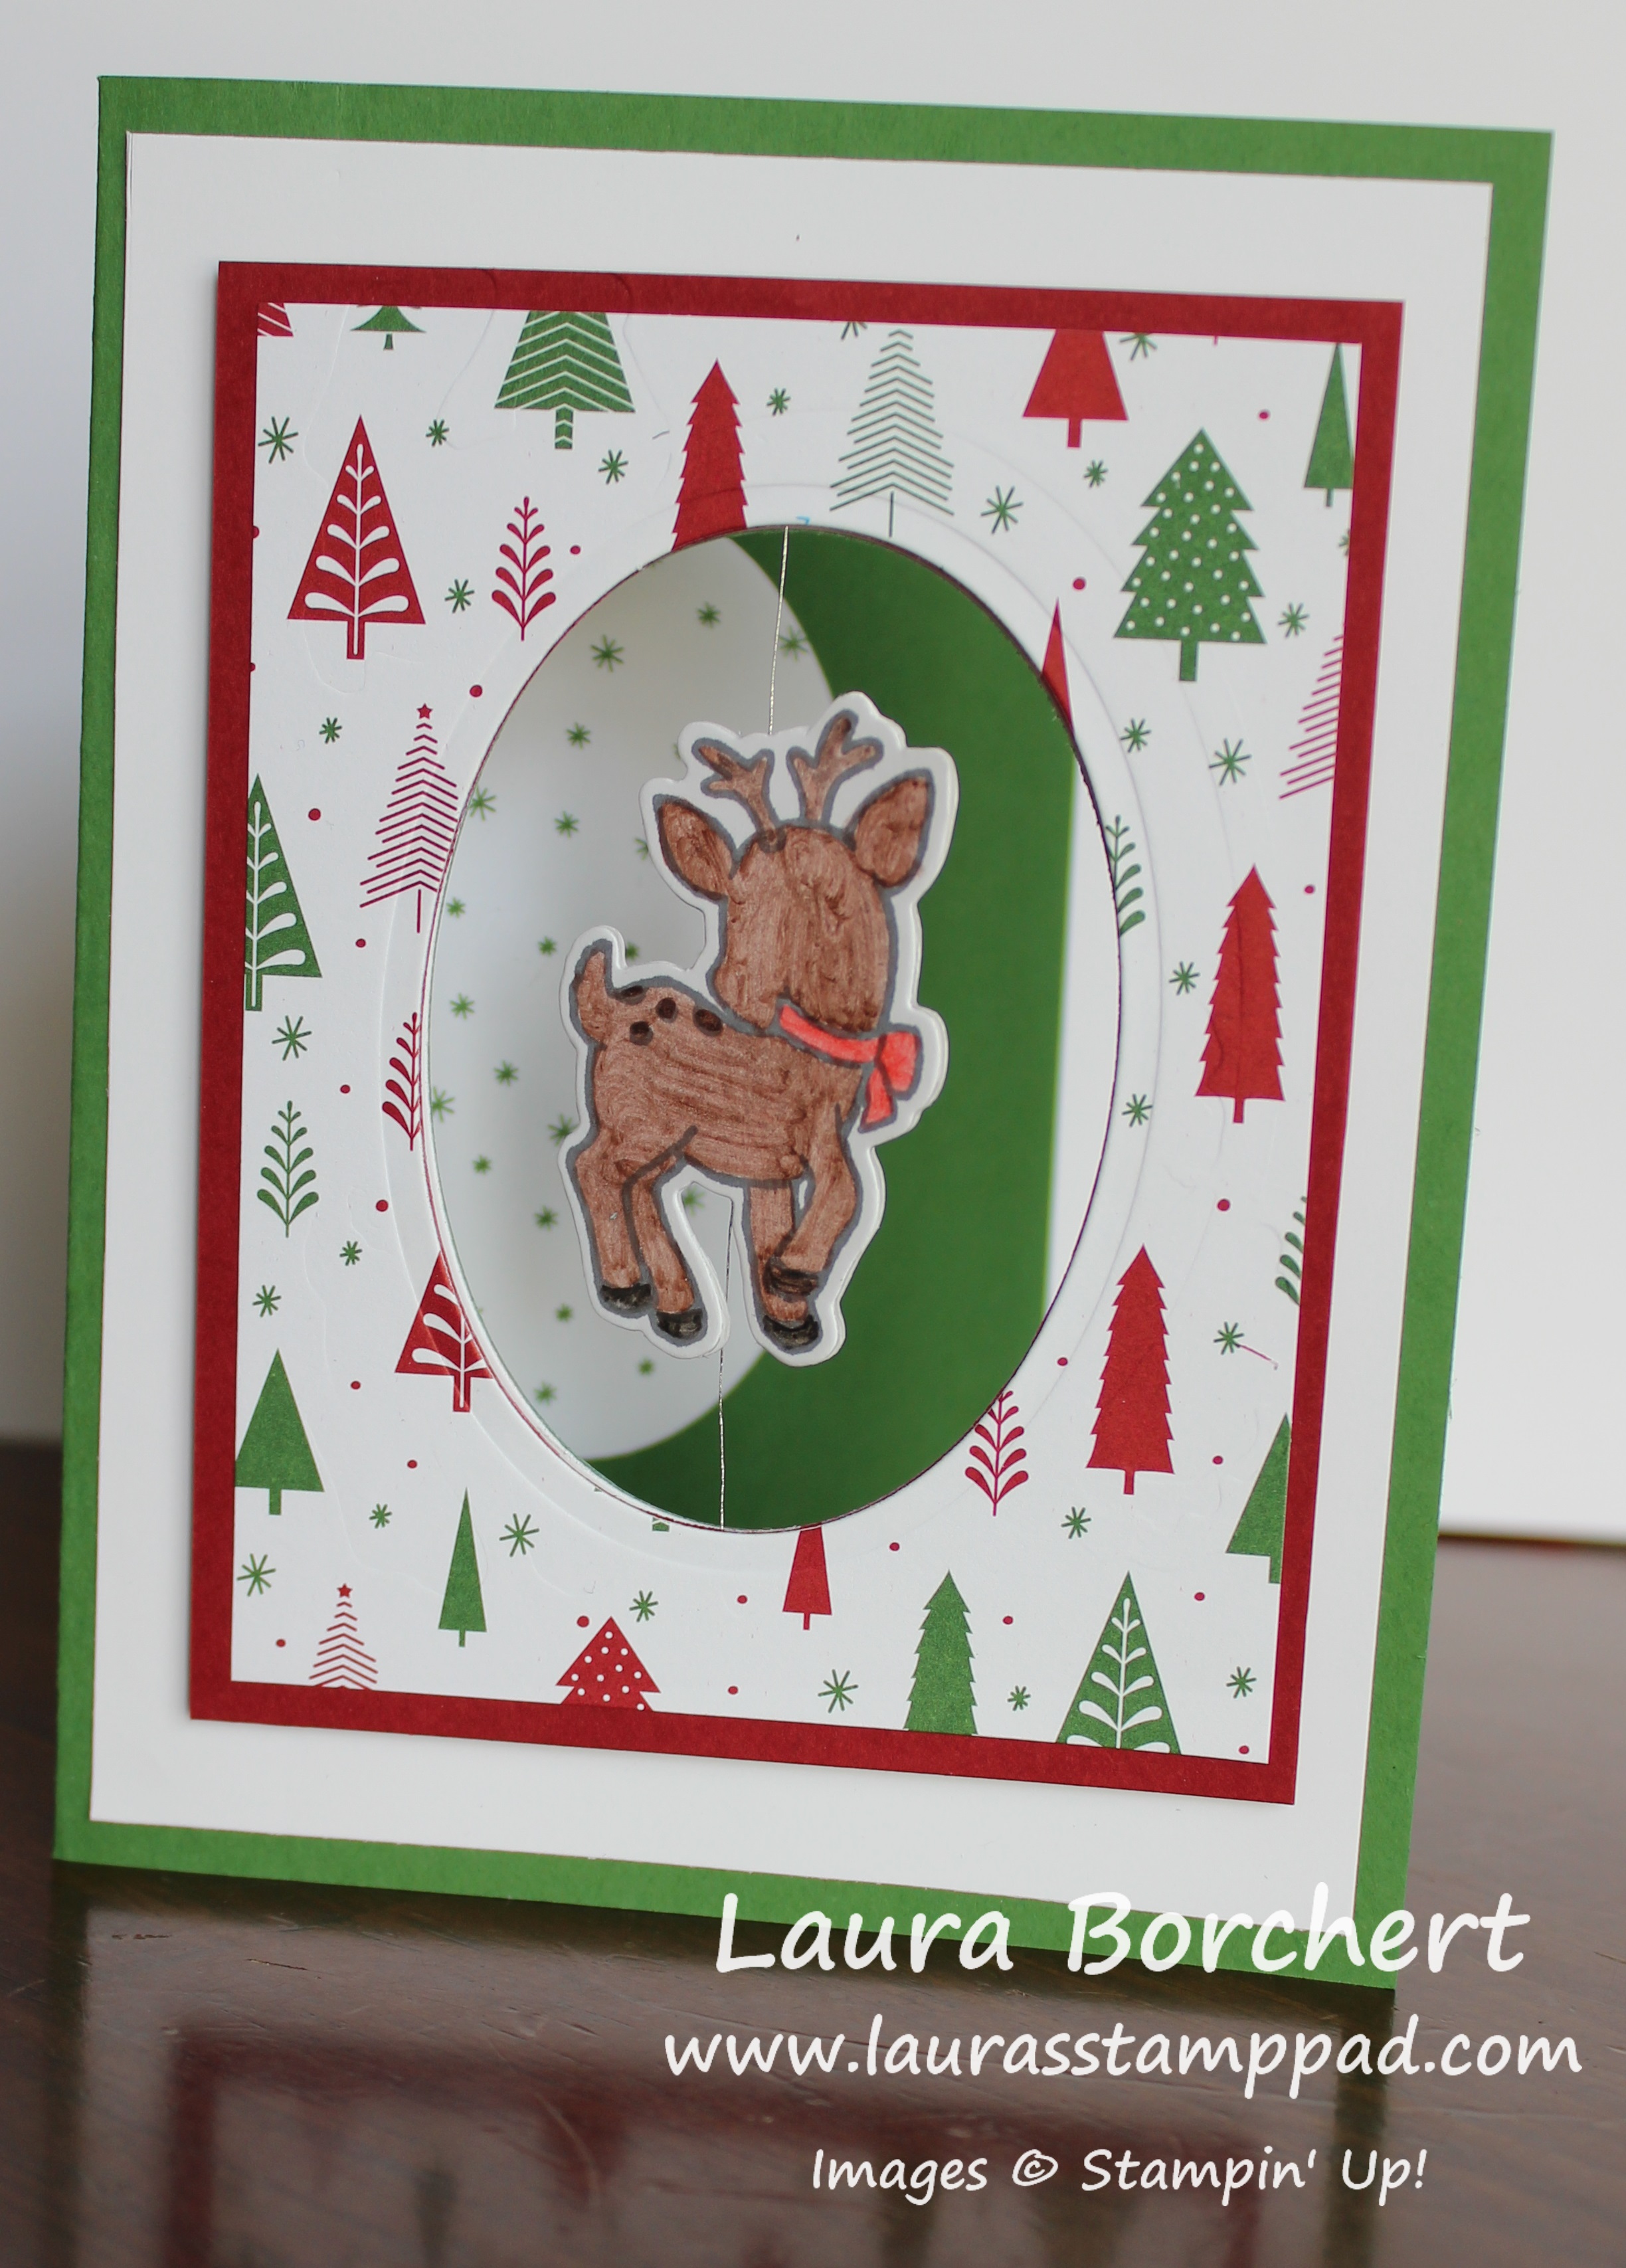
Happy Tuesday!! That means I have a fabulous technique to share with you today and it’s a major WOW!!! This spinner card is just soooo cool. Be sure to watch the video to really see it in action!

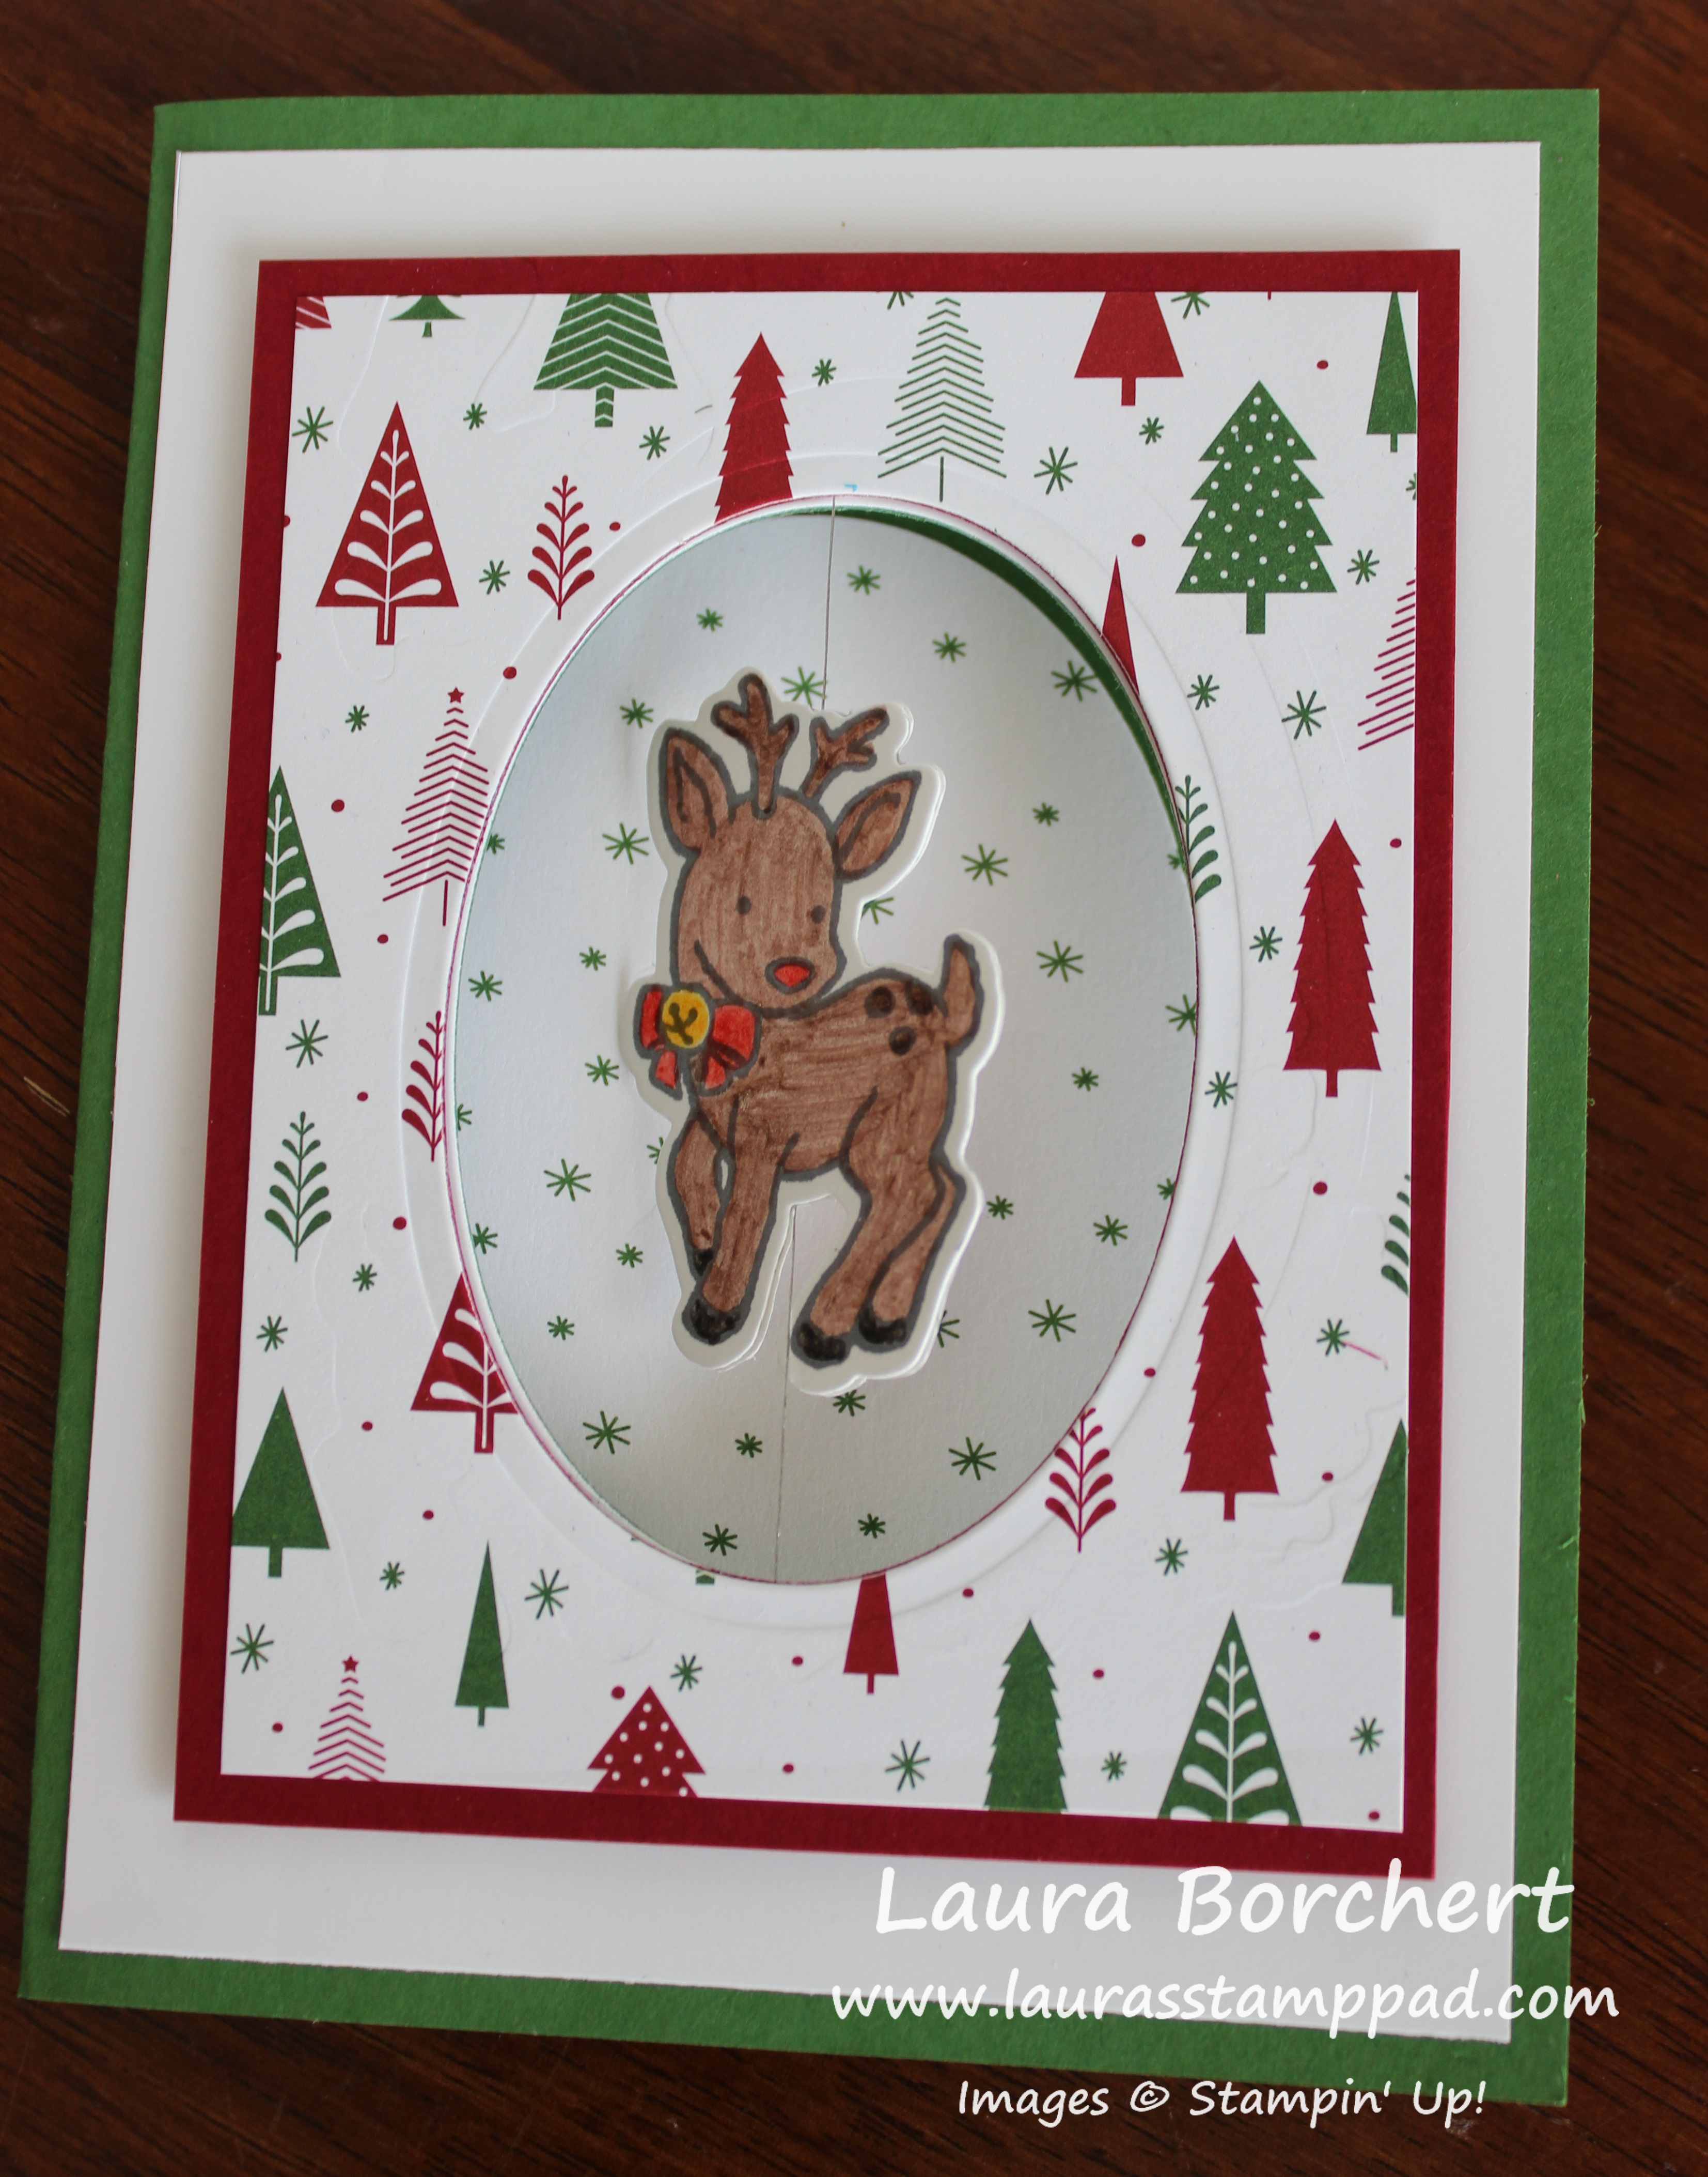
Spinner Card, www.LaurasStampPad.com

Traditional red and green and just so precious with that little reindeer!!! Thank you to Jessica Ingold for this amazing idea! Let’s get started!!!

I started with a Garden Green Card Base (5-1/2″ x 8-1/2″) and layered on a piece of Whisper White (4″ x 5-1/4″). Be sure to only put adhesive around the edges and then you can use your cut out ovals for another project. Next, I layered Cherry Cobbler (3-1/2″ x 4-1/2″) and a piece of the Be Merry Designer Paper (3-1/4″ x 4-1/4″) together. Using the Layering Ovals Framelits (3rd largest), I die cut an oval in the center. I placed this on top of my card base in the center and traced with a pencil around the middle of the oval. This helps to line up the oval on the card base layers. Be sure to open the card up when running the base through the Big Shot with the Layering Ovals Framelits. Again using the 3rd largest oval for this piece as well.

Be Merry Designer Paper, www.LaurasStampPad.com

Now let’s work on that little reindeer spinner part. I stamped the reindeer from the Seasonal Chums Stamp Set from the Holiday Mini Catalog. Next, I colored him with Watercolor Pencils and a Blender Pen. Using the coordinating Seasonal Tags Framelits, I die cut them out. Since I don’t need the tag portion, I snipped off the string hole and the fold. Now there are 2 separate reindeer. I added Fast Fuse to the back of both reindeer. Next, I placed some Silver Metallic Thread down the center and pressed it between the 2 reindeer.

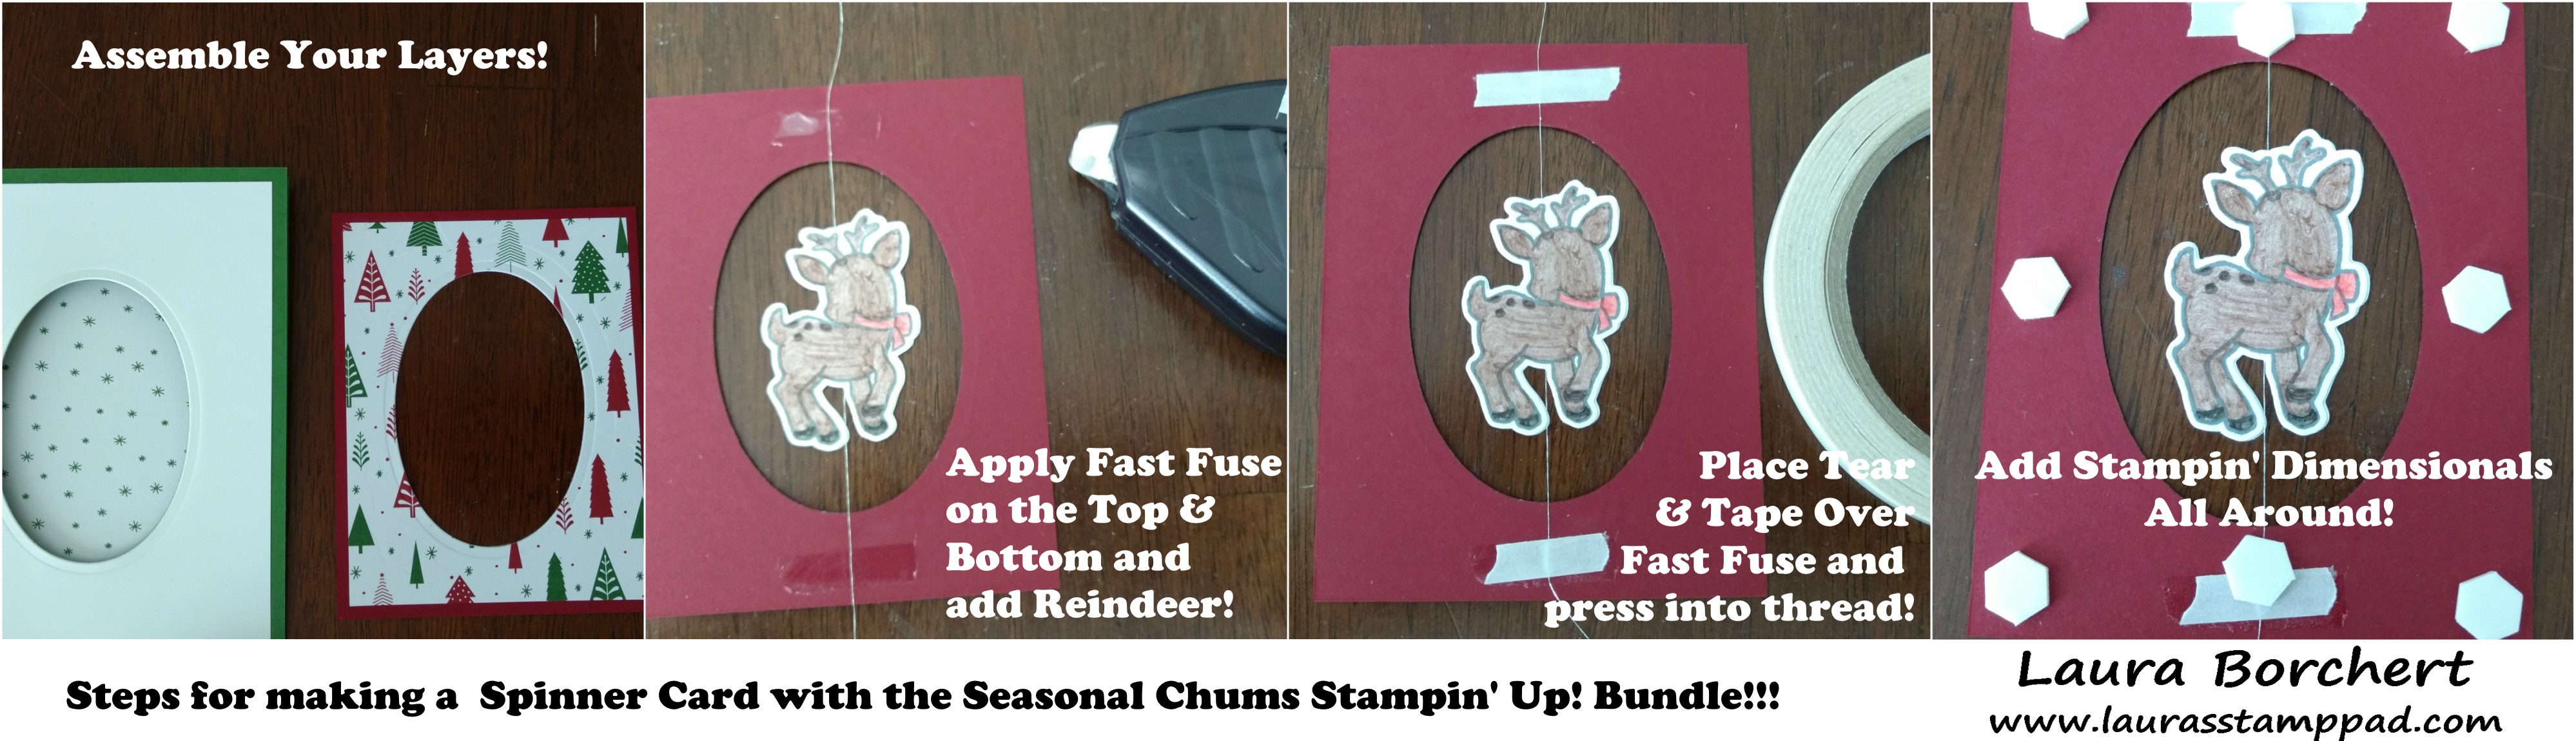
Spinner Card Tutorial, www.LaurasStampPad.com

Now to assemble the spinner. I added a small strip of Fast Fuse to the top and bottom of the oval (cherry cobbler layer). Next, I pressed the thread into it, making sure it was nice and tight. (Be sure your reindeer and designer paper are both in the same direction so your trees aren’t upside down.) Then I took some Tear And Tape and placed it over the thread and covering the Fast Fuse strip. Now it is time to assemble the card! I added Stampin’ Dimensionals all around the Cherry Cobbler layer and placed it on the card base, lining up the ovals.

Layering Ovals Framelits, www.LaurasStampPad.com

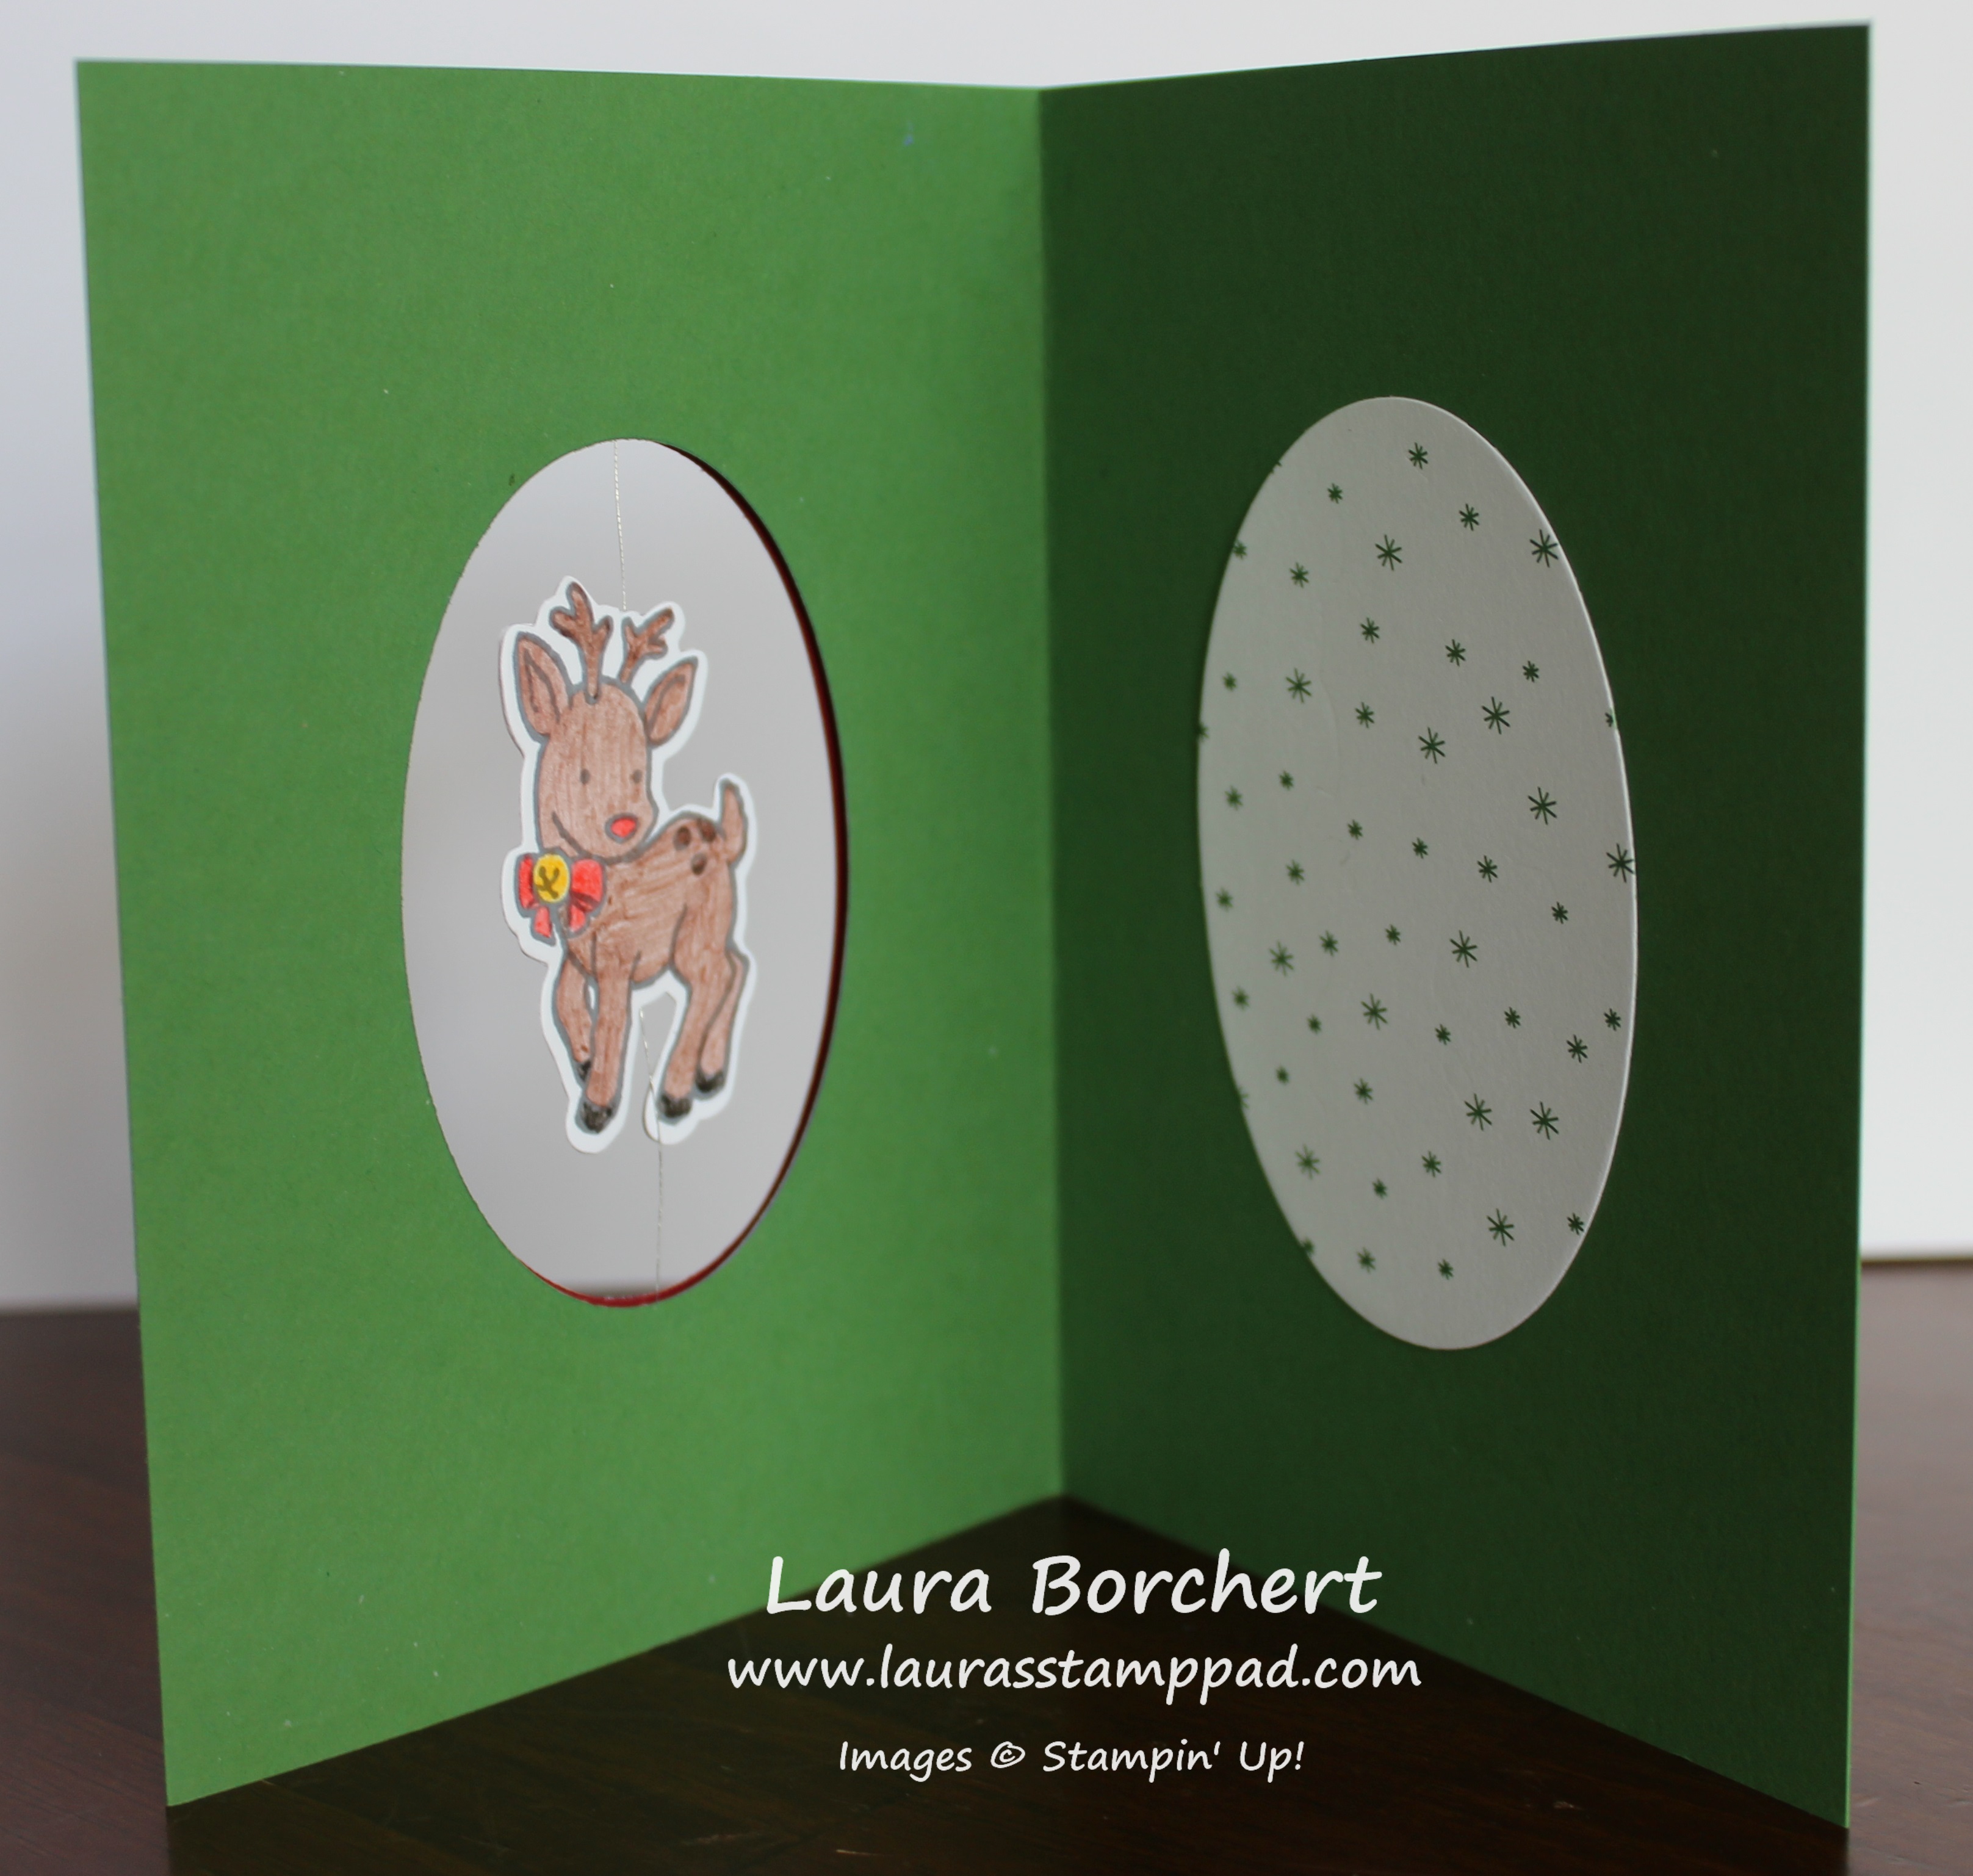
For the inside, I die cut the 2nd largest oval from the Layering Ovals Framelits and placed  it in the center to give a nice background for the reindeer! Now just wind up the reindeer and close the card! When the recipient opens the card, the little reindeer will spin and twirl around!!!

If you would like to see this all in action, check out the Video Tutorial below or click here! Be sure to give the video a thumbs up if you liked it and don’t forget to subscribe if you are new. If you would like a notification when I post a new video, be sure to click the bell right next to the subscribe!!!

Happy Stampin’

~Laura

Product List


Flowers Are Better In Odd Numbers!!!

Posted on

They say you should always decorate in odds, right? Well I would agree and flowers are better in odd numbers as well! Isn’t this card stunning?

Flowers Are Better In Odd Numbers, www.LaurasStampPad.com

This card is super fun because you can mix and match the flower, the colors, and greeting. Flowers are great for any occasion, I think!

I started with a Whisper White card base. Next, I took three white pieces measuring 1-1/2″ x 3-1/4″ and stamped the flowers. I used the Beautiful Bouquet Stamp Set which has lots of stems and flowers to pick from. The stems were stamped in Old Olive Ink and the flowers were stamped in Fresh Fig Ink. I stamped the stems first with the flowers then placed on top! I placed these on a piece of Wood Textures Designer Series Paper (4″ x 5-1/4″). Once I had the placement down, I lifted each one individually for adhesive.

Beautiful Bouquet, www.LaurasStampPad.com

Next, I placed a strip of Finely Woven Fresh Fig Ribbon over the lower portion of the flowers. I simply wrapped the ends to the back side and then added it to the card base. For the greeting, I die cut the Whisper White oval with the Stitched Shapes Framelits and the scallop oval with the Layering Ovals Framelits. I just love the layered look of these two sets of Framelits in squares, circles, and ovals! The greeting was stamped from the same stamp set – Beautiful Bouquet! I love a set that has flowers and amazing greeting options! There are also greetings for the inside of the card!! BONUS!

If you would like to see this all in action, check out the Video Tutorial below or click here! Be sure to give the video a thumbs up if you liked it and don’t forget to subscribe if you are new. If you would like a notification when I post a new video, be sure to click the bell right next to the subscribe!!!


Product List

Happy Stampin’

~Laura


Lemon Cupcakes Are My Favorite!!!

Posted on

Lemon Cupcakes Are My Favorite!!! There is just something about that tang and the sweetness! Cupcakes are heavenly to me anyway!!! Let me know in the comments…..cake or cupcakes???

Lemon Cupcakes are my favorite, www.LaurasStampPad.com

When I decided to make cupcakes with embossing paste icing, I knew I wanted yellow for a lemon look!!! I think I nailed it! 🙂

I started with a Night of Navy card base (4-1/4″ x 11″). Next, I took a piece of Whisper White measuring 3-3/4″ x 1-3/4″ and stamped the greeting from the Sweet Cupcake Stamp Set in Night of Navy. Be sure to stamp it on the lower portion so the Designer Paper doesn’t cover it! I layered this onto the bottom of a piece of Daffodil Delight (4″ x 5-1/4″). On the top portion, I layered on a piece of Delightful Daisy Designer Series Paper (3-3/4″ x 3-3/4″). The designer paper till overlap over the top of the greeting piece. I tied some Daffodil Delight Double Stitched Ribbon around the piece, covering the overlap of papers. This piece was then added to the card front with Stampin’ Dimensionals.

For the cupcake, I used the Sweet Cupcake Stamp Set and coordinating Cupcake Cutouts Framelits. The liner is a 3 step stamping image. I stamped the largest image in Crumb Cake Ink. The next image was stamped in Soft Suede (stamped off once) and the smallest final image in Soft Suede (full strength). The icing was stamped with the largest (most solid) image in Crushed Curry. I decided on using a darker yellow so it would really pop! I added the liner to the card front with Snail Adhesive but I used Stampin’ Dimensionals for the icing! It is easier to ice the cupcake when it is adhered on already. Plus, this way you don’t have to touch it again while it dries.

Sweet Cupcake Stamp Set, www.LaurasStampPad.com

For this icing, I added a few drops of Daffodil Delight Re-inker to some Embossing Paste. Using the Palette Knives, I mixed it in and then added a fine layer to the cupcake icing. Go thin so it doesn’t take forever to dry and there is less curling and cracking of the cardstock. A few things I did to finish off the card were add some Glitter Enamel Shapes to either side of the greeting and Wink of Stella on the icing! Be sure the embossing paste is completely dry and just brush some glitter all over for a hint of shine! I just love how this turned out!!!

Product List

Happy Stampin’

~Laura

Need Mittens in Alaska, www.LaurasStampPad.com

Don’t forget you can get the Smitten Mittens Stamp Set for FREE with a $75 order placed before August 31st!!! Click here for more details!