Lots of Happy Card Kit!!!

Posted on

Today, I’m finally sharing the Lots of Happy Card Kit. I got this kit months ago as you can see in the unboxing and reveal video here! I finally completed one each of the 5 designs. Yes, just 1…..there is a lot of coloring in this kit and I just don’t have the patience. LOL The cards are super stunning though!

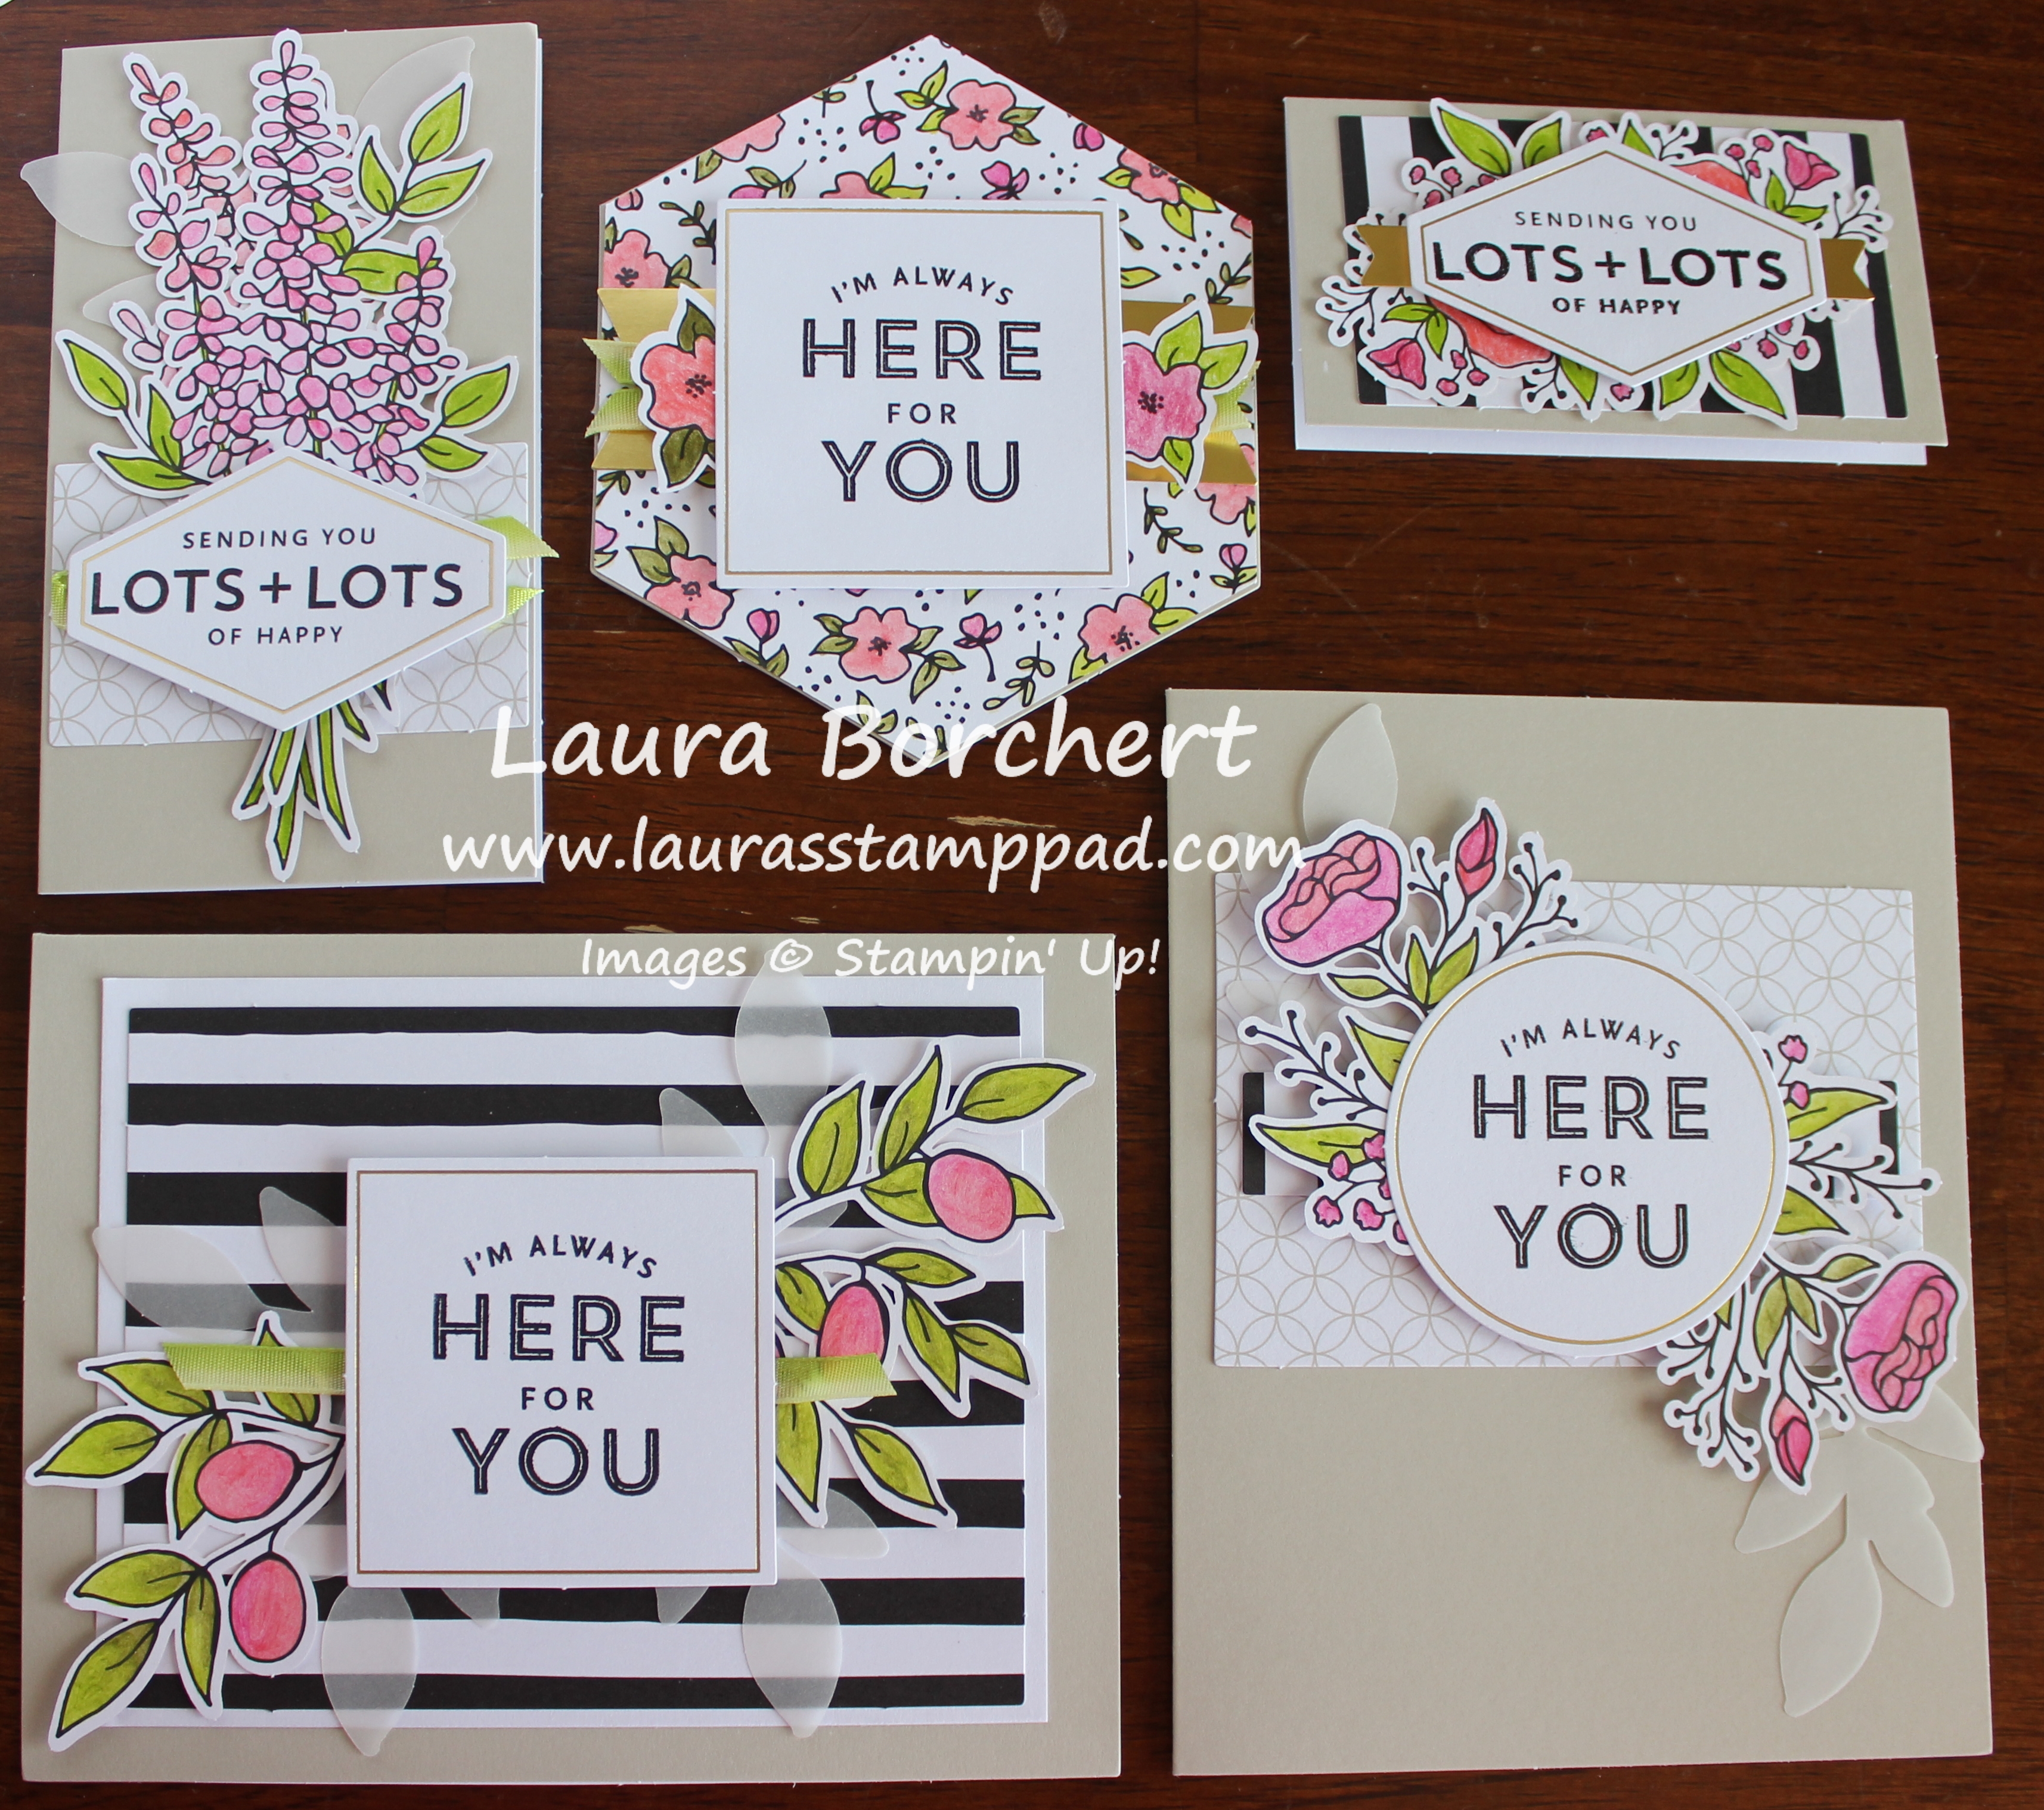
Lots of Happy Card Kit, www.LaurasStampPad.com

I mean look at these beauties. They are amazing and the envelopes have a fun black and white strip to them. But again let me just say…..it was way more coloring than I thought or I’m just slow. The kit comes with Exclusive colors of Watercolor Pencils – Flirty Flamingo, Lemon Lime Twist, Old Olive, and Rich Razzleberry. Simply coloring with the pencils works or you can also use a Blender Pen to get some fun color variation. I did that with a few but it slowed me down even more! 🙂

Floral Sheet Watercolored, www.LaurasStampPad.com

After finishing this sheet of coloring, I realized this was only 1 each of the 5 designs and there are 3 more sheets to go. I do love flowers and pinks though!

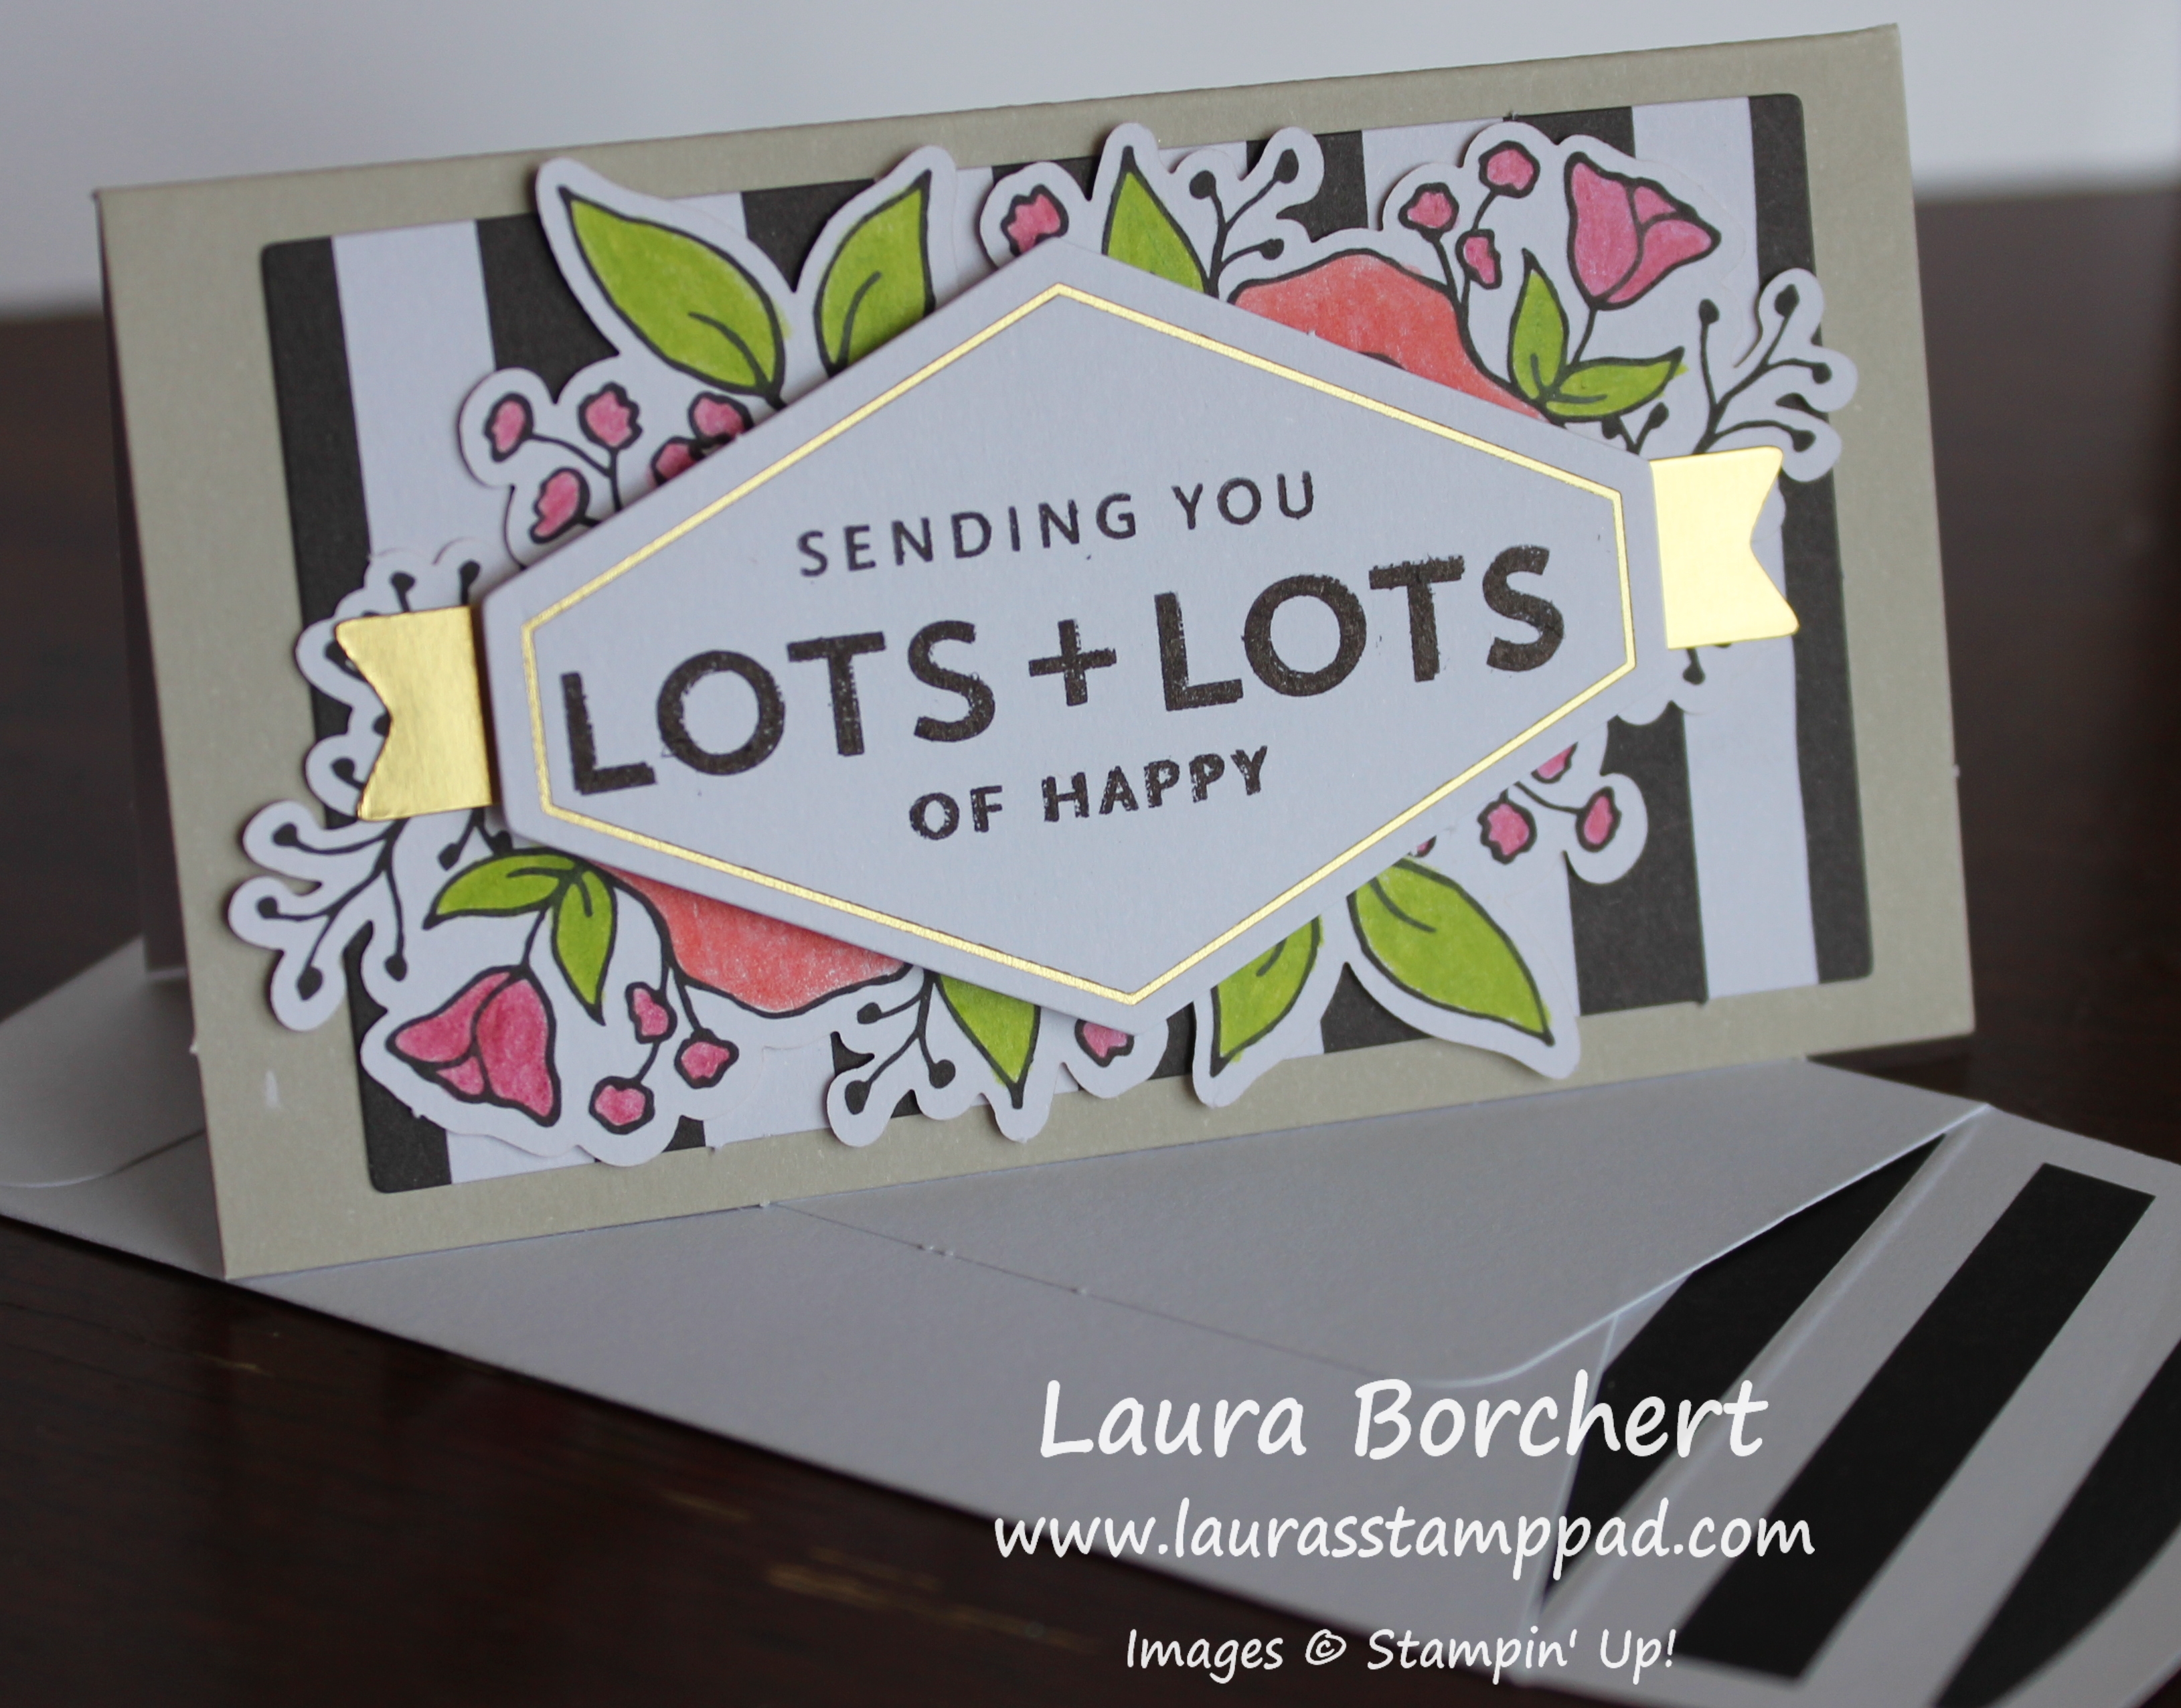
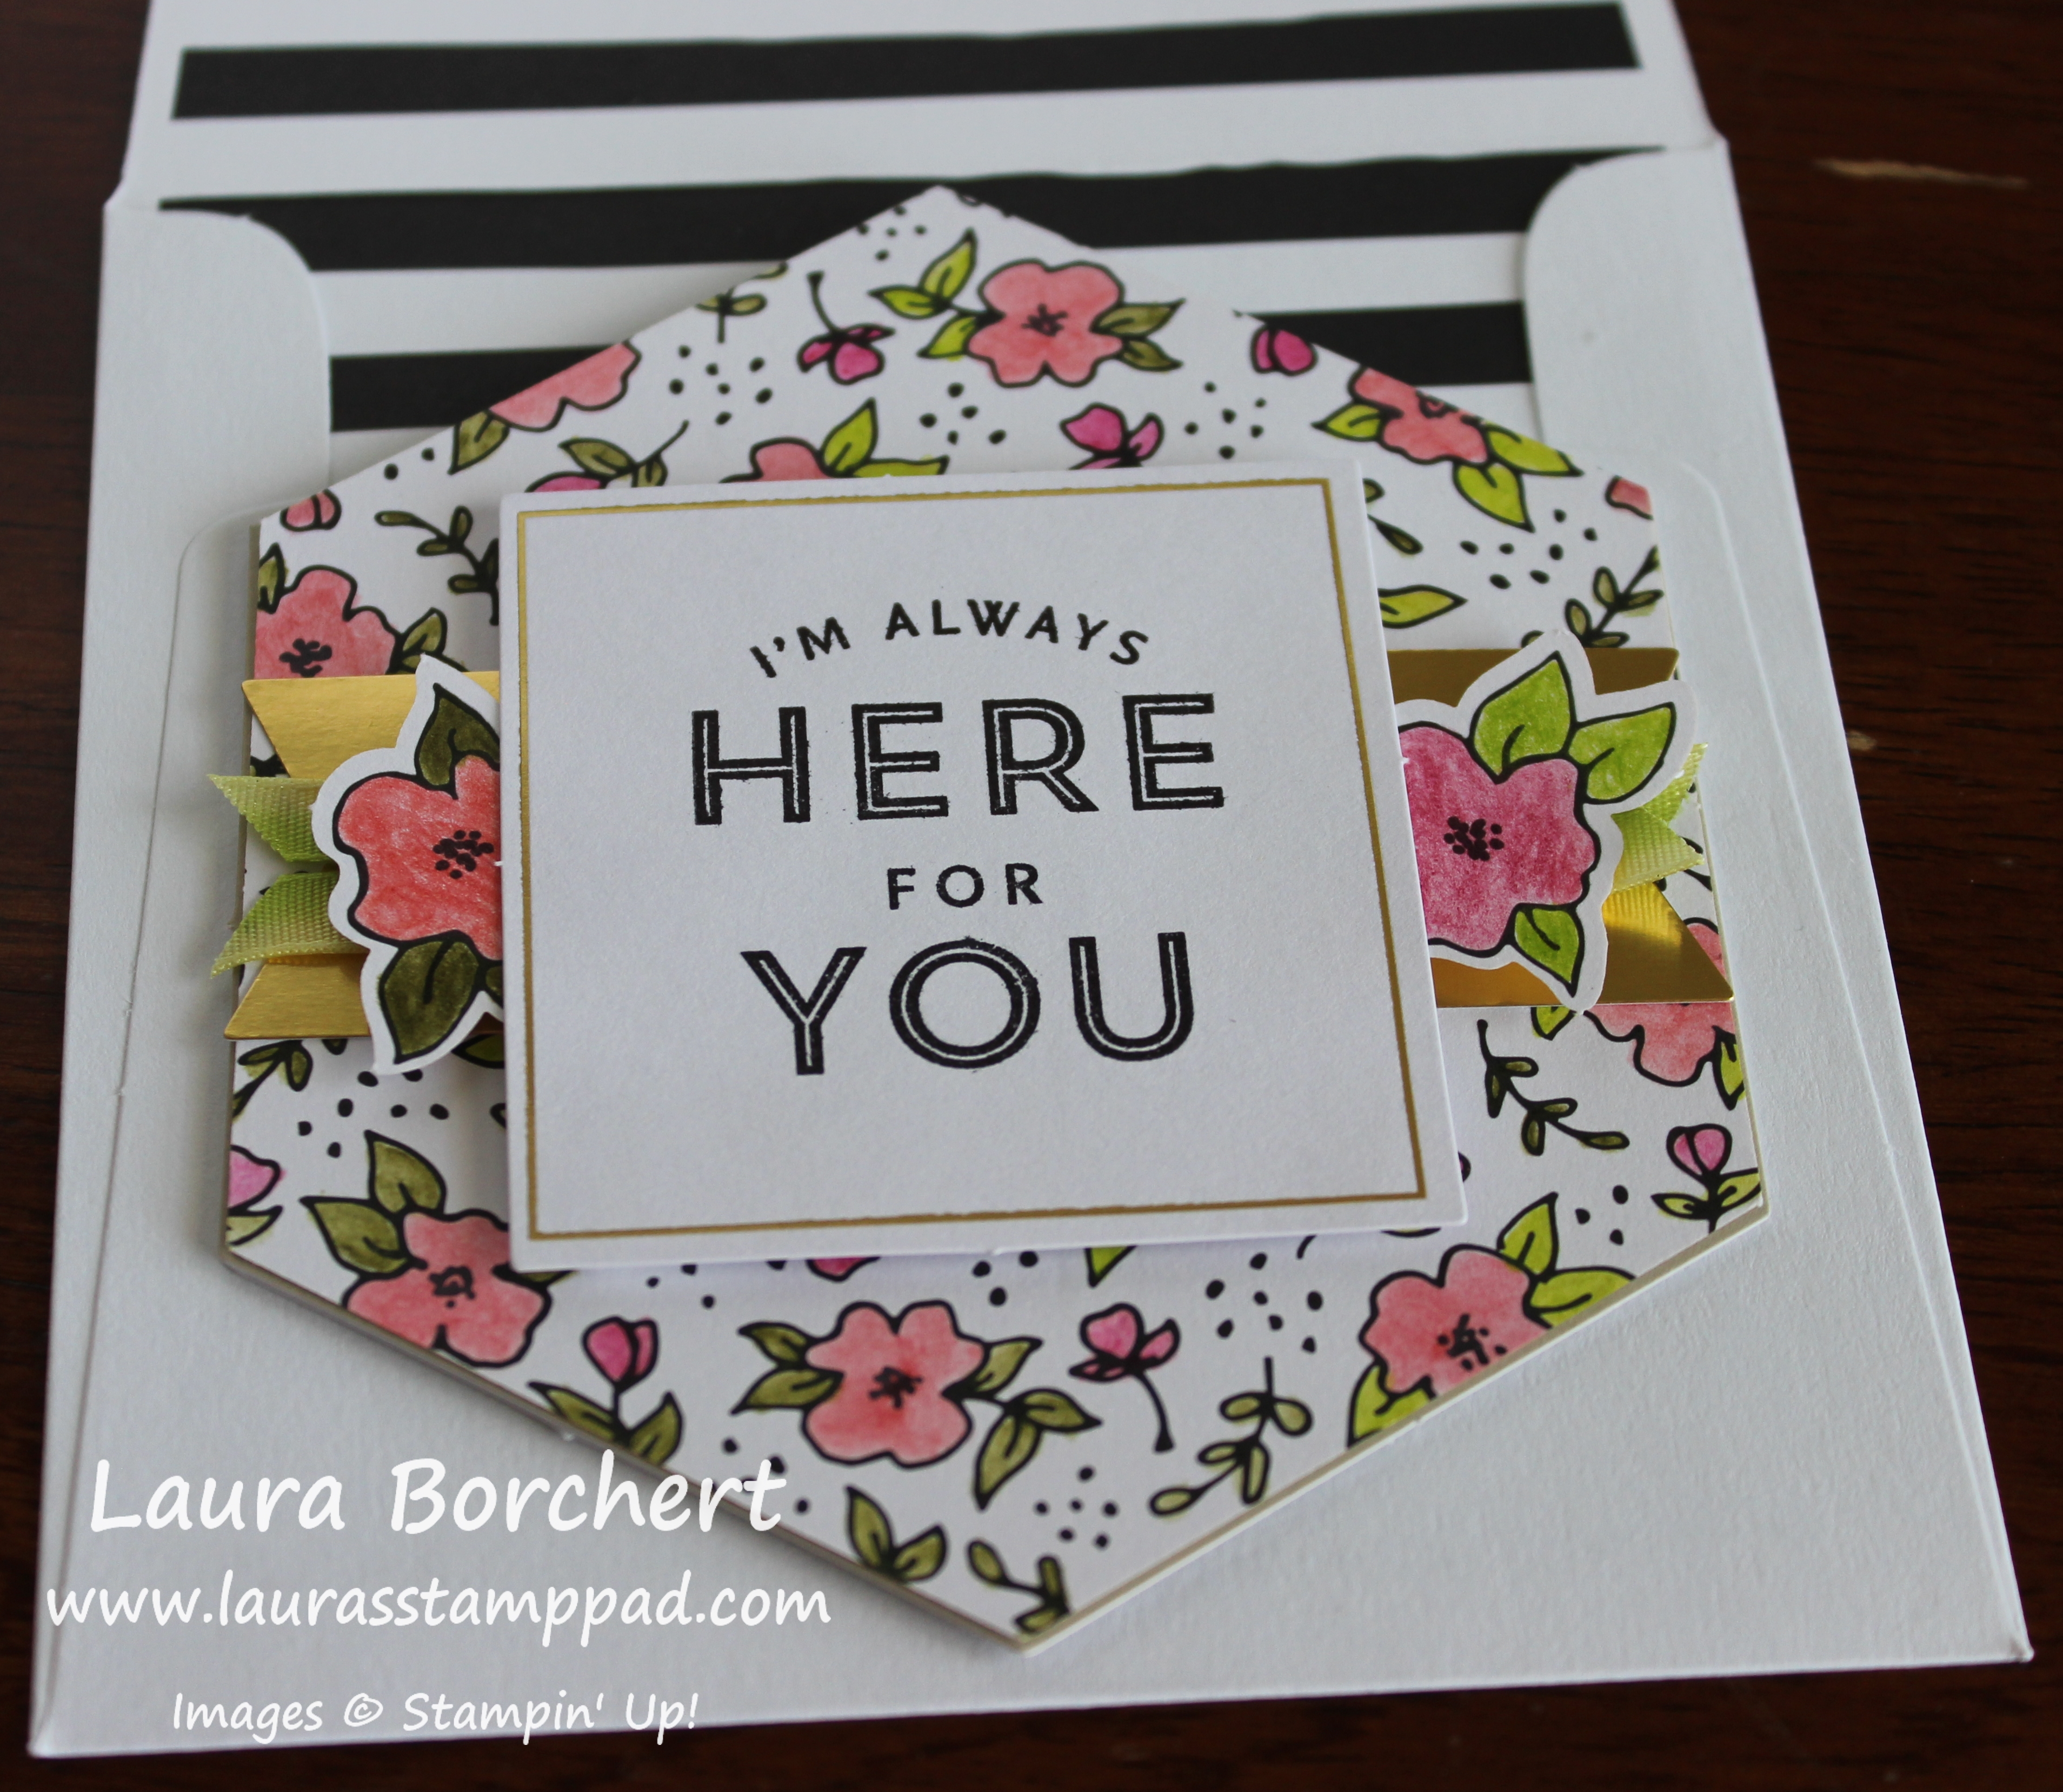
Flowers & Gold Foil, www.LaurasStampPad.com

I think this is my favorite card because of the fun shape and design. Another thing I will point out is that I feel like some of the colored flower weren’t necessary for each card and I would use on another project. For example, see those two little flowers on either side of the greeting? They are hard to notice and cover up the gold foil banner. I think for the rest of the cards, I will add one to the inside of the card or use on another project.

Flowers Make Me Happy, www.LaurasStampPad.com

This is my second favorite card! Again, there are 2 lavender pieces overlapped for a nice full arrangement but I really don’t think it is necessary. Most of my fabulous coloring is covered up. I could create another card with some Crumb Cake as a card base and the other extras from the kit!

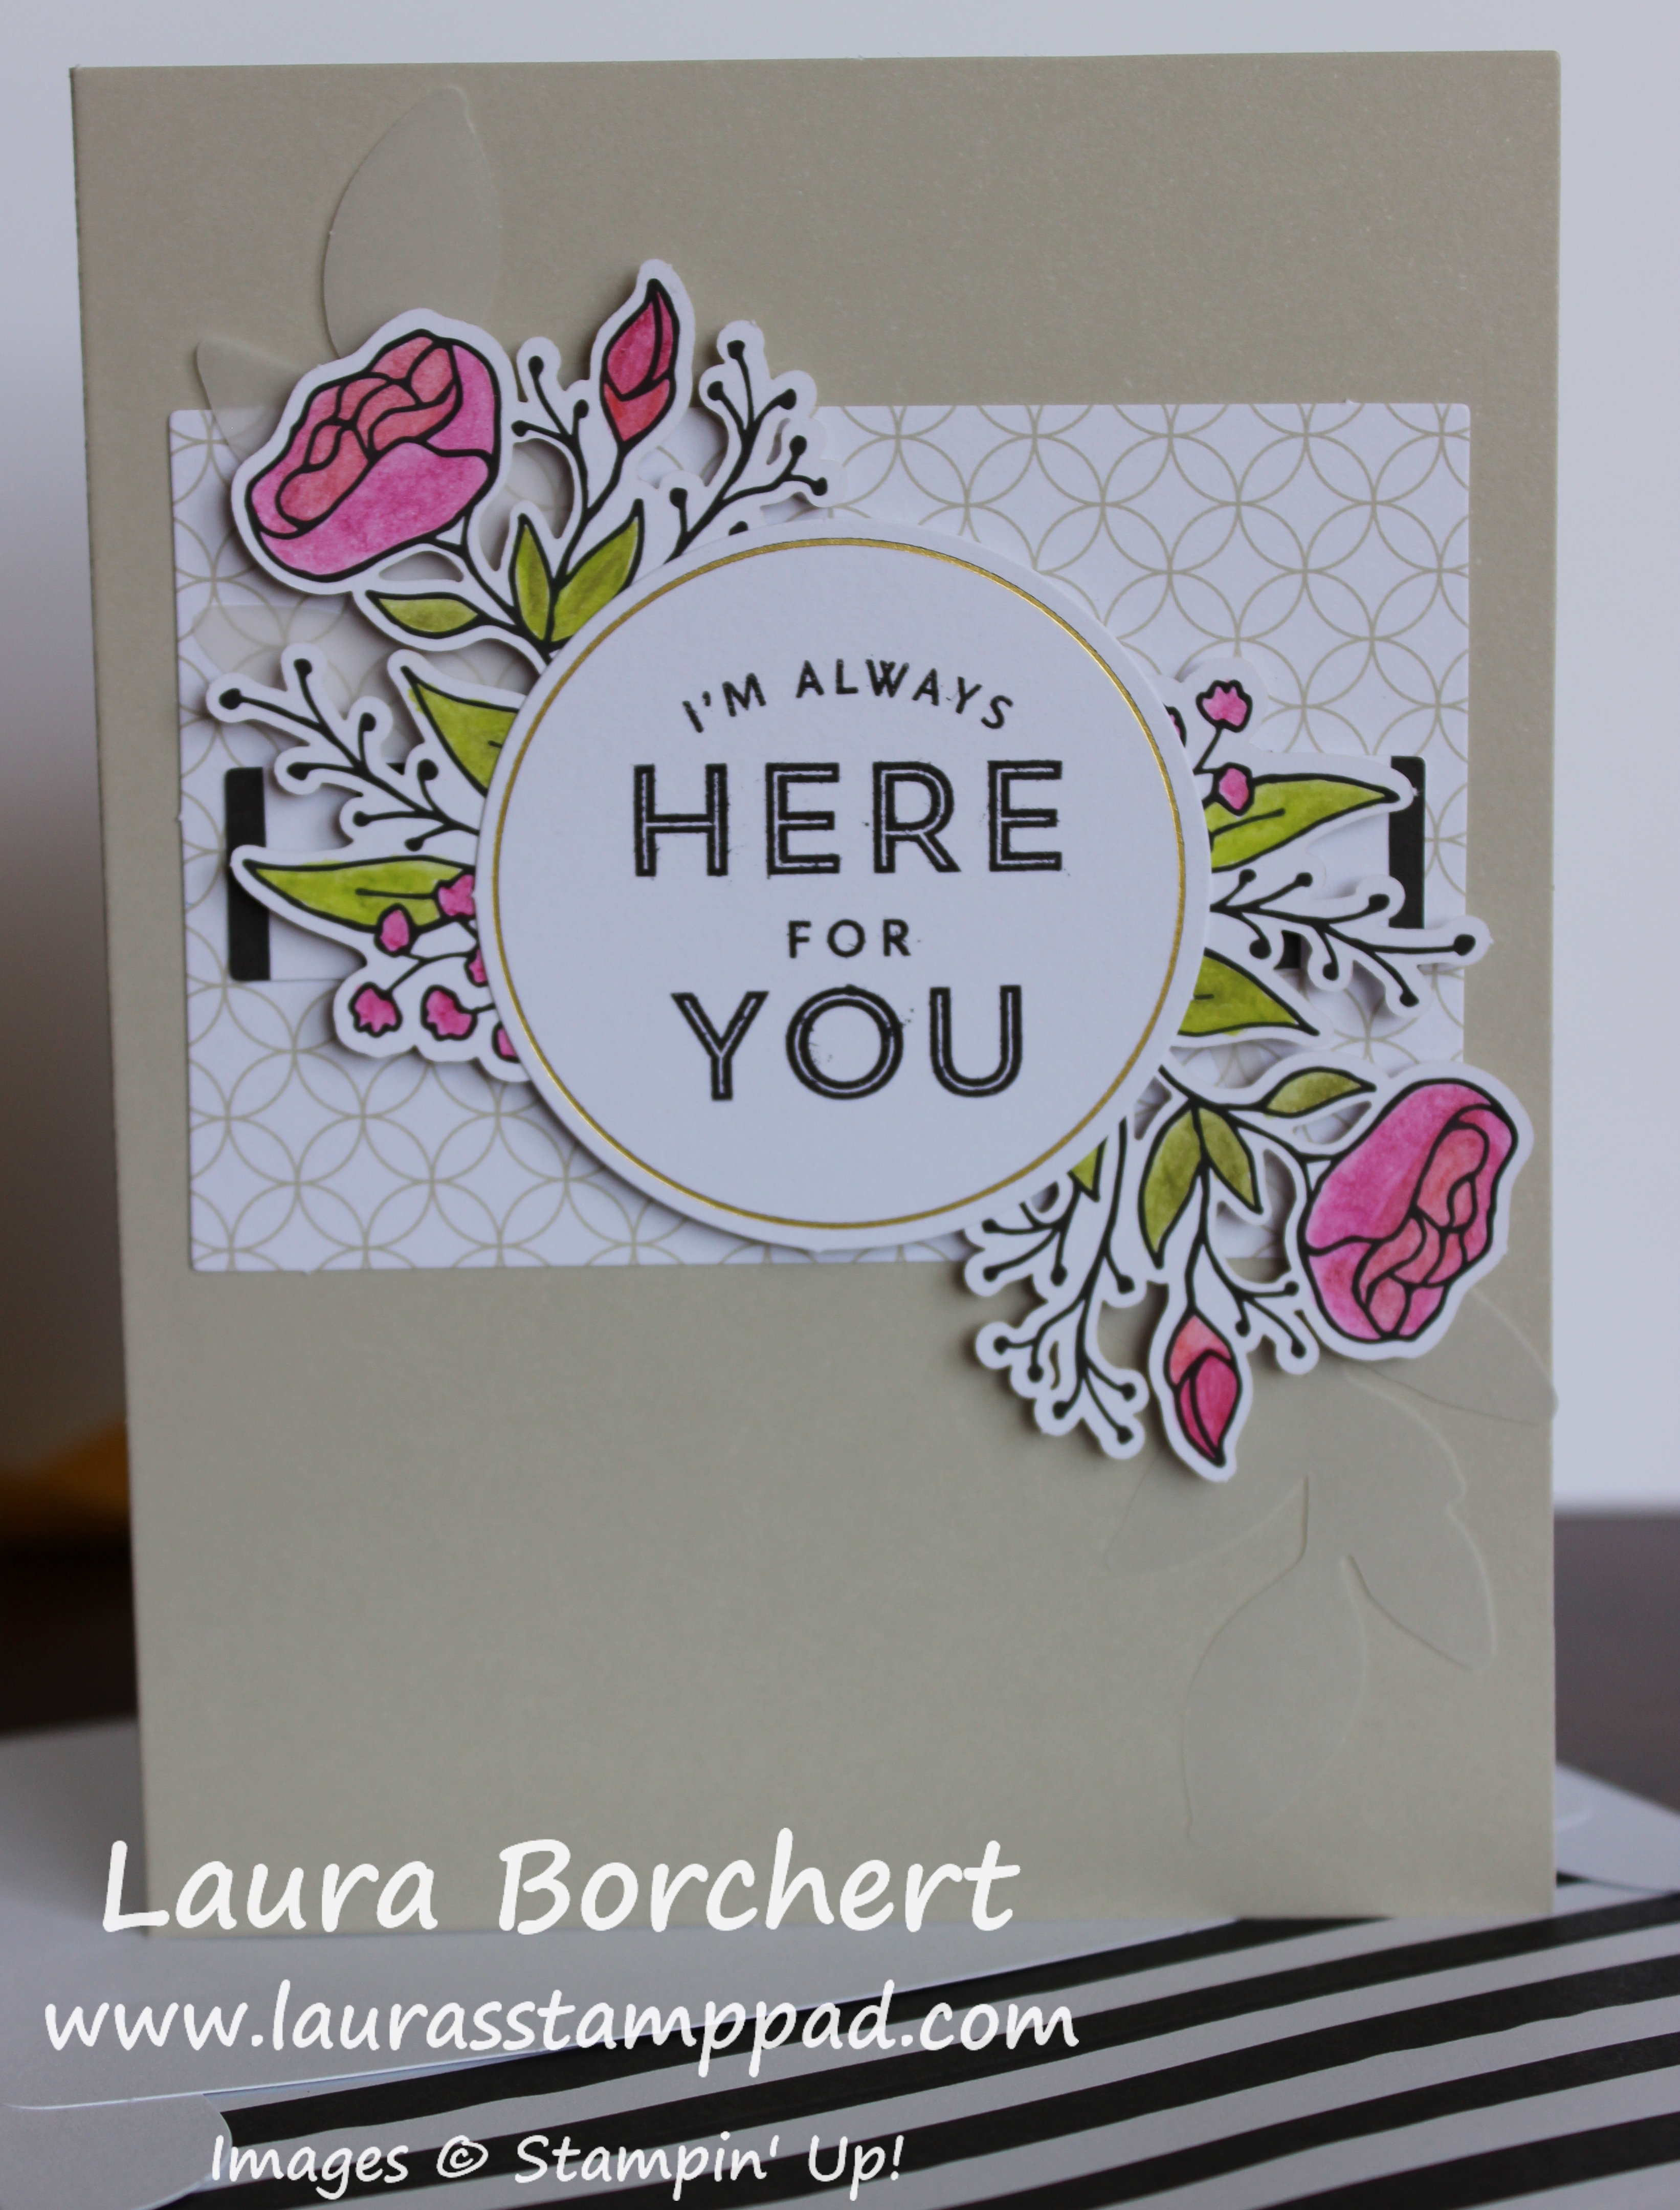
Always Here For You, www.LaurasStampPad.com

I do love the little vellum leaves in the background. They are subtle but also add a fun pop to the card! Vellum is one of those things I always forget about….maybe because it’s almost clear. lol Adhering vellum can be a struggle but I just adhered it at the stem/base and let it peak out.

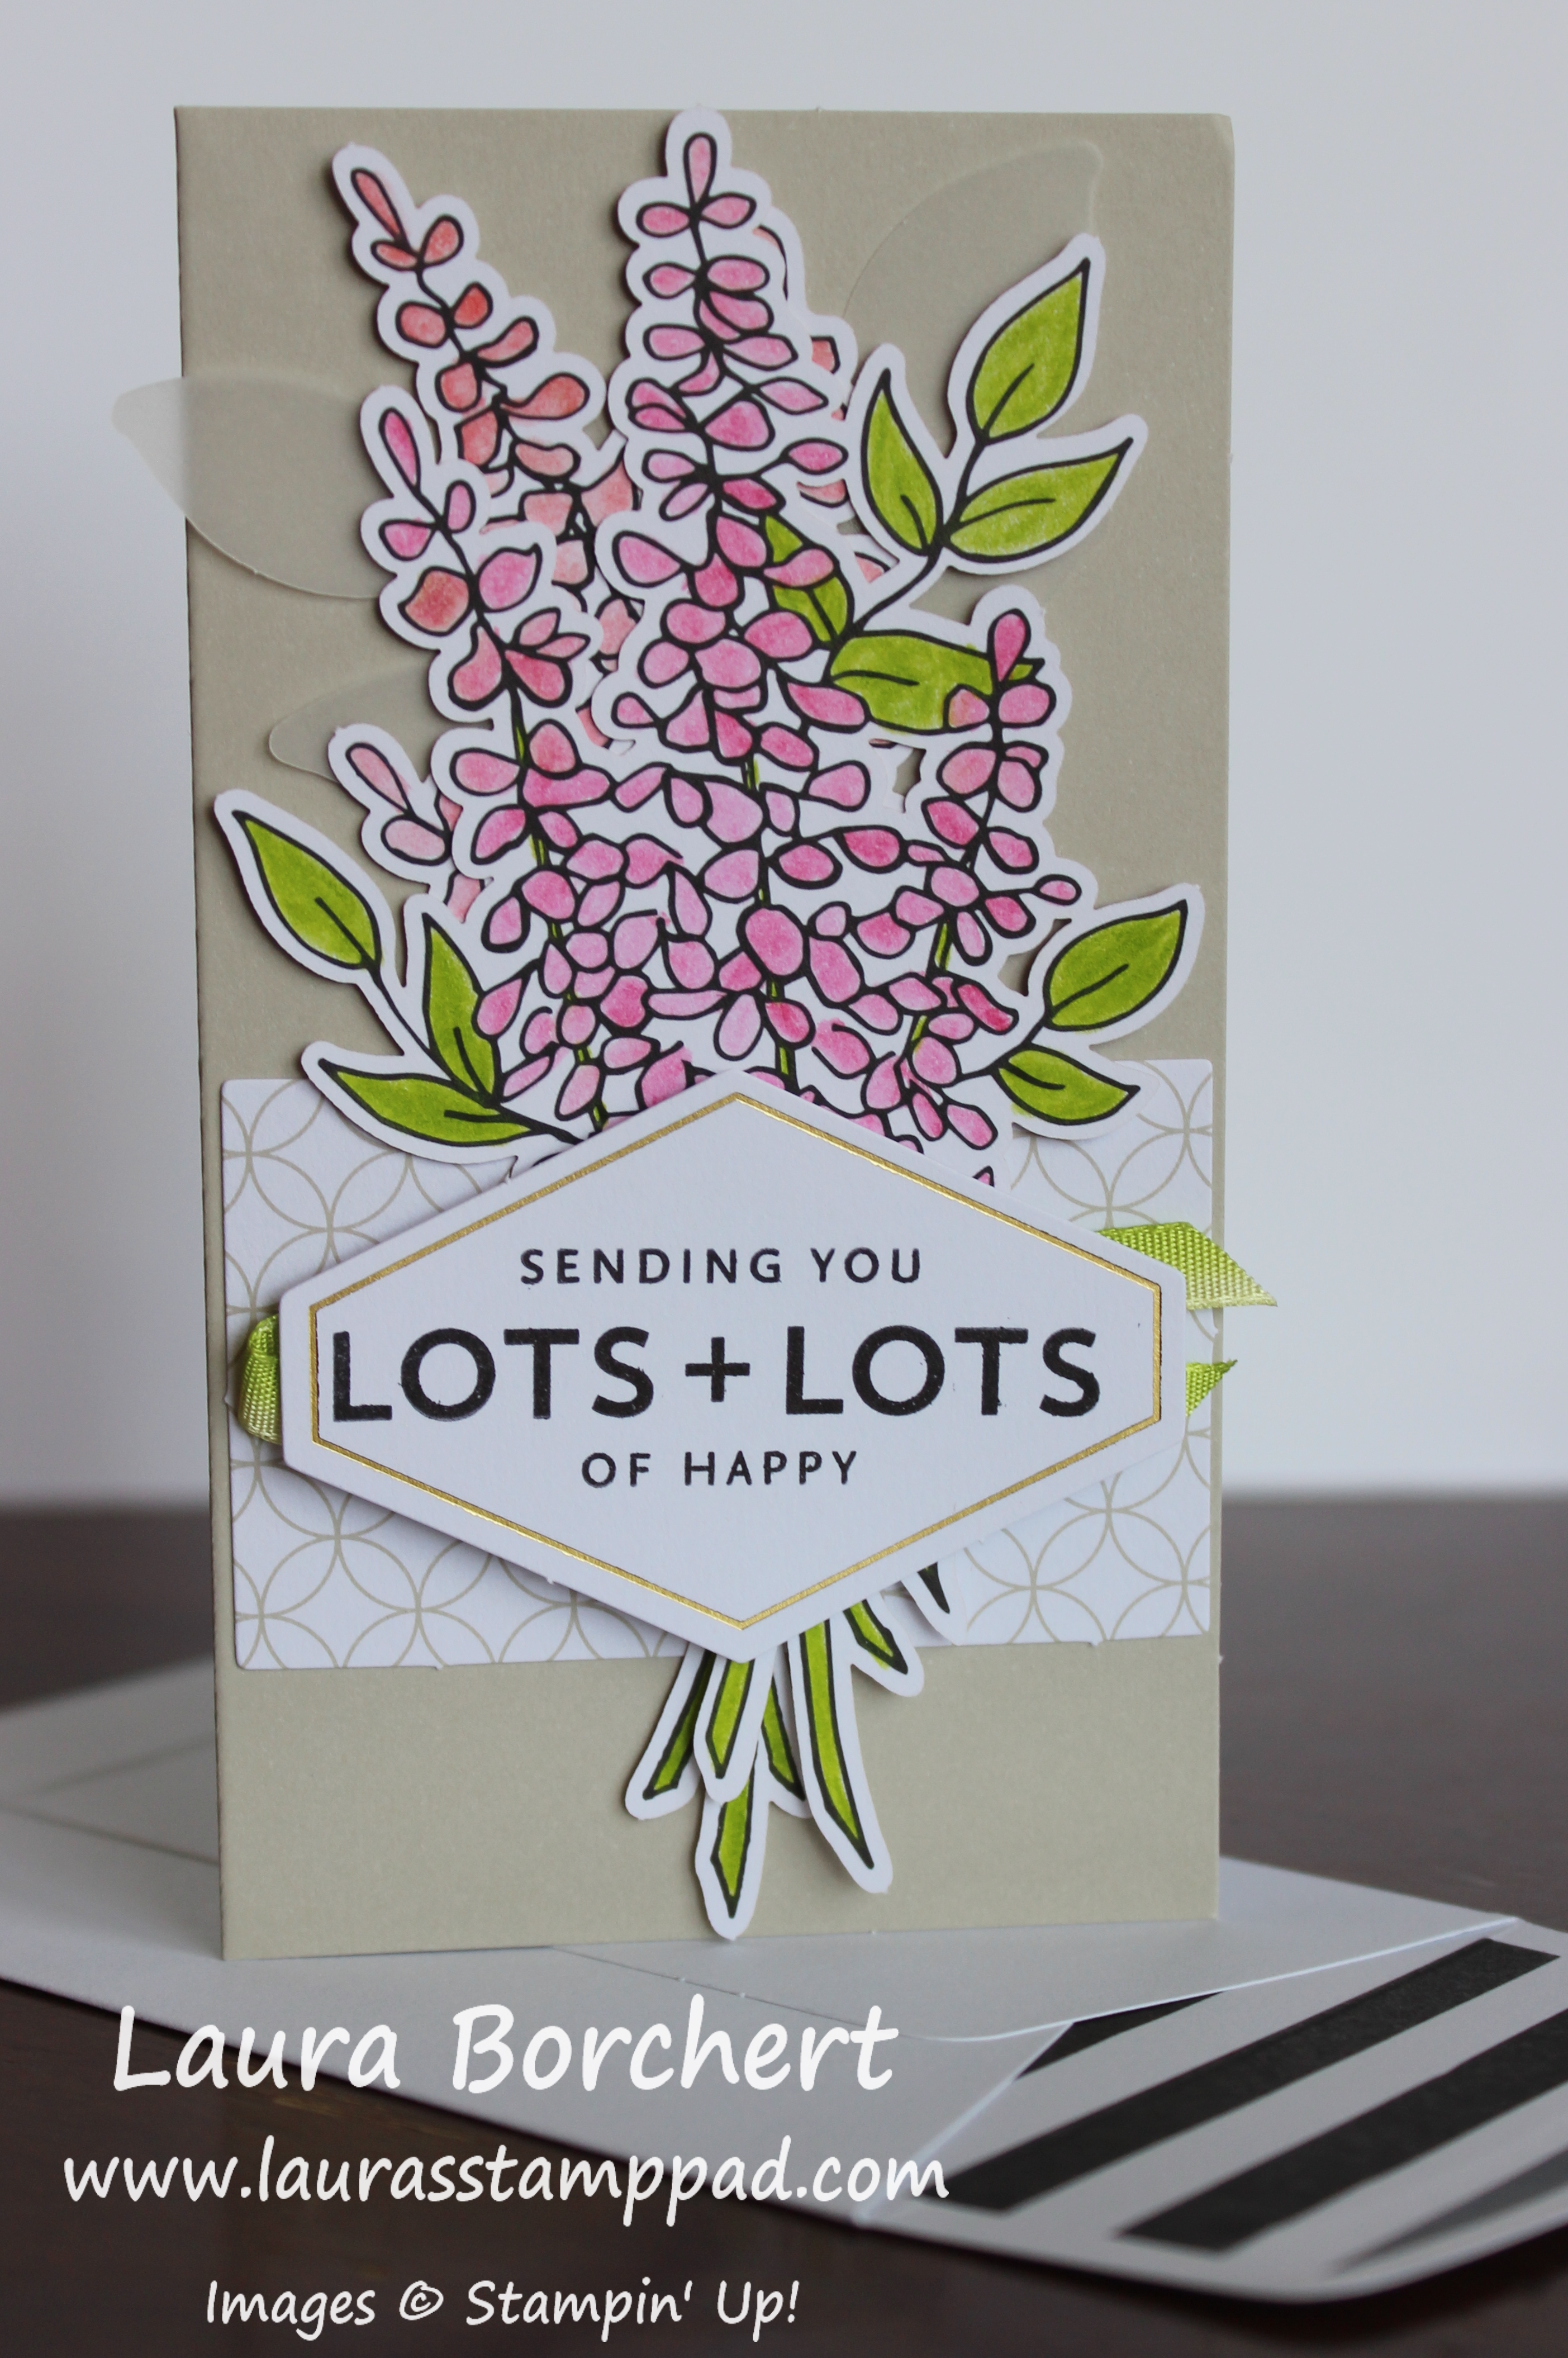
Sending Lots of Happy, www.LaurasStampPad.com

This little card is super cute and perfect for a gift topper or to attach to some homemade goodies to deliver! I was sad that the greeting covered up a lot of my coloring though. Can you tell I worked hard on that coloring and was sad to see it not showing. 🙂

Vellum Leaves, www.LaurasStampPad.com

Here is the final card! Did you notice that fun Lemon Lime Twist Ombre Ribbon? I love it!!! It’s so bright and cool looking! More little vellum leaves for this card too!

So  that is the entire Lots of Happy Card Kit. This kit is an all inclusive kit which means it comes with the supplies, ink, clear block, and colored pencils. This makes the kit easy to gift or to grab and go. I really did love the kit but it was a lot of coloring which isn’t really my favorite! I do love flowers and pink though! 🙂 This kit also comes with the option to buy refills meaning you get all the consumables to make more cards. Click the photo below to get your kit today!

Happy Stampin’

~Laura

Product List


Simple Sweet Soirée!!!

Posted on

Happy Monday!!! I hope you all had a wonderful weekend! Let’s start off the week with this quick and simple Sweet Soirée card! I love this card because you can add any greeting and it uses up every bit of the 12″ x 12″ sheet of paper! Woot Woot!

Simple Sweet Soirée, www.LaurasStampPad.com

This is a great card template to have on hand because it can work with any designer paper, ribbon, and greeting! Also, with all the colors in the paper, you can use any one of them as the card base. The same goes for the ribbon. I used up lots of different styles of ribbon making this card!

I started with a Marina Mist card base measuring 4-1/4″ x 11″. Next, I took a piece of the Sweet Soirée Specialty Designer Paper and cut it into 4″ x 4″ squares. One sheet of the designer paper will get you 9 squares! How awesome is that?!?!? Now for the greeting, I cut a piece of Whisper White measuring 4″ x 2″. Using the Special Celebrations Stamp Set, I stamped the greeting in Rich Razzleberry Ink.

To assemble the card, I added the greeting piece to the top portion of the card, leaving a nice border around the top and sides. Next, I took the designer paper and added it to the bottom portion, again leaving a border all around. There will be a little bit of overlap. Then, I tied some Calypso Coral Sheer Ribbon around the card to the inside on that overlap. I finished the card off with a few Subtles Enamel Shapes!

TIPS: I like to tie the ribbon to the inside of the card so that I can use less Whisper White. If I tied it around the front layer, I would need a full 4″ x 5-1/4″ piece of Whisper White to stamp and layer the designer paper on. This way I’m saving on paper and thickness of the card. Another bonus is that when I do tie my ribbon to the inside, I like to make the card base 4-1/4″ x 11″ so I’m using less ribbon than if I went 5-1/2″ x 8-1/2″!

I hope you enjoyed this quick and simple card. Also, a few little tips on saving product is always a plus! 🙂 Don’t forget that the Sweet Soirée Designer Paper is retiring at the end of the month (or while supplies last). Click here to check out all of the retiring items before they are gone!

Happy Stampin!

~Laura

Product List


Hope!!!

Posted on

This week seems to be flying by kind of…..anyone else out there think so? I always feel like some weeks fly by and others so go slow when really they are all the same. I find that super crazy! If your week is going slow…..this Hope card will give you the strength to power through to the weekend! 🙂

Hope, www.LaurasStampPad.com

This card could be created in many different colors. I know that different ribbon colors stand for different types of cancer and diseases. Also, the fun floral pattern can be colored any way you wish for any type of thinking of you card! I love it!

I started with a Pink Pirouette card base. Next, I die cut out the letters in Rich Razzleberry from the Large Letter Framelits. Rather than using an “O”, I used the ribbon from the Support Ribbon Framelits Dies. I die cut out 3 ribbons in Bermuda  Bay and then stamped the floral image from the Ribbon of Courage Stamp Set onto Whisper White. I stamped the ribbon in Memento Ink and colored it with Stampin’ Blends. Most of the images were so small that I didn’t blend much but just colored light and dark in spots.

Ribbon of Hope, www.LaurasStampPad.com

Now it is time to assemble it all. First, I took a piece of Whisper White measuring 4″ x 5-1/4″ for the background. After placing the letters and ribbon on it, I realized it looked too plain. Using the flower from the Ribbon of Courage Stamp Set, I stamped it all over the background. When I did this in class, one of the ladies used Pink Pirouette for the little flowers rather than Rich Razzleberry like me. I think I liked her’s better because it filled in but was more subtle.

Layered Ribbon, www.LaurasStampPad.com

Using the Fine Tip Glue Pen, I added the letters and layers of the ribbon. The extra layers really made the ribbon pop and I loved that look and texture! The hardest part of this card is just the spacing and making sure the letters all fit. I find it best to place them down and then pick up one at a time to glue down.

What color(s) of ribbon would you use for your card? Let me know in the comments below! Also, to purchase any of these items used for this card, just click the photos below!

Happy Stampin’

~Laura

Product List

Share What You Love Early Release Bundles!!!

Posted on

Happy Tuesday….May…..Ziggy Arrival Month!!!! Today, I’m taking a break on Technique Tuesday to share with you the Share What You Love Early Release Bundles!!!! This suite of products will be in the New Catalog coming out on June 1st. Stampin’ Up is releasing some fun bundles a month early though. The only way to purchase these items is as a bundle and there are FREE ITEMS too! Woot Woot!

Share What You Love Early Release Bundles, www.LaurasStampPad.com

Of course, I LOVE this suite of items because there are flowers and the color combination is just amazing. I am super loving those Pearlized Doilies as well. I love a good doily but for a clean, elegant, white look and not a rustic, antique look so these are perfect!!! Let me know which you prefer in the comments below! Am I alone here or do others prefer it that way?

For this card, I started with a So Saffron card base. Next, I took a 4″ x 4″ piece of the Share What You Love Specialty Designer Series Paper. I added adhesive along the right edge for the doily. I cut a Pearlized Doily in half and attached it to the adhesive on the designer paper and added it to the card front. Cutting doilies in half or pie shaped pieces is an awesome way to get even more fabulous projects out of each one. I did add a few Mini Glue Dots to a few scallops of the doily to really secure it down too!

For the greeting, I die cut a square from the Stitched Shapes Framelits. Using the Love What You Do Stamp Set, I stamped the greeting in Rich Razzleberry Ink. Then I stamped the leaves in Old Olive Ink. Before adding the greeting, I put a little Snail Adhesive across the center of the card and placed 2 strips of the Rich Razzleberry Velvet Ribbon down. After placing the ribbon down, I cut the tips to create that fun look. Then, I added the greeting over the top with Stampin’ Dimensionals. Be sure not to put dimensionals in the center where the ribbon will be and your greeting will lay much smoother.

There are 4 NEW Bundles of goodies that are available starting today!!! The Share What You Love Suite comes in 3 Bundles – Just Getting Started, A Little More, Please, and Gotta Have It All. Each tier of bundles has one or more FREE items in it and of course all of the products coordinate together. This month only is when you can purchase these products as a bundle and get the FREE item. The 4th Bundle option is the New 2018-2020 In Color Collection of Ink Pads. Woot Woot!!!!! Click here to see all of the items and order yours today!!!

If you would like to see all of the products in action, check out the Video Tutorial below or click here! Be sure to give the video a thumbs up if you liked it and don’t forget to subscribe if you are new. If you would like a notification when I post a new video, be sure to click the bell right next to the subscribe!!!

Happy Stampin’

~Laura


Love With All Your Heart!!!

Posted on

Happy Monday!!! I feel like this card is so heart warming and the greeting is so powerful – Live Every Moment, Laugh Every Day, Love With All of Your Heart. This card is perfect for any occasion or day!!!

Love With All Your Heart, www.LaurasStampPad.com

Shades of pink, sweet hearts, and that amazing greeting makes me love this card so much!

I started with a Powder Pink card base. Next, I took a piece of Whisper White measuring 4″ x 5-1/4″ and stamped hearts on the top half. The hearts are from the Ribbon of Courage Stamp Set and were stamped in Powder Pink and Berry Burst Ink. Be sure to fall off the edges of the cardstock so it looks like the pattern continues. On the bottom portion, I added a piece of the Powder Pink Fresh Florals Designer Paper (2″ x 5-1/4″). Then I tied some Berry Burst Crinkled Seam Binding around the middle to cover up the seam of the paper.

Hearts of Love, www.LaurasStampPad.com

For the greeting, I stamped it from the Ribbon of Courage Stamp Set onto Powder Pink cardstock. Then I punched it out with the Everyday Label Punch and added it to the card front with Stampin’ Dimensionals. To finish off the card, I added some Rhinestones to the top and bottom of the greeting for a little bit of bling. I also die cut a few Berry Burst hearts with the coordinating Support Ribbon Framelits (Bundle & Save 10%). I added the hearts with the Fine Tip Glue Pen! The die cut hearts are super necessary as I did another sample without them and loved it just the same!

If you would like to purchase any of the items used in this card, click on the supplies below!

Happy Stampin’

~Laura

Product List


Mermaids Under The Sea!!!

Posted on

Whether you like the Little Mermaid Disney Movie or not, these mermaids under the sea on this card are just adorable!!! I love the layers, texture, and fun in this card so much!!!

Mermaids Under The Sea, www.LaurasStampPad.com

There is just so much fabulous-ness going on with this card. I’ll let you continue to stare at it or you can keep reading for all the details to make your own!

I started with a Pool Party card base. Next, I took another piece of Pool Party (4″ x 5-1/4″) and ran it through the Big Shot in the Seaside Embossing Folder. I added this layer to the card front. Then, I took a piece of the Myths & Magic Designer Series Paper (blue bubbles) measuring 2″ x 4-1/2″ and punched the banner tips with the Banner Triple Punch. This piece was added to the card front as well.

Swimming Mermaids, www.LaurasStampPad.com

I took the sheet of mermaids from the Myths & Magic Designer Series Paper and cut out by hand 2 different mermaids. I wanted them going in different directions so that they fit on the square better. Since I’m not a huge fan of fussy cutting, I just did a basic around the body and didn’t get into all the details. Next, I stamped the bubbles from the Magical Day Stamp Set in Bermuda Bay all over a Stitched Shape die cut square. Then I added the mermaids to the front and added this to a layer of Bermuda Bay Glimmer Paper. I liked to use Tear And Tape to add layers to glitter to make sure it has a nice strong hold.

Using the coordinating Magical Mates Framelits (Bundle & Save 10%), I die cut out some seaweed in Lemon Lime Twist and Tranquil Tide. Then I added these along the side of the glimmer square, securing them on the back side with Stampin’ Dimensionals. I finished off with a few more dimensionals and then added it to the card front! For the greeting at the bottom, I stamped it from the Picture Perfect Birthday Stamp Set onto Lemon Lime Twist cardstock. Then I punched it out with the Classic Label Punch and added it to the card front with Stampin’ Dimensionals. On either end of the greeting, I added an Epoxy Dot for even more shine and texture!

I told you there were lots of layers and fun in this card but isn’t it just so magical?!?!?! I love it even if I only make 1…or maybe 2. 🙂 The Myths & Magical Suite is retiring at the end of the May which makes me sad. Be sure to stock up on these amazing products before they are gone. To see more samples using these products, click here, here, and here! Shop all of the products by clicking the items below!

Happy Stampin’

~Laura

Product List

Technique Tuesday – Coloring Embossing Paste with Sponge Daubers!!!

Posted on

Happy Tuesday!!! You all know what that means!!! I have a fabulous technique to share with you today. I’m coloring Embossing Paste with Sponge Daubers. This technique is super cool because you only use the amount needed of the Embossing Paste. When I colored some with Re-Inker in the past, I ended up making millions of cards because I colored too much paste!

Coloring Embossing Paste With Sponge Daubers, www.LaurasStampPad.com

I love how that background adds texture to the card and gives it a fun variation in color. Also, I love love love my Sponge Daubers and while I have used them in awhile, I do enjoy it!

I started with a Whisper White card base measuring 4-1/4″ x 11″. Next, I took a piece of Pear Pizzazz measuring 3-3/4″ x 5″ to add the Embossing Paste to it. First, I took the Sweet Soiree Decorative Mask and added color all over by pouncing a Sponge Dauber over the top. You can always use the same color (Pear Pizzazz) or go a shade darker like Old Olive or Wild Wasabi. Mixing the colors and pouncing all over would be fabulous too. After adding color in an area big enough for the cardstock, I placed the mask over the cardstock and onto the Silicone Craft Sheet. Then I added the Embossing Paste and as it swipes across the mask it picks up the color. I love it! Peel off the mask and allow it dry!

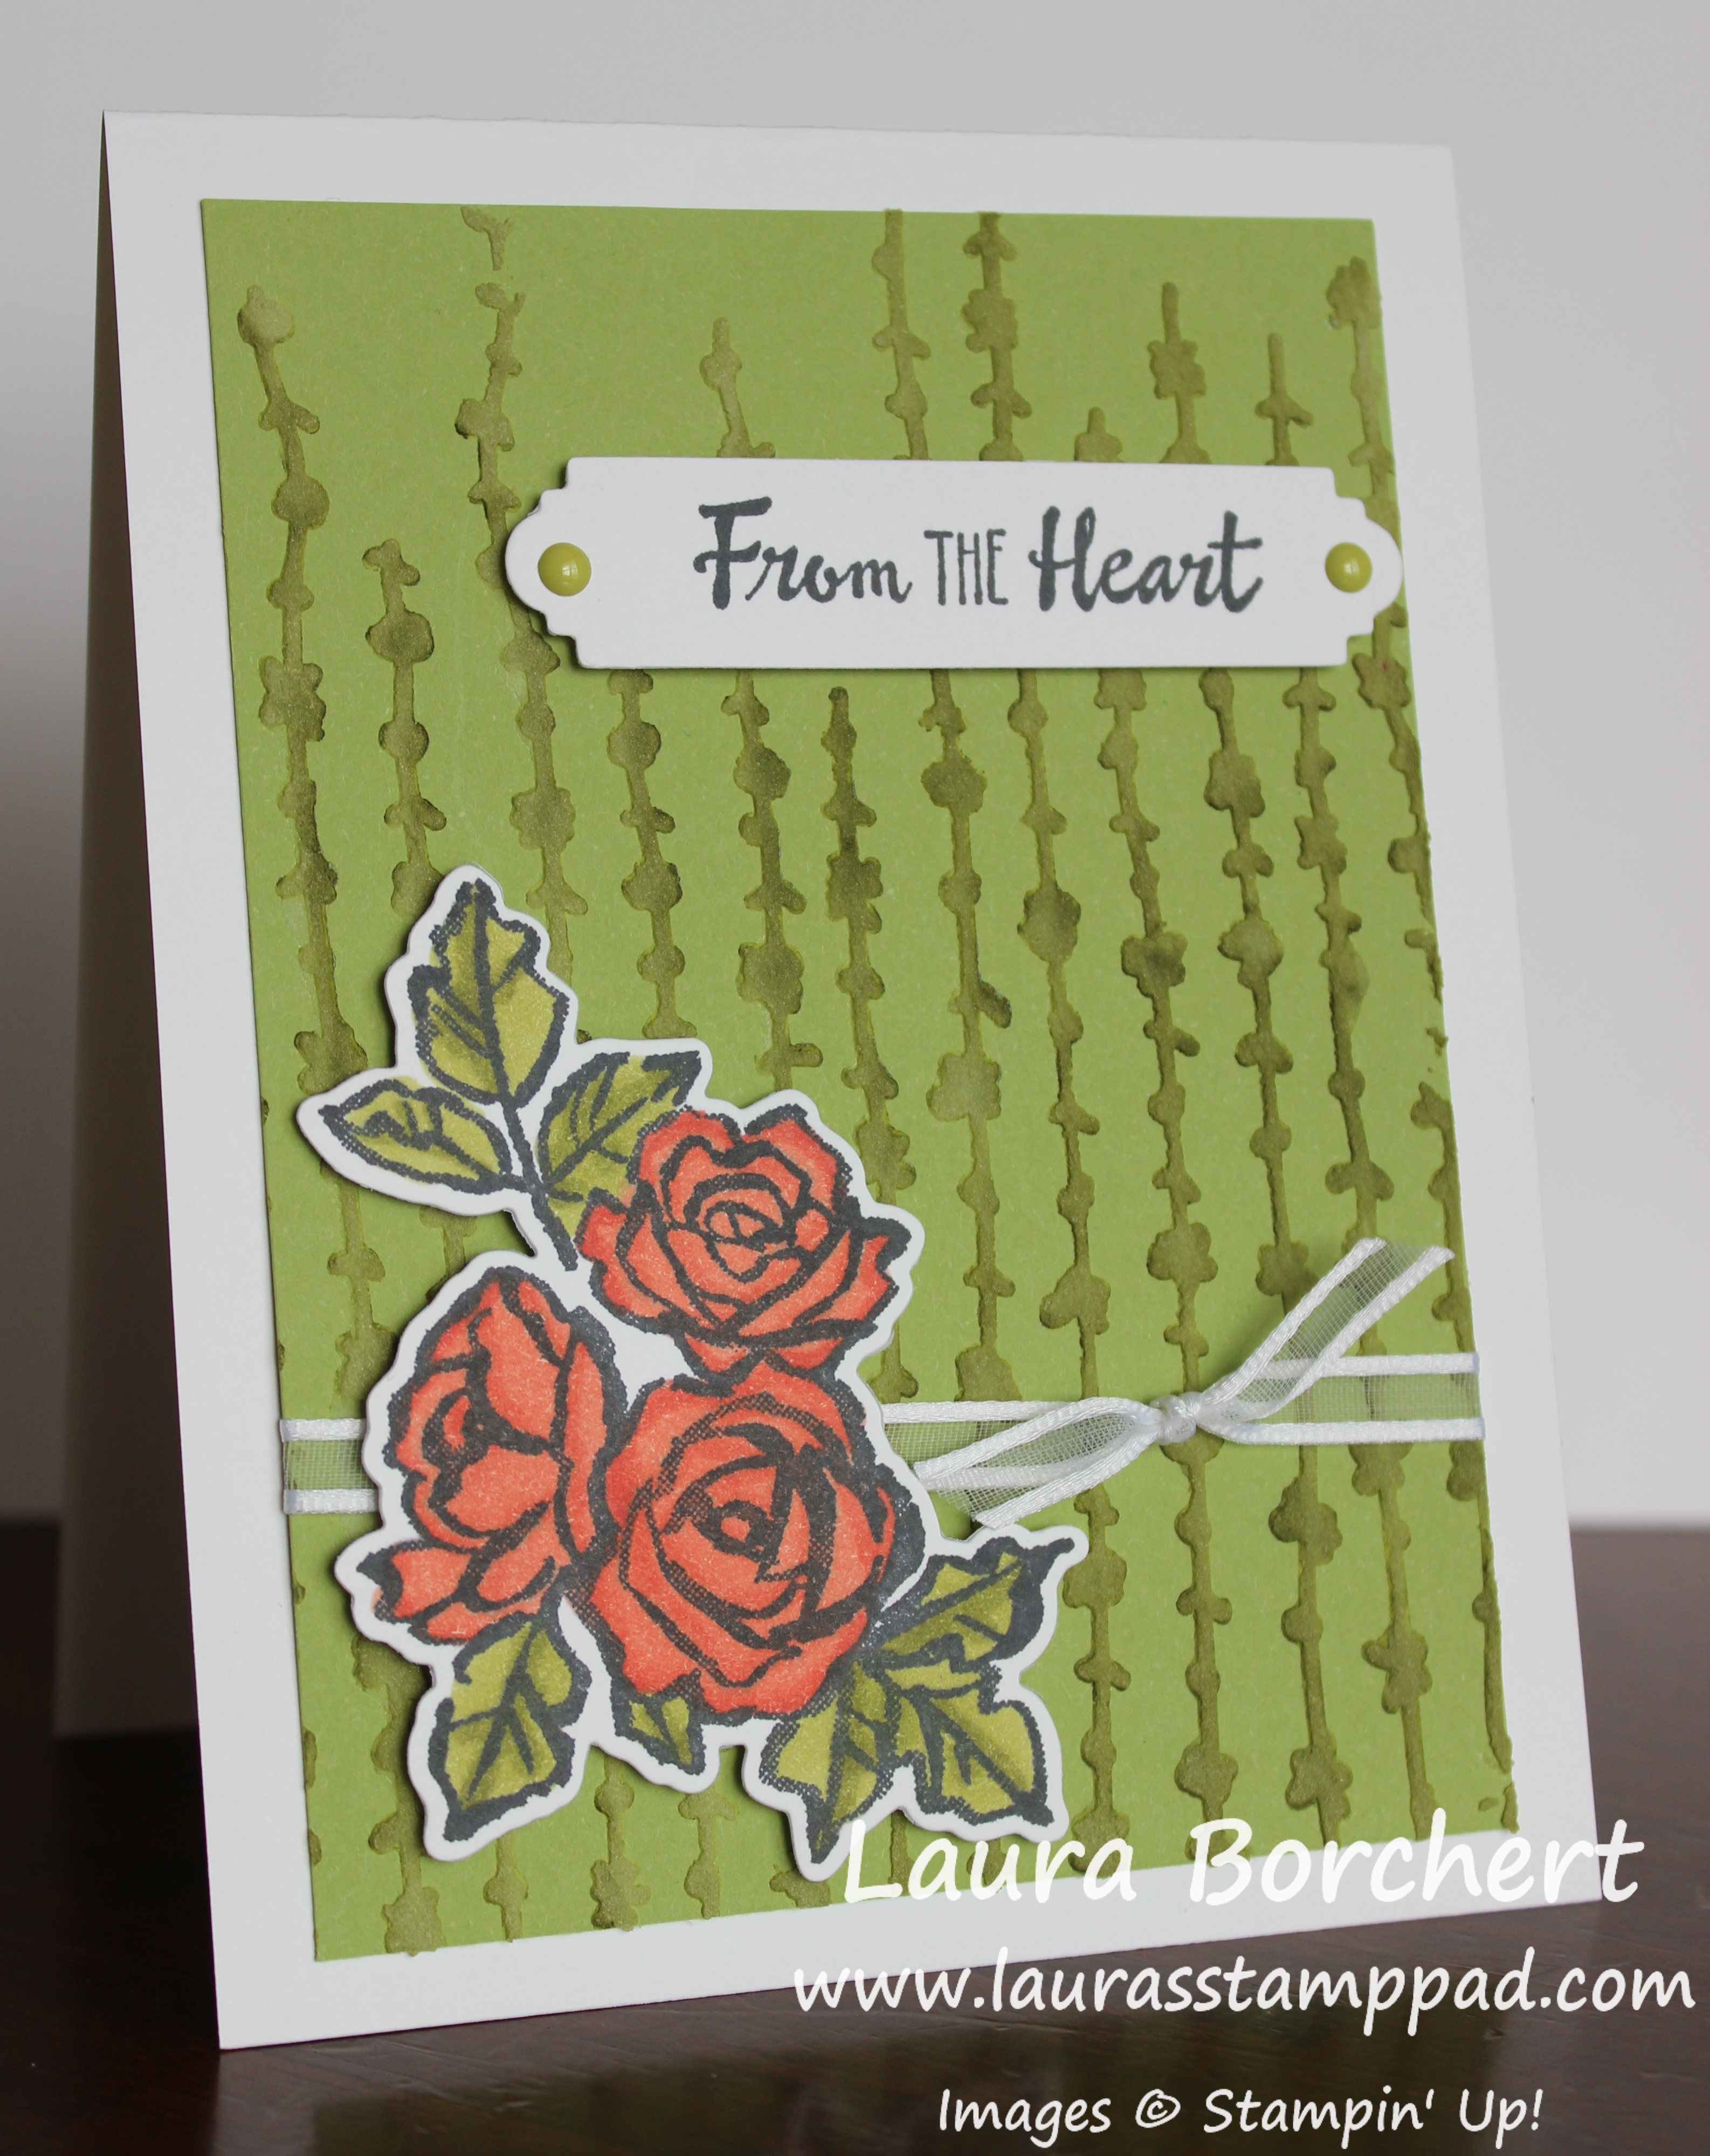
From the Heart, www.LaurasStampPad.com

While the Embossing Paste is drying, I worked on the floral image and greeting. Using the Petal Palette Stamp Set and coordinating Petals & More Framelits (Bundle & Save 10%), I stamped the flowers and greeting Memento Black Ink. Then I colored the flowers with the Old Olive and Calypso Coral Stampin’ Blends. After coloring, I die cut the flowers out and the greeting with the frame. Now to assemble, I added some Organza Ribbon around the card and then added it to the card base. Next, I added the flowers and greeting to the card front with Stampin’ Dimensionals. This gives the card some texture but also a nice smooth look over the Embossing Paste. To finish off the card, I added some Enamel Shapes to the greeting. I love it and it’s perfect for lots of occasions!

If you would like to see this all in action, check out the Video Tutorial below or click here! Be sure to give the video a thumbs up if you liked it and don’t forget to subscribe if you are new. If you would like a notification when I post a new video, be sure to click the bell right next to the subscribe!!!

Happy Stampin’

~Laura

Product List

Hold On To Hope!!!

Posted on

Happy Monday! I hope you all had a wonderful weekend! Last week, I showed these amazing samples and here is another fabulous one. All of these use the Hold On To Hope Bundle from the Occasions Mini Catalog!

Hold On To Hope, www.LaurasStampPad.com

I have really been having lots of fun with different creations using this bundle – Hold On To Hope Stamp Set and coordinating Cross of Hope Framelits! There are just lots of great ways to use it for religious events as well as lots of other occasions and lifting up styles!

I started with a Pear Pizzazz card base. Next, I took a piece of Whisper White measuring 4″ x 5-1/4″ and stamped all around the edge. The stamped image is from the Hold On To Hope Stamp Set and it was stamped in Pear Pizzazz Ink. Then, I die cut the solid cross in Pear Pizzazz and the skinnier cross in Silver Foil Paper using the Cross of Hope Framelits. Using the Fine Tip Glue Pen, I adhered these together and added them to a piece of Whisper White cardstock (3-1/4″ x 2-1/4″).

This piece was then layered onto a piece of Pear Pizzazz (3-1/2″ x 2-1/2″) and added to the card front with Stampin’ Dimensionals for a little bit of texture. For the greeting, I stamped it from the Hold On To Hope Stamp Set onto scrap white and then die cut it out with the coordinating framelit in the Cross of Hope Set. I added this across the top of the crosses.

This card is great to lift someone spirits, as a thinking of you or sympathy, and even for religious occasions like Confirmation, First Communion, etc. Going with a monochromatic look makes it easier and fewer supplies to get out. Woot Woot!

Don’t forget that the Stampin’ Up! Retiring List is out and these items are while supplies last so don’t wait if there is something you need! Click here to shop the retiring items.

Happy Stampin’

~Laura

Product List

Coloring On Stamps With Markers!!!

Posted on

I feel like I always go through waves on using different stamp products in my craft room. I realized I haven’t used my markers in awhile so I got them out and created this beauty by coloring on stamps with markers!!!

Coloring On Stamps With Markers, www.LaurasStampPad.com

This card is just stunning in the simplicity of it. I wondered if I should add some jewels or more stamping to fill it in but decided to go simple. Let me know in the comments if you love it as is or if you would have added more to the card!

I started with an Elegant Eggplant (retiring color) card base. Next, I cut 2 piece of Whisper White measuring 4″ x 5-1/4″. One is for the inside of the card and the other is for the front. Then, I took the floral image from the Hold On To Hope Stamp Set and colored it in with markers. I used Elegant Eggplant for the flowers and Old Olive for the greenery. After coloring it all in using the marker tip and not the pen tip, I huffed on it a bit and stamped it down. Think about eating a piece of hot food. When you put it in your mouth and it’s hot, you sort of ha ha breath with your mouth open to cool it off. That is huffing. This action will moisten the ink on the stamps to make sure it is ready to stamp. For the sample above, I actually inked it up both times but you could always stamp it once, huff on it and stamp it again. The second image will come out a bit lighter but still look fabulous!

Another option would be to create 2 cards are one time, stamp the fresh image on one piece of white and the second stamp on another. Ink it up again and do the same, then one card will be the darker images and the second card will have both of the lighter images. I’m all about getting the most bang for your buck when stamping!

After stamping the flowers, I added this layer to the card front. Then for the greeting I used the Layering Squares Framelits with Whisper White and Gold Foil Paper. I stamped the greeting from the Hold On To Hope Stamp Set in Elegant Eggplant and added it to the card front with Stampin’ Dimensionals.

If you would like to see this all in action, check out the Video Tutorial below or click here! Be sure to give the video a thumbs up if you liked it and don’t forget to subscribe if you are new. If you would like a notification when I post a new video, be sure to click the bell right next to the subscribe!!!

Happy Stampin’

~Laura

Last Chance Items, www.LaurasStampPad.com

Click here to see all the retiring products!

Product List


Basket Full of Flowers!!!

Posted on

Happy Wednesday!!! Hopefully this Basket Full of Flowers will help brighten your day and help you push through the week!!! It sure does help mine because you all know how much I love flowers! 🙂

Basket Full of Flowers, www.LaurasStampPad.com

This card is such a classic because I went with neutral colors of Crumb Cake and Old Olive so that the flowers in the basket can really be any color you wish! What color would you make the flowers? All one color? A variety of colors? Pink? Blue? Yellow? Orange? Let me know in the comments below!

I started with a Whisper White card base. Next, I took a piece of Crumb Cake (4″ x 5-1/4″) and ran it through the Big Shot with the Basket Weave Embossing Folder. This item as well as the stamped basket (Blossoming Basket Stamp Set) were one of the free Sale-A-Bration items last month. Have no fear if you weren’t able to get the Basket Weave Embossing Folder, it will be available in the 2018-2019 Annual Catalog coming out on June 1st! 🙂

Next, I tied some Old Olive Sheer Ribbon around the bottom and into a bow. Then I added this to the card front. For the flower basket, I stamped it from the Blossoming Basket Stamp Set in Memento Black Ink. Using the Stampin’ Blends Markers, I colored in the basket and flowers. I went with Crumb Cake for the basket, Old Olive for the leaves, and Rich Razzleberry for the flowers. For the leaves, I did a few with the dark marker and a few with the light. For the basket, I did each little line on the handle with the dark and then colored over it all and filled in with the light marker. On the bottom basket part, I colored the top weave in with the dark Crumb Cake Marker and the rest with the Light. This is how I got that variation of color for it all.

Blossoming Basket, www.LaurasStampPad.com

I love how Stampin’ Blends really make me feel like an artist when I totally am not a coloring artist whatsoever. After coloring, I added this piece to a layer of Old Olive and then added it to the card front with Stampin’ Dimensionals. I like to use Stampin’ Dimensionals when adding layers to a embossed layer because the foam falls into the grooves of the cardstock and hold tight as well as looks smooth! Plus you all know how much I LOVE Stampin’ Dimensionals.

Don’t forget to let me know in the comments below what colors you would use for your basket of flowers!

Happy Stampin’

~Laura

Product List