Technique Tuesday – Halloween Punch Art!!!

Posted on

Happy Tuesday!!! You know what that means….I have a fabulous Technique to share with you today! Punch Art is so much fun, uses up your scraps and really makes punches super versatile!!! I love that!

Halloween Punch Art, www.LaurasStampPad.com

How cute are all of these?? Since I’m not a huge Halloween fan, I like to find Halloween options with some of the supplies I already have. I used the Owl Builder Punch for all of these!!! Love it!!!! These little 3″ x 3″ cards are perfect to attach to a gift or treat bag. Let’s get started with each one and don’t worry, I did do a Video Tutorial for each of these!!! 🙂

Bat Punch Art, www.LaurasStampPad.com

This card is a Whisper White card base measuring 6″ x 3″ and folded in half. I used a 2-1/2″ Circle Punch in Crushed Curry for the moon!!! The branch was punched in Chocolate Chip with the Bird Builder Punch! I punched a full Owl body from the Owl Punch and then two sides of the owl. I cut the sides straight to get those wings. Using a Sponge Dauber and Whisper White ink, I added a little color around the edges for some texture. I attached the wings with a Mini Glue Dot and added him to the card with Stampin’ Dimensionals! Here is the video tutorial!

Frankenstein, www.LaurasStampPad.com

Little Frankie is my favorite!!!! I used the Owl Builder Punch for each of the pieces. I punched out a bottom half of the Owl body and the front body piece in Elegant Eggplant. I punched out a full Owl body and 1 large circle in Old Olive. I punched 2 large circles in Whisper White and 2 small circles in Basic Black. You will snip off the olive feet and place the eggplant feet to the back side of the owl. Then with your Paper Snips, you will cut the other eggplant piece into spikes for his hair and attach it to his forehead! For the eyes, you will assemble them with Mini Glue Dots – black circles onto the white ones and then cut the olive one in half and place those on top. I used a White Chalk Marker for the dots in the eyes and a Black Marker for the stitches all over!! For the greeting, I used the Happy Halloween from the Teeny Tiny Wishes Stamp Set. I stamped it in Elegant Eggplant and punched it out with the Word Window Punch. I layered this onto an Old Olive punched Washi Label Punch! Here is the Video Tutorial!

Ghost Punch Art, www.LaurasStampPad.com

I used a Whisper White card base and then layered on a piece of Basic Black measuring 2-3/4″ x 2-3/4″. I punched out an owl in Whisper White and cut off the little feet and turned it over. There is your little ghost. Then I punched out 2 small circles and 1 big circle and adhered them on with Mini Glue Dots. The greeting is from the Cheer All Year Stamp Set and I punched it out with the 1″ Circle Punch! Here is the Video Tutorial!

Spider Punch Art, ww.LaurasStampPad.com

For the little spider, I punched out a Black Owl and snipped off his feet. Then I punched 8 slivers from the piece of paper that I punched his body out of and that is how I created the legs. Check out the Video Tutorial here (it is at the exact spot for you) to see how I did that. You will also need 2 black hearts, 2 small red circles and a red body front piece. What is that front piece called? Owl belly? It looks like a vest to me! 🙂 I glued the owl belly on at the bottom of the owl body and added the hearts with 2-Way Glue Pen but you could also use the NEW Fine Tip Glue Pen! For the legs, I put Snail Adhesive all over the back of the spider and then attached all of the legs. Once I was done I added another layer of cardstock over top to really hold them in place!! I added googly eyes to the red circles and added them to the body with Mini Glue Dots. The eyes really bring him to life! If you don’t have googly eyes, you could always do black centers and a white dot like Frankie up above!!! For the greeting, I used the Teeny Tiny Wishes Stamp Set and stamped Sweet Treats in Real Red. I punched it out with the Word Window Punch. I layered this onto a Real Red punched Washi Label Punch! Here is the Video Tutorial!

Aren’t they all adorable and the best part is you can use up your scraps!!!! Love it!!! Here is the complete Video Tutorial!! Be sure to give it a thumbs up if you liked it!!!

Let me know which one is your favorite in the comments below!

Happy Punchin’

~Laura


Christmas Wreath Card!!!

Posted on

Wreath on a Brick Wall, www.LaurasStampPad.com

I love this card for the Brick Wall! I know that isn’t the focal point but it really sets the scene!!! I went a little outside the box for this card and love the way it turned out!!! Let’s get started!!!

I used a card base of Basic Gray cardstock. Then I took a piece of Real Red (4″ x 5-1/4″) and ran it through the Big Shot with the Brick Wall Embossing Folder. Using my Sponge Dauber, I rubbed side to side and up and down with Cherry Cobbler Ink. This gives darker edges to the brick and a little texture. It really makes that brick wall come to life! Love it!!!! Then I cut out a wreath from the Wonderful Wreath Framelits in Mossy Meadow. Using one of the branch stamps from the Berry Merry Stamp Set and Mossy Meadow Ink, I stamped it all over the wreath. I stamped a few times before going back to the ink pad and I stamped in all directions to give a full look to the wreath! I added the wreath to the card with Stampin’ Dimensionals and then attached a Whisper White Satin Stitched bow with Mini Glue Dots!! For the greeting, I stamped Merry Christmas in Mossy Meadow from the Snow Place Stamp Set! I used a 1″ piece of Whisper White for the greeting and punched the ends with the Banner Triple Punch! I curled the ends by running them over a Bone Folder like curling ribbon. The greeting was added to the card with Stampin’ Dimensionals as well! 🙂

Up Close Wreath on Brick, www.LaurasStampPad.com

If you would like to see this card in action, check out the Video Tutorial below or by clicking here!!! Don’t forget to give it a thumbs up if you liked it!!!

Happy Stampin’

~Laura


Holiday Joy!!!

Posted on

Plaid Christmas Card, www.LaurasStampPad.com

This card is perfect for the Holidays! I know many people send Christmas Cards, Holiday Cards, or Winter Cards….mostly because the timing of sending the card out can vary due to busy schedules! I can totally understand that!! So let’s get started!

I started with a card base of Crumb Cake and added a piece of plaid designer paper from the Merry Moments Designer Series Paper Stack! This stack is great for making multiples because you get 48 Sheets 6″ x 6″ Sheets (24 each of 2 double-sided designs). For the greeting, I used the Berry Merry Stamp Set! The Joy and Pine Cone were stamped in Crumb Cake, the Ribbon in Cherry Cobbler, and the Leaves in Mossy Meadow! I did the bow first and then the other items….this was best for spacing. For the leaves, I stamped once fully inked and moved it a smidge and stamped it again without re-inking. This gave a variation of colors and texture! I die-cut this out with the Deco Label Framelits and layered it onto a Cherry Cobbler frame as well. I added the greeting to the card with Stampin’ Dimensionals! I finished it off with a few Pearls! Love it!! Of course if you are making multiples of this card, be sure to do it in assembly line fashion. Do all of the stamping, then all of the die-cutting, then assemble each piece as a time.

How many cards do you create each year for the Holidays…5? 500? None?? Let me know in the comment below!!!

Happy Stampin’

~Laura


Technique Tuesday – Halloween Treats!!!

Posted on

Happy Tuesday!!! Halloween is right around the corner and today I have some simple yet fabulous treat packaging ideas for you!!! It’s never to early to get start but wait to buy the candy to avoid temptations of eating it all before Halloween arrives!!! 😉

Halloween Spider Doily Treat Packaging, www.LaurasStampPad.com

I am loving the Spider Web Doilies and they really are so fabulous you don’t need much else to decorate!!!

SUPPLIES NEEDED: Spider Web DoiliesSketched Dots Tag & Bag Gift Bags, Sponge Daubers, Alphabet Stamp Set, Pumpkin Pie Cotton Ribbon, 1″ Circle Punch, 3/4″ Circle Punch, 7/8″ Scallop Circle Punch

First let’s start with the little mason jars. These are really quick and simple and you can put lots of different gift options in there for teachers, neighbors, friends, family, etc – Gift Card, Nail Polish, Candy, Cookies, Chex Mix, Hot Cocoa, and more! I started off by taking my 2-1/2″ Circle Punch and either Basic Black or Pumpkin Pie cardstock for the top lid! The greeting that I used came from the Cheer All Year Stamp Set from the Holiday Mini Catalog. One of them I punched out with a 1″ Circle Punch added it to the lid with a Stampin’ Dimensional. The other one I punched out with the 3/4″ Circle Punch and layered it onto a 7/8″ Scallop Circle in Basic Black!

Mason Jar Lids, www.LaurasStampPad.com

Now for the side, I added Tear & Tape half way around the jar right along the top! This is what holds the half of Spider Web Doily onto the jar! Of course since the doily has holes in it and the sticky comes through, I added the ribbon to cover it up! I used Pumpkin Pie Cotton Ribbon to tie around the jar and into a bow. On one of them I placed the bow over the doily and on the other one I placed it on the back side of the doily! All done!!! Fill with goodies and enjoy!!!

Spider Web Treat Jars, www.LaurasStampPad.com

For the Treat Bag, I started with a Sketched Dots Gift Bag and used my sponge daubers to add Pumpkin Pie and Daffodil Delight for the candy corn look!!! You can use the ink pad directly to the bag but I found this to be super messy and all of the ink doesn’t soak in so it is a bit of a waste! For the tag, I stamped the word BOO from the Layered Letters Alphabet Stamp Set and the little spider is from the Cheer All Year Stamp Set! These were stamped onto Pumpkin Pie cardstock and then die cut with the Lots of Labels Framelits! I adhered the tag to the Spider Web Doily and then to the front of the bag!!! Fill with goodies and enjoy!!!

Candy Corn Bag, www.LaurasStamppad.com

I am not a huge fan of Halloween so I’m never really drawn to Halloween Stamp Set. I do like to make a few cards and treats for the very few trick-or-treats (if any) that we do get. I usually end up giving them to stampers at classes, the cashier at the grocery store and my neighbors! Finding out of the box ways to create the Halloween look is sometimes more fun too!!!

If you would like to see today’s technique in action, check out the video below or click here!!! Be sure to give it a thumbs up if you liked it!!! Don’t forget to subscribe to my channel so you don’t miss and future videos too! 🙂

Happy Trick-Or-Treatin’

~Laura


Witching Decor….Spooky!!!

Posted on

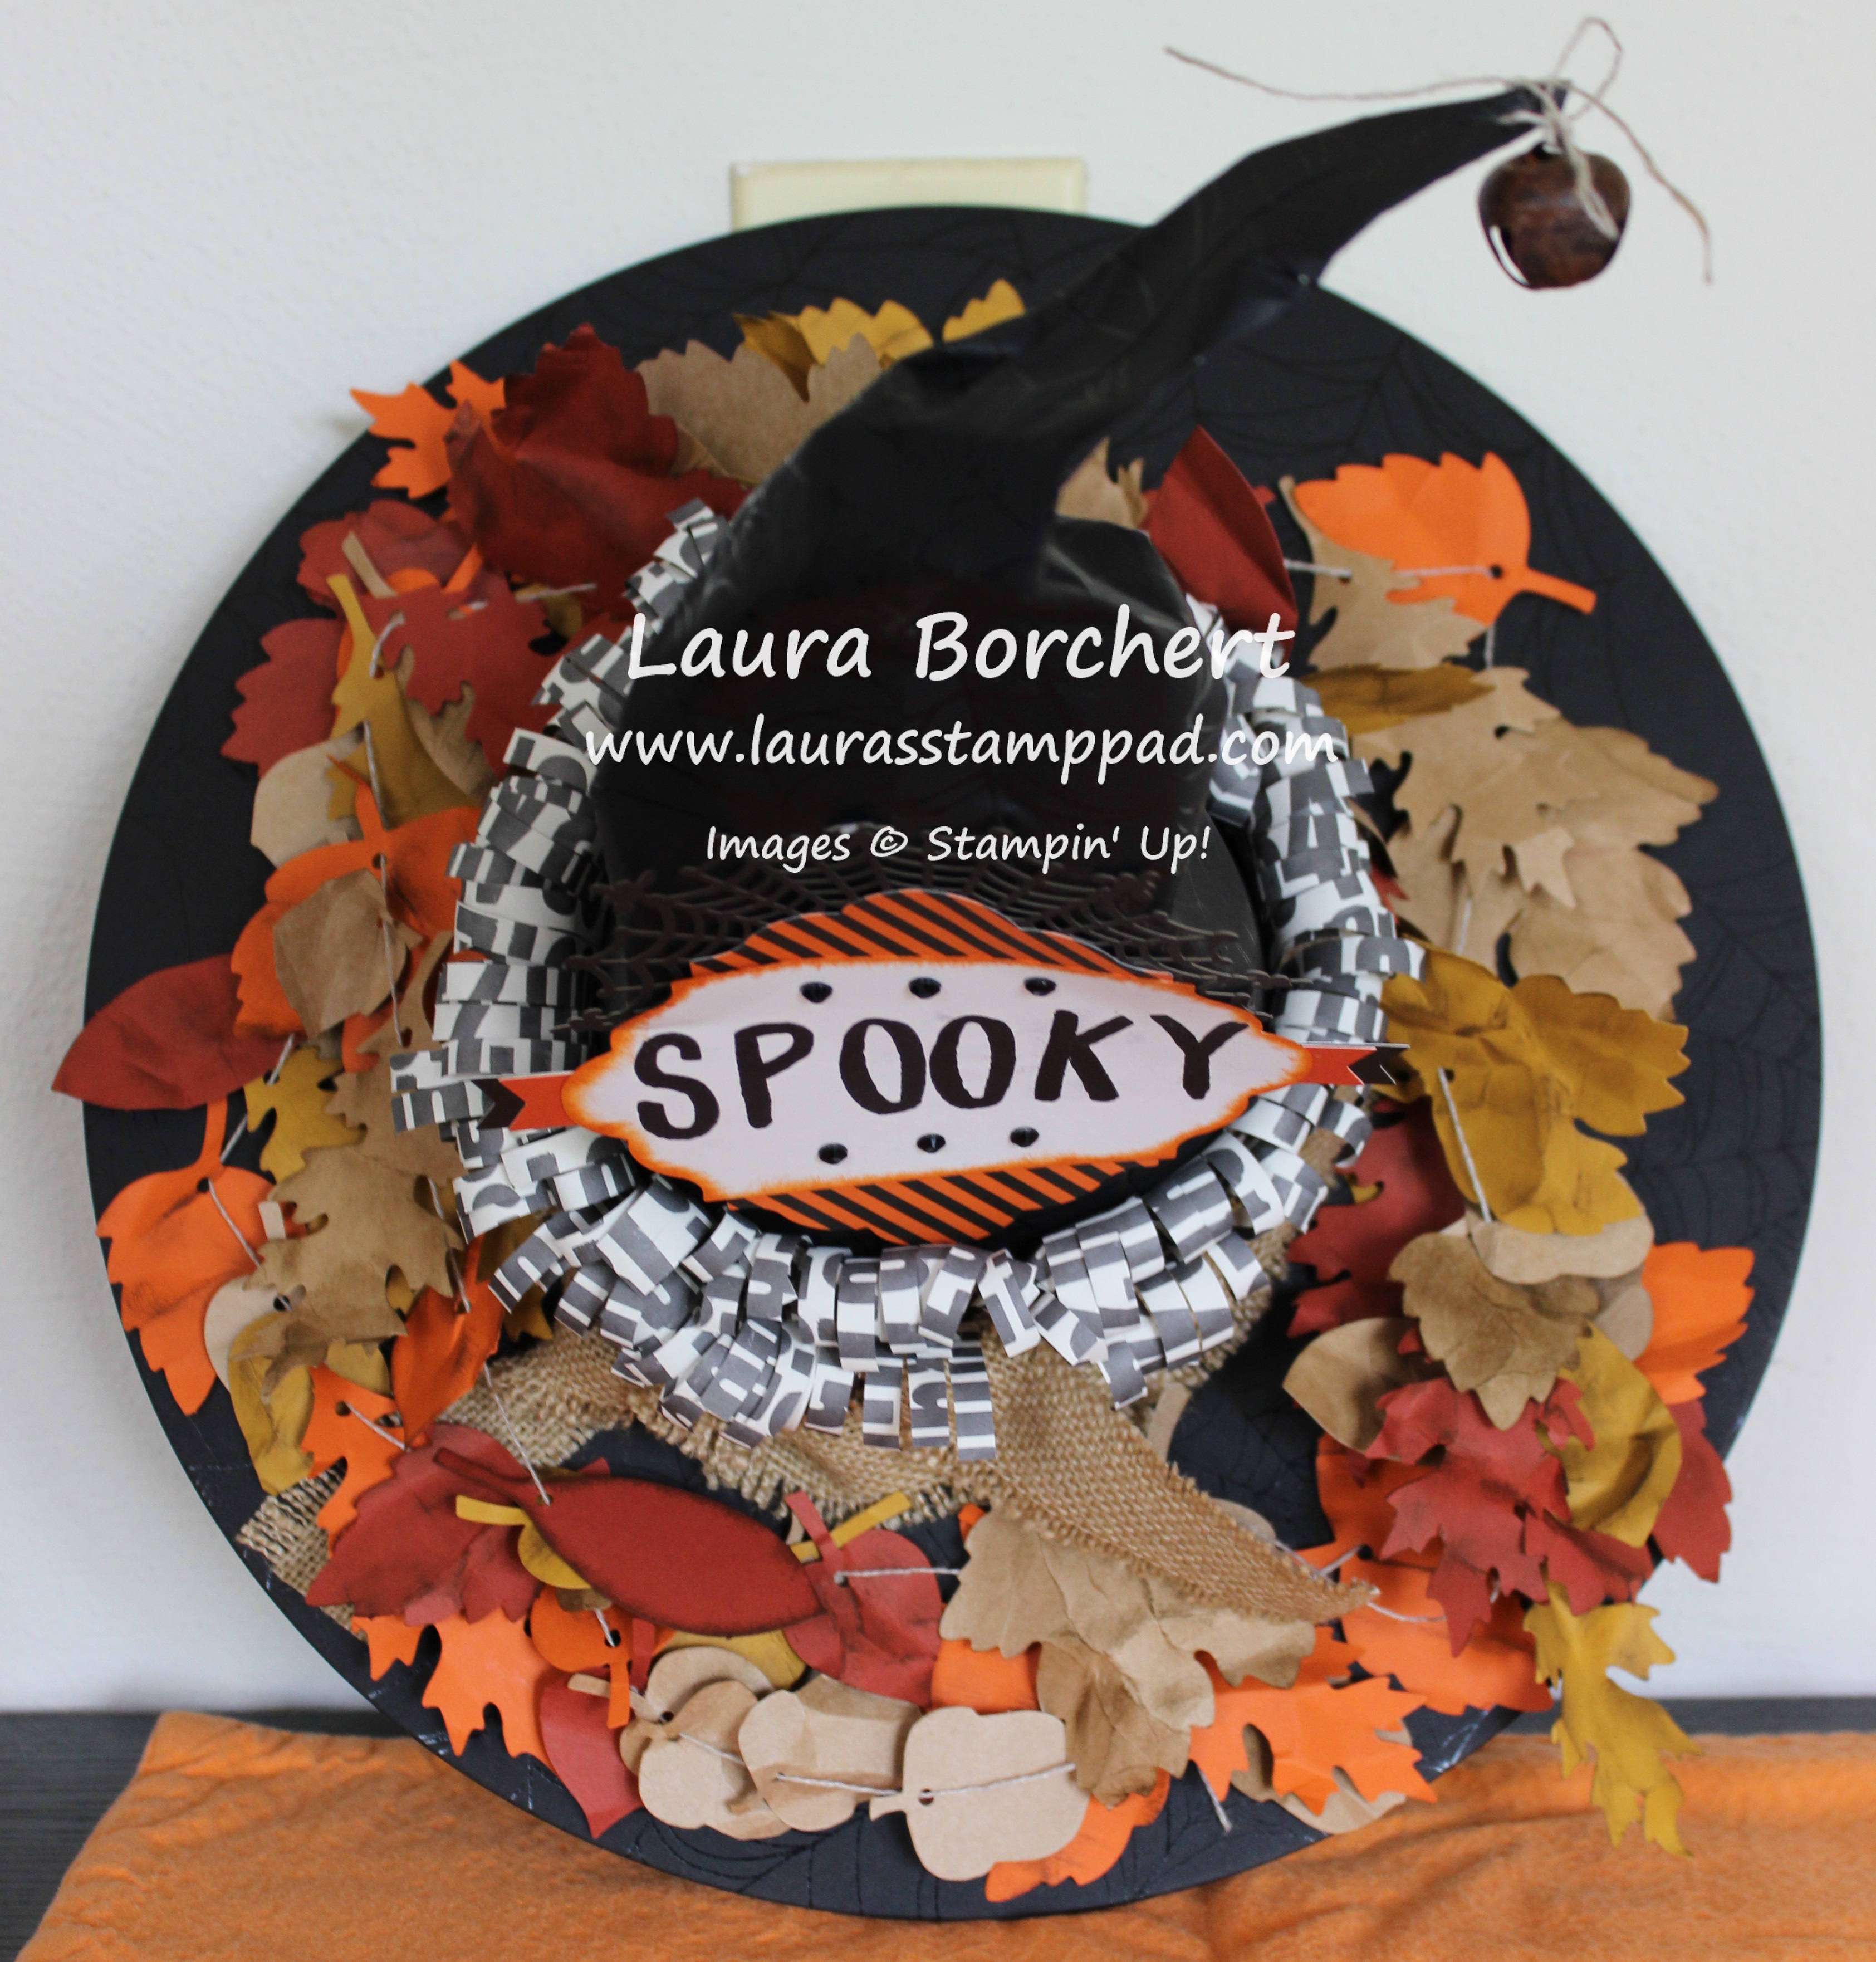
Witching Decor Project Kit, www.LaurasStampPad.com


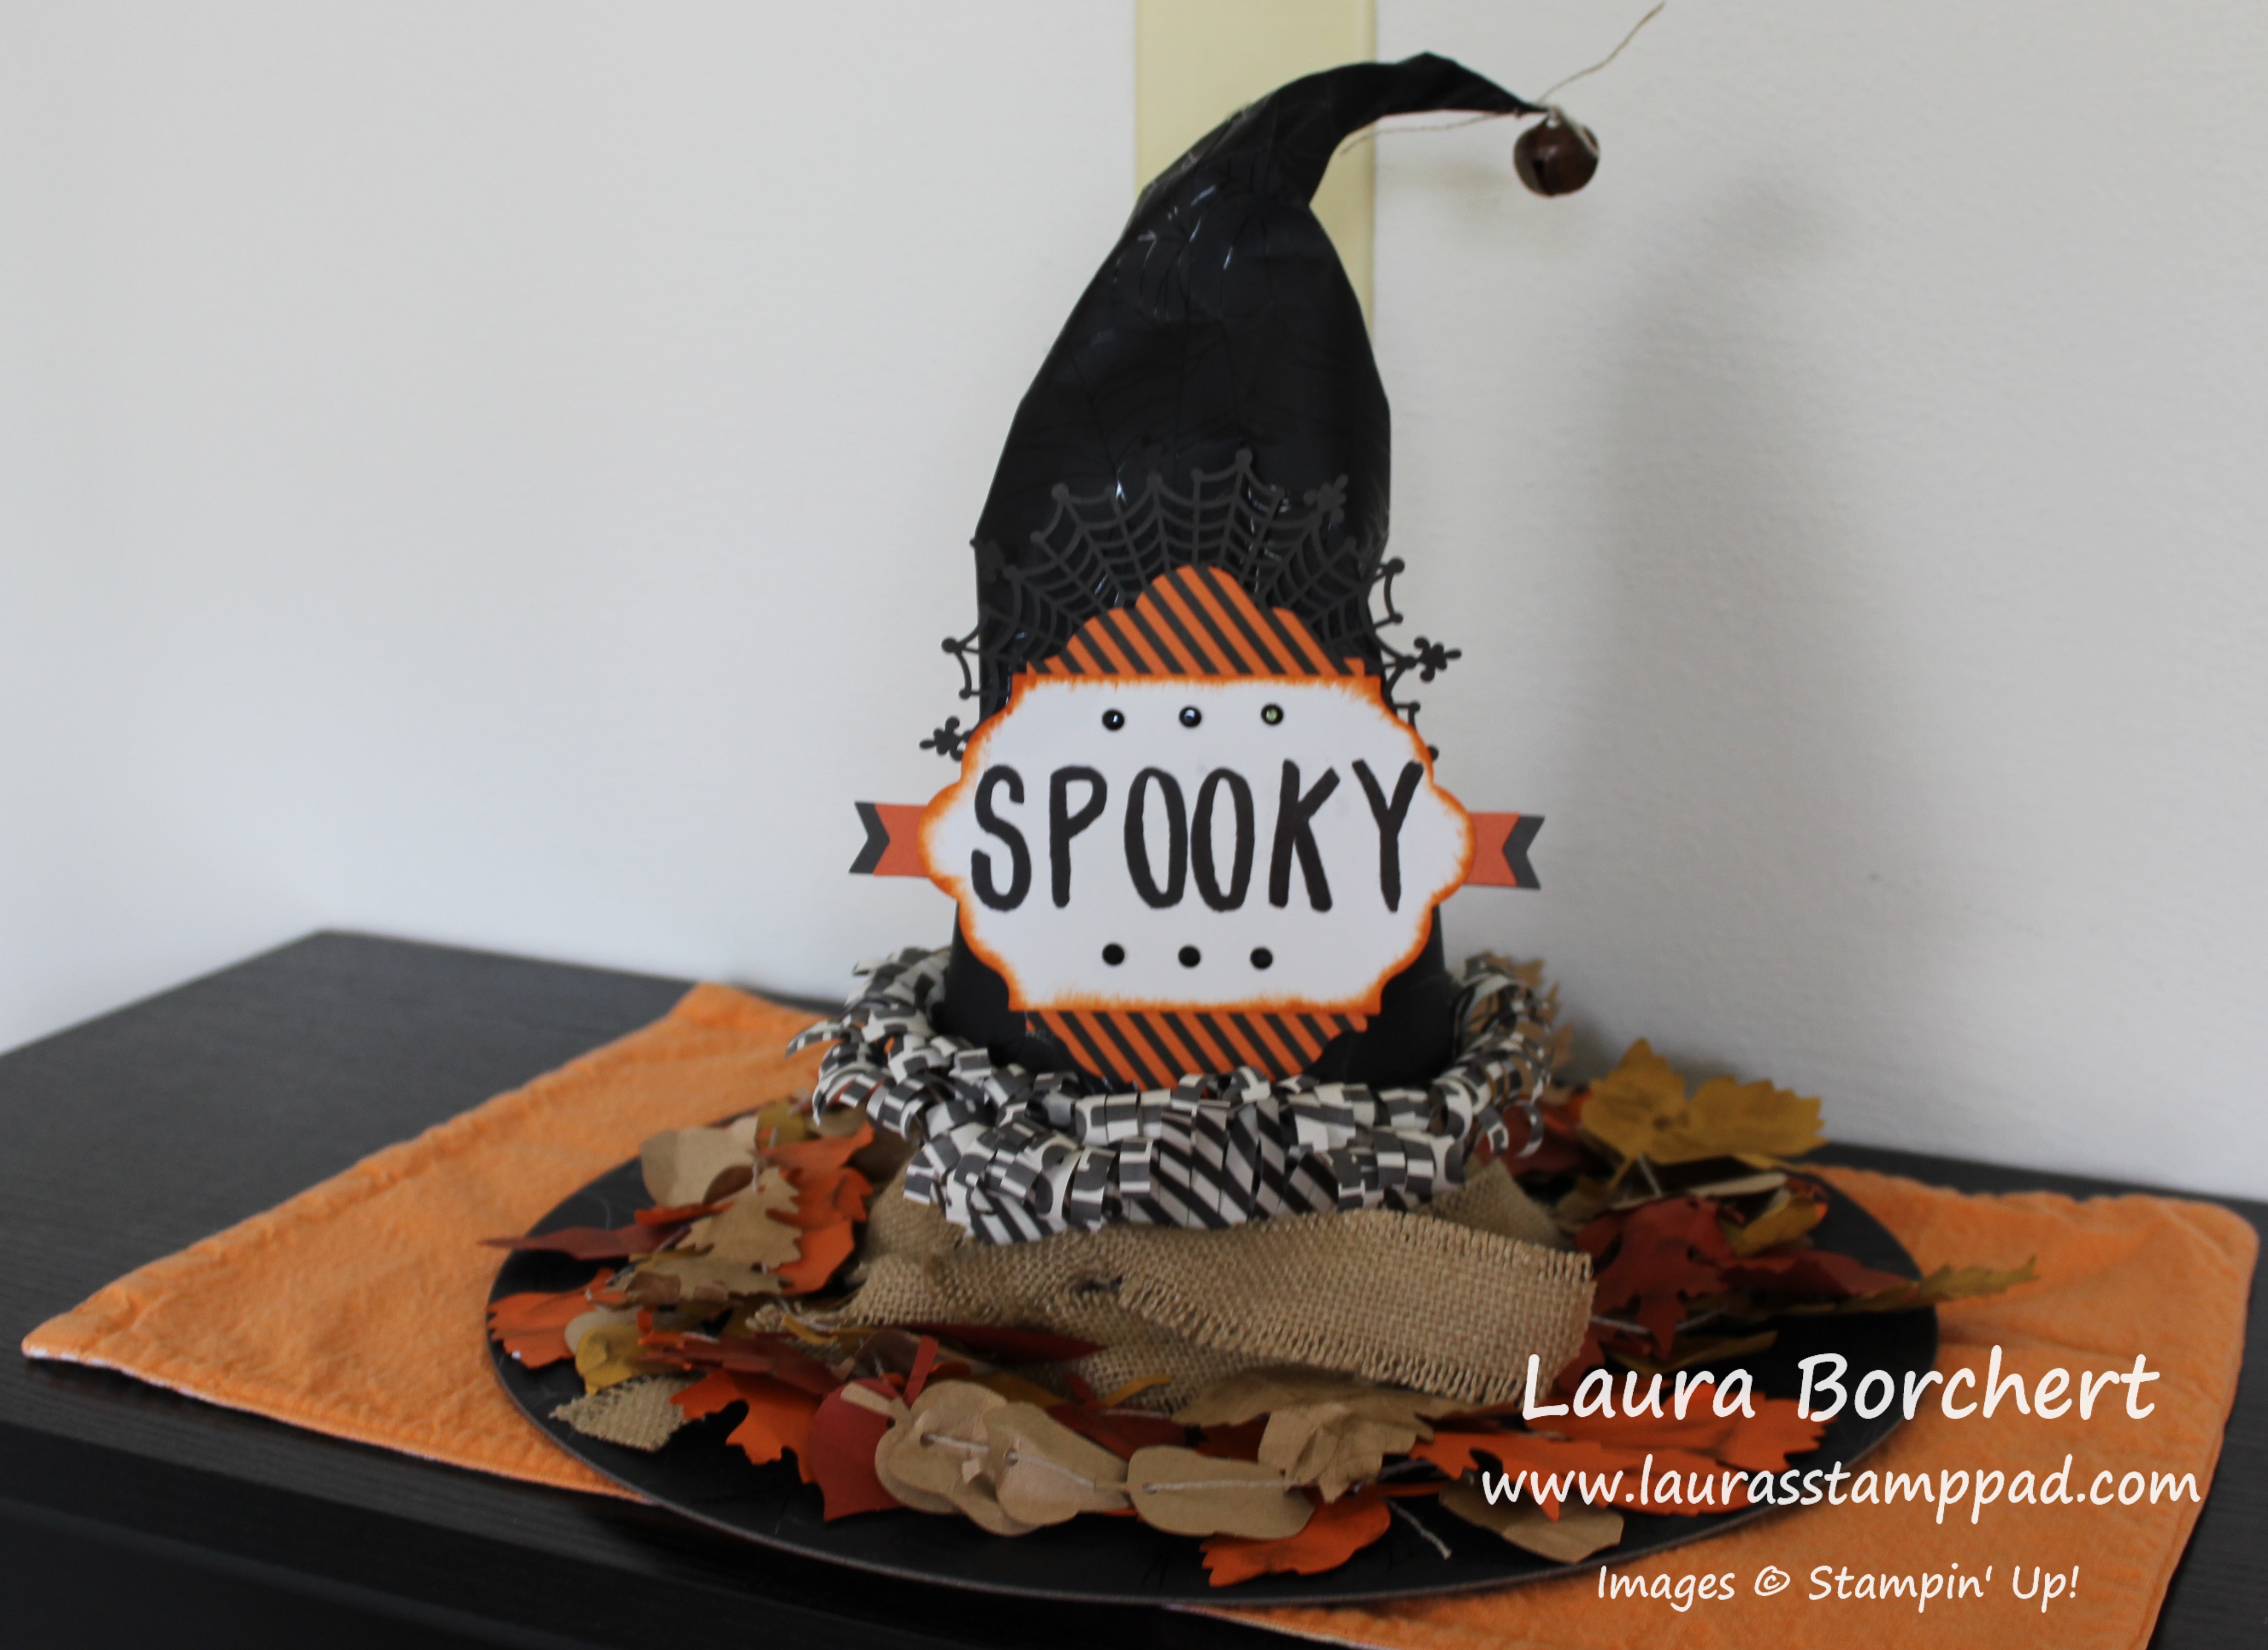
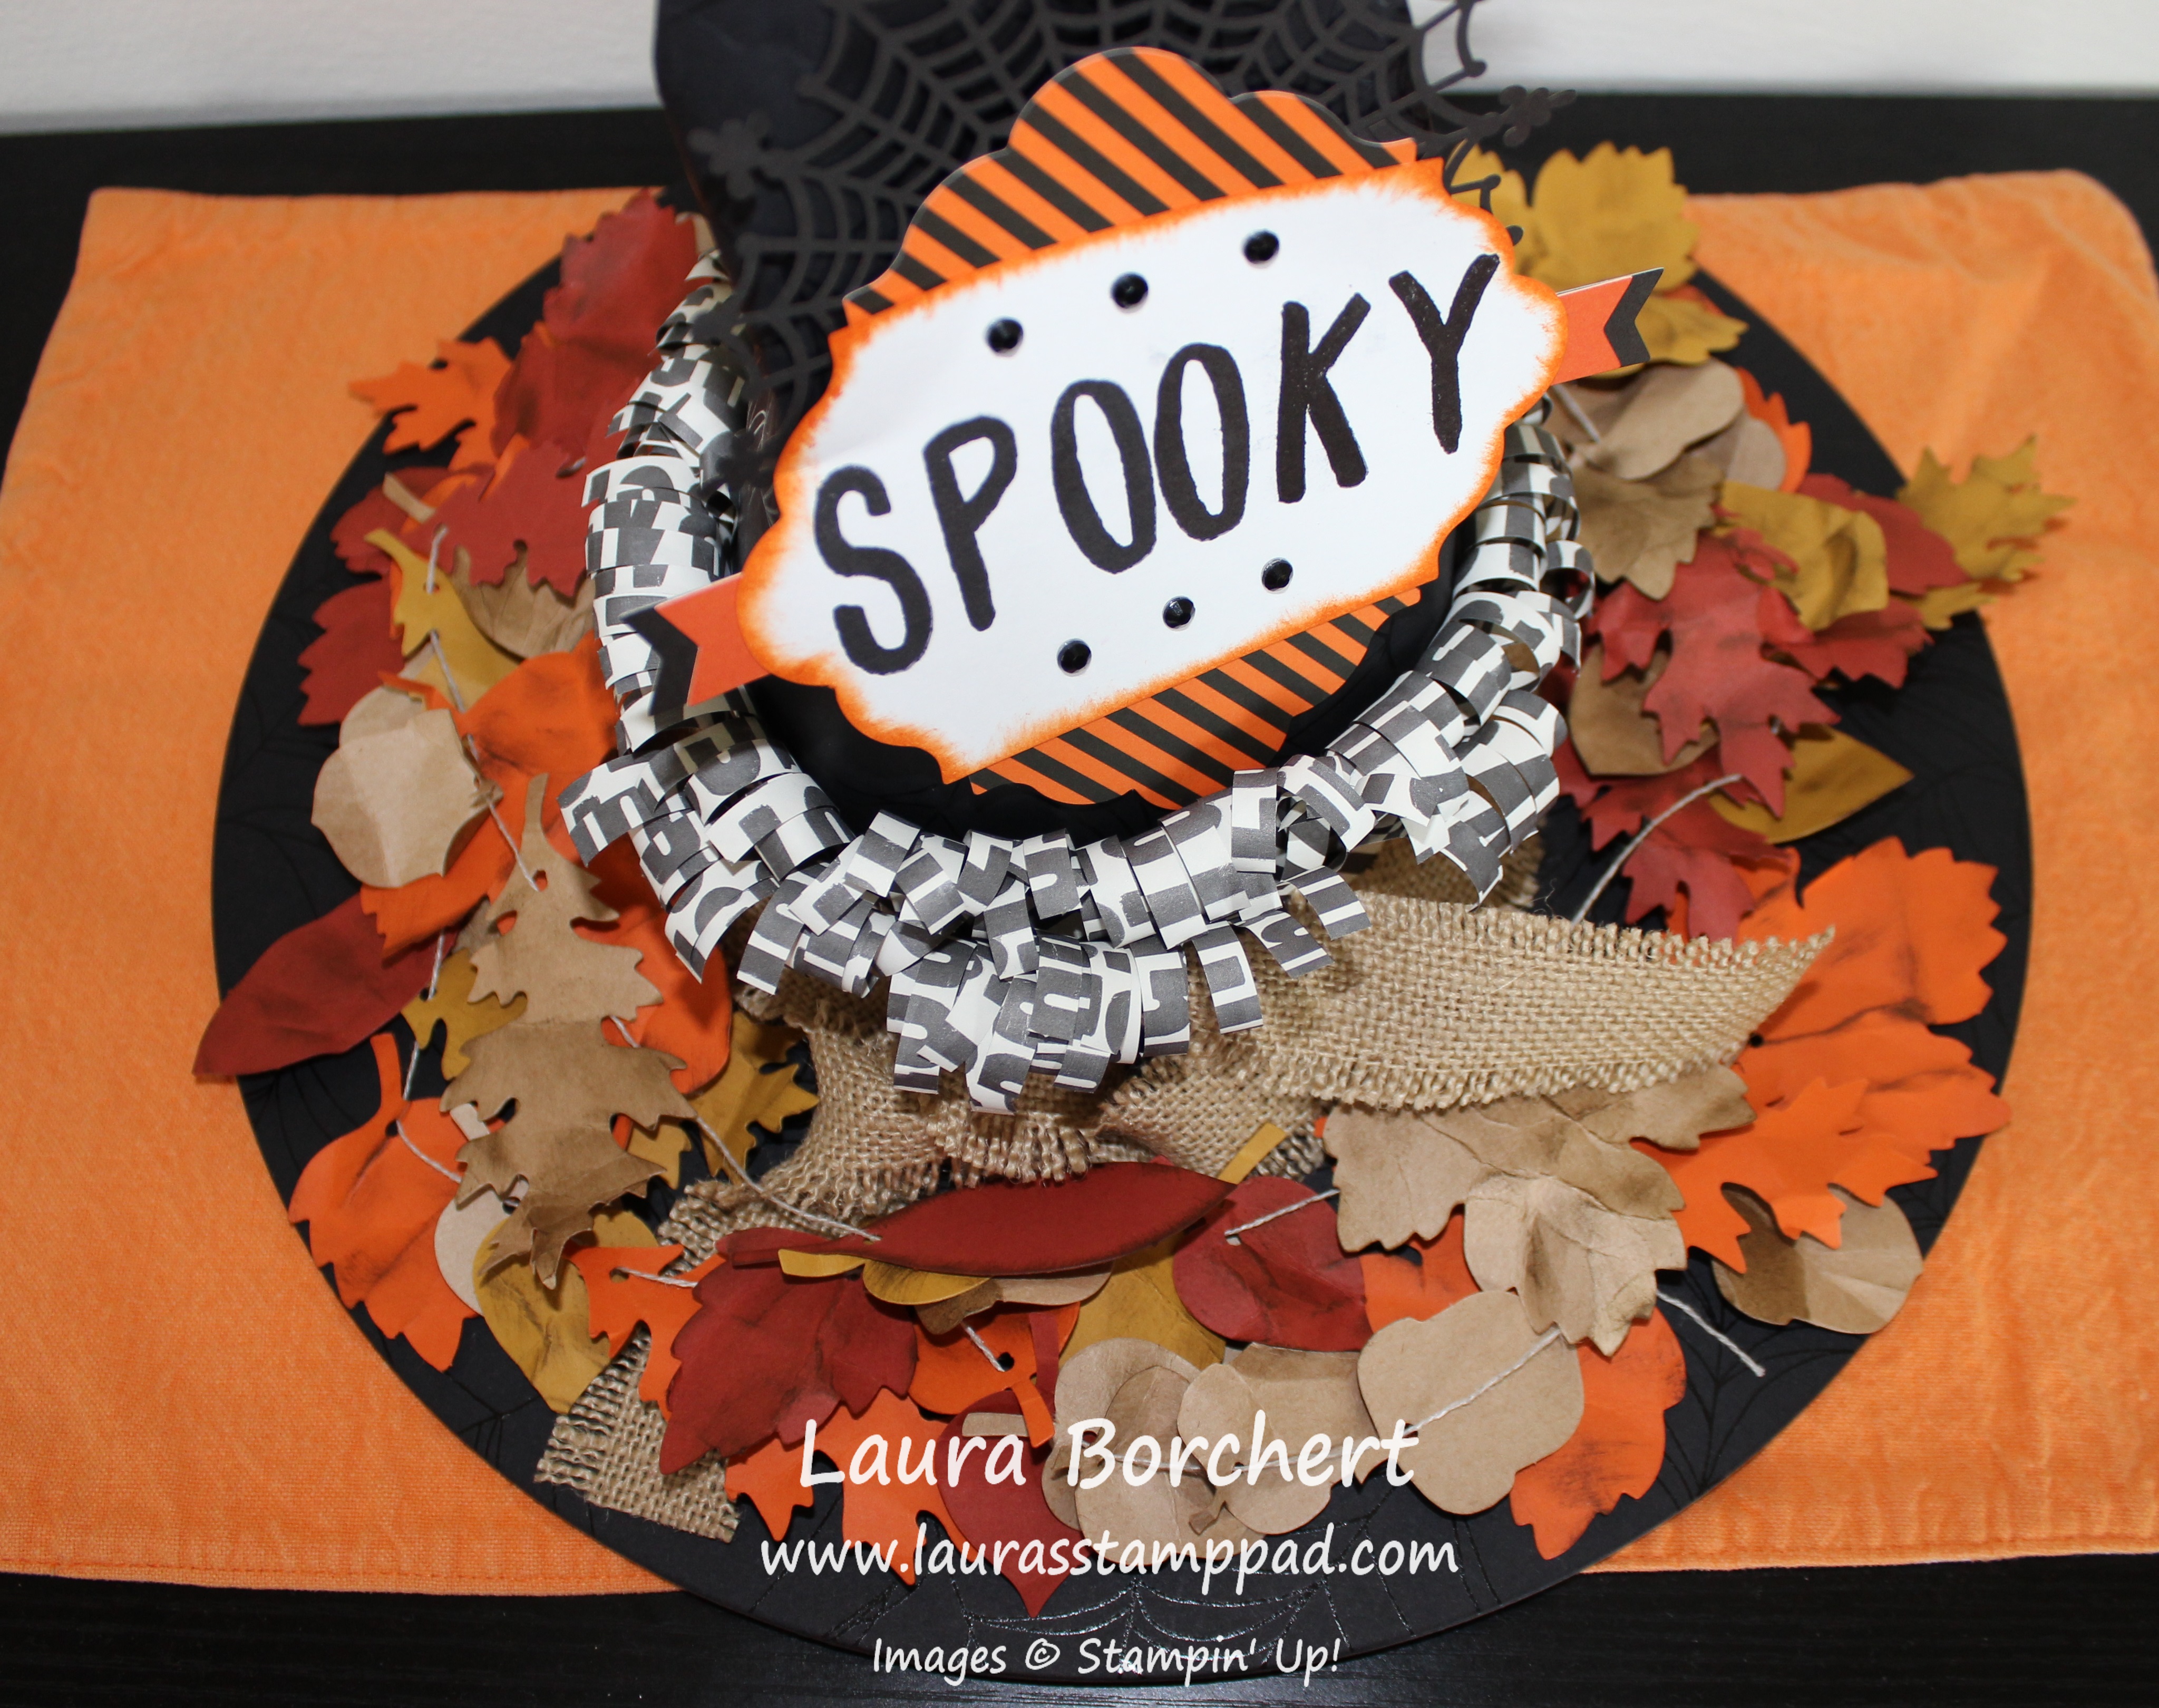
I really love how this Witching Decor Project Kit turned out!!! I’m not a huge Halloween fan but this will be fun to have out as a decoration!!! Love it!!! Don’t worry I took TONS of pictures/angles of this thing to show off all of the details!!!

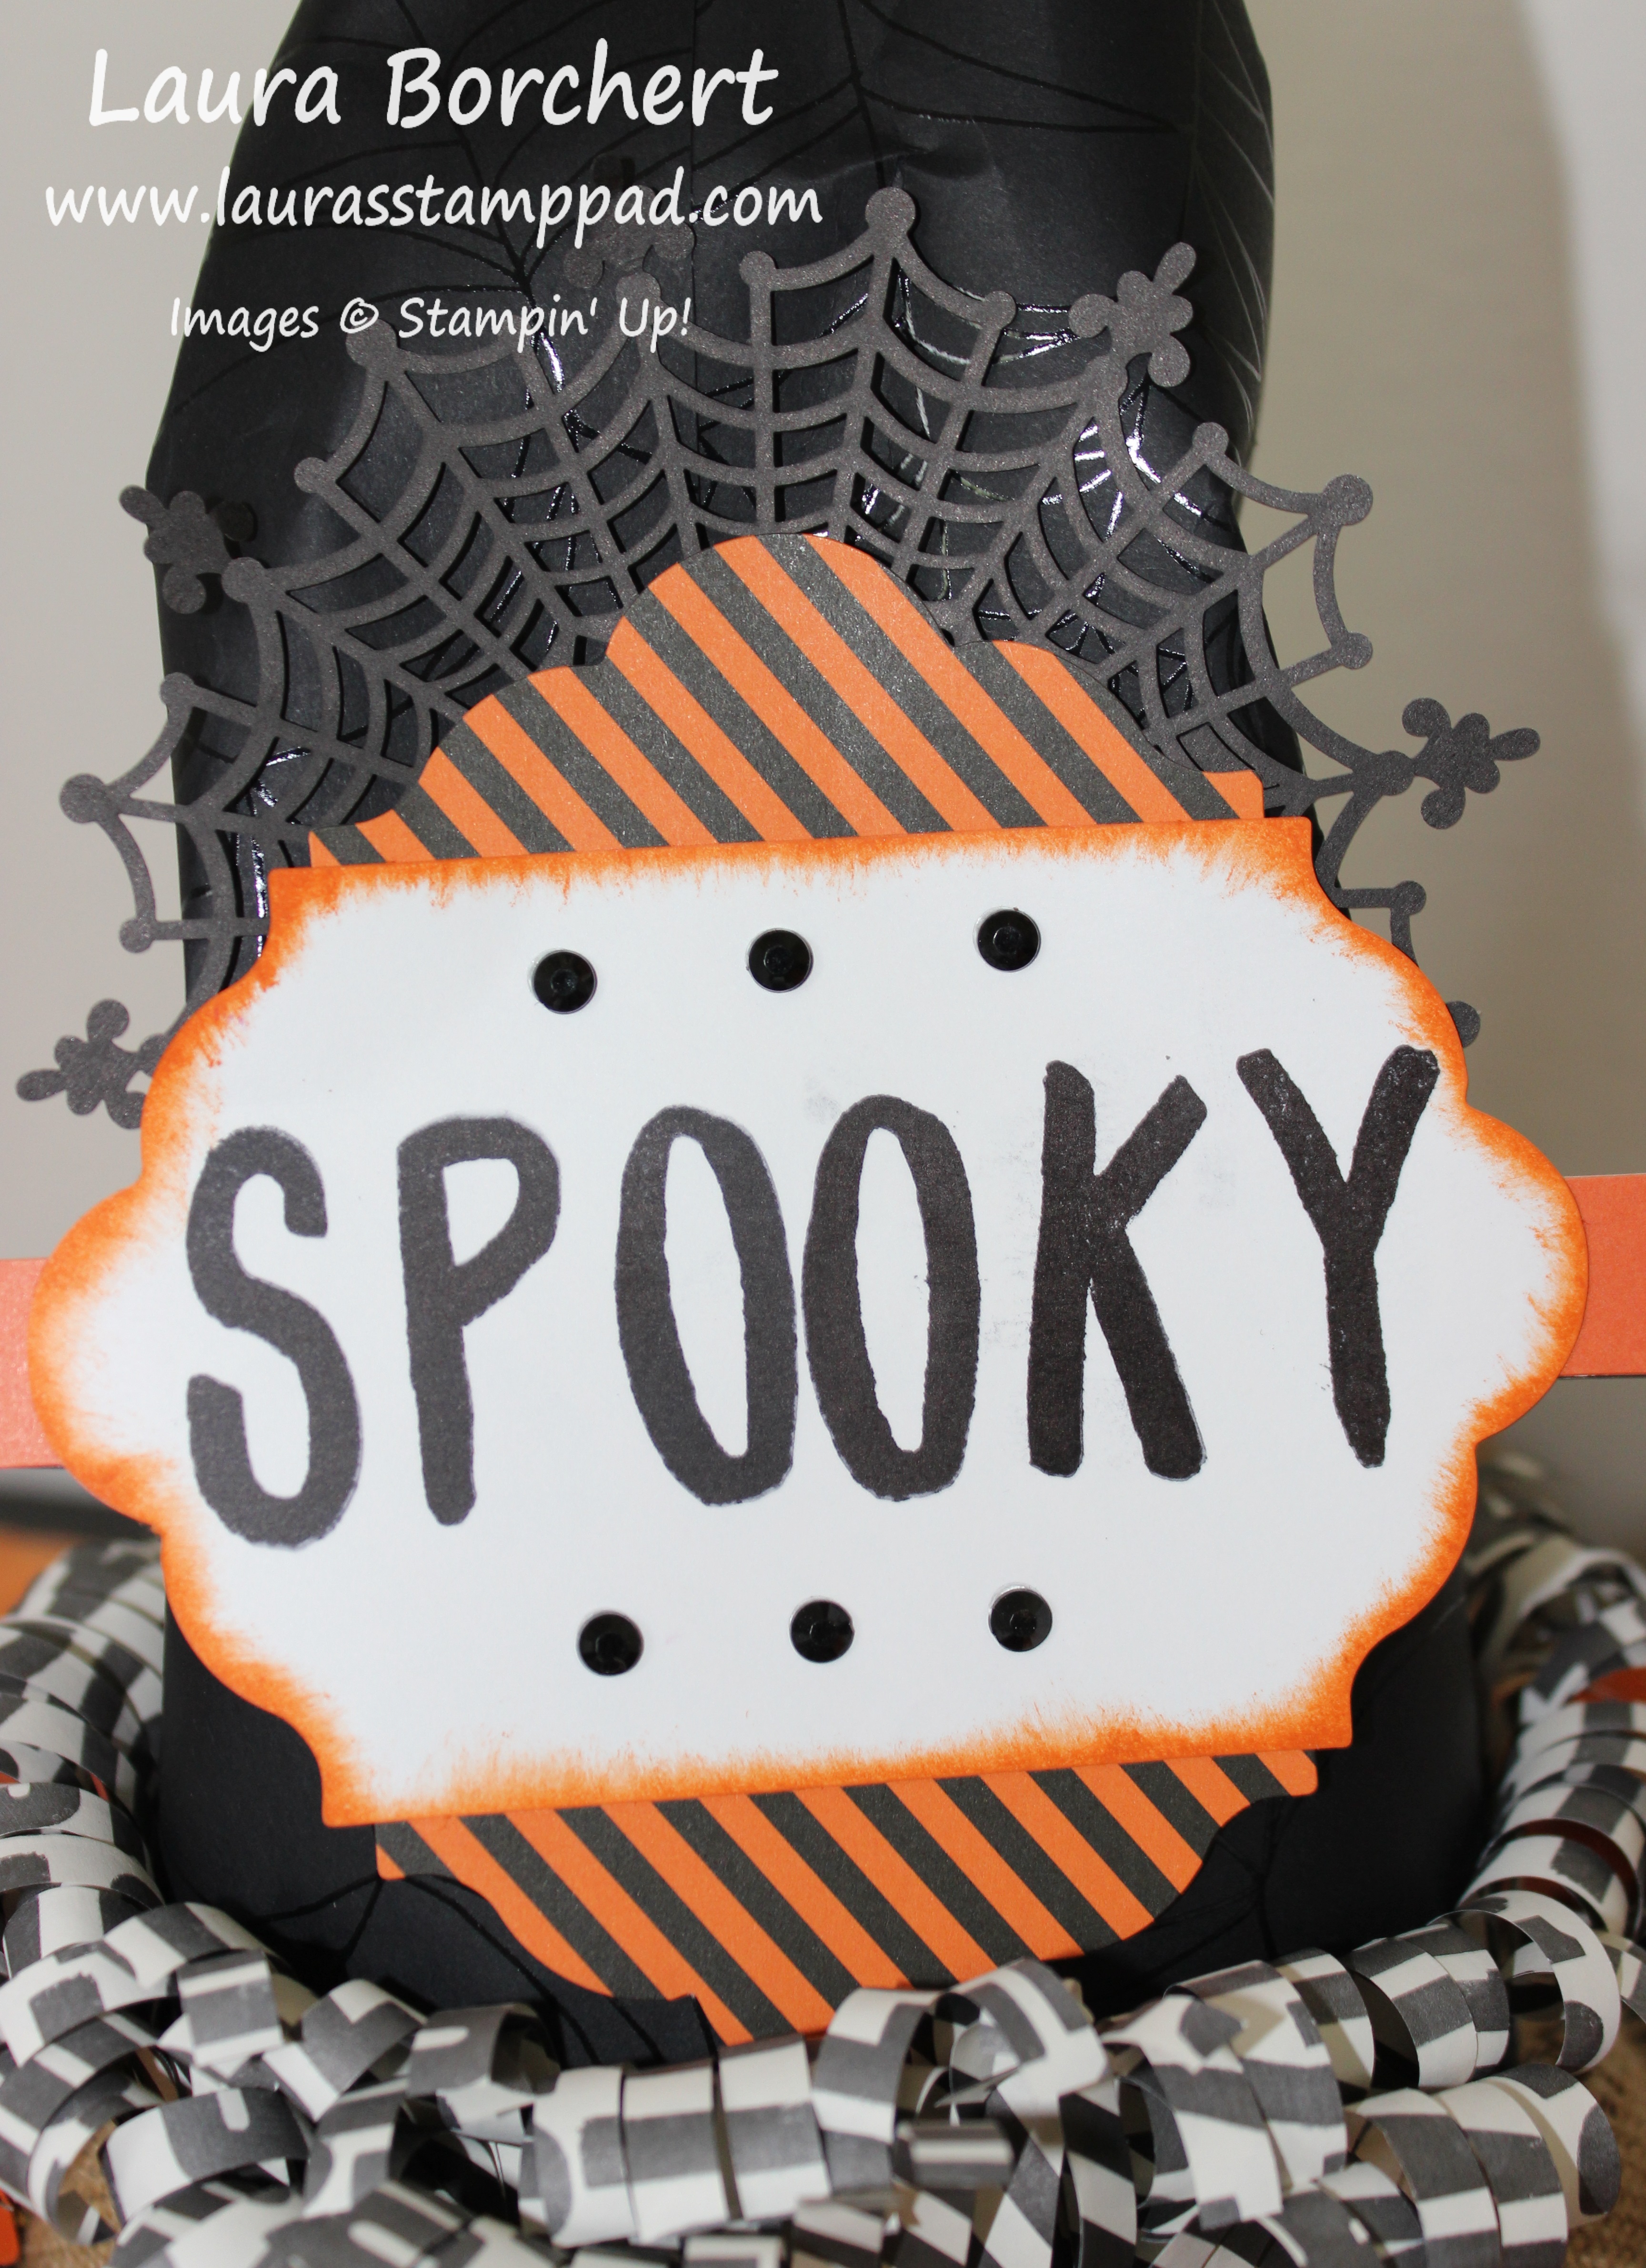
I started with the tag which this kit comes with tons of them so you can make mistakes (who does that?) or use them on other projects. Woot Woot! Again, since I’m not a huge Halloween fan, I decided not to get the coordinating stamp set – Witches Night! Instead I used the Layered Letters Alphabet Set and stamped SPOOKY in Basic Black and then brushed the edges with a Pumpkin Pie Sponge Dauber! I added the little black rhinestones from the kit to the top and bottom. The little banners on the sides were layered and then adhered on the ends of the tag. I adhered all of this to the orange and black striped label and added the Spider Doily to the back. I set this aside and started on the hat.

Witch Hat Kit, www.LaurasStampPad.com

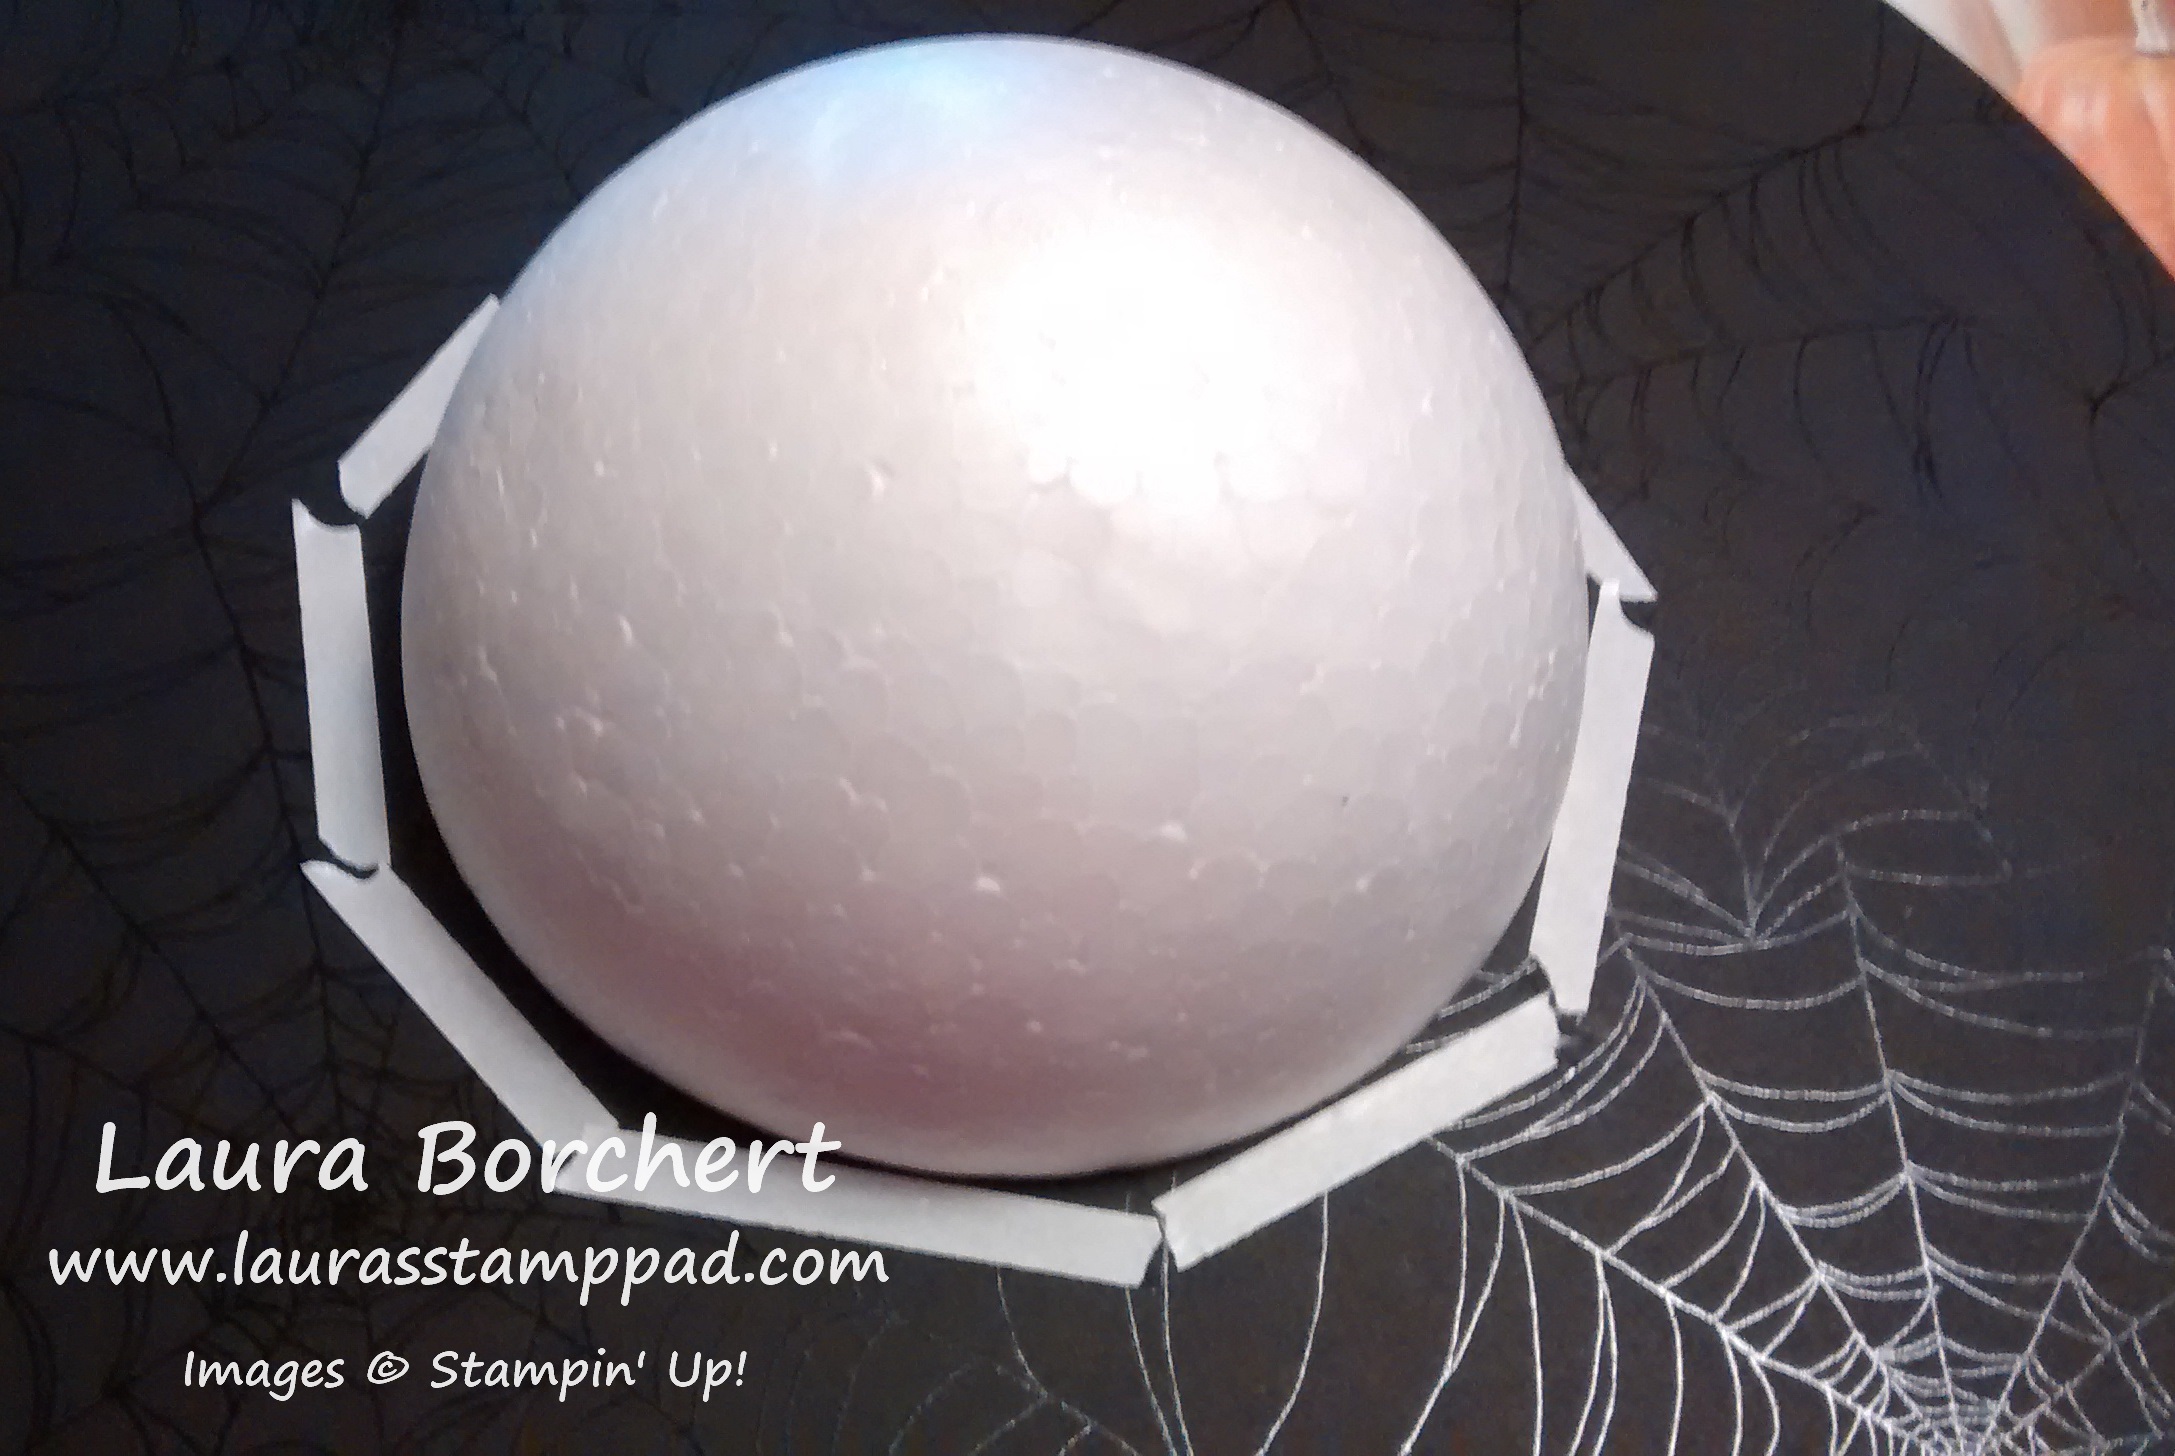
The bottom circle comes already black with a spider web clear embossed on it. Alone, it was really cool looking. The point of the hat is also the same pattern. I glued the foam dome to the hat with Multi-Purpose Glue and let it sit to dry. Before adding the top I placed stripes of Tear & Tape Adhesive around the bottom of the dome to adhere all of the tabs!!! Then I added the point of the hat. I had my husband help me because 2 hands just wasn’t enough to hold on to it, pull off the adhesive strip and keep it still!!! After you have the cone shape then you can peel off the Tear & Tape and adhere it down!!!

Foam Dome, www.LaurasStampPad.com

Now for the 2 things that took the longest….not the hardest but the longest – punching all the leaves out and fraying the burlap ribbon! Oh my I swear it took my a day and a half….okay really just like an hour. I squashed each of the leaves in my hands to get them some wrinkle and texture and then I used my Sponge Dauber and Soft Suede Ink to add some color.

Fall Leaves, www.LaurasStampPad.com

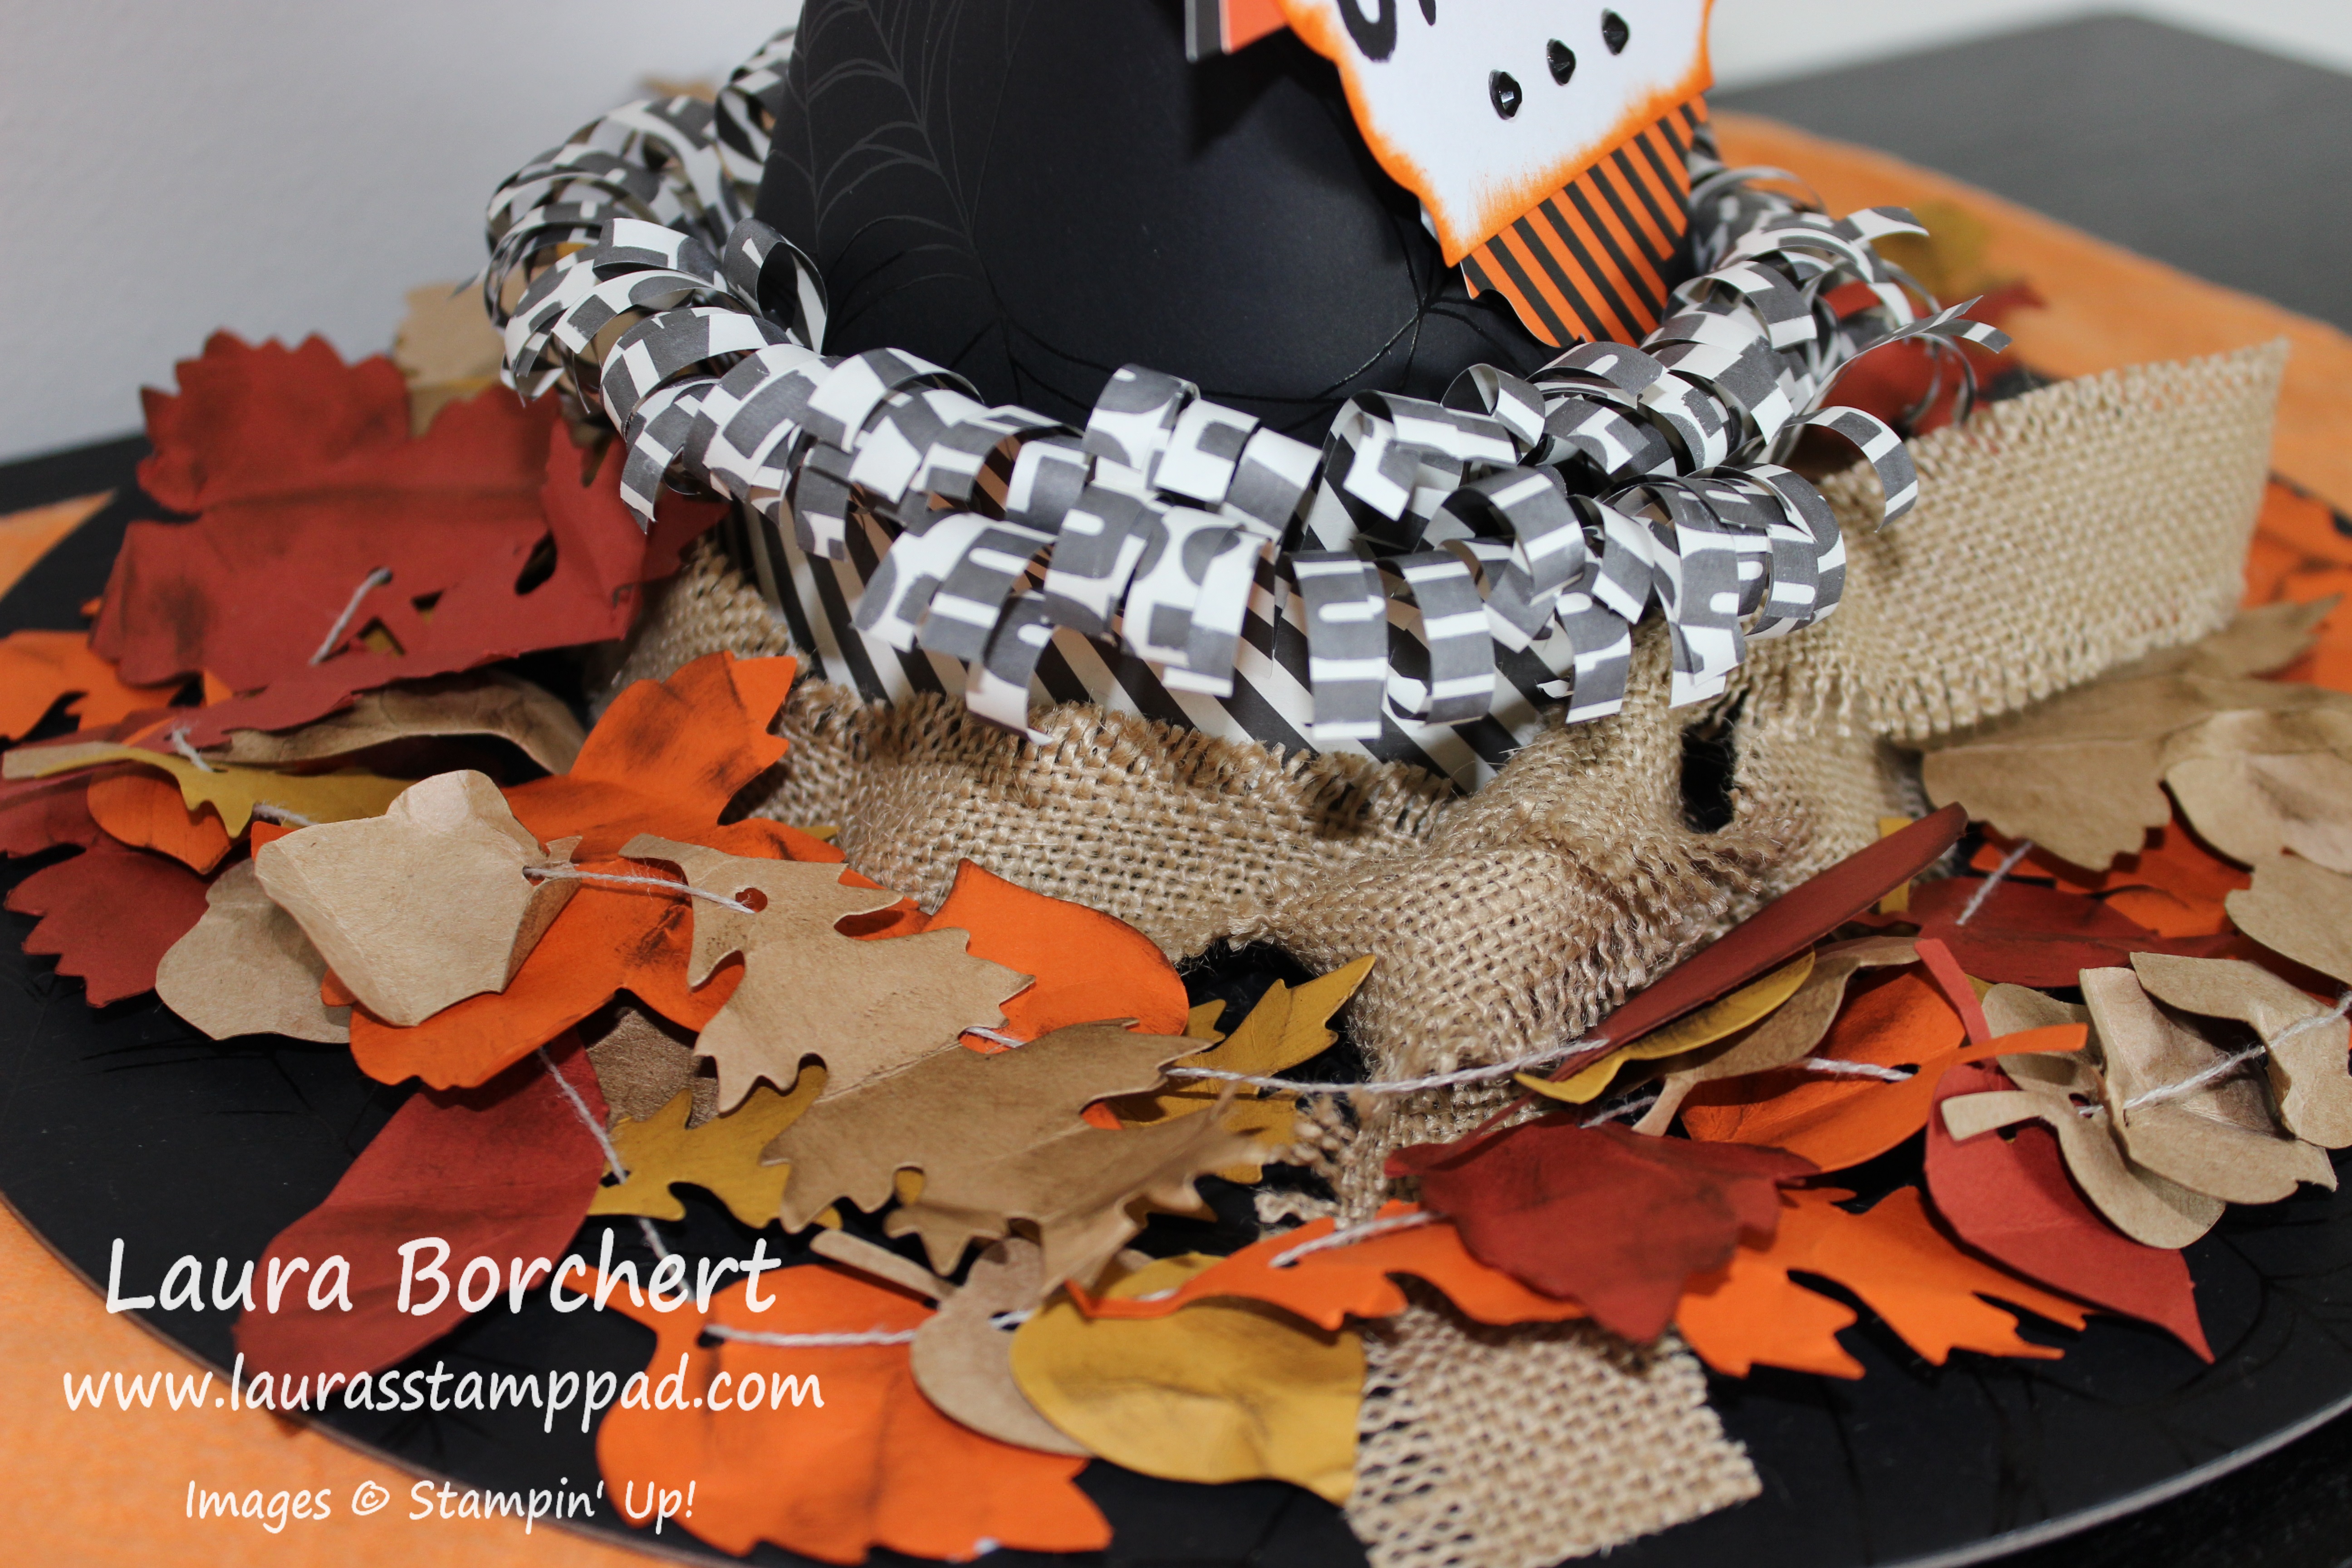
Now time to assemble. First I added the black and white fringe. I adhered the strips together with Fast Fuse and wrapped them around the cone of the hat (not on the bottom, up about 1/2″ to 1″) Then I wrapped the burlap around and tied it into a double knot. I did place a few Stampin’ Dimensionals in a few places to hold the ribbon either down farther or up higher so that it wasn’t just tight around the base. I wanted to to look loose but still hold in place! I adhered the greeting tag with Stampin’ Dimensionals as well but before attaching it, I scrunched and bent my hat so it wasn’t sticking straight up! I really liked the more ruffled up look of the scrunched hat rather than a straight pointy one.

Spooky Halloween Tag, www.LaurasStampPad.com

For the leaves, I took a large needle and looped the twine through and then went through all of the leaves. It was much easier and quicker this way. I had them all threaded up in like a minute!!! I did tie the first and last leave to the twine so that they wouldn’t slide off. Then I added a few Stampin’ Dimensionals around the base of the hat and used those as staking points for my leaves. So like 5 of the leaves are stuck on there (first one, last, one and 3 towards the beginning of the loop) but the are just laying all over.

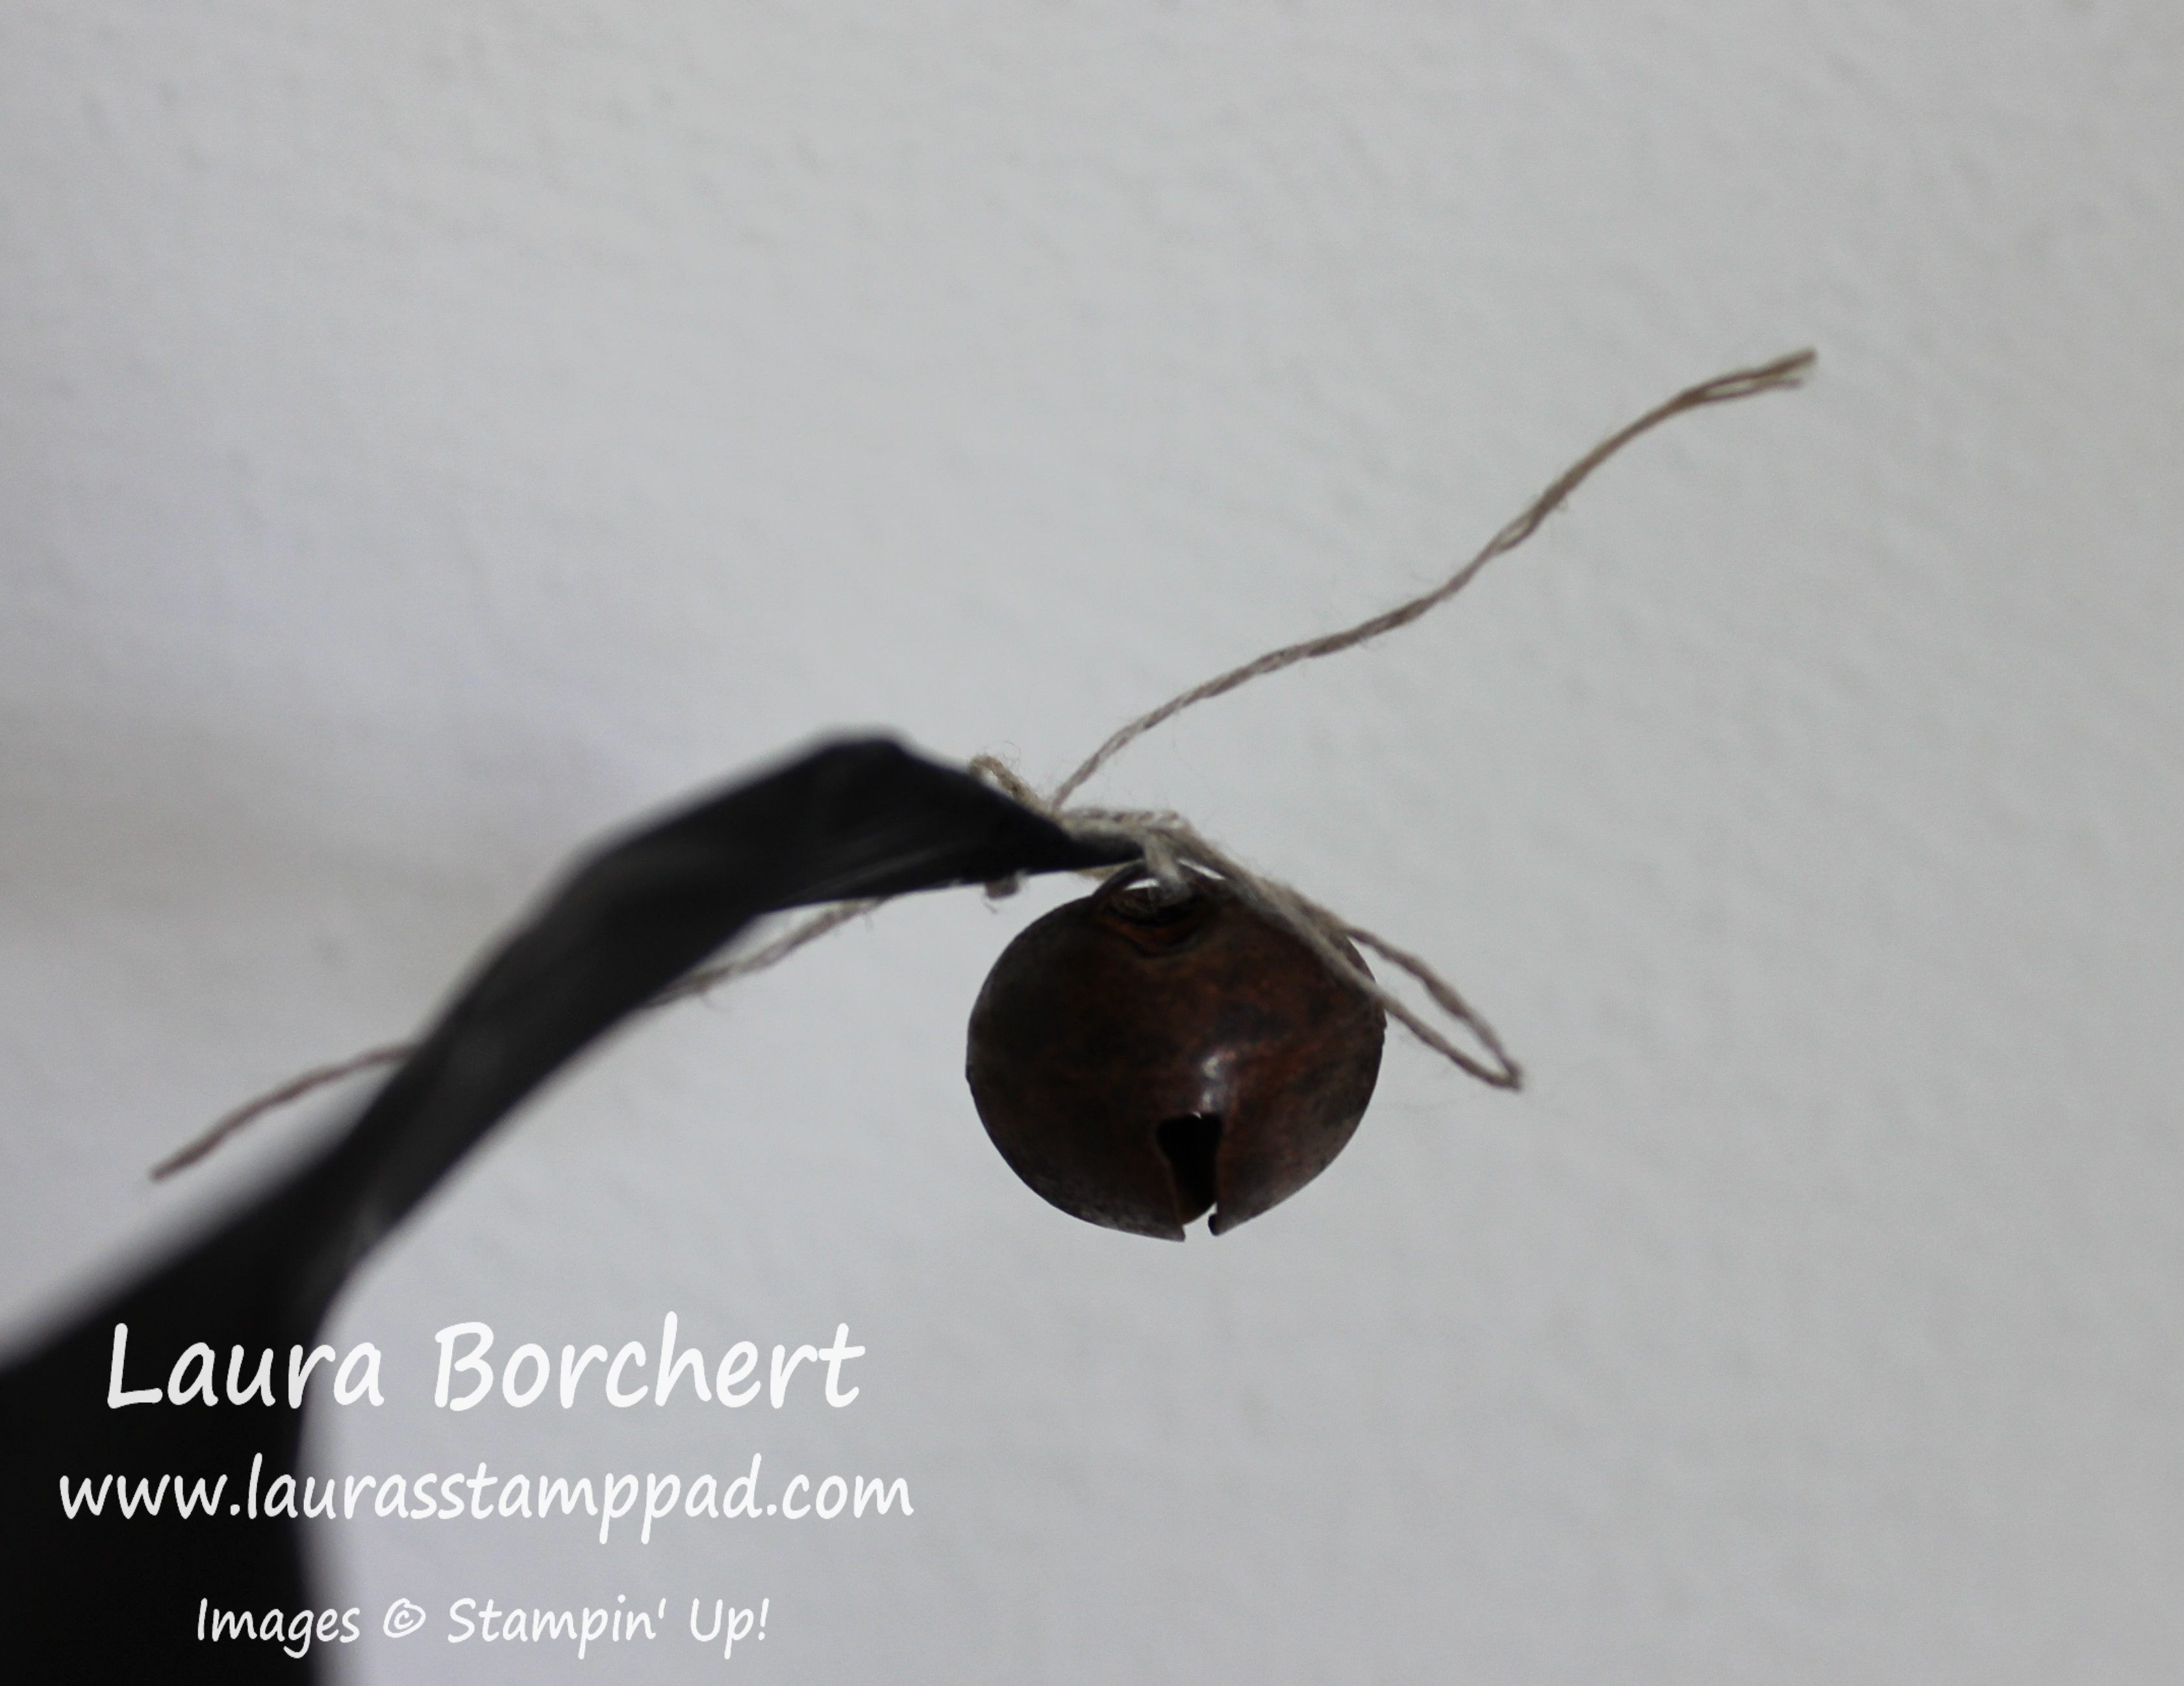
Bell, www.LaurasStampPad.comNow for the final touch – my favorite part!!! I used my Handheld 1/8″ Circle Punch to punch a little hole in the tip of the hat. Then I used the Twine and tied the little bell on!!! I think this is just precious. When I was carrying it downstairs to photo it, it jingled and I giggled! LOVE IT!!!

Witch's Hat, www.LaurasStampPad.com

So I had bought this kit thinking it would be cute on the front door BUT I think I have decided that it is too cute to put out there and I don’t think it would work. 1. All…or most….of the leaves would need to be tacked down because otherwise they are going to bunch up or hang off. 2. On it’s side like this, it’s not as cute. 3. I think I like it as a centerpiece instead!!! 🙂

If you would like to see the Unboxing and Reveal of this Kit, check that out below or by clicking here!!! If you liked it, be sure to give it a thumbs up! Click here to order your Witching Home Decor Kit so you can get festive this Halloween!

Happy Hauntin’

~Laura


Rustic Wonderland!!!

Posted on

Happy Tuesday!!!! That means I have a fabulous technique to share with you today and this one is super simple and yet packs a punch of a fabulous look!!! Have you ever wanted a forest look or a bouquet of flowers look but don’t know how to achieve it without making your card look like a mess of stamping?? I have the tip (or technique) for you!!!Silent Night Rustic Forest, www.LaurasStampPad.com

I love the look of this card with the forest behind the greeting. There is texture and variation which makes it look more real. The trick is stamping multiple times without going back to the ink pad!!!!

SUPPLIES INCLUDED: Wonderland Stamp Set, Linen Tread, Deco Labels Framelits, Big Shot, Markers

I started with a Garden Green card base measuring 5-1/2″ x 8-1/2″. Then I took a piece of Very Vanilla cardstock measuring 4″ x 5-1/4″ and stamped with Garden Green the trees from the Wonderland Stamp Set which is in the Holiday Mini Catalog. Stamp the trees down and then move it a little to the left or right and also a little up or down to give that variation and stamp again. Then move a little again and stamp again. I stamped 3 times in different spots with each inking. Be sure to go both side to side and up and down so the trees aren’t just straight across! It’s as simple as that. Then I wrapped some Linen Thread around the trees twice and tied a knot. For the greeting, I took a piece of scrap Very Vanilla and stamp the greeting from the Wonderland Stamp Set in Chocolate Chip. Then I took the pine branch and inked it with my markers. This allowed me to color the pine cones Chocolate Chip and then branch Garden Green! I stamped it once above and once below the greeting. Then I lined up the Deco Labels Framelit (2nd smallest one) and die cut it out. I then used the 2nd largest one to cut out a Chocolate Chip frame to layer with my greeting. I added this greeting piece to my card with Stampin’ Dimensionals!! I love it!!! It would make a great Man Card as well with a Birthday greeting…..might be making a few of those as well!!! 🙂

Do you want to see this technique in action? Here is a quick tutorial showing your how to create that forest look my stamping multiple times before re-inking. Be sure to give it a thumbs up if you like!!!

What is your favorite stamp set from the Holiday Mini Catalog or what would you like to see a sample using? Let me know in the comments below!!!

Happy Stampin’

~Laura


Season to Season Wreath!!!

Posted on

4 Season Wreath, www.LaurasStampPad.com

This wreath is fabulous! I love the look and I love that I have my wreath all set from now until 2016!!!! Not having to worry about my wreath decoration during some of the busiest months of the year….sound amazing to me!!! The Season to Season Wreath Kit comes with all of the supplies to make this wreath including the foam circle!!! The kit comes with TONS of the leaves to fill the wreath too! I am usually the one that goes too close in the beginning and then runs out so I was very careful and what happened….I had tons left over. I used lots of the extras to fill in open holes but still had tons left over so that was awesome!!! Now here are some up close looks at each one!!!

Hello Fall Wreath, www.LaurasStampPad.com

I took a photo of each wreath on the inside and outside door as well as a close-up! This wreath I will hang up this month for Fall….maybe in a few weeks, I’m holding tight to Summer! 🙂 The kit includes the burlap ribbon and all the goodies for the banner. You will want to purchase the Cheer All Year Stamp Set to stamp on all of the die cut included in the kit. The little pom pom looking things are adorable too!!!

Halloween Wreath, www.LaurasStampPad.com

This wreath will go up in October for Halloween! I love the black and white striped ribbon!!! The bats, spider, and Boo are super cute too….well minus the spider. I really don’t like spiders even stamped ones!

Thanksgiving Wreath, www.LaurasStampPad.com

This wreath will go up in November for Fall/Thanksgiving! I love the leaves, especially the wooden element leaves in the kit. I used the burlap ribbon again for this one!

Christmas Wreath, www.LaurasStampPad.com

This one is my favorite! That Cherry Cobbler satin striped ribbon is AMAZING!!!! It is just beautiful! I did a two loop bow for this one. I really like the red sequins on the trees as well! Love it!!!

Ribbon Attachment, www.LaurasStampPad.com

Here is how I attached my ribbons and banners – with straight pins!!! It is really simple to do and to change out! It holds really well as long as you angle the pins in different directions!! You could also leave a spot open on the wreath with no leaves and have the ribbon loop around the foam. This would work if you ran out of leaves and still had foam showing.

Holiday Banners, www.LaurasStampPad.com

Here are all of the banners. The kit comes with the twine and four T pins to use to attach to your wreath. I tied a knot in the twine and then pushed the pin through the knot. Some of the banners I pinned in across and some diagonal. It was really easy to do!!! This entire kit was pretty easy and didn’t really take that long. The longest part was the leaves on the wreath…..but I seriously think it is because I am not good with a hot glue gun! 🙂 Picking it up and setting it down and up and down is so not cool and time consuming. Tips anyone?

If you would like to see the Unboxing and Reveal of this Season to Season Wreath Kit, you can check that out below or by clicking here!!! If you are local and want to create this kit, I’m having a class on September 29th!!! Come over for stamping, chatting and gluing! Go home with a beautiful wreath!!!

Happy Stampin’

~Laura


Holiday Mini Madness!!!

Posted on

Holiday Mini, www.LaurasStampPad.com

The Holiday Mini Catalog is here and it is AMAZING!!!! You can check it out here – Holiday Mini Catalog! I am so excited to start planning Holiday Card Classes because lets face it those are some of my most popular classes….after Flower Classes! 🙂 Oh how I love my stampers and their love for flowers like me!!! Gold is soooo in again this year and I am loving it!!!

Here are a few of my favorites:

Wonderland Stamp Set

Winter Wonderland Designer Series Paper

Black Glimmer Paper

Boughs and Berries Embossing Folder

Red Foil Sheets

Delicate Ornament Thinlit Dies

Gold & White Glitter Ribbon

Spider Web Doilies

Okay, I’m stopping there because I could go on and on!!! As always the list keeps growing as I see samples or play more. I will be posting lots of samples in the coming weeks! It is super exciting!!!

If you would like a copy of this catalog, I can mail one to you. Leave me a comment below and I will reach out to you for your address!! If you would like to order from the catalog, click here!!! Don’t forget the Weekly Deals that came out today as well!!

Happy Stampin’

~Laura


Technique Tuesday – Winter Wreath!!!

Posted on

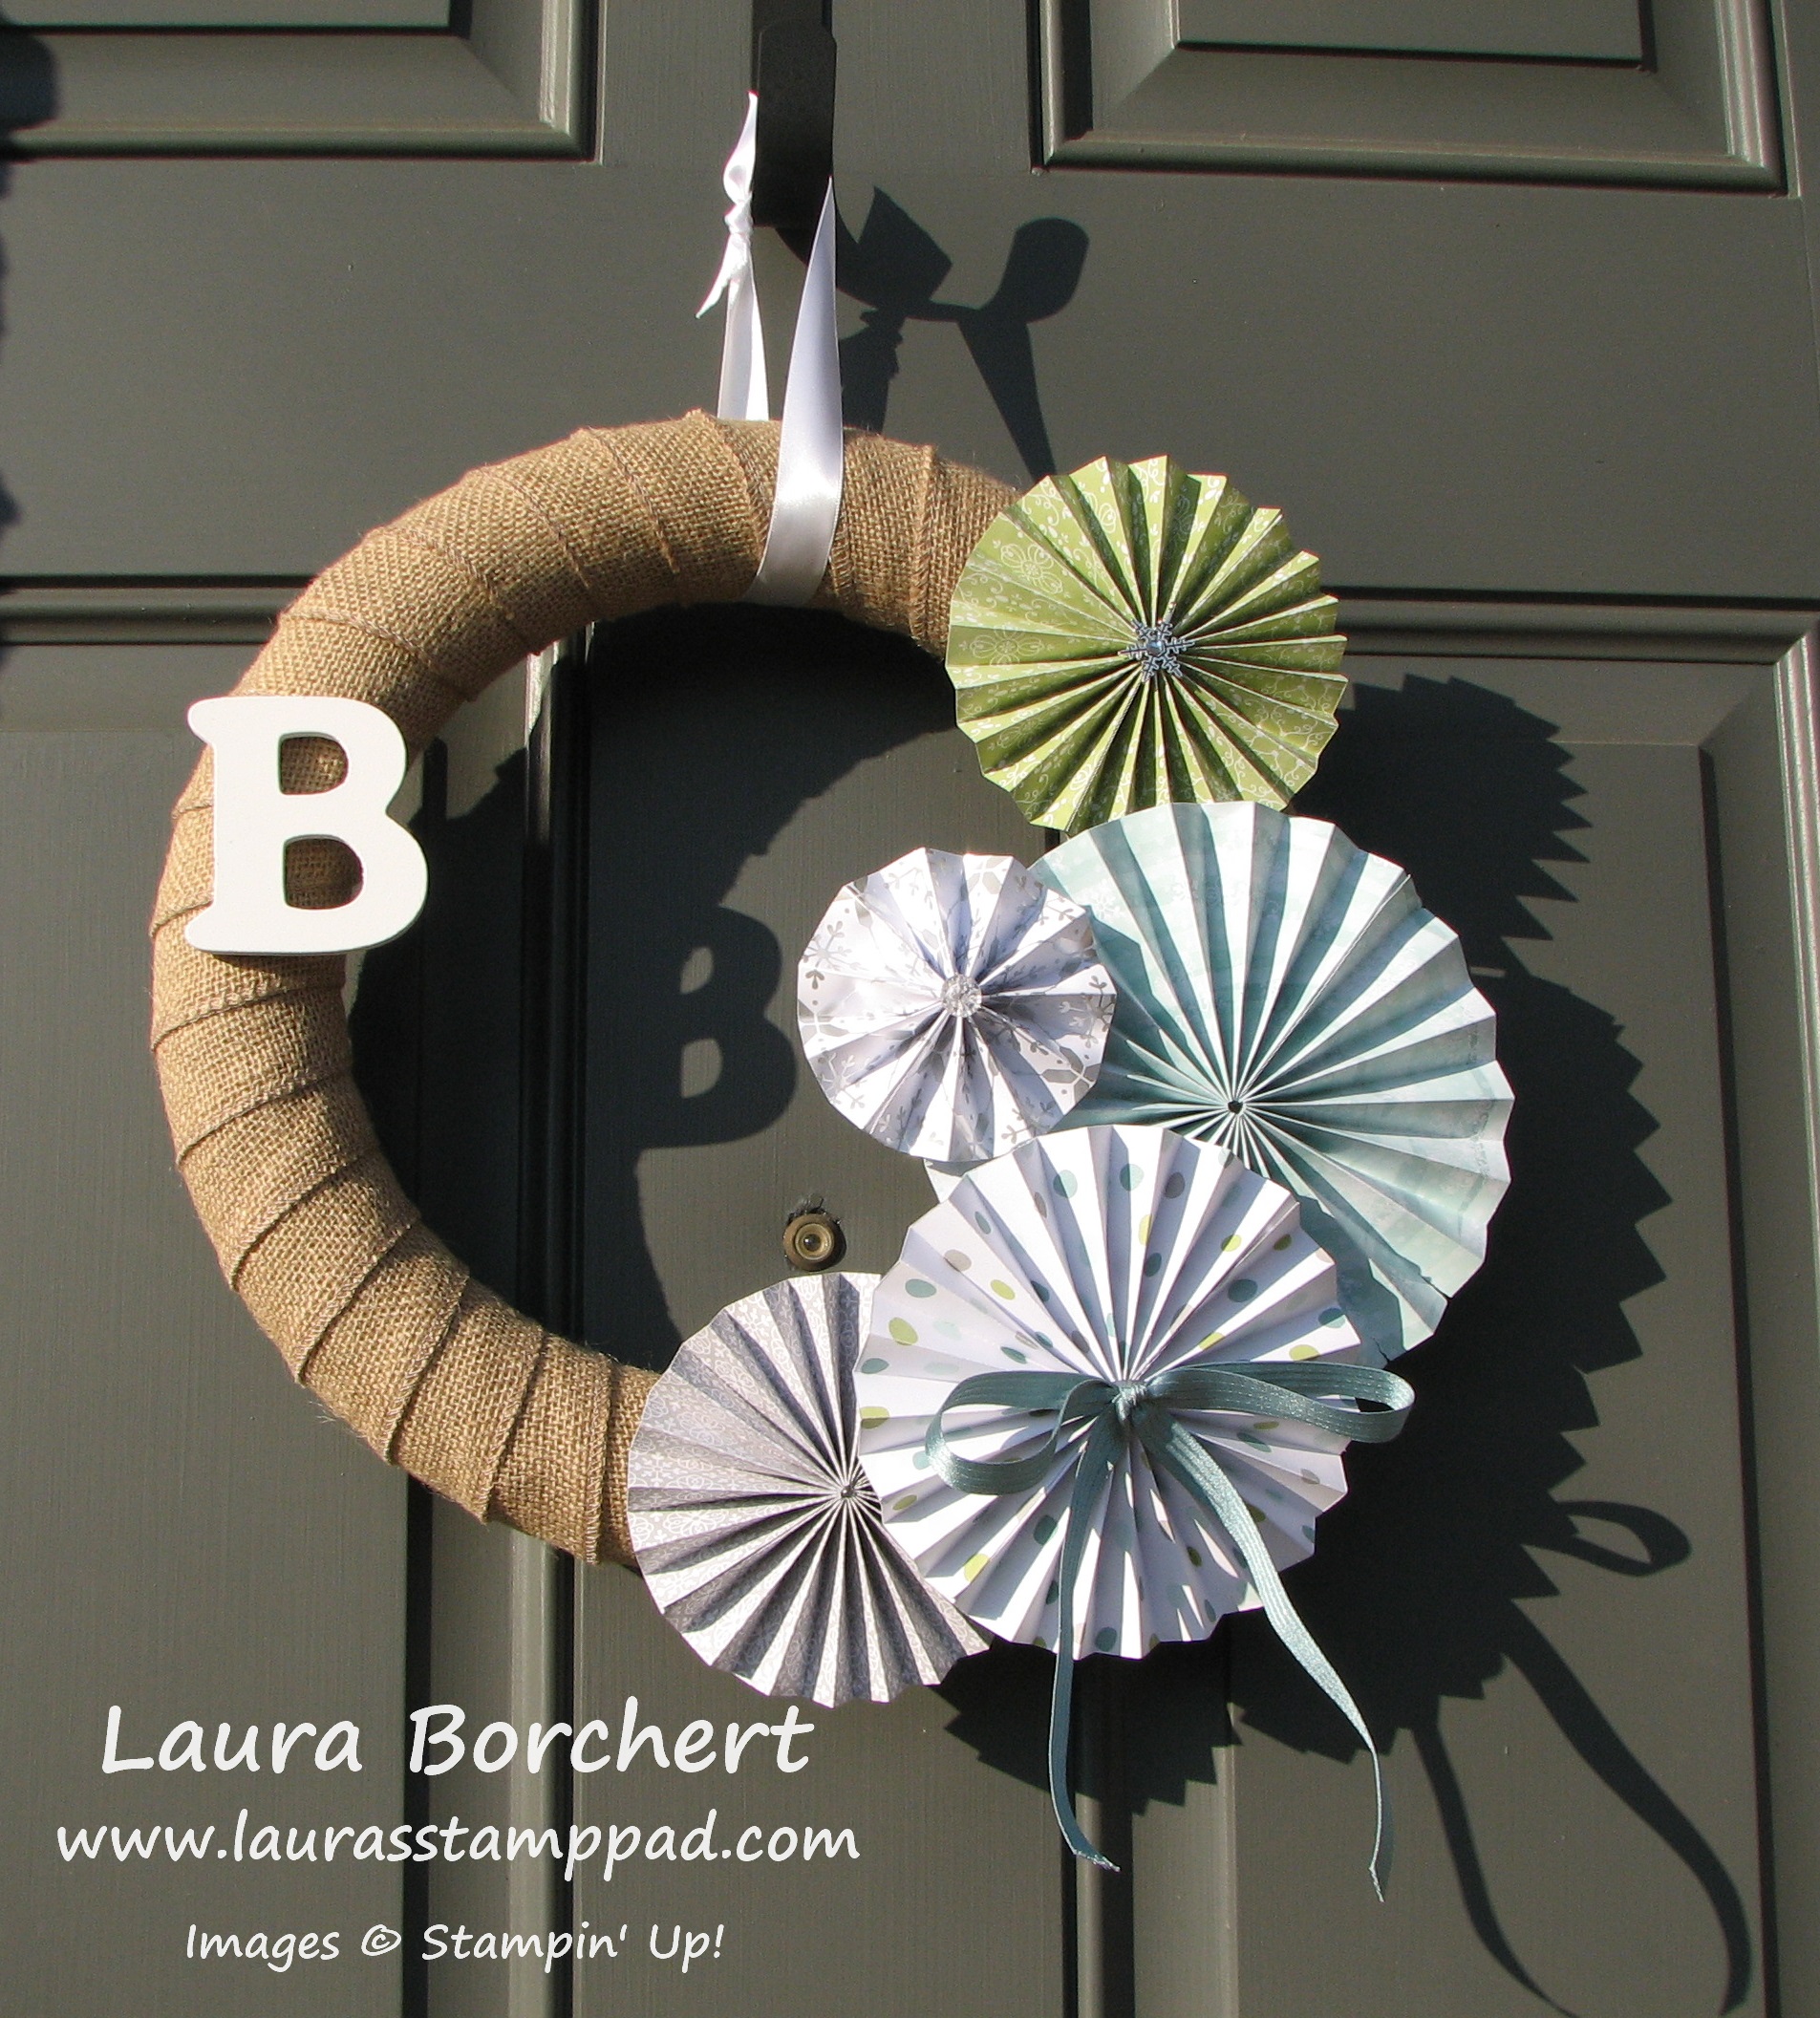
Happy Tuesday everyone!!! That means I have a fabulous technique to share with you today and that is a fabulous winter wreath!!! After my Halloween wreath, I realized I needed to come up with something for the Holidays. After some thought and time going by, I realized that a winter wreath would be better and last longer than a Christmas one. Now I can keep this one up until the end of February or so.

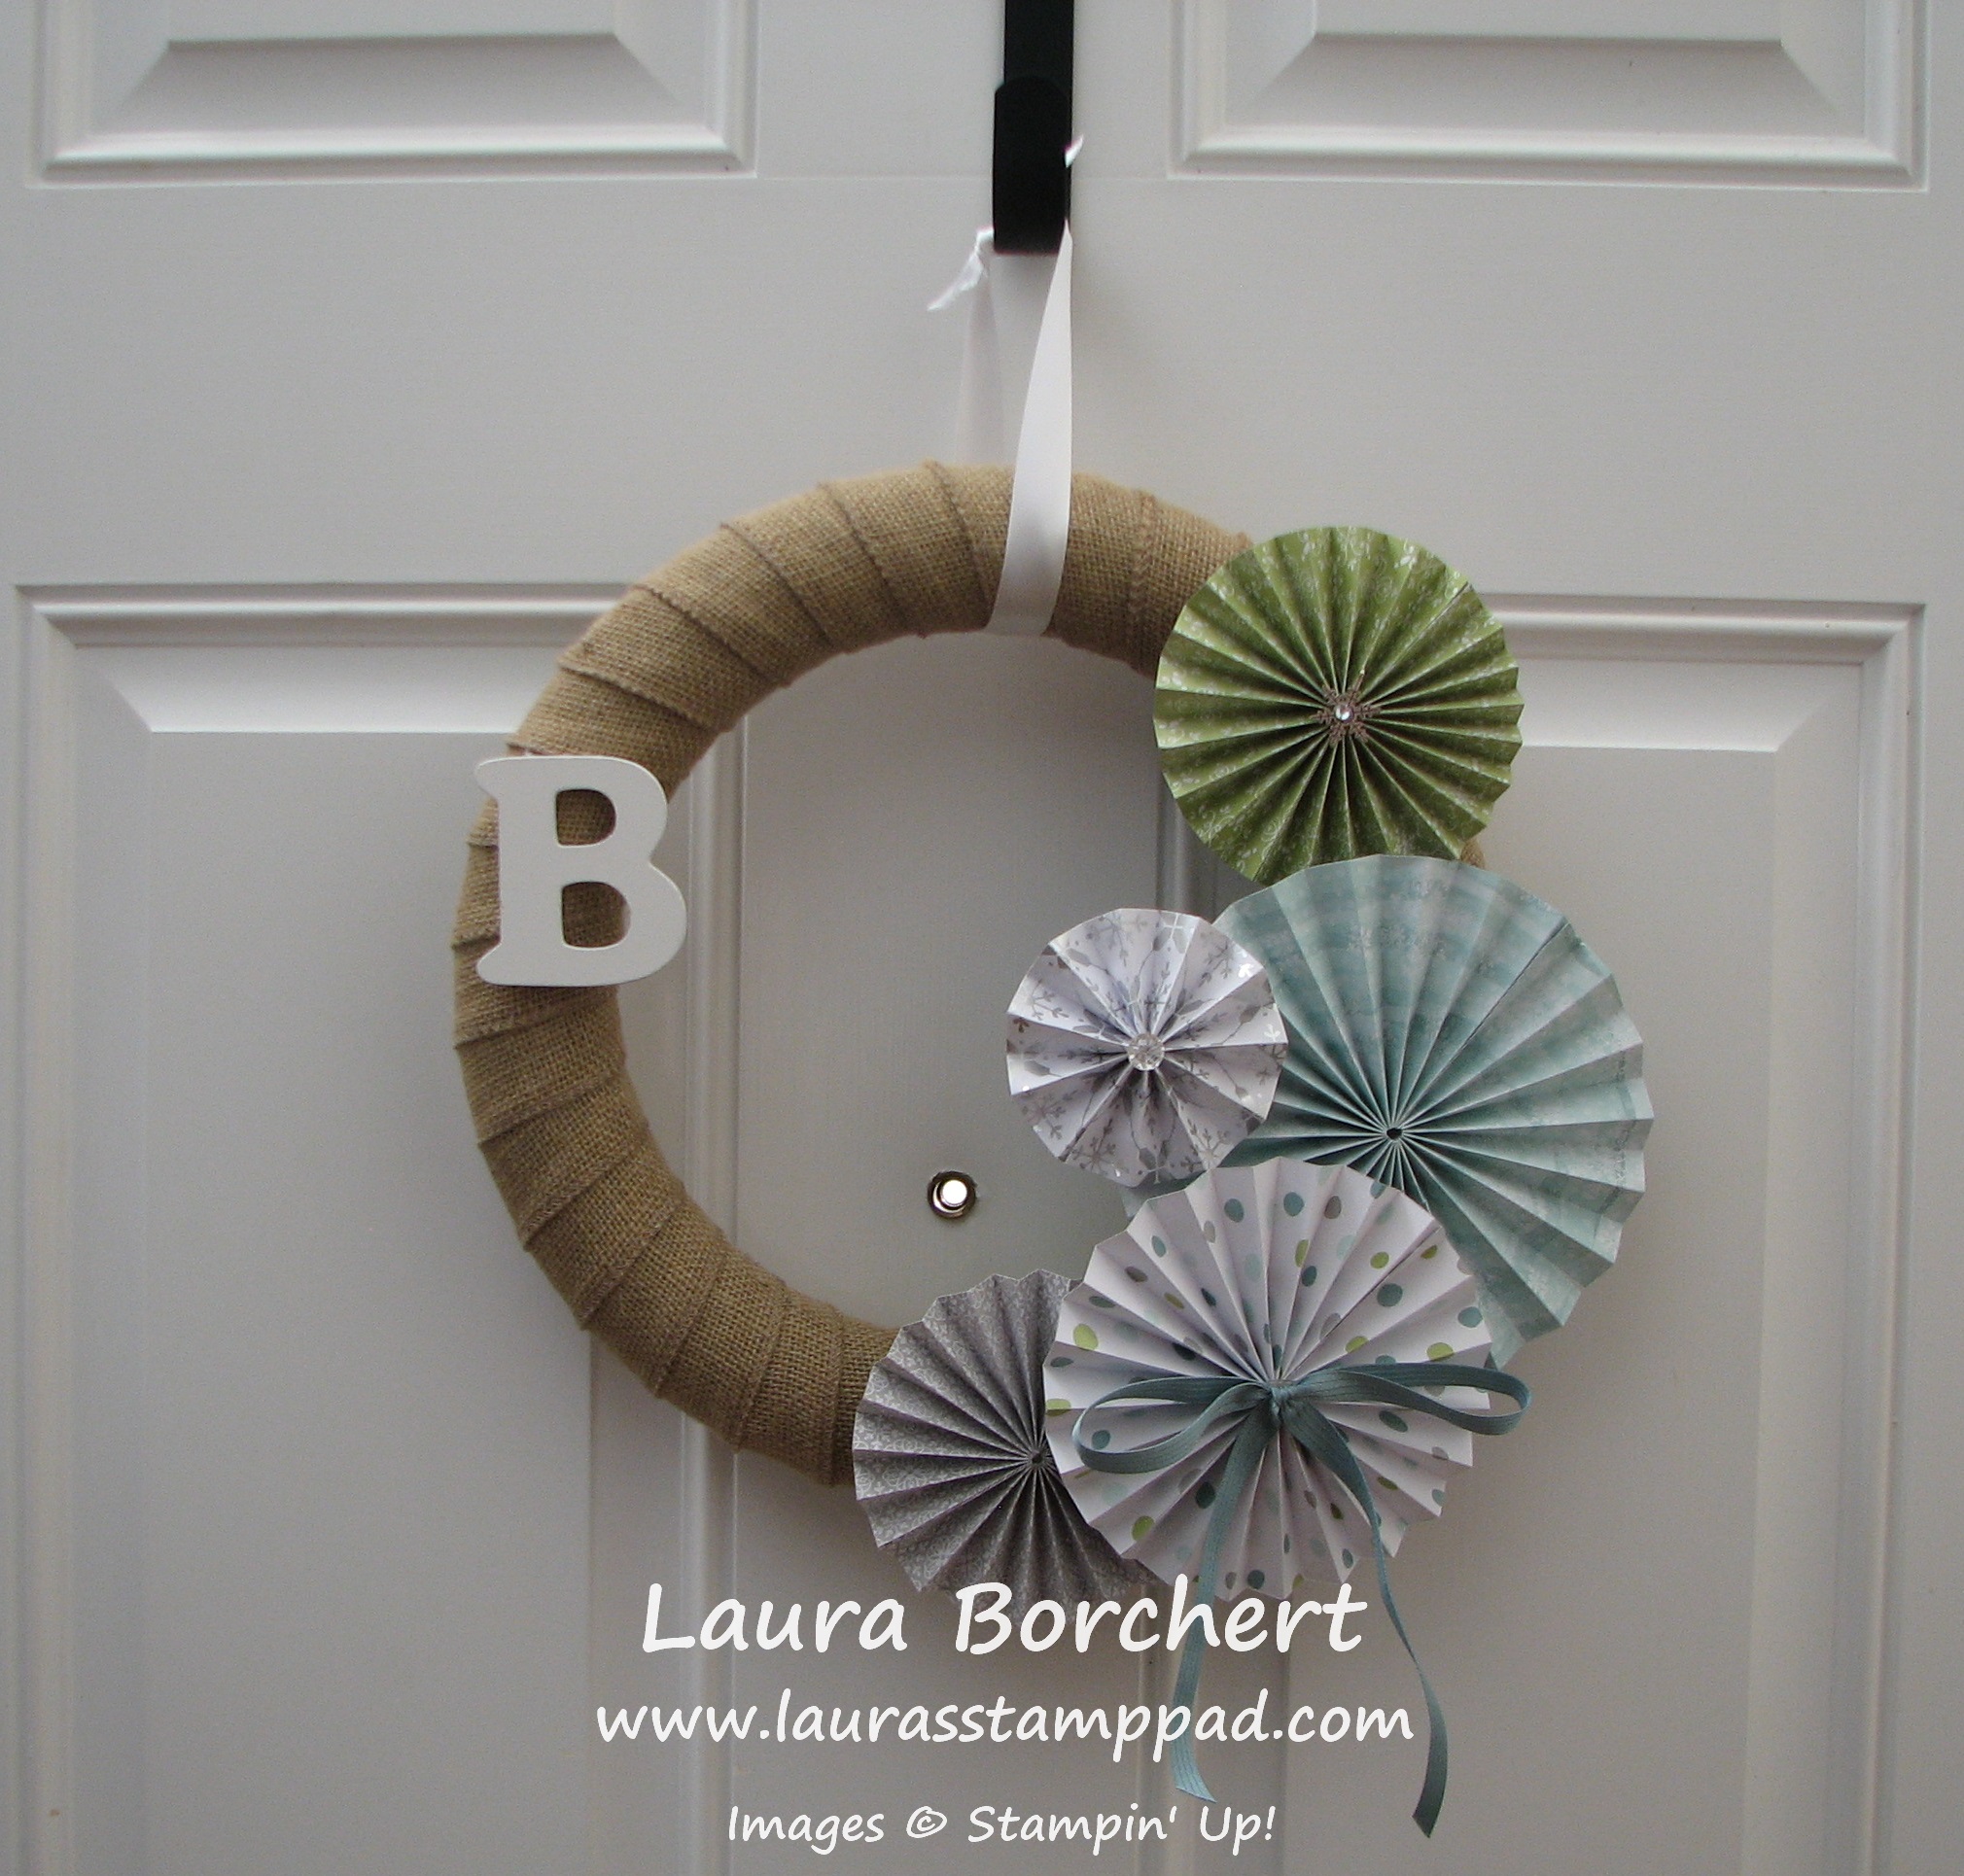
Winter Wreath Rosette, www.LaurasStampPad.com

This is what I came up with!!!! What do you think?

SUPPLIES NEEDED: Foam Wreath, Burlap Ribbon, All is Calm Designer Series Paper, Rosette Designer Bigz XL Die, Big Shot, Hot Glue Gun, Embellishments (Ribbon, Buttons, All is Calm Snowflake Embellishments, Vintage Faceted Buttons)

I started by wrapping my foam wreath with the Burlap Ribbon! You can secure the ends with hot glue or straight pins. Be sure to go at an angle and make it just barely overlap or you won’t have enough to cover the wreath. Mine didn’t go all the way around but I covered up the missing portion with my rosettes. I did a class and some were able to cover all of it. You can always add more from another roll as well. Now it is time to make your Rosettes.

Smallest Rosette – One strip of Designer Series Paper: 1-1/2″ x 12″

2 Medium Rosettes – 2 strips of DSP for each Rosette: 2″ x 12″

Medium/Large Rosette – 2 strips of DSP: 2-1/2″ x 12″

Large Rosette – 2 strips of DSP: 3″ x 12″

Run each of the strips through your Big Shot with the Rosette Designer Die to get the folds for creating your Rosettes. Fold on the creases in a mountain/valley fold style. You can use your hot glue gun or some Sticky Strip to adhere the strips together and into a circle. To get your Rosette to stay down and not pop up, you will want to get our your Silicone Mat and put a glob of hot glue in the middle. Press your Rosette down onto the glob of glue right in the middle and hold while it cools. Once it is cool, it will pull right off and you are set. I did add a little scrap punched oval of cardstock to the back to cover up that glue spot and in case some of them still needed a little more stability. Once you are done with all of your rosettes, it is time to assemble them to your wreath. You can arrange them in the bottom right corner like I did or do 3 down there and 2 in the top left corner. You could even make lots of these rosettes and cover the entire wreath. Note: when assembling them to your wreath, place the glue on the wreath and place the rosette on top rather than putting the glue on the rosette. There were many times I would put it on the rosette and then realize that spot wasn’t even touching the wreath. 🙂 I added some Lost Lagoon Satin Stitched Ribbon, Vintage Faceted Buttons, and Snowflake Embellishments. You can always hang the wreath as is or you can add a ribbon loop. My ribbon loop was created with Whisper White Satin Ribbon. Love it!!!! Here it is on my front door!!!

Winter Wreath Rosette, www.LaurasStampPad.com

Let me know if you want this wreath! I would love to see your creation! Also, do you create a wreath for Valentine’s Day or just skip to Spring? Leave me a comment down below!

Happy Stampin’

~Laura


Silver & Night of Navy!!!

Posted on

I love Silver and Navy together! It is so elegant and beautiful! Here I created this amazing card and it was quick and simple!!!!

Silver Festival of Trees, www.LaurasStampPad.com

I started with a Night of Navy card base and added a few strips of All is Calm Designer Washi Tape! Then I took a piece of Whisper White cardstock and stamped three of the trees from the Festival of Trees Stamp Set using my Silver Encore Ink Pad. NOTE: Allow this to dry for a bit because this ink takes a smidge longer to dry than your typical ink pad! Of course I added this piece to the card front with Stampin’ Dimensionals! Oh how I love those things! Done! Quick and Simple!!

Are you almost done or all done with your Christmas Cards? What about presents? If you still need gift ideas, you can give a Gift Certificate for Stampin’ Up through me OR one of my favorites – My Paper Pumpkin Subscriptions? Also, if you need gift packaging ideas, check out my Video Series!

Happy Stampin’

~Laura