May Paper Pumpkin Fun!!!

Posted on

I love love love Paper Pumpkin because it is such a fun surprise in the mail each month that I get to unwrap like a present. It comes with so much goodie in such a small box and it’s the perfect little crafting moment for me where I don’t have to pull out tons of supplies or think up the idea! This May Kit is AMAZING!!!! It comes with cards and gift bags!!! Love it!!! Click here to see the video of my opening the box!

May Paper Pumpkin, www.LaurasStampPad.com

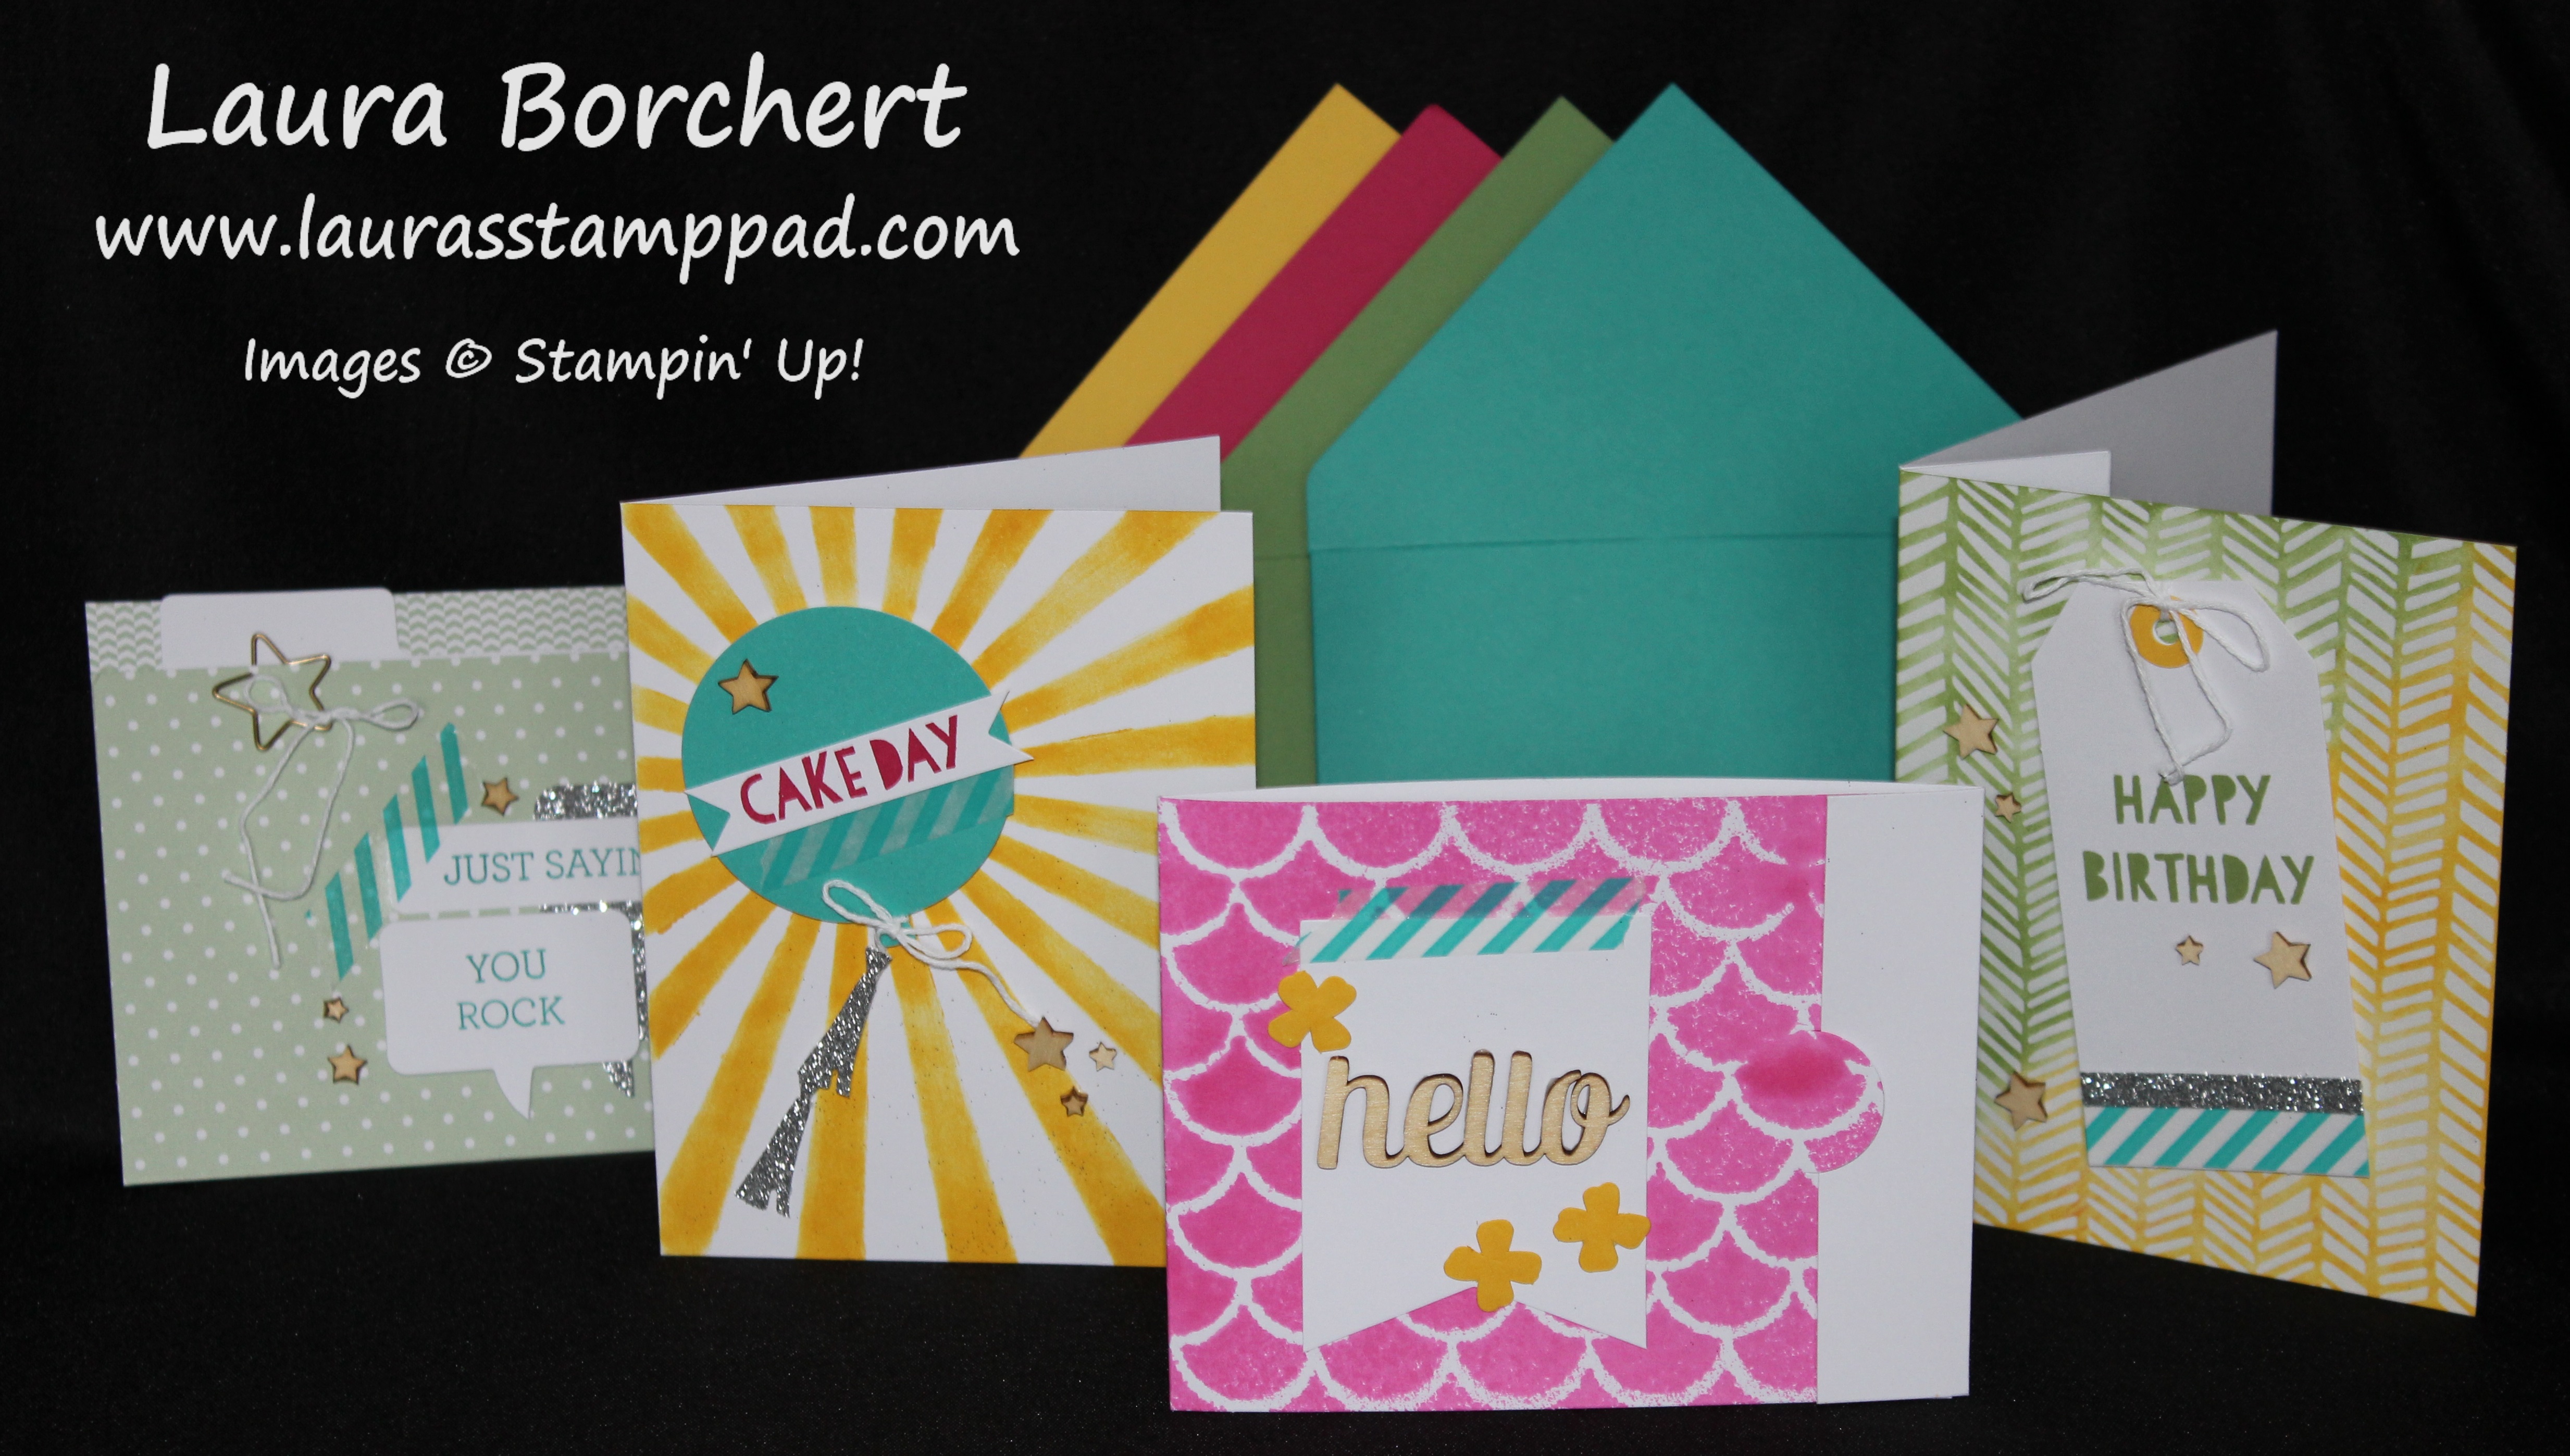
Look at all of these fabulous cards and gift bags!!!! For this Kit, I didn’t do any of the cards like the directions stated. I went all out!!!! Get ready for picture craziness!!!!

Gift Bags May Paper Pumpkin, www.LaurasStampPad.com

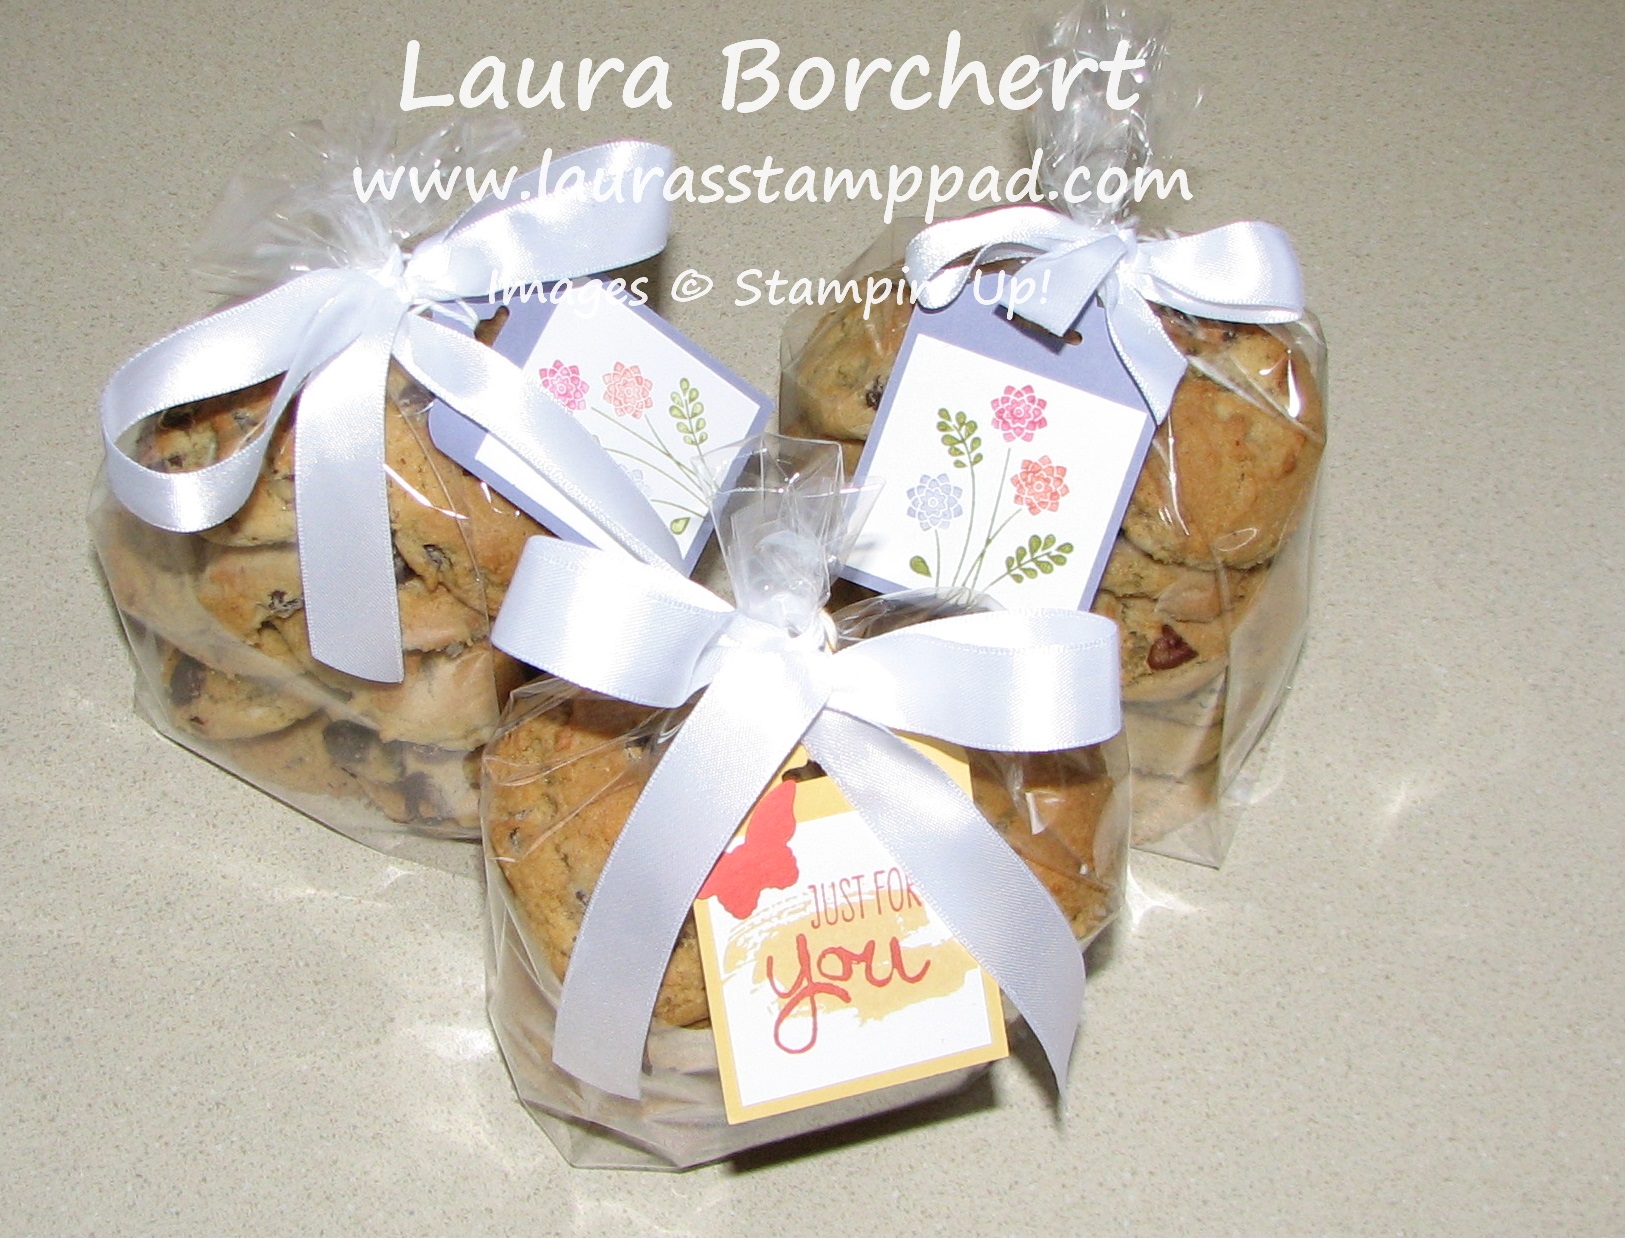
Here are all of the gift bags! I did these pretty much like directions but had to modify a few. The blue balloon was created by me tracing it with one of the coral balloons from one of the card bases. The little striped balloon was from a card base and I stamped it on the back to use as a guide for cutting it out! Also, that mini bow in the front bag is so little because I didn’t think there was a lot of ribbon. Who am I kidding? These kits always come with plenty and now I have extra! 🙂

Gift Bag May Paper Pumpkin, www.LaurasStampPad.com

This gift bag is tied up and then I unraveled the ribbon a little! Super cute! Now for the cards…

May Paper Pumpkin, www.LaurasStampPad.com

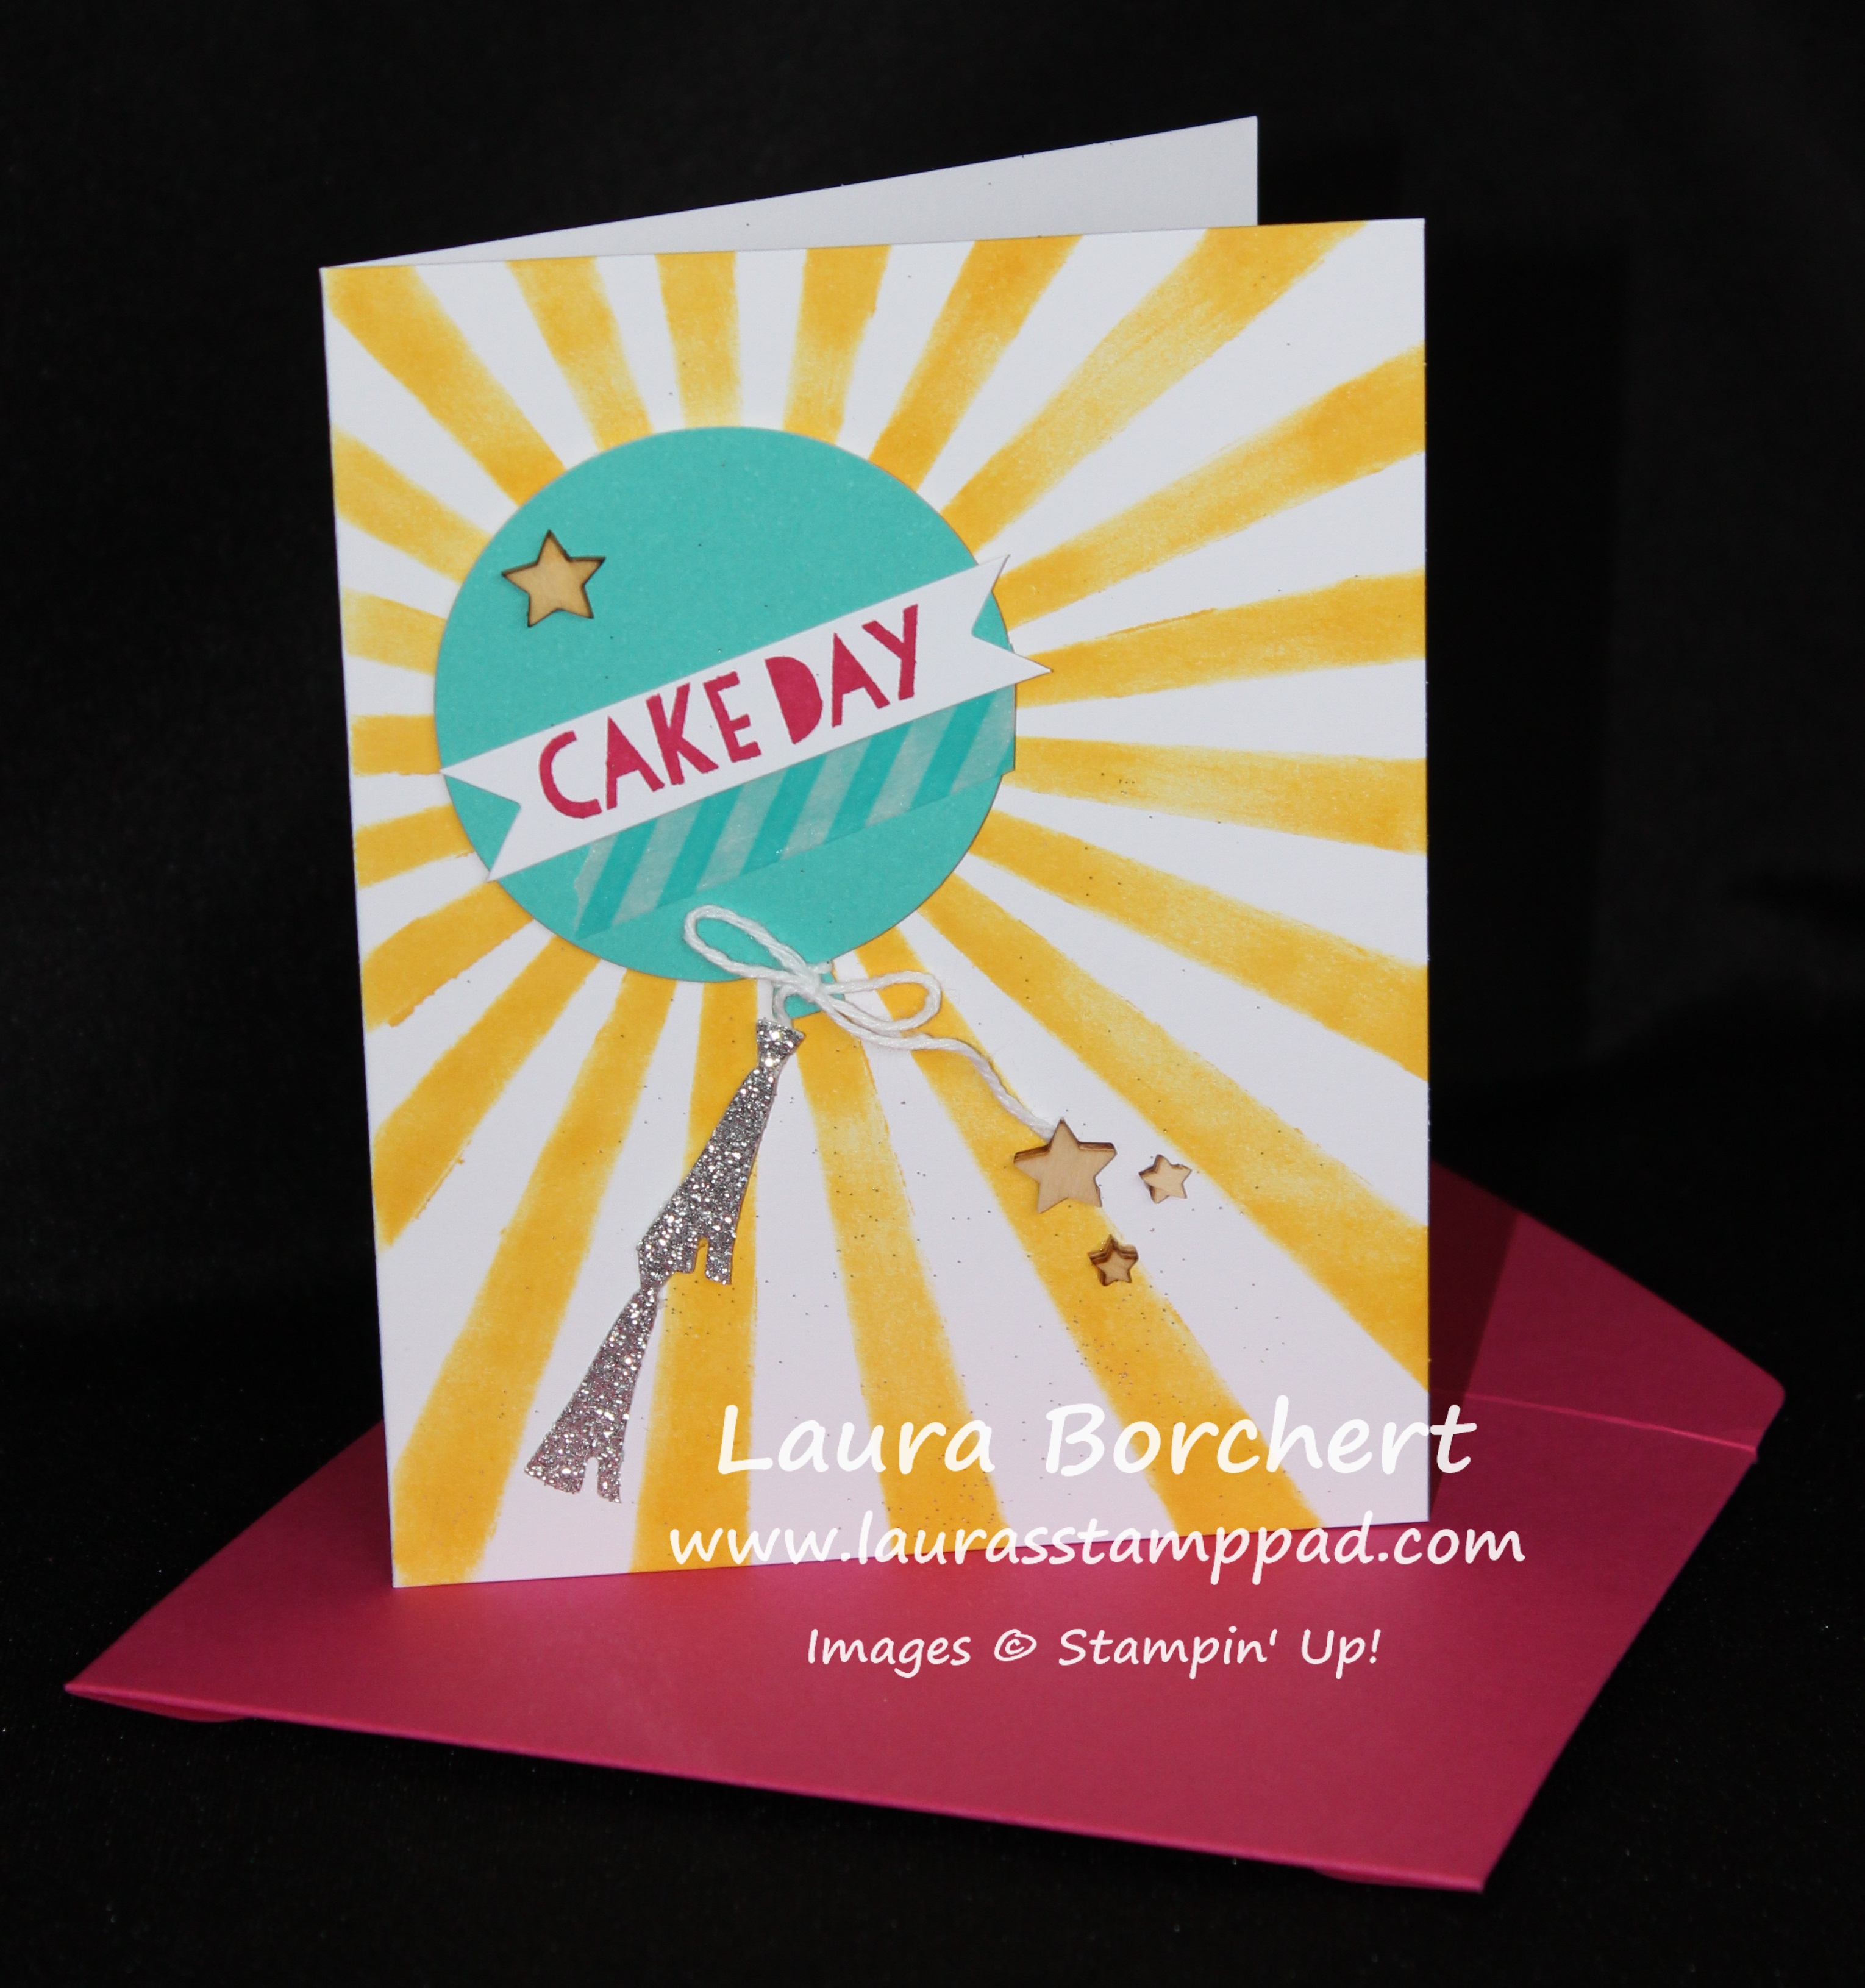
So both of these cards use the regular card base provided in the kit. For the card on the left, I took some of the tissue paper and used my Fringe Scissors to cut it. Then I layered a smaller piece of the Bermuda Bay strip on top. I stamped the greeting on the circle and attached it with Stampin’ Dimensionals and added a few Bermuda Bay Sequins! For the card on the right, I added the Whisper White cardstock (3-3/4″ x 5″) and stamped the balloons on scrap white and cut them out!!! I used Bermuda Bay Baker’s Twine for the strings! Love them!!!

May Paper Pumpkin, www.LaurasStampPad.com

The card on the left uses a piece of Whisper White cardstock (3-3/4″ x 5″) that I stamped the balloon tails in Island Indigo, Bermuda Bay, Crushed Curry, and Calypso Coral. I stamped the 3 balloons on scrap white and cut them out. I added a little Bermuda Bay Baker’s Twine for the bow!!! The card on the right uses the back of the card base (the stripes are on the back of this one). For the white border behind the Bermuda Bay strip was cut from border of the circles (see below).

IMG_20150528_130726611

Balloon Cards May Paper Pumpkin, www.LaurasStampPad.com

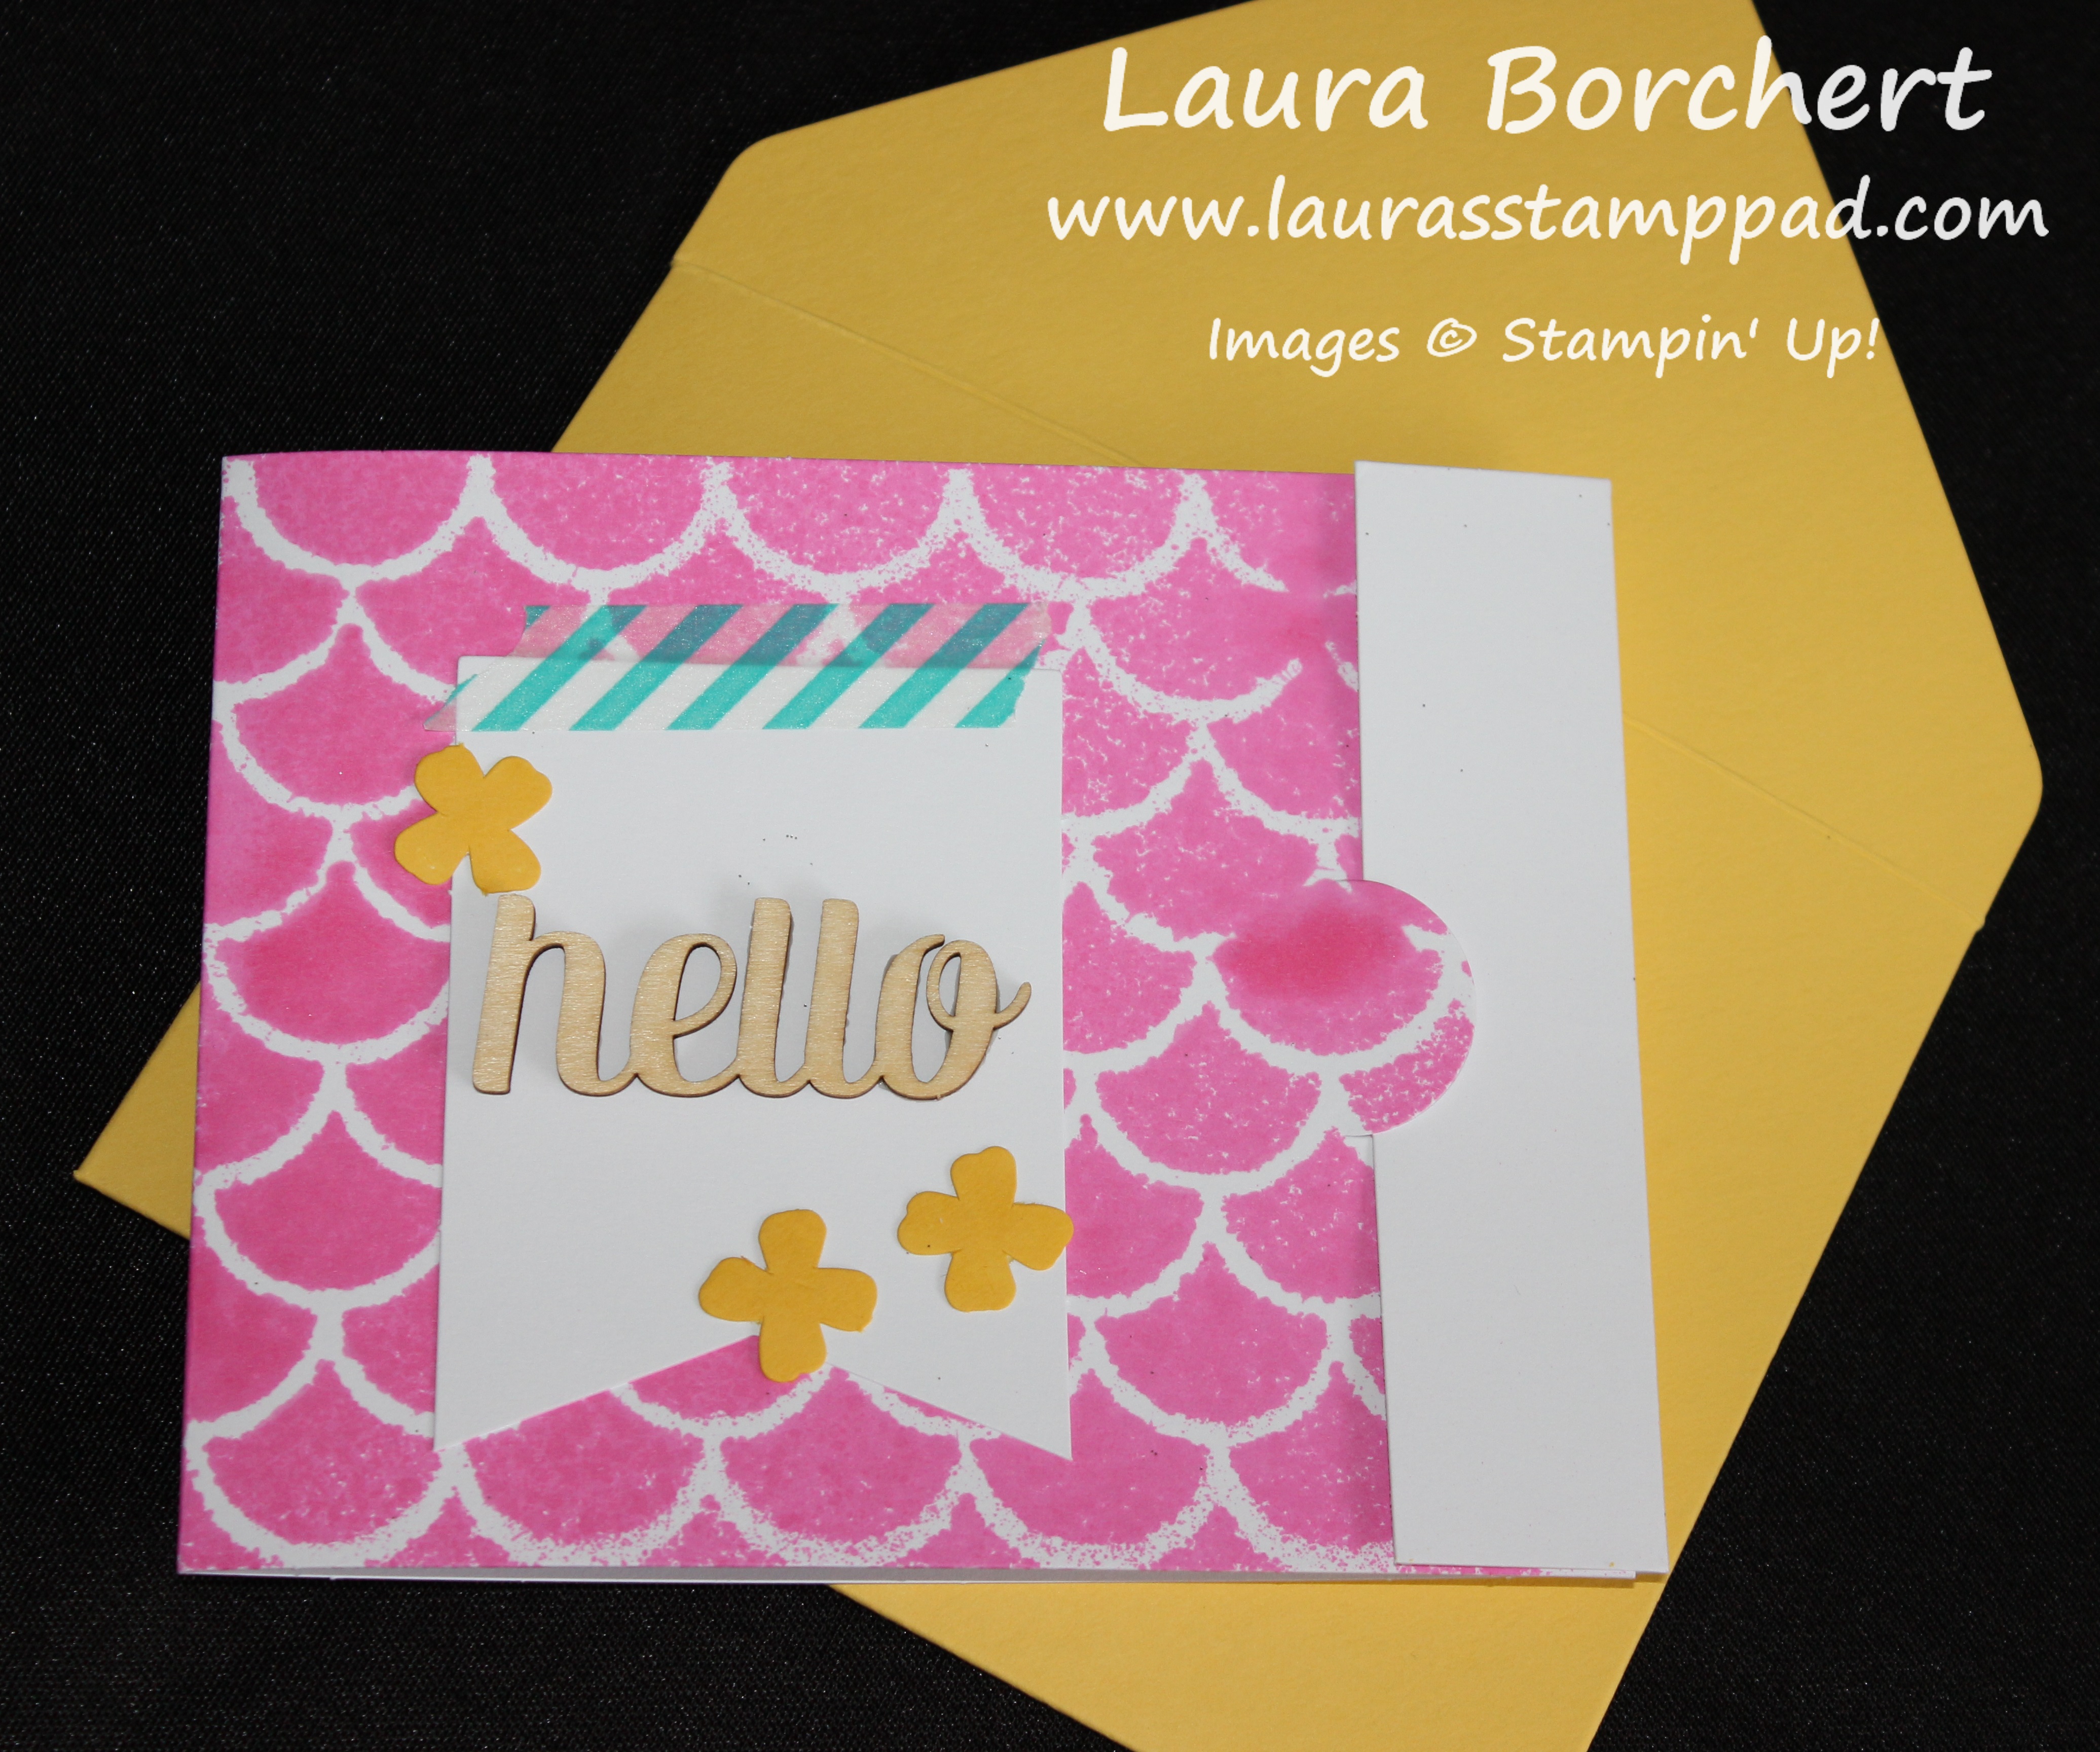
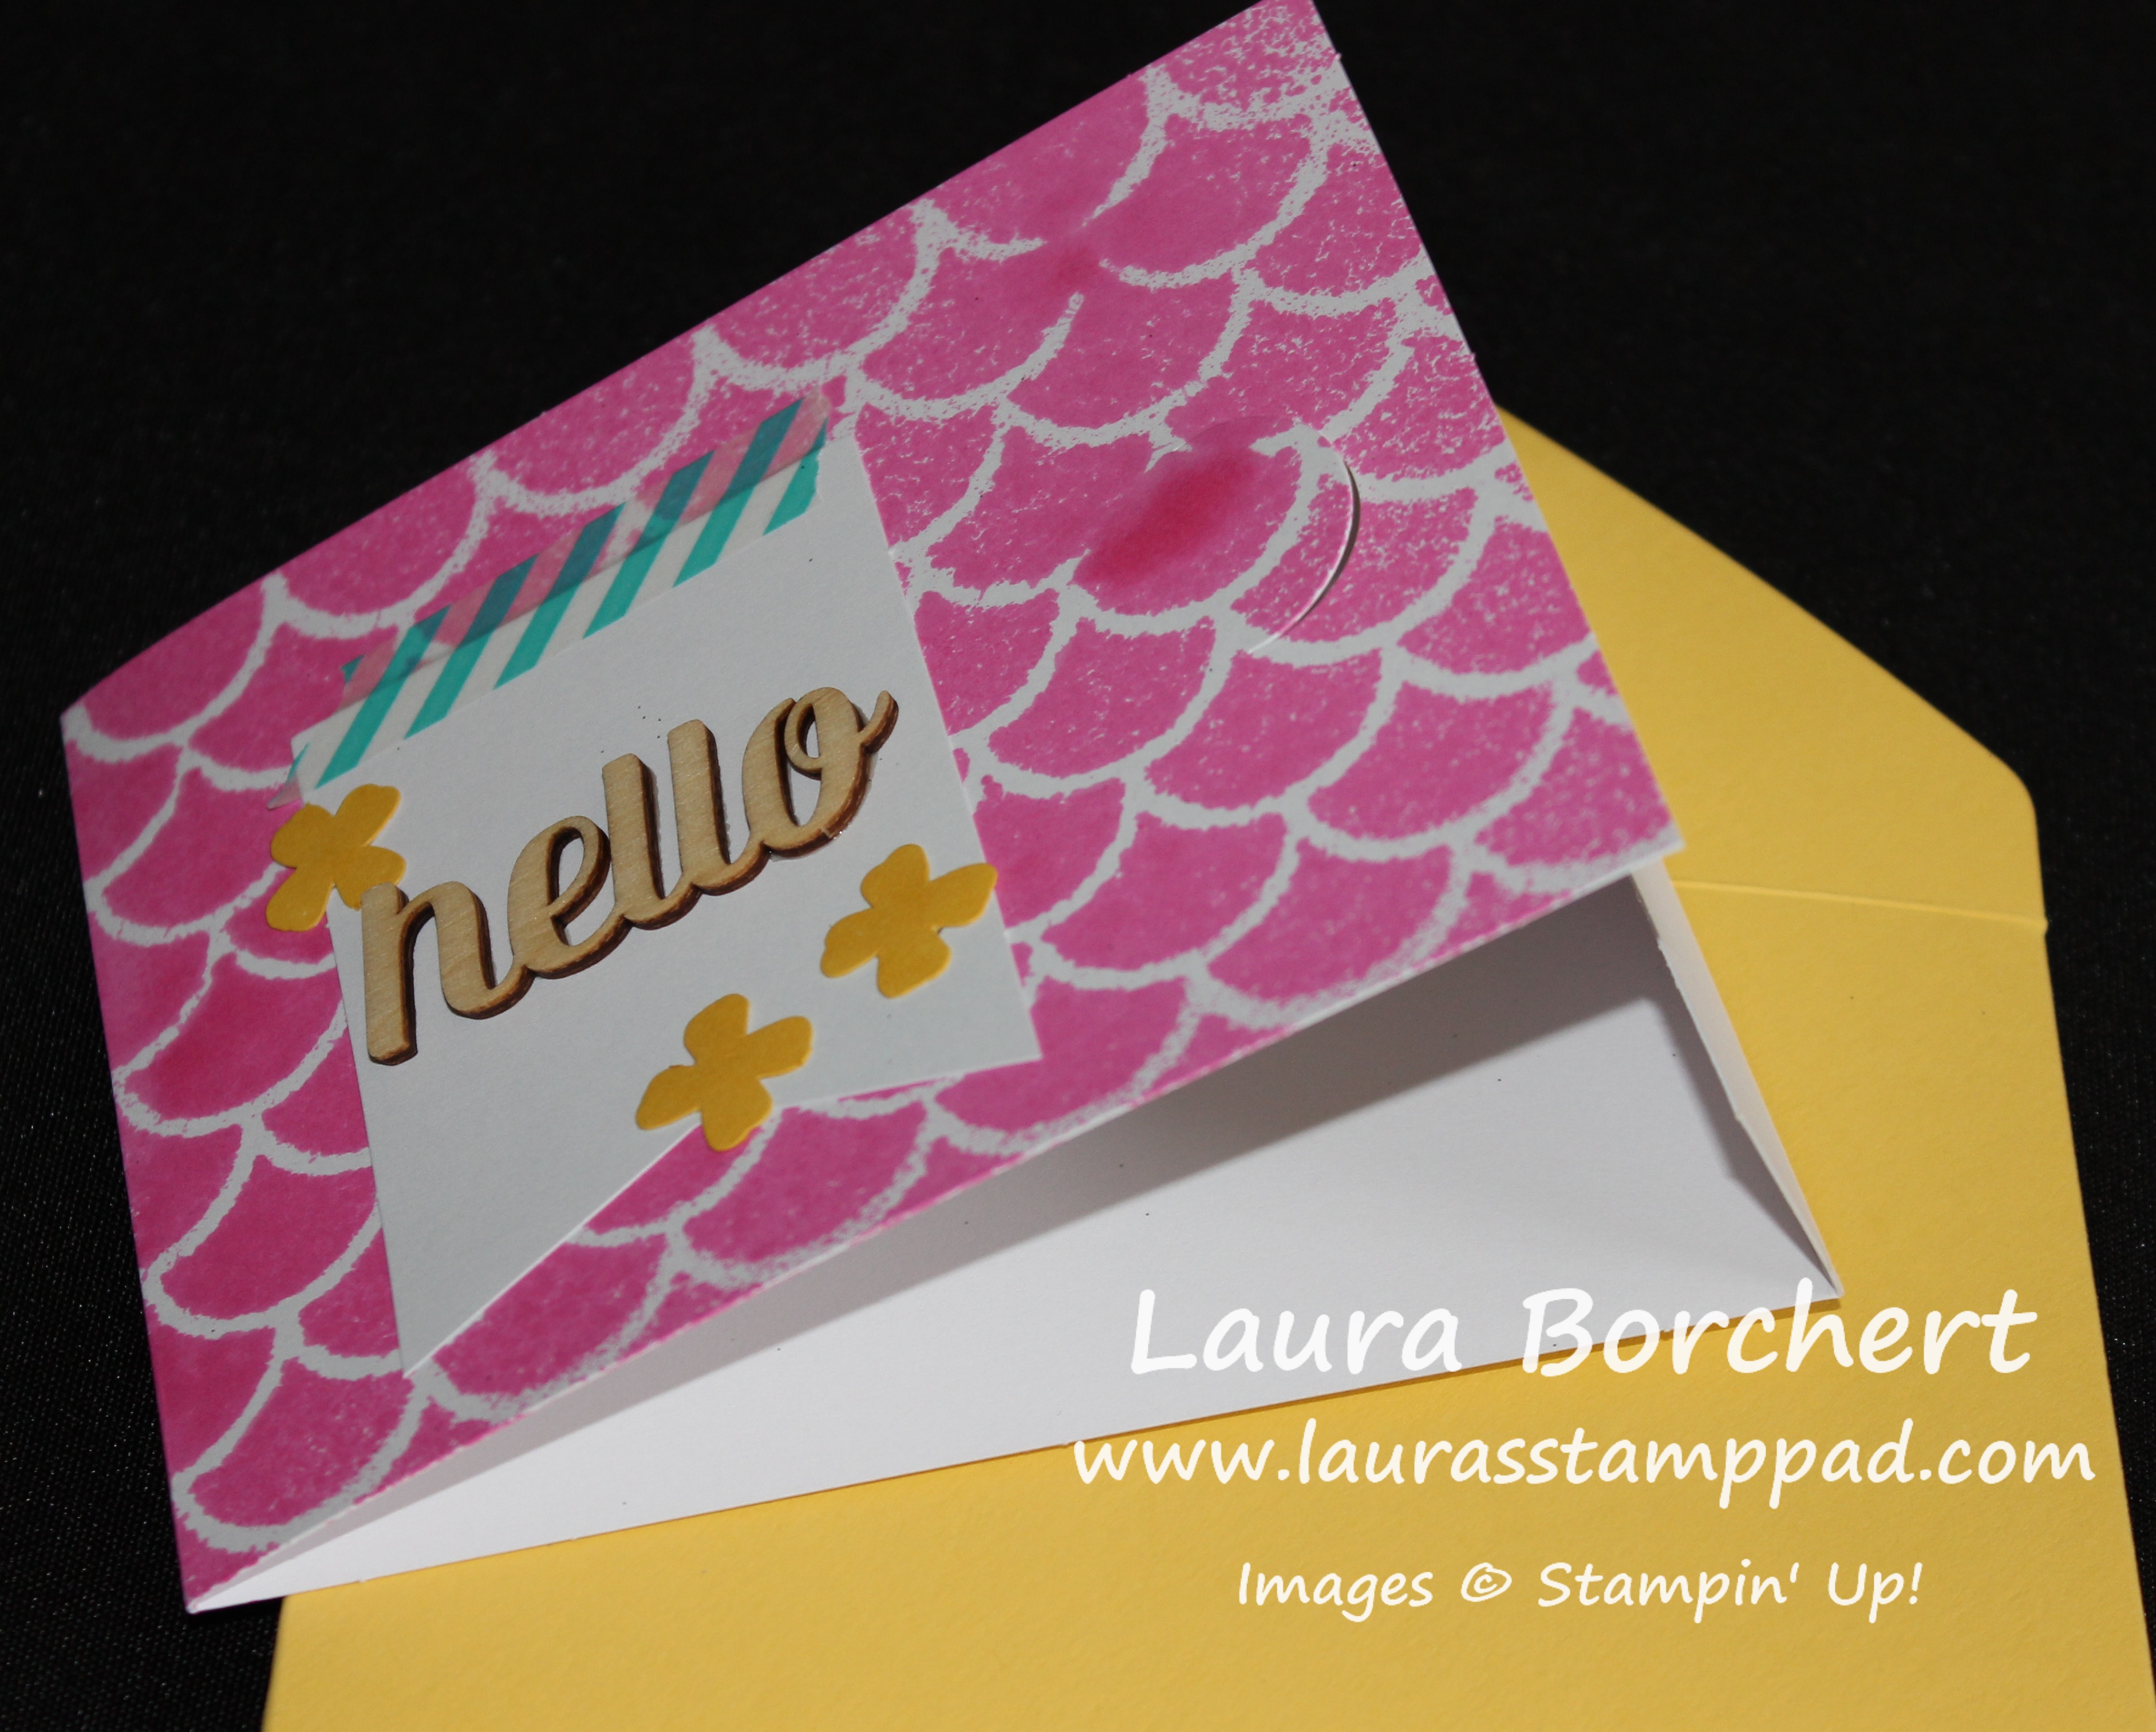
I love love love this card on the left because it uses my favorite tool – Sponge Daubers!!!!! I used the negative of the punched out Coral Balloons as a template!

IMG_20150528_130739681

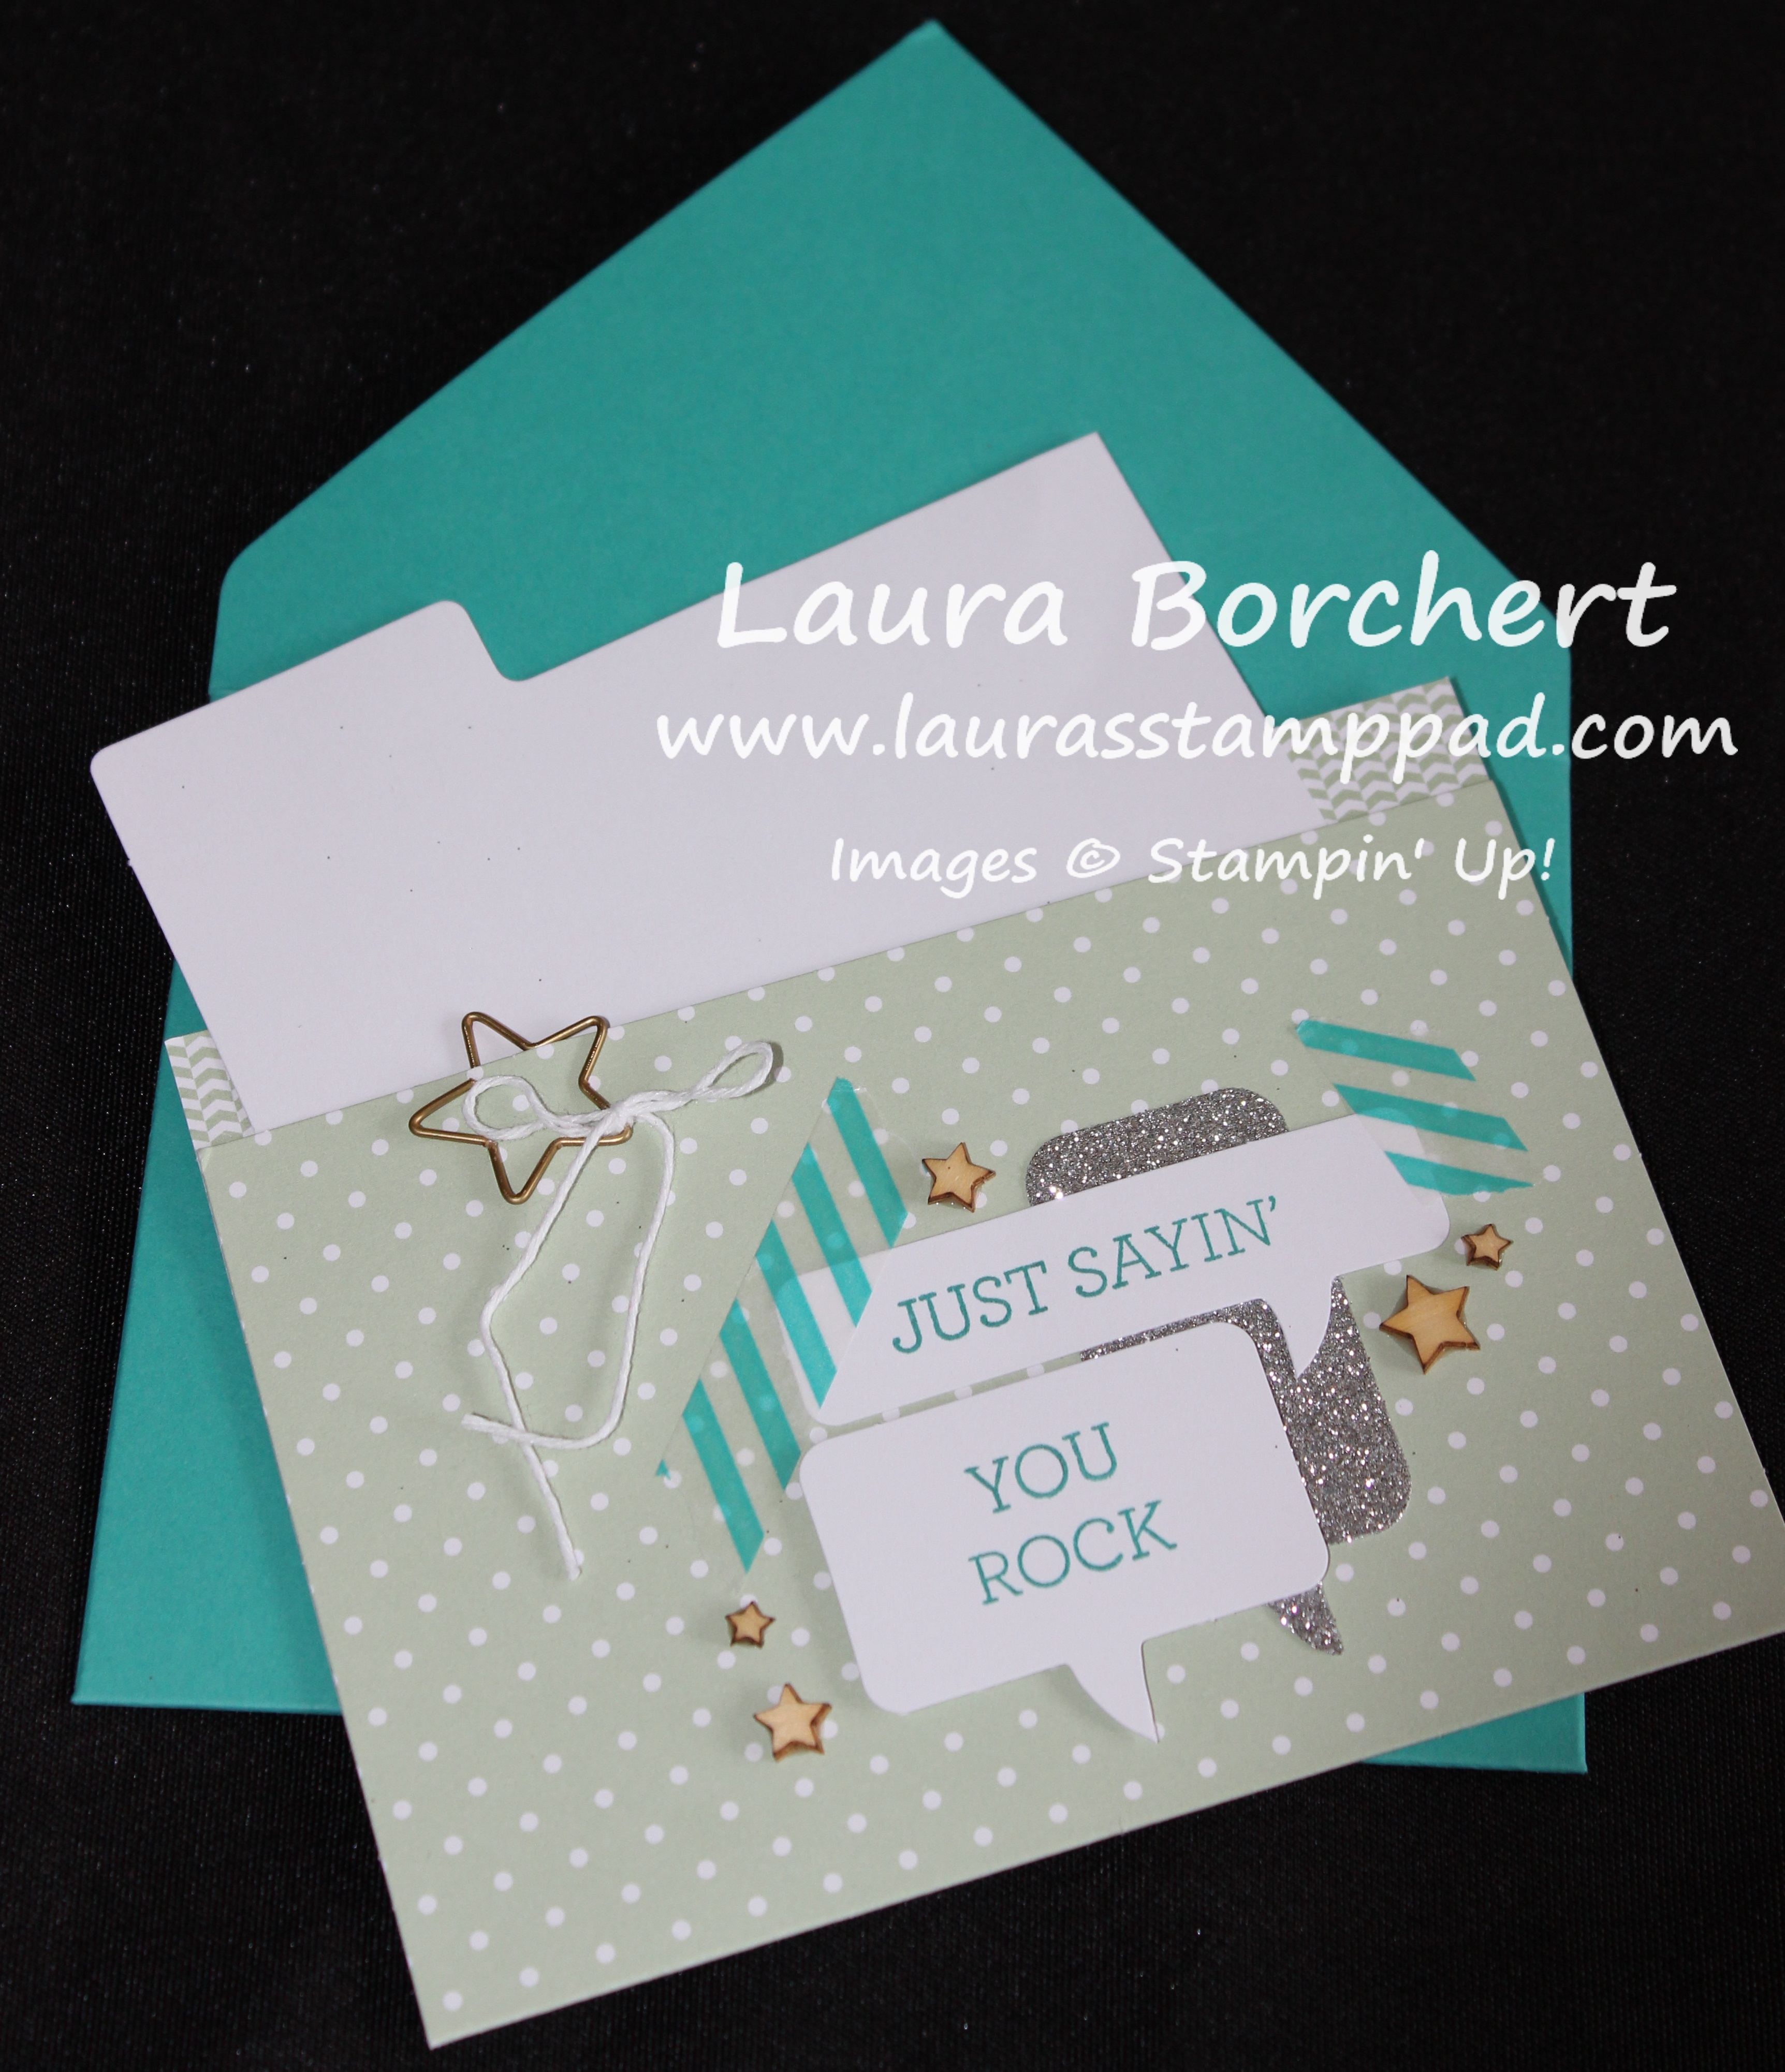
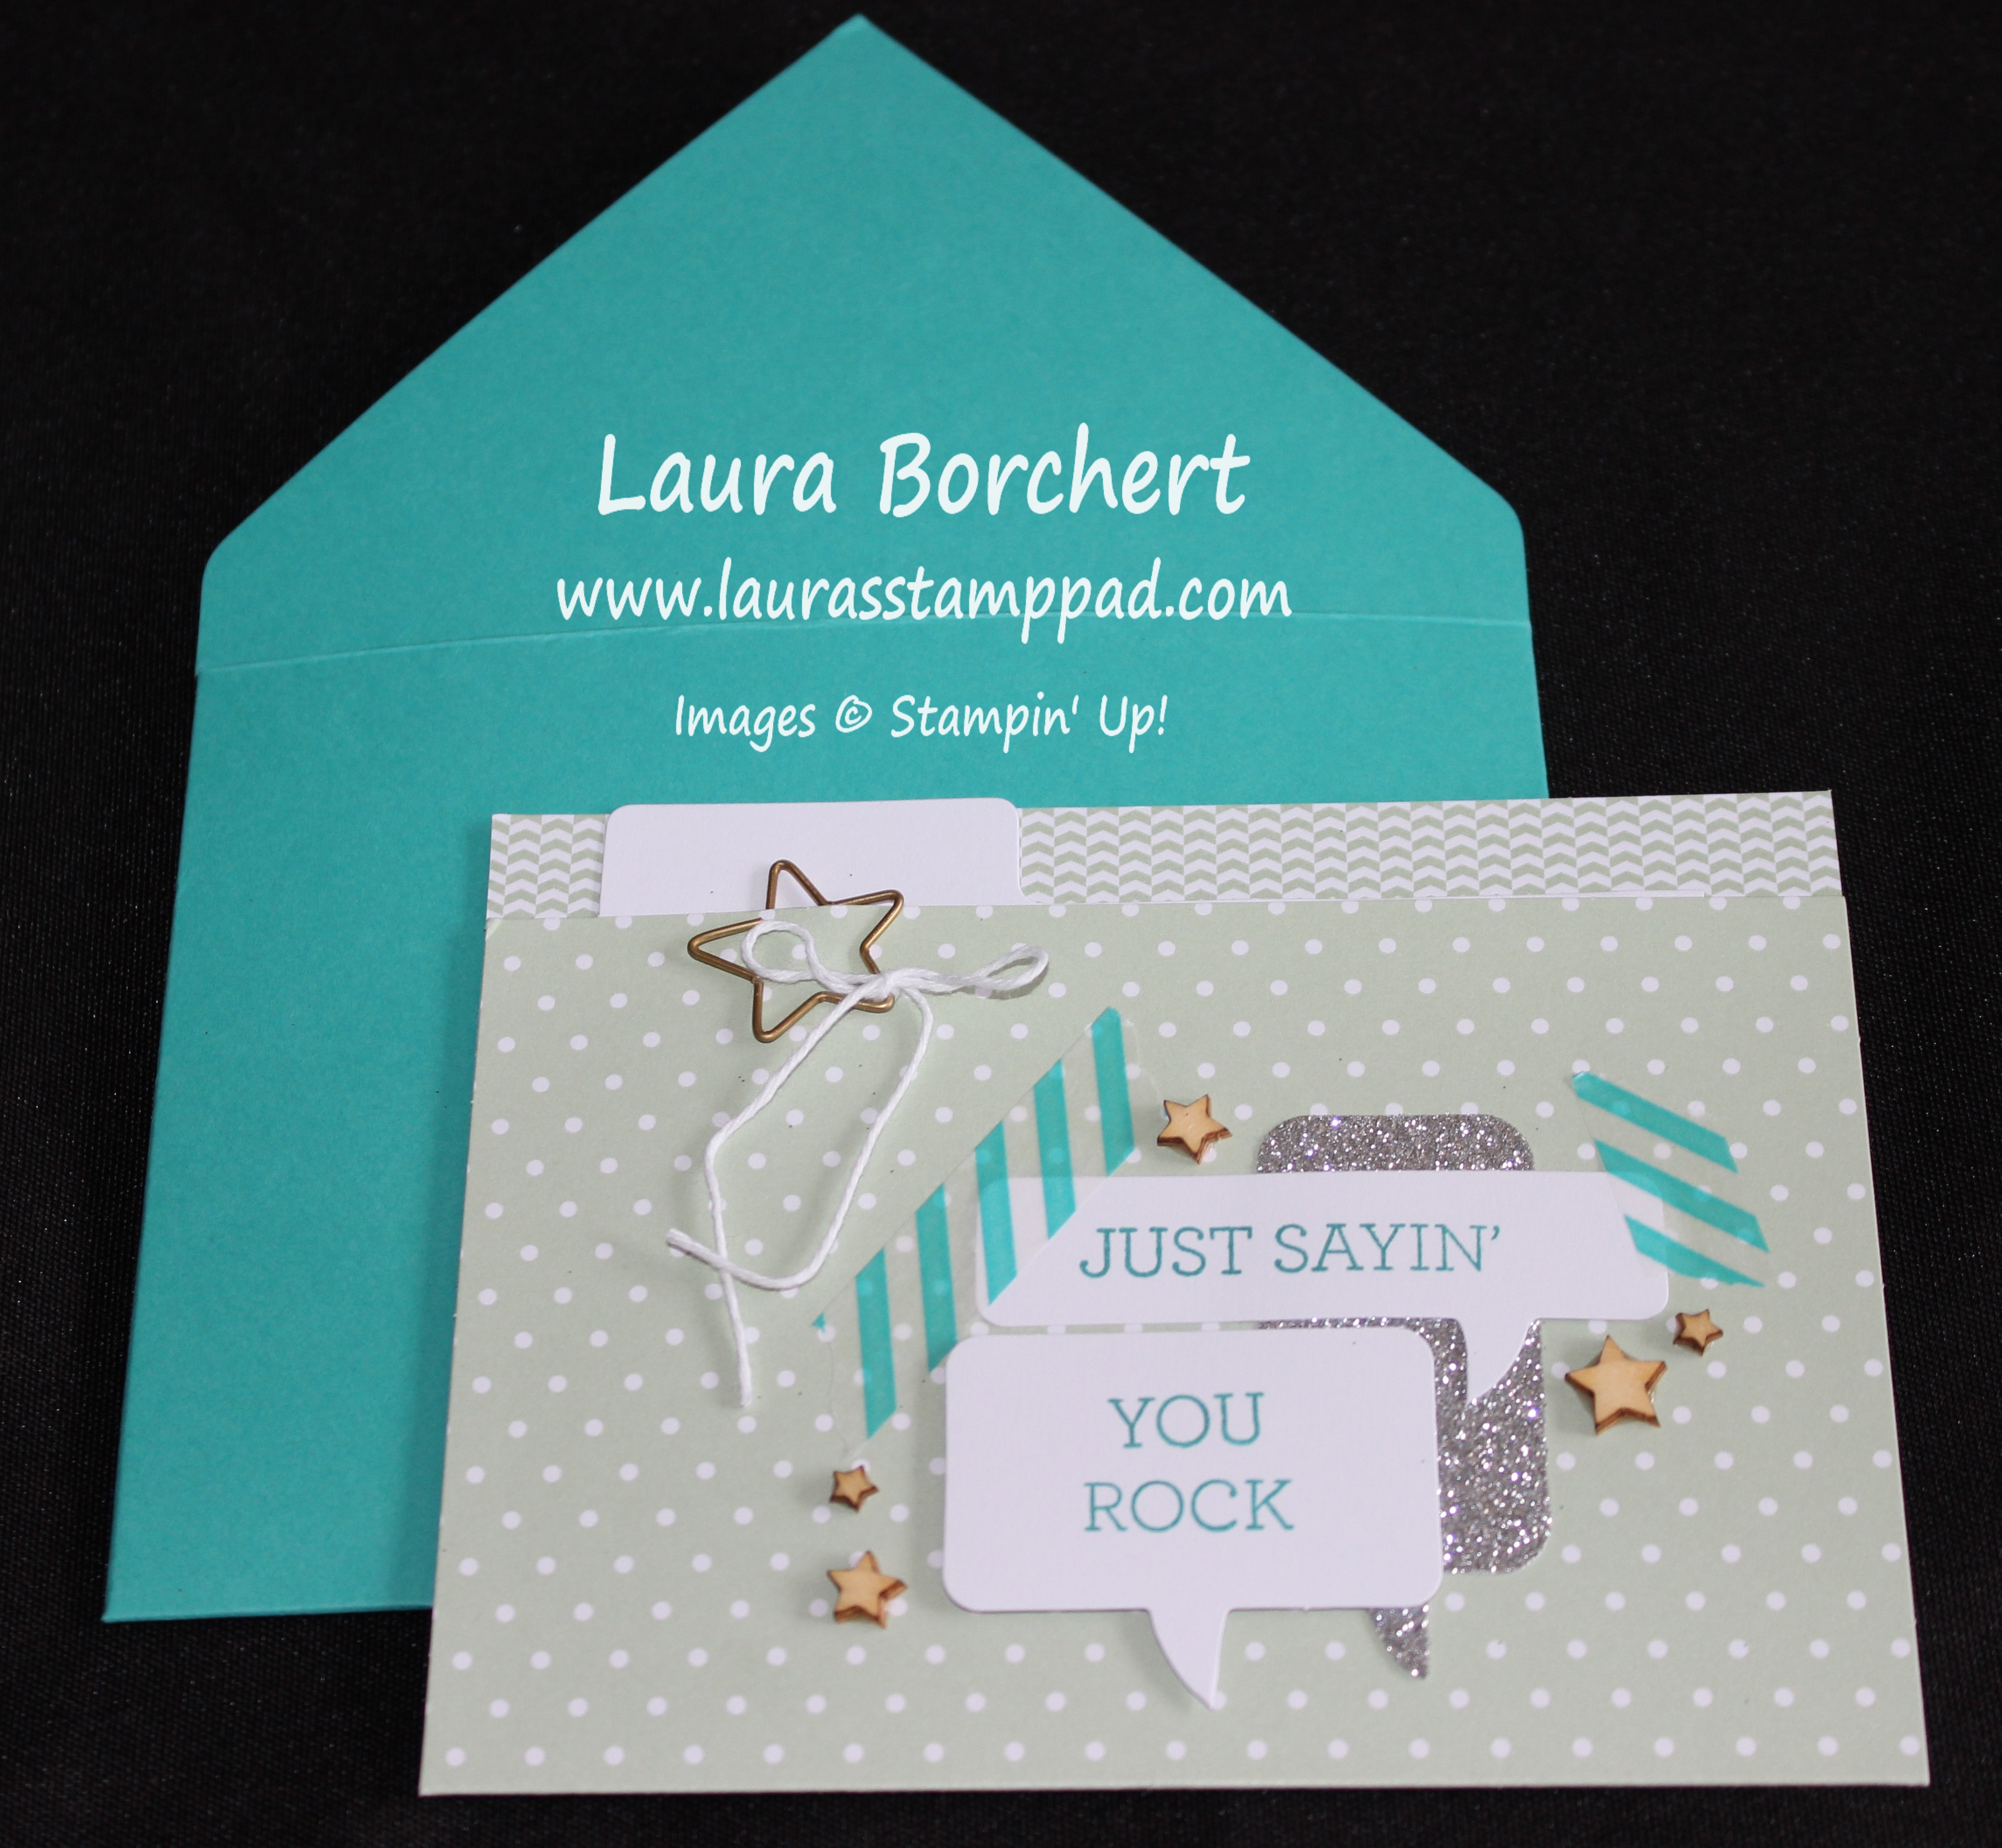
For the cards on the right, I cut up one of the card bases where it uses a little bit of front stripes and the back – solid Island Indigo! I cut up one of the Bermuda Bay bands and cut banner tips into it. I also added some Bermuda Bay Baker’s Twine and Bermuda Bay Sequin Trim!

Birthday Cards May Paper Pumpkin, www.LaurasStampPad.com

These are the final 3 cards. I used cardstock for all of the bases – Crushed Curry and Bermuda Bay! I did the fun fringe on the middle cards with the tissue paper again! Here is an up close photo of that!

Fringe Fun May Paper Pumpkin, www.LaurasStampPad.com

With a little bit of extra cardstock and ribbon/trim, I created 9 cards and 3 gift bags with this kit!!! I love it!!! Many of the ideas were from Stampin’ Up that they showed in the Sneak Peak Video. I loved it so much then that I added a second box to my subscription. These projects were all made with 1 box and I will be taking the other box with my on an upcoming vacation to do with my Mom and Niece! Crafting on the road since all I need is the box and a pair of scissors! LOVE IT!!!

You can sign up and get your June and July Kit at 1/2 Price when you sign up and enter the PROMO CODE: SAVE50. Be sure to sign up before June 10th!!!! Click here to sign up now! Also, as a Paper Pumpkin Subscriber, you can purchase past kits and refill kits so you can order more of this kit of any others. Check out all of them here!

I posted a little video on how to apply the labels to your Stampin’ Up! ink pads last week! If you missed it, you can check it out here!!! See this is why you should Subscribe to My Channel! 🙂 Also, if you noticed the ink pads shown are the NEW In-Colors!!!!! Tomorrow is the big day!!!!

Happy Stampin’
~Laura


Fabulous Friday!!!

Posted on

Happy Friday everyone!!!! Can you believe that May is almost over and June is coming??? That is just so crazy to me! What is even more crazy is the NEW CATALOG IS COMING and I just can’t wait. Only 3 more full days! Eeeeeeee It’s like Disney (even though I have never been)!!!! Until then we can look at this adorable little thing! This little adorable owl is sure to brighten your Friday!!!

Baby Owl Curvy Keepsake Box, www.LaurasStampPad.com

I created him with the Curvy Keepsake Die and used various punches for all of his features – Circle Punches, Scallop Circle Punch, Flower Medallion Punch (beak) and the Oval Framelits for his body! Just precious! He would be perfect for a baby shower or for little treats when you are visiting the baby at the hospital! 🙂 All together now…..Awwwwww!

Of course it just isn’t a Friday without the Weekly Deals!

Weekly Deals 5.26

I just recently moved my Flower Bouquet that I created with the Build A Bouquet Kit to a new spot in my kitchen and it just lovely. It really brightens up the room! You can check out my post on that here! The Painted Blooms Designer Series Paper is sooooo lovely! You will want to add some of that to your cart before it is gone on June 3rd but this sale price ends on Monday! You can see some projects using that here and here!

I hope you all have a wonderful weekend!!! I know I will!

Happy Stampin’

~Laura


Hooray It’s Your Day!! (Part 2)

Posted on

Sunshine Template, Hooray It's Your Day, www.LaurasStampPad.com

Welcome back!!! Today is Part 2 of the Hooray It’s Your Day Card Kit from the Occasions Mini Catalog! If you missed Part 1 yesterday, you can check that out here!!

I LOVE this card….which is why I paired it with the Melon Mambo envelope! <3 It was super fun to make and you can make tons of them because the template in the kit is reuse-able! Again, I used my Sponge Daubers for this one rather than the included spritzer. I like to have more control over my color  and get a strong line image. I love the bright colors and bold look of this sun! You could always do it in other colors as well. Many of my stampers at the class I held on this kit did Melon Mambo. They sure know the way to my heart! 🙂 TIP: If you drop your sponge dauber down at the center circle of this template and rub out on each ray you will get a fabulous ombre look. It will be really dark around the center and lighten up as you go out! It looks amazing!!! I stamped my greeting from Age Awareness and add all the little goodies which were provided in the kit. I would love to do this card with a greeting stamped in the middle of the sun and maybe some Dazzling Details! That would be awesome too!!

Scallop Template, Hooray It's Your Day, www.LaurasStampPad.com

Now for the final card! This card comes scored and cut with that little tab! How cute is that? I used the scallop template for this one and used my Spritzer with Melon Mambo Re-inker in it (Alcohol 70 Proof or less and as few or many drops of re-inker you wish). I love the look of this card as it makes me think of a mermaid but you can see how the lines are very distinct and the colors vary across the card. It looks cool but the OCD in my goes a little crazy. When there is a spot that doesn’t have ink or enough ink, I spritz and spritz and then over do it. Ehhh What are you going to do? Remember less is more! 🙂 I added the wooden greeting and the tag. The little flowers came in the kit but are white so I pounced a few times on them with my Daffodil Delight Sponge Dauber and make them yellow! 🙂 Love it! Here is another photo showing that tab look of this card!

Scallop Template, Hooray It's Your Day, www.LaurasStampPad.com

I was really impressed with all of the goodies that were included in this kit and how amazing the cards are! I really loved making them and seeing what my other stampers came up with in the class!

Hooray It's Your Day Kit

Here is another snapshot of all of the supplies! And here is 1 set of all of the cards. The kit makes 5 each of these!

Hooray It's Your Day Card Kit, www.LaurasStampPad.com

Be sure to get your kit before it is gone on June 2nd! Click here to get yours! I hope you enjoyed these and if you make these cards and add your own flare I would love to see what you come up with! Please share in the comments below!

Happy Stampin’

~Laura


Hooray It’s Your Day!! (Part 1)

Posted on

File Folder Card, Hooray It's Your Day, www.LaurasStampPad.com

This is just one of the fabulous cards you can create from the Hooray It’s Your Day card kit from the Occasions Mini Catalog (which ends on June 2nd)! I had some much fun with this kit and I made a lot of modifications! Remember, you don’t have to follow the instructions on these kits! The kit comes with 5 each of 4 different designs for a total of 20 cards including envelopes. I think the envelopes are my favorite part – Bermuda Bay, Melon Mambo, Wild Wasabi, and Daffodil Delight! LOVE THEM!!!!

Hooray It's Your Day Kit

Look at all these goodies!!! Of course the spritzer and mask templates can be used over and over again. Also, there is tons of Washi Tape on that roll and I didn’t come close to using it all. Love it! Okay so let’s get down to the fun stuff!!! I will be showing 2 cards today and the other 2 tomorrow! 🙂

File Folder Card, Hooray It's Your Day, www.LaurasStampPad.com

Here is another photo of the File Folder Card! This is super cute and the file folder style is really popular right now. Still not sure if it is my thing but I’ll go with it! TIP: When sealing your Wild Wasabi pocket for the file card to go in, you need to stay really, really close to the edge. Even staying close, I had to cut down my file card. Another option would be to use your washi tape to seal the ends by wrapping it around the side. This would allow for plenty of room for your file card! Then you can decorate as you wish with the thought bubbles, washi tape, wooden stars, and star clip! I used the Crazy About You Stamp Set for this card. (I didn’t purchase the coordinating stamp set – Hooray It’s Your Day and just used a few of my favorite greeting sets!) Also, I didn’t add any color to this one…..I noticed that a few days later that mine didn’t look like the sample in the kit photo! 🙂

Gift Card Holder, Hooray It's Your Day, www.LaurasStampPad.com

I love love love this one because it is an emboss resist card. The card comes already embossed on the front with that fish tail look.What do you call that pattern? Let me know in the comment below! I actually used my sponge daubers on this card rather than the spritzer. You know how much I love those things. Then for the tag, I stamped the greeting from Age Awareness and added a little Washi Tape and Silver Glimmer Paper (included in the kit). The other cool thing about this card is it comes with a gift card holder built in. All of the score lines are created and you just need to add a little adhesive (Fast Fuse works best) on the outer edge! Check this out! Perfect for a Graduation card!!!

Gift Card Holder, www.LaurasStampPad.com

Now you have to wait until tomorrow to see the other 2 cards in the kit. Be sure you are subscribed to my blog in the upper right hand corner and you will receive an email of my blog post so you don’t miss out! See you tomorrow!

Happy Stampin’

~Laura


Monogram Note Cards!!!

Posted on

Sophisticated Serifs Note Cards, www.LaurasStampPad.com

These little note cards are so fabulous and simple to create, you could whip up tons of them in no time flat! I’m sure your Accountant would enjoy a little set of these! Happy Tax Day!!!! They would also make a perfect Mother’s Day gift which is just a few weeks away!!! The would be a fabulous gift for a Bridal or Baby Shower Gift too!! I packaged the cards up in a Gusseted Cellophane Bag with some Whisper White Organza Ribbon!

The Note Cards above are just a piece of cardstock measuring 4-1/4″ x 5-1/2″ and I layered a piece of Whisper White measuring 4″ x 5-1/4″ on top. I used the Sophisticated Serifs Stamp Set for the flowers and letter! I love this stamp set because the font is simple yet elegant and it offers each letter in both a big and small font! LOVE IT!! The little flowers for the corners are super fabulous as well!!! I pulled out all of my scraps that I had that were big enough for this size and quickly made up lots of these little cards! I haven’t stamped the letter on there just yet because I’m waiting to see who I will give it to! Perfect little gift to have on hand!

Monogram Scallop Circle, www.LaurasStampPad.com

This little card is precious! I used the Note Card & Envelopes to create these. I took my Designer Series Paper Scraps and cut a piece 2″ x 5″. This card uses the Brights Background Designer Series Paper! For the Monogram, I used my Scallop Circle Punches and Circle Punch to layer the letter so perfectly! Super cute and another great way to use up some scraps.

Sheltering Tree Monogram Card, www.LaurasStampPad.com

This one is super fabulous because it uses the Sheltering Tree Stamp Set for the dotted background! I love using a random stamp set for a card like this – getting more out of a stamp set is fabulous!!!! You can see more samples using this stamp set here, here and here! You can see the 2 sizes of the alphabet font from the Sophisticated Serifs Stamp Set. LOVE IT!!! I also stamped a little corner of the envelope! Do you all like to coordinate your envelopes with your cards?? Let me know in the comments below!

Happy Stampin’

~Laura


Fabulous Gift Idea & a Give-Away!!!

Posted on

Gift Idea, Lotus Flower,www.LaurasStamppad.com

Who wouldn’t love this adorable gift??? It is fabulous, useful, and simple to make!!!! I grabbed some Note Cards & Envelopes, Lotus Flower Stamp Set which is a Sale-A-Bration item and some ink pads!!!! I stamped the flowers and greeting in Elegant Eggplant, Melon Mambo, Crushed Curry, and Tangerine Tango! My stem was done in Mossy Meadow! You can see a tutorial on stamping with this stamp set here!

Lotus Flower, www.LaurasStamppad.com

Aren’t they gorgeous? After stamping them all, I put them in a Gusseted Cellophane Bag and tied it shut with some Whisper White Organza Ribbon. I looped a little bit of Gold Sequin Trim in there as well for a little bling! 🙂 I love it! I have been using these as Thank You Gifts to my Hostesses and Bridal Fair Give-Aways! These would be perfect for a friend’s birthday, a thank you gift to someone who you wish to thank, or a gift at your next Bridal or Baby Shower! You can match the flower color to the recipient’s favorite color or Bride’s wedding colors! So much fun!

So who would love to receive some of these??? Subscribe to my blog (in the upper right corner) and leave me a comment below with your favorite color of flower!!!! I will be picking a random winner!!!!

Happy Stampin’

~Laura


Valentine Treats!!!!!

Posted on

Valentine’s Day is right around the corner….okay so still a month away but still! I thought I would share some fabulous treats with you that are quick and simple for you to make up for kid’s classrooms, neighbors, nieces and nephews, friends, or random people you see the week of Valentine’s Day! 🙂

Valentine Treat Bag, www.LaurasStampPad.com

This is your traditional treat bag using a 4″ x 6″ Cellophane Bag! I used some of the Stacked with Love Washi Tape to decorate the bag. I overlapped the ends on the back of the bag in the same spot as the seam of the bag. For the Topper, I used a piece of Real Red Cardstock measuring 4-1/4″ x 4″ and punched the bottom of the front with my Scallop Border Punch! Then I stamped the front with a To/From stamp in Real Red Ink. The one I used was from the Wondrous Wreath Stamp Set which is still available from the Holiday Mini Catalog!! Then I folded the piece of cardstock over the top of the bag and stapled it closed. Then I decided I didn’t like the staples showing so I added the Gold Ribbon which looks amazing so I’m glad I added it! If you like the staple took, you can leave the ribbon off or just place it lower. In one of my classes, I had a stamper staple on top of her ribbon so that is an option as well! I finished it off with a few hearts punched out with the Itty Bitty Punch Pack and some Gold Glitter Paper!

Valentine Treat Box, www.LaurasStampPad.com

This little treat box is perfect for oddly shaped candy or other treats or if you wish to keep it a surprise! I started with the Tiny Treat Boxes which have also been held over from the Holiday Mini Catalog! Before assembling the box, I stamped the So Sweet greeting from the Hello Life Stamp Set in the Occasions Mini Catalog! I stamped it to wrap around to left. When we did this box in a stamp class, many of the stampers stamped either the entire greeting again on the back 2 sides or stamped just the curvy end on the other 2 sides! Then I added a little strip of Stacked with Love Washi Tape. After handling the box and showing it off at classes I realized that it started to curl on the corner so I would suggest wrapping the Washi Tape all the way around or at least around the corner to the side and not on the corner! I finished it off with some Real Red Cotton Ribbon! I love how that bow looks! Adorable!

Let me know what you think about these treats and what you plan on creating for your Valentine’s Day Treats in the comments below! I would love to hear your plans!

Happy Stampin’

~Laura


Fabulous Friday – Gift Ideas!!!

Posted on

Happy Friday everyone!!! Are you ready for Christmas? This is the last weekend before the big day! We are kicking off the weekend with our HUGE Family Christmas! It is always crazy yet fun!!! You know how I love family time! But if you still have some Christmas shopping to do, check this out!!!

My Paper Pumpkin makes a fabulous gift for young and old, near and far! It is shipped directly from Stampin’ Up and comes all wrapped up each month so it’s perfect! Click here to see me open the December Kit! 🙂 Click here to purchase 1,3,6 or 12 month subscriptions! I love my Paper Pumpkin!

Dec My Paper Pumpkin, www.LaurasStampPad.com

Of course, the amazing Weekly Deals for the week!!

Weekly Deals 12.16

And I thought I would share this little gift bag with you all too! This was created with the Tag-A-Bag Accessory Kit and the Festival of Trees Stamp Set! I used some Cherry Cobbler Chevron Ribbon and Mossy Meadow Satin Stitched Ribbon. I love the two textures and looks of the ribbon together! Quick, Simple, and AMAZING!

Gift Packaging, www.LaurasStampPad.com

I hope you have a wonderful weekend and I will see you back on Monday!!!! 🙂

Happy Stampin’

~Laura


Technique Tuesday – Gift Card Holders

Posted on

Happy Tuesday!!!! December is officially here and that means the holidays are right around the corner! Today I’m sharing the technique of making adorable gift card holders!!!! This is another fabulous part of my Gift Packaging Series! You can check out other here, here, and here!

Gift Card Holders, www.LaurasStampPad.com

Aren’t these adorable?? Well they are quick and simple to make too and really spruce up the Gift Card!

SUPPLIES NEEDED: Cardstock, Sticky Strip, Score Blade, Corner Rounder Punch,  Designer Series Paper, Velcro and Stamps & Punches to decorate

Cut a piece of cardstock to 3 ½” x 8 ½” (you can make 3 gift cards holder from 1 piece of 8 1/2” x 11 cardstock)! Now score the cardstock along the 8-1/2″ side at 2 ½” from one end and 2” from the other end. Then cut 3 pieces of Designer Series Paper into the following: 3 ¼” x 1 ¾”, 3 ¼” x 2 ¼”, 3 ¼” x 3 ¾”. Fold on your score lines and you will place Sticky Strip along the edges of the 2-1/2″ side and adhere. This creates the bottom pocket! For the top flap, using your Corner Rounder Punch to round the two corners giving that soft look on the flap. You will want to round the corners on the smallest piece of Designer Series Paper too! Once you have done that, adhere that piece to the flap, the large Designer Series Paper piece to the back, and the medium piece to the pocket portion. Now take a little piece of velcro and place it on the top, middle of the pocket and close the flap to allow the top portion of the velcro to adhere to the flap. You can decorate the gift card holder as you wish! I like using my Label Love Stamp Set and matching Artisan Label Punch! The Designer Series Paper used in the photo above is the Trim the Tree Designer Series Paper Stack!!!! These are great for any occasion! If you would like to see this in action, check out the Video Tutorial below!!!! Don’t forget to give it a thumbs up if you like it!!!!

I hope you enjoyed this technique and try it out! Leave me a comment down below on which Designer Series Paper you like to use on your Gift Card Holders!

Happy Stampin’

~Laura


Happy Thanksgiving!!!!

Posted on

Happy Thanksgiving everyone!!! This is one of my favorite holidays because it is low key and there is just so much to be thankful for today and everyday throughout the year!!!! I am so very thankful to each and every one of you who visit my blog, comment, share, and pin! Thank you all very much! You are all fabulous!!!

Today I thought I would share a quick and simple little project!

Gift Tags Cookies, www.LaurasStampPad.com

I get told by many people that my Chocolate Chip Cookies are pretty good so I usually whip up a batch for any and all special occasions – family visits, friends visits, when visiting my new niece and nephew in the hospital, and many other times! It is always more fun to give the cookies in an adorable package too! Here I used some of the Gusseted Cellophane Bags to put 13 (Baker’s Dozen) cookies into. I tied them up with some Whisper White Satin Ribbon and then added a tag. These tags are quick and simple and can probably use some of the scraps you have laying around! You need a piece that is 2″ wide and the length can be whatever you wish. I go with about 2-1/2″ but sometimes a little shorter or longer if I have a scrap piece that measures just so. I used my Scallop Tag Topper Punch for the adorable top. Then I used a piece of scrap Whisper White measuring 1-3/4″ x 1-3/4″ and decorated it. For the one up front, I used the Work of Art Stamp Set and Bitty Butterfly Punch. For the two in the back, I used the Embellished Events Stamp Set! Quick and Simple Gift Packaging! Check out this tag here to use this Holiday Season!

I hope you have an amazing day today celebrating Thanksgiving! I know I will as I will be spending lots of time with Family!

Happy Thanksgiving!

~Laura