Birthday Sparkles!!!

Posted on

Happy Monday! Happy back to normal….or at least I’m hoping! I’m a very routine girl so I’m ready to get back at it. Although I did really enjoy the down time! I thought I would start off with some birthday sparkles today. After all who doesn’t love bling and we all celebrate birthdays!!!

Birthday Sparkles, www.LaurasStampPad.com

This card is actually sort of a mini card. It still fits into a regular envelope but it’s 4″ x 4-1-1/4″. I cut the cardstock at 4-1/4″ (in half) and then at 8″ to fold in half. Something a little different!!!

My card base is Bermuda Bay and I layered on a piece (3-1/4″ x 4″) of the Lily Impressions Sale-A-Bration Designer Series Paper with Stampin’ Dimensionals. Next, I took a piece of Whisper White (3″ x 3-3/4″) and stamped the cake in Melon Mambo Ink. The cake is from the Happy Birthday to You Sale-A-Bration Stamp Set. Right after stamping, I took the Wink of Stella Pen and colored over the flowers. This makes the ink bleed just a bit while adding the perfect amount of sparkle!

Coloring with Wink of Stella, www.LaurasStampPad.com

I love the perfect hint of pink and shimmer! After coloring this, I layered it onto the card front and added a few Champagne Rhinestones. You can also use some of the Peacock Rhinestones for different color options! I love them all!

Glittered Flowers, www.LaurasStampPad.com

For the inside of the card, I stamped the greeting from the same set in the center and then did the top corner of the cake stamp in the bottom right corner. This gives the perfect flower coordination to the inside of the card. Of course, I colored it with some Wink of Stella too!

If you want to create this Birthday Sparkles card, click the supplies listed below. Remember that you get a Sale-A-Bration item FREE with a $50 order!

Happy Stampin’

~Laura

Product List

Golden Goddess!!!

Posted on

Happy Monday, everyone! I hope you had a wonderful weekend! I sure did! My Mom came yesterday and we stamped her Christmas Cards!!! It was so much fun and a good time to catch up! Today, I’m sharing another samples using the Christmastime is Here Suite. Check out this Golden Goddess!!!

Golden Goddess, www.LaurasStampPad.com

This card is just so elegant and beautiful! It would be perfect for a wedding card too!!! All white and gold and so amazing!

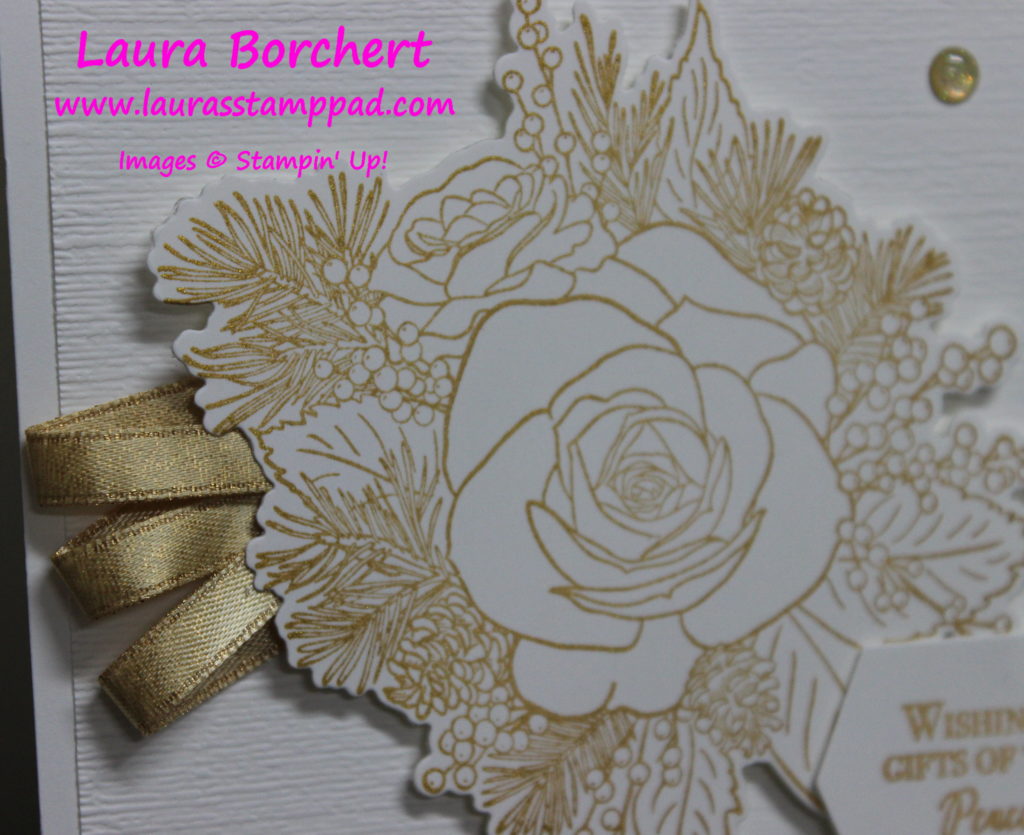
I started with a Whisper White card base. Next, I embossed another piece of Whisper White with the Subtle Embossing Folder and added it to the front. Then with yet another piece of Whisper White, I stamped the Christmas Rose in Gold Delicata Ink. Be sure to set it aside a bit to dry completely. I have found sometimes it smears if it isn’t fully dry. Once it is dry, I used the coordinating Roses Dies to die cut the rose and the greeting label. The greeting was also stamped in Gold Delicata!

Golden Rose, www.LaurasStampPad.com

To assemble, I flipped the rose over and added three little loops of the Gold Shimmer Ribbon. This stuff is just stunning! Using the Stampin’ Dimensionals to secure the ribbon and then all over the rest of the rose, I then added it to the card front! The greeting was also added with Stampin’ Dimensionals. You know me and my love for those things. To finish it off, I added a few Gold Glittered Enamel Dots! LOVE!!!!

Don’t forget that these items are while supplies last so click the supplies below to get your today and recreate this beautiful golden goddess card!

Happy Stampin’

~Laura

Product List
Christmastime Is Here Suite Bundle (English)
$112.50
Christmastime Is Here Specialty Designer Series Paper
$14.50
Gold 1/4" (6.4 Mm) Shimmer Ribbon
$7.00
Christmas Rose Bundle (English)
$61.00
Golden Glitz Delicata Metallic Ink Pad
$11.00
Subtle Dynamic Textured Impressions Embossing Folder
$10.00

Warmth & Love!!!

Posted on

That’s what we all need this time of year – warmth & love! Am I right??? Well I hope this card brings it to all of you!!!

warmth & love, www.LaurasStampPad.com

I’m so in love with the Christmastime is Here Suite. All of the amazing products are used in this card. The Stamps, coordinating Framelits, Gold Ribbon, Designer Paper, and Gold Enamel Embellishments are all part of it!

Here I started with a Whisper White card base measuring 4-1/4″ x 11″. Then I layered on a piece of the Christmastime is Here Designer Series Paper (4″ x 4″). This means that you can get 9 cards from 1 sheet of the paper. Next, I stamped the greeting in Cherry Cobbler at the top from the Christmas Rose Stamp Set and tied some of the ribbon around the card front.

Red Roses, www.LaurasStampPad.com

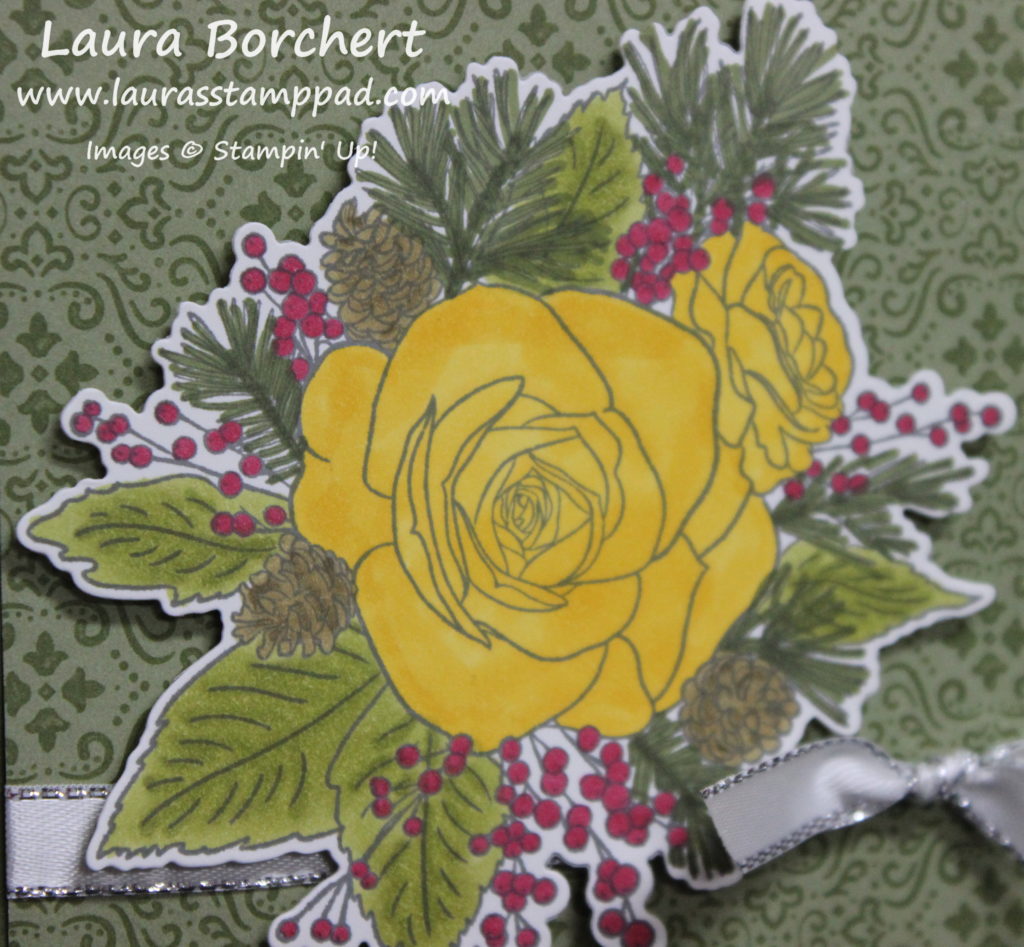
For the roses, I stamped them in Basic Gray and colored them with Stampin’ Blends. Cherry Cobbler, Mossy Meadow, Poppy Parade, Soft Suede and Old Olive were the colors I used! After die cutting it out, I added it to the card front and just trimmed off the part hanging over. To finish it off, I added some of the Gold Glittered Enamel Embellishments! STUNNING!!!

Be sure to check out this post and this one for more on this amazing bundle full of warmth & love. It is while supplies last so don’t delay. Click the supply list below to get yours today!

Happy Stampin’

~Laura

Product List
Christmastime Is Here Suite Bundle (English)
$112.50
Basic Gray Classic Stampin' Pad
$7.50
Cherry Cobbler Stampin' Blends Markers Combo Pack
$9.00
Mossy Meadow Stampin' Blends Combo Pack
$9.00
Soft Suede Stampin' Blends Markers Combo Pack
$9.00
Poppy Parade Stampin' Blends Markers Combo Pack
$9.00
Old Olive Stampin' Blends Markers Combo Pack
$9.00

Christmas Roses!!!

Posted on

Happy Tuesday!!! Today’s technique is a bit tricky…..stamping or coloring! Can you guess which one I did on these Christmas Roses?? Which one do you prefer??

Christmas Roses, www.LaurasStampPad.com

I am just loving the Christmas Roses Stamp Set that just came out this month! The image is stunning and so fun to color! The card above is actually colored rather than stamped with all of the coordinating images. While stamping was easy to do as the images are photopolymer, I found coloring to be more fun!

This card was created super quickly as I just stamped in the image in Basic Gray and then colored it with Stampin’ Blends. Next, I die cut it with the coordinating Roses Dies. After that, I added it to the card. The card base is Mossy Meadow with a piece of the Christmastime Is Here Designer Series Paper!!! While the Suite has a lot of gold in it, I decided to branch out and use some silver for the card.

Coloring Roses, www.LaurasStampPad.com

Meanwhile, stay tuned for tomorrow’s card where I show more fabulous samples using the Christmastime is Here Bundle. Remember it is while supplies last so get these fun products before they are gone!

If you would like to watch me show off these Christmas Roses, check out the video below or click here! Be sure to give the video a thumbs up if you liked it and don’t forget to subscribe if you are new. If you would like a notification when I post a new video, be sure to click the bell right next to the subscribe!!!

Happy Stampin’

~Laura

Product List
Christmastime Is Here Suite Bundle (English)
$112.50
Christmas Rose Stamp Set (English)
$38.00

Let’s Do This Together!!!

Posted on

Happy Monday!!! Happy November!!! Don’t panic the holidays are still “around the corner”…..at least that’s what I keep saying to myself to so I don’t panic. Everything is better when you have a friend with you!!! So let’s do this together and we will be golden!!! We got this!

Let's Do This Together, www.LaurasStampPad.com

Is this not the best greeting ever???? I love it! It’s so true and perfect! This card is perfect for the just because, the friend who is going through a rough time (cough cough being a mom) 🙂 , or just any day these next couple of months as we tackle the holidays! I think I am going to give it to a friend of mine who just had a baby! Going through that with a friend who can cheer you on the days you think you can’t take another poopy diaper or celebrate with you that they finally slept for X amount of hours. That makes life so much better! Am I right?!?!

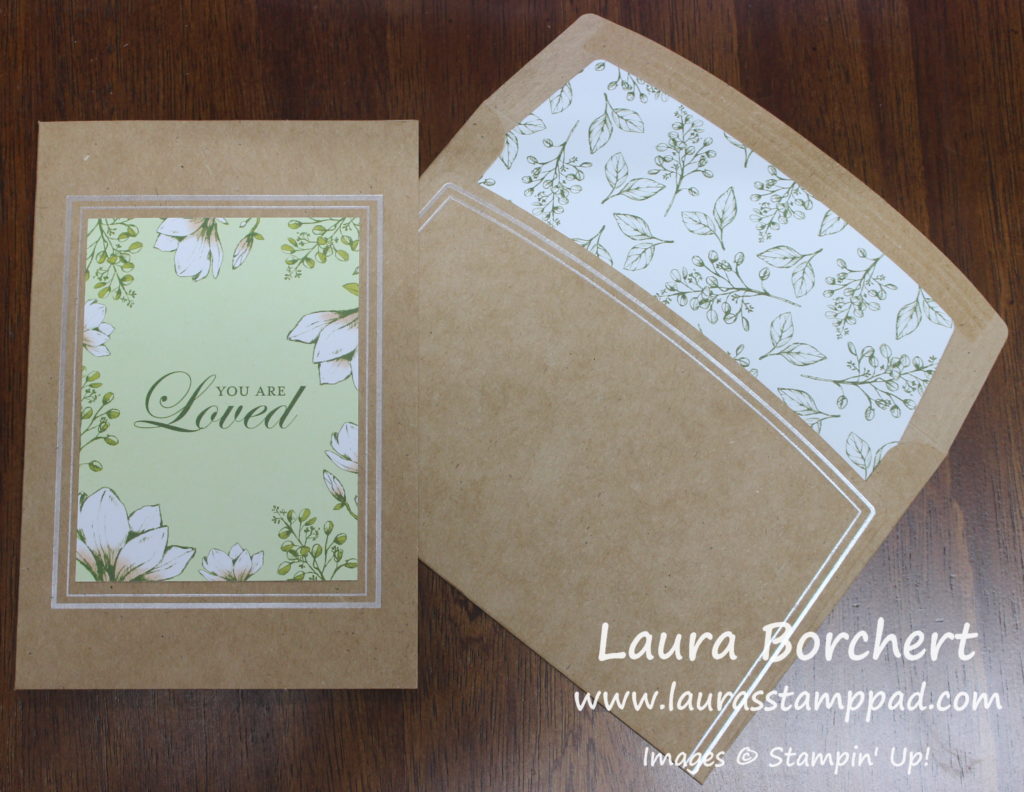
This card was super simple because I used the Magnolia Lane Memories and More Card Pack and Envelope Pack. You may look at these and think they are for scrapbooking only but no no no. I, too, thought that same way so I would get a pack here and there and save it for my scrapbooking. Now I use them for card making and it is magical. Quick and simple beautiful cards. Some of the cards have greetings on them and they are fabulous. Others have an open area that you can stamp a greeting into! They are perfect! The one above uses the stamp from Good Morning Magnolia!

You are Loved, www.LaurasStampPad.com

You will notice that the one up top is a larger card that covers up the silver foil frame. This card here uses a smaller card and it shows off that fabulous foil! Oh so beautiful and simple! I love it! Check out the supplies listed below so you can create quick and simple cards to have on hand! For more fun samples using the Magnolia Suite, click here!

Happy Stampin’

~Laura

Product List
Magnolia Lane Memories & More Card Pack
$11.00
Magnolia Lane Memories & More Large Specialty Cards & Envelopes
$12.50
Good Morning Magnolia Cling Stamp Set
$36.00
Early Espresso Classic Stampin' Pad
$7.50


Magnificent Magnolia!!!

Posted on

Happy Monday!!! Wow did I have an amazing weekend!!! So much fun at Vacation Stampin’ School with 100+ of my fellow stamping sisters. Also, it was a nice little getaway even for just 24 hours! I’ll chat more about that this week. Today, I’m sharing this magnificent magnolia that I think is just stunning!!!

Magnificent Magnolia, www.LaurasStampPad.com

I colored this card and was a little unsure if I liked it so I set it aside. Later, I glanced over at it on my table and was like WOW!!!! I thought it was stunning. I think this happens a lot for me so any time you don’t think someone looks good, set is aside and come back to it!!!

First, I started with a Soft Seafoam card base. Next, I took the magnolia from the Good Morning Magnolia Stamp Set and stamped it in Basic Gray. I like to use that color when coloring because it gives a lighter look rather than such a bold image. Then I colored it in with Stampin’ Blends!!!

Stampin' Blends Colors, www.LaurasStampPad.com

These were the colors I used! Light and Dark Soft Suede were used for the branch. Old Olive (both light and dark) were used for the leaves. The flower I added a Daffodil Delight center and some touches of Flirty Flamingo on the petals!

After coloring it, I added a small piece of Rococo Rose to the left side after running it though the Big Shot with the line from the Stitched Nested Labels Dies. How fabulous is that little stitched edge? It gives so much to this card a and it’s so simple!

Someone So Special, www.LaurasStampPad.com

Using the greeting and another flower from the Good Morning Magnolia Stamp Set, I decorated the inside! I LOVE IT!!!

Check out the supplies listed below for this magnificent magnolia card so you can make this fabulous card! Don’t forget to use you Bonus Bucks before the end of the month!

Happy Stampin’

~Laura

Product List

Pale Pink Birdies!!!

Posted on

You all know I love the color pink. This card inspiration came from the Bird Ballad Designer Series Paper and I was super excited to use pink for a birdie card. These pale pink birdies are perfect for a card for any occasion. What occasion would you use this look for?? Let me know in the comments below!

Pale Pink Birdies, www.LaurasStampPad.com

Isn’t this card just precious with the soft colors, beautiful flowers, and little birdies???

I started with a Petal Pink card base measuring 4-1/4″ x 11″. This size works well when tying ribbon around the card because then you use less ribbon. 🙂 Next, I layered a piece of the Bird Ballad Designer Series Paper onto Soft Suede cardstock! Before adding it to the lower half of the card front, I stamped a few leaves from the Free As A Bird Stamp Set in Petal Pink Ink. This adds a little decoration to the top solid portion but without being too bold.

Stitched Labels Dies, www.LaurasStampPad.com

After laying on the designer paper, I tied some Very Vanilla Scallop Lace Trim around the card front and into a knot. Then for the focal point, I die cut out a label from the Nested Stitched Label Dies. These are the Bundle & Save 10% dies that go with the Free As A Bird Stamp Set. Using that stamp set, I stamped the greeting and the birdies in Basic Gray. Next, I colored in the branch and birdies with Stampin’ Blends Markers!

Coloring birds with Stampin' Blends, www.LaurasStampPad.com

I added the pale pink birdies to the card front with Stampin’ Dimensionals for a little bit of texture and so the image was smooth over the ribbon! To finish it off, I added a few Rhinestones for some bling!

Pink Petal Flowers, www.LaurasStampPad.com

For the inside, I added a piece of Whisper White (4″ x 5-1/4″) and stamped the leaf image and then the little flower. Using Stampin’ Blends, I colored them in for the perfect coordination!

If you want to recreate this card, check out the supply list below! If you want to see more samples using the Free As A Bird Set, click here and here!

Happy Stampin’

~Laura

Product List

For the Love of Felt!!!

Posted on

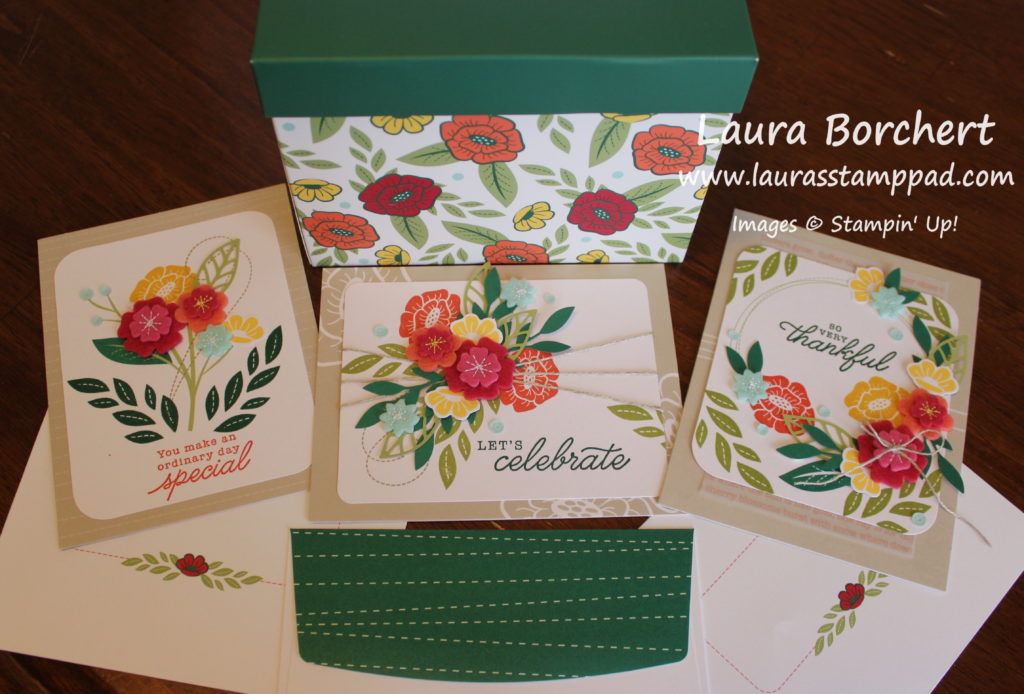
Stampin’ Up does some amazing Project Kits! These are perfect for gift giving because some some all inclusive meaning all you need is scissors. Some are more detailed and some require the purchase of additional supplies like stamps and ink. The awesome thing about the ones that don’t come with stamps and ink is that you can purchase multiples to make for gifts and not end up with 5 stamp sets. All inclusive are good to give the entire thing and the others are perfect for making and gifting or enjoying yourself! The For the Love of Felt Kit is fun to make and give!

For the Love of Felt, www.LaurasStampPad.com

This kit is super cute with 3 designs of cards, 4 each. The envelopes have a pretty green pattern on the back lip and the front has a cute box to write the address or name in! All of this fits into a little card box that coordinates. It scream gift box! Actually I think the box looks like a cute recipe box but either way I love it!

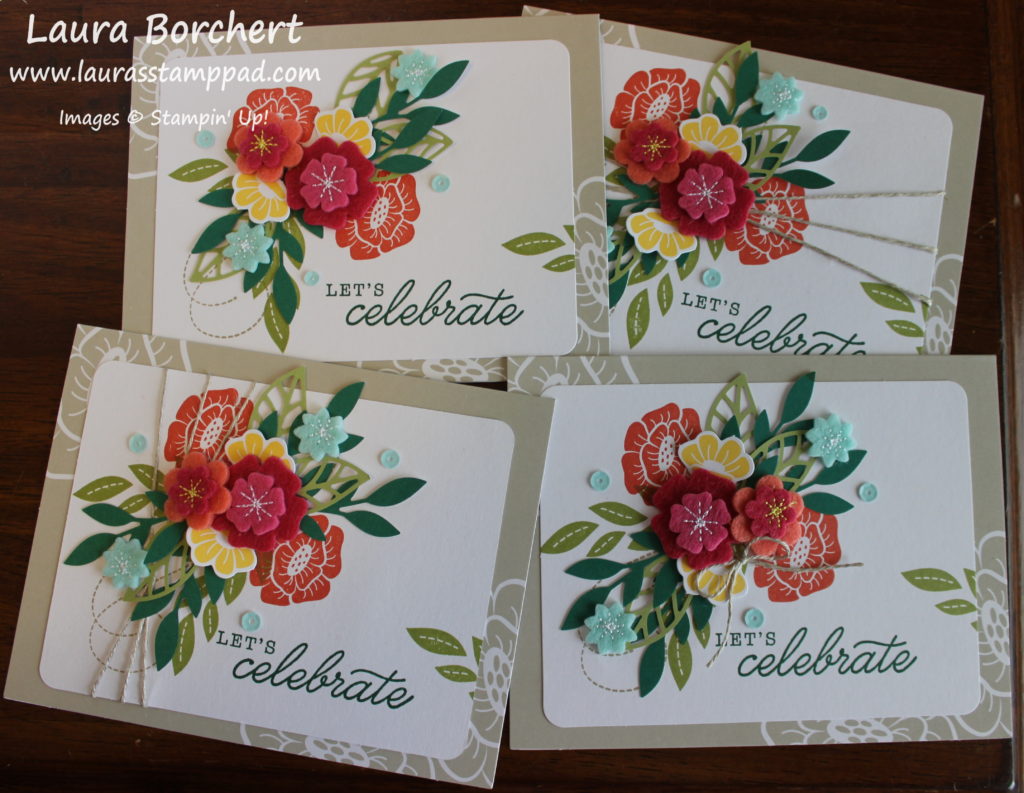
Felt Flowers, www.LaurasStampPad.com

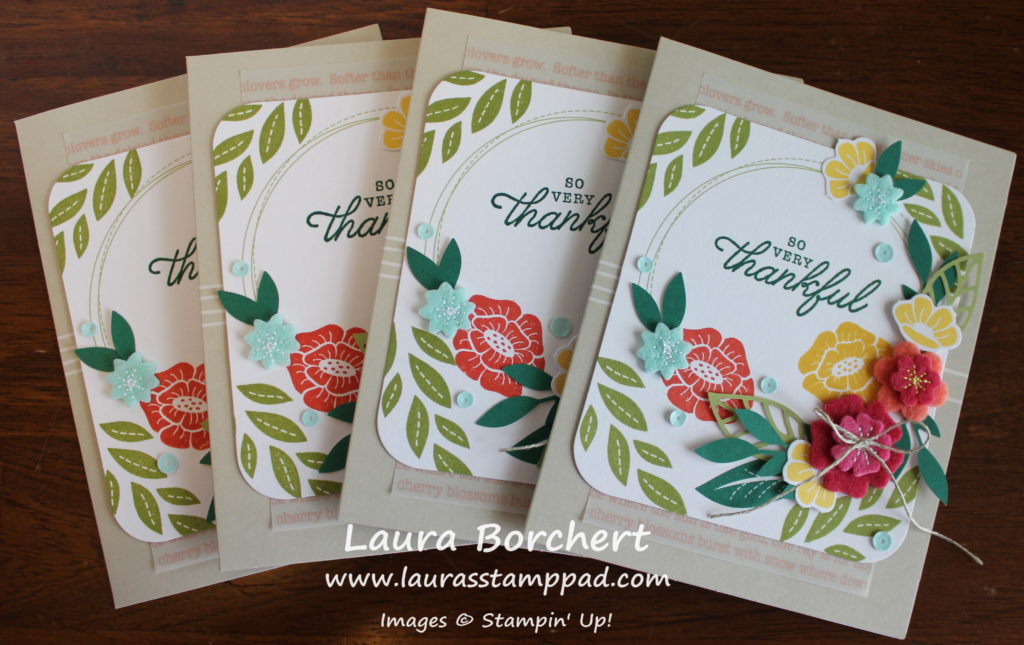
This was the hardest card of the set I think! There are lots of details and layers and flowers! I would almost suggest doing this one last because it also has a ton of pieces. I did it first and was counting out all the pieces to make sure I wasn’t using them all up. If it was the last set, you wouldn’t have to worry about that. First, I stamped the leaves on all 4 corners. Then I built up the outside and worked my way to the big flower in the middle. This means I did the little blue and yellow ones at the top and the coral and blue off to the left and then slowly worked my way to the main focal point. For the leaves, I used Mini Glue Dots to secure them.

Stampin' Up Project Kit, www.LaurasStampPad.com

This card was the easiest one. I whipped these 4 together really fast. Stamp, stamp, glue, glue! For the felt flowers, I used Multipurpose Adhesive Glue.

Bouquet of Flowers, www.LaurasStampPad.com

These cards I did a little different for each one….a little on purpose! So, the first card I did (top left), I finished it and realized I forgot the thread. So I nailed it on the second card (top right) and wasn’t so sure I liked it. The thread went right over the coral flower. For the next card, I did the thread vertical (bottom left) and really liked that one. On the last card, I thought I might as well try another option just to see so I went with a little bow. Following the direction is fun but doing your own thing is even more fun!

Which card is your favorite?? Let me know in the comments below. Also, let me know if you like getting handmade greeting cards for a gift or giving handmade greeting card as a gift.

If you would like to see the For the Love of Felt Project Kit, check out the video below or click here! Be sure to give the video a thumbs up if you liked it and don’t forget to subscribe if you are new. If you would like a notification when I post a new video, be sure to click the bell right next to the subscribe!!!

Happy Stampin’

~Laura

Product List

You Mean the World to Me!!!

Posted on

You Mean the World to Me! This greeting is so amazing. It is perfect to send to a friend you miss. This card would work for a Mother’s Day card or even a birthday card! Get Well or Thinking of You would work too. It just all depends on what you put on the inside! It’s so beautiful!

You Mean the World to Me, www.LaurasStampPad.com

This card is super simple because the amazing Bird Ballad Designer Series Paper does all the hard work for you. I’m so in love with these colors and those beautiful flowers and birds! The pattern is perfect for any occasion.

I started with a Pool Party card base. Next, I layered on a piece of Daffodil Delight measuring 4″ x 5-1/4″. Then I layered on a piece of the Bird Ballad Designer Series Paper measuring 3-3/4″ x 5″. It is as simple as that!

Now it is time to embellish and add a greeting! I went with some of the Whisper White Flax Ribbon that I attached with a bit of adhesive. Then I made sure the Stampin’ Dimensionals secured it well with the greeting. For the greeting, I stamped it from the Free As A Bird Stamp Set in Basic Gray Ink. I used the coordinating Nest Stitched Labels to die cut it out. These labels are perfect for greetings and that stitching adds so much extra to it. I love it! To finish off the card, I added a few Gingham Gala Adhesive Backed Sequins for texture and a pop of shiny color!

Simple Stamped Flowers, www.LaurasStampPad.com

I went with a few simple stamped flowers in Daffodil Delight on the inside. These flowers are from the Free As a Bird Stamp Set too!

If you want to make this card, check out the supplies listed below! Click here to see more samples using these products too! Also, always remember that you mean the world to me. Thank you for reading my blog, following me on social media, and watching my videos! I appreciate it so much!

Happy Stampin’

~Laura

Product List

Let’s Celebrate You!!!

Posted on

This greeting – Let’s Celebrate You – is perfect for any occasion. It would work for birthday, promotion, achieving a goal, becoming a mom, graduation and so much more!!! We can celebrate YOU each and every day!!!

Let's celebrate you, www.LaurasStampPad.com

Last week, I did another fabulous card using this Bloom & Grow Stamp Set and I just can’t get enough! That’s no surprise though since you all know I love flowers!

I started with a Soft Sea Foam card base. Next, I stamped all around the edges of the base with the flower image from the Bloom & Grow Stamp Set. I stamped these flower in Mint Macaron for that slightly darker shade of green! Clean off the stamp and then stamp 2 more in Basic Gray onto scrap white cardstock! I like using Basic Gray when I’m coloring because it makes the image softer looking. It tends to blend in better than being so bold like black can be.

Color Options for coloring flowers, www.LaurasStampPad.com

Using Stampin’ Blends, I colored the beautiful flowers and greenery. There are so many fun options for this. I was blown away by all the fabulous looks that my stampers combined at class. I wanted to keep all of their cards!!! Once the image is colored, I die cut it with the coordinating framelits Budding Blooms (Bundle & Save 10%).

The greeting was stamped from the Bloom & Grow Stamp Set onto one of the NEW Stitched Nested Labels. These are so fun and pretty!!! Two of the cards above have a greeting stamped in Lovely Lipstick Ink and the bottom one was stamped in Rich Razzleberry Ink! The greeting was added to the card with Snail Adhesive but the flowers are popped up on Stampin’ Dimensionals! To finish off the card, I used some of the Basic Sequins and Glittered Enamel Shapes!

Bloom & Grow Stamp Set, www.LaurasStampPad.com

For the inside of the card, I just stamped some flowers from the Bloom & Grow Stamp Set!!! If you love to color, this card is perfect for you!!! Check out the supplies listed below so you can recreate it! Don’t forget that today and every day….Let’s Celebrate You!!!

Happy Stampin’….and colorin’

~Laura

Product List