Pink is my favorite color and I just love flowers so this card makes me super happy! The Color & Contour Stamp Set has been on my desk a lot lately. This card could be made in every In Color with the supplies I used!!! Check out the list of items below so you can make some too!
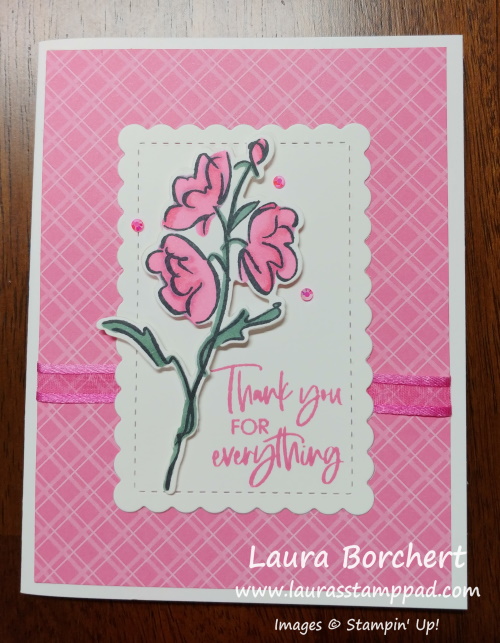
I started with a Basic White thick cardstock base! When I create a card with the base of white or vanilla, I like to use the Thick Cardstock! Next, I took a piece of the In Color Designer Series Paper (4″ x 5-1/4″) and wrapped some Polished Pink Open Weave Ribbon around it. This ribbon comes in all 5 of the in colors! Adding just a small piece across the card front adds a little texture and fun to the card but no need for a bow and only uses a small amount!
For the focal point, I die cut one of the scallop rectangles from the coordinating Scalloped Contour Dies. LOVE THESE!!! The greeting was stamped in Polished Pink and then I added it to the card front!! The flower image was stamped in Memento Black Ink and colored with Stampin’ Blends! Then I die cut it out with the same Scalloped Contour Dies and added it to the label with Mini Stampin’ Dimensionals!

For the inside of the card, I added a little leftover strip of the designer paper to the left hand side. Then using the little dots of the Color & Contour Stamp Stamp Set, I stamped them in the right hand corner. To get a little variation of color, I inked it up and stamped 3 times, moving the stamp around a bit.
I love this Color & Contour Bundle so much because it’s super versatile. This card could be created in any color you like too! Check out the supplies listed below to see what I used! If you want them all, click ADD ALL TO CART for quick and simple shopping!
Happy Stampin’
~Laura
Product List")

 Designer Series Paper")


 Open Weave Ribbon")


")
 Specialty Designer Series Paper")


 Designer Series Paper")


 Woven Ribbon")


")
")


 Cardstock")


")


 Designer Series Paper")
 2020–2022 In Color Ribbon")


")


