Technique Tuesday – Simple Yet Fabulous!!!

Posted on

Happy Tuesday everyone!!!! I have two great little techniques to share with you today that are simple and yet super cool!!! You may have seen them before but if not you will be blown away!!!

Double Polka Dot Emboss, www.LaurasStampPad.com

I love so many things about this card – the colors (Navy and Coral), that bow, the greeting, and the double embossing!!!!

Supplies Needed: Polka Dot Embossing Folder, Decorative Label Punch, greeting stamp set of your choice and ribbon of your choice

I started with a piece of Whisper White measuring 4″ x 5-1/4″ and I ran it through the Big Shot in the Polka Dot Embossing Folder. I then shifted it over a bit and ran it through again to get those second dots. You can also flip it over and off set it to get a cool look. Who knew you could double emboss and get such a cool look? LOVE IT! Then I wrapped the Calypso Coral Seam Binding around it and decided I wanted a bow rather than a knot. At first I didn’t like that it came out sideways but now I love it. Every bow doesn’t come out perfect but they all look amazing!!! Then for the greeting, I stamped the birthday greeting from the Tin of Cards Stamp Set (love that font) in Night of Navy on a scrap of Whisper White. I punched it out with the Decorative Label Punch and then I punched another one in Night of Navy to layer it. Of course both punched pieces are exactly the same size so I cut the navy one in half long ways. Then I add adhesive to the stamped greeting on the top and bottom and attach one of the navy pieces to the top and one to the bottom. You can have a little bit showing or a lot; it’s all up to you! This works with lots of different punches for that perfect layering effect and pop of color!!! (For a long time, I punched 2 to get the same look but it was so bulky on the backside, then I saw this and use it all the time!!!) Of course I added the greeting to the card with Stampin’ Dimensionals!!!!

I know I am not the best with typing out instructions so I did a Video Tutorial for you!!! I show a few different ways to layer these and another fabulous tip with punches!!! Check it out below or click here!!!

Over the weekend I passed 1,000 Subscribers on my Laura’s Stamp Pad Channel! That is super exciting!!! Thank you to all of the subscribers and if you aren’t one of them, what are you waiting for???

Happy Stampin’

~Laura


Polka Dot Perfection!!!

Posted on

Polka Dot Ombre Background, www.LaurasStampPad.com

I love how this card uses a lot of my favorites – polka dots, ombre, pink, and flowers!!!! Woot Woot! I started with a card base of Watermelon Wonder and then cut a piece of Whisper White measuring 5″ x 3-3/4″. I stamped the dots from the Perpetual Birthday Calendar Stamp Set in Watermelon Wonder and Calypso Coral. I stamped 2-3 times before going back to the ink each time, this is how I got those various shades! I love it!!! Also, when it comes to the random background stamping be sure to fall off of your paper so it looks more like a background and not just in the middle of the paper. I stamped the flower and greeting in Memento Black Ink from the You’ve Got This Stamp Set!!! Love it!!! This would be a fabulous card to make multiples of and you could do it in so many colors!!!

What color would you like to use for your polka dots??? Let me know in the comments below!!!

Happy Stampin’

~Laura


Fabulous Friday!!!

Posted on

Happy Friday everyone!!! I don’t even know what day it is anymore! We left for our family vacation on Saturday, August 1 and now I’m home but can’t believe it is already August 7th and my days are all messed up! It is crazy how vacation can do that to you!!! We had a wonderful time together with beautiful views and I didn’t get sunburned! I call that a win!!!

Me Lake

Lake

It is so beautiful and peaceful in the mornings on the lake!!! LOVE IT!!! In the afternoons when it was really hot and sunny out, I spent a little bit of time in the cabin working on some wedding invites for a Bride!!! I am glad to be back home now and get on a regular schedule again and see all my stampers again! I really miss them when I go a week to a week and a half without seeing any of them! 🙂 You know you are doing something right when a week away makes you miss it all! I did place my Holiday Mini Catalog Pre-Order and can’t wait till it arrives! I will be playing with the goodies, making videos, and prepping for upcoming classes so stay tuned!!! Be sure you are subscribed to my YouTube Channel so you can see sneak peaks!!!

Weekly Deals 8.4

Of course, it just isn’t Friday without the Weekly Deals!!! Oh how I love ribbon and it is my #1 embellishment so I will be stocking up this week! Also, Stampin’ Up added more items to the Clearance Rack this week so be sure to check that out here! I spotted some great items for Holiday Cards at a fabulous price!!!

I hope you all have a great weekend!!! My weekend is all about weddings – family friend’s wedding on Saturday and a big Bridal Fair on Sunday!!! I LOVE WEDDINGS!!!! Bring on love, laughter, and good times!!!

Happy Stampin’

~Laura


Woodgrain Wonder!!!

Posted on

Woodgrain Emboss Resist, www.LaurasStampPad.com

Are you wondering how I created this awesome woodgrain look??? I used the New Color Me Irresistible Specialty Designer Series Paper!!! This piece is the Tip Top Taupe woodgrain embossed piece. I used my Chocolate Chip Sponge Dauber to color the cardstock. This is how I got the two shades of brown. I love it!!! I just cut these stripes and added it to a piece of Mossy Meadow measuring 4″ x 5-1/4″. I added this to a card base of Tip Top Taupe!! For the greeting, I used the Tin of Cards Stamp Set which is fabulous! I love a good scroll-y font!!! It is stamped in Mossy Meadow and then punched out with the Decorative Label Punch! I punched a piece of Chocolate Chip as well to layer it. I cut the chocolate chip one in half. Then add adhesive to the back of the white greeting piece and add one of the chocolate chip pieces to the top and the other to the bottom. Then you can adhere it to your card with Stampin’ Dimensionals!!! It is as simple as that!! The woodgrain makes a wonderful man card, fence, furniture and so many other great looks on a card or box!!!!

If you would like to see all of the paper in the Color Me Irresistible Designer Series Paper Pack and adding color to the paper, check out the video below! Be sure to give it a thumbs up if you liked it!!! You can also see some more cards created with this paper here!!

Happy Stampin’

~Laura


Washi Tape All Over!!!

Posted on

Washi Tape Diagonal, www.LaurasStampPad.com

There are so many fun ways you can use Washi Tape on your project – cards, scrapbook page, home decor piece, or decoration!!! I love this card because of all of the bright colors and the fact that it took me about 2 minutes (if that) to create…..even more if I didn’t color in the cake! 🙂 I used a piece of Whisper White measuring 4″ x 5-1/4″ and I placed the Cherry on Top Designer Washi Tape on it diagonally. There is no measurements or correct way to do it, just start placing it down!! The first piece I laid down was the dots, then the green dots, then the blue, and finally the stripes! To be completely honest, I stamped afterwards which worked out fine. I just pulled out a stamp set and looked to see what would work. I used the Endless Birthday Wishes Stamp Set for the cake and the greeting. I stamped the greeting in Bermuda Bay and the cake in Stazon Black! I layered this piece on a Bermuda Bay card base and was all set! See….2 minutes or less!!!

What is your favorite way to use Washi Tape??? Here is another sample!

Happy Washi Tappin’

~Laura


Technique Tuesday – Precious Little Purse!!!

Posted on

Happy Tuesday!!! You know what that means…..I have a fabulous technique to share with you today!!! These little purses are just so precious! They are little and perfect for adding some hand-stamped cards, candle, candy, lotion, nail polish, cookies, or just about any little gift item!!!

Mini handmade bag, www.LaurasStampPad.com

Isn’t it adorable??? I love this one the best with the Bermuda Bay accents!!! I created a few of these and have made a few of my own modifications. I got the idea from Dawn. You can check it out here as well as a video tutorial! Thank you Dawn for the inspiration!

SUPPLIES NEEDED: Cardstock, Designer Series Paper, Fast Fuse or Tear and Tape, Brads, and 1/16″ Handheld Punch

You will need the following pieces for your Purse:

For the Designer Series Paper, cut 2 pieces measuring 6 1/4″ x 3 1/2″

For the solid color accents, you will need the following:

~1 Piece measuring 2 1/2″ x 5 1/4″ (score at 1/2″ all (4) sides) for the bottom

~2 Pieces measuring 1/2″ x 8 1/2″ for the handles

~4 Pieces measuring 1/2″ x 6 1/4″ for the trim

I used the Bohemian Designer Series Paper for my purse! You can always modify to make a taller purse by changing the dimension of the Designer Series Paper (DSP) (adding inches to the 3-1/2″ number). You will start off by adhering your DSP together along the 3-1/2″ side to make. This will make a 3-1/2″ x ~12-1/4″ strip of paper. Then take the bottom piece of cardstock and cut one of the little corner pieces to create tabs so you can fold them in and make a little box bottom! Now you will take your DSP and wrap it around the little box bottom on the outside. The more I played with this, I prefer to start in the middle on the short side so that my seams are on the sides rather than in the middle/front. Now you can add Tear and Tape to all four of the 1/2″ x 6-1/4″ pieces and then use 2 for the bottom trim and 2 for the top trim!

Mini Purse made of Paper, www.LaurasStampPad.com

The last two stripes (1/2″ x 8 1/2″) are the handles! Gently run them over your Bone Folder like you are curling ribbon to help with the curvature of the handles. Also, on each of the four ends of the strips, add a little score like 1/2″ up. This will help you determine how deep to place the handles in the purse and each one will be even because you will go down to that score line!!! You can jsut adhere the handles on and you are done or you can use your 1/16″ Handheld Punch to create little holes and add brads. I used the Antique Brads in the purse above and Silver Mini Brads for the purse up top!

Bohemian Purse, www.LaurasStampPad.com

You are all done now! You can always add some embellishments like a flower using the Spiral Flower Die like this or any other fun foo foo!!! I have so many fabulous little purses in mind to create for lots of occasions! With the Holidays around the corner, these would make adorable Halloween Treat Bags or Christmas gifts or neighbor treats! Oh the possibilities!!!

What colors or Designer Series Paper would you use for your Purse??? Leave me a comment down below!

Happy Stampin’

~Laura


Center Pop Up Easel Card!!!!

Posted on

I have done a few different pop up cards. You can check those out here and here! I just think a card that pops up or out is super fun because it is different than a typical card. I also love it when the card looks great on display because I always love displaying my cards for a while to enjoy whether it be on the fridge, on the kitchen table, or near my stamp desk!!! Check out this new POP up card!!!

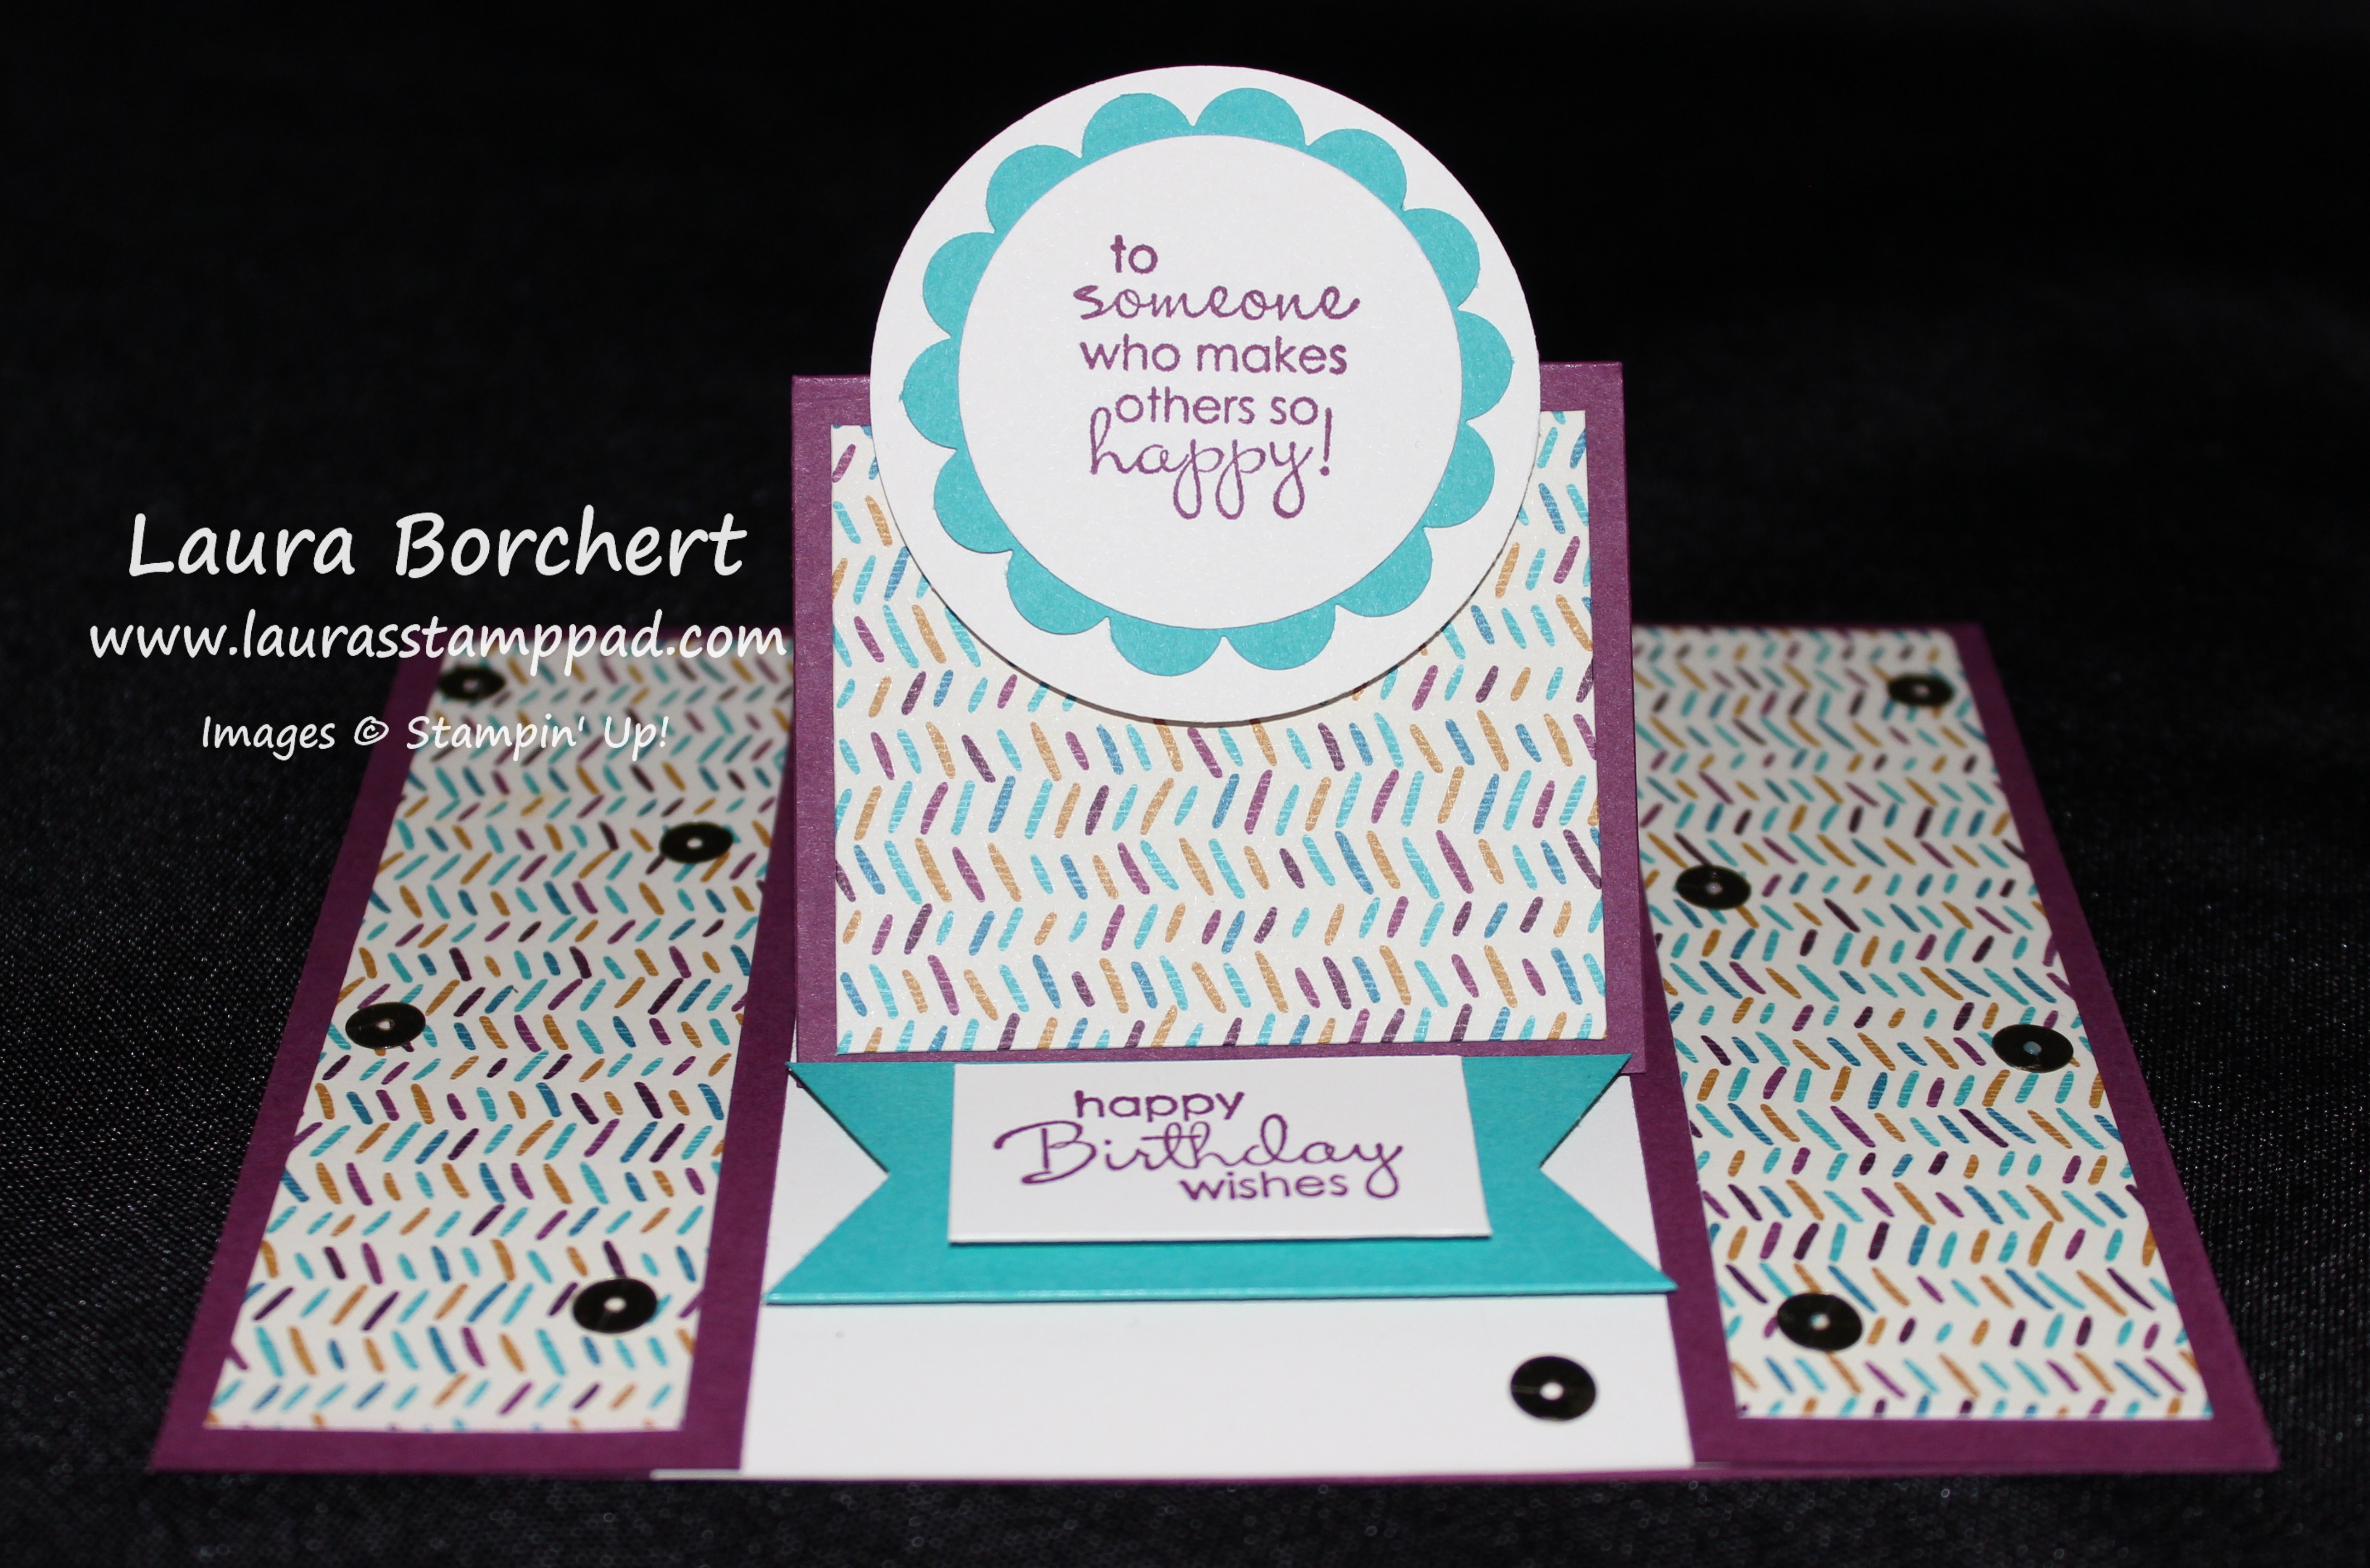
Pop Up Center Easel Card, www.LaurasStampPad.com

How cute?!?!?! Love it and those gold sequins are so fabulous! I really think I am going to start using them more because they really finish a card off well!!! Let’s get started on how to make this card!!!

Starting with a 8-1/2” x 5-1/2” piece of Rich Razzleberry cardstock, you will fold your card in half like you did to create a typical card base. Now place it in your Stampin’ Trimmer with the 5-1/2” along the bottom. You will now cut at 1-1/4” from the bottom up to the center score line (4-1/4”). Slide it along and cut at 4” up to the score line (4-1/4”).

You will need a Very Vanilla piece measuring 3” x 4-1/4” and place that in the center of your card (on the inside). Now you can glue down the left and right sides and add your Bohemian Designer Series Paper to each panel. The Designer Series Paper side panels measure 1-1/4” x 4” each. You will also need 2 Bohemian Designer Series pieces measuring 2-1/4” x 1-7/8” for the center piece. Before adhering them on, fold the center flap in half.

Center Easel Card, www.LaurasStampPad.com

Now you can decorate. Be sure to add a greeting or embellishment to the inside with Stampin’ Dimensionals so it can hold your easel up! I stamped the greeting from the Petite Pairs Stamp Set on a scrap piece of Very Vanilla and layered it onto a piece of Bermuda Bay which I punched the ends with the Triple Banner Punch!! Both the greeting and then banner are adhered with Stampin’ Dimensionals. I wanted this part to be popped up well so it would hold the easel up!! For the greeting on the front, I stamped it in Rich Razzleberry and punched it out with the 1-1/2″ Circle Punch. That is layered on a Bermuda Bay 1-3/4″ Scallop Circle Punch and then a 2″ Circle Punch! All of these pieces are layered with Snail Adhesive. I adhered it to the card with Stampin’ Dimensionals though. Be sure to adhere only on the bottom half so that it pops up!!! To finish it off, I added some Gold Sequins. I have been using Multi-Purpose Glue but I have found that Two-Way Glue works really well and doesn’t bubble up in the middle hole!!! Super cute! Love it!

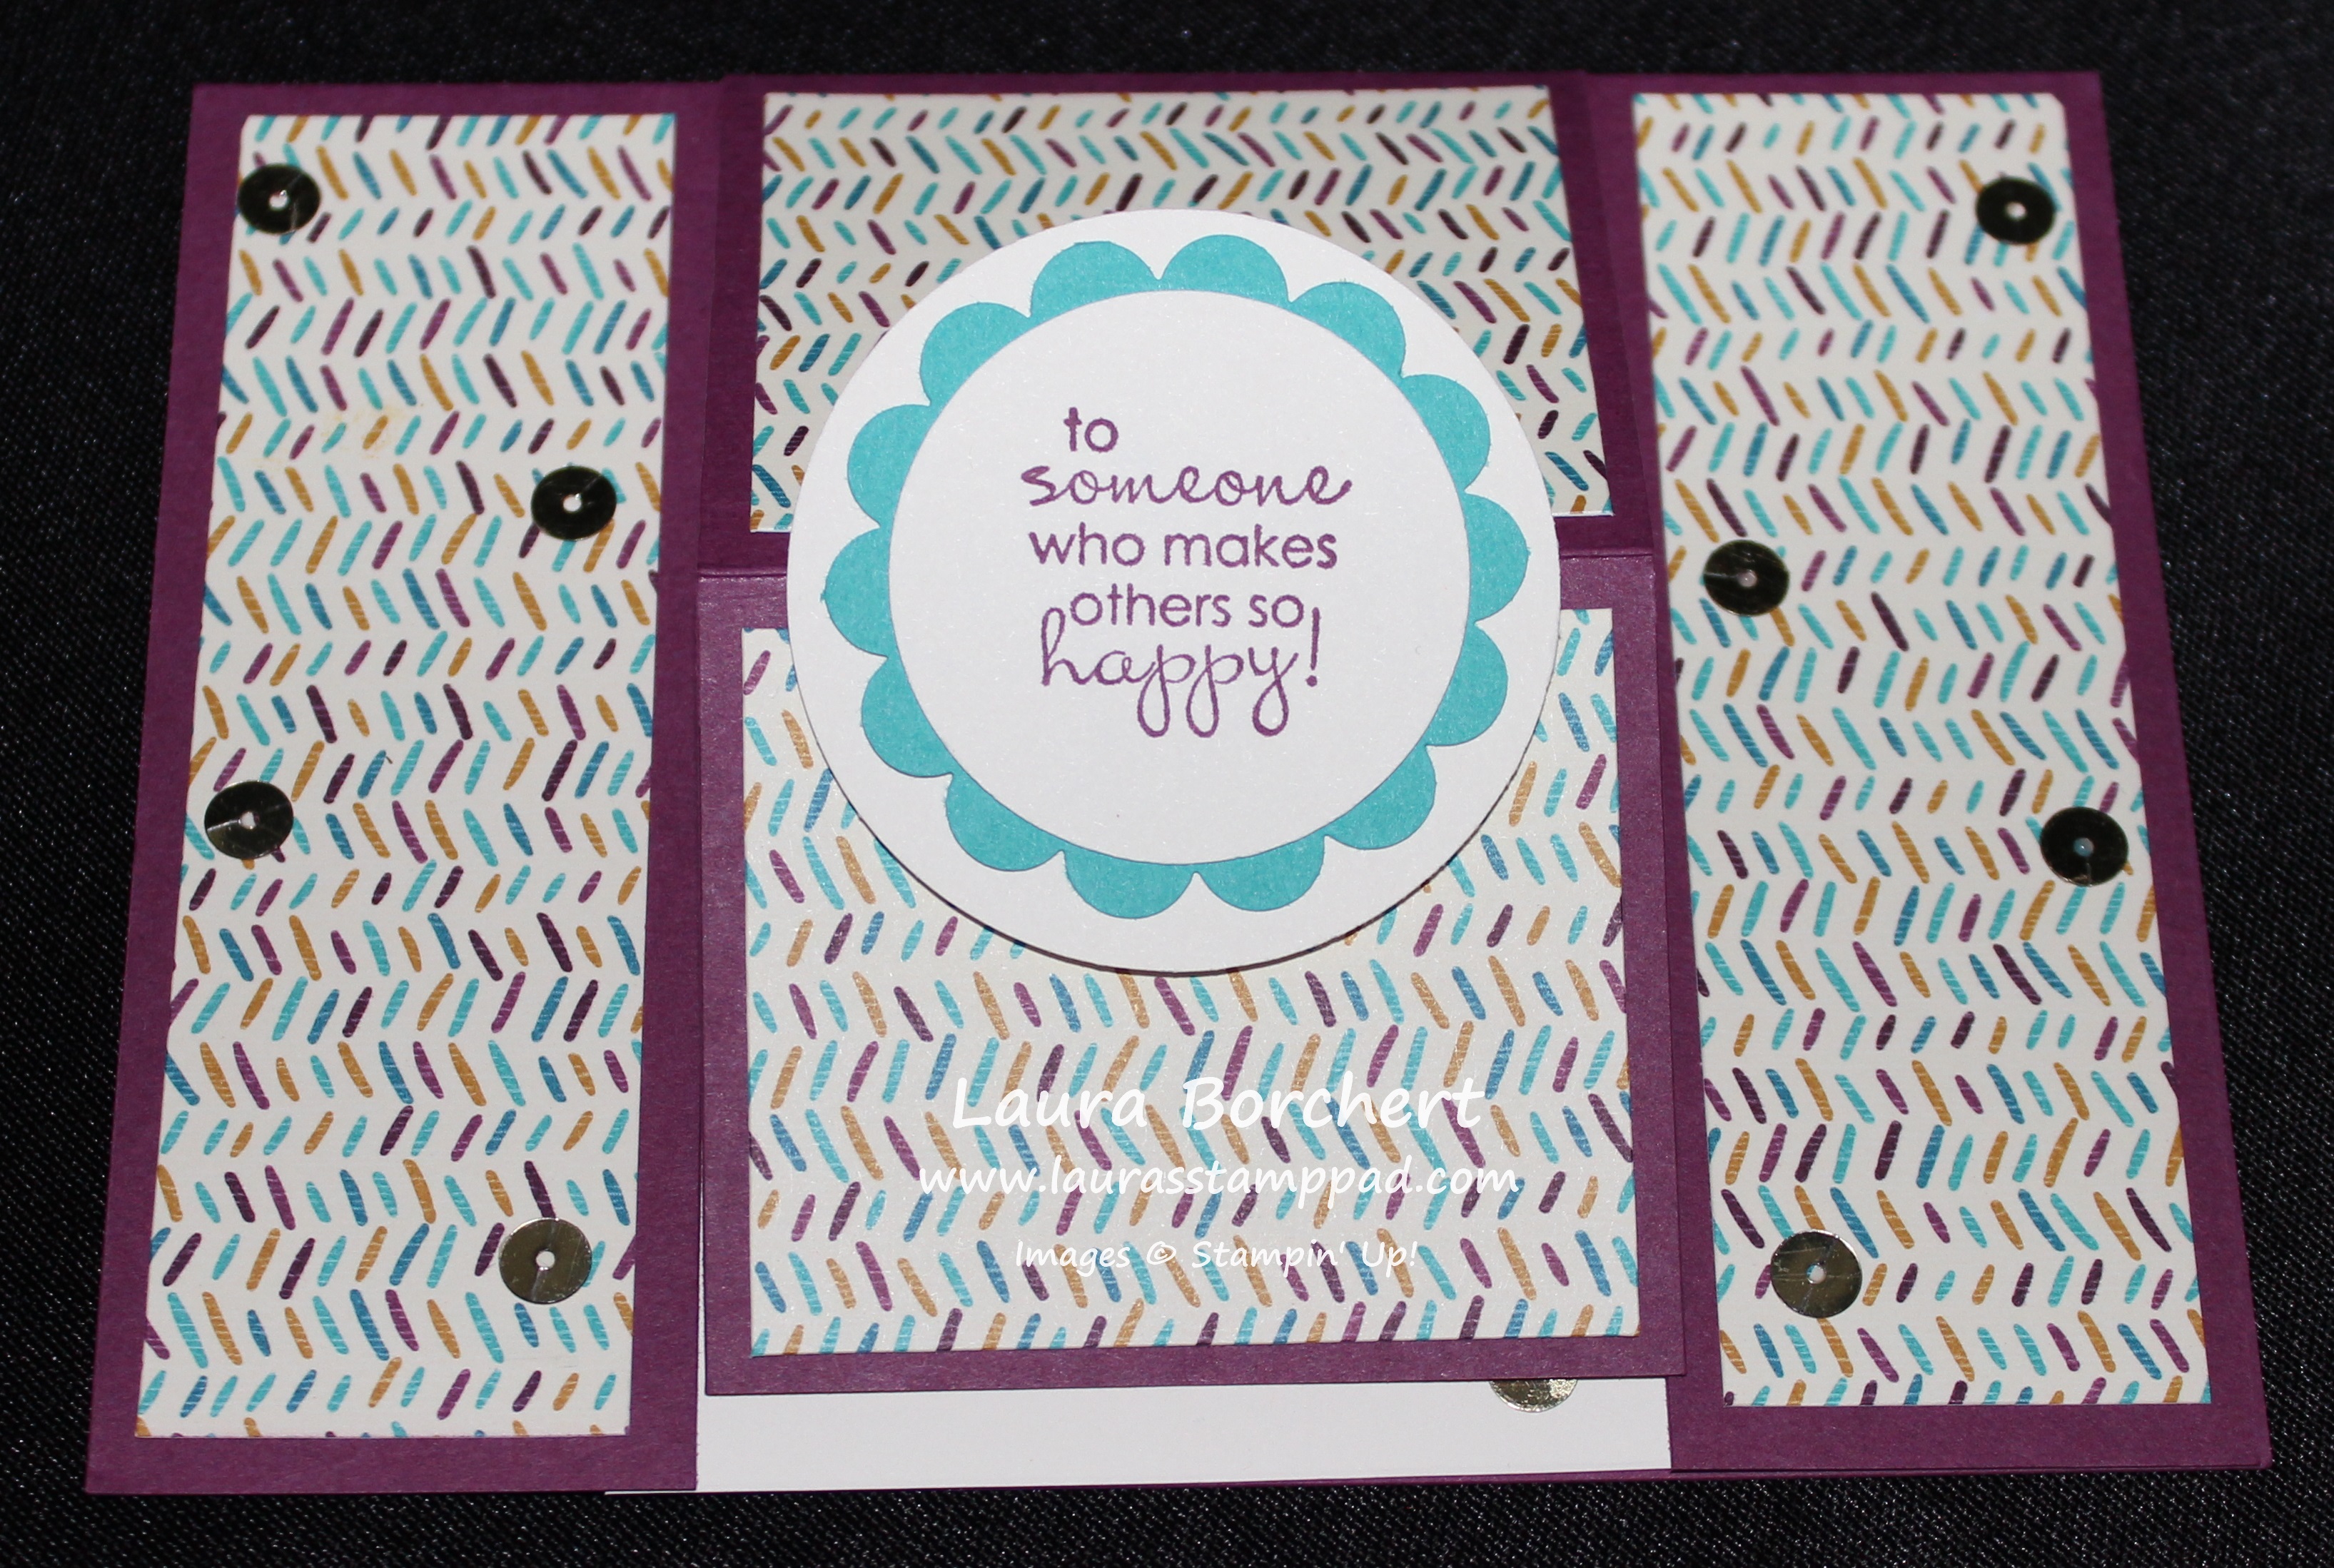
Flat Center Easel Card, www.LaurasStamPPad.com

The other bonus is that this card still fit in a Regular Medium Envelope! Woot Woot!

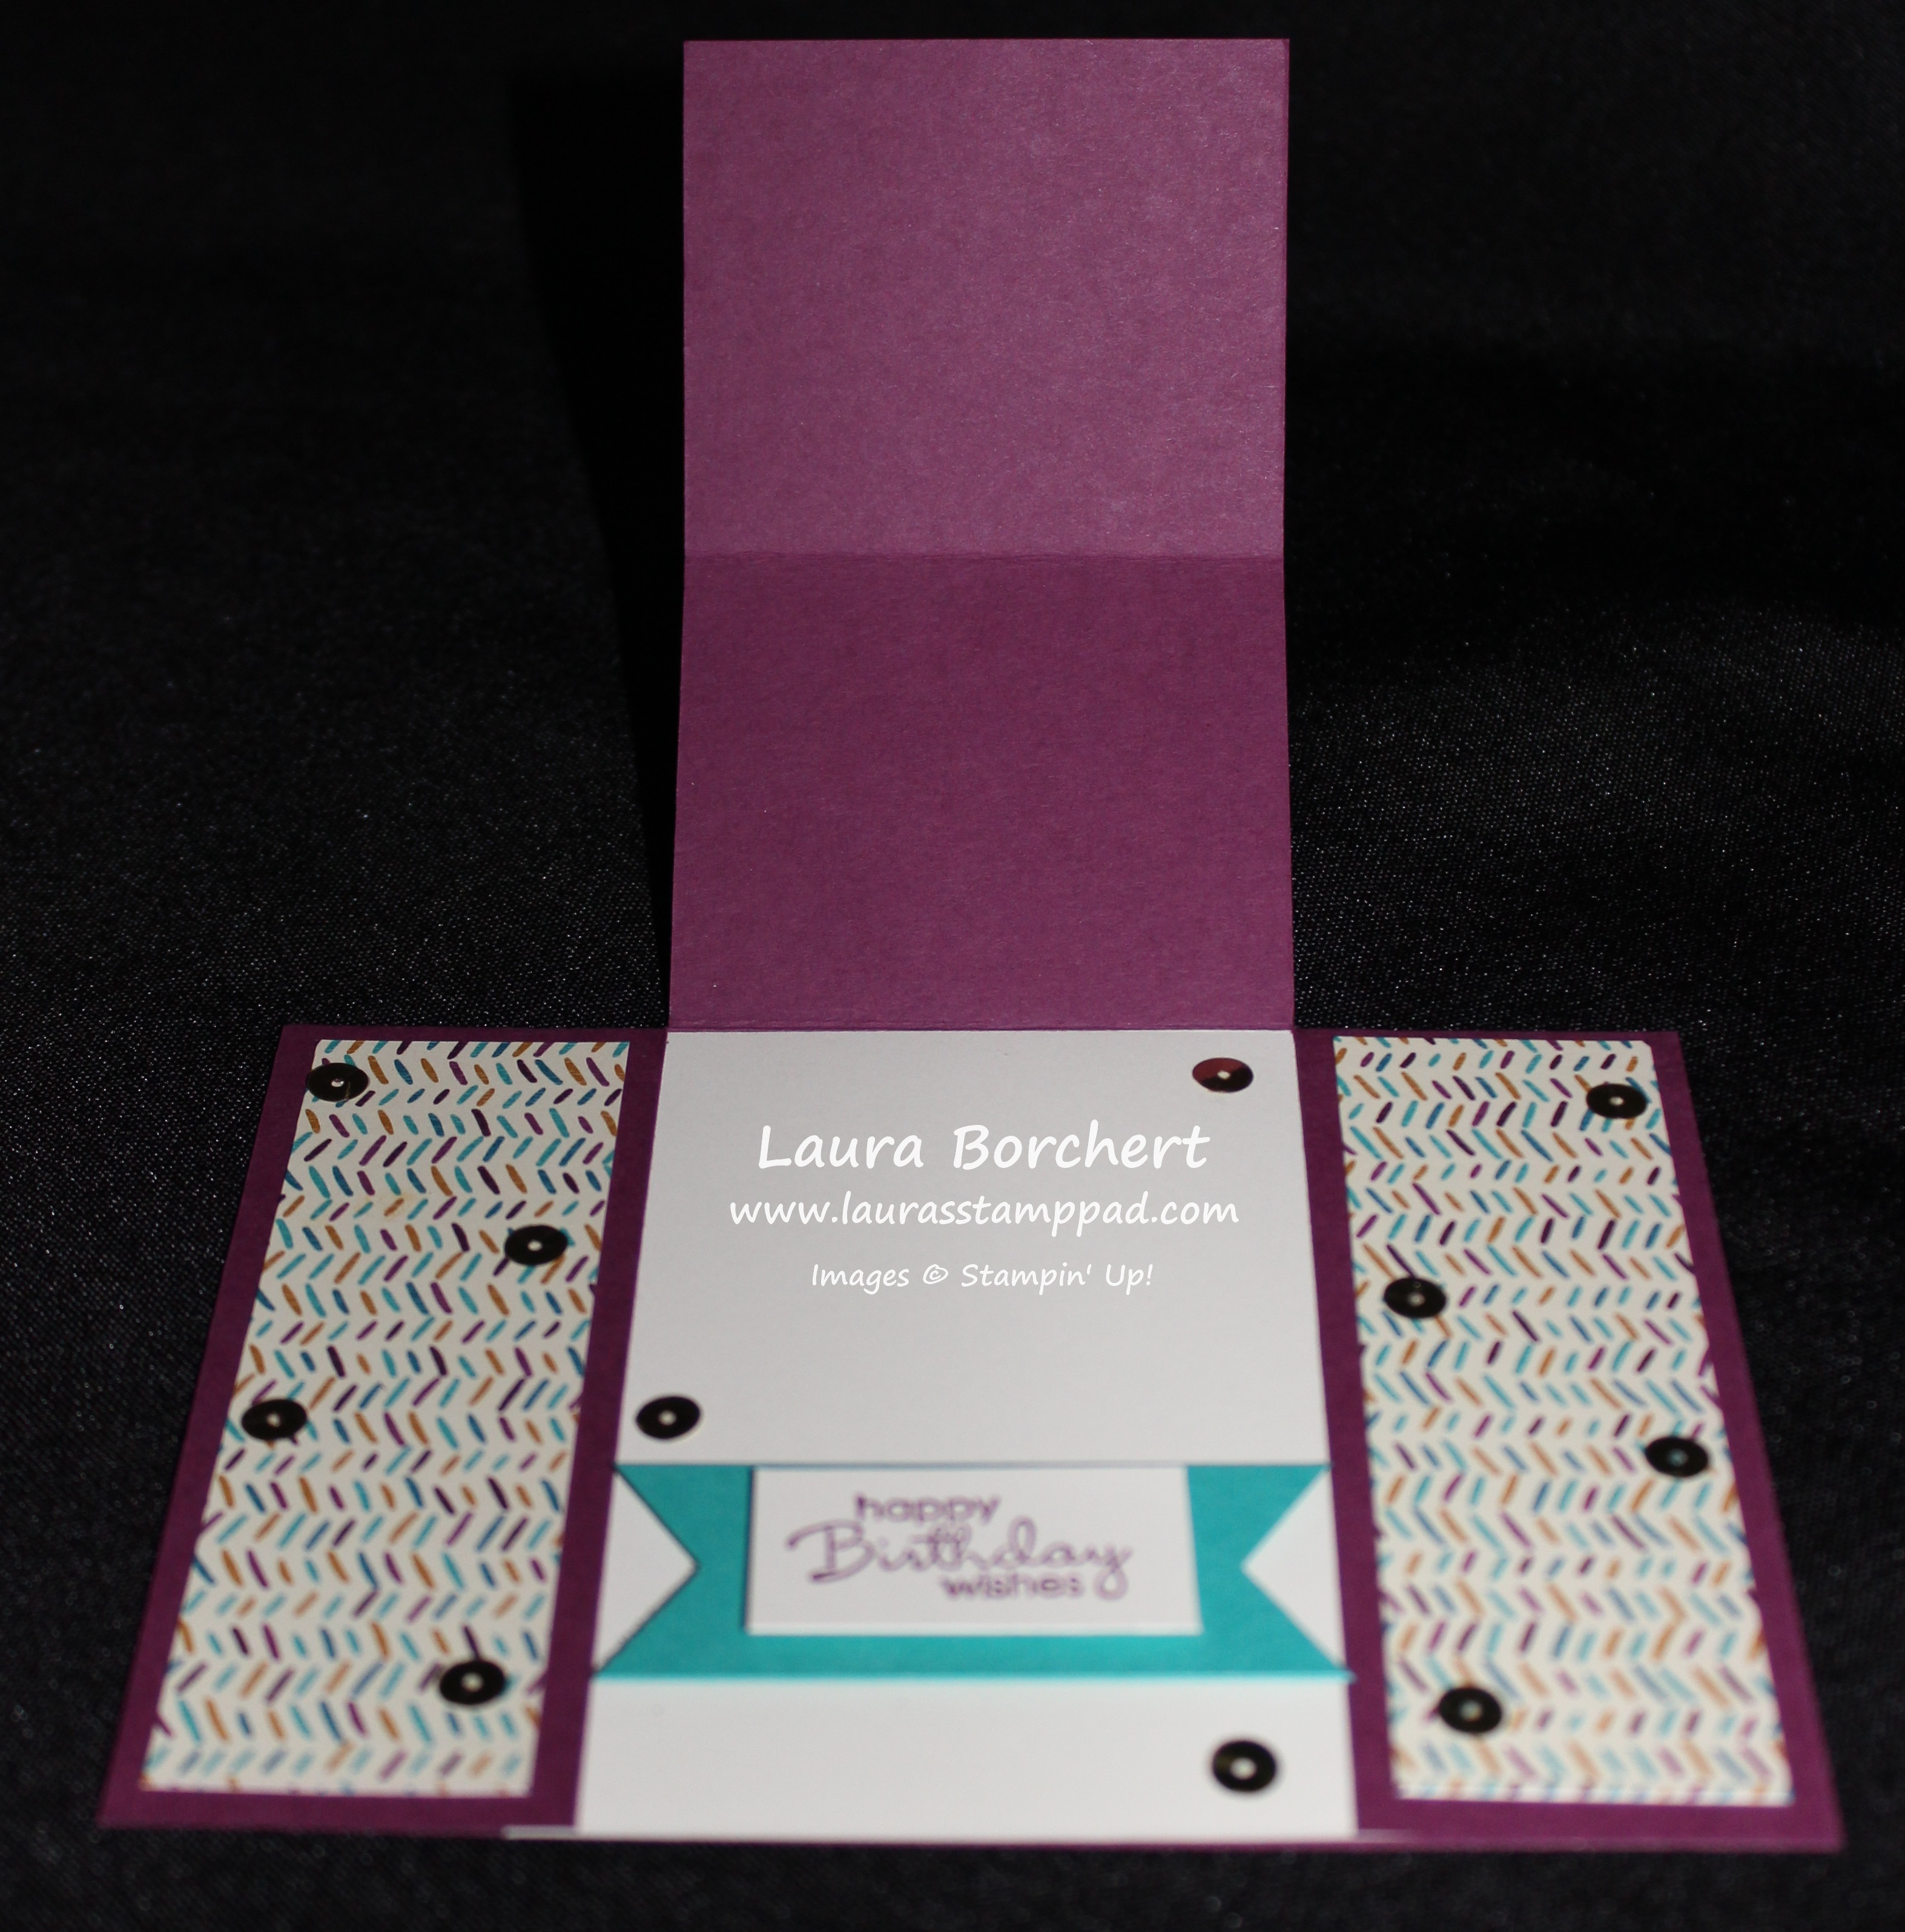
Open Pop Up Card, www.LaurasStampPad.com

Here is the card open showing that you can still write on the inside vanilla piece or even up on the easel portion!

I got this idea from Dawn and you can check out her samples as well as a video tutorial here! I hope you try this card out! Leave me a comment down below what Designer Paper or design you use for your card!!!

Happy Stampin’

~Laura


Fabulous Friday!!!!

Posted on

Happy Friday!!! Can you believe tomorrow is August 1st already?? That means tomorrow starts my Birthday Month….yes I like to celebrate all month long! 🙂 Woot Woot!!!

Speaking of August……on the 4th I, as a demonstrator, get to pre-order Holiday Mini Catalog items. My list is huge. I seriously want it ALL – every snowman, tree, ornament, and snowflake. Eeeee I can’t wait for it all to arrive!!! Are you excited about it??? Did you know that if you join Stampin’ Up! on/after August 4th, you can get these pre-order items in your kit?? How fabulous is that? It’s like you get an amazing deal and a sneak peak all in one! I love that! When you join, you get to pick out $125 in product (any product you wish) and you pay $99 (plus tax, free shipping)! For more information on that, click here! If you have any questions or are interested in joining and would like to see the sneak peak items to add to your kit, send me a message here!!! I am really looking forward to the next few months and all of the excitement!!!

Of course, it isn’t a Friday without the Weekly Deals!!!

Weekly Deals 7.28

Um…..RIBBON HEAVEN!!!! I am stocking up! My favorite and THEE most amazing ribbon ever – Melon Mambo Satin Ribbon! Swoon! Also, now is a great time to stock up on the Metallic Foil Doilies and Black Ribbon for the upcoming holidays!!!! Love it!!! Remember that all orders placed online by clicking here earn Laura’s Loyal Stampers Points!!!!

PP Half Off

Also, don’t forget that you can try out Paper Pumpkin for August and September OR September and October for half off (regular $19.95)! I LOVE Paper Pumpkin and this is a steal so it’s a great time to give it a try. You can check out some of the past Paper Pumpkin Kits here!!! Click here to join and don’t forget to end HALFOFF as the Promo Code!!! Be sure to enter my name so that I can send you a Thank You Note!!!!

Have a wonderful weekend and see you back on Monday!!!!

Happy Stampin’

~Laura


Color Me Irresistible!!!!

Posted on

Color Me Irresistible Paper, www.LaurasStampPad.com

Have you seen the NEW Color Me Irresistible Specialty Designer Series Paper in the NEW Stampin’ Up! Catalog??? It can be tricky to understand exactly what it is but it is very similar to the Designer Series Paper from Sale-A-Bration! This is what it looks like in the catalog!!!
Color Me Irresistible, www.LaurasStampPad.com

Half of the sheets in the pack already have color – the 2015-2017 In-Colors and Basic Black. Then there is a coordinating piece of Whisper White with the same pattern! This paper is clear embossed with fun images which will resist ink when you add color. You can add color with a Sponge Dauber, Spritzer, Brayer, Marker, and even a stamped image!

The card above uses the Watermelon Wonder dotted paper which makes a fun, quick, and simple card! I added the greeting from the You’ve Got This Stamp Set and some Whisper White Satin Stitched Ribbon!

Tuxedo Card, www.LaurasStampPad.com

This fun little card was created with the Whisper White striped paper. I could have added color but I wanted it to look like the under shirt of a tuxedo. I like this card due to the texture and fun better than my Tuxedo Card here! For the “V” cut out, I marked the center of the paper along the top and cut down the paper there. Then I cut diagonally to that center cut from the sides!!! I added the Designer Series Paper to a Basic Black card base. I added a few Pool Party Candy Dots for a little color and flare. You could always use Black Candy Dots too! For the Bow Tie, I used the Bow Builder Punch which is super simple to punch and assemble!!! If you mail this card, I’m sure the bow will flatten but that’s okay!!! I love it!! This would be great for a Groom’s Card on the wedding day, and engagement card, or just a little something fancy for the man in your life!!!

I love this paper!!! Check back for more samples using this paper!!!

Happy Stampin’

~Laura


Cherry On Top Washi Tape!!!

Posted on

Cherry On Top Washi Tape, www.LaurasStampPad.com

You all know I LOVE bright colors and this card just makes my heart happy!!! I love how quick and simple Washi Tape can add color, texture and a really cool background to your card!!! I started with a Crushed Curry card base and layered on some Watermelon Wonder! Then I took a piece of Whisper White (3-3/4″ x 5″) and added 3 little stripes of the Cherry On Top Designer Washi Tape to the center! I just ripped the ends for a torn look and because it’s easier! 🙂 Then I used the dots from the Endless Birthday Wishes Stamp Set to stamp on the corners! I stamped it a few times in Watermelon Wonder without going back to the ink pad. That is how I got those various shades! I used the same stamp set for the greeting which was also stamped in Watermelon Wonder on a piece of scrap white cardstock! I punched it out with the 2″ Circle Punch and layered it onto a Watermelon Wonder 2-3/8″ Scallop Circle Punch! Of course I used Stampin’ Dimensionals to add this to my card front!!! Simple and Fabulous!!!

Have you used Washi Tape before??? You  can check out a few more ways to use it here, here, and here!

Happy Stampin’

~Laura