Technique Tuesday – Floral Boutique One Sheet Wonder!!!

Posted on

Happy Tuesday!!!! I hope you are having a wonderful week and if you are like me, you have no clue what day it really is….the holidays always do this! Before long it will be the weekend again and another holiday!!! Today I’m sharing a favorite – One Sheet Wonders!!!
Floral Boutique One Sheet Wonder, www.LaurasStampPad.com

So technically only 9 of these cards came from 1 sheet of 12″ x 12″ Designer Series Paper but I couldn’t stop at just 1 sheet so I made TONS!!!

Supplies for the One Sheet Wonder, www.LaurasStampPad.com

You will need the following:

9 Crumb Cake Card Bases – 5-1/2″ x 8-1/2″

9 Night of Navy Cardstock – 4-1/8″ x 5-3/8″

1 Sheet of 12″ x 12″ Floral Boutique Designer Series Paper – cut into 4″ Squares = 9 squares

Floral Boutique Washi Tape

9 Whisper White Cardstock – 1-1/2″ x 4″

For all of the greetings and stamped decorations, I used the Designer Tin of Cards Stamp Set and Flourishing Phrases Stamp Set in Night of Navy Ink and Crumb Cake Ink! I like using just 1 or 2 stamp sets and ink pads because it makes it quick and simple without pulling out all of the supplies you have and making a huge mess!!!

Sympathy Note, www.LaurasStampPad.com

For the card on the left, I added some Washi Tape to the greeting piece and layered it all together. For the card on the right, I cut an inch off the top of  4″ Square giving me a 1″ piece for the top and 3″ for the bottom!

Floral Boutique Paper, www.LaurasStampPad.com  You can swap the Designer Paper to be on the top or bottom. I added a little bit of the Washi Tape on the overlap of the Designer Paper and greeting piece!

Sending You Love, www.LaurasStampPad.com

I will say for the diagonal one, you will need a longer piece of Whisper White but that depends on your angle. Just take a strip that is 1-1/4″ and then trim down once you have cut your Designer Paper. The 4″ square was cut diagonal at any angle you wish! For the card on the right, I cut the 4″ square in half and put it on the top and bottom!

Navy and Tan, www.LaurasStampPad.com

I used the Washi Tape on both of these. You can add some more design to the greeting piece with stamps, enamel shapes, or punched pieces!

Fantastic Person, www.LaurasStampPad.com

I love the confetti swirl in the Designer Tin of Cards Stamp Set! Super fun!!!

You Can Do It, www.LaurasStampPad.com

So many fun prints but they all look amazing! You could cut up the entire package of Floral Boutique Designer Paper and make 108 cards in no time at all!!!

If you would like to see these cards in action, check out the Video Tutorial below or click here! Don’t forget to give it a thumbs up if you liked it and be sure to subscribe if you are new!!!

Have you tried a One Sheet Wonder? Do you love them too? Let me know in the comments below and check out others here, here, and here!

Happy Stampin’

~Laura


Stitching & Stamping!!!

Posted on

stitched-ornaments, www.LaurasStampPad.com

I know that Christmas was yesterday but I realized I never shared this fabulous card!!! It was a bit time consuming with all of the stitching but it is super amazing and as always made with love!!! Many of the items used in this card are on SALE right now too!

I started with a Garden Green card base. I stamped the ornaments from the Festive Season Stamp Set in Real Red and Delightful Dijon Ink. Then using the coordinating Festive Stitching Framelits (Bundle & Save 10%) to add all of the little holes which make it super simple to stitch. Then I spent the next 10+ minutes…..okay probably more like 15 minutes…..stitching the ornaments with the Baker’s Twine Trio Pack!

I added Stampin’ Dimensionals to the ends of the thread to secure them and double as adhesive to add to my card! I used the same Framelit set to die cut the ornament tops in Gold Foil Paper! I added the gold Baker’s Twine through the ornament top and secured it on the back. Then I tied little bows with the twine and added them with the Fine Tip Glue Pen. The greeting is actually from the Star of Light Stamp Set! I stamped it in Delightful Dijon Ink. That is so not my favorite color but I really like how it looks golden and that’s fabulous for this time of year. Love it. This is one that you will only make a few of…..or you can get started now and will have tons completed by next Christmas! 🙂

Check out all of the items on the Year End Closeout here! Many items are up to 60% off. The Holiday Mini Catalog ends on January 3rd so get these items before they are gone!!

Happy Stampin’

~Laura


On the 12th Day of Stamps-Mas!!!

Posted on

On the 12th Day of Stamps-Mas, my true love gave to me……..A Big Shot, Framelits, and Thinlits!!!! My Big Shot is one tool that I have had for years and would buy another one instantly if something ever happened to it!! Love this tool for die cutting, embossing, and so much more!!!

12thDayofStamps-Mas, www.LaurasStampPad.com

This picture if my little Big Shot Station in my craft room. I have all of my Embossing Folders, Dies and Big Shot all in one place! I love that it is all super handy and easy to use! I have had this Big Shot for about 7 years I think! It’s been forever it seems! It still works amazing and that is what I call a great product!!

Embossing Folders are super easy to use and add texture to your project. I love this look because it adds so much to your project with extra product or embellishments. Just crank your cardstock through the Big Shot and you already have a WOW on your project.

Framelits & Thinlits are the metal dies that cut out images that coordinate with stamp sets so that you don’t have to fussy cut. They create detailed images that you can layer on your cards or build together to create an amazing project! I can’t believe how detailed some of these are. They are fabulous and no one likes to fussy cut! Also, where there is a Stamp Set and coordinating Framelit Set, you can always Bundle & Save 10%! That’s super fabulous because it’s a deal every day, you don’t need to wait for a special!

Big Shot Die Brush is a lifesaver when it comes to the intricate detailed dies. You can place the die and cardstock onto the foam provided and run the brush over the top and it will pop out all of the pieces. You can see all of the details about this on the Video Tutorial here!

What are some of your favorite embossing folders or dies? Let me know in the comments below!!! My favorite Embossing Folder is probably Festive Texture….as of recently. It changes often! 🙂 My favorite dies right now have to be the Layering Circles Framelits!!

If you have missed out on the past days of Stamps-Mas, you can check them out here – Day 1, Day 2, Day 3, Day 4, Day 5, Day 6, Day 7, Day 8, Day 9, Day 10 and Day 11. I hope you enjoyed the 12 Days of Stamps-Mas!!! Wishing you all a very Merry Christmas!!! May you have an amazing holiday season filled with joy and love!!! 

Happy Stampin’

~Laura


On the 11th Day of Stamps-Mas!!!

Posted on

On the 11th Day of Stamps-Mas, my true love gave to me…..Ribbon!!! This is one of my favorite embellishments. I just love the texture and elegant or rustic look! Super fun!!!

11thDayofStamps-Mas,www.LaurasStampPad.com

There are so many different styles of Ribbon like Satin, Taffeta, Striped, Stitched, Ruched, and Organza. I love how each one gives a different look – elegant, rustic, playful and more. I mostly use ribbon by wrapping it around the cardstock and tying it into a bow or knot. A few other ways to use it are just a strip behind your focal point, folded in half peaking out of the edge, or in loops behind your focal point. Ribbon is great on gift packaging and other 3D items too! I just love how versatile it is!!

How do you like to use ribbon? Do you love ribbon as much as me? Let me know your favorites in the comments below!

If you have missed out on the past days of Stamps-Mas, you can check them out here – Day 1, Day 2, Day 3, Day 4, Day 5, Day 6, Day 7, Day 8, Day 9, and Day 10. Be sure to subscribe to my blog so you don’t miss the last one tomorrow! You can do that by adding your email address in the subscribe box on the right hand side (on a computer) or at the bottom of the page (on a phone). 

Happy Stampin’

~Laura


On the 10th Day of Stamps-Mas!!!

Posted on

On the 10th Day of Stamps-Mas, my true love gave to me…..Heat Embossing!!! This technique is super fun and always adds so much bling, flare, and elegance to any project!!! You can check out a few samples here, here, and here!

10thdayofstampsmas, www.LaurasStampPad.com

The Heat Tool is like a super strong hair dryer that blows the hot air on the embossing powder and melts it to set it. There are 2 settings on the tool – 1 for drying your cardstock when watercoloring, etc and 2 for melting embossing powder. Make sure when you use it to focus on one area of your project until it starts to melt and then slowly move it around the project. If you wave it around, you are just dispersing the air and it will take longer. The first time you use it it takes a bit to warm up but after the first one it goes really quickly.

The Embossing Buddy is one of those tools you could technically do without but will love once you use it! This little guy is a bag of powder that reduces static on your cardstock before embossing. It’s like the same stuff gymnasts use on their hands. You will want to tap this over your cardstock before stamping the image. It will leave a bit of a white chalky look on your cardstock but you can wipe that off later.

VersaMark Ink is the sticky, clear ink used in Heat Embossing. You will ink up your stamp in this ink and then stamp it onto your cardstock. This ink is sticky to hold onto the powder when you pour it over.

Embossing Powder comes in Clear, White, Silver, Gold, and Copper! Once you have stamped your image, you can pour the powder of the top and it will stick to the VersaMark Ink. Tap off the excess and you are ready to melt it with the Heat Tool. One tip that I have seen stampers do is pour their powder into a container and place a plastic spoon in there. This way they can spoon on the powder and tap off the excess into the larger container rather than trying to get it into the little container it comes in.

What is your favorite color to Heat Embossing with? Do you enjoy heat embossing? Let me know in the comments below! If you would like to check out a complete tutorial on Heat Embossing check out this video!

If you have missed out on the past days of Stamps-Mas, you can check them out here – Day 1, Day 2, Day 3, Day 4, Day 5, Day 6, Day 7, Day 8, and Day 9. Be sure to subscribe to my blog so you don’t miss the next 2! You can do that by adding your email address in the subscribe box on the right hand side (on a computer) or at the bottom of the page (on a phone). 

Happy Stampin’

~Laura


On the 9th Day of Stamps-Mas!!!

Posted on

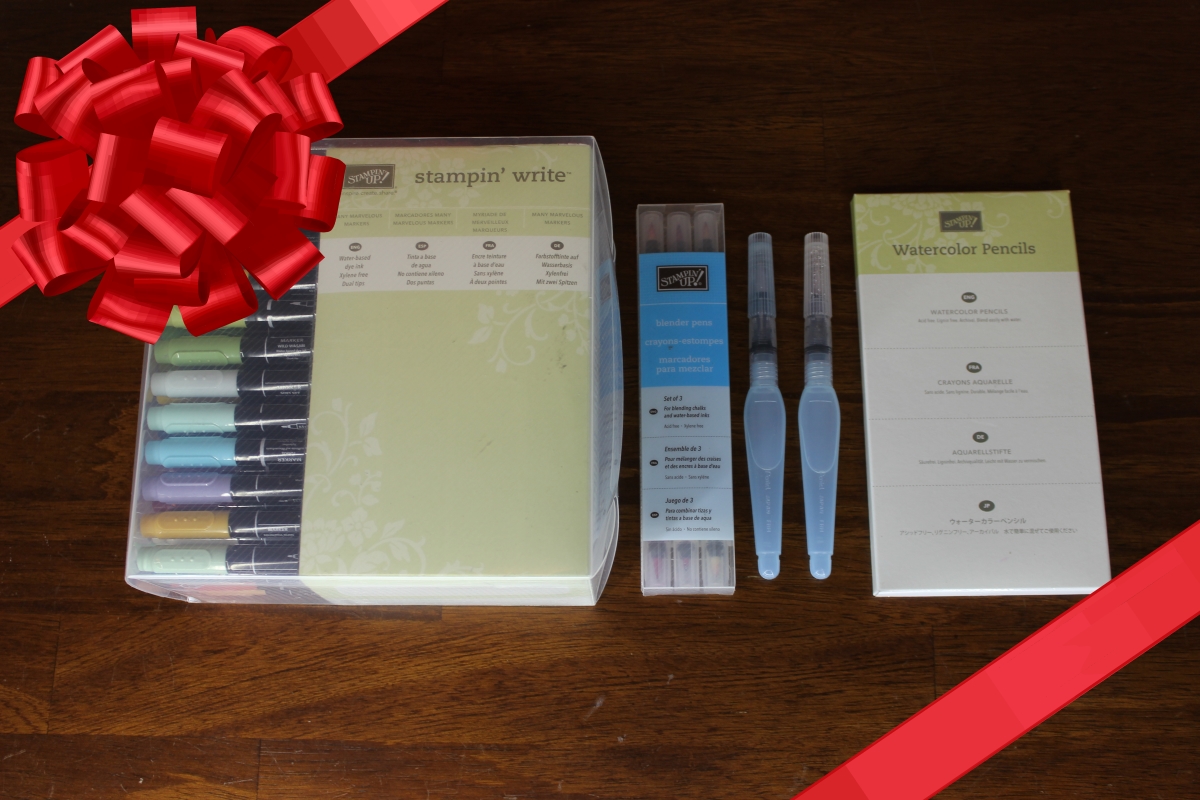
On the 9th Day of Stamps-Mas, my true love gave to me…..coloring tools!!! Markers, Aqua Painters, and Blender Pens make coloring stamped images or background so much fun!!! Also, you will notice……Watercolor Pencils in this photo. That is because they are coming out in the Occasions Mini Catalog on January 4th!!! WOOT WOOT!

10thDayofStampsMas, www.LaurasStampPad.com

Aqua Painters are probably my favorite out of all of these above. I feel like I have found my groove on using them and just love the look that comes out. I like to use a Clear Block pressed into an ink pad as my color palette. Then just brush into the color and then color on your project. You never really want to squeeze when coloring because then you will too much water. You also don’t want to press hard on tip because it will flare the bristles and allow more water to come out. You can use these for a watercolor background like in this sample or to color small details like this sample. You can also add other things into the pen like alcohol or bleach for many other techniques!!! Also, you don’t always have to use these with Watercolor Paper. You can use any type of paper like Whisper White, Very Vanilla, or Shimmery White. Check out this video tutorial to see more on these!

Blender Pens are similar to Aqua Painters but they are more like a clear marker. There isn’t a way to squeeze out too much water so you never have to worry about that. Again, you can pick up color from a marker, pencil, or color palette like the one mentioned above! I feel like these are to much like a marker and I end up with streaks but for small things I think they work well. When doing a large image, I prefer Aqua Painters.

Markers are always great to have on hand. Any time I leave my house to craft, I always take them because then if I forget an ink pad I still have every color. I love that you can color with the markers directly onto the stamps to create multi-colored stamped images, omitted images, and so much more! I don’t really prefer to color in an image with the markers, at least not a large image. I tend to always see the strokes of the marker when I use them for coloring. Each marker has 2 ends – a larger marker tip and a smaller pen tip. This makes journaling fun when you are scrapbooking! Because there are 2 ends to the markers, you want to make sure that you store the markers on their side so the ink doesn’t go all the way to one side.

Watercolor pencils are coming out in the Occasions Mini Catalog in January!!! I have played with them a little and they are super fun to color with and then blend with an Aqua Painter or Blender Pen. You can color images in and even do a watercolor background with them. Stay tuned for more on these as I play with them more!!! 🙂

What is your favorite coloring tool?? Let me know in the comments below!!

If you have missed out on the past days of Stamps-Mas, you can check them out here – Day 1, Day 2, Day 3, Day 4, Day 5, Day 6, Day 7, and Day 8. Be sure to subscribe to my blog so you don’t miss the next 3! You can do that by adding your email address in the subscribe box on the right hand side (on a computer) or at the bottom of the page (on a phone). 

Happy Stampin’

~Laura


On the 8th Day of Stamps-Mas!!!

Posted on

On the 8th Day of Stamps-Mas, my true love gave to me…..Adhesive!!! There are so many different types of Adhesive out there and each one has a specialty!!! I have my favorites – Stampin’ Dimensionals of course!!! 🙂

8thDayofStampsmas, www.LaurasStampPad.com

We will start with my favorite – Stampin’ Dimensionals!!! I love these things because they give your project texture and dimension and make it come to life. You can use the edge/border pieces cut up or on the long skinny objects. Love it!! I also love using these when adhering items to embossed images or ribbon because the dimension falls into the grooves and holds on tight. It also gives a smooth look to the image that you place over the top of the ribbon rather than a bumped up look.

Snail Adhesive is the most used adhesive in my craft room. This is a 2 sided tape to use on just about any project. I use this for all of my cards and basic crafty. You can add refills too so no need to buy the whole thing each time!

Fast Fuse is similar to Snail in that it is a 2 sided tape and comes with Refills. This adhesive is super strong and great for putting together boxes or other 3D items. This adhesive does require a little trick – doing a check mark motion after adding the adhesive to your project. You need to break the seal of the adhesive so don’t pull up or back, be sure to flick your wrist to the left or right to snap off the strip of adhesive. I hope this makes sense….if not check out the video below! 🙂

Mini Glue Dots are perfect for adding small items to your project or things like buttons. These are small dots of glue that are clear. My tip is to never touch the actual glue dot because otherwise it will fold and ball up. Just place the button or stamped image on top of the glue dot and then pull it off and place it on your project. The glue dot will hold tight and you never have to handle it.

The Fine Tip Glue Pen is a miracle glue for adhering those thin, detailed images that can be die-cut out with a Thinlit. This glue is clear, liquid that comes out of a super thin needle nozzle. You don’t need a lot at all, just a small amount. I usually add it to the corners or tips or biggest areas on the image. Then I place it on my project and press my hand over the top and hold for a good 10 seconds so that the glue grabs hold. Then if there is a spot that still pops up, you can just place the nozzle under there and add a bit more glue. Love this stuff!!!

Foam Adhesive Strips are perfect for making shaker cards!! These are long strips are perfect for outlining an image that you would like for your shaker card! They are a bit taller than a typical dimensional but work perfectly. Again, you can always use the edges of these as well. You can see some samples of these used here and here!

Tear & Tape is a strong adhesive for using on boxes and other 3D items. The awesome thing about this tape is that you can just tear it off at the edge of your project rather than using your scissors and having them get gummy. Sometimes I like to use this tape when my Fast Fuse runs out or I just can’t seem to get the flick right that day!!

Multipurpose Liquid Glue (aka: Tombow or Green Lid Glue) is the consistency of elmer’s glue. It comes out white and thicker than the others. I hardly ever use this glue as I am not a fan of liquid glue because of the drying time and I tend to use to much and then it squishes out and makes a mess. This glue does have a pen small tip on one end and a wider/spread tip on the other side to smear it all over your project background or whatever you need it for. The other liquid glue that is pictured is 2-Way Glue which I hardly ever use and realized it is retired. As you can see I don’t use it much. It was a pen type liquid glue that has pretty much been replaced with the Fine Tip Glue Pen.

Of course there is also the Adhesive Remover for when you make a boo boo! What is your favorite type of adhesive?? Let me know in the comments below!

If you would like to see an Up Close and Personal on all of these adhesives, check out the Video Tutorial below or click here. Don’t forget to give it a thumbs up if you liked and be sure to subscribe for more!!!

If you have missed out on the past days of Stamps-Mas, you can check them out here – Day 1, Day 2, Day 3, Day 4, Day 5, Day 6, and Day 7. Be sure to subscribe to my blog so you don’t miss the next 4! You can do that by adding your email address in the subscribe box on the right hand side (on a computer) or at the bottom of the page (on a phone).

Happy Stampin’

~Laura


On the 7th Day of Stamps-Mas!!!

Posted on

On the 7th Day of Stamps-Mas, my true love gave to me…..Designer Series Paper!!! Oh for the love of paper and all of the different colors and patterns. They are just so beautiful, cheery, elegant, playful, and fabulous!!! Are you a paper hoarder?? I would like to say I’m about in the middle. I have a good collection but I’m not overboard!!! 🙂

7thDayofStampsMas, www.LaurasStampPad.com

Designer Series Paper comes in so many different colors and patterns so there are endless possibilities with it. Since I started out crafting as a scrapbooker, I always look at it as a complete piece of paper – the whole 12″ x 12″ (or 6″ x 6″). I sometimes forget that I can cut it up and enjoy it so much more on 14+ cards or something like that. I love love love doing One Sheet Wonders because you get to create so many cards quickly and enjoy both sides of the paper. You can check out all the One Sheet Wonder Videos, I have created here. These are always perfect when you need a lot of cards to fill your stash quickly or if you wanted to gift someone with some beautiful cards! I love using Designer Series Paper in small strips to back my greeting, as the background/focal point, or just for a little texture on the side.

Of course my favorite patterns are those that include Pink, Flowers, and Polka Dots but I really love branching out as well. What are some of your favorite styles, colors, or patterns of Designer Series Paper?? Let me know in the comments below!!

Are you just tuning in to Stamps-Mas or have you been following along? If you have missed the first few days, check them out here – Day 1, Day 2, Day 3, Day 4, Day 5, and Day 6! Be sure to subscribe so you don’t miss out on the rest of Stamps-Mas. You can do that by entering your email address on the right hand side bar on my website or at the bottom of the page if you are on your phone.

Happy Stampin’

~Laura


On the 6th Day of Stamps-Mas!!!

Posted on

On the 6th Day of Stamps-Mas, my true love gave to me…..Embellishments!!! What are your favorite ways to embellish your projects – Bling? Enamel Shapes? Sequins? Ribbon? Washi Tape?

6thDayofStampsmas, www.LaurasStamppad.com

I have fallen in love with Enamel Shapes!!! They come in lots of different colors – Brights, Subtles, Regals, Metallics, and 2016-2018 In Colors.   I love that they aren’t super bulky. I love that they come off the clear sheet packaging without popping off of the adhesive backing (at least I haven’t had a problem yet). I love that they come in all the colors!!! I will say it can be difficult to do a big project and need just 1 color. Then you have to purchase an entire color family just for that one color. So my tip for that is to always use the Enamel Shapes in multiple colors. If your card is Rich Razzleberry with Island Indigo and Crushed Curry, then use one of each color or use one color on the first card, another color on the second, and so on. That way you are spreading out the usage. Another tip is to share with another stamper friend and if that person needs red and you need blue, then you swap colors!!! 🙂

Sequins are fabulous because of the bling they offer but they are something I always kind of forget about. They come lose in a container in Brights and Metallics. You can also get Sequin Trim in Bermuda Bay, Blushing Bride, Silver, and Gold. I love using the trim in with ribbon on gift packaging like this fabulous one below! big-shot-giveaway-gift

This is the Big Shot that I wrapped up for the Giveaway!!! It looked so fabulous!!! You can also cut the trim and pull off the sequins to use individual. I find the Fine Tip Glue Pen is perfect for adhering them onto a project!

Washi Tape is super fun to use in so many different ways. You can rip it or cut it. You can wrap it to the back side of your cardstock when creating a background. You can use it like tape to hold something in place on a card or memory keeping. You can use it to make a border or background or anything. I love how Stampin’ Up has coordinating Washi Tape with a lot of the Designer Series Paper. It makes it so much fun to use together. Washi Tape comes in lots of different patterns and widths. You can check them all out here. One tip I do have to say about using Washi Tape is try to handle is as little as possible. It may not seem super sticky or problematic but I have found that when I touch the backside of it a lot, the oils/dust/whatever from my hands make the sticky not as strong and then sometimes it will curl and not stick. To see some quick and simple background techniques, check out this post and this post!

You can check out all of the Bling Embellishments in Day 5 of Stamps-Mas and stay tuned for Ribbon!! I hope you didn’t miss Day 1Day 2, Day 3, and Day 4 of Stamps-Mas!!! Be sure to subscribe so you don’t miss out on the rest of the days! You can do that on the right hand side-bar online or at the bottom of the page if you are on a phone!

Happy Stampin’

~Laura