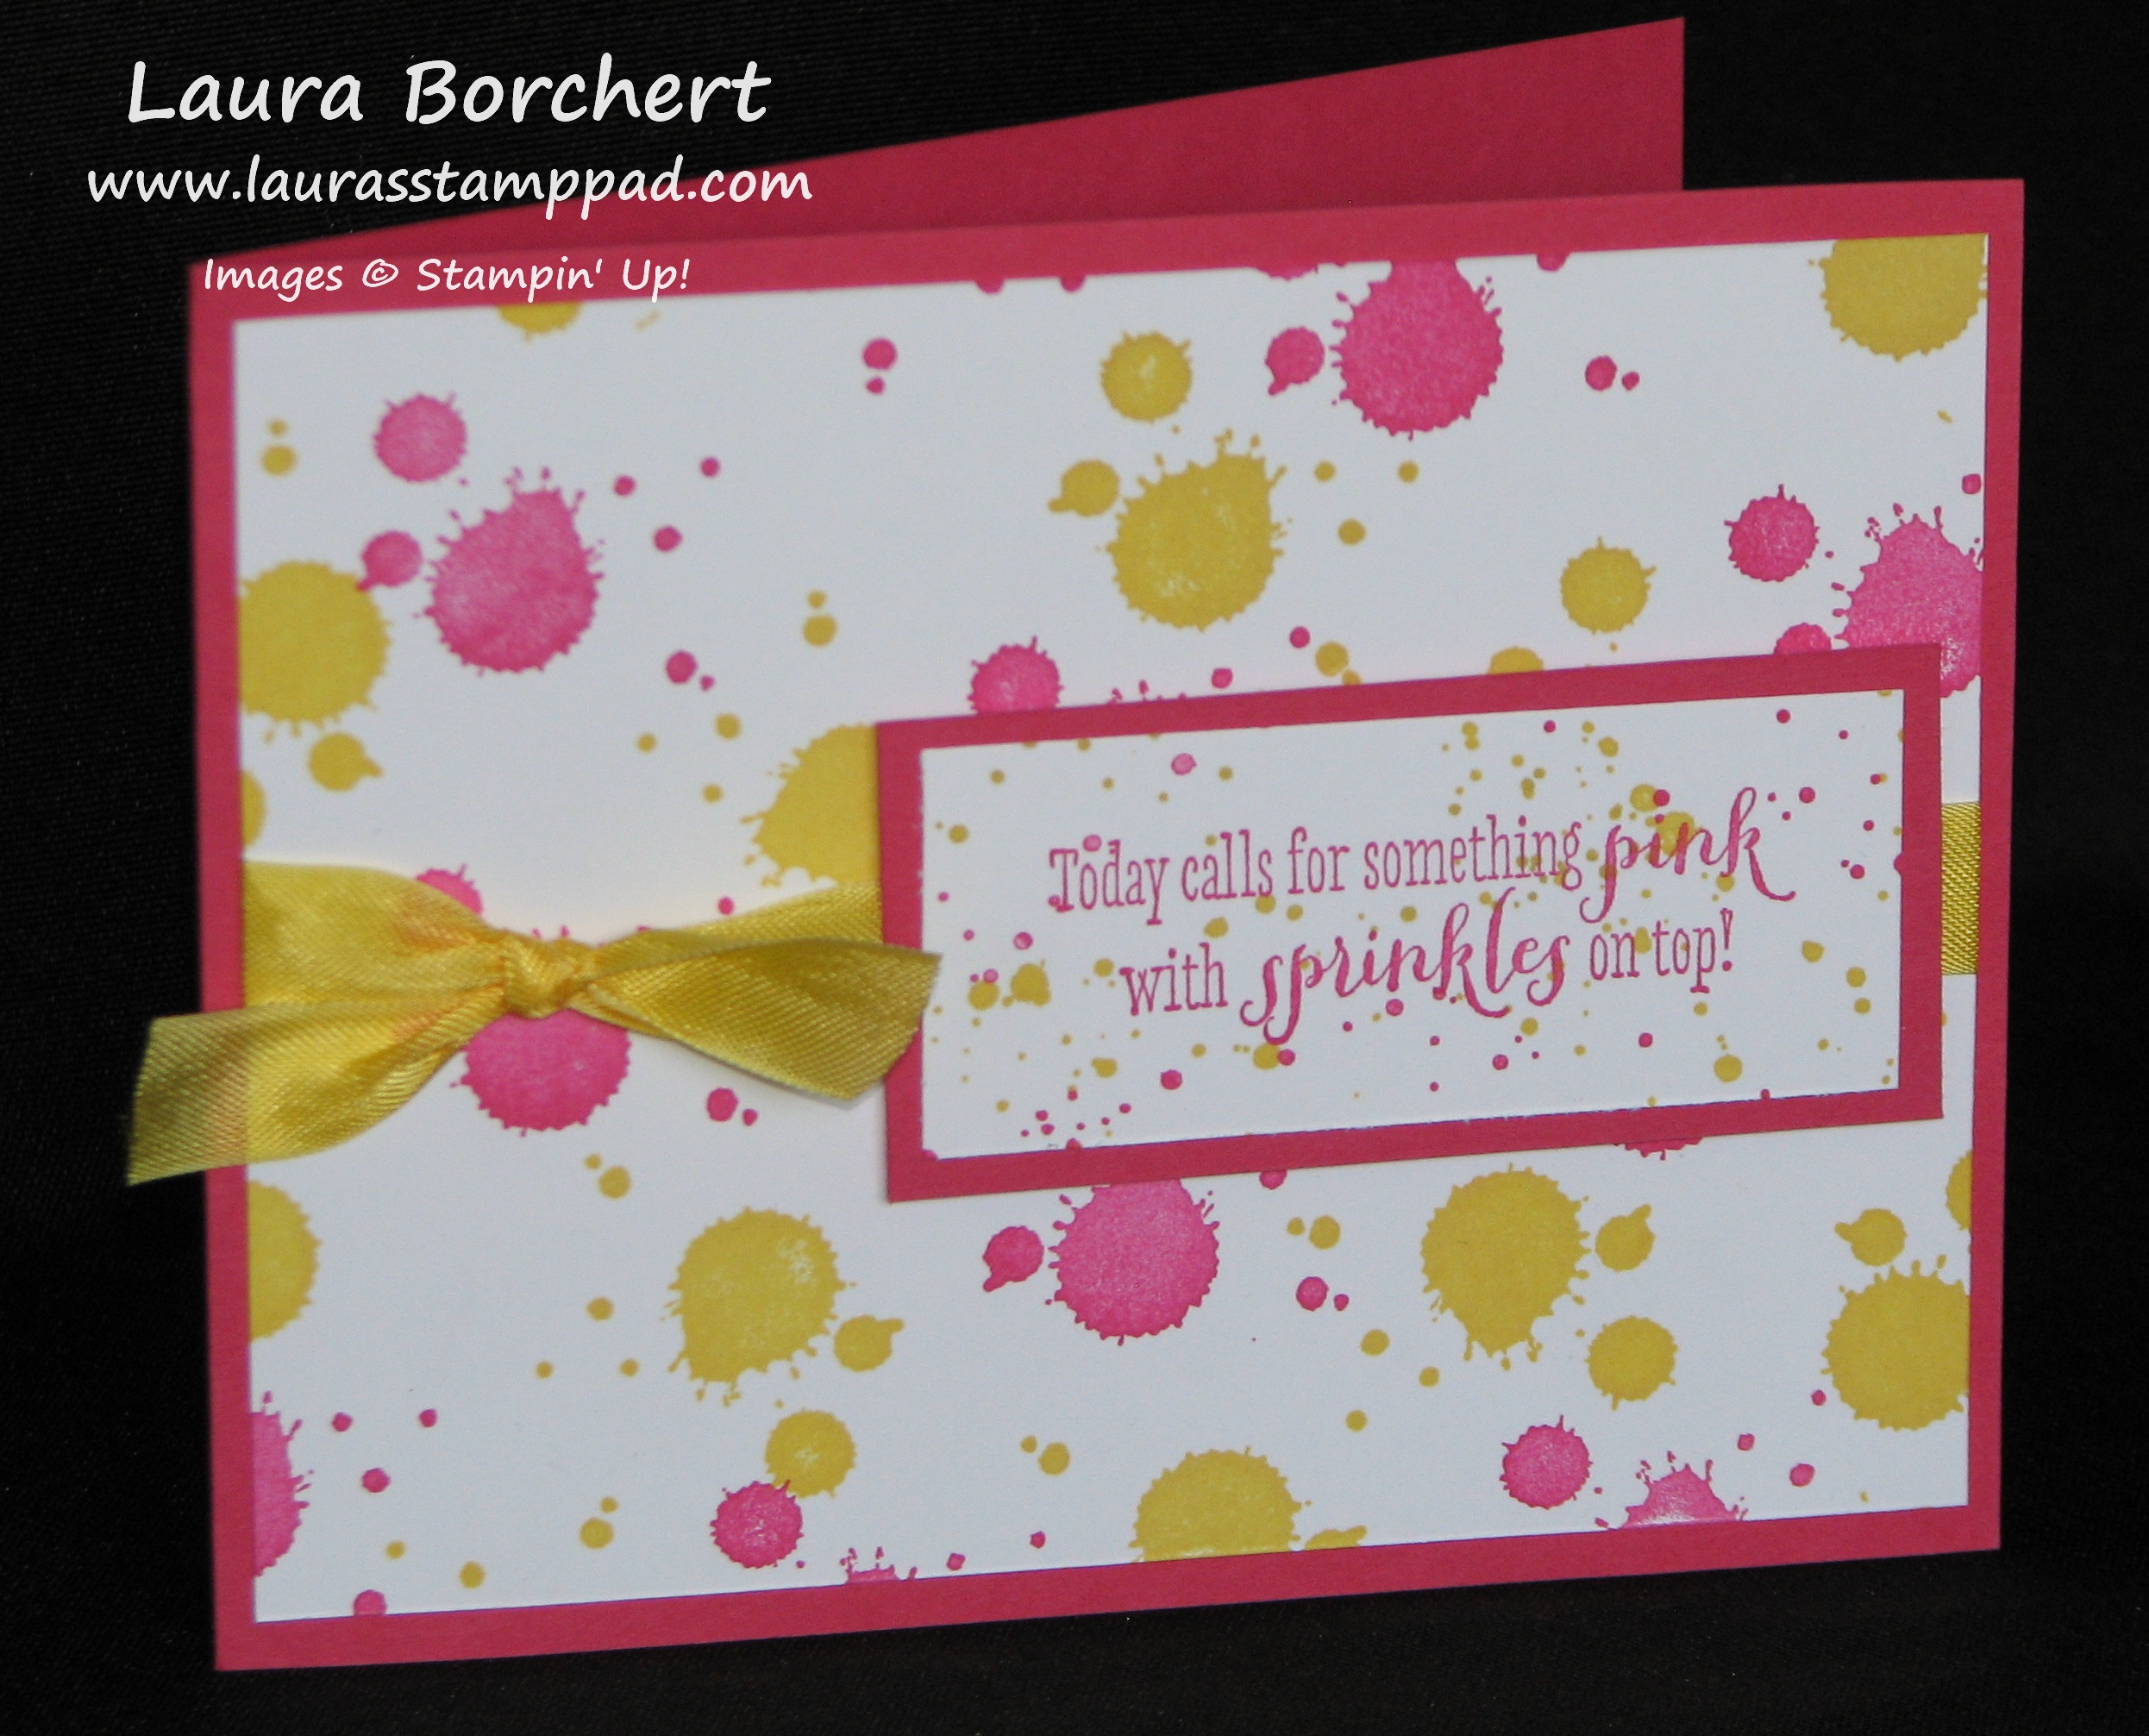
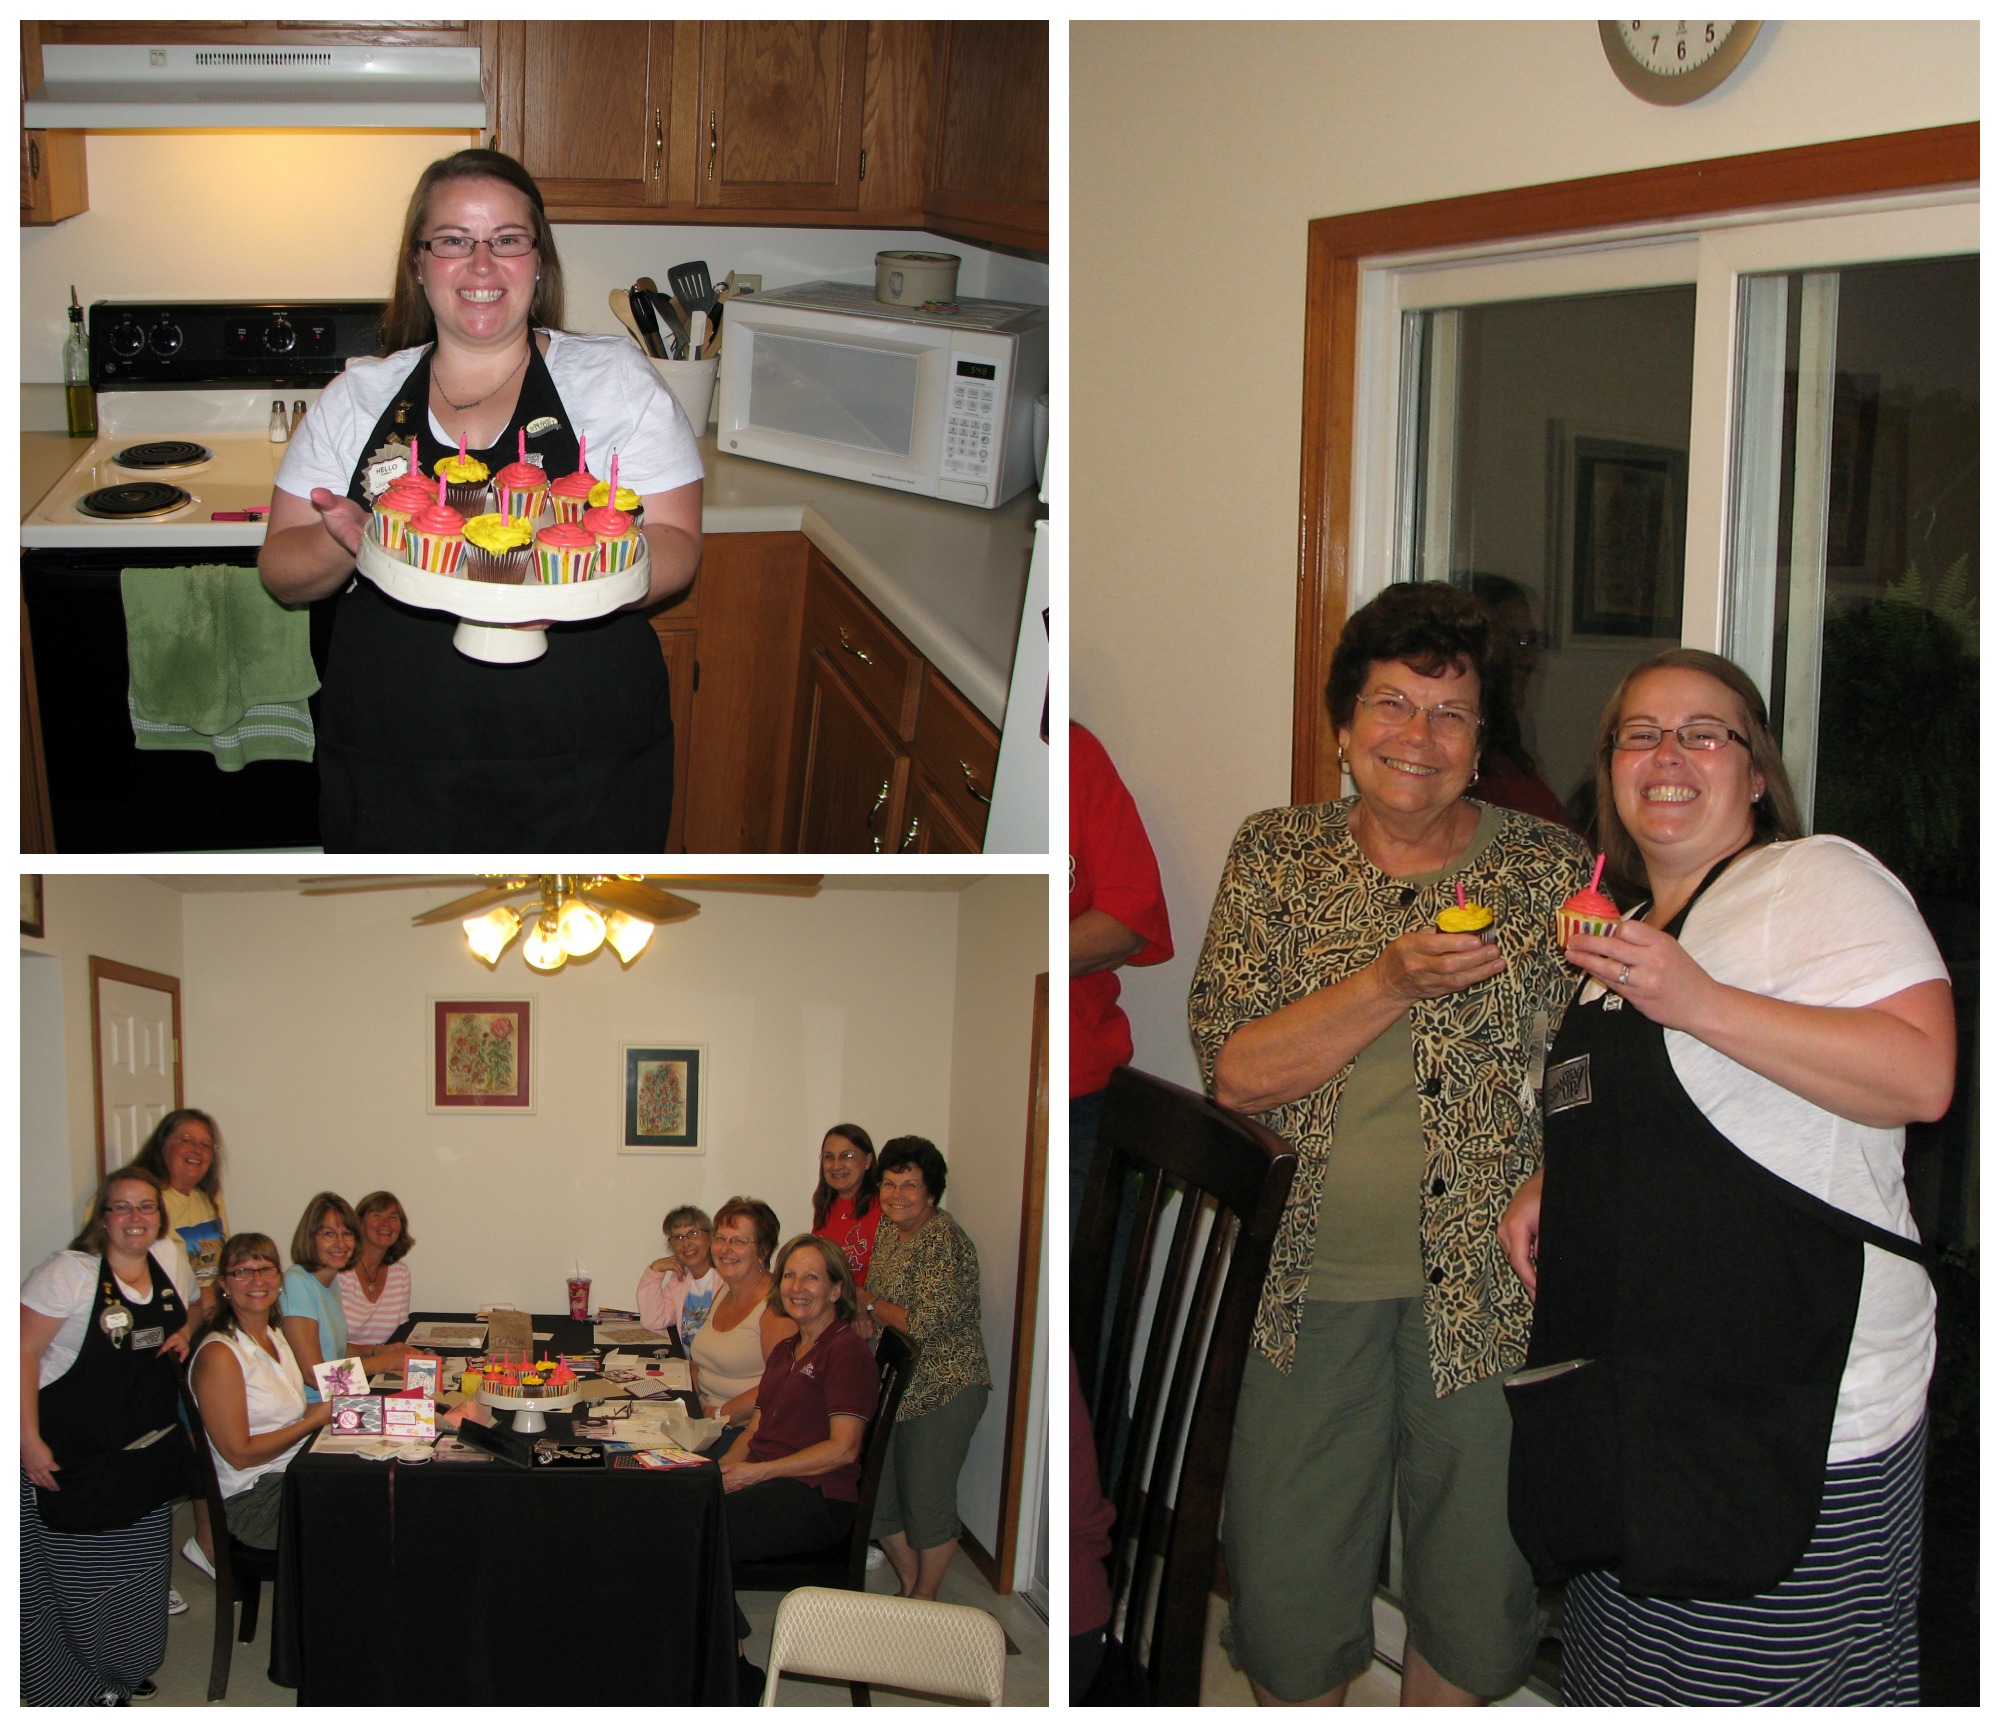
This card is just fabulous because it uses the color PINK (Melon Mambo) and it mentions SPRINKLES (I love them)! This was one of the cards that we made at my Birthday Celebration Class last week! I used my Gorgeous Grunge Stamp Set for the background with Melon Mambo & Daffodil Delight Ink. Then for the greeting I used my Remembering Your Birthday Stamp Set and another stamp from Gorgeous Grunge for those little dots in the background! Gorgeous Grunge makes some amazing backgrounds! You could even do this in boy colors like blues and greens, blue and gray, 2 shades of blue or green. I see some inspiration happening. 🙂 Okay, back to the card, I added some Daffodil Delight Seam Binding to give the card some POP and texture! This is a fairly simple simple card and the little greeting piece uses up scraps! Bonus!
For more samples using the Gorgeous Grunge Stamp Set, click here and here!
Are you tired of the Work of Art Stamp Set? No, yeah me neither!!! The possibilities are endless with this set! LOVE IT! You can check out more samples here, here, and here! This card uses all of the 2013-2015 In Colors except Pistachio Pudding. I used Coastal Cabana, Crisp Cantaloupe, and Strawberry Slush for all of the swish marks (that’s the technical term, right?)! Then I stamped the greeting in Baked Brown Sugar! For the background, I stamped the circle image from the stamp set in Crisp Cantaloupe onto Crisp Cantaloupe cardstock! I finished it off with some Thick Baker’s Twine in Coastal Cabana! After I tied the twine, I frayed the ends to get a fuller, pom pom look! What do you think? Is this your favorite one? Leave me a comment down below!
Happy Tuesday!!!! I know it kind of feels like Monday since yesterday was a Holiday but trust me it’s Tuesday! Woot Woot for skipping on Monday!!!! I have a fabulous technique to share with you today! These items make perfect gifts for co-workers, teachers, friends and just about anyone!
Of course you can make more masculine ones for those teachers and co-workers who are men but everyone uses Post-It Notes!!!
Starting with a piece of cardstock that measures 3-1/4″ x 7″, you will score along the 7″ side at 3-1/4″ and 3-3/4″. These are the folds to wrap around your post-it note. Go ahead and add some adhesive to the back of your post-its and stick them inside your base! Now for the decoration on the front, I layered a piece of Sweet Taffy Designer Series Paper (2-3/4″ Square) onto a piece of Old Olive (3″ Square). Then I took 2 pieces of Whisper White Organza Ribbon that were 4″ long and placed them in a “T” pattern on top of my Designer Series Paper! Wrap the ends to the back and adhere to the front of your Post-It Holder base. For the flower, I stamped a flower from the Flower Shop Stamp Set with my Stazon onto a piece of Window Sheet. Be careful not to wiggle or smear your image and be sure to set this aside for a minute to dry. Once it is dry, flip it over to the backside and using your Blendabilities Markers, you will color the flower! I used the Rich Razzleberry Blendabilities and used the darkest color! Once that is complete, punch out your flower with the Pansy Punch. While waiting for it to dry a bit, you can stamp the same flower with Stazon onto a piece of Old Olive cardstock and punch it out. Then with a pair of Paper Snips, cut out 2 of the petals and these will be use as leaves for your flower! For a faux glass look and to have your petals curl up a bit, you can heat your window sheet flower with your heat tool. Hold your heat tool about 1-2 inches away from the flower and after a bit (first it needs to heat up) you will start to see the Window Sheet melt and curl. Be careful not to burn yourself. Now it is time to assemble your flower. Attached your leaves with a little bit of Snail or a Mini Glue Dot and then attach your flower to your card with a Mini Glue Dot. Now you can attach your Vintage Faceted Button with a Mini Glue Dot as well. If you wish to color your button first, you may do so with your Blendabilities! Then I colored a pearl with my Blendabilities and placed that in the center of the button! Don’t you just love all the things and way you can color with your Blendabilities! LOVE IT!!! Super cute and a great gift to give!
I hope you enjoyed this technique and try it at home!!! Let me know what you think or how yours came out in the comment below!
Happy Monday and Happy Labor Day!!! I hope you are enjoying this long weekend (if you actually get the day off)! I used the long weekend as an excuse to celebrate me birthday even longer!!!! As some of you may know, my husband (who is not the crafty one in the house) has started making my cards for all occasions! You can check out his other card here! I absolutely love it because it’s handmade and it was made by my sweetie! Well here is the card I got for my Birthday this year!
He used a Whisper White card base with Chocolate Chip and Whisper White layers. He had drew the little Domo character on the top of the cake and the cake was created with Very Vanilla & Pink Pirouette cardstock. NOTE: He even picked through my scraps of Vanilla and found textured cardstock. Bonus Points! Of course the scallops were created with the Scallop Border Punch! The greeting is from Remembering Your Birthday and he covered up the word sprinkles with Domo! I love it and think he did an amazing job!!!!
I had a class scheduled for August 28th, the day before my Birthday! As I was planning the projects, I thought this will be my Birthday Celebration class so we shall do all things Birthday, add in some PINK and lots of FUN! Well fun was had for sure! I think my neighbors a few blocks away must have been wishing they could have joined in the fun! We were laughing, chatting and having a good time!!!! It was the perfect Birthday Celebration! I made cupcakes for everyone and they all had a candle in them! One of my stampers shares my Birthday so it was wonderful to celebrate with her as well! I LOVE the people, relationships, and fun that Stampin’ Up! has brought to my life! I am so very thankful for Stampin’ Up and all of these amazing ladies that celebrated with me and those that weren’t able to attend! Thank you all! You are AMAZING!
Who wants to party next with lots of fun and stamping? Don’t forget that when you hostess in September and your party reaches $300, you will earn an exclusive Good Greetings Stamp Set on top of your regular Hostess Goodies! You can see one of the stamps (I Love You) in this sample!
HAPPY FRIDAY!!!!! HAPPY BIRTHDAY TO ME!!!! Today is my Birthday and I love Birthdays because it is the amazing day that you were born and that is very special!!!! Of course, on my Birthday I like to share a little bit About Me! This time I am sharing my Stamp Pad (aka Craft Room)!! Here is a video showing you all around my stamp room AND you get to see my face! In all of my other videos, you only get to see my hands! 🙂 Be sure to give this video a thumbs up if you like it and don’t forget to subscribe to my YouTube Channel so you don’t miss out on any other videos!!!
Of course, I have to share all the other AMAZING things going on in the stamp world! Check out these amazing Weekly Deals!
The Big Shot Promotion ends on Sunday so be sure to take advantage of that before it is gone! Purchase the Big Shot and get a Bundle for FREE (includes a Stamp Set and matching Framelit Set)! Already have the Big Shot, get the Bundles for 15% off!!!
Only 12 more days to get signed up for My Paper Pumpkin at HALF OFF! You use the Promo Code: HALFOFF2 and you will get your September and October kits for half off! This is a great chance to try it out and see what it is! Click here, here, and here for samples of the past kits! Click here to get started and join in the fun!
Okay now go enjoy this Holiday Weekend and Happy Stampin’
Eeeee This Gift Box Punch Board is sooooo much fun and makes super cute boxes! Okay, it doesn’t make them on it’s own, I use it to make them. Just thought I needed to put that disclaimer out there. 🙂 Today the Holiday Mini Catalog is LIVE which means you can now start ordering from it!!! WOOT WOOT!
Adorable little boxes!!!! Each of the boxes pictured above were created with the Gift Box Punch Board. The board has all the score lines for you to create, a stylus right there for you, and a punch for all of your notches and rounding! It also has a wonderful grid printed right on there showing you the Box Size, Starting Cardstock Size, Starting Line, and Diagonal Line! Everything you need minus the cardstock is right on the board! I love that! The sizing goes from 6″ x 6″ to 12″ x 12″ for your starting cardstock. Of course, you can also use Designer Series Paper too but be sure to press lightly as the DSP is a thinner style of paper! Be sure to decorate your box before scoring or before assembly! 🙂 I have already made that mistake…..about 5 times I think!
Of course, I created a Video Tutorial for you to see this amazing tool in action!!! Be sure to give the video a thumbs up if you like it and want to see more videos! Don’t forget to subscribe to my Channel so you don’t miss out on any future videos!
I will be posting a lot more amazing Holiday Mini Catalog samples in all the weeks so come! So many amazing new products!
This is just a fabulous card to top off any wedding gift or even for an Anniversary! I just love the greeting and I love the amazing elegant look – very Tiffany’s look! Oh how I am loving that look lately with Pool Party, Coastal Cabana and even the brighter Bermuda Bay. This amazing greeting is in the Big News Stamp Set which I LOVE! You can see more samples here, here and here! It just the perfect greetings and images! I stamped that in Pool Party and then brushed the edges with my Sponge Daubers and attached that to my card with Stampin’ Dimensionals (love)! I used my Beautifully Baroque Embossing Folder to get that gorgeous background and added some Whisper White Organza Ribbon to top it off! The one ribbon end fell just so perfectly so I “made” the other end do the same with a little adhesive help! 🙂 Can’t wait to use this card for a newlywed couple or a couple who has been married for many many years!
Leave me a comment down below of ways you have used your Big News Stamp Set!
Happy Tuesday!!! That means I have a fabulous technique to show you and I thought I would keep the Big Shot Fun rolling!!! So this technique uses the Rosette Designer Die and I will show how to make fabulous Rosettes!!! PS: If you missed out on all of the Big Shot Fun last week, click here!
Aren’t these adorable? I am using them for my Bridal Events as name tags but you could always create a wreath out of them or an amazing backdrop or even a gift tag!
For the Rosettes above, I cut 2 pieces of cardstock measuring 1-1/2″ x 8-1/2″ because I wanted a little Rosette. You will need 2 pieces of cardstock because otherwise the rosette is too tight and it will not reach around without ripping. The more pieces you use, the fuller your rosette will look. If you want a larger rosette you will make your cardstock pieces wider. Once I had my cardstock ready to go, I placed them on the Rosette Designer Die with at least one end on a crease line, this way I knew it was lined up straight. Run it through your Big Shot and then start folding on the lines in a mountain/valley pattern. Then you will bring out your Silicone Mat and Hot Glue Gun. You can use the hot glue or Sticky Strip or the new Fast Fuse to connect your ends with each other. You will want to connect them so that they keep the mountain/valley. Now you will take your hot glue gun and squeeze out a big glob of it onto your Silicone Mat, then place the rosette on top of the the hot glue, placing the center of the rosette on the glue. Hold for a few seconds, allowing it to cool and then you have your perfect rosette and you can decorate as you wish! I added some Blackberry Bliss Satin Stitched Ribbon and Venetian Crochet Trim, adhering it with more hot glue. Then for the greeting I used the I love you from the Good Greetings Stamp Set which is a Hostess Special Set that you can earn starting on August 28th! I stamped it on Very Vanilla cardstock and punched it out with my 1-3/4″ Circle Punch and layered it onto a Blackberry Bliss Scallop Circle Punch. For the other one, I used a greeting from a Demonstrator Set that I have so I could have little name tags! I used the Decorative Label Punch for that one!
Okay so I may have lost you on the directions above so I have created a Video Tutorial to show you how to create these amazing little rosettes! Be sure to give the video a thumbs up if you like it and want to see more Video Tutorials!
Don’t forget about the Big Shot Special that ends on August 31st! Also, if you want to earn the Good Greetings Stamp Set for FREE, click here to book your party/stamp class today!!!
Okay, so if you have been following my blog for even a week you probably know I love the color PINK and my SPONGE DAUBERS! These are just the coolest things ever and can really make your project amazing!!! Check out some samples using them here and here. Then I did a Video Tutorial on using your sponge daubers here! Well today I thought I would show you a few more samples!!!!
In the video, I showed you a sample using shades of green but then I created a shade of purple background! This is the completed card! I stamped the word Hello using the Epic Alphabet Stamp Set and my Stazon Ink and then I added some bling – Rhinestones! I layered that piece onto Wisteria Wonder (the lightest shade I used) and then placed it on a card base of Blackberry Bliss (the darkest shade I used)! I just love using multiple shades of one color because it really shows an amazing spectrum!
This card was created by one of my stampers at Stamp Class and she used 5 different shades of green – Pistachio Pudding, Pear Pizzazz, Old Olive, Garden Green, and Mossy Meadow! She added the name Mike because his birthday was right around the corner! She also used the Epic Alphabet Stamp Set as well as A Dozen Thoughts (Wish Big) and Teeny Tiny Wishes (Happy Birthday)! I love how my stampers sometimes do exactly what I do and other times get creative and do their own thing! Together, we always come up with another great idea! I love it!!! I hope you try out this technique and feel free to leave me a comment below or send me your project. I would love to see it and share it!
Today is HOT HOT HOT (and I’m not just talking about the temperature outside)! Today I am keeping the Big Shot Fun rolling so I have another Big Shot Tutorial for you! If you missed out any of the others this week, check them out here – Monday, Tuesday, Wednesday, and Thursday! It’s also FRIDAY so the weekend is in site! Can I get a WOOT WOOT?
I’m showing you how to make these amazing little flowers! I used the Spiral Flower Die with my Big Shot to get the template cut out for these flowers! You need a piece of cardstock that measures 4″ x 4-1/4″ and you can run 2-4 pieces of cardstock through the Big Shot at one time! Great for making lots of flowers at the same time! Then you will un the die-cut image over your bone folder to break down the fibers of the cardstock. This will make it start to curl as well. The middle of the flower is the smallest little scallop, not the bigger end. (That was a surprise to me, I totally thought start big and work your way down. Fold the first (smallest) scallop back and then start rolling forward. This will create a nice flower center. Your hot glue gun and Silicone Mat will be your best friend for finishing these flowers off too! When making a flower with 2 colors, just lay the 2 pieces together and start rolling! You can even do 2 of the same colors and roll them together for a nice full flower! After you have rolled it all nice and tight, throw it in the air and let it bounce around a little to loosen up if you want a fuller, more open flower! Add your hot glue glob to the last circle/scallop and press your flower rolls into that glob and hold for 10 seconds. You can then add some hot glue to the 2nd scallop to adhere it to the side of your flower if you want a tight look. Once you are finished and it is dried/cooled, take a clear block and press it on the top of your flower (too much pressing can result in a ripped/smoothed flower). This will flatten the petals out a little and make your flower look more open. You can also use your bone folder to fold the petals out a little too! Don’t forget to save your negative image of the die to use for Pop Up Cards, check that out here!
To see this in action, check out my Video Tutorial below! Be sure to give it a thumbs up if you enjoyed it and want to see more! Let me know in the comments what you would like to see next!
Only 10 more days to take advantage of Stampin’ Up’s Big Shot Promotion – purchase the Big Shot and get your choice of one of five select Bundles for FREE!!! If you already own the Big Shot, you can purchase the specials Bundles at 15% off!
Of course here are this week’s Weekly Deals!!!! Love the Elegant Butterfly!!!
And last but not least, the BEST Promotion of all!
If you sign up as a new demonstrator between August 21-28, you can receive extra Starter Kit product! That’s right, you’ll receive $150 (rather than $125) worth of product in your Starter Kit, for just $99 (FREE Shipping). Talk about a sweet deal! Click here to learn more or click here to ask my any questions your might have!
Well I hope you have an amazing weekend! Happy Stampin’