The Perfect Fall Card!!!

Posted on

I feel like this is the perfect fall card. It’s got fall colors and it has that wonderful greeting.

Perfect Fall Card, www.LaurasStampPad.com

I just love this greeting. It warms my heart and I love sending it to others. Of course, you could always change up the colors and designer paper for all year long! Just perfect!!! 🙂

I started with a Very Vanilla card base. Next, I layered on a piece of Cajun Craze measuring 4″ x 5-1/4″. For the center piece, I cut the following pieces:

Early Espresso Cardstock – 2-3/4″ x 4″

Painted Autumn Designer Series Paper – 2-1/2″ x 1-5/8″

Painted Autumn Designer Series Paper – 1″ x 2″

Very Vanilla Cardstock – 2″ x 1-3/8″

Using the greeting from the Rose Wonder Stamp Set, I stamped the greeting in Cajun Craze Ink. I added a little knot of Crushed Curry Mini Chevron Ribbon to the smaller designer paper, adhering the ends to the back. To ensure my placement was even, I placed all of the piece on the Early Espresso cardstock. Then picking up one at a time, I adhered them down. Then I added this piece to the card front with Stampin’ Dimensionals. You all know how much I love a little texture and those Stampin’ Dimensionals.

Don’t forget that this Painted Autumn Designer Series Paper is one in the Buy 3, Get 1 Free Designer Series Paper Special!! This special ends on October 31st. Click here to start shopping! If you order is $75 or more, you will earn this month’s Free Stamp Set. It is your choice between the Graceful Garden Stamp Set and the Daisy Delight Stampin Set.

Happy Stampin’

~Laura

Product List


Technique Tuesday – Creating a Glitter Window!!!

Posted on

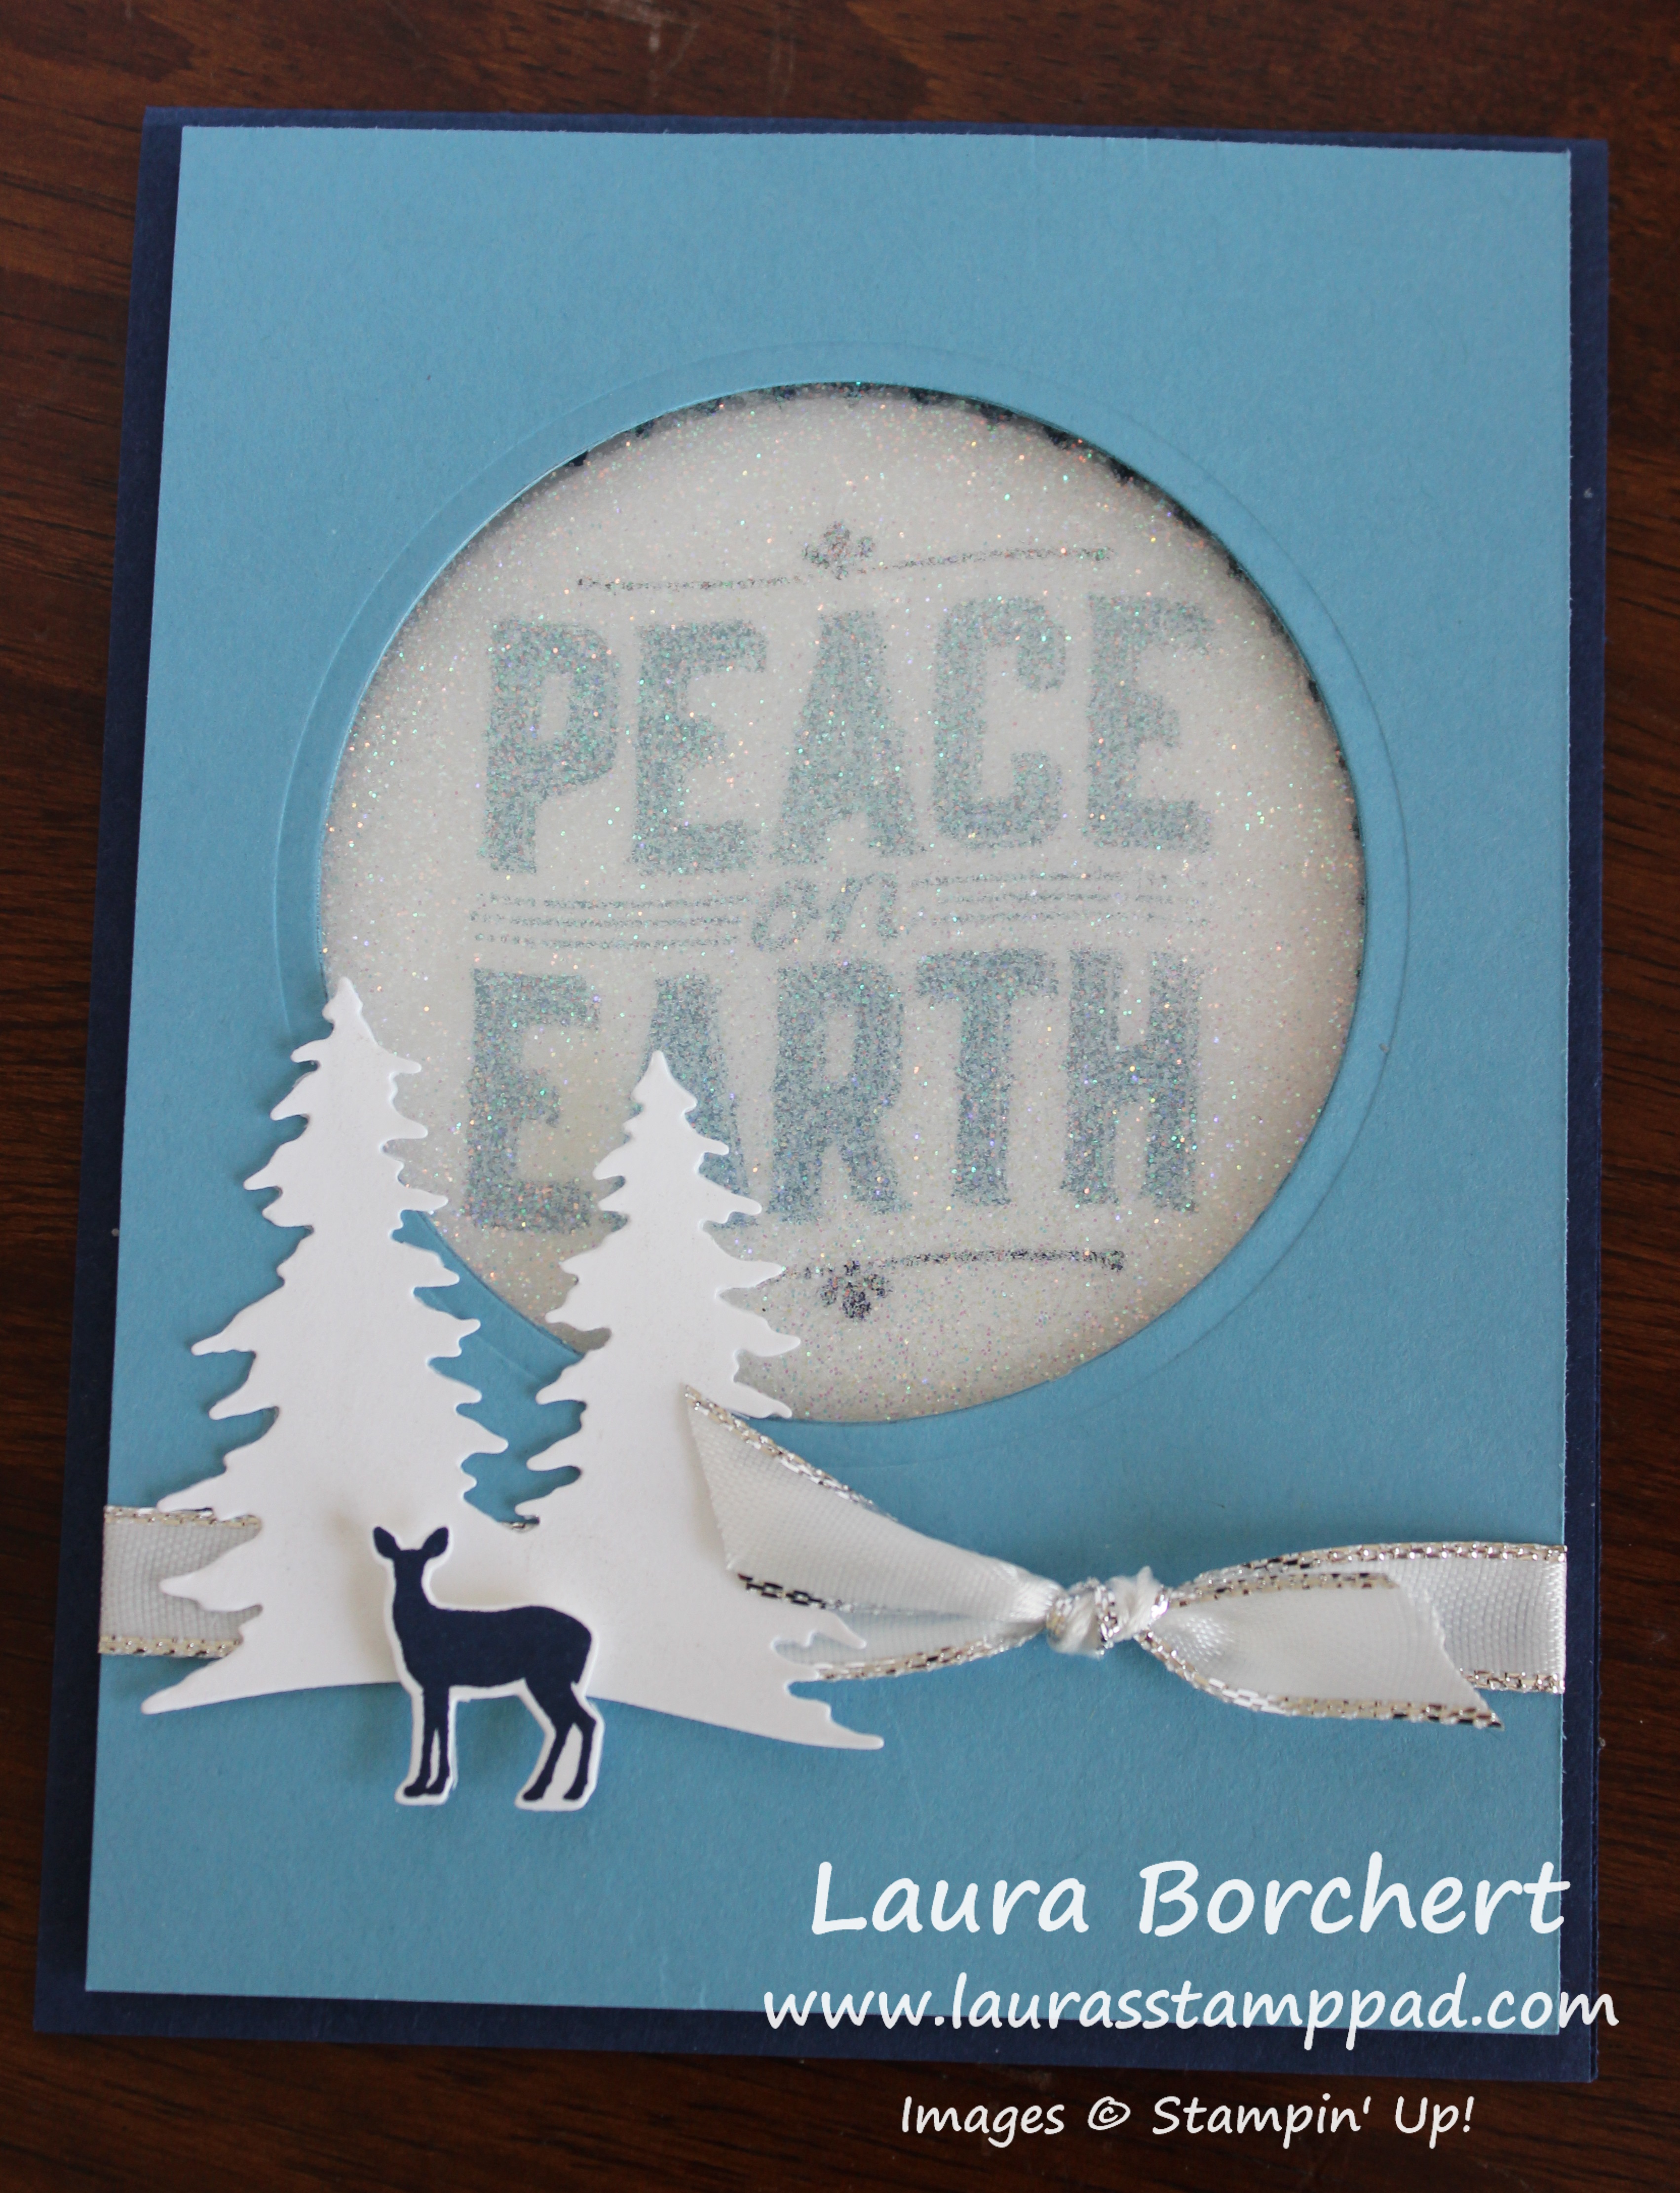
Happy Tuesday!!! You all know what that means! I have a fabulous technique to share with you! Today, we are creating a glitter window for the greeting to peek through!

Creating a Glitter Window, www.LaurasStampPad.com

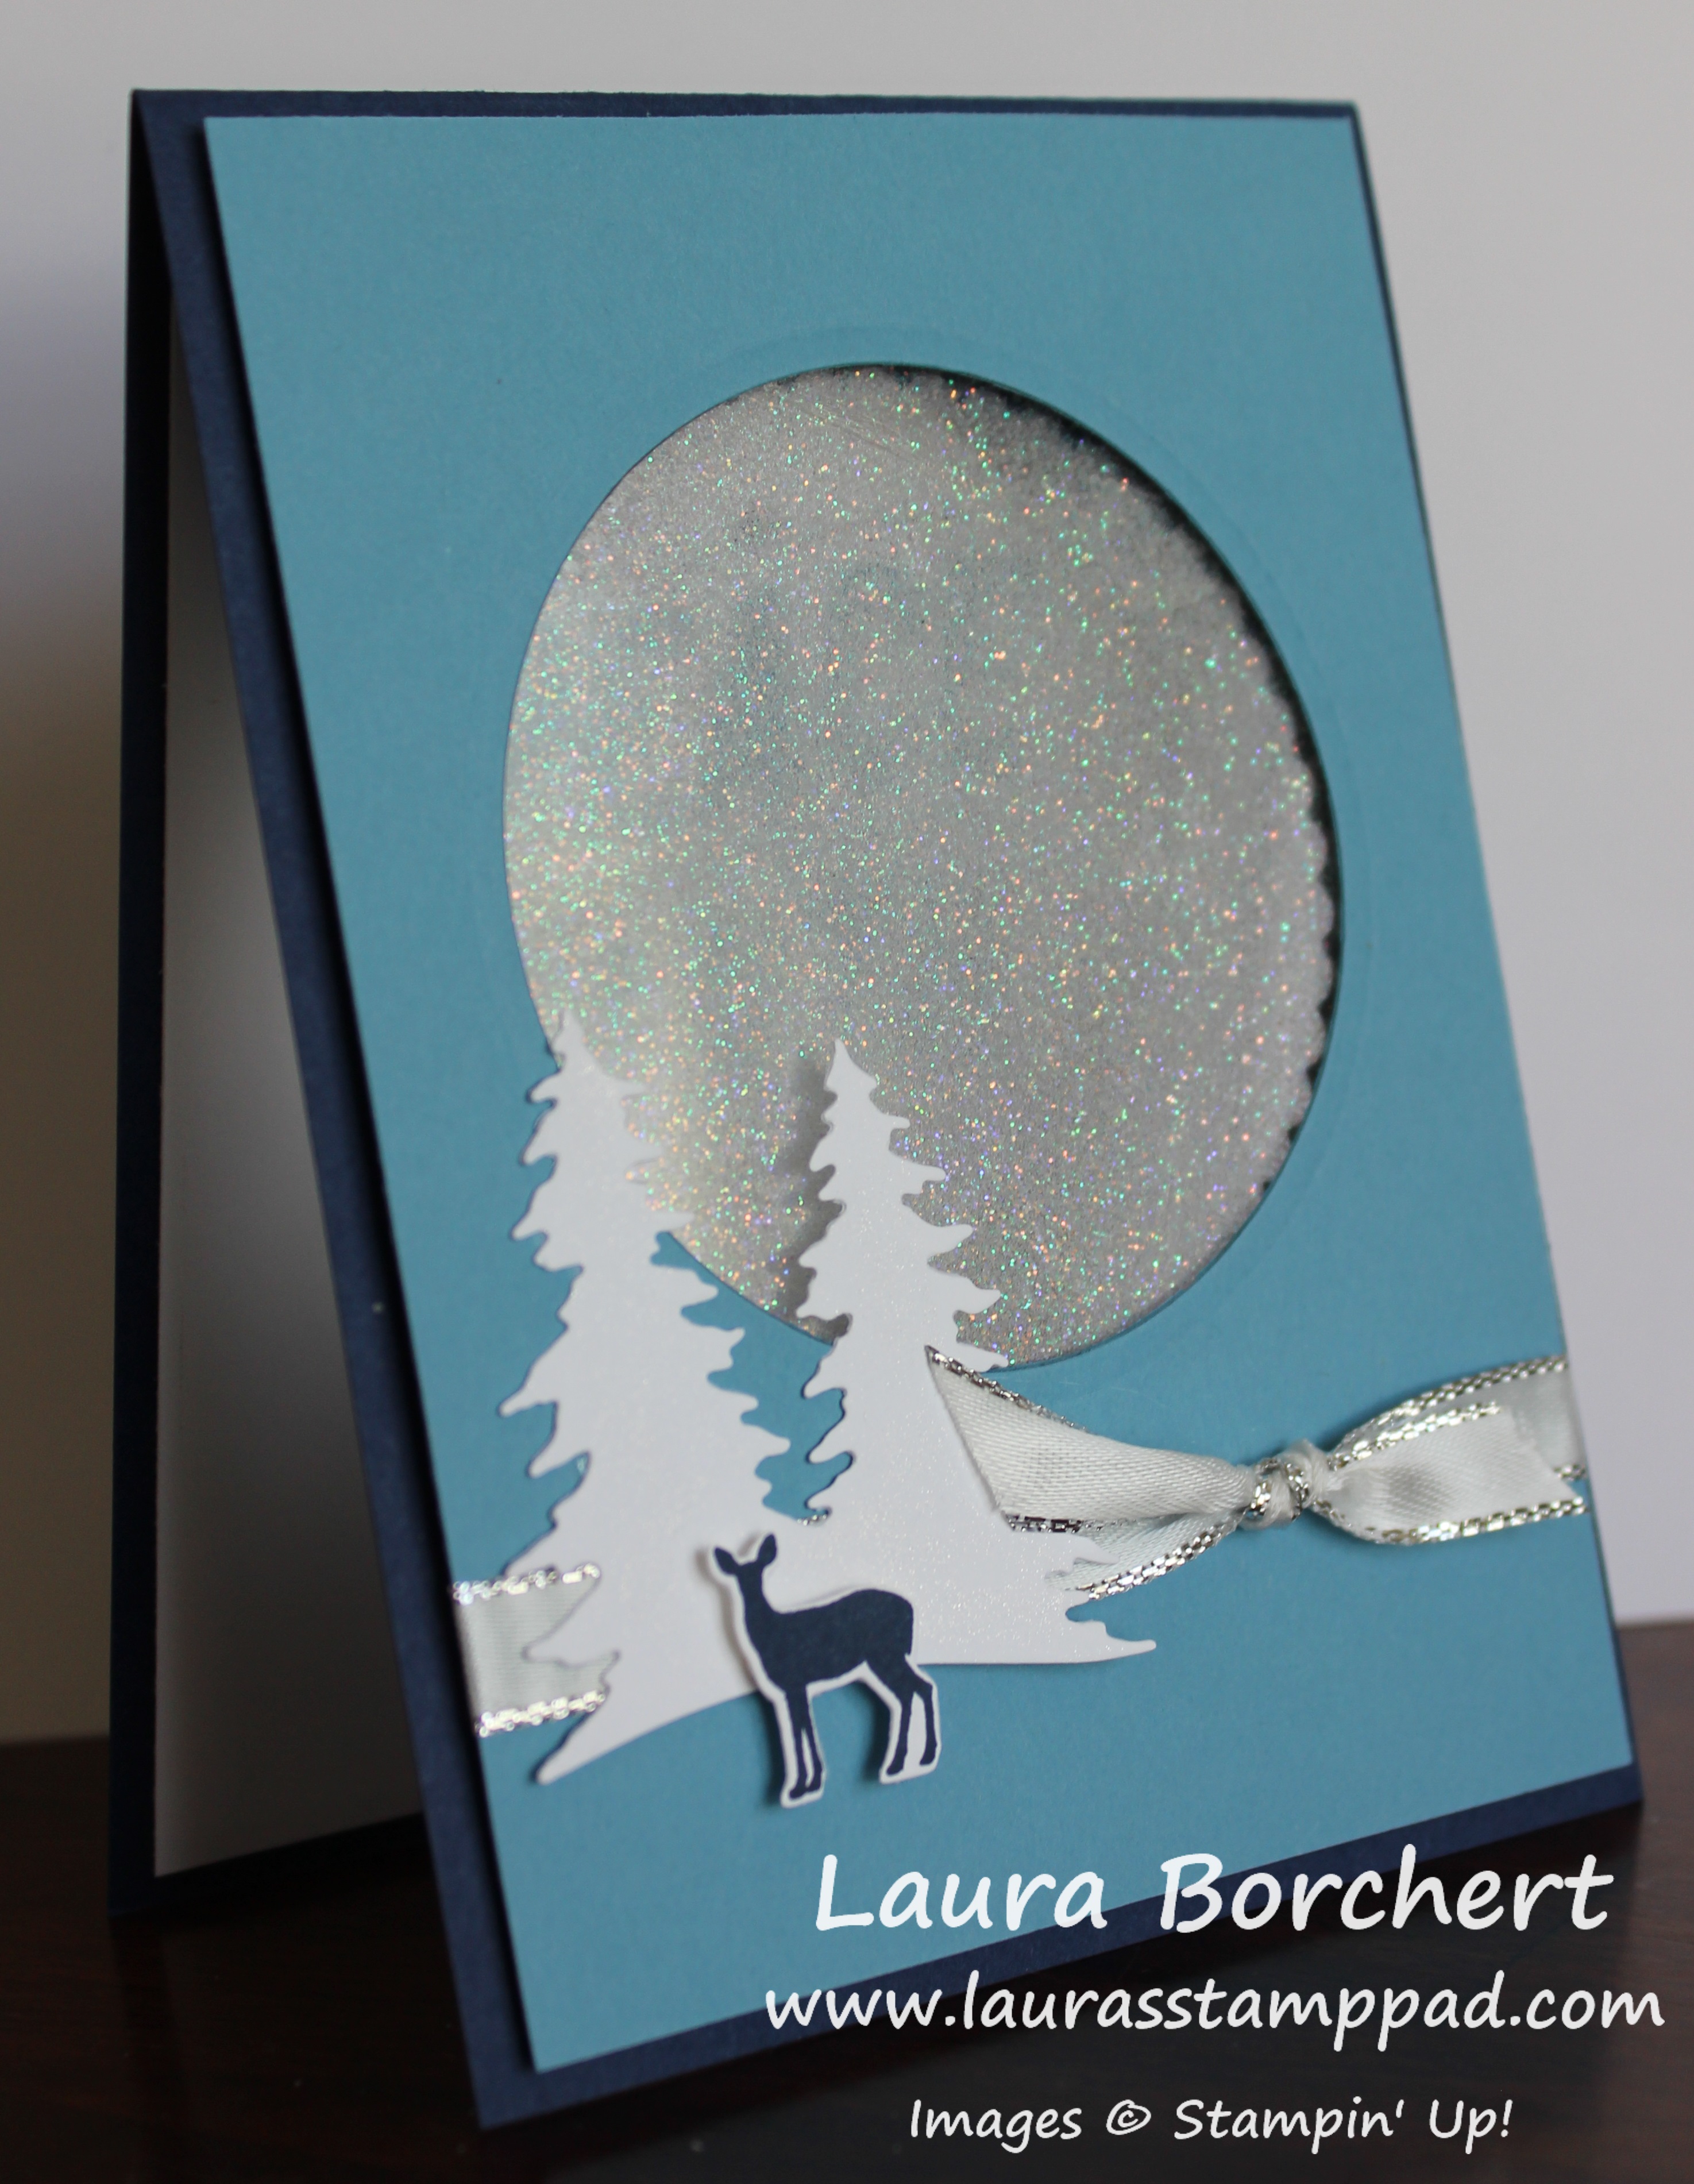
Isn’t this card just stunning with those blues and that glitter and shine! I love it. The best part is that the glitter is contained and won’t flake off all over! Woot Woot! 🙂 Thank you to Julie Davison for the amazing idea! When I first say this, I knew I had to recreate it.

I started with a Night of Navy card base (4-1/4″ x 11″). Next I took a piece of Marina Mist (4″ x 5-1/4″) and die cut a circle using the Layering Circles Framelits. This circle can be in the middle or towards the top, it all depends on how much room you want for the bottom decoration. Then, I set this on the card front and traced a circle onto the navy card front. Using the scallop circle that is just a bit larger, I die cut that from the card front. You don’t have to use the scallop circle but it gives a little texture and cuteness to the inside!

Glitter Peek-A-Boo, www.LaurasStampPad.com

Before completing the glitter window, I stamped the greeting on the inside. First, I took a piece of Whisper White (4″ x 5-1/4″) and placed it on the inside on the card. I closed the card and stamped the Peace on Earth from the Carols of Christmas Stamp Set through the hole in Marina Mist Ink. By stamping in the circle, you have perfect placement of your greeting. I added the little decoration to the top and bottom of the greeting in Night of Navy Ink! Once I stamped the greeting (and there were no mistakes) I adhered the white to the inside of the card!

Peace On Earth, www.LaurasStampPad.com

Glitter Window, www.LaurasStampPad.com

Now for the glitter window, I used 2 squares of Window Sheet and 2 sheets of Adhesive Sheets. I placed a piece of adhesive sheet over each window sheet and covered 1 one of them in Dazzling Diamonds glitter. Then I pressed the two together. It’s okay if the glitter doesn’t go all the way to the edge perfectly because that will hidden anyway! Now to build the window, I added a little bit of Snail Adhesive around the navy circle and placed the window on top. Before adhering the Marina Mist, I tied some Metallic Silver Edge Ribbon around towards the bottom. I used Stampin’ Dimensionals to adhere this to the card front! For the decoration, I stamped the deer from the Carols of Christmas Stamp Set in Night of Navy. Using the coordinating Card Front Builder Framelits (Bundle & Save 10%), I die cut the deer and the trees. Then I added those to the card front!

This isn’t a card I would recommend making hundreds of for your Christmas card this season but it’s fun to make for a special few!!!

If you would like to see this all in action, check out the Video Tutorial below or click here! Be sure to give the video a thumbs up if you liked it and don’t forget to subscribe if you are new. If you would like a notification when I post a new video, be sure to click the bell right next to the subscribe!!!

Happy Stampin’

~Laura

Product List


I Am Thankful For You!!!

Posted on

I have been having so much fun with these sunflowers. You can check out more sample here and here! This greeting, I Am Thankful For You, if great for all year long and especially for Thanksgiving!I Am Thankful For You, www.LaurasStampPad.com


I started with a Crumb Cake card base. Next, I layered together a piece of Tangerine Tango (3-1/4″ x 4-1/4″) and the Painted Autumn Designer Series Paper (3″ x 4″). I added this to the center of the card. For the greeting, I used the Painted Harvest Stamp Set. I took a piece of scrap white and stamped the greeting in the middle in Early Espresso Ink. Next, I added the sunflower to the top and bottom with Crushed Curry Ink and Early Espresso Ink. Using the 2″ Circle Punch, I punched it out with the greeting in the middle.

Layering a Greeting, www.LaurasStampPad.com

Next, I took a piece of Early Espresso and punched it with the Everyday Label Punch. In order for it to pop out on either side of the circle greeting, I cut it in half to extend it out. Before adding the label pieces, I cut two piece  of Burlap Ribbon and placed them on the greeting with Stampin’ Dimensionals securing them on top. Then I added the label pieces and added Snail to the back. I placed this on the card front in the lower right corner of the designer paper!

Painted Autumn Designer Paper, www.LaurasStampPad.com

After cutting all the pieces of designer paper for the front, I had these small pieces left over. Rather than saving them for a “future project” that I will totally forget about, I just added them to the inside of the card for a little pop of color! I love it!

Don’t forget the Painted Autumn Designer Series Paper is part of the Buy 3, Get 1 Free Designer Series Paper Special! Click here to start shopping. Ends October 31st!

Happy Stampin’

~Laura


Christmas Candles…..Can Later Be Used for Birthday Candles!

Posted on

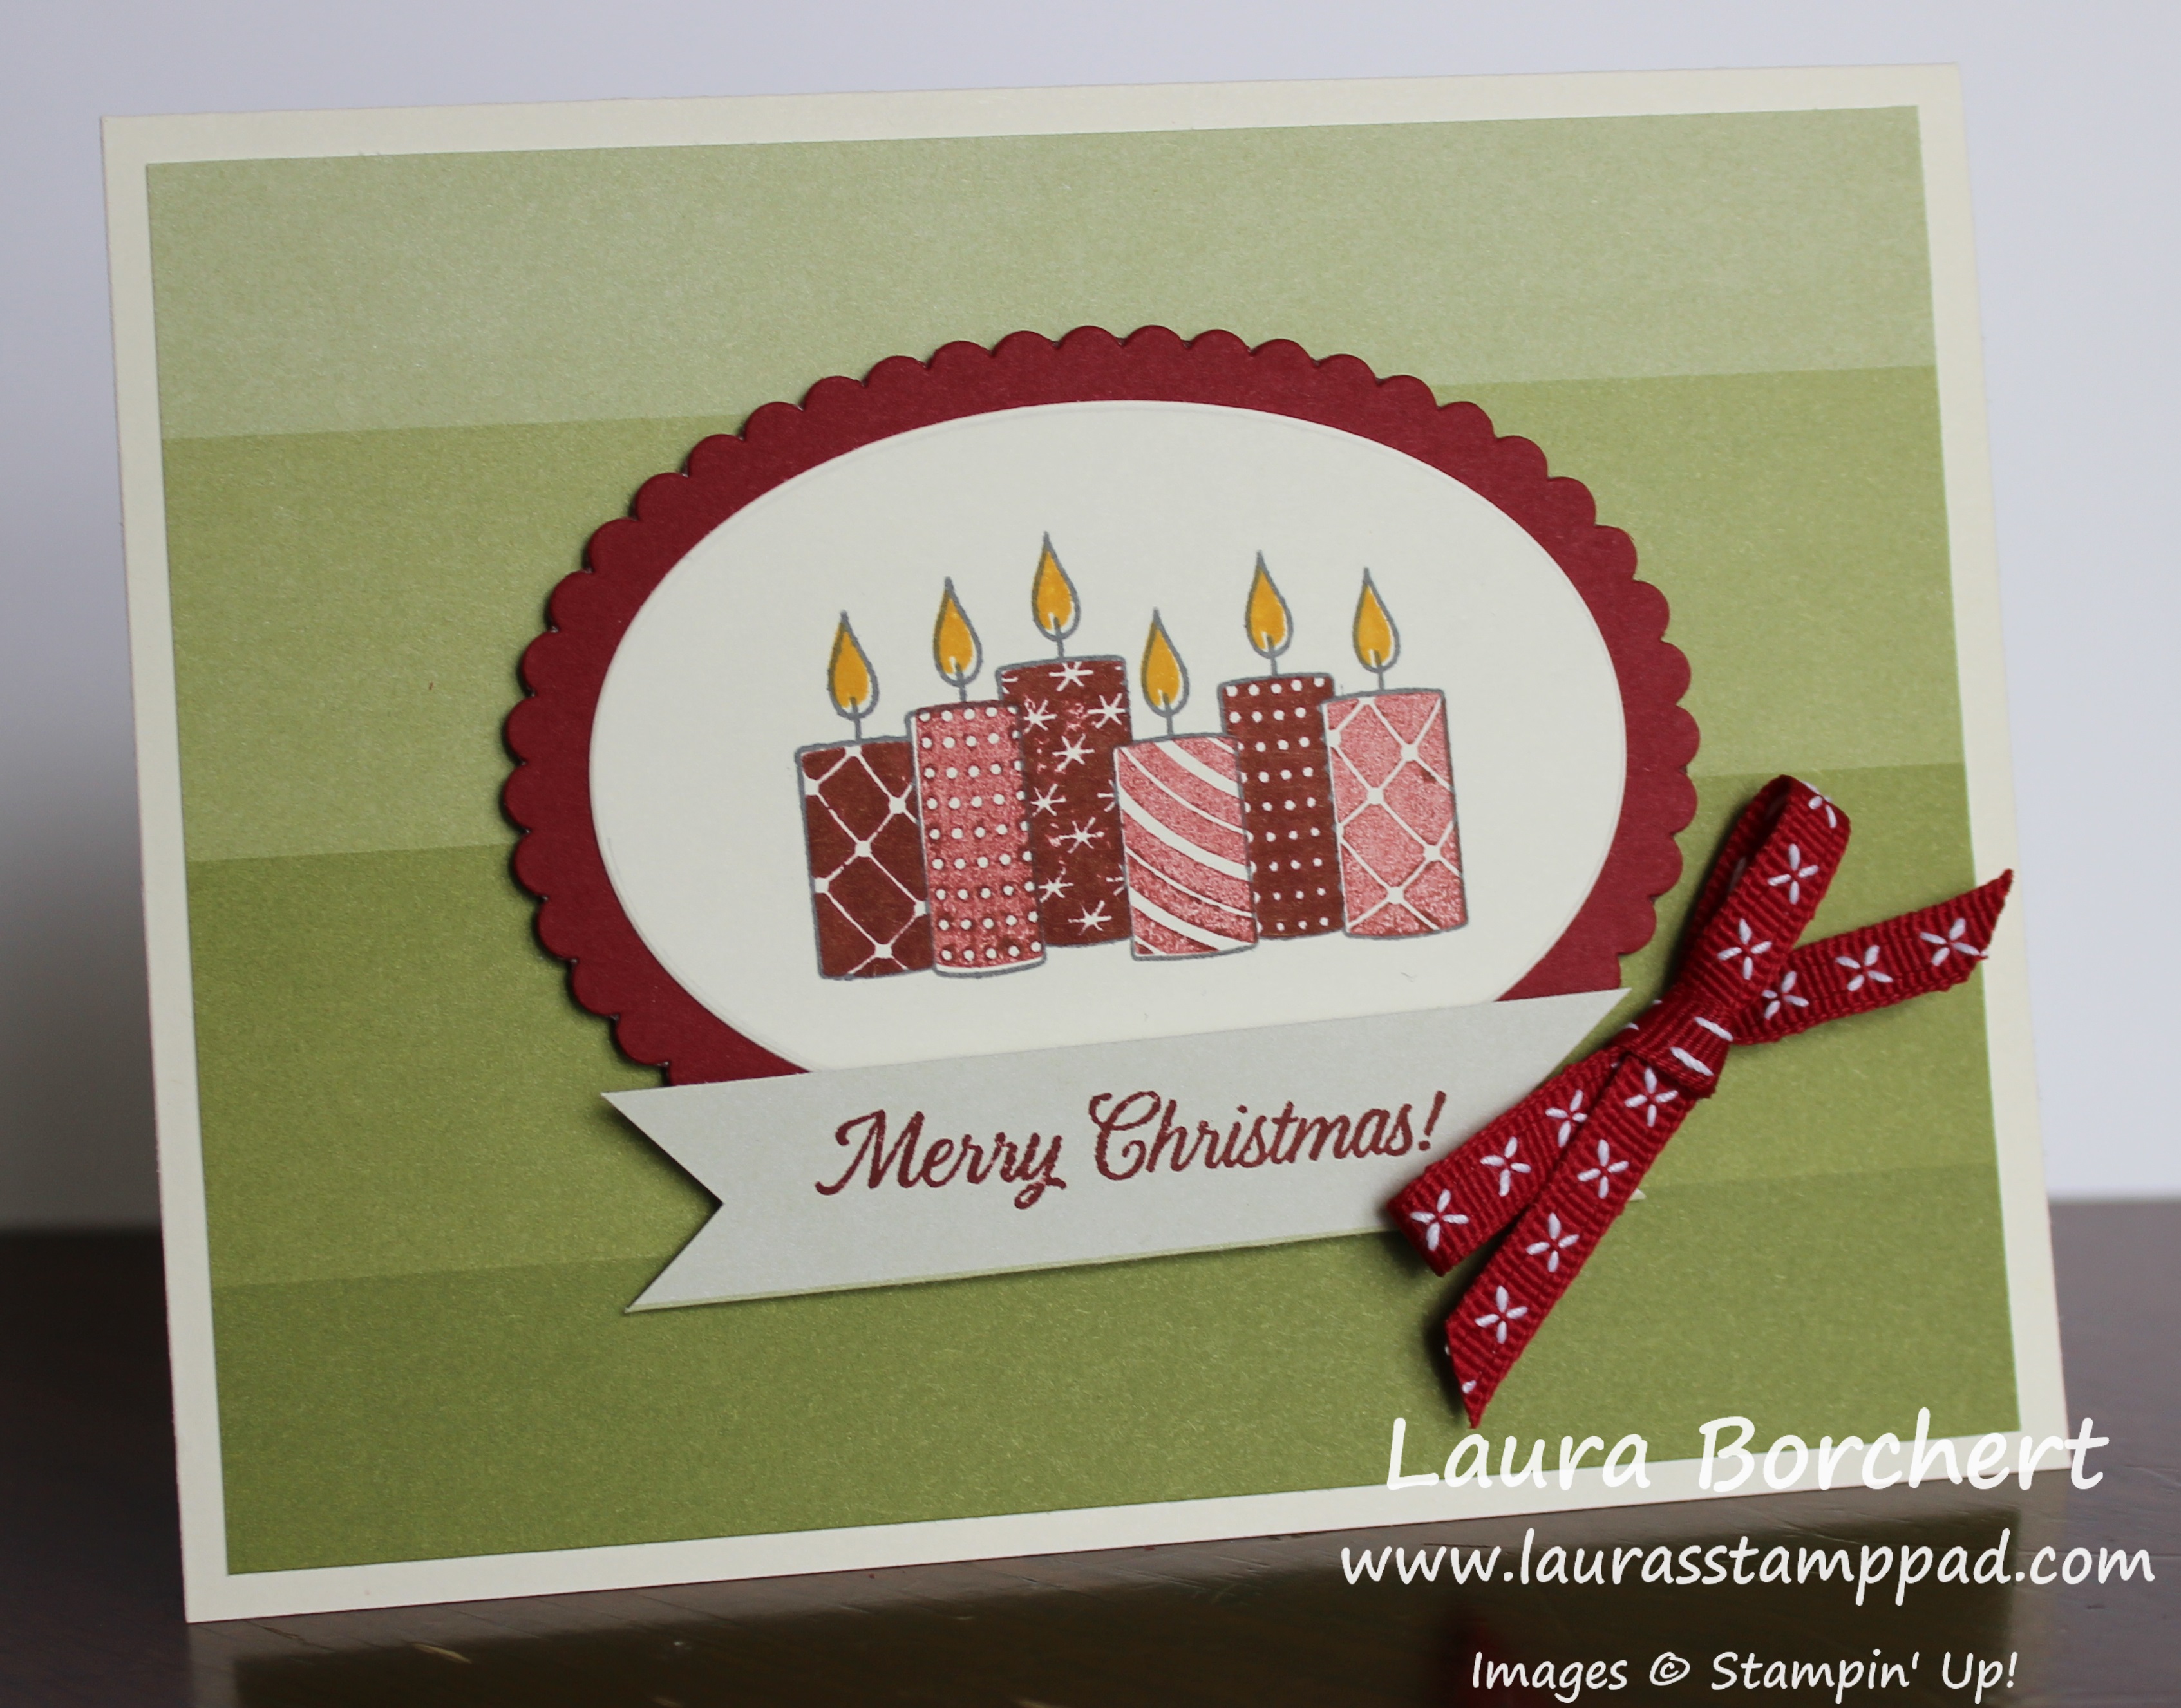
Happy Friday!!! I love how the Merry Patterns Stamp Set has these Christmas Candles but they can be used all year long as birthday candles and more!!! Perfect!

Christmas Candles, www.LaurasStampPad.com

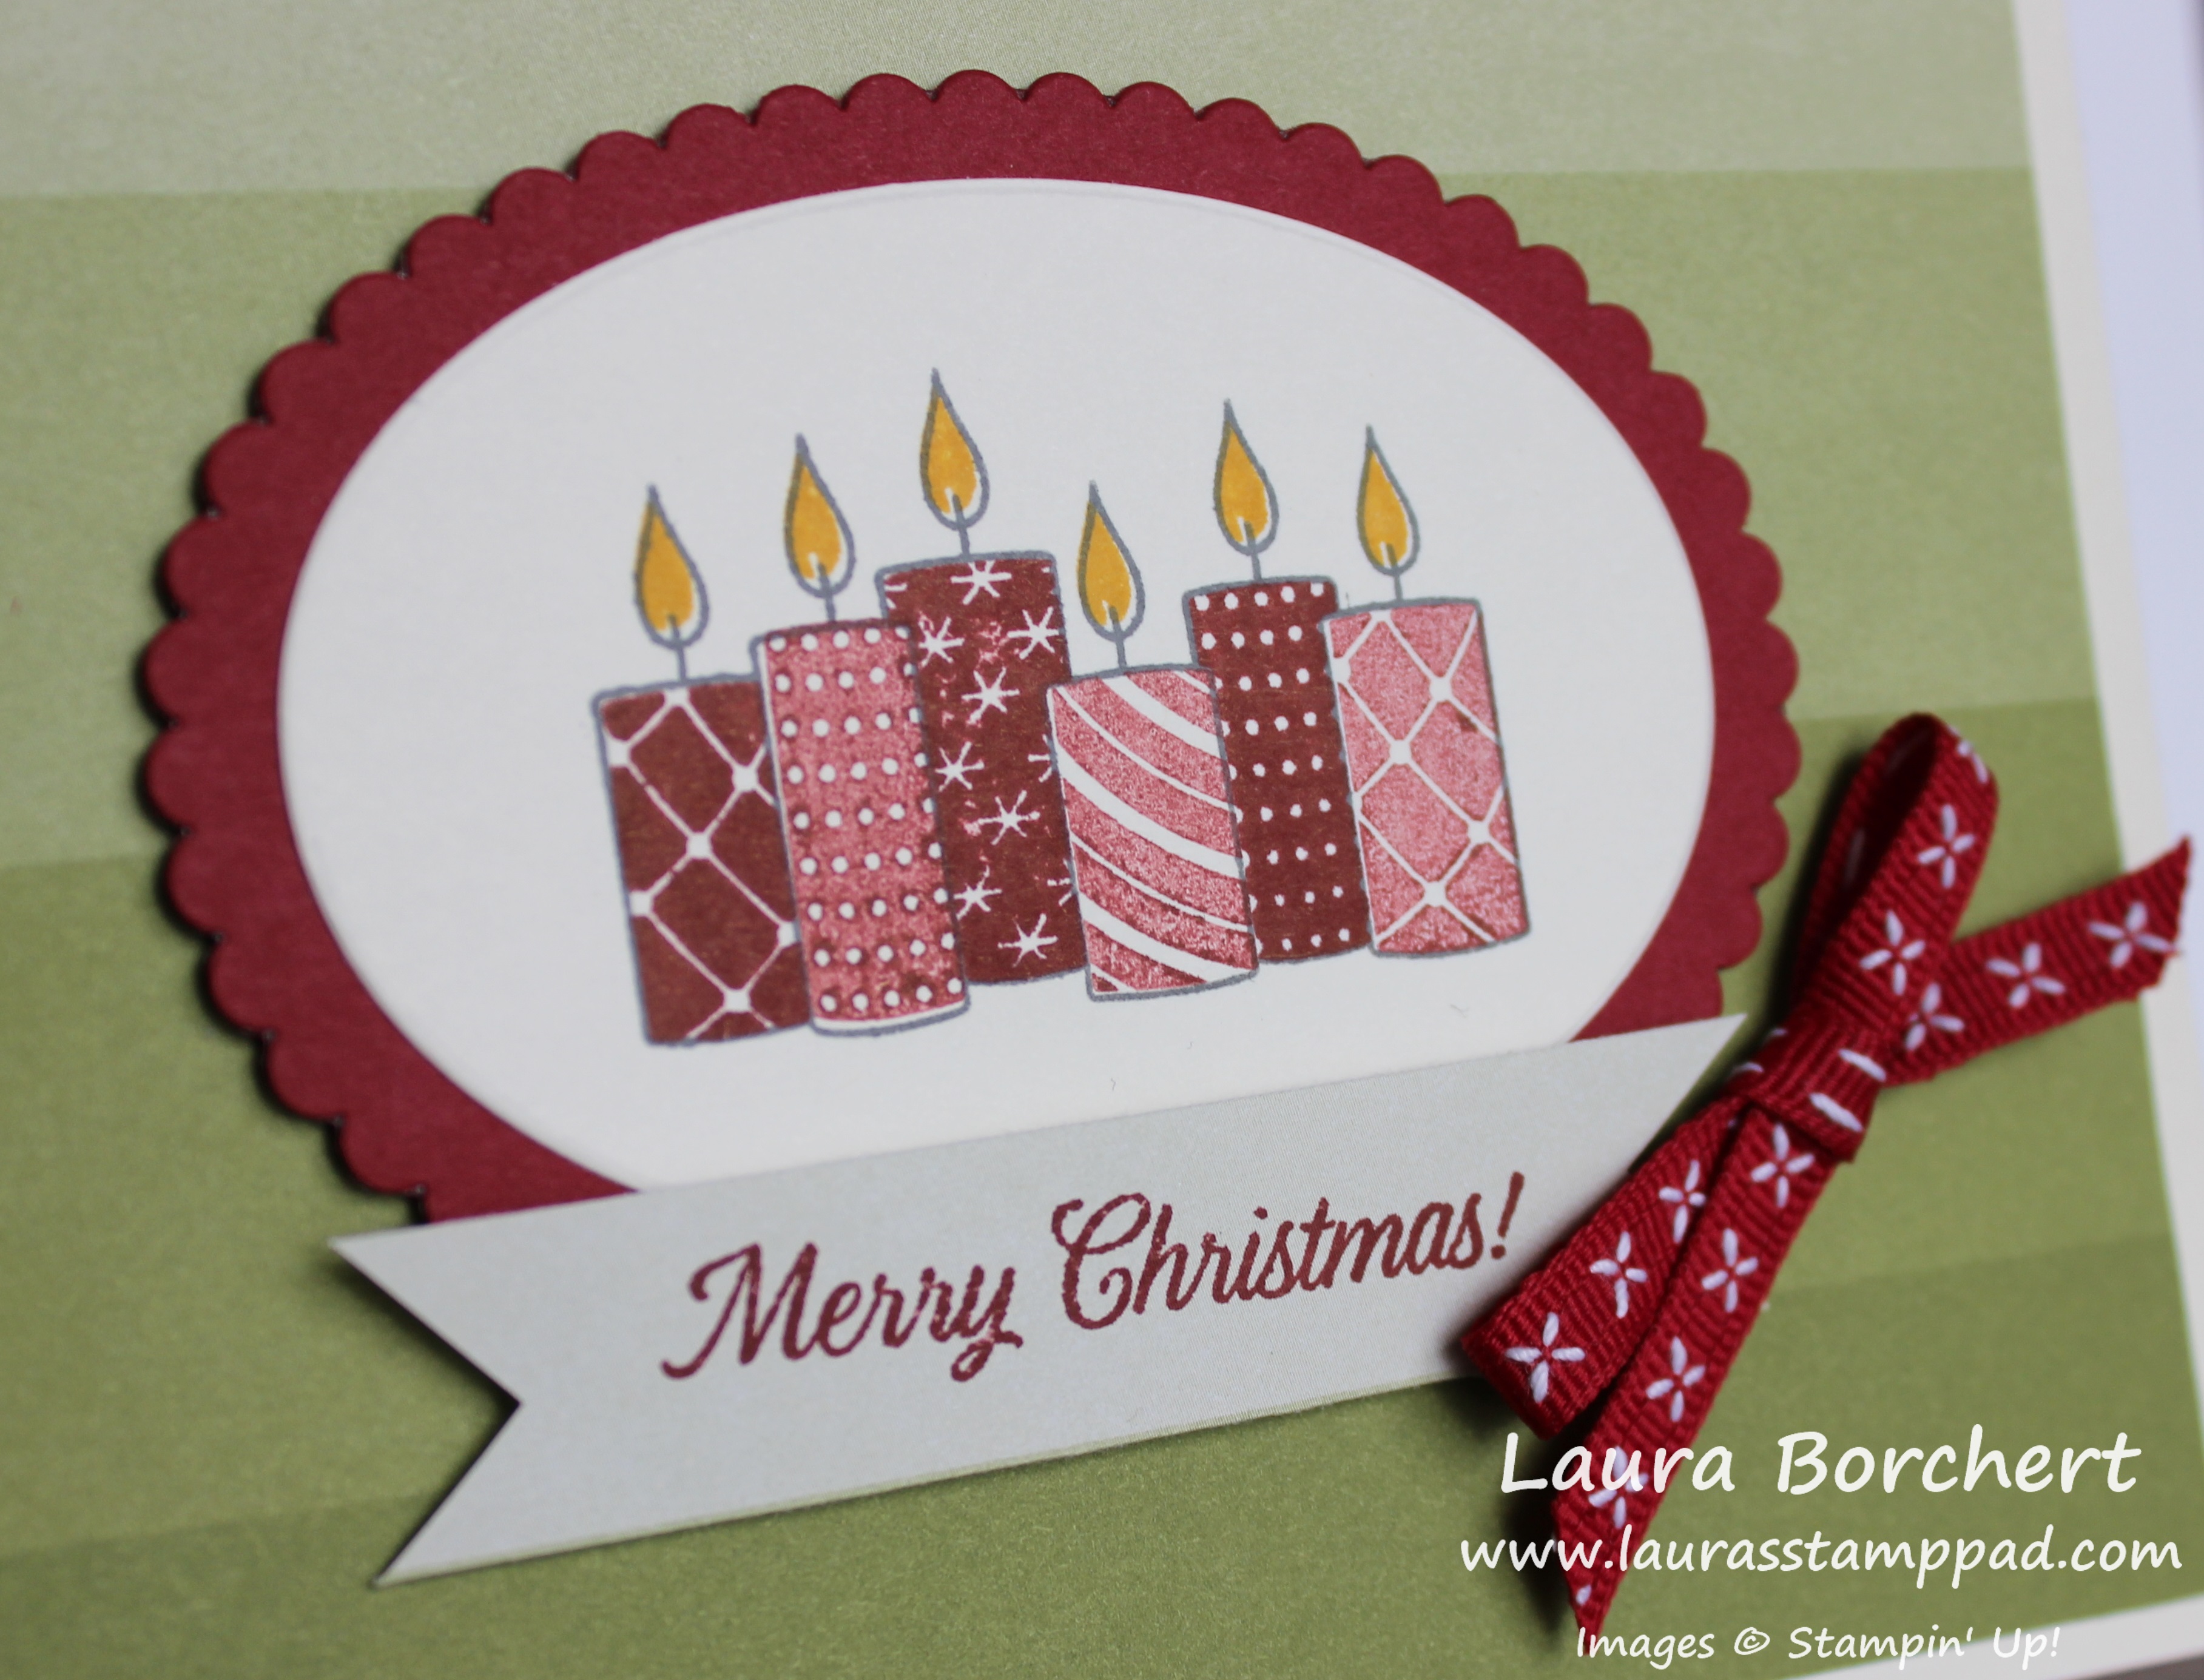
I started with a Very Vanilla card base. Next I layered on a piece of the Old Olive ombre paper from the Color Theory Designer Series Paper Stack. Don’t forget this is one in the Buy 3, Get 1 Free Paper Special this month! Then I used the Layering Ovals Framelits for the main focal point. Using the Merry Patterns Stamp Set, I stamped the outline of the candles first in Basic Black Ink. Next, I stamped one of the candles in full strength Cherry Cobbler Ink and the second one was stamped off once. This gives that variation in color. You could always pick 2 different colors for these too! The flames were stamped in Crushed Curry Ink. I layered this onto the scallop Cherry Cobbler oval and added it to the card front with Stampin’ Dimensionals.

For the greeting, I used a leftover scrap piece from the designer paper and stamped it in Cherry Cobbler Ink. I cut the banner tips on both ends and added it to the bottom of the candles. Using some Cherry Cobbler Double Stitched Ribbon, I tied a bow and adhered it with some Mini Glue Dots. I used the glue dots to rotate the one ribbon so it showed X’s and not the lines. I love using glue dots to make my ribbon look exactly how I want it to! 🙂

Red Candles, www.LaurasStampPad.com

If you would like to see more samples using this stamp set, check out this post and this one!

Don’t forget this still time to take advantage of the Buy 3, Get 1 Free Designer Series Paper Special. Also, all order of $40 or more will earn Laura’s Loyal Stampers Stickers and orders of $75 or more will also earn the Free Stamp Set of the Month! You get to pick from Daisy Delight or Graceful Garden this month!!

Have a fabulous weekend! Happy Stampin’

~Laura

Product List


A Sweater on a Deer Isn’t So Weird!!!

Posted on

A Sweater on a Deer Isn’t So Weird….or is it? You make the call!

A Sweater on a Deer Isn't So Weird, www.LaurasStampPad.com

Maybe not one I have ever seen in person but this one is super cute!!!

I started with a Garden Green card base measuring 4-1/4″ x 11″! Then, I took a piece of Whisper White (4″ x 5-1/4″) and stamped some greenery around the top half. I used the Merry Patterns Hostess Exclusive Stamp Set and Garden Green Ink. You can earn this one for free with a $300 order or combine some orders with friends to get to $300. This offer ends October 31st! To get the variation in color, I simply inked it up and stamped twice and then went back to the ink pad. I love that simple technique!

Next, I took a piece of the Merry Little Christmas Designer Series Paper (2″ x 4″)and added it to the bottom portion. Then I stamped the deer from the Merry Patterns Stamp Set in Smoky Slate Ink. I used some Cherry Cobbler Double Stitched Ribbon to tie a knot around the overlap of paper.  Then I added this to the card base with Stampin’ Dimensionals. For the greeting, I took some scraps of Whisper White and Cherry Cobbler and layered them together. I stamped the greeting in Cherry Cobbler Ink and snipped the end in a diagonal. I added this to the card front on the right hand side! Simple and fabulous for the Holiday Season!

If you would like to see more samples using the Merry Patterns Stamp Set in action, check out the Video Tutorial below or click here! Be sure to give the video a thumbs up if you liked it and don’t forget to subscribe if you are new. If you would like a notification when I post a new video, be sure to click the bell right next to the subscribe!!!

I posted another sample using this set yesterday! Click here to see that and stay tuned for one more! If you would like to earn this set, click here to start shopping! Don’t forget that orders over $75 will earn the Free Stamp Set of the Month from me. This month you get to pick from the Daisy Delight Stamp Set or Graceful Garden Stamp Set. You will also earn Laura’s Loyal Stampers Stickers once your order hits $40! I just love spoiling all of you!

Happy Stampin’

~Laura

Product List

‘Tis The Season!!!

Posted on

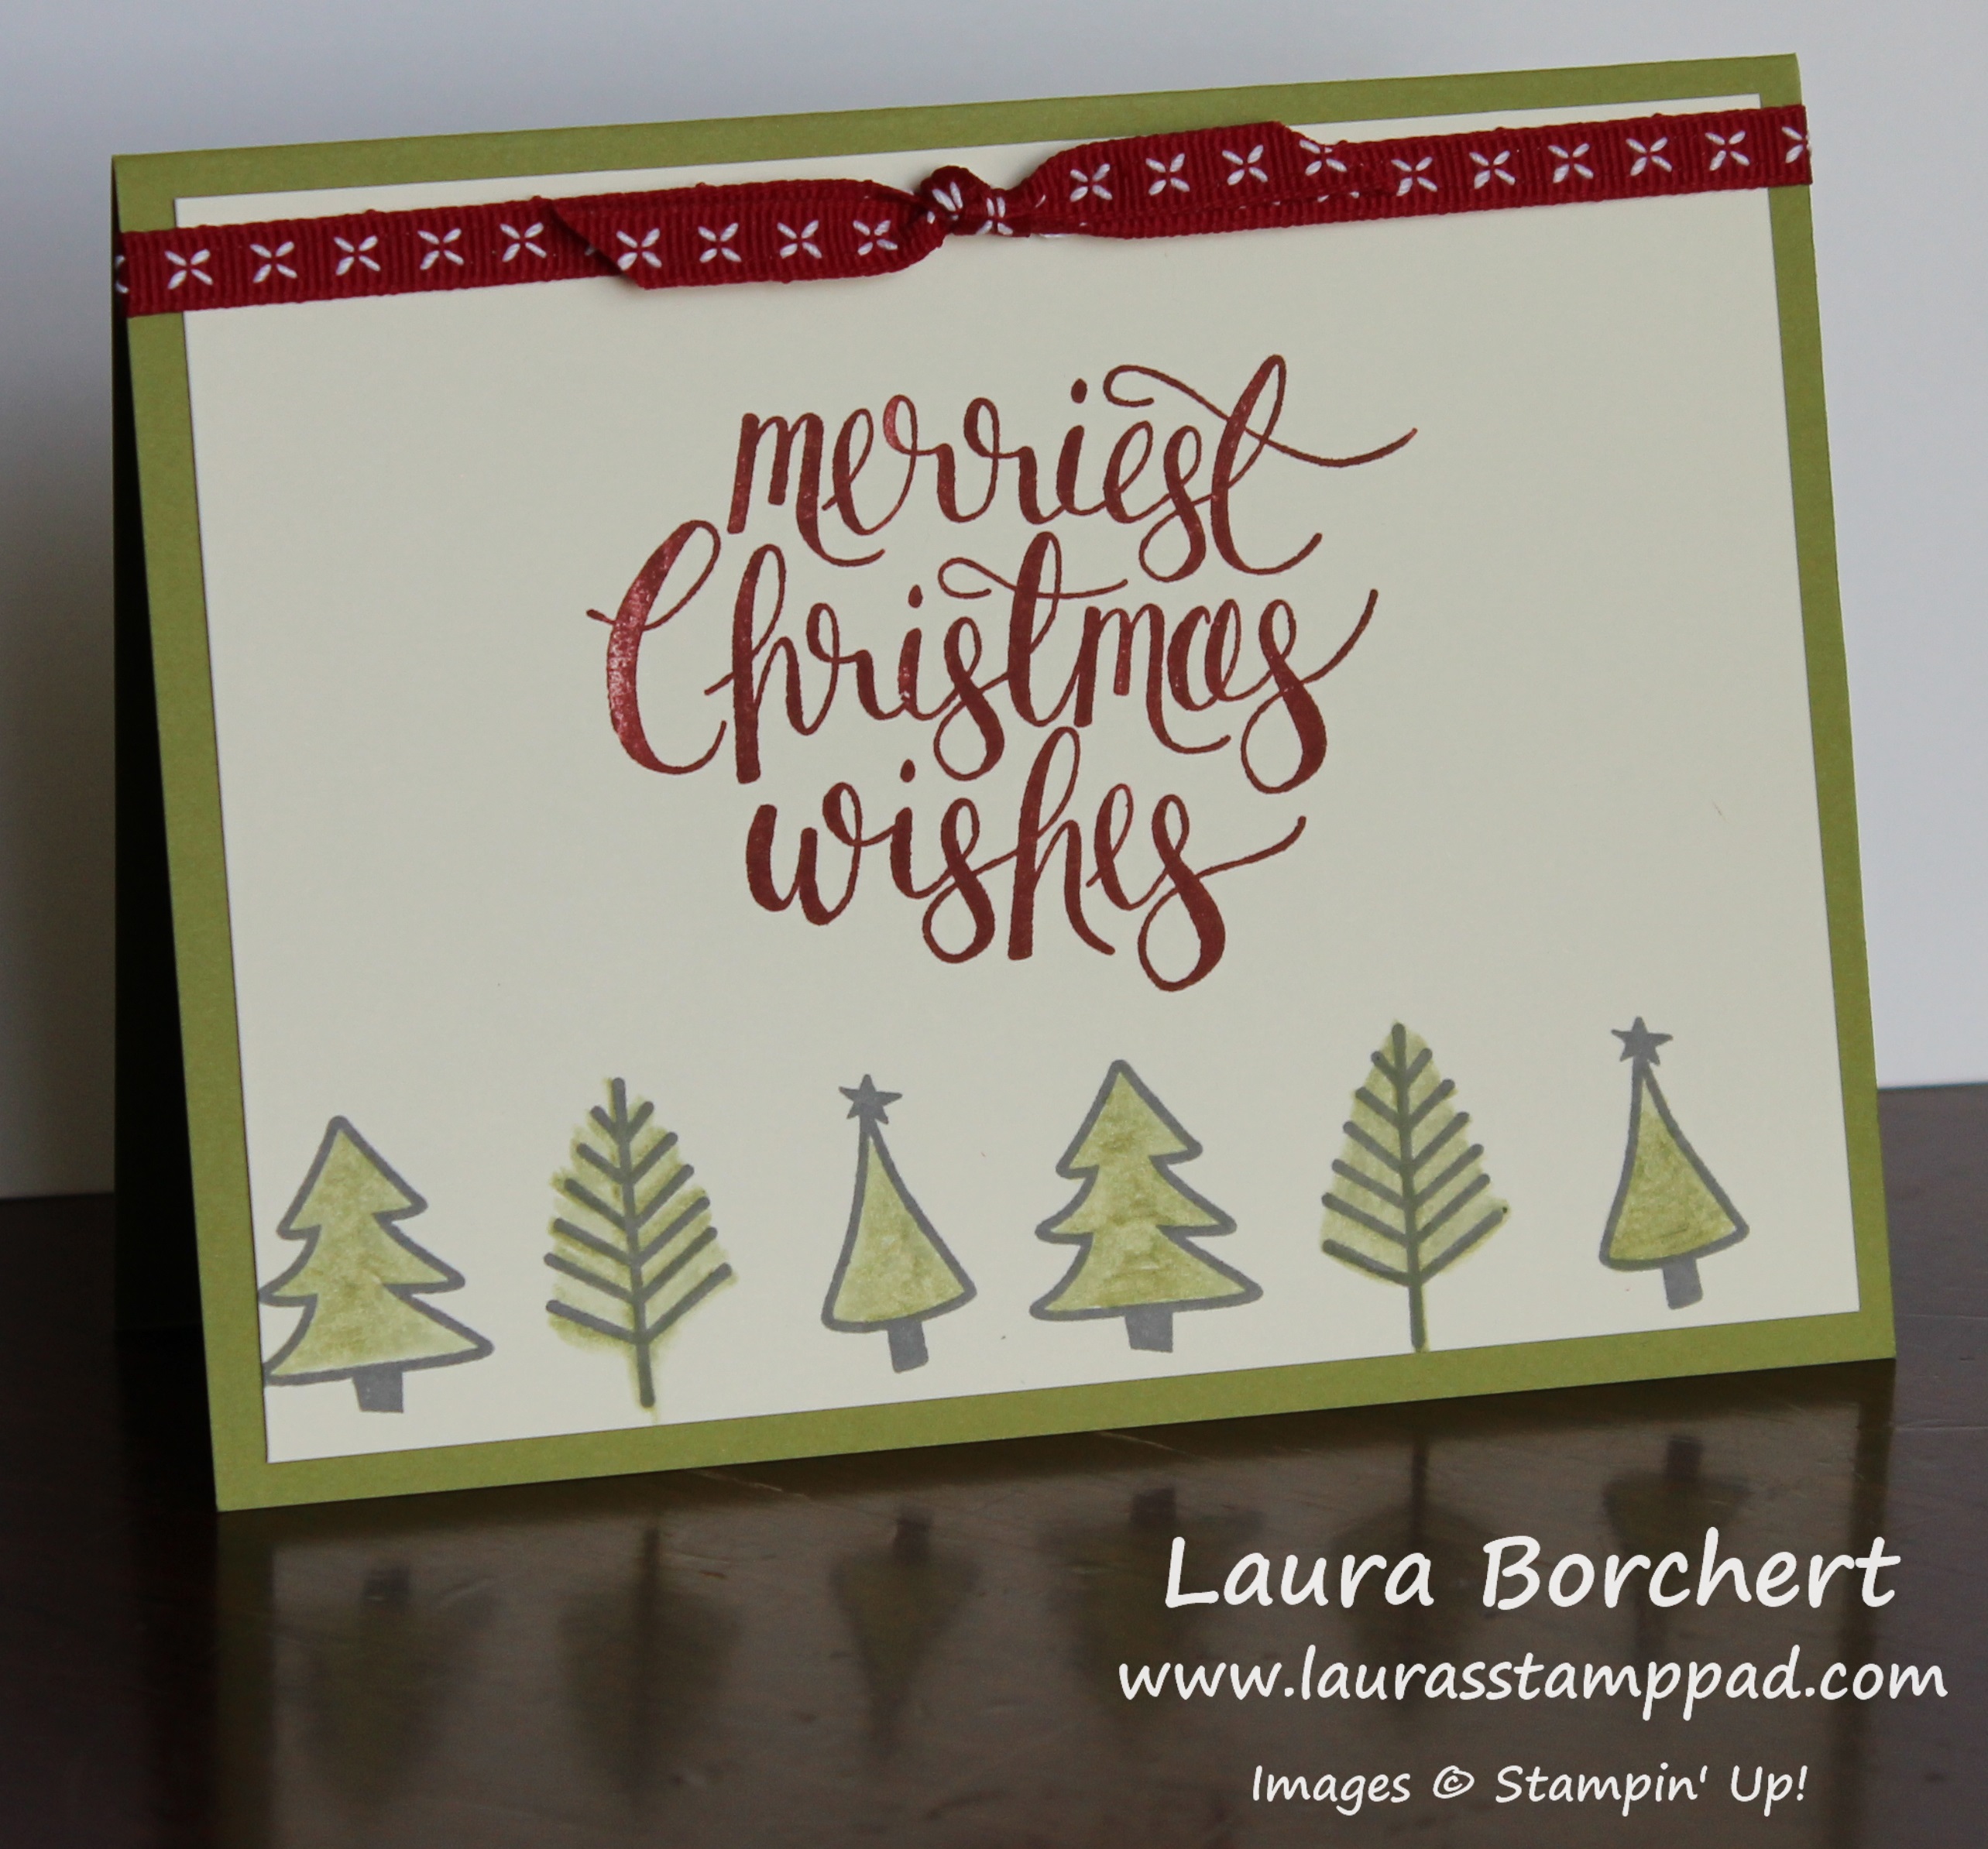
‘Tis The Season…..for crazy schedules, time with family, counting our blessings, and cute cards like this one!!! This one is super simple but I just love how it turned out!

Tis The Season, www.LaurasStampPad.com

You might be looking at this greeting and wondering which set it is in. This greeting is from the Merry Patterns Stamp Set which can only be earned for FREE by a Hostess with a $300 party. This can be a single order, orders collected, or a stamp gathering! This promotion ends at the end of October! Stay tuned for more samples using this set tomorrow!

I started with a Real Red  card base. Next, I took a piece of the Merry Little Christmas Designer Series Paper (3″ x 5-1/2″) and ripped both ends for a little texture! Then I took a piece of Whisper White (1-1/2″ x 5-1/2″). I stamped the first image with the “’tis the” in it in Old Olive Ink. Next, I stamped the patterned season in Real Red. This is all personal preference so try it out and see which you prefer. Stamp the green first and then the red pattern or stamp the red pattern and line up the green over the top. I go back and forth all the time on 2-step stamping and which way I prefer. Then to finish off the greeting, I stamped the greenery on the ends in Old Olive Ink. I stamped it twice each time before going back to the ink for that variation in color. All of these are layered flat (surprise, no dimensionals) to the card base! Simple and yet fabulous!

Join my mailing list so you get fabulous tips, updates on specials and more. Click here to join!

Happy Stampin’

~Laura


Product List


Technique Tuesday – Creating a Glossy Greeting!!!

Posted on

Happy Tuesday!!! That means I have a fun technique to share with you today!!! Today, I’m creating a glossy greeting using Glossy Cardstock and some ink refills! I love the striped look!

Creating a Glossy Greeting, www.LaurasStampPad.com

This simple card has a major wow factor with that glossy striped greeting! This technique is perfect for a greeting or just a background! I got the inspiration for this card from Sandy Jacobson!

I started with a Whisper White card base. Next, I took a piece of Real Red (3-3/4″ x 5″) and ran it through the Big Shot in the Quilt Top Embossing Folder. Then, I layered it onto a piece of Emerald Envy (4″ x 5-1/4″) and placed a strip of Whisper White Classic Weave Ribbon across it. I secure the ends to the back side and added this to the card front!

Glossy Baby Wipe Coloring, www.LaurasStampPad.com

Now for the greeting, I used Glossy Cardstock, a Baby Wipe, and ink refills! Simply fold up the baby wipe so it fits in your hand. Add drips of ink refill to the end. I have used both the rounded end and the layered end. The rounded end comes out more smooth and solid, whereas the other end  is more streaky. It’s all up to you! I tried Real Red and Emerald Envy but the red came out pink and the overlap of the colors turned purple. I ended up just doing Emerald Envy for this card. Check out the Video Tutorial below to see blues! When I ran it across the Glossy Cardstock, I went lightly for a more white/streaky look or I pressed hard for a fuller coverage.

Glossy Background, www.LaurasStampPad.com

The cool thing is that this dries quickly. I used the greeting from the Watercolor Wishes Stamp Set and Memento Ink to stamp the greeting. Be sure to stamp carefully as it will want to slide around if you press at an angle! I punched out the greeting with the 2″ Circle Punch. I added this to a scallop circle die cut using the Layering Circles Framelits in Silver Glimmer Paper. The greeting was then added to the card with Stampin’ Dimensionals.

Glitter Greeting on Glossy Cardstock, www.LaurasStampPad.com

If you would like to see this in action, check out the Video Tutorial below or click here! Be sure to give the video a thumbs up if you liked it and don’t forget to subscribe if you are new. If you would like a notification when I post a new video, be sure to click the bell right next to the subscribe!!!

Happy Stampin’

~Laura

Product List


Hooray Happy Birthday!!!

Posted on

Happy Monday, everyone!!! I’m super excited today because this card is quick, simple, and masculine! I really struggle with man cards because I love flowers and bling but Hooray Happy Birthday! I nailed it!!!

Hooray Happy Birthday, www.LaurasStampPad.com

Not only does this card fit the perfect man card look, I also used up a lot of scraps of the Color Theory Designer Series Paper! Double win!!

I started with an Island Indigo card base. Then I took a piece of Whisper White (4″ x 5-1/4″) and added a strip of the Color Theory Designer Series Paper to the left side. This designer paper is 6″ x 6″ and I cut a 4″ x 5-1/4″ for this card and was left with a 2″ x 6″ strip which I cut for this card to 2″ x 5-1/4″. I love using up scraps. Next, I added this to the card front.

For the greeting, I cut a piece of Whisper White (2-1/2″ x 3-1/2″). Using the Happy Birthday Gorgeous Stamp Set, I stamped the speckled balloon in Island Indigo Ink. Then I stamped the Hooray Balloon in Old Olive Ink and punched it out with the Balloon Bouquet Punch. I added that balloon with Stampin’ Dimensionals for a little texture. Then I stamped the greeting in Old Olive. Finally, I layered this piece onto a piece of Old Olive (2-3/4″ x 3-3/4″) and added it to the card front with Stampin’ Dimensionals. To finish it off, I added a few Enamel Shapes all around. I love how it turned out!

Don’t forget that the Color Theory Designer Paper is part of the Buy 3, Get 1 Free Designer Series Paper Special this month. Click here to see all of the papers! Spend $75 or more and you will earn the Free Stamp Set of the Month from me. This month you get to pick from the Daisy Delight Stamp Set or the Graceful Garden Stamp Set! Message me with your preference after placing your order!

Happy Stampin’

~Laura


Perfect Petal Garden!!!

Posted on

Happy Friday!!! You all know I love flowers and this card is the perfect petal garden with stamped flowers and floral designer paper!

Perfect Petal Garden, www.LaurasStampPad.com

I started with a Calypso Coral card base. Next, I took a piece of Whisper White (4″ x 5-1/4″) and stamped images from the Graceful Garden Stamp Set all over. I did focus a little more to the right hand side but make it go all over so the patter looks like it continues. The trellis image was stamped in Pool Party. For the rose, I used my markers to ink up the stamp with both Old Olive Ink and Calypso Coral Ink. This isn’t something you would want to do when making 100 cards but it’s fabulous for a few!

Collage Stamped Roses, www.LauraStampPad.com

Next I added a piece of the Petal Garden Designer Series Paper to the left hand side and tied some Whisper White Classic Ribbon around it. Then I added this to the card base with Stampin’ Dimensionals. I do this because I love those things but also because it makes the ribbon look smooth to pop it up rather than press it out flat. For the greeting, I used Beautiful Bouquet Stamp Set and Layering Circles Framelits. I added the greeting to the card with Stampin’ Dimensionals as well! This card is perfect for lots of occasions like birthday, wedding, anniversary, and just because!

Don’t forget that you can get the Petal Garden Designer Series Paper in the Buy 3, Get 1 Free Special going on this month. Spend $75 and you can get the Graceful Garden Stamp Set from me for FREE! Woot Woot! Click here to start shopping! 

Also, if you would like to get tips, ideas, and information on current specials, click here to join my mailing list!

Have a wonderful weekend and I’ll see you back here on Monday! Happy Stampin’

~Laura

Product List


Using the Card Front Builder Framelit Differently!!!

Posted on

I fell in love with the Carols of Christmas Bundle back in August with Stampin’ Up! preleased it! Now I’m even more excited about using the Card Front Builder Framelit differently for even more looks! With this technique, you can use this framelit all year long! Thanks to Julie Davison for the inspiration and concept idea!

Card Front Builder Framelit Differently, www.LaurasStampPad.com

I started with a Whisper White card base. Next, I took a piece of Tangerine Tango (4″ x 5-1/4″) and placed the border framelit from the Card Front Builder Framelits in the middle, close to the top. I ran this through the Big Shot. Then I added the strip of Painted Autumn Designer Series Paper to the bottom portion and tied some Old Olive Chevron Ribbon around the overlap. After this was complete, I added this piece to the card base. I love how the white peaking through gives so much more to this card!!

Layering Squares Framelits, www.LaurasStampPad.com

For the greeting, I used the Layering Squares Framelits to die cut the squares. I went with Daffodil Delight and Whisper White. The greeting and dots are from the Painted Harvest Stamp Set and I used Old Olive and Tangerine Tango Ink. Of course, I added the greeting to the card front with Stampin’ Dimensionals for some texture. I finished it off with some Enamel Shapes! Great for fall or any occasion actually!

If you would like to see this in action, check out the Video Tutorial below or click here! Be sure to give the video a thumbs up if you liked it and don’t forget to subscribe if you are new. If you would like a notification when I post a new video, be sure to click the bell right next to the subscribe!!!

Happy Stampin’

~Laura

Product List