Are you a scrapbooker?! Have you looked at it and thought you wanted to try it out but feel scared?! I totally get that! I was a scrapbooker back when I got started with Stampin’ Up! but then I moved into card making. Then I had kids and scrapbooking has just been pushed aside. Stampin’ Up! launched new kits and now I’m excited to get back into it with these fun and easy scrapbooking pages!
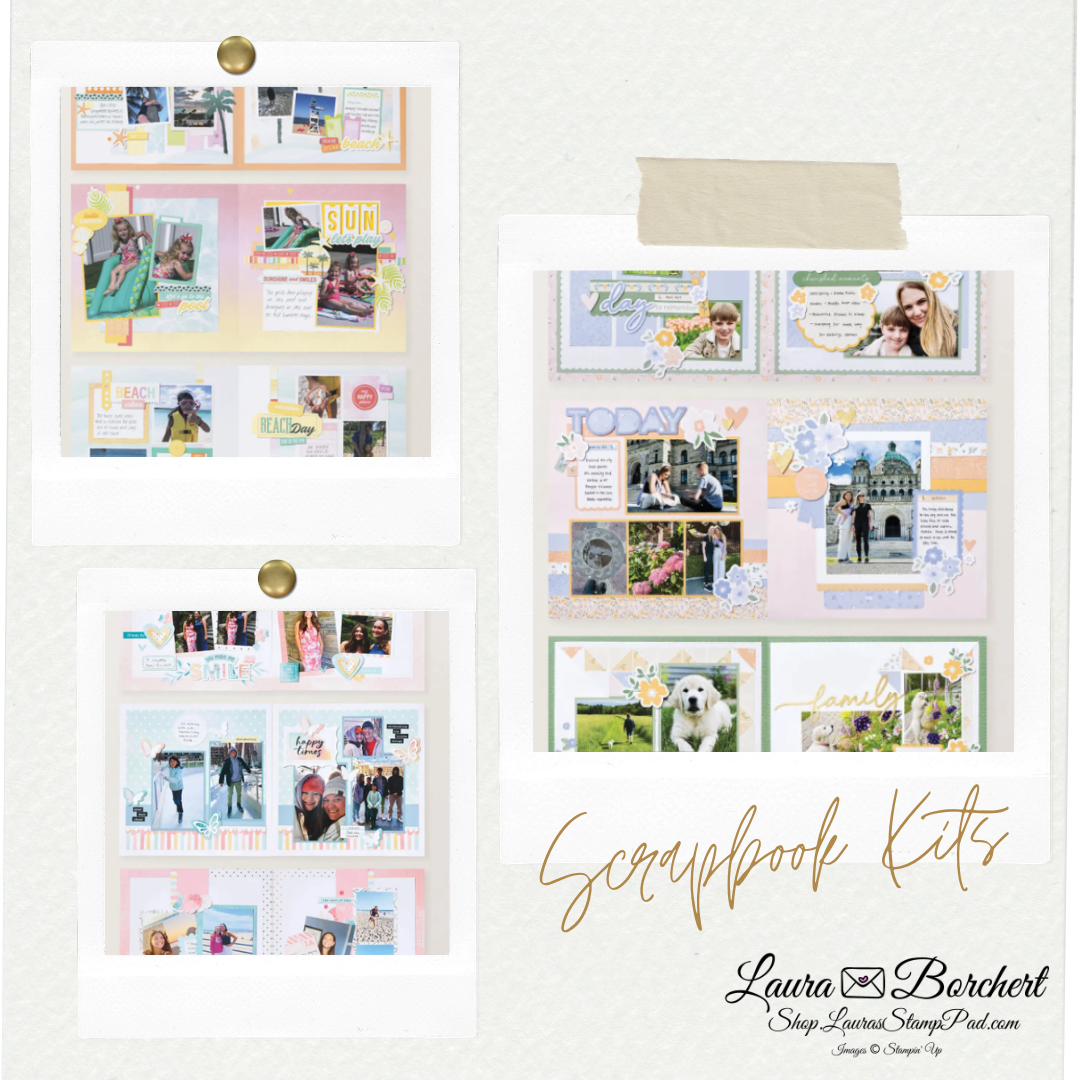
These kits take the guesswork out of creating beautiful scrapbook layouts so you can focus on what matters most: your memories ✨
🌟 Why These Kits Are So Amazing
Each Scrapbooking Kit includes:
✔ Coordinated supplies
~ Step-by-step instructions
✔ Pre-designed layouts
~ Beautiful papers and embellishments
✔ Everything planned out for you!
No wondering what matches or staring at a blank page.
No complicated designing.
Just open the kit and start creating! Instructions included!!!
They’re perfect for:
📸 Family memories
🎂 Birthdays
🏖 Vacations
🎄 Holidays
🎓 School events
💛 Everyday moments
Even if you only have a little time, you can still make meaningful scrapbook pages you’ll treasure forever.
💛 A Great Way to Actually USE Your Photos
Let’s be honest…most of us have hundreds (or thousands 😅) of photos sitting on our phones.
These kits are such a fun way to finally print those memories and turn them into something special you can flip through, display, and share with family.
Because your memories deserve more than staying stuck on your camera roll! Recently I have looked through my past albums with the kids and they LOVE them! My spark is back and I’m excited!
Check out all the Stampin’ Up! Scrapbooking Kits! Some are on the Last Chance Clearance Rack too!!!
Happy Stampin’
~Laura
Product List![Heirloom Boutique Scrapbooking Workshop Kit (English) [ 167723 ]](https://assets1.tamsnetwork.com/images/EC042017NF/167723s.jpg "Heirloom Boutique Scrapbooking Workshop Kit (English) [ 167723 ]")
![Made With Sweetness Scrapbooking Workshop Kit (English) [ 167484 ]](https://assets1.tamsnetwork.com/images/EC042017NF/167484s.jpg "Made With Sweetness Scrapbooking Workshop Kit (English) [ 167484 ]")
![Life In Bloom Scrapbooking Workshop Kit (English) [ 167862 ]](https://assets1.tamsnetwork.com/images/EC042017NF/167862s.jpg "Life In Bloom Scrapbooking Workshop Kit (English) [ 167862 ]")
![Sweet Bugs Photopolymer Stamp Set (English) [ 166995 ]](https://assets1.tamsnetwork.com/images/EC042017NF/166995s.jpg "Sweet Bugs Photopolymer Stamp Set (English) [ 166995 ]")
![Endless Love Dies [ 167061 ]](https://assets1.tamsnetwork.com/images/EC042017NF/167061s.jpg "Endless Love Dies [ 167061 ]")
![Cute As A Bug 12" X 12" (30.5 X 30.5 Cm) Designer Series Paper [ 166994 ]](https://assets1.tamsnetwork.com/images/EC042017NF/166994s.jpg "Cute As A Bug 12\" X 12\" (30.5 X 30.5 Cm) Designer Series Paper [ 166994 ]")
![Basic White 8 1/2" X 11" Cardstock [ 166780 ]](https://assets1.tamsnetwork.com/images/EC042017NF/166780s.jpg "Basic White 8 1/2\" X 11\" Cardstock [ 166780 ]")
![Old Olive 8-1/2" X 11" Cardstock [ 100702 ]](https://assets1.tamsnetwork.com/images/EC042017NF/100702s.jpg "Old Olive 8-1/2\" X 11\" Cardstock [ 100702 ]")
![Petal Pink 8-1/2" X 11" Cardstock [ 146985 ]](https://assets1.tamsnetwork.com/images/EC042017NF/146985s.jpg "Petal Pink 8-1/2\" X 11\" Cardstock [ 146985 ]")
![Basic Black Hybrid Stampin' Pad [ 166648 ]](https://assets1.tamsnetwork.com/images/EC042017NF/166648s.jpg "Basic Black Hybrid Stampin' Pad [ 166648 ]")
![Versamark Pad [ 102283 ]](https://assets1.tamsnetwork.com/images/EC042017NF/102283s.jpg "Versamark Pad [ 102283 ]")
![Cloud Cover Stampin’ Blends Combo Pack [ 165287 ]](https://assets1.tamsnetwork.com/images/EC042017NF/165287s.jpg "Cloud Cover Stampin’ Blends Combo Pack [ 165287 ]")
![Lemon Lolly Stampin’ Blends Combo Pack [ 161673 ]](https://assets1.tamsnetwork.com/images/EC042017NF/161673s.jpg "Lemon Lolly Stampin’ Blends Combo Pack [ 161673 ]")
![Petal Pink Stampin' Blends Combo Pack [ 154893 ]](https://assets1.tamsnetwork.com/images/EC042017NF/154893s.jpg "Petal Pink Stampin' Blends Combo Pack [ 154893 ]")
![Pool Party Stampin' Blends Combo Pack [ 154894 ]](https://assets1.tamsnetwork.com/images/EC042017NF/154894s.jpg "Pool Party Stampin' Blends Combo Pack [ 154894 ]")
![Basics Wow! Embossing Powder [ 165679 ]](https://assets1.tamsnetwork.com/images/EC042017NF/165679s.jpg "Basics Wow! Embossing Powder [ 165679 ]")
![Silicone Craft Sheet [ 127853 ]](https://assets1.tamsnetwork.com/images/EC042017NF/127853s.jpg "Silicone Craft Sheet [ 127853 ]")
![Simply Shammy [ 147042 ]](https://assets1.tamsnetwork.com/images/EC042017NF/147042s.jpg "Simply Shammy [ 147042 ]")
![Stampin' Mist [ 153648 ]](https://assets1.tamsnetwork.com/images/EC042017NF/153648s.jpg "Stampin' Mist [ 153648 ]")
![Pretty Party Kit (English) [ 167998 ]](https://assets1.tamsnetwork.com/images/EC042017NF/167998s.jpg "Pretty Party Kit (English) [ 167998 ]")
![Serene Scenes Kit (English) [ 167995 ]](https://assets1.tamsnetwork.com/images/EC042017NF/167995s.jpg "Serene Scenes Kit (English) [ 167995 ]")
![Silly Old Bear 12" X 12" (30.5 X 30.5 Cm) Designer Series Paper [ 167616 ]](https://assets1.tamsnetwork.com/images/EC042017NF/167616s.jpg "Silly Old Bear 12\" X 12\" (30.5 X 30.5 Cm) Designer Series Paper [ 167616 ]")
![Silly Old Bear Suite Collection [ 167634 ]](https://assets1.tamsnetwork.com/images/EC042017NF/167634s.jpg "Silly Old Bear Suite Collection [ 167634 ]")
![Scalloped Blooms Bundle (English) [ 167647 ]](https://assets1.tamsnetwork.com/images/EC042017NF/167647s.jpg "Scalloped Blooms Bundle (English) [ 167647 ]")
![Splash & Relax Bundle [ 167903 ]](https://assets1.tamsnetwork.com/images/EC042017NF/167903s.jpg "Splash & Relax Bundle [ 167903 ]")
![2026–2028 In Color™ 8 1/2" X 11" Cardstock [ 167683 ]](https://assets1.tamsnetwork.com/images/EC042017NF/167683s.jpg "2026–2028 In Color™ 8 1/2\" X 11\" Cardstock [ 167683 ]")
![2026–2028 In Color™ Butterflies [ 167656 ]](https://assets1.tamsnetwork.com/images/EC042017NF/167656s.jpg "2026–2028 In Color™ Butterflies [ 167656 ]")
![Paper Pumpkin 12 Month Subscription [ 166818 ]](https://assets1.tamsnetwork.com/images/EC042017NF/166818s.jpg "Paper Pumpkin 12 Month Subscription [ 166818 ]")
![Paper Pumpkin 6 Month Subscription [ 166817 ]](https://assets1.tamsnetwork.com/images/EC042017NF/166817s.jpg "Paper Pumpkin 6 Month Subscription [ 166817 ]")
![Paper Pumpkin 3 Month Subscription [ 166816 ]](https://assets1.tamsnetwork.com/images/EC042017NF/166816s.jpg "Paper Pumpkin 3 Month Subscription [ 166816 ]")
![Paper Pumpkin Subscription [ 166815 ]](https://assets1.tamsnetwork.com/images/EC042017NF/166815s.jpg "Paper Pumpkin Subscription [ 166815 ]")
![Lakeside Retreat Paper Pumpkin Refill (English) [ 171464 ]](https://assets1.tamsnetwork.com/images/EC042017NF/171464s.jpg "Lakeside Retreat Paper Pumpkin Refill (English) [ 171464 ]")
![Fluttering Garden Paper Pumpkin Refill (English) [ 168629 ]](https://assets1.tamsnetwork.com/images/EC042017NF/168629s.jpg "Fluttering Garden Paper Pumpkin Refill (English) [ 168629 ]")
![Wonderful Scenes Dies (English) [ 168665 ]](https://assets1.tamsnetwork.com/images/EC042017NF/168665s.jpg "Wonderful Scenes Dies (English) [ 168665 ]")
![Paradise Garden Bundle (English) [ 167121 ]](https://assets1.tamsnetwork.com/images/EC042017NF/167121s.jpg "Paradise Garden Bundle (English) [ 167121 ]")
![Misty Moonlight 8-1/2" X 11" Cardstock [ 153081 ]](https://assets1.tamsnetwork.com/images/EC042017NF/153081s.jpg "Misty Moonlight 8-1/2\" X 11\" Cardstock [ 153081 ]")
![Crushed Curry Classic Stampin' Pad [ 147087 ]](https://assets1.tamsnetwork.com/images/EC042017NF/147087s.jpg "Crushed Curry Classic Stampin' Pad [ 147087 ]")
![Fresh Freesia Classic Stampin' Pad [ 155611 ]](https://assets1.tamsnetwork.com/images/EC042017NF/155611s.jpg "Fresh Freesia Classic Stampin' Pad [ 155611 ]")
![Granny Apple Green Stampin' Pad [ 147095 ]](https://assets1.tamsnetwork.com/images/EC042017NF/147095s.jpg "Granny Apple Green Stampin' Pad [ 147095 ]")
![Misty Moonlight Classic Stampin' Pad [ 153118 ]](https://assets1.tamsnetwork.com/images/EC042017NF/153118s.jpg "Misty Moonlight Classic Stampin' Pad [ 153118 ]")
![Petal Pink Classic Stampin' Pad [ 147108 ]](https://assets1.tamsnetwork.com/images/EC042017NF/147108s.jpg "Petal Pink Classic Stampin' Pad [ 147108 ]")
![Watercolor Pencils Assortment 2 [ 149014 ]](https://assets1.tamsnetwork.com/images/EC042017NF/149014s.jpg "Watercolor Pencils Assortment 2 [ 149014 ]")
![Pearlized Faceted Circles [ 166978 ]](https://assets1.tamsnetwork.com/images/EC042017NF/166978s.jpg "Pearlized Faceted Circles [ 166978 ]")
![Stampin' Dimensionals [ 104430 ]](https://assets1.tamsnetwork.com/images/EC042017NF/104430s.jpg "Stampin' Dimensionals [ 104430 ]")
![Filled With Sweetness Photopolymer Stamp Set (English) [ 167469 ]](https://assets1.tamsnetwork.com/images/EC042017NF/167469s.jpg "Filled With Sweetness Photopolymer Stamp Set (English) [ 167469 ]")
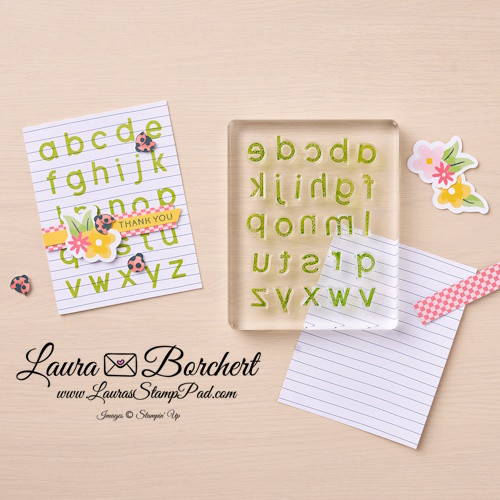
![Simple Alphabet Photopolymer Stamp Set [ 167541 ]](https://assets1.tamsnetwork.com/images/EC042017NF/167541s.jpg "Simple Alphabet Photopolymer Stamp Set [ 167541 ]")
![Homemade Sweetness Designer Series Paper & Sticker Sheet (English) [ 167496 ]](https://assets1.tamsnetwork.com/images/EC042017NF/167496s.jpg "Homemade Sweetness Designer Series Paper & Sticker Sheet (English) [ 167496 ]")
![Daffodil Delight 12" X 12" (30.5 X 30.5 Cm) Two Tone Cardstock [ 166669 ]](https://assets1.tamsnetwork.com/images/EC042017NF/166669s.jpg "Daffodil Delight 12\" X 12\" (30.5 X 30.5 Cm) Two Tone Cardstock [ 166669 ]")