Daydream Medallion Birthday Invitations!!!

Posted on

A friend of mine reached out to me to make invitations for her mother’s 60th Birthday Party! I was so excited to be able to help with this party!! I know that the Mother’s favorite color is Purple and she loved a rustic/vintage look. Here is what I came up with:

Daydream Medallion Invitation, www.LaurasStampPad.com

What do you think?? I think I nailed it on the head!!! I used the Daydream Medallion Stamp Set which has quickly became my go to stamp set. You can check out more samples here and here! LOVE IT! I randomly stamped all over and then added a little more ink with my sponge daubers for the bottom half of the card. Then I die-cut all of the smallest flowers from the Floral Frames Framelits and brushed the edges with Elegant Eggplant ink and my sponge daubers. I brushed the edges of the banners as well. Here are a few of the steps I took when making these.

Daydream Medallion Invitation, www.LaurasStampPad.com

Remember assembly line is the best way to make multiple cards!

Daydream Medallion Invitation, www.LaurasStampPad.com

I even stamped a little on the corner of the envelopes to make them match and a decorated envelope in the mail is sooooo exciting to receive! I love how they turned out and the Birthday Girl LOVED them too! HAPPY BIRTHDAY, Sue!!!!!

If you are having a party or wedding and need help with the invitations, programs, party favors, and more let me know and I would love to help you make the perfect party!!!!

Happy Stampin’

~Laura


Technique Tuesday – Making Multiple Cards!!

Posted on

Happy Tuesday All!!! You know what that means, I’m sharing a Technique with you! I get asked a lot of time how long it takes for me to make cards! Well I am going to share with you this card that I created a total of 400 and it only took me a few hours on 2 different days!!!

Lots of Thank You Cards, www.LaurasStampPad.com

This is what 400 cards looks like (and yes it was hard for me to mess them up to take this picture rather than keep them in their perfect stacks of 25 🙂 ) So I’m sure you are wondering how I made 400 of them in just a few hours on 2 days. I used Very Vanilla and Whisper White Cardstock. TIP: Use Washi Tape for fun and fabulous quick cards! I didn’t cut the 8-1/2″ x 11″ cardstock in half for the typical card size until after I put the Washi Tape on, this way I only had to grab my scissors to cut the Washi Tape every 2 cards (so only 200 times, rather than 400). So I had a stack of cardstock and put the 2 strips of Washi Tape on the cardstock and then cut it in half on the 8-1/2 side like you see below!

Washi Tape Card, www.LaurasStampPad.com

Then I stamped my name on the back of all the cards and folded them in half. Thank you Bone Folder for helping me fold 400 cards in half and not having to use my thumb! Then I stamped the various Thank You greetings from the Lots of Thanks Stamp Set! TIP: Making multiples of 1 card is much easier than making 400 different cards! These cards were super simple and affordable to make! Washi Tape also comes in so many fabulous styles too so your possibilities are endless! I made these cards for all of the amazing Brides that I met with at the Gateway Bridal Fair last week!

Happy Stampin’

~Laura


Rustic and Elegant Weddings!

Posted on

The Wedding Trend for awhile now has been Rustic and Elegant. It seems everyone is doing the burlap, doily, lace, pearls, mason jars, barn theme! Here are a couple samples of cards that I have recently done to help out a friend with her daughter’s wedding!!!

Thank You Cards, www.LaurasStampPad.com

Here are a few of the items that were made! The cards above were the Thank You cards for the Bride to send out to all of the guests after the wedding! They were quick and simple and kept the theme of the wedding going! And speaking of cards, I created these adorable ring binders for the Bride to keep all of the cards she received together! The one has the last name initial on it and the other one has the initials of the Bride and Groom! I kept the doily, lace, pearl theme with these items too!

Card Holders, www.LaurasStampPad.com

Wedding Invitation, www.LaurasStampPad.com

This is the actual Wedding Invitation (well half of it to keep the privacy of the Bride and Groom). The wording was on the right and on the left was this fabulous white doily using the Hello Doily Stamp! It was stamped and then embossed in Whisper White which gave it a fabulous raised texture! This piece of Crumb Cake was also layered on a piece of Very Vanilla Cardstock but I didn’t get a picture of the final piece.

Bridal Shower Tags, www.LaurasStampPad.com

This adorable tag was used at the Bridal Shower on the little tea cups that everyone got as a favor for coming! Again I kept with the theme and used the Victoria Crochet Trim for a rustic look!

Wedding Card, www.LaurasStampPad.com

And last but not least, this is the wedding card that I made! Again I used the Hello Doily Stamp and embossed it. Then I took a sponge dauber (love them) and added a little Chocolate Chip ink around the doily. I really loved how it turned out!

If you are getting married or planning a party and need some help with the invitations, party favors, or more, reach out to me and I can assist you with your crafty side or I can create the item for you! Email me for more information or comment below! Check out more samples here and here!

Happy Stampin’

~Laura


Decorated Mason Jars!!!!

Posted on

Mason Jars are so cute to me and what is even better is how useful they are!!! I have done lots of decorated mason jars for various gift ideas like adding layered cookie mixes, adding actual cookies or candy, adding a few gift items like nail polish and a nail kit, and so many more fabulous ideas! Another great idea is to use them at parties. You can create a layered dessert in them, add some of the items listed above as a party favor or use for the drinks at the party! The possibilities are endless!

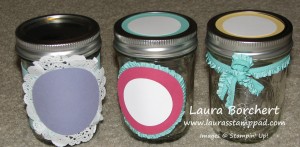
Decorated Mason Jars, www.LaurasStampPad.com

How cute are these? I have decorated the one on the far left with a Tea Lace Paper Doily and then a punched circle piece of cardstock! The middle one is decorated with punched circles of cardstock on the lid and layered on the side with Ruffled Ribbon around the edge! Super adorable! The one on the right is the same Ruffled Ribbon tied around the jar and into a bow and some punched circles for the lid! You could add any type of greeting on the side to match you Bridal Shower, Wedding, Birthday or Gift theme! Greetings such as Thank you for coming, Happy Birthday, Enjoy your treats, and so many more! You can check out some of my other decorated mason jars here!

Happy Stampin’

Laura


More Wedding Invitations!!!

Posted on

I have said it before and I’ll say it again….I LOVE WEDDINGS! They are just so amazing – the love, family time, the day every girl dreams of, and so much more! I love it and I love that even though my wedding day is over I can still be apart of so many weddings by helping brides!

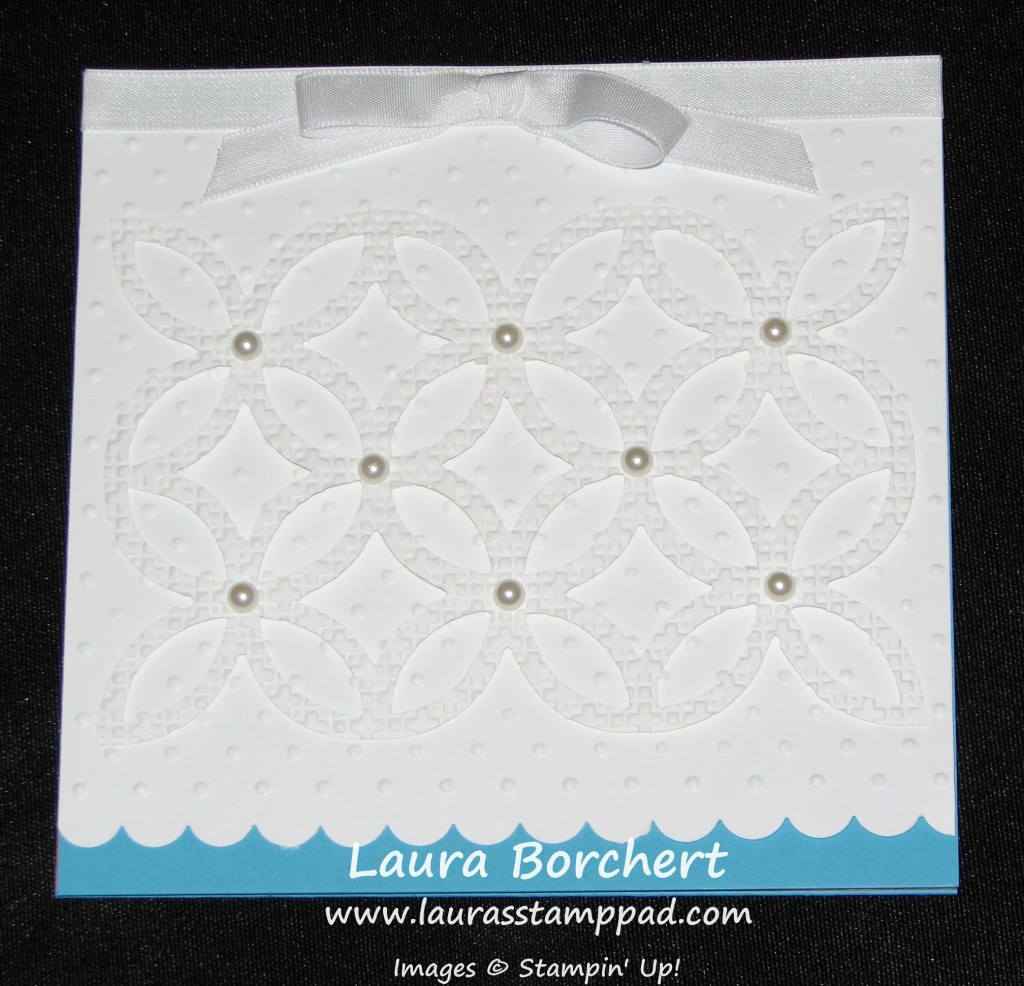
Wedding Invitation, www.LaurasStampPad.com

Inside Wedding Invitation, www.LaurasStampPad.comThis is a wedding invitation that I have recently finished! I love all of the textures and layers in this one! So elegant with the lattice and white on white look! This is a square invitation so it does require more postage but it just wouldn’t be the same if it was rectangle! The picture on the left is the inside of the invitation. The colors are flip-flopped though. The invitation is Tempting Turquoise and the pocket on the bottom is Calypso Coral. The pocket held the Reception Information and RSVP card and envelope! I added some texture to the pocket with the same embossing folder that I used on the front – Perfect Polka Dot (my favorite). You can see the Save The Dates from this wedding here.

If you are getting married or planning any other type of party and need invitations, menu cards, party favors, or any other item, let me know! I would love to help you create the greatest party ever! I can make the items for you or help you with everything you need so you can use your crafty side!

Happy Stampin’

~Laura


So I Hear Gold Is In!

Posted on

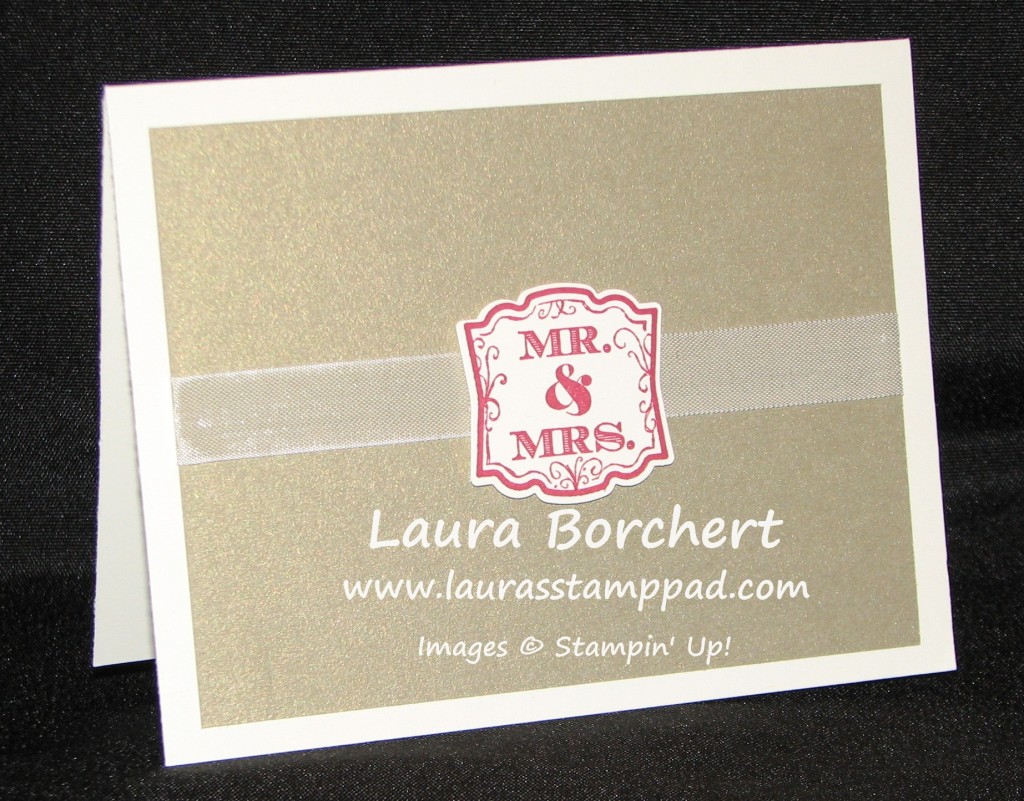
Wedding Card, www.LaurasStampPad.comSo I am more of a Silver Girl but I hear that GOLD is in! Either way, this card is super simple and has a great WOW factor with the Brushed Gold Cardstock (it comes in Silver too)! This card makes a great Wedding Card, 50th Anniversary Card or Invitation, Golden Birthday Card (this year is my Golden Birthday year!!!!) or just about any type of card! I used Very Vanilla Cardstock and Seam Binding and the image comes from the Label Love Stamp Set. All of the images in the set coordinate with the Artisan Label Punch! How perfect!! You can purchase them both in a bundle and save 15%!

Happy Stampin’

~Laura


Technique Tuesday – Adding Texture!!

Posted on

It is Tuesday and so I’m sharing a fabulous technique with you!!! This week it is these adding texture to your card! I love having a card that has a little bit more than just pieces of cardstock flat against each other. I love adding Dimensionals for some depth and other embellishments to add texture and effect!

For the Newlyweds, www.LaurasStampPad.com

I have added texture to this card in 3 ways! Can you find them???

1. I have used Pink Pirouette Cardstock on top of my Whisper White card base and again to back my stamped Whisper White piece. I added Stampin’ Dimensionals between the 2 layers of Pink Pirouette to give a little texture and shadow!

2. I stamped the branch image from the Thoughts & Prayers Stamp Set with my Old Olive Marker and Pink Pirouette Maker. Then using the flower image from the Punch Pack, I punched out Pink Pirouette Flowers and added those to the branch for a bigger, bolder looking flower! It makes the branch a little more full as well! I added some little pearls to the center of each one too! Gotta have a little bling!

3. I brushed the edges of the punched flowers with Pink Pirouette ink using a Sponge Dauber. This makes the flower have a shaded look and adds a variation of color.

I hope you try out some of these fabulous ways to add texture and depth to your cards! Easy to do and really creates a WOW factor to your project!

Happy Stampin’

~Laura


The Elegant Beautifully Baroque Stamp!

Posted on

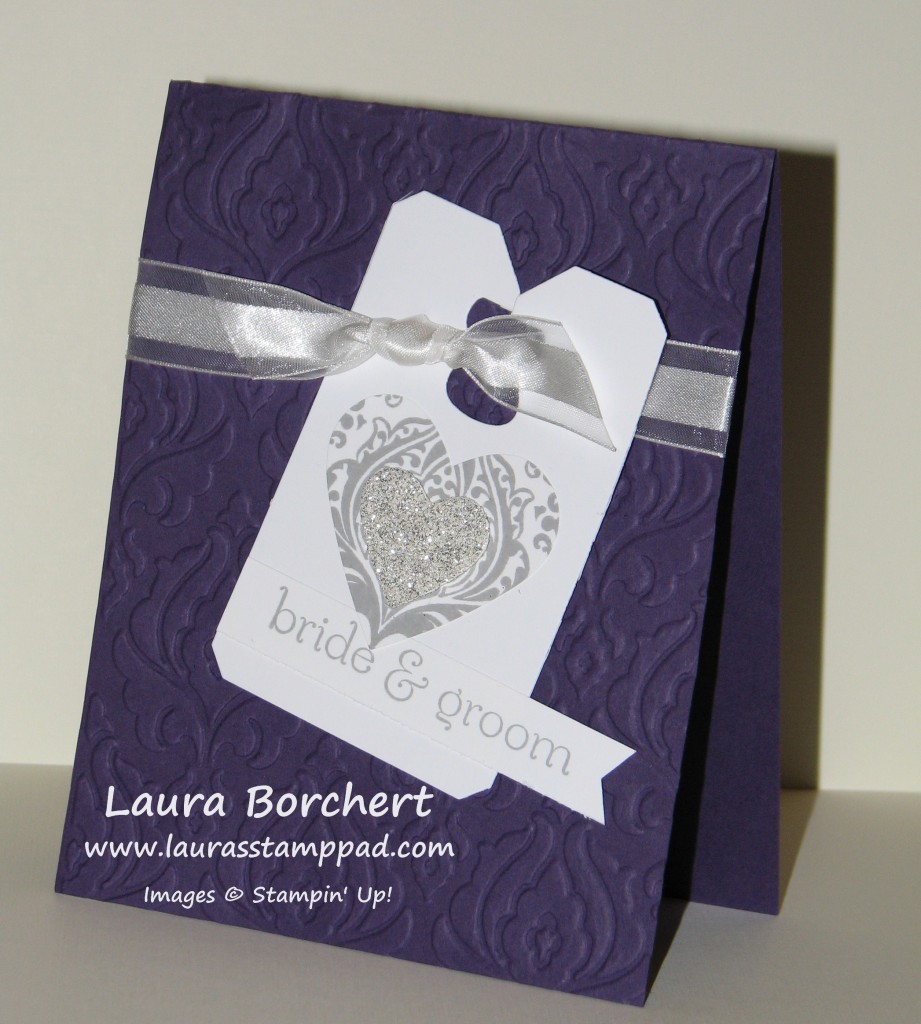
Bride & Groom Card, www.LaurasStampPad.com

I am loving the Beautifully Baroque Stamp Set and matching Beautifully Baroque Embossing Folder! I feel like the Elegant Eggplant color screams elegance! Is that just me? I embossed my card front with the folder and then created the tag with the Chalk Talk Framelits! I stamped the Beautifully Baroque image in Smoky Slate on a scrap piece of cardstock and then punched it out with the Heart Punch. I layered a Silver Glimmer Paper punched heart on top of it. LOVE IT! The greeting is from the Sweet Essentials Stamp Set! I encourage you to try out a stamp set and find ways to make many different styles of cards with it! It is fun and sometimes challenging! Here and Here are some other samples using the Beautifully Baroque Stamp!

Happy Stampin’

~Laura


More My Digital Studio!!!

Posted on

My Digital Studio, www.LaurasStampPad.com

I love stamping and playing with real stamps, ink, and embellishments but it is fun to do it digitally too!!! My Digital Studio is great for making invitations when you need to make a ton or don’t have a ton of time or just because you enjoy playing digitally!!! Here is an invitation that I created for a Beach Wedding! You can change all of the color to match your Wedding colors or you can use this for your next Luau Party too! Here is the inside of the card! I added each of those little flowers in there! You can move them around and mix it up and change the colors! It is so much fun to play around in My Digital Studio!

My Digital Studio, www.LaurasStampPad.com

There are a lot of Digital Downloads for all occasions and events! Some templates include everything you need for a party – banners, treat toppers, invites, place cards, food tags, etc. How fabulous is that? I love when everything coordinates together! Check out My Digital Studio for FREE with the 30-Day Trial or you can jump right in and purchase the download!

Don’t forget that this week is Digital Scrapbooking Week so there are lots of fabulous deals! Check them out!


Tying the Knot!

Posted on

Are you Tying The Knot? I know right now there seems to be a ton of wedding happening every weekend and of course with the Holidays around the corner, many more happy couples will be getting engaged! It makes me sooooo happy! I love love love weddings!

Tying The Knot, www.LaurasStampPad.com

Here is an amazing Save the Date that I just completed for a Bride! I used her wedding colors and created a little tag for the front with the Bride and Groom’s names on it! As you open the card, the Baker’s Twine pulls tight and “Ties the Knot.” How precious is that? Right now I am working on the Wedding Invitations and they are going to be AMAZING! Here is a sneak peak?

Lattice Die Cut, www.LaurasStampPad.com

TeeHeee I said Sneak Peak! I won’t be posting the invitation until later since the wedding is still a few months away! But here is my work space and what looks like a mess! Each invitation has 2 Die-Cut Lattice pieces on it so here are all of the lattice pieces and the punched out pieces. They make great stars and leaves and I think I have enough to last a lifetime! 🙂

If you are tying the knot soon or having any kind of party for that matter, I would love to help customize your invitations, programs, party favors, place cards and any other items you might need! Just send me an email with your colors/theme and we can come up with the perfect one!!!!

Happy Stampin’

~Laura