Little Gingerbread Man!!!

Posted on

gingerbread-man, www.LaurasStampPad.com

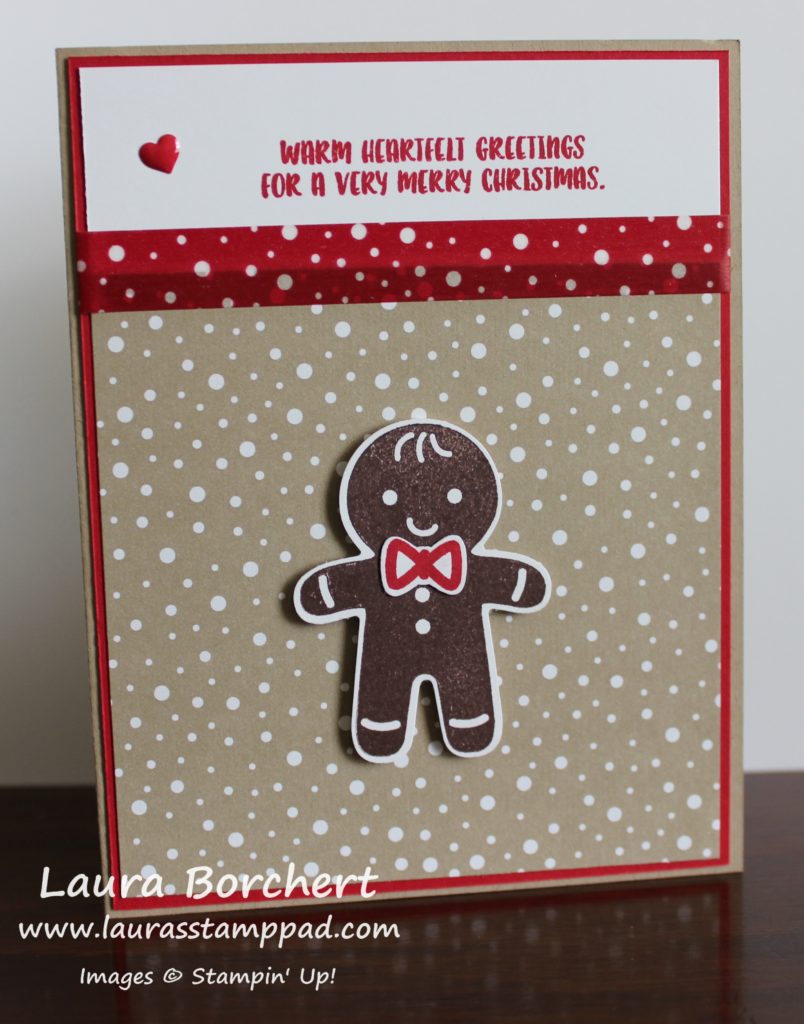
Isn’t he adorable? I love the little gingerbread from the Cookie Cutter Christmas Stamp Set! This is one of my favorite sets from the Holiday Mini Catalog! You can check out more samples here, here, and here!

I started with a Crumb Cake card base! Then I took a piece of Real Red cardstock measuring 4-1/8″ x 5-3/8″ and placed a piece of the Candy Cane Lane Designer Series Paper (4″ x 4″) on the lower portion. I stamped the greeting from the Cookie Cutter Christmas Stamp Set in Real Red Ink onto Whisper White cardstock (1-1/2″ x 4″). I attached the greeting to the top portion of the Real Red. Then I used some of the Candy Cane Lane Designer Washi Tape to place over the overlap of the greeting and designer paper. I just wrapped the ends around to the back side. Now you can add this piece to your card front. For the little gingerbread man, I stamped him in Chocolate Chip Ink onto Whisper White cardstock. Then I punched him out with the coordinating Cookie Cutter Builder Punch (Bundle & Save 10%). I also stamped the bow in Real Red and punched it out with the same punch. I added the bow to the gingerbread man with a Mini Glue Dot and I added the gingerbread man to the card with Stampin’ Dimensionals. I finished off the card with a little heart to share a little more love in the card. I used the Real Red Enamel Shapes for the little heart! Love it!!!

Don’t forget about the Online Extravaganza going on this week! 24 Hour Door Busters on Monday to end out this amazing sale! Click here to start shopping and use the Hostess Code: 6YAGWW43 and you will get a FREE Gift from me!

Happy stamping and shopping!

~Laura

Warmth & Cheer Washi Card!!!

Posted on

Warmth & Cheer Washi Tape, www.LaurasStampPad.com

Washi Tape is one of those things that comes in amazing prints and colors but you may not know how to use it. I feel like I use it in ways many other don’t. I like using it for backgrounds on my cards or borders. I usually don’t use it as “tape” to secure a focal point or in my scrapbook. I love how it can create so many beautiful looks so feel free to use however you wish!!! 🙂 Just have fun with it!

I started with a Crumb Cake card base. Then I took a piece of Whisper White (4″ x 5-1/4″) and laid a piece of the Warmth & Cheer Designer Washi Tape diagonal across the piece a little lower than the center. There is no right or wrong angle or spot to place the first piece. Just place it down. Then you will want to stamp your greeting above that piece. You can use any of your favorite greetings. I used one from the Stitched With Cheer Stamp Set from the Holiday Mini Catalog in Crumb Cake Ink! Then I continued to fill in the rest of the cardstock with more washi tape. Continue to use that same angle from the first piece you placed down. I just rip the ends and fold them to the back side. Simple and no scissors necessary! Once you have filled it all in, place it on the card base and you can add embellishments. I added a few Pearls but you could always use Enamel Shapes, Rhinestones or Sequins!

I have done a few other samples with other styles of Washi Tape here! Also, I did a Video Tutorial with yesterday’s post showing this card as well! You can check that out below or click here!

How do you like to use Washi Tape? Let me know in the comments as I would love to hear all the different ways you like to use it!

Happy Stampin’

~Laura

Big Shot Code:HSQJBEPD, www.LaurasStampPad.com

Hate fussy cutting? Check out the Big Shot and all it can do with die cutting, embossing and so much more! Get yours for FREE when you enter my Big Shot Giveaway! Click here for details.


Fast Friday!!!

Posted on

gumdrops, www.LaurasStampPad.com

The weekend is almost here and so I thought I would share a quick and simple card!!! Some may think this is super basic and needs a little something more and some may think it’s fabulous! I’m somewhere in between.

I started with a Whisper White card base and added some Candy Cane Lane Designer Washi Tape along the top and bottom. Then I took the Candy Cane Christmas Stamp Set, which is in the same suite and has coordinating images, and stamped in the middle of the card. I stamped the greeting in Basic Black to make it pop and the single gumdrops in Real Red Ink. That’s it!!! Quick and Simple!!!

If you are looking for a quick and simple holiday card, I am offering a special this season – Cut For Christmas! I do all of the cutting and all you have to do is stamp and assemble. I look forward to helping you during this busy time of year!!!

Happy Stampin’

~Laura


Designer Tin of Cards!!!

Posted on

designer-tin-of-cards, www.LaurasStampPad.com

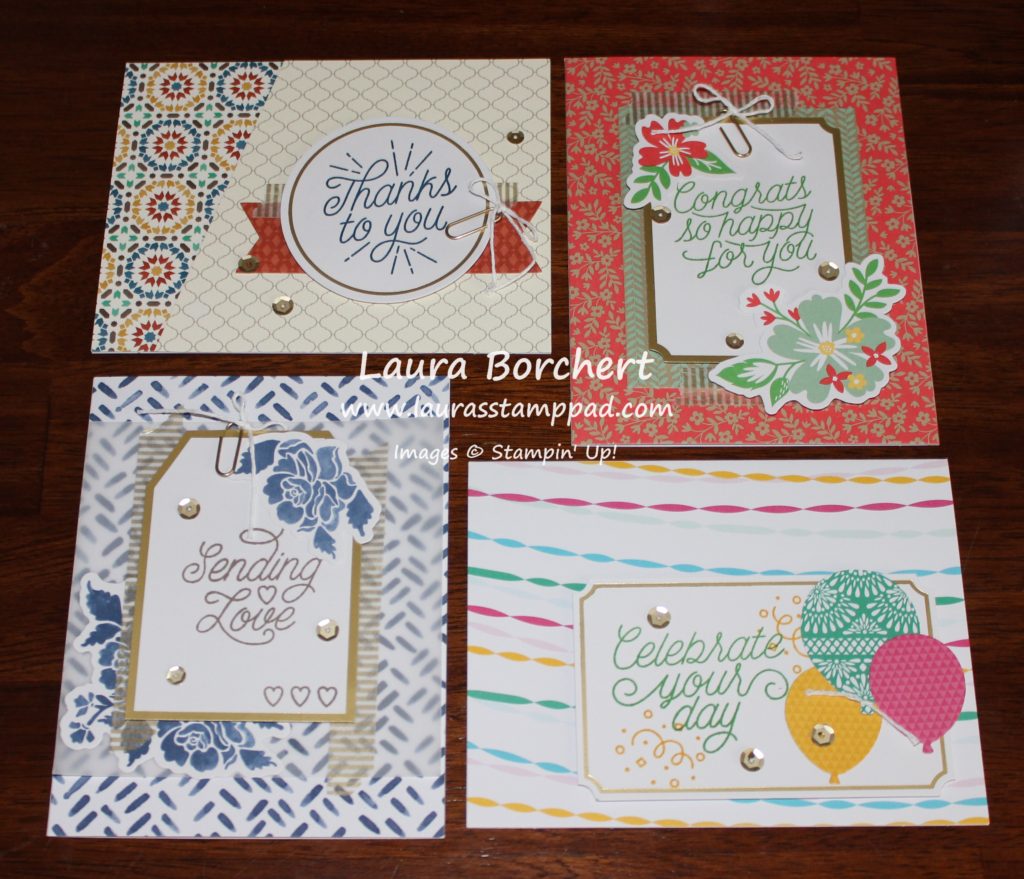
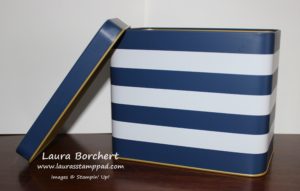
Check out these amazing cards in the Designer Tin of Cards Kit!!! I kind of like how this card kit has a big array of colors using the different patterns from the Designer Series Paper Packs! There are some regals, brights, and subtles! I LOVED the Tin of Cards from last year. You can check that out here. I knew I needed this kit as well. After all the little tin is super cute and I feel like I need to collect them all! Last year it was mint and white and this year it is navy and white!!!

navy-white-tin, www.LaurasStampPad.com

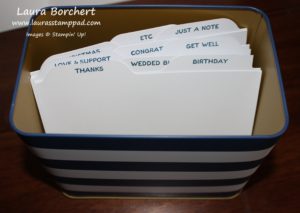
Isn’t it amazing??? I love it! There are dividers in the kit so you can stamp the titles from the Designer Tin of Cards Stamp Set on them and create the perfect tin of cards to keep yourself or give as a gift!!!

card-storage, www.LaurasStampPad.com

There is a category for all of the cards you need throughout the year!!!! Now onto the cards in the Designer Tin of Cards Kit!

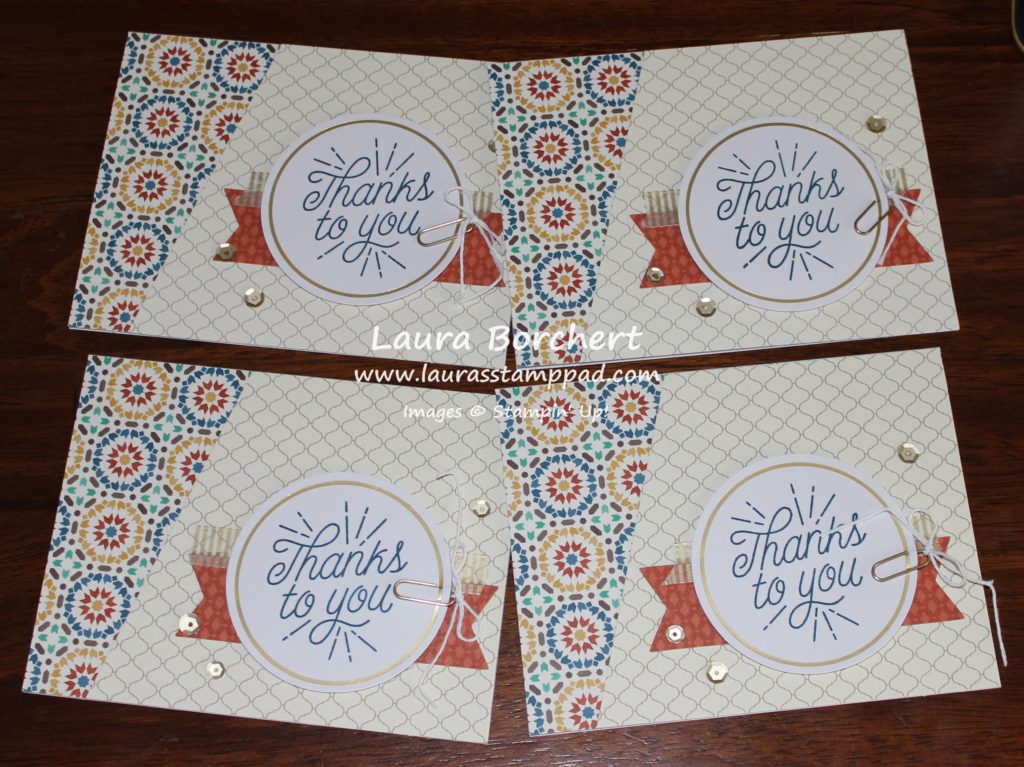
thanks-to-you, www.LaurasStampPad.com

This set of cards uses the pattern/theme from the Moroccan Designer Series Paper (part of the Buy 3, Get 1 Free Special!). I stamped the greetings from the Designer Tin of Cards Set. I adhered the sequins on with the Fine Tip Glue Pen!

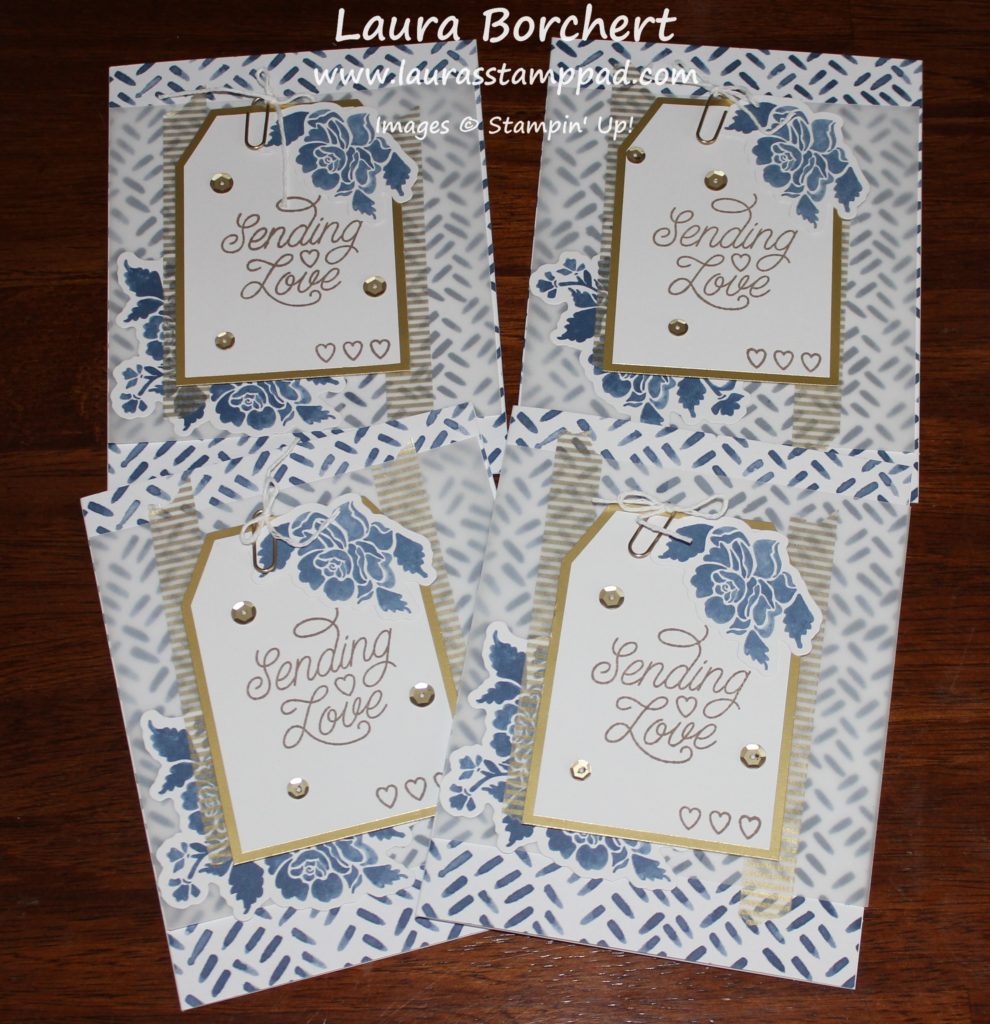
sending-love, www.LaurasStampPad.com

I really really like these cards. There is something about that simple navy and white look with a little touch of gold! So beautiful!!! This set of cards uses the style from the Floral Boutique Designer Series Paper (part of the Buy 3, Get 1 Free Special).

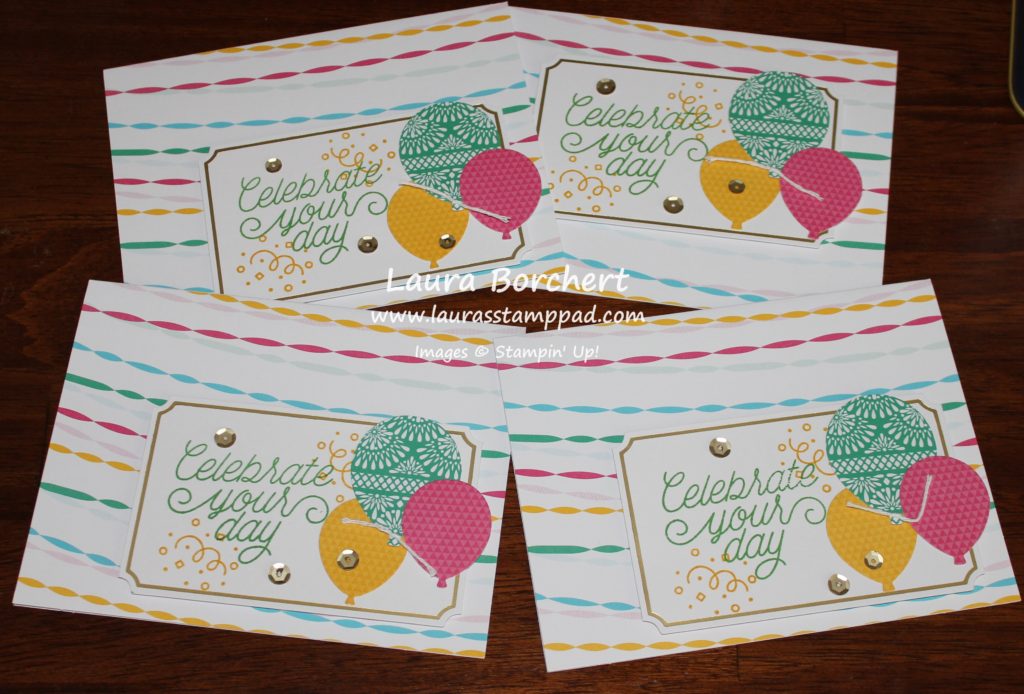
celebrate-your-day, www.LaurasStampPad.com

I love these cards because of the bright colors. I am realizing I really need some of the Festive Birthday Designer Series Paper (part of the Buy 3, Get 1 Free Special), which is what this style is from.

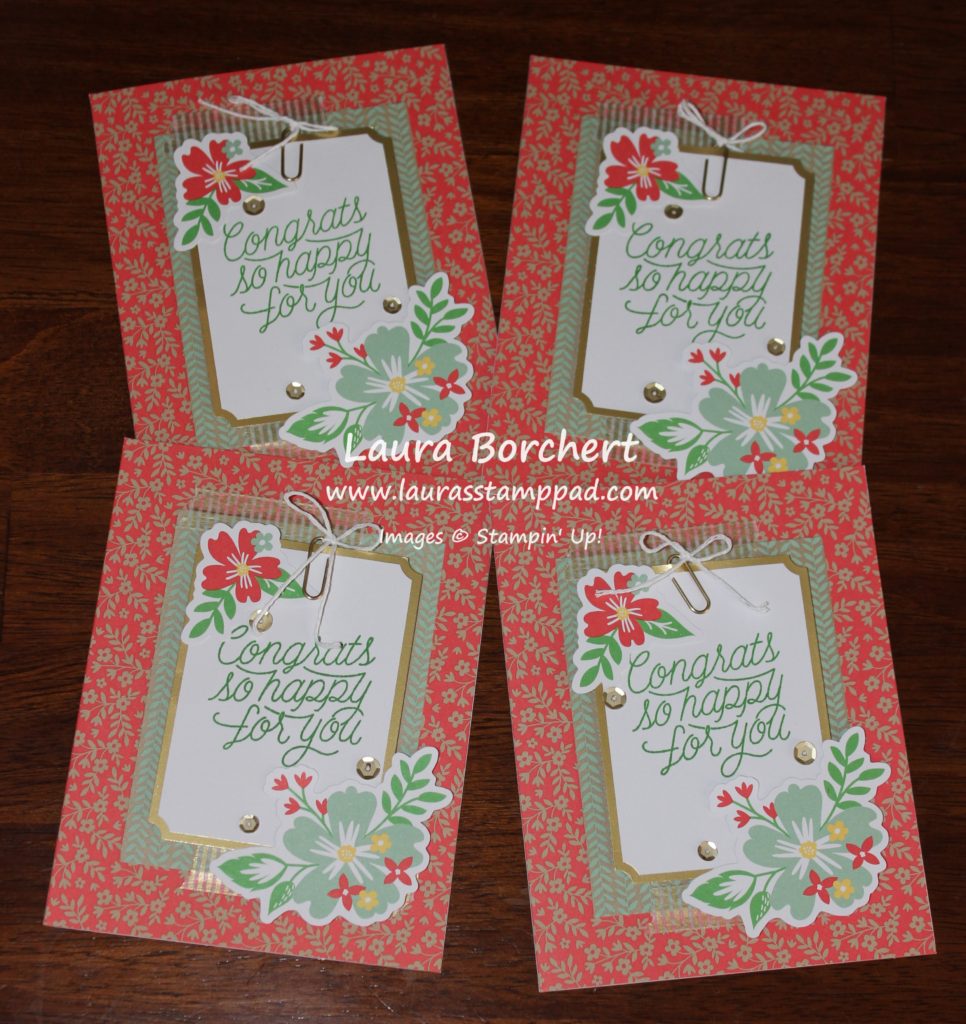
congrats-so-happy-for-you, www.LaurasStampPad.com

These cards use the Affectionately Yours Specialty Designer Paper theme and they are perfect for graduation, wedding, engagement, and so much more!

Which one is your favorite??? Let me know in the comments below! I really enjoyed making these cards and love the samples. The hardest part was trying the bows onto the paper clips but the rest was super easy and fun!!!

If you would like to see the unboxing and reveal of this kit, check that out here or click below! Don’t forget to give it a thumbs up if you liked it! Be sure to subscribe if you are new as I post every Tuesday and Thursday!!!

Happy Stampin’

~Laura

Seasonal Offer, www.LaurasStampPad.com

Check out this fabulous offer for the Holiday Season!!!


A Sweet Season!!!

Posted on

Candy Cane, www.LaurasStampPad.com

I love the Candy Cane Christmas Stamp Set….well actually the entire Suite of products including Designer Paper and Washi Tape and more! The images are adorable and the greetings are fun! Also, I love a great scroll-y font!! 🙂

I started with a Whisper White card base and stamped the greeting in the lower right corner in Real Red Ink. I used the Candy Cane Christmas Stamp Set for all the images! I took a small piece of the Candy Cane Lane Designer Washi Tape and placed it on the card front! Then I layered 3 squares – Candy Cane Lane Designer Series Paper (2-1/4″ Square), Real Red (2″ Square) and Whisper White (1-3/4″ Square). I stamped the candy cane from the same stamp set in Real Red! I layered the squares with Snail Adhesive but added it to the card with Stampin’ Dimensionals. Quick, simple and super adorable!!!

sweet-season, www.LaurasStampPad.com

Here is another one with just a few changes. For this one, I used the striped image from the Candy Cane Christmas Stamp Set as the background rather than Washi Tape. Also, I changed up the center image to another fabulous one from the stamp set. See how you can do so much with this amazing set! This card is also in my Cut For Christmas offer!!! All you need in a Real Red Ink Pad and the Candy Cane Christmas Stamp Set!!! Love it!!! Be sure to check out the other cards in the offer as well!

Happy Stampin’

~Laura

Only a few more days left for the Buy 3, Get 1 Free Designer Series Paper Sale. Click here to start shopping!!

dsp-special, www.LaurasStampPad.com


Part 2: Double Z Fold Frenzy

Posted on

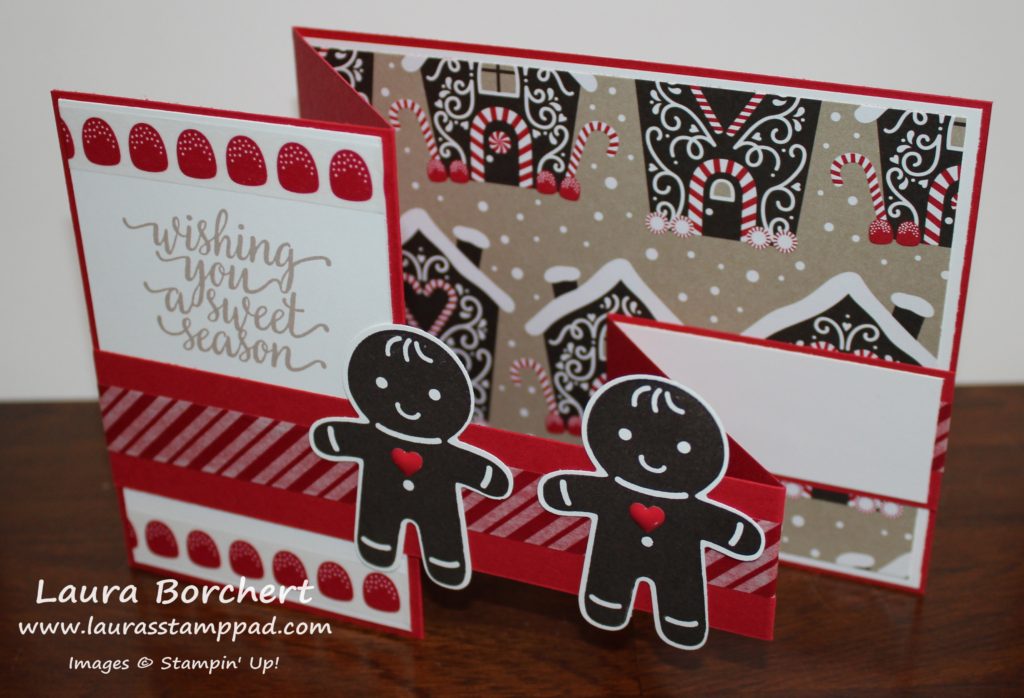
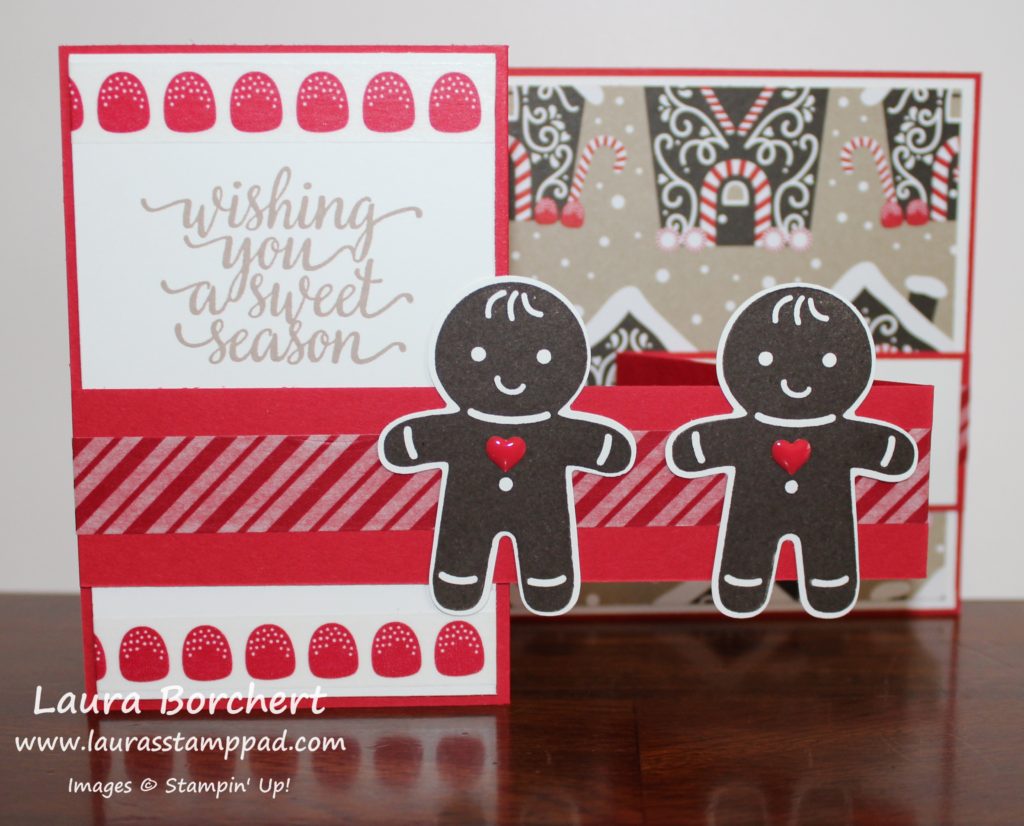
Yesterday I posted the fabulous Fall Single Z Fold Card and today I am going to show you a Double Z Fold Card!!! I just love the pop out piece and the Candy Cane Suite with the little Gingerbread Men!!! LOVE IT!!!

Double Z Fold Card, www.LaurasStampPad.com

Isn’t it precious??? I love love love this card!!! Also, my sample has the blank white rectangle but during Club the ladies stamped the greeting from the Cookie-Cutter Christmas Stamp Set “Warm Heartfelt Greetings For a Very Merry Christmas” and it fits perfectly. Precious!!!! Now let’s get started!!!

So this card starts off the same as the Single Z Fold from yesterday. Start with a Real Red card base measuring 11″ x 4-1/4″ and scored it at 2-3/4″ and 5-1/2″. These are the measurements of folding the card base in half for a normal card and then folding the front of the card back (in half) to create the “Z”. Now it is time to decorate. The front panel has a Whisper White layer measuring 2-5/8″ x 4-1/8″ and I added some of the Candy Cane Lane Designer Washi Tape to the top and bottom. The greeting is from the Candy Cane Christmas Stamp Set and I stamped it in Crumb Cake Ink towards the top so it wouldn’t be covered up by the second Z fold. Adhere this piece to the front panel. On the inside, I layered some of the Candy Cane Lane Designer Series Paper (4″ x 5-1/4″) onto Whisper White (4-1/8″ x 5-3/8″) and adhered it down.

Candy Cane Lane, www.LaurasStampPad.com

Now it is time for the second Z. All you need to do is take a strip of cardstock, score it the same as above and add it to your card opposite folds as the base. I used Real Red cardstock measuring 11″ x 1-1/4″ (you can go as wide as you wish) and scored it at 2-3/4″ and 5-1/2″. Fold it like a Z and the long panel will go across the front (sticking to the left side) and the short panel will adhere to the back right hand side. I added some of the Candy Cane Lane Washi Tape down the center of the strip and added a little white rectangle on the end which you can stamp on or leave blank to write on it. The little gingerbread men were stamped from the Cookie-Cutter Christmas Stamp Set and punched with the coordinating Cookie-Cutter Builder Punch (Bundle & Save 10%). Be sure that when you adhere them to your strip, you only add adhesive in the middle of his body. Otherwise you will have them stick to the back of you card and it won’t open. For the little red hearts, you can either use Enamel Shapes or you can punch out a red heart with the Cookie-Cutter Builder Punch. So precious!!!

Gingerbread Men, www.LaurasStampPad.com

You can check out the Video Tutorial that went up yesterday with the Single Z Fold by clicking here!!! Let me know in the comments which one you like more – the Single or the Double? The Fall or the Christmas? I would love to hear from you!!!

Happy Stampin’

~Laura

Don’t forget about the Paper Pumpkin BOGO Sale for new subscribers!!! Click here to get started and be sure to enter the Promo Code: BOGO  Offer ends on October 10th!

PP_BOGO_Facebook_US, www.LaurasStampPad.com


Precious Ombre Pinks!!!

Posted on

Ombre Sponge Brayer, www.LaurasStampPad.com

I loving the Pink and Yellow combination of this card with that little pop of copper bling in the washi tape!!! I love it!!!

I started with a piece of the Irresistibly Yours Designer Series Paper measuring 5″ x 3-3/4″. I used 3 different colors for the background (although it is hard to tell). The colors are Flirty Flamingo, Calypso Coral, and Watermelon Wonder and I added them ot the designer paper with a Sponge Brayer. I went diagonal and just rolled over the paper until I got the shade I loved. Remember pressing hard into the ink or onto your paper won’t make the color become darker. Just lightly roll in the ink and then lightly over the paper. If you want darker, just repeat that same move. Be sure that when you are moving to the next color, you will want to overlap the colors so they blend and don’t look like stripes. After you are done adding your color, wipe off the excess ink with a paper towel to make the embossed image POP! I added some of the Affectionately Yours Designer Washi Tape along the bottom (copper dots). Then, I layered this onto Daffodil Delight (4″ x 5-1/4″) and then onto a Flirty Flamingo card base! I die cut the flower from the May Flowers Framelit Set in Watermelon Wonder and added it to the front of the card with the Fine Tip Glue Pen! For the greeting, I used the Greatest Greetings Stamp Set and punched it out with the Classic Label Punch. I added the greeting to the card with Stampin’ Dimensionals! I love it! This card would be perfect for any occasion – baby, birthday, wedding, just because!!!

What color combination would you use for this card? Pinks like mine? Blues? Greens? Purples? Multi-color? Let me know in the comments below!!!

Happy Stampin’

~Laura

Don’t forget about the Paper Pumpkin BOGO Sale for new subscribers!!! Click here to get started and be sure to enter the Promo Code: BOGO

PP_BOGO_Facebook_US, www.LaurasStampPad.com


Pop Up Corner Card!!!

Posted on

Ridiculously Happy, www.LaurasStampPad.com

This is a super beautiful card because of that amazing Affectionately Yours Designer Series Paper! I mean just look at that little shiny flower reflection in the right corner. Ahhh, it’s so beautiful! I am loving the new copper foil!!! You might be thinking this card looks fairly plain and simple but just wait till you open it up!!!!

Pop Up Corner Box Card, www.LaurasStampPad.com

That is the inside!!! This card pops up and stands which shows off all of that gorgeous paper. I always think that cards like these are perfect for someone’s desk, bedside table or hospital room during their stay or recovery, or even to send to someone with a photo on the right side to display in their home. This is for sure a card you will want to display for a long time and not just read it and set it aside! So let’s get started!

You will start with an 8-1/2″ x 8-1/2″ piece of Watermelon Wonder cardstock and score it in half on both sides (4-1/4″). This will then create 4 equal squares on your card. Then turn your square diagonal in your Stampin’ Trimmer and score one of the squares from the outside corner to the center corner. You can always use a ruler and Bone Folder if you wish! Now you will fold on all score lines. With the diagonal fold in the upper left corner, you will cut the right side square apart on the score line. For the folding magic, you will fold the diagonal line in half making a triangle in that square, then fold the back square up, the front square up and that last square will fold around. Here is a little diagram to help!

Pop Up Card Instructions, www.LaurasStampPad.com

Now it is time to decorate!!! I used the Affectionately Yours Designer Series Paper for the front and one of the inside panels. Those pieces measure 4″ x 4″. For the greeting on the front, I used a scrap strip of Whisper White and stamped the greeting from Love & Affection Stamp Set in Cucumber Crush. I added the banner tips by cutting up the center of the end of the paper and then diagonal from the corner to that center cut line! I went with a basic front since the Designer Series Paper (DSP) does all of the work and the inside is so fabulous as well. I attached the DSP to the right side. For the left side, I cut a piece of Whisper White (4″ x 4″) and added some of the Affectionately Yours Designer Washi Tape to the top and bottom and stamped in the middle with the Love & Affection Stamp Set!

Top View Pop Up Box, www.LaurasStampPad.com

Once you get the folds down, it is a really simple but WOW card!! You can create this card with lots of different looks for any occasion! I love it!!! Here is one more photo!

Fold Up Pop Up Box, www.LaurasStampPad.com

I want to give a big shout out to my amazing upline, Meg Loven for this amazing idea! She is a wonderful stamper and shared this idea. I couldn’t wait to create it with my favorite Designer Series Paper! She also did a Video Tutorial on this as well so you can check that out here! Thanks, Meg!!!

If you love the Affectionately Yours Suite as much as me, check out these other samples here, and here!

Happy Stampin’

~Laura


Technique Tuesday – Diagonal Washi Tape!!!

Posted on

Happy Tuesday!!! You all know that means I have a fabulous technique to share with you today! This one is fun and simple and you can use with any of the products you have at home – washi tape and stamp set of your choice!

Affectionate Washi Tape, www.LaurasStampPad.com

The super bright colors and fun pattern make this card so cheery and amazing! You might have remembered me making a similar card a few weeks ago, check that out here! That one was just the Washi Tape background but this one I added in the stamping. It was really simple and easy to do so don’t fret and keep on reading!!!

SUPPLIES NEEDED: Washi Tape of your Choice, Stamp Set of your Choice

I took a piece of Whisper White cardstock (3-7/8″ x 5-1/8″) and placed a strip of the Affectionately Yours Designer Washi Tape diagonal across the paper (around the middle). The angle doesn’t matter, that is all up to you. I always try to start around the middle rather than the top or bottom because it allows for a good, long template rather than the little corner piece. Now that you have your base piece down, you can stamp a greeting or image above the washi tape. This can be anything you wish. I used the Love & Affection Stamp Set for the greeting and flowers. I used Cucumber Crush Ink, Night of Navy Ink, and Watermelon Wonder Ink. I stamped only the greeting at this time and filled in the flowers once I was all done. Now that you have your greeting on there, you can add another strip of Washi Tape above it at that same angle. Then stamp again and repeat until the entire cardstock is filled up. You will want to stamp each time so that you have enough room between each strip of Washi Tape. I off-set all of my greeting and used different colors. You could always add the greeting to one of the strips and filled the rest in with flowers or the image of your choice or you can stamp the greeting in each strip. It is all up to you! That’s why I love this card! You can do it at any angle, any stamped image, any colors, any washi tape. No rules, just lots of crafty fun!!! I layered this piece onto Night of Navy (4″ x 5-1/4″) and then onto a Watermelon Wonder card base!

If you would like to see this all in action, check out my Video Tutorial below or click here. Be sure to give this video a thumbs up if you liked it and don’t forget to subscribe if you are new!!! Also, let me know in the comments below what your favorite Washi Tape is or which one you can’t wait to use for a card like this!

Happy Stampin’

~Laura


Just a Note…

Posted on

Just a Note, www.LaurasStampPad.com

Happy Monday and Happy Birthday Month to me!!! I love celebrating all month long. Today I wanted to share this stunning monochromatic beauty with you! The greeting makes this card perfect for sending to a friend or family member just to say hello!! I love it!!!

I started with a Whisper White card base and layered Night of Navy measuring 4″ x 5-1/4″. Then I took a piece of Whisper White measuring 3-3/4″ x 5″ and added some of the Floral Boutique Designer Washi Tape to the top and bottom. Now that the washi tape is in place I know where I can stamp my greeting which is from the Flourishing Phrases Stamp Set. I stamped it in Night of Navy. I die cut the flourish image from the coordinating Flourish Thinlits (Bundle & Save 10%) in Night of Navy cardstock. The Fine Tip Glue Pen is perfect for adding glue to the back of the intricate details of the flourish image! I then placed that onto the card front and you are all done!!! I will say that I placed the flourish onto the cardstock before I did the Washi Tape and you can see I went a little too high with the flourish image. I thought for sure I allowed enough space which is why I suggest putting the Washi Tape down first! 🙂 I’m here to make mistakes for all of you and help you do it the right way!

Do you like monochromatic cards? Let me know in the comments below what your favorite color is to use with Whisper White!

Want to see more samples with the Flourishing Bundle, check them out here and here!

Happy Stampin’

~Laura