It’s a Piece of Cake!!!

Posted on

Happy Tuesday!!! You know that means I have a fabulous technique to share with you! This one is a Piece of Cake….lol! It uses the Piece of Cake Stamp Set and coordinating Cake Builder Punch too! 🙂

Piece of Cake, www.LaurasStampPad.com

Look how fabulous this card is in each of the colors. It can be masculine or feminine!!! All you need is the card base and 2 pieces of Whisper White measuring 4″ x 5-1/4″. One is for the front of the card and the other is for the inside.

Wink of Stella Cake, www.LaurasStampPad.com

For the front, I stamped the greeting from the Piece of Cake Stamp Set all over the center of the cardstock. After inking up the image, I stamped 3 times before going back to the ink for that fun variation of color. It is super cool to get 3 different shades from 1 ink pad! Next, using the same color, I stamped the cake stand in the same ink onto the same cardstock color. For the sample above, that was Melon Mambo. The cake was then stamped in Melon Mambo Ink onto Powder Pink cardstock. Using the Cake Builder Punch, I punched out the images.

Purple Birthday Card, www.LaurasStampPad.com

One of the best ways to save paper with the dual punch is to cut long skinny strips. Using the Fine Tip Glue Pen, I added the cake stand to the card front. Before adding the cake, be sure to stamp the lollipops. Simply place the cake down on the plate, move it down a 1/4-1/2″ and then stamp the lollipops. Then I added the cake with Stampin’ Dimensionals. Using the cake as a guide really helps get the spacing correct.

Using the Fine Tip Glue Pen again, I added glue all over the drips of the cake and then poured Dazzling Diamonds over the top for a fun glittered look (Gorgeous Grape card). For the Melon Mambo card, I went the safe glitter route and used Wink of Stella!

Masculine Birthday Cake Card, www.LaurasStampPad.com

For a more masculine look, on the Bermuda Bay card, I just colored in the drips with the Fine Tip Glue Pen and let it dry for a nice glossy look! Which one is your favorite???

Cake Is the Answer, www.LaurasStampPad.com

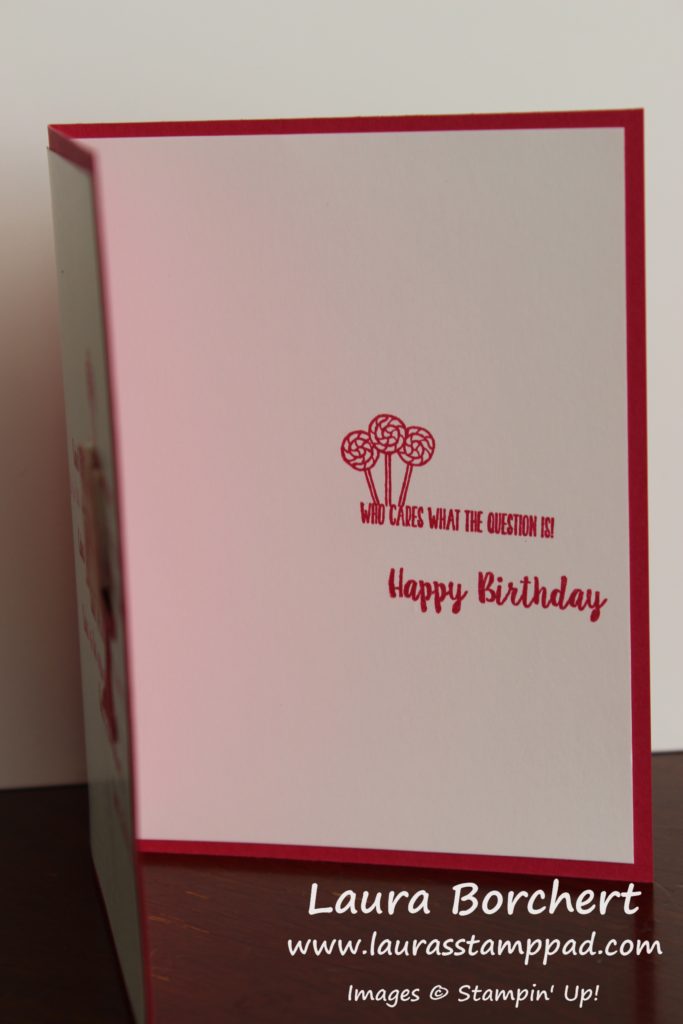
A little decoration and fun on the inside of the card too!!!

If you would like to see this all in action, check out the video below or click here! Be sure to give the video a thumbs up if you liked it and don’t forget to subscribe if you are new. If you would like a notification when I post a new video, be sure to click the bell right next to the subscribe!!!

Happy Stampin’

~Laura

Product List

Coloring the Lovely Lattice!!!

Posted on

Hello Stampers!!! Do you like to color?? Do you have time to color?? I am somewhere in the middle. Sometimes, I don’t mind coloring a little bit but too much overwhelms me. I DO love bright colors and lots of colorful images though!!! Today, I’m sharing a card that is just that! Coloring the Lovely Lattice Sale-A-Bration Stamp Set would take some time but here I achieved beautiful color quickly!

Coloring the Lovely Lattice, www.LaurasStampPad.com

For this card, I started with a Real Red card base. Next, I took a piece of Whisper White (3-3/4″ x 5″) and stamped the Lovely Lattice image on the top of it. I used the Spectrum Pad which I inked up with the following colors: Real Red, Poppy Parade, Pumpkin Pie, Mango Melody, and Pineapple Punch. Since the image is rather large, I left the inks apart and inked across the image moving slightly up and down as I went across to ensure full coverage of ink.

Lovely Lattice Sale-A-Bration Stamp Set, www.LaurasStampPad.com

After stamping the image, I decorated and stamped the greeting on the bottom. I just couldn’t decide which one I liked the best. A simple greeting and some of the Gingham Gala Adhesive Backed Sequins or a greeting and some Pineapple Punch Ribbon. Then for the third one, I punched the greeting out with the Pretty Label Punch and brushed the edges in Real Red Ink with a Sponge Dauber. Which one do you like the best???

Technique Tuesday, www.LaurasStampPad.com

Don’t forget that Sale-A-Bration ends on Sunday so you only have a few days left to earn this amazing Lovely Lattice Stamp Set for FREE! Click here to start shopping!

If you would like to see this all in action, check out the video below or click here! Be sure to give the video a thumbs up if you liked it and don’t forget to subscribe if you are new. If you would like a notification when I post a new video, be sure to click the bell right next to the subscribe!!!

Happy Stampin’

~Laura

Product List

All Adorned!!!

Posted on

Happy Tuesday!!! You all know what that means….I have a fabulous technique to share with you today!!! This All Adorned Sale-A-Bration Stamp Set is perfect to use on a Stamparatus because the images interlock. The set is photopolymer so you can see through the images and use it on blocks as well!

All Adorned, www.LaurasStampPad.com

I am loving Night of Navy and Pineapple Punch together. The contrast is AMAZING and the colors work for many occasions. This card is perfect to have on hand and just stamp a greeting on the inside when you need it.

I started with a 4″ x 8″ Night of Navy card base. I wanted the square look since the pattern looks better for a square. It still fits into a regular envelope with a little room on the side but that’s okay and this way it will still cost the same postage. Next, I took a piece of Pineapple Punch measuring 3-1/2″ x 3-1/2″ and stamped the corner image on each corner. This was super simple with the Stamparatus. Simply line it up to stamp in one corner and then rotate your cardstock around! Perfectly lined up and in the corner each time! I love that!

Then for that fabulous focal point, I stamped the 2 layering images overlapping each other using the Stamparatus. First, stamp 1 of the images. I started with the Night of Navy image. Next, place the other stamp over the top and pick it up with the clear plate of the Stamparatus. Then ink it in Pineapple Punch and stamp. That image was then punched out with a 2″ Circle Punch and layered onto a Night of Navy piece punched out with the 2-1/4″ Circle Punch. I added these to the card front with Stampin’ Dimensionals.

For the Bride, www.LaurasStampPad.com

For the inside, I stamped a few of the images on the corners to make it all match with the front. I used the greeting from the Well Said Stamp Set because I’m going to use this card for an upcoming Bridal Shower!! The perfect little card for any occasion!

Now is the time to get the Stamparatus because you just need $1 more and you will earn this All Adorned Sale-A-Bration Stamp Set for FREE!!! Click the supply list below to start shopping!

If you would like to see this all in action, check out the video below or click here! Be sure to give the video a thumbs up if you liked it and don’t forget to subscribe if you are new. If you would like a notification when I post a new video, be sure to click the bell right next to the subscribe!!!

Happy Stampin’

~Laura

Product List

Laura’s Quick Tips: Assemble Cling Stamps!!!

Posted on

Hello stampers!!! Today, I’m sharing another one of Laura’s Quick Tips!!! I had some customers the other day at class watch me assemble a stamp set and they were in awe. They said to do that again because it wasn’t how they did it and this was much easier. If they are asking, I’m sure all of you are wondering as well! Here we go…

Assemble Cling Stamps, www.LaurasStampPad.com

Time to get those stamp sets and assemble them so they are ready to go when you need a card quickly or when you want to just sit and play. In fact, put on a movie or your favorite show and work on a few stamp sets tonight! This quick and simple trick makes it go fast!

Peel off the sticker from the back of the rubber stamp. Next, peel off the sticker back from the sticker sheet. DO NOT PULL THE STICKER OFF. Leave the sticker on the sheet. Then starting with a detailed side of the stamp, place it down on the sticker, guiding it around to make sure it lines up perfectly. Be sure not to bend, squish, or force the stamp so that it lands on the sticker nice and smooth and flat! Now just pick up the stamp and you are golden!

For some stamps, especially small ones, the sticker wants to come off the sheet once you pull off one side. Try your best to keep the sticker on the sheet. As long as 1 side of the backing is removed, place the stamp down like I mentioned above. It will stick to one side and the label is on the other side. That is okay and at least we know that it is secure and correct one half of the stamp. Now simply hold the sticker back and peel off the other side of the sticker. Now lay the stamp down and press over the top to secure that second half. This may sound confusing so I did a video tutorial below!

I hope you find this useful and enjoy getting all of your stamps ready to go for your next project. Let me know in the comments below if you liked this tip and if you are enjoying Laura’s Quick Tips. If you have a question that you would like answered, just ask and I will do my best to share the answer in the next episode of Laura’s Quick Tips!

To see this all in action, check out the video below or click here! Be sure to give the video a thumbs up if you liked it and don’t forget to subscribe if you are new. If you would like a notification when I post a new video, be sure to click the bell right next to the subscribe!!!

Happy Stampin’

~Laura


Double Z Fold Candy Card!!!

Posted on

Happy Tuesday!! You all know that means I have a fabulous technique for you! With Easter around the corner, let’s bring on ALL THE CANDY!!! Easter is my favorite holiday and Easter candy is AMAZING! Jelly Beans, Peeps, and Reese’s Eggs are just a few of my favorites. What is your favorite! Okay back to this fabulous technique of a Double Z Fold Candy Card!!!

Double Z Fold Candy Card, www.LaurasStampPad.com

Isn’t it beautiful???? I am loving the fun colors. Hello, Lisa Frank! Am I right? Eeee It just makes me so happy. This card uses all the goodies in the How Sweet It Is Suite!

First, I started with a Coastal Cabana card base measuring 4-1/4″ x 11. That is right, this is a regular card size! Simply fold in half like you normally would for a card and then fold that front piece back (in half) to create your first Z. You can also score it if you wish at 2-3/4″ and 5-1/2″. I added a piece of the How Sweet It Is Designer Series Paper the the inside of the card (stripes ~ 4″ x 5-1/4″) and another piece to the left side front flap (polka dots ~ 4″ x 2-1/2″).

Birthday Treats, www.LaurasStampPad.com

Now for that second Z on our card, I used Gorgeous Grape (3″ x 9″) and scored it at 3″ and 6″. This creates three 3″ squares. Fold it to create a Z and add adhesive to the back square making sure the next square is on the left side. Place it down on the striped paper. Next, place the top Z on the polka dotted paper with the card all folded and laying flat. Place your fingers at the edge of the purple 3″ square as a guide to know how much adhesive you will need for that flap (video explains better). Lift the 3″ purple square and add adhesive to the polka dots. It is typically 2 lines of Snail Adhesive. Once your adhesive is down, place the Z over it by pressing flat. Don’t hold the card up to connect it or it might not close flat.

Candy Jar Die Cuts, www.LaurasStampPad.com

Now it is time to decorate!!! Using the Jar of Sweets Framelits, I die cut out the candy jars from the How Sweet It Is Stamp Set. I love that these coordinate and line up perfectly. I also die cut the candy pieces with the framelits. Using the Sweetest Thing Stamp Set, I stamped the greetings to coordinate. Don’t forget you can bundle and save 10% when you get the stamps and framelits together! The Whisper White layers measure 2-3/4″ x 2-3/4″! Just have fun with all the possibilities!!!

Birthday Z Fold Card, www.LaurasStampPad.com

If you would like to see this all in action, check out the video below or click here! Be sure to give the video a thumbs up if you liked it and don’t forget to subscribe if you are new. If you would like a notification when I post a new video, be sure to click the bell right next to the subscribe!!!

Happy Stampin’

~Laura

Product List

Laura’s Quick Tips – Textured Stamping!!!

Posted on

Good morning!!! I hope you are all having a wonderful day to start out with! Today, I wanted to share another one of Laura’s Quick Tips! This one is showing you how to get that perfect textured stamping. Many of Stampin’ Up’s stamps have that amazing texture to the image that makes it look so real. If you ink pads are too juicy though, it just comes out like a splotch!

 Textured Stamping, www.LaurasStampPad.com

All you need for this tip is a plastic spoon. I prefer to use this because it is easy to clean and cheap/disposable if I forget to clean it. It is also gentle on your ink pad so it won’t tear the foam pad.

If you are stamping a detailed image and it comes out all splotchy, I can help you! I’m using the lily in the Lasting Lily Sale-A-Bration Stamp Set. First, rub the back of the spoon over the ink pad to move some of the ink over. If the ink pad is too wet/inked, then too much ink gets on the stamp and doesn’t allow for that texture to shine through. By moving some of the ink over, it allows for the stamp to be inked just enough and show off that perfect texture! Then stamp your image! If it is still splotchy, rub a little more ink over.

Too Much Ink, www.LaurasStampPad.com

If you would like to see this all in action, check out the video below or click here! Be sure to give the video a thumbs up if you liked it and don’t forget to subscribe if you are new. If you would like a notification when I post a new video, be sure to click the bell right next to the subscribe!!!

Happy Stampin’

~Laura


Using Both Sides of the Paper!!!

Posted on

Happy Tuesday!!! You all know what that means! I have a fabulous technique to share with you today!!! We are using both sides of the paper from the How Sweet It Is Designer Series Paper to create 2 cards!

Using Both Sides of the Paper, www.LaurasStampPad.com

Which one is your favorite – the left or the right?? Let me know in the comments below!! To be honest, I don’t know that I could pick. I really had a lot of fun with this card style……as you can see below with all the different options I just had to try out!

I started with a Whisper White card base. Next, I layered on a piece of the How Sweet It Is Designer Series Paper (5-1/2″ x 2-3/4″) and tied some ribbon around the card. I used the Gorgeous Grape Striped Ribbon and the Granny Apple Green/Coastal Cabana Reversible Ribbon. Check out the same below where I even mixed those up and used the reversible ribbon on the purple dotted paper. The paper is the same piece for both cards just the left card using one side and the right card using the other!

Gum drops in the candy jar, www.LaurasStampPad.com

For the greeting, I stamped it from the Sweetest Thing Stamp Set. I used the same images for the focal point too. I stamped the candy jar in Coastal Cabana and die cut it with the Layering Ovals Framelits. Then I really had fun with the different candy options in the Sweetest Thing Stamp Set. Gum drops, hard candy, jelly beans, gummy bears, and chocolates….YUM!!! Using Stampin’ Blends, I colored them in!

Sweetest Thing Stamp Set, www.LaurasStampPad.com

After coloring, I layered the oval onto a scalloped oval of Coastal Cabana and added it to the card front with Stampin’ Dimensionals. I added some Glittered Enamel Shapes to some for a little pop of texture and glitter.

So many fun looks and combinations with this amazing bundle. Click the supply list below so you can get started on creating your favorites!!! Which is your favorite??? If you would like to see this all in action, check out the video below or click here! Be sure to give the video a thumbs up if you liked it and don’t forget to subscribe if you are new. If you would like a notification when I post a new video, be sure to click the bell right next to the subscribe!!!

Happy Stampin’

~Laura

Product List

Laura’s Quick Tips: 6″ x 6″ Designer Paper!!!

Posted on

Today, I am sharing another fabulous one of Laura’s Quick Tips and it’s all about 6″ x 6″ Designer Paper!! I don’t like wasting designer paper because it is so pretty and I don’t like to waste. Creating cards using specific measurements makes little to no waste and lots of fabulous card creations!!!

Laura's Quick Tips: 6" x 6" Designer Paper, www.LaurasStampPad.com

I’m sharing samples using the Gingham Gala Designer Paper from the Occasions Mini Catalog. Actually you can use any 6″ x 6″ Designer Series Paper. In fact, you can even cut your 12″ x 12″ pieces down to create these same projects!!!

One way to use up all of the 6″ x 6″ piece is to cut as follows. First, cut at 4″ creating a 6″ x 4″ piece. Then cut that into 2″ x 4″ pieces resulting in 3 pieces of that size. The leftover piece measures 2″ x 6″ so cut another 2″ x 4″ piece. This leaves a 2″ square leftover. This is perfect for punching out a piece to layer behind a greeting or save up 4 of these for a 2″ x 4″ four square grid. Here is a fabulous sample using the 2″ x 4″ pieces!

The other way to use up all of the 6″ x 6″ piece is as follows. First, cut at 4″ creating a 6″ x 4″ piece. Then cut that one at 5-1/4″ creating a 4″ x 5-1/4″ piece which is perfect for laying on the front of a card base. The little 3/4″ x 4″ piece leftover is perfect to place on the inside of the card for some fabulous coordination and decoration. Then there is a leftover 2″ x 6″ piece that can be cut at 2″ x 4″ and a 2″ square like the one above. Another option would be cutting it at 2″ x 5-1/2″ for a side strip down the edge (or middle) of a card front. Here is a fabulous sample using that!

If you would like to see this all in action, check out the video below or click here! Be sure to give the video a thumbs up if you liked it and don’t forget to subscribe if you are new. If you would like a notification when I post a new video, be sure to click the bell right next to the subscribe!!!

Happy Stampin’

~Laura


Memories & More Card Collections!!!

Posted on

Happy Tuesday!!! You all know that means I have a fabulous technique to share with you today!!! Have you ever heard of the Memories & More Card Collections?? Did you know that you can scrapbook and make cards with these? They are like a kit that is super quick and simple but there are lots of ways to use them!

Memories & More Card Collections, www.LaurasStampPad.com

This fabulous card has no stamping on it at all. I used the large card from the Happiness Blooms Memories & More Card Collection. Simply add that to the Happiness Blooms Cards & Envelopes and you are all done. I embellished a bit with some punched flowers from the Bitty Blooms Punch Pack and Happiness Blooms Enamel Shapes from the Suite. How fabulous is that??

Happiness Blooms Cards & Envelopes, www.LaurasStampPad.com

Here is another fabulous card using the other size of the Card Collection and the Cards & Envelopes in the pack! For this one, I didn’t stamp at all. I just simply added a few Enamel Shapes!

Scrapbook with Memories & More, www.LaurasStampPad.com

The Memories & More Card Collections can also be used in scrapbooking for quick and simple pages. Just drop in the cards for a fabulous look or greeting or embellish it as you wish! I’m just so impressed at how fun and versatile these Memories & More Card Collections are. I challenge you to check them out and use them for cards and scrapbooking! Check out the supplies below!

If you would like to see this all in action, check out the video below or click here! Be sure to give the video a thumbs up if you liked it and don’t forget to subscribe if you are new. If you would like a notification when I post a new video, be sure to click the bell right next to the subscribe!!!

Happy Stampin’

~Laura

Product List

Faux Embossing with Punches!!!

Posted on

Happy Technique Tuesday!!! You all know what that means!!! I have a fabulous technique to share with you all today! I’m not really sure if there is an official name for this so I’m calling it Faux Embossing with Punches!!

Faux Embossing with Punches, www.LaurasStampPad.com

Look how fabulous that white panel looks with those butterflies all over. The awesome thing about this technique is that 1. it uses up scraps and 2. you can do it with any of your punches.

I started with a Grapefruit Grove card base. Next, I took a piece of Whisper White cardstock measuring 2″ x 5-1/4″ and placed a lot of punched butterflies all over it. I punched the butterflies out of scrap white cardstock using the Butterfly Duet Punch. Don’t worry! For those of you who haven’t had a chance to order this yet, it will be available again soon. The butterflies can be placed straight up and down or angled all over. Be sure to allow the butterflies to fall off the edges so it looks like the pattern continues.

Once you have all the butterflies in place, simply turn it over and use the edge of the cardstock as a guide to trim off the butterflies hanging over the edge. Then I added this to the card front and tied some ribbon around it. Using the Butterfly Gala Stamp Set, I stamped the greeting in the lower right corner

Butterfly Duet Punch, www.LaurasStampPad.com

 For the butterflies, I stamped the outline in Grapefruit Grove full strength.  Then the solid image was stamped off once for that lighter look. The centers and antennae were done in Memento Black Ink. TIP: To get the antennae in the right spot, place the butterfly where you would like it, then move it down a smidge. Stamp the antennae above the butterfly. Then attach the butterfly to the card correctly placed on the antennae. This is much easier than trying to stamp the antennae after the butterfly is placed down and hoping they look attached.

If you would like to see this all in action, check out the video below or click here! Be sure to give the video a thumbs up if you liked it and don’t forget to subscribe if you are new. If you would like a notification when I post a new video, be sure to click the bell right next to the subscribe!!!

Happy Stampin’

~Laura