How To Get Your Spacing Right!!!

Posted on

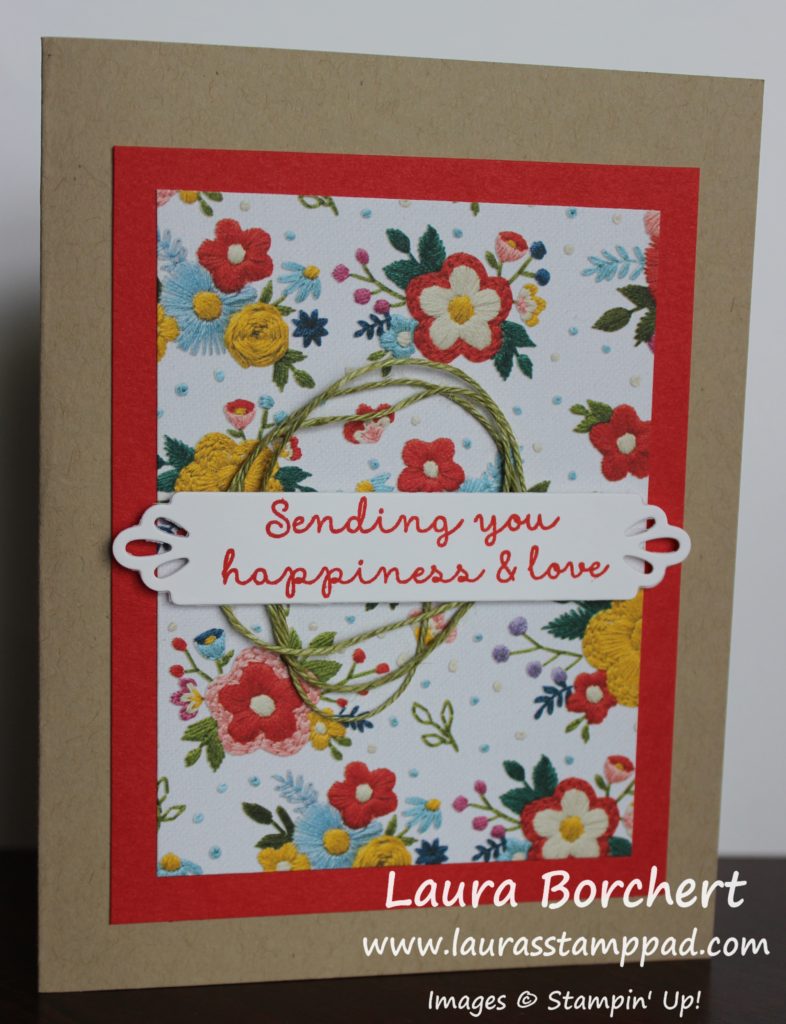
Sometimes I just wing it and sometimes I measure and sometimes I have fun little tips like this one!!! Today, I’m sharing how to get your spacing right on stamped flowers so you can fit a greeting in the middle!!!

How To Get Your Spacing Right, www.LaurasStampPad.com

The Bloom & Grow Stamp Set makes my heart happy!! I just love all the flower combinations and how they can be stamped so beautifully!

I started with a Gorgeous Grape card base. Next, I took a piece of Whisper White (4″ x 5-1/4″) to stamp the flowers from the Bloom & Grow Stamp Set. These were stamped in Basic Gray because I like that softer look for coloring rather than the bold black look.

So now for the hot topic: How To Get Your Spacing Right?!?! I simply placed the greeting strip (Highland Heather measuring 4-1/4″ x 1″) to the side of the white cardstock and in the middle where I wanted it to be placed. Then I stamped the top flowers making sure to be at the top of that greeting strip. Ink it up again, flip it over, and stamp the bottom flowers near the bottom of that greeting strip. By placing the guide on the side, it helps get that perfect spacing where they aren’t too far apart or too close together! Simple and fabulous!

Stampin' Blends Coloring, www.LaurasStampPad.com

Here are the colors of Stampin’ Blends that I used for these flowers. I like to take a photo with my phone right after I am done so I know which colors were used. Then if I want to recreate it exactly, I don’t have to guess!!!

You are Simply Wonderful, www.LaurasStampPad.com

Once I finished coloring, I added this layer to the card base. Then I stamped the greeting from the Bloom & Grow Stamp Set in Gorgeous Grape Ink. This piece was then attached to the center of the card. For a little bit of texture, I added a Baker’s Twine bow with a Mini Glue Dot and some Basic Sequins.

Simply Wonderful Card Insert, www.LaurasStampPad.com

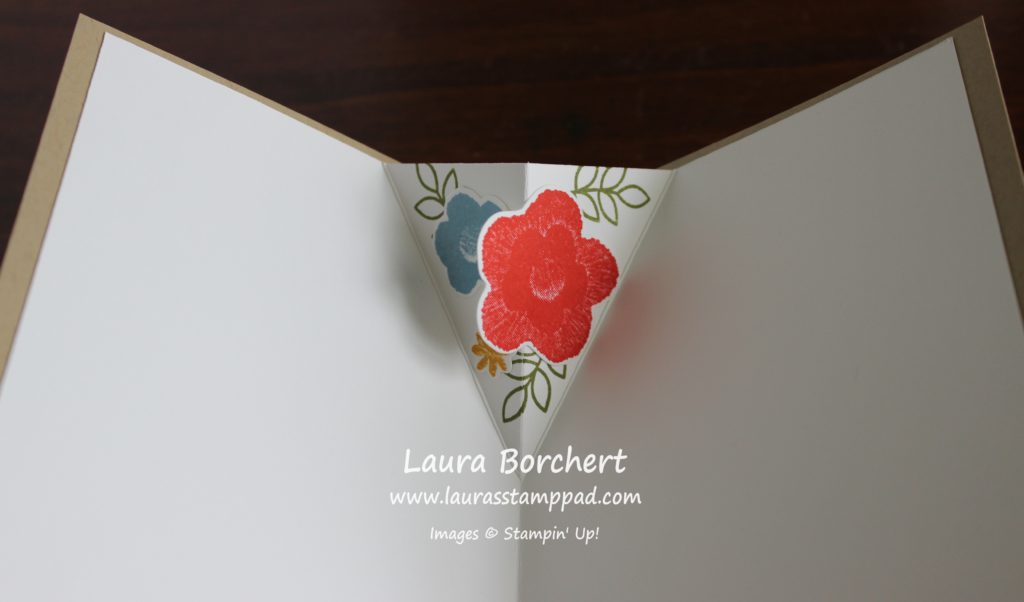
For the inside, I added a piece of Whisper White (4″ x 5-1/4″) and stamped some greenery on the corners from the Bloom & Grow Stamp Set. Perfect coordination to complete the card! Here are some more color options for this amazing card!

Coloring Options, www.LaurasStampPad.com

If you would like to see all of this in action, check out the video below or click here! Be sure to give the video a thumbs up if you liked it and don’t forget to subscribe if you are new. If you would like a notification when I post a new video, be sure to click the bell right next to the subscribe!!!

Happy Stampin’

~Laura

Product List

Fussy Cutting Frenzy!!!

Posted on

Do you like to fussy cut?? You know where you cut out an image by hand rather than having a punch or framelit! I’m not a fan of it because I don’t have the patience. Apparently the day I made this card I had lots of time because I went on a Fussy Cutting Frenzy!!!

Fussy cutting frenzy, www.LaurasStampPad.com

Minus the fussy cutting frenzy that took place to make this card, it was a fairly simple card. The amazing Mosaic Mood Designer Series Paper and Memorable Mosaic Stamp Set did all the hard work!

I started with a Mint Macaron card base. Next, I stamped along the side using the Memorable Mosaic Stamp Set and Mint Macaron Ink. TIP: Start somewhere in the middle with the circle image. Then stamp the twisted image on either side and fill in till it is complete. Also, make sure the twisted image is on the edge/falls off the edge. The designer paper will cover up the other end so if they aren’t all level, that’s okay! I did this same stamped image on the inside of the card too!

Next, I added the piece of Mosaic Mood Designer Series Paper measuring 3-1/4″ x 5-1/2″. Be sure it covers up all of the ends of the twisted stamped images. Then I fussy cut out the hummingbird from another piece of the Mosaic Mood Designer Series Paper. This paper is so gorgeous! Using Stampin’ Dimensionals, I added the hummingbird to the card front!

For the greeting, I stamped it in Soft Suede Ink and punched it out with the coordinating Timeless Label Punch (Bundle & Save 10%). Then I stamped it again in Terracotta Tile Ink so I could fussy cut (hand cut it out) out the word kindness. Next, I glued the word kindness over the other one and flipped it over to add the ribbon. Using Stampin’ Dimensionals to secure the ribbon, I laid the ribbon down in a squiggle pattern and then added it to the card front.

Memorable Mosaic, www.LaurasStampPad.com

For the inside, I did the same pattern of stamping along the edge and then I added some Very Vanilla cardstock to write on! This also covers up the unevenness of the twisted stamped image! 🙂

If you would like to see all of this in action, check out the video below or click here! Be sure to give the video a thumbs up if you liked it and don’t forget to subscribe if you are new. If you would like a notification when I post a new video, be sure to click the bell right next to the subscribe!!!

Happy Stampin’

~Laura

Product List

NEW Stamp Cleaning Pad Review!!!

Posted on

The New Catalog that came out last week and that means there are new products to try out!! Today, I’m sharing my honest review of the New Stamp Cleaning Pad. It sounds super interesting so I had to get it. It cleans Photopolymer Stamps!!! Woot Woot!

New Stamp Cleaning Pad Review, www.LaurasStampPad.com

So I bought this little Stamp Cleaning Pad to see what it was all about. It arrives all white/cream and clean. We all know that won’t last long….but it is okay! After all if the Stamp Cleaning Pad is clean, your stamps probably aren’t. 🙂 Am I right?

So the instructions say to clean the excess ink off of the stamp and then rub it onto the pad! I went all in and tried it out with a new photopolymer stamp and Melon Mambo Ink. Stamped onto some paper and then wiped it off on the Simply Shammy like I normally would! Of course the stamp still has a pink look to it because that’s what pinks and reds do! I lightly rubbed it on the new Cleaning Pad and pink everywhere. The Stamp Cleaning Pad is no longer clean and perfect and I panicked a bit. BUT the stamp was clean. I was super impressed. There is still a hint of pink here and there but the stamp is clear again! As long as the stamp looks fairly clean and not neon pink after 5 stamping sessions, I’m sold!

No More Pink Ink, www.LaurasStampPad.com

Check that out??? The right side has been cleaned and the left has not!!!

The Stamp Cleaning Pad does leave the stamp a bit wet with the solution so I just wiped it again on the Shammy as the final cleaning! I’m impressed and love it. Now I won’t be going through all of my stamps to clean them from the past but going forward I will!

Click here to get your Stamp Cleaning Pad so you can stamp in Pink with no fear of stained stamps! There is also a Refill Solution to add to it. I haven’t needed any yet but I’m guessing after many, many, MANY cleaning sessions, it will sort of dry up?!?! Then adding the solution back will make it fabulous again!

If you would like to see all of this in action of the New Stamp Cleaning Pad, check out the video below or click here! Be sure to give the video a thumbs up if you liked it and don’t forget to subscribe if you are new. If you would like a notification when I post a new video, be sure to click the bell right next to the subscribe!!!

Happy Stampin’….or should I say Cleanin’

~Laura


Follow Your Art!!!

Posted on

Today, I’m sharing the Follow Your Art Designer Series Paper!!! This paper is super cute and can be used for so many different projects. Kids cards for those who love to craft and create! Cards for all of your stamping, scrapbooking, and crafty friends! Use it on a scrapbook page with photos from a crop or stamping event! It would also be perfect for teacher gifts too!!! There are endless possibilities!!

Follow Your Art, www.LaurasStampPad.com

This paper has specific crafty items on one side like ribbons, pencils, hot glue gun, etc. The other side has fun patterns to use for any style of card like stripes, smears, and shapes. That is what makes Stampin’ Up designer paper so versatile. There is always at least one side you love! That 3rd sheet in has fun stitches all over it which is perfect for sewing friends!

If you would like to see all of these sheets of Follow Your Art Designer Series Paper in a full piece, check out the video below or click here! Be sure to give the video a thumbs up if you liked it and don’t forget to subscribe if you are new. If you would like a notification when I post a new video, be sure to click the bell right next to the subscribe!!!

Happy Stampin’

~Laura


Strolling Down Garden Lane!!!

Posted on

Stop and smell the flowers!!! Let’s go strolling down garden lane!!! Okay actually there are no flowers in this designer paper but I think it will be perfect for floral cards!!! These shades of green are perfect backgrounds for any style of card – masculine or feminine!

Strolling Down Garden Lane, www.LaurasStampPad.com

Look at all of these fabulous shades and prints. I think these would make great masculine cards. They will also make great background patterns for all my flowers cards. You all know how much I love flowers on my cards!! I just can’t get enough!

Don’t forget you can check out more of these paper reveals here and here. Enjoy strolling down Garden Lane! 🙂 Let me know in the comments which one your favorite is so far!! I can’t wait to start playing with them and showing off all the projects! So far my favorite is the Mosaic Mood and the Perennial Essence Designer Series Paper!!

If you would like to see all of these sheets of Garden Lane Designer Series Paper in a full piece, check out the video below or click here! Be sure to give the video a thumbs up if you liked it and don’t forget to subscribe if you are new. If you would like a notification when I post a new video, be sure to click the bell right next to the subscribe!!!

Happy Stampin’

~Laura


Come Sail Away Designer Paper!!!

Posted on

Are you singing the song?? Come Sail Away, Come Sail Away, Come Sail Away with me!!! No? Just me? Let me know in the comments if you were singing along with me! Today, I’m sharing the Come Sail Away Designer Paper!!!

Come Sail Away Designer Paper, www.LaurasStampPad.com

This paper scream masculine to me! I struggle with man cards too so I am hoping this inspires me. I’m always looking for great ideas to create some fabulous man cards! It is super nautical themed and I will admit that’s not really my thing. Living here in Illinois, I just don’t feel like it fits since we are miles from the beach and sail boats. BUT there are lots of great patterns that aren’t so nautical in this set too so I still love this paper pack! There is a whole suite of products to coordinate with this as well!!!

Did you see the Perennial Essence Designer Series Paper that was posted on Tuesday??? Click here to check that out! You can also check out others I posted last week here and here!

If you would like to see all of these sheets of Come Sail Away Designer Paper in a full piece, check out the video below or click here! Be sure to give the video a thumbs up if you liked it and don’t forget to subscribe if you are new. If you would like a notification when I post a new video, be sure to click the bell right next to the subscribe!!!

Happy Stampin’

~Laura


Bird Ballad Designer Series Paper!!!

Posted on

Are you ready for more Designer Series Paper Reveals??? Check out some of the others here! Today, I’m sharing with you the Bird Ballad Designer Series Paper! This paper has totally blown me away and I didn’t think I was a bird person!

Bird Ballad Designer Series Paper, www.LaurasStampPad.com

The colors in this paper pack are just so cheerful and fun! They are Basic Black, Basic Gray, Smoky Slate, Soft Suede and Whisper White as the basics. The other colors are Bermuda Bay, Calypso Coral, Crumb Cake, Daffodil Delight, Old Olive, Petal Pink, and Pool Party. They are also a combination that I don’t know if I would have picked myself which I love. Finding new color combinations makes me happy! It’s always good to branch out. Also, those birds are stunning and super cute! There are bird patterns and more solid background images which makes this pack versatile for all kinds of occasions!!!

There are lots of beautiful papers in the Annual Catalog! Let me know which ones you are most excited about and want to see next in the comments below!!! Some of them I will have to wait to do in June because I can’t order all of them in the Demonstrator Pre-Order!

If you would like to see all of these sheets of Bird Ballad Designer Series Paper in a full piece, check out the video below or click here! Be sure to give the video a thumbs up if you liked it and don’t forget to subscribe if you are new. If you would like a notification when I post a new video, be sure to click the bell right next to the subscribe!!!

Happy Stampin’

~Laura


Mosaic Mood Specialty Paper!!!

Posted on

We are getting closer and closer the the reveal of the NEW Annual Stampin’ Up Catalog. I thought I would take a break from Technique Tuesday to share more designer paper in preparation!!! Today, I am sharing the Mosaic Mood Specialty Paper!!! This is STUNNING!!! The colors are beautiful and one side of each sheet is clear embossed for extra shine!

Mosaic Mood Specialty Paper, www.LaurasStampPad.com

Blue and yellow are just so pretty together and this paper has so many shades of both. It is amazing!!! The shades of green on the sheet with leaves all over is going to make a perfect background for any card with flowers on it. You all know I love flowers!!! 🙂 The New In-Color Terracotta Tile color (burnt orange) is used in this paper as well!!

There is an entire suite of coordinating products with this paper including stamps, ribbon, embellishments, and an embossing folder! I can’t wait to start playing with it!

Check out the Magnolia Lane Designer Series Paper Reveal here!

If you would like to see all of these sheets of Mosaic Mood Specialty Paper in a full piece, check out the video below or click here! Be sure to give the video a thumbs up if you liked it and don’t forget to subscribe if you are new. If you would like a notification when I post a new video, be sure to click the bell right next to the subscribe!!!

Happy Stampin’

~Laura


Magnolia Lane Designer Series Paper!!!

Posted on

The Stampin’ Up Annual Catalog is coming on June 4th so that means lots of new products. There are so many amazing new designer papers that I can’t wait to play with and show you!! Per request, I’m going to do the reveal videos again so you can see the full sheet and not just the little swatch in the catalog! Today, check out the beautiful Magnolia Lane Designer Series Paper!!!

Magnolia Lane Designer Series Paper, www.LaurasStampPad.com

You all know how much I love flowers so of course I’m loving this pack. Those soft colors are perfect for any occasion! The other thing that I am loving about this set is the simple green patterned pieces. Those are perfect for masculine cards or great backgrounds for any type of flower card! I love it!!!

If you would like to see all of these sheets of Magnolia Lane Designer Series Paper in a full piece, check out the video below or click here! Be sure to give the video a thumbs up if you liked it and don’t forget to subscribe if you are new. If you would like a notification when I post a new video, be sure to click the bell right next to the subscribe!!!

Happy Stampin’

~Laura


Technique Tuesday – Pop Out Insert!!!

Posted on

Happy Tuesday!!! You all know what that means! I have a fabulous technique today that I got from the amazing stamper Ronda Wade!!! This Pop Out Insert really takes a card up a notch. I went simple on the front since the inside is so fabulous!!!

Sending Happiness & Love, www.LaurasStampPad.com

I used the Needlepoint Nook Suite from the Occasions Mini Catalog for this card and it is just fabulous! The images look so real and that just blows my mind!!

I started with a Crumb Cake card base. Next, I layered on a piece of Poppy Parade (3-1/2″ x 4-1/2″) with some Needlepoint Nook Designer Series Paper on top (3″ x 4″). For the greeting, I die cut out the label from the Needlepoint Elements Framelits. Using the greeting from the Needle & Thread (Bundle & Save 10%), I stamped it in Poppy Parade Ink. Before attaching it to the card front, I added a few loops of Old Olive Linen Thread.

Now for the real fabulous part!!! The inside of the card has this beautiful pop out insert. This is something that can be inside any of your cards. Simply score, fold, and decorate!!! I started with a piece of Whisper White measuring 5-1/4″ x 8″ and folded it in half at 4″. Then with a pencil, I marked 1-1/2″ on either side of that center score line. Measuring 2-1/2″ down the center score line, I made another mark with my pencil. Then using the score blade on the Stampin’ Trimmer or a ruler and Bone Folder, score from the 2-1/2″ mark to the 1-1/2″ mark. This creates a little triangle. Next, I folded on all of the lines to create that pop out.

Be sure to decorate before adding it to the card. I stamped a few leaves first. Next, I stamped and die cut the flowers from the Needle & Thread Bundle. These images can hang off the top of the cardstock because they are folding down when the card closes so they won’t hang out the top.

When adding the insert to the card, I used Tear And Tape because it is super strong. Once the tape it on, place it inside the card, open the card flap, peal off the tape backing and then press the card closed. This ensures that the insert will still allow the card to close flat. Next, flip over the card and repeat. Again be sure to press the card closed to seal the adhesive for that perfect look. When you open the card it might not go all the way to the fold or seem a little off on the sides but that is okay. The important part is that it closes flat.

If you would like to see this all in action, check out the video below or click here! Be sure to give the video a thumbs up if you liked it and don’t forget to subscribe if you are new. If you would like a notification when I post a new video, be sure to click the bell right next to the subscribe!!!

Happy Stampin’

~Laura

Product List