Technique Tuesday – Heat Embossing with Water!!!

Posted on

Happy Tuesday!!! You all know what that means! I have a fabulous technique to share with you and today we are heat embossing with water!!! Just splatter water all over and pour the powder on top!!!

Heat Embossing with Water, www.LaurasStampPad.com

I just love this stunning gold and purple card! It’s so wonderful…..just like the greeting says!

I started with a Whisper White card base. Then I took a piece of Elegant Eggplant measuring 4″ x 5-1/4″ and dripped/splattered water all over with an Aqua Painter! A good splatter can be done by tapping/hitting the Aqua Painter on your finger for that bump that makes the water fly. See the video tutorial below for that in action….I’m not sure how else to explain that. 🙂

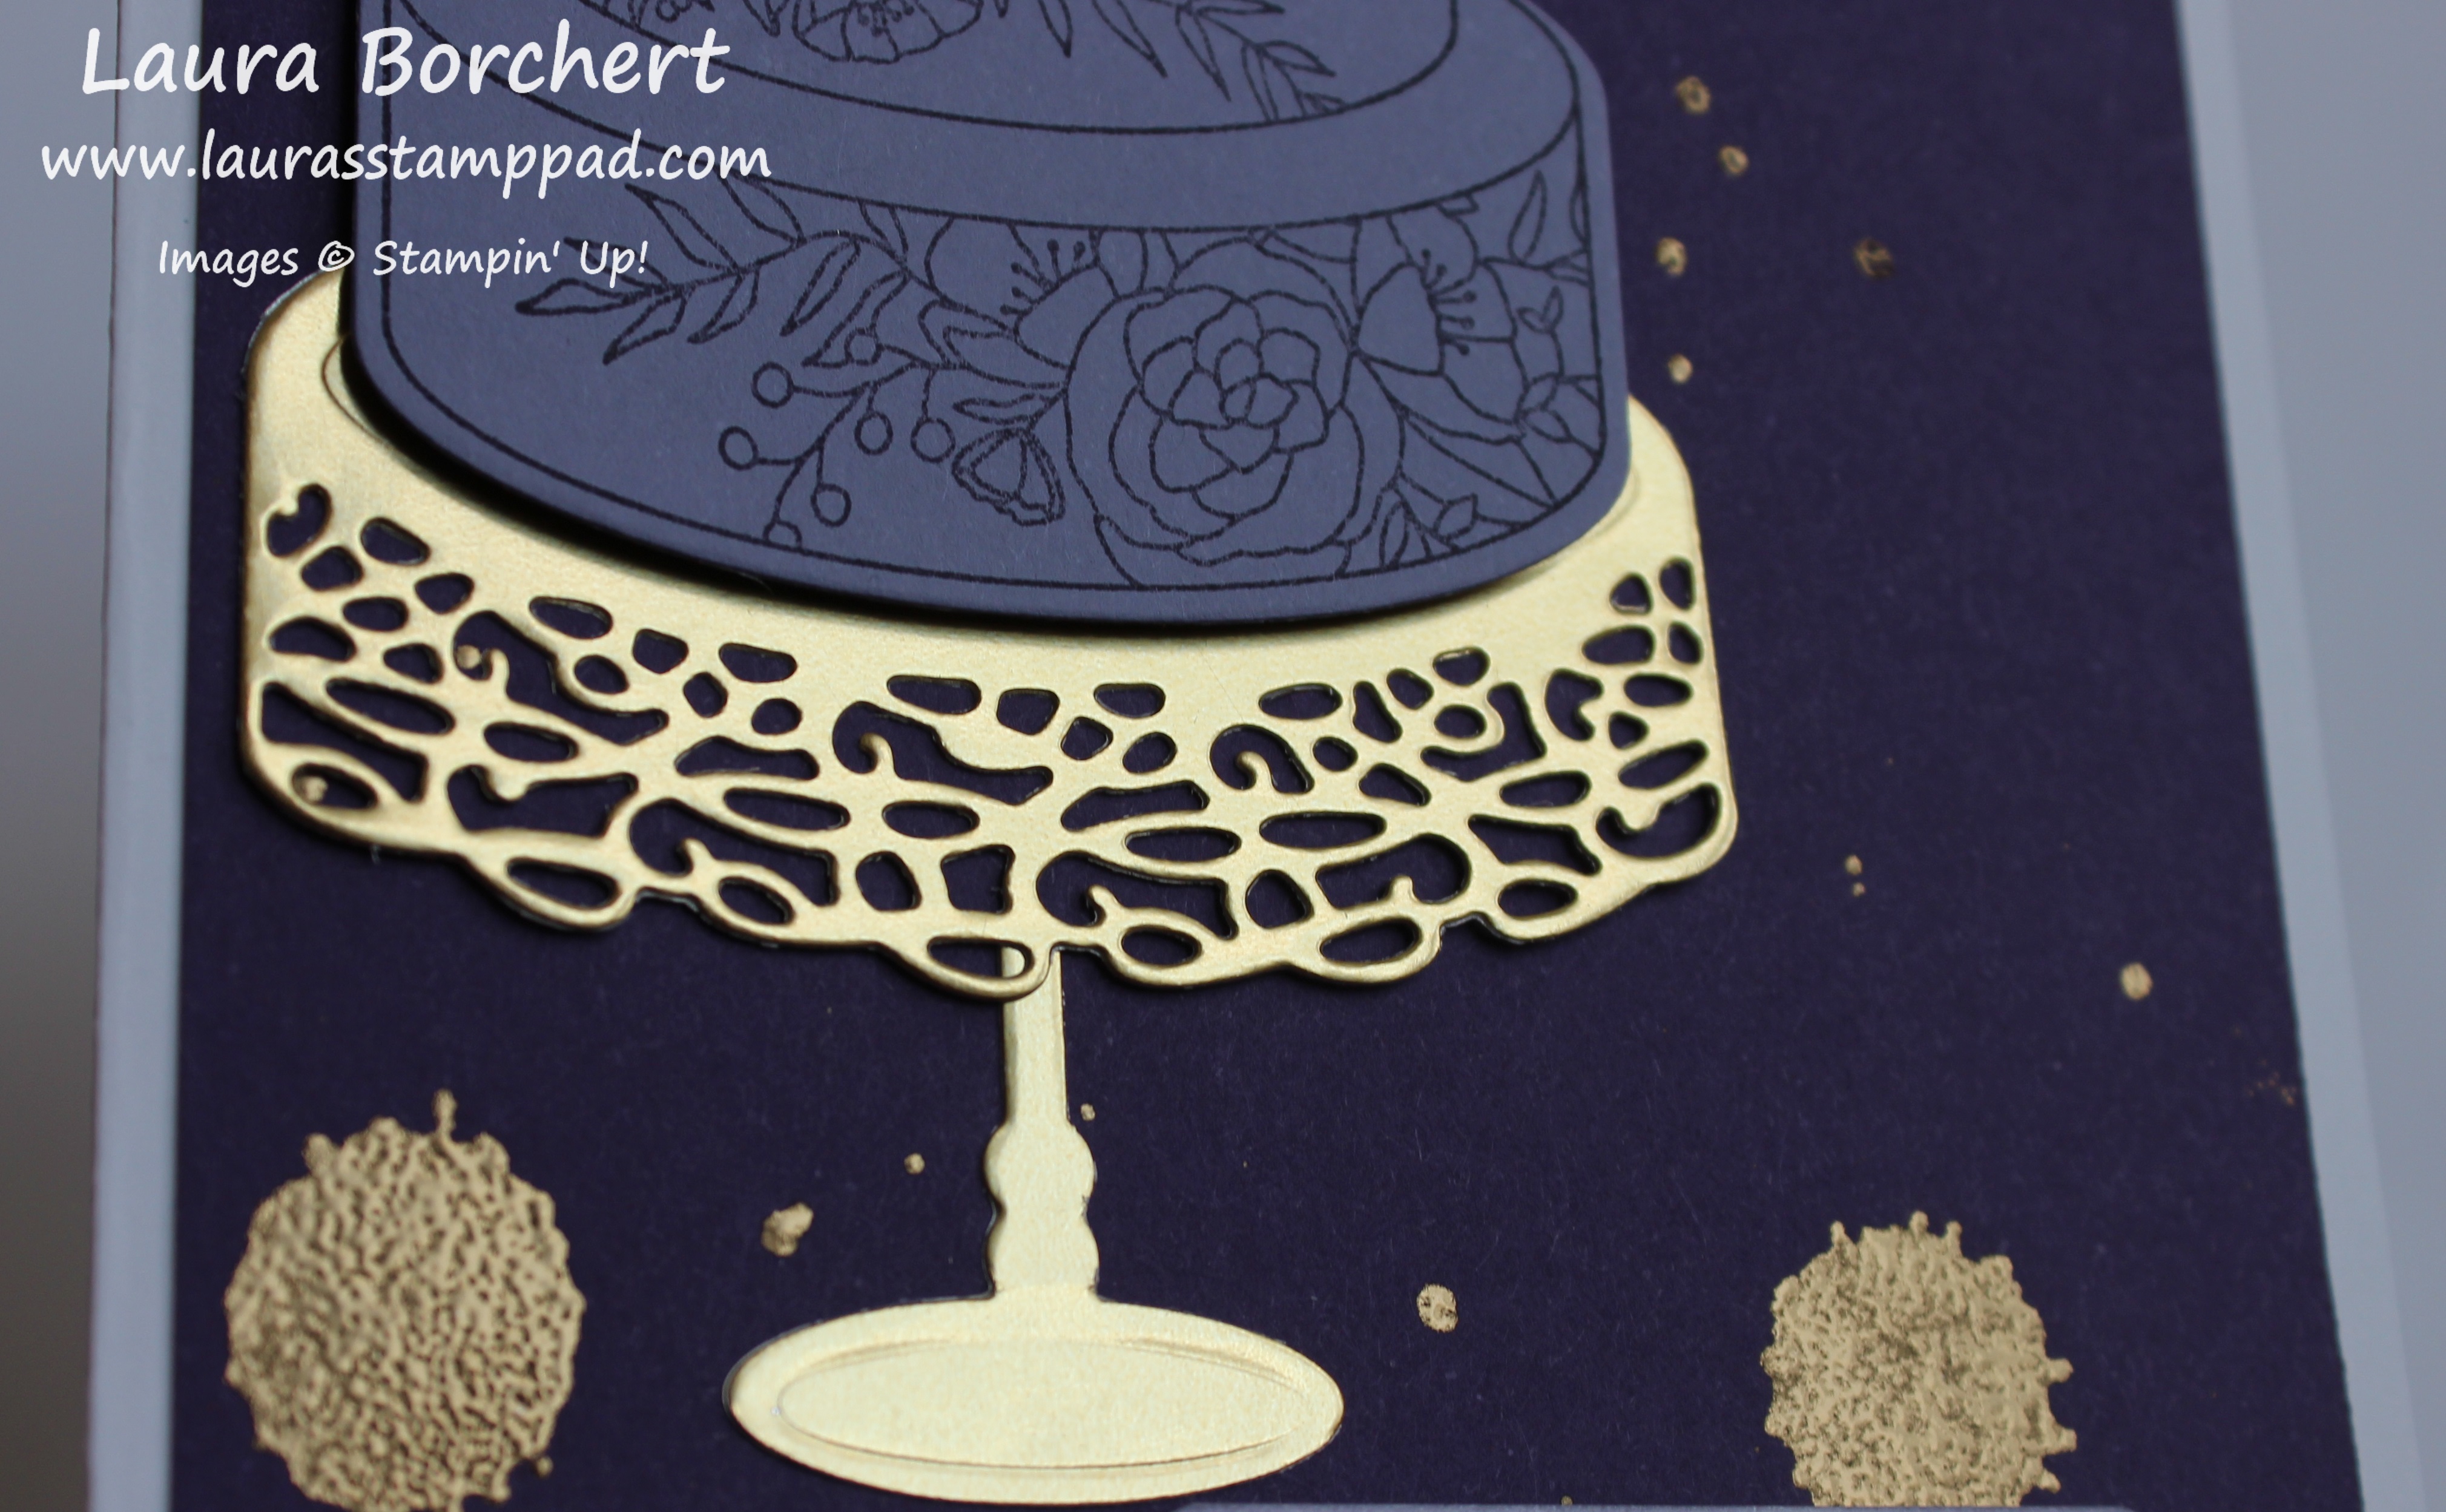
Once the desired amount of water is on the cardstock, I poured Gold Embossing Powder over the top and the powder sticks to all the water spots. Using the Heat Tool, I melted the powder. The larger drops are full of water and you will notice the water wiggle below the powder when the heat tool blows it around. In order to not make the splatter drip or blow, I would apply the heat a little and then move to another spot and then come back again, repeating this a few times till everything was melted. I love watching the bubbles wiggle though. It’s so magical!

Golden Splatter, www.LaurasStampPad.com

After I set the powder with the Heat Tool, I added this piece to the card front and then added decoration. I used the Cake Soirée Stamp Set and coordinating Sweet Cake Framelits Dies (Bundle & Save 10%). The cake was stamped in Elegant Eggplant Ink onto Wisteria Wonder cardstock. I used Gold Foil Paper for the cake stand and bow! When adding it to the card front, I did the cake stand flat and the cake with Stampin’ Dimensionals. Using the Fine Tip Glue Pen, I added the bow to the top.

For the greeting, I stamped it from the Cake Soirée Stamp Set in Elegant Eggplant Ink and punched either side with the Pretty Label Punch for that cut little rounded edges. Using a Sponge Dauber, I brushed a little color on all of the edges and added this to the card front with Stampin’ Dimensionals. I finished it off with some Gold Metallic Enamel Shapes on either end!!!

If you would like to see this all in action, check out the Video Tutorial below or click here! Be sure to give the video a thumbs up if you liked it and don’t forget to subscribe if you are new. If you would like a notification when I post a new video, be sure to click the bell right next to the subscribe!!!

Happy Stampin’

~Laura

Product List


Technique Tuesday – Perfect Tree Placement!!!

Posted on

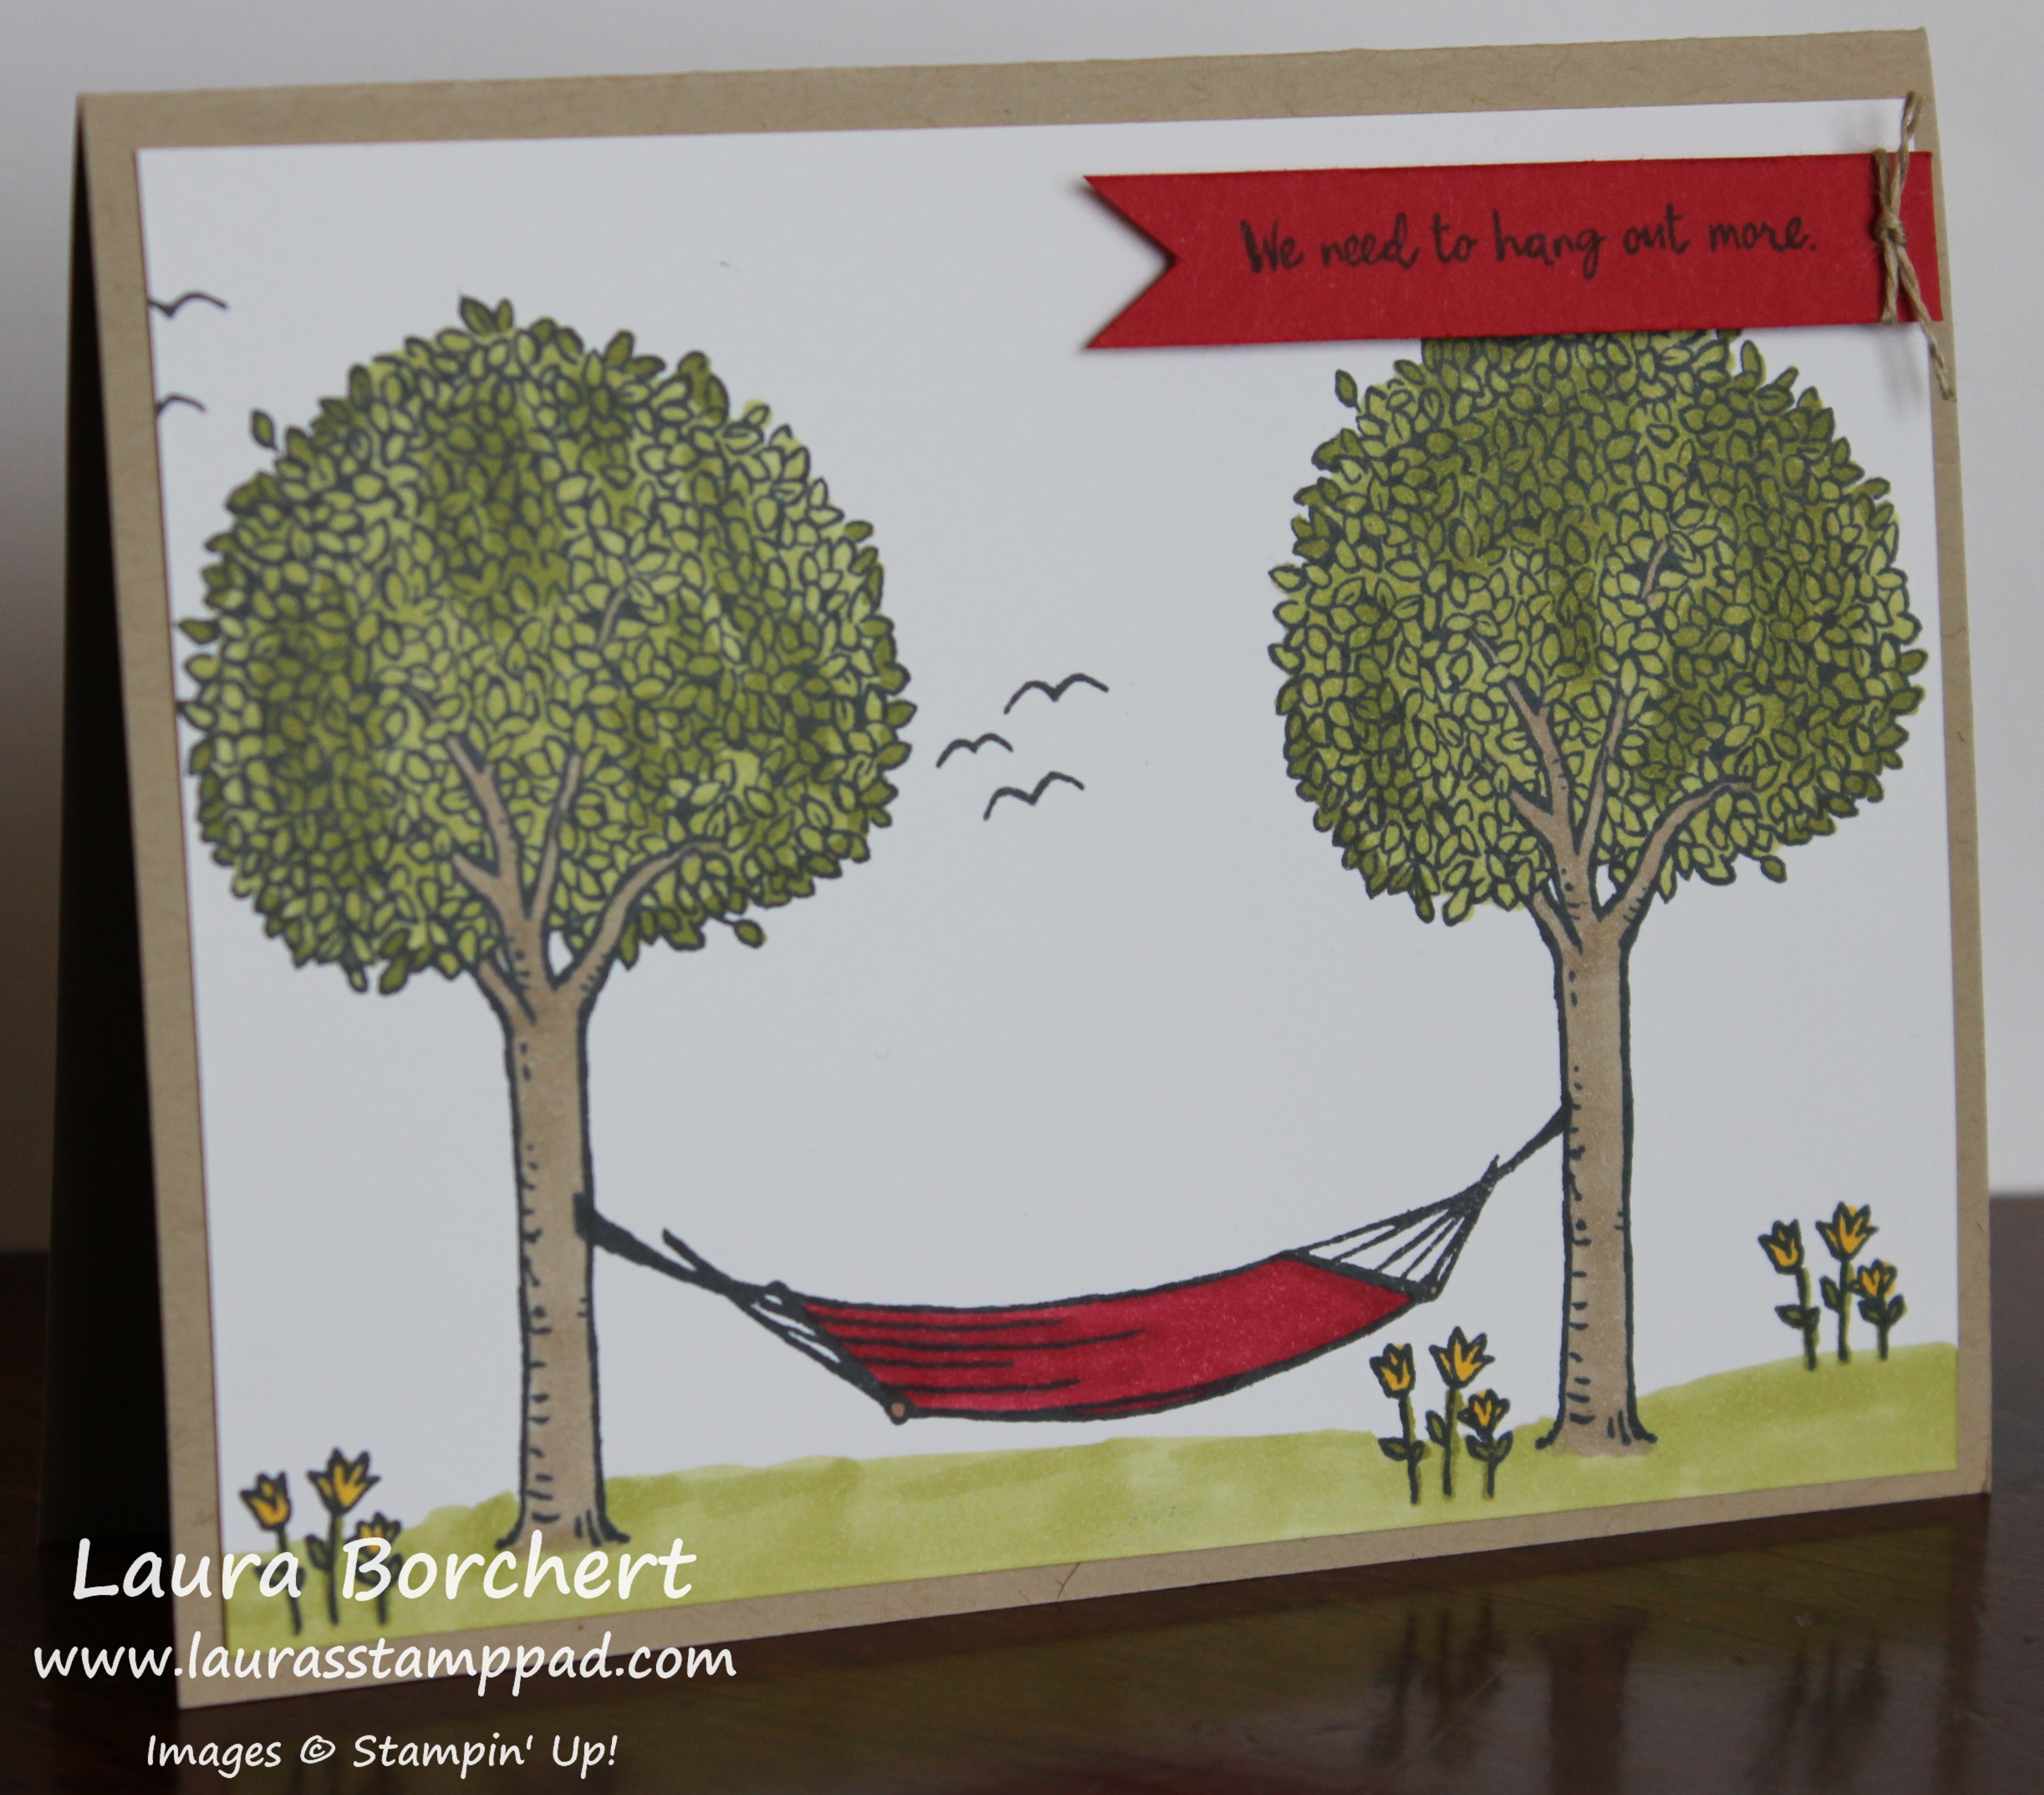
Happy Tuesday!!! You all know what that means! I have a fabulous technique to share with you all today! Create the perfect tree placement from the In The Trees Stamp Set using the Stamparatus!!!

Perfect Tree Placement, www.LaurasStampPad.com

Doesn’t this scene just look so relaxing, peaceful, and Spring-like?? Oh how I am counting down the days till Spring (34 more days)!!!! Let’s get started on this beauty!

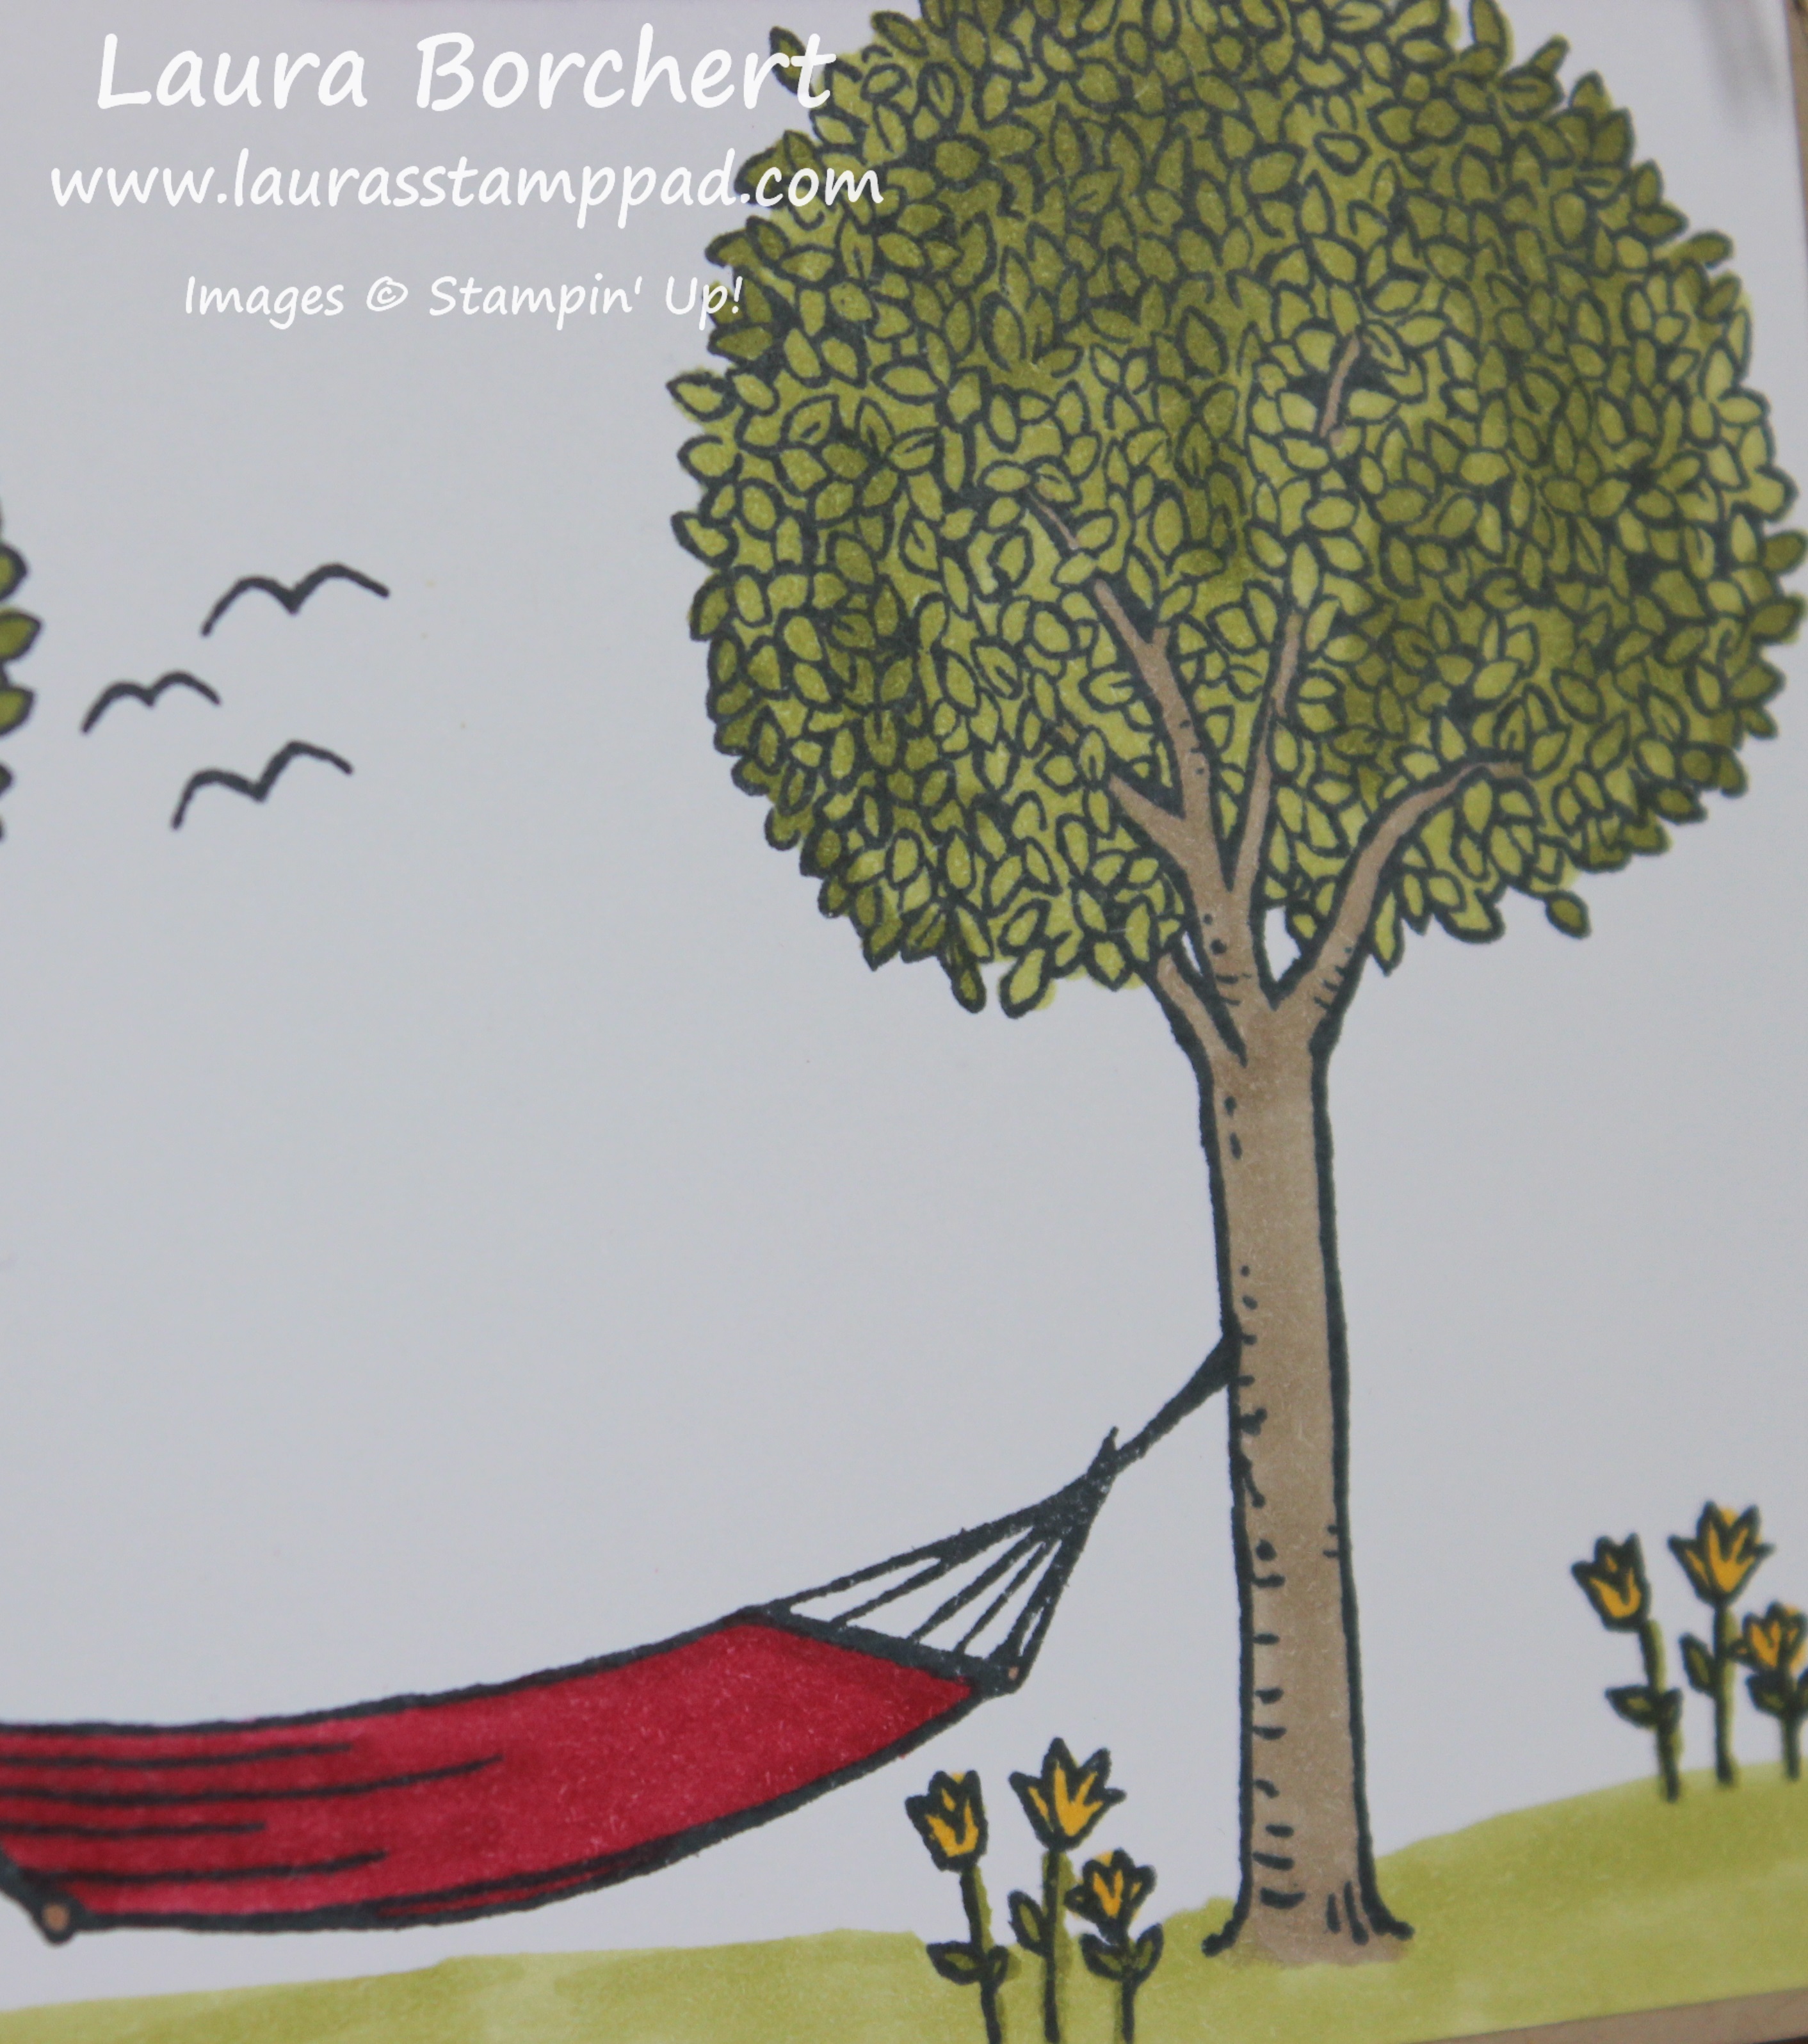
I started with a Crumb Cake card base! Next, I took a piece of Whisper White measuring 4″ x 5-1/4″ for all the stamping! I started with the trees, then the hammock, and finished with filling in with flowers and birds! All of the images were stamped in Memento Black Ink since I colored them in with the Stampin’ Blends alcohol markers! I used the Stamparatus for the perfect placement on the trees and hammock. Stampin’ Up created the amazing notched hinges so we can move the stamp over. After stamping the first tree, I moved it over 2 full spots (into the 3rd spot over) which is the perfect spacing amount for the hammock to hang between them! How simple and cool is that?!?! I love it!!!

Spring Flowers & Trees, www.LaurasStampPad.com

For the coloring on the tree, I did not color each individual leaf! Heck no do I have the patience for that. LOL I colored big spots with the dark Old Olive and then blended it all together with the light Old Olive for a little variation in color! The trunk was done in Crumb Cake and the hammock in Real Red! I colored the flowers with Old Olive and Daffodil Delight. Then I thought it needed some green grass. There is a grass stamp in the set but I went with use swiping some of the light Old Olive Marker across the bottom. The awesome thing is that there aren’t streaks like when using a marker! I loved how it turned out!

To finish off the card, I added this piece to the card front and added the greeting onto a strip of Real Red. For a little bit of texture, I tied some Linen Thread around the greeting and added it to the card front with Stampin’ Dimensionals!

If you would like to see this all in action, check out the Video Tutorial below or click here! Be sure to give the video a thumbs up if you liked it and don’t forget to subscribe if you are new. If you would like a notification when I post a new video, be sure to click the bell right next to the subscribe!!!

Happy Stampin’

~Laura

Product List


Technique Tuesday – Candle Creations!!!

Posted on

Happy Tuesday!!! That means I have a fabulous technique to share with you today! This one is rather simple and super fun! I’m sharing some candle creations using the Picture Perfect Birthday Stamp Set from the Occasions Mini Catalog. This Suite is my favorite by far and I just can’t put it down!

Candle Creations, www.LaurasStampPad.com

This quick and simple card is perfect for a Man Card but stay tuned to the card I’m going to show tomorrow which is more feminine and changed up a little! Both of these styles of cards are great for making multiples to have on hand all year long!!!

I started with a Lemon Lime Twist card base. Next, I stamped the greeting all along the top and bottom in Bermuda Bay Ink using the Picture Perfect Birthday Stamp Set! Be sure to start stamping on the edge with the greeting hanging off some so that it looks like the greeting continues on and on! Then, I added a piece of the Picture Perfect Party Designer Series Paper (5-1/4″ x 3″) in the center.

Boy Candles, www.LaurasStampPad.com

Then I took a piece of Whisper White cardstock (2-1/2″ x 4-3/4″) and stamped the candles. There are 3 styles of candles in the set – solid, dots, and stripes. So while each candle can be stamped alone, there are also combinations that can be created. Simply stamp the solid image off once onto scrap paper and then onto your project. Then stamp the patterned candle in full strength! Be sure to check out the video tutorial below to see these fun combinations! I stamped the center candle first and then worked my way out from either side. I found that this helped me with my spacing. Another tip was that I stamped them a little angled on purpose because I knew I wouldn’t be able to get them perfectly lined up straight and even! After stamping the candles in Bermuda Bay and Lemon Lime Twist Ink, I stamped the flames in Crushed Curry Ink. Once I was finished stamping, I added this to the card front! Check back tomorrow to see a few ways I stepped up this card with some variations! You can even join my mailing list here so you don’t miss out!

If you would like to see this all in action, check out the Video Tutorial below or click here! Be sure to give the video a thumbs up if you liked it and don’t forget to subscribe if you are new. If you would like a notification when I post a new video, be sure to click the bell right next to the subscribe!!!

Happy Stampin’

~Laura

Product List


Technique Tuesday – Some Things Are Just Meant To Be!!!

Posted on

Happy Tuesday!!! This greeting is like my favorite of all time, I think! Some Things Are Just Meant To Be…Like The Two Of You Together! Come on now, aren’t you loving this?? I think it will be great for engagement, wedding, and anniversary!

Some Things Are Just Meant To Be, www.LaurasStampPad.com

I started with a Calypso Coral card base. Next, I took the Lots of Labels Framelits and die cut some of the Lemon Lime in the Fresh Florals Designer Series Paper Stack and some Whisper White! Depending on how much you want to show between the layers, you can pick the size of framelit.

Floral Border, www.LaurasStampPad.com

Now for the focal point, I stamped it all in Memento Black Ink! The greeting was stamped in the middle from the Petal Palette Stamp Set from the Occasions Mini Catalog and the floral edge pieces are from the Lots of Lavender Sale-A-Bration Stamp Set. Get the Petal Palette Bundle, save 10% and earn the Lots of Lavender Stamp Set for Free! How fabulous is that?!?!?! Woot woot! Using the images in the Lots of Lavender Stamp Set, I added color to the flowers with Calypso Coral and Lemon Lime Twist! The cool thing about these images are that they are textured and not a perfect match. This makes it easier to stamp and gives it a watercolor look almost. Tip: The greenery has a stamp for the top and the bottom so if it looks like it totally doesn’t line up, try the other side!!

After finishing the stamping and coloring, I added ribbon from the Sale-A-Bration Shimmer Ribbon Pack to the back as well as some Silver Sequin Trim! Simply start on one end and secure it with Stampin’ Dimensonals, run it to the other side and make a loop and secure it with Stampin’ Dimensionals. Keep filling in until you have a loop on either side and the ends on opposite sides. Once all the ribbon is secure, peel off the Stampin’ Dimensionals and add it to the card front. I had a few sequins fall off the ends so I added those around the base with the Fine Tip Glue Pen.

If you would like to see this all in action, check out the Video Tutorial below or click here! Be sure to give the video a thumbs up if you liked it and don’t forget to subscribe if you are new. If you would like a notification when I post a new video, be sure to click the bell right next to the subscribe!!! Don’t forget to check back tomorrow to see another sample using the Lots of Lavender Stamp Set!

Happy Stampin’

~Laura

Product List


Technique Tuesday – Brusho Color Palette!!!

Posted on

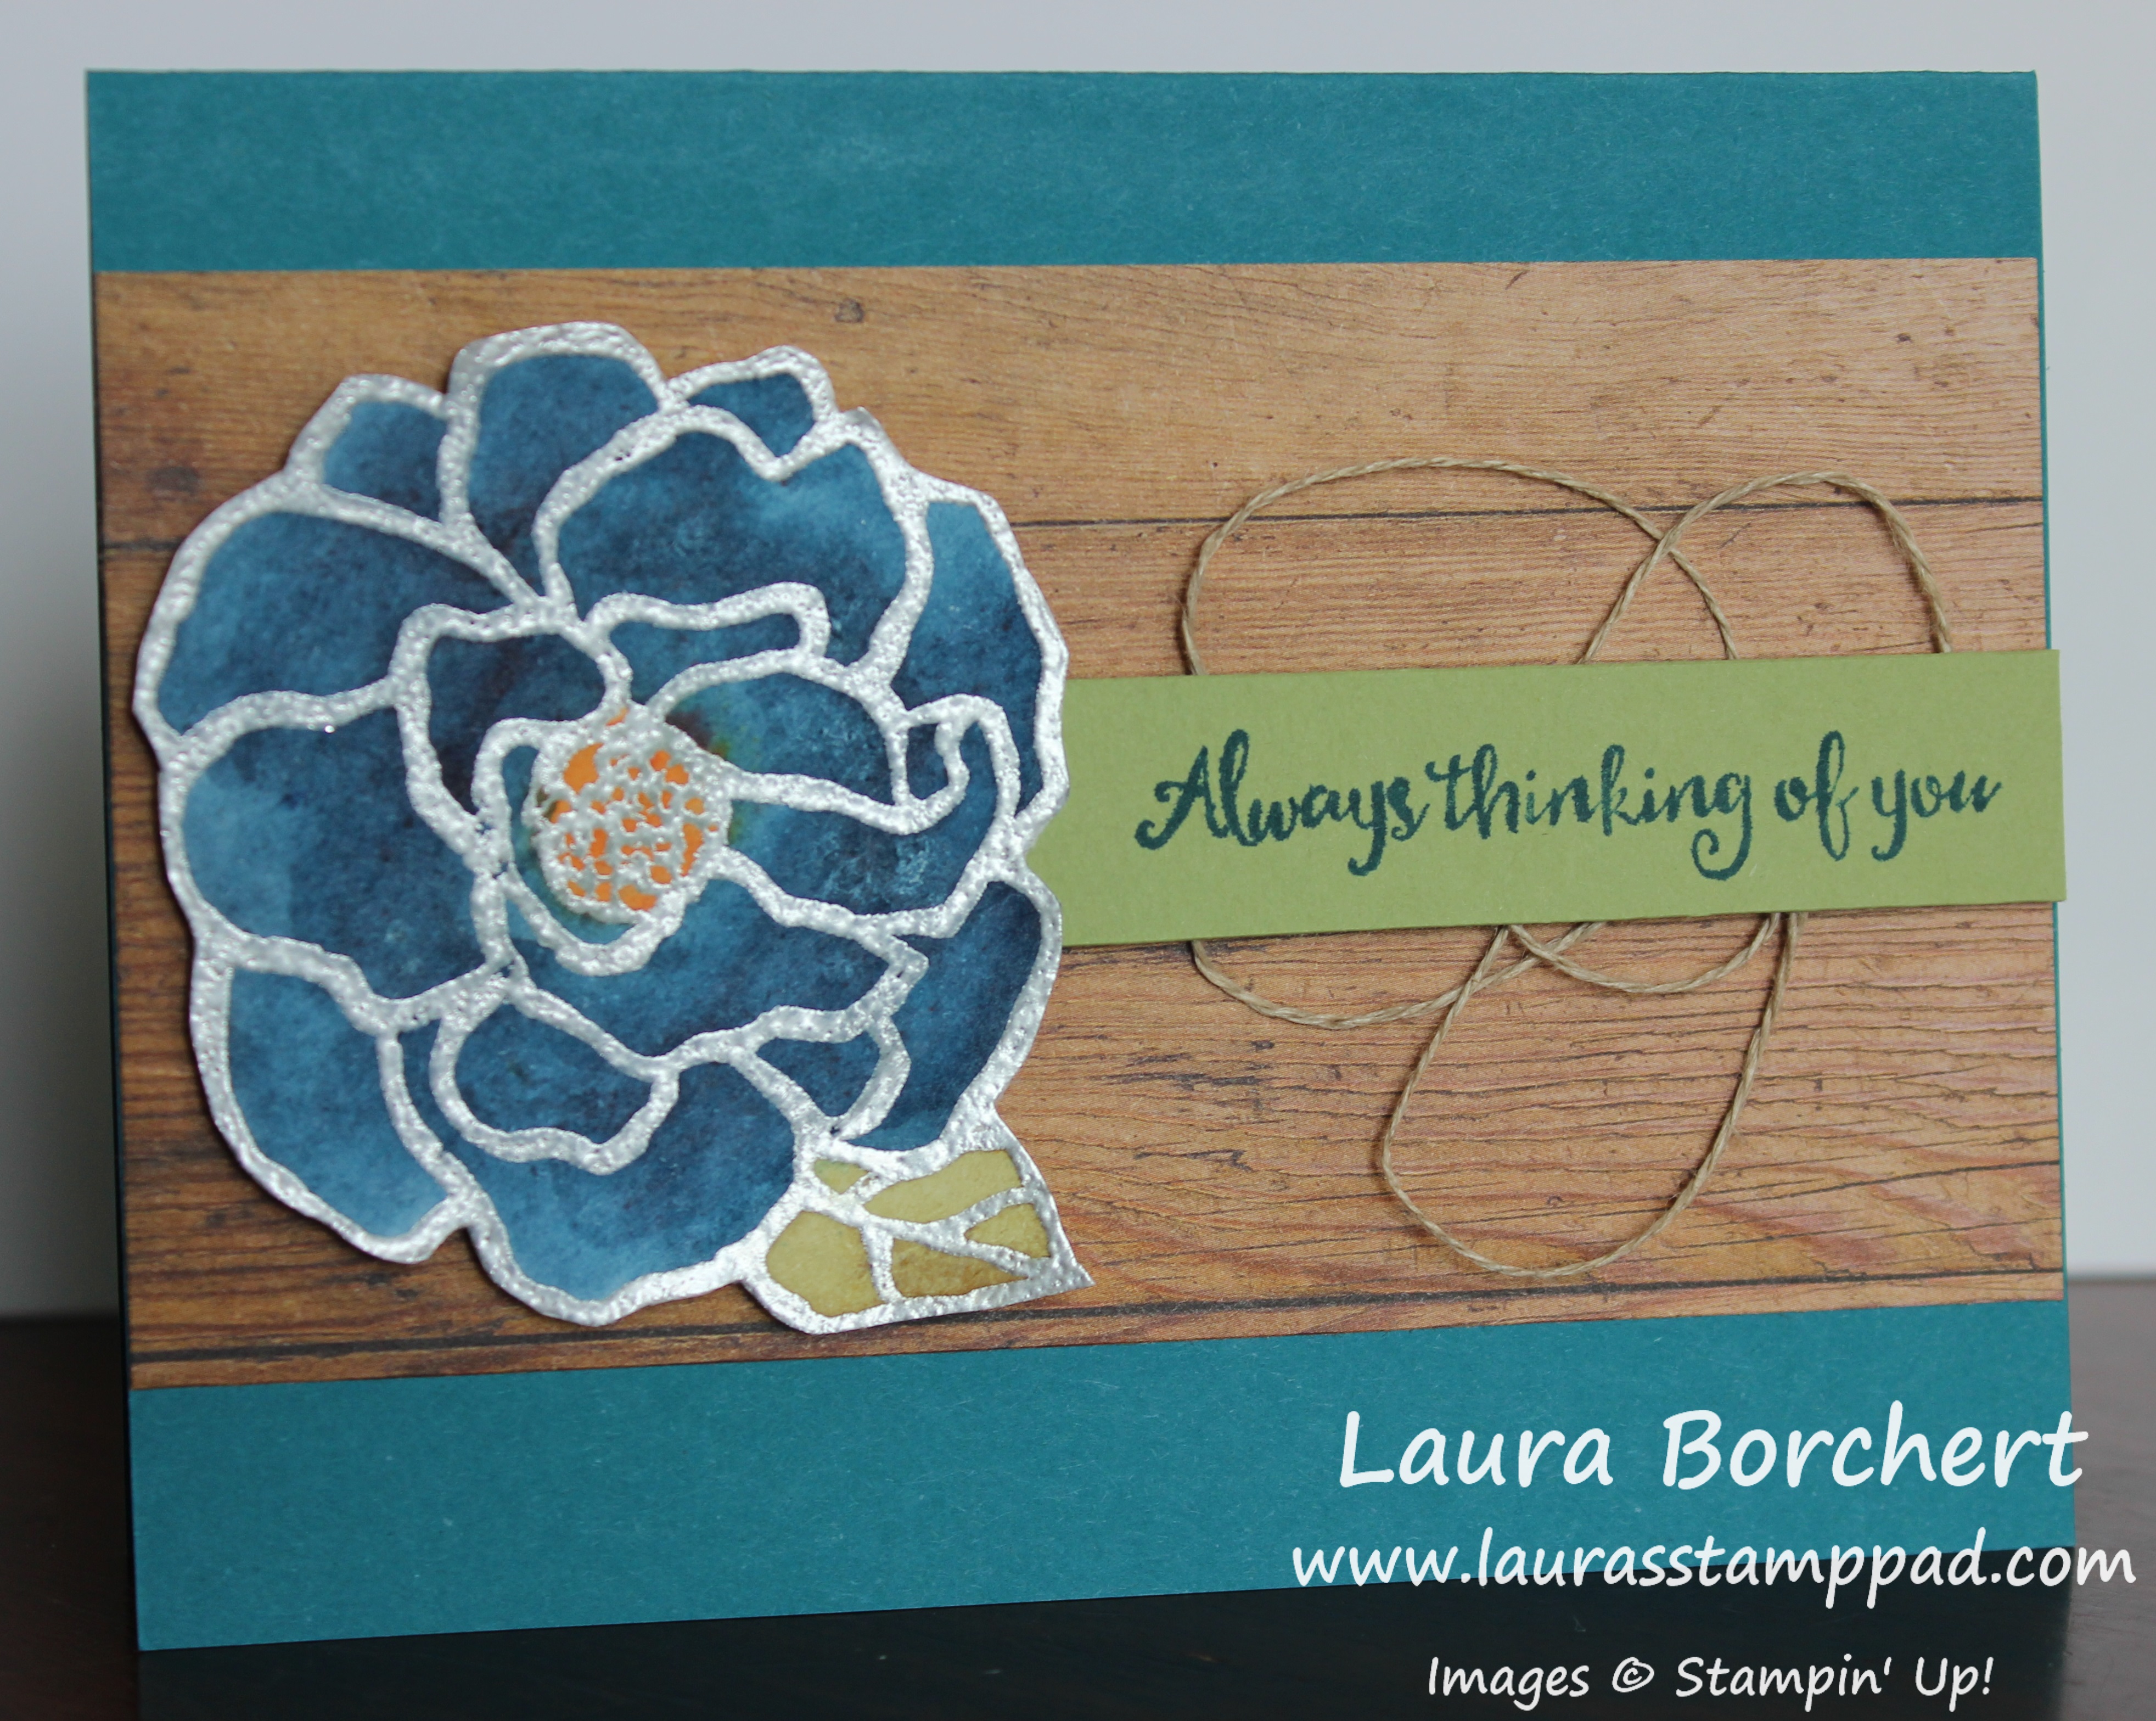
Happy Tuesday!!! You all know what that means…..I have a fabulous technique to share with you today!!! I’m showing your how to create a Brusho Color Palette!!! I prefer to have more control and precision with my crafting so I love coloring with Brusho like this!!!

Brusho Color Palette, www.LaurasStampPad.com

I love the rustic look of this card with that metal shine from the silver embossing and bold color from the Brusho Crystal Colour. Let’s get started!!

I started with a Island Indigo card base. Next, I layered on a piece of the Wood Textures Designer Series Paper. For the greeting, I took a strip of Pear Pizzaz cardstock and stamped the greeting from the Beautiful Day Stamp Set in the Occasions Mini Catalog. The greeting was stamped in Island Indigo Ink. Then I took some Linen Thread and wrapped it around my fingers to create the loops. I slid the loops off my fingers and placed them on the back of the greeting. Using Stampin’ Dimensionals, I secured the loops all over the back and made sure the ends were held tight. The greeting was placed on the far right side of the card!

Rustic Flower, www.LaurasStampPad.com

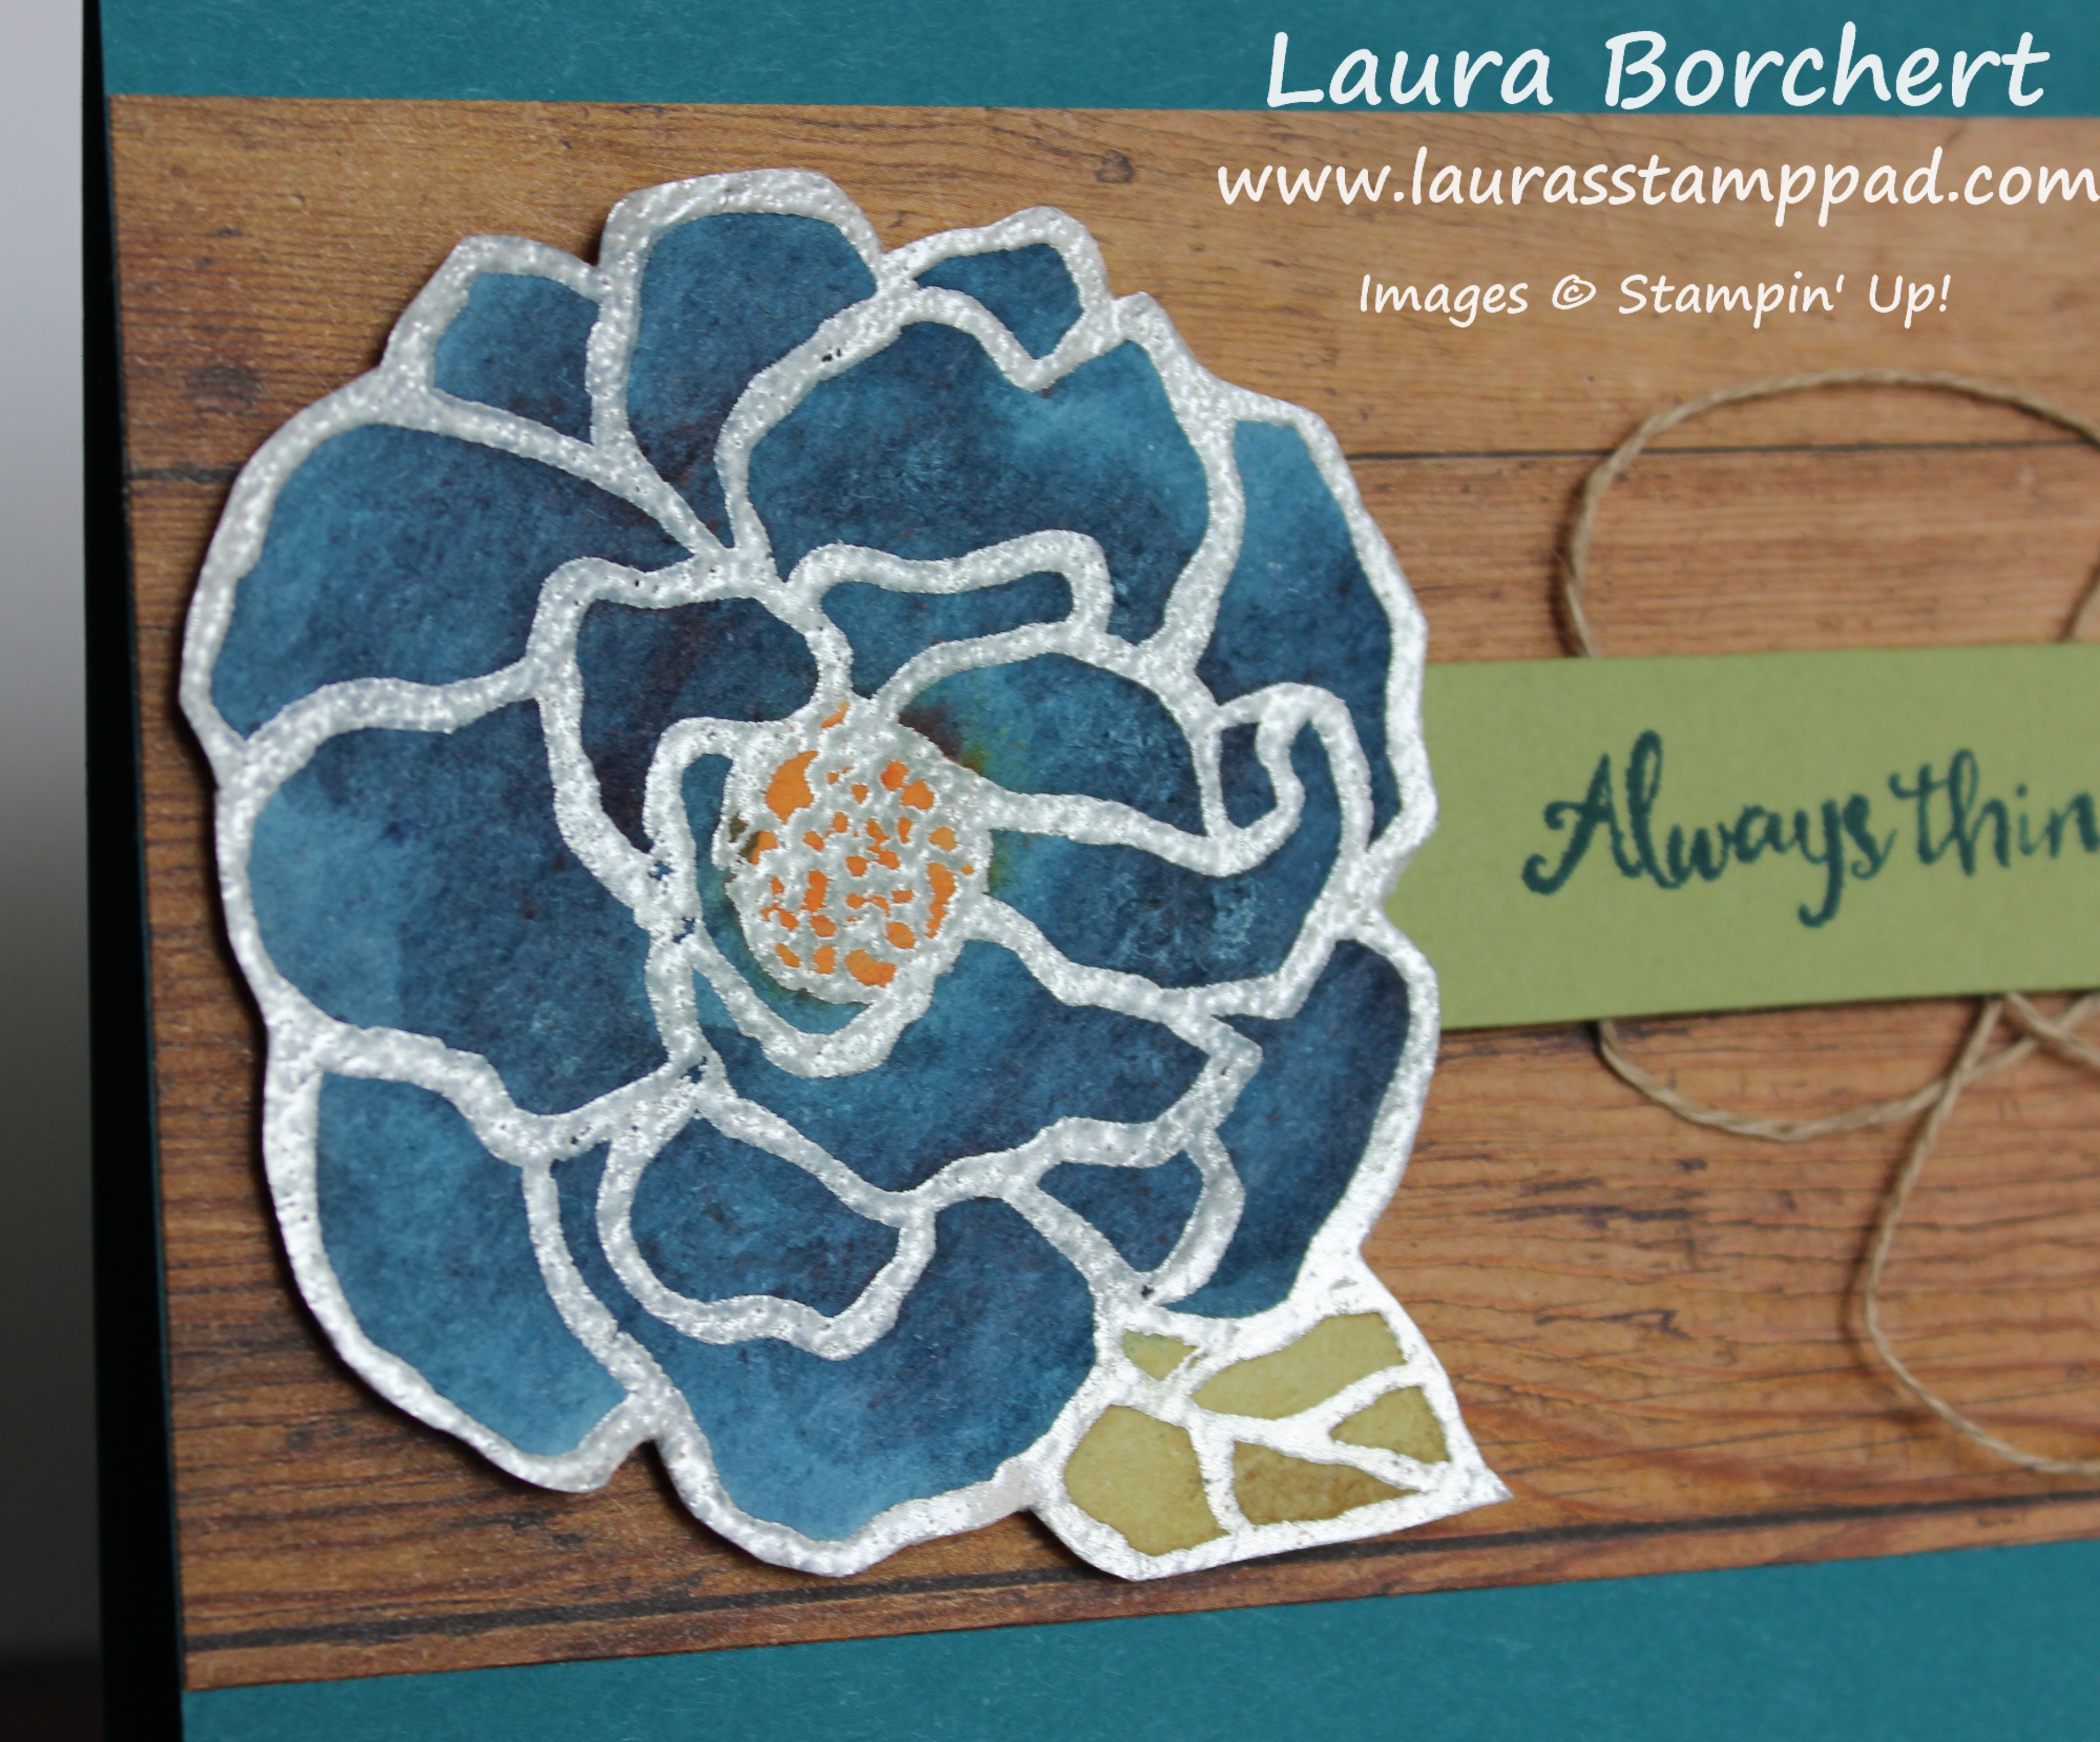
Now for that stunning flower and amazing technique using the Brusho Crystal Colour. I stamped the flower from the Beautiful Day Stamp Set in Versamark Ink onto Watercolor Paper. Then I added Silver Embossing Powder and set it with the Heat Tool. Be sure to firmly stamp the flower since the watercolor paper is textured but of course don’t press so hard that you rock or end up with Versamark Ink all over. 🙂 It’s a delicate balance.

For the color palettes, I took a clear block, tapped a little Brusho Crystal Color onto it and added some drops of water from an Aqua Painter. Then I used the Aqua Painter to color the flower. I used the Brilliant Blue, Moss Green, and Yellow! To be honest, I prefer to use the green in this way because of the color combination used to create the green. I find that when I tap it on the purples and yellows pop too much and I prefer a more green look. After coloring the flower and allowing it to dry, I added some Stampin’ Dimensionals and placed it on the left hand side of the card!

If you would like to see this all in action, check out the Video Tutorial below or click here! Be sure to give the video a thumbs up if you liked it and don’t forget to subscribe if you are new. If you would like a notification when I post a new video, be sure to click the bell right next to the subscribe!!!

Happy Stampin’
~Laura
Product List

Technique Tuesday – Blending Butterflies!!!

Posted on

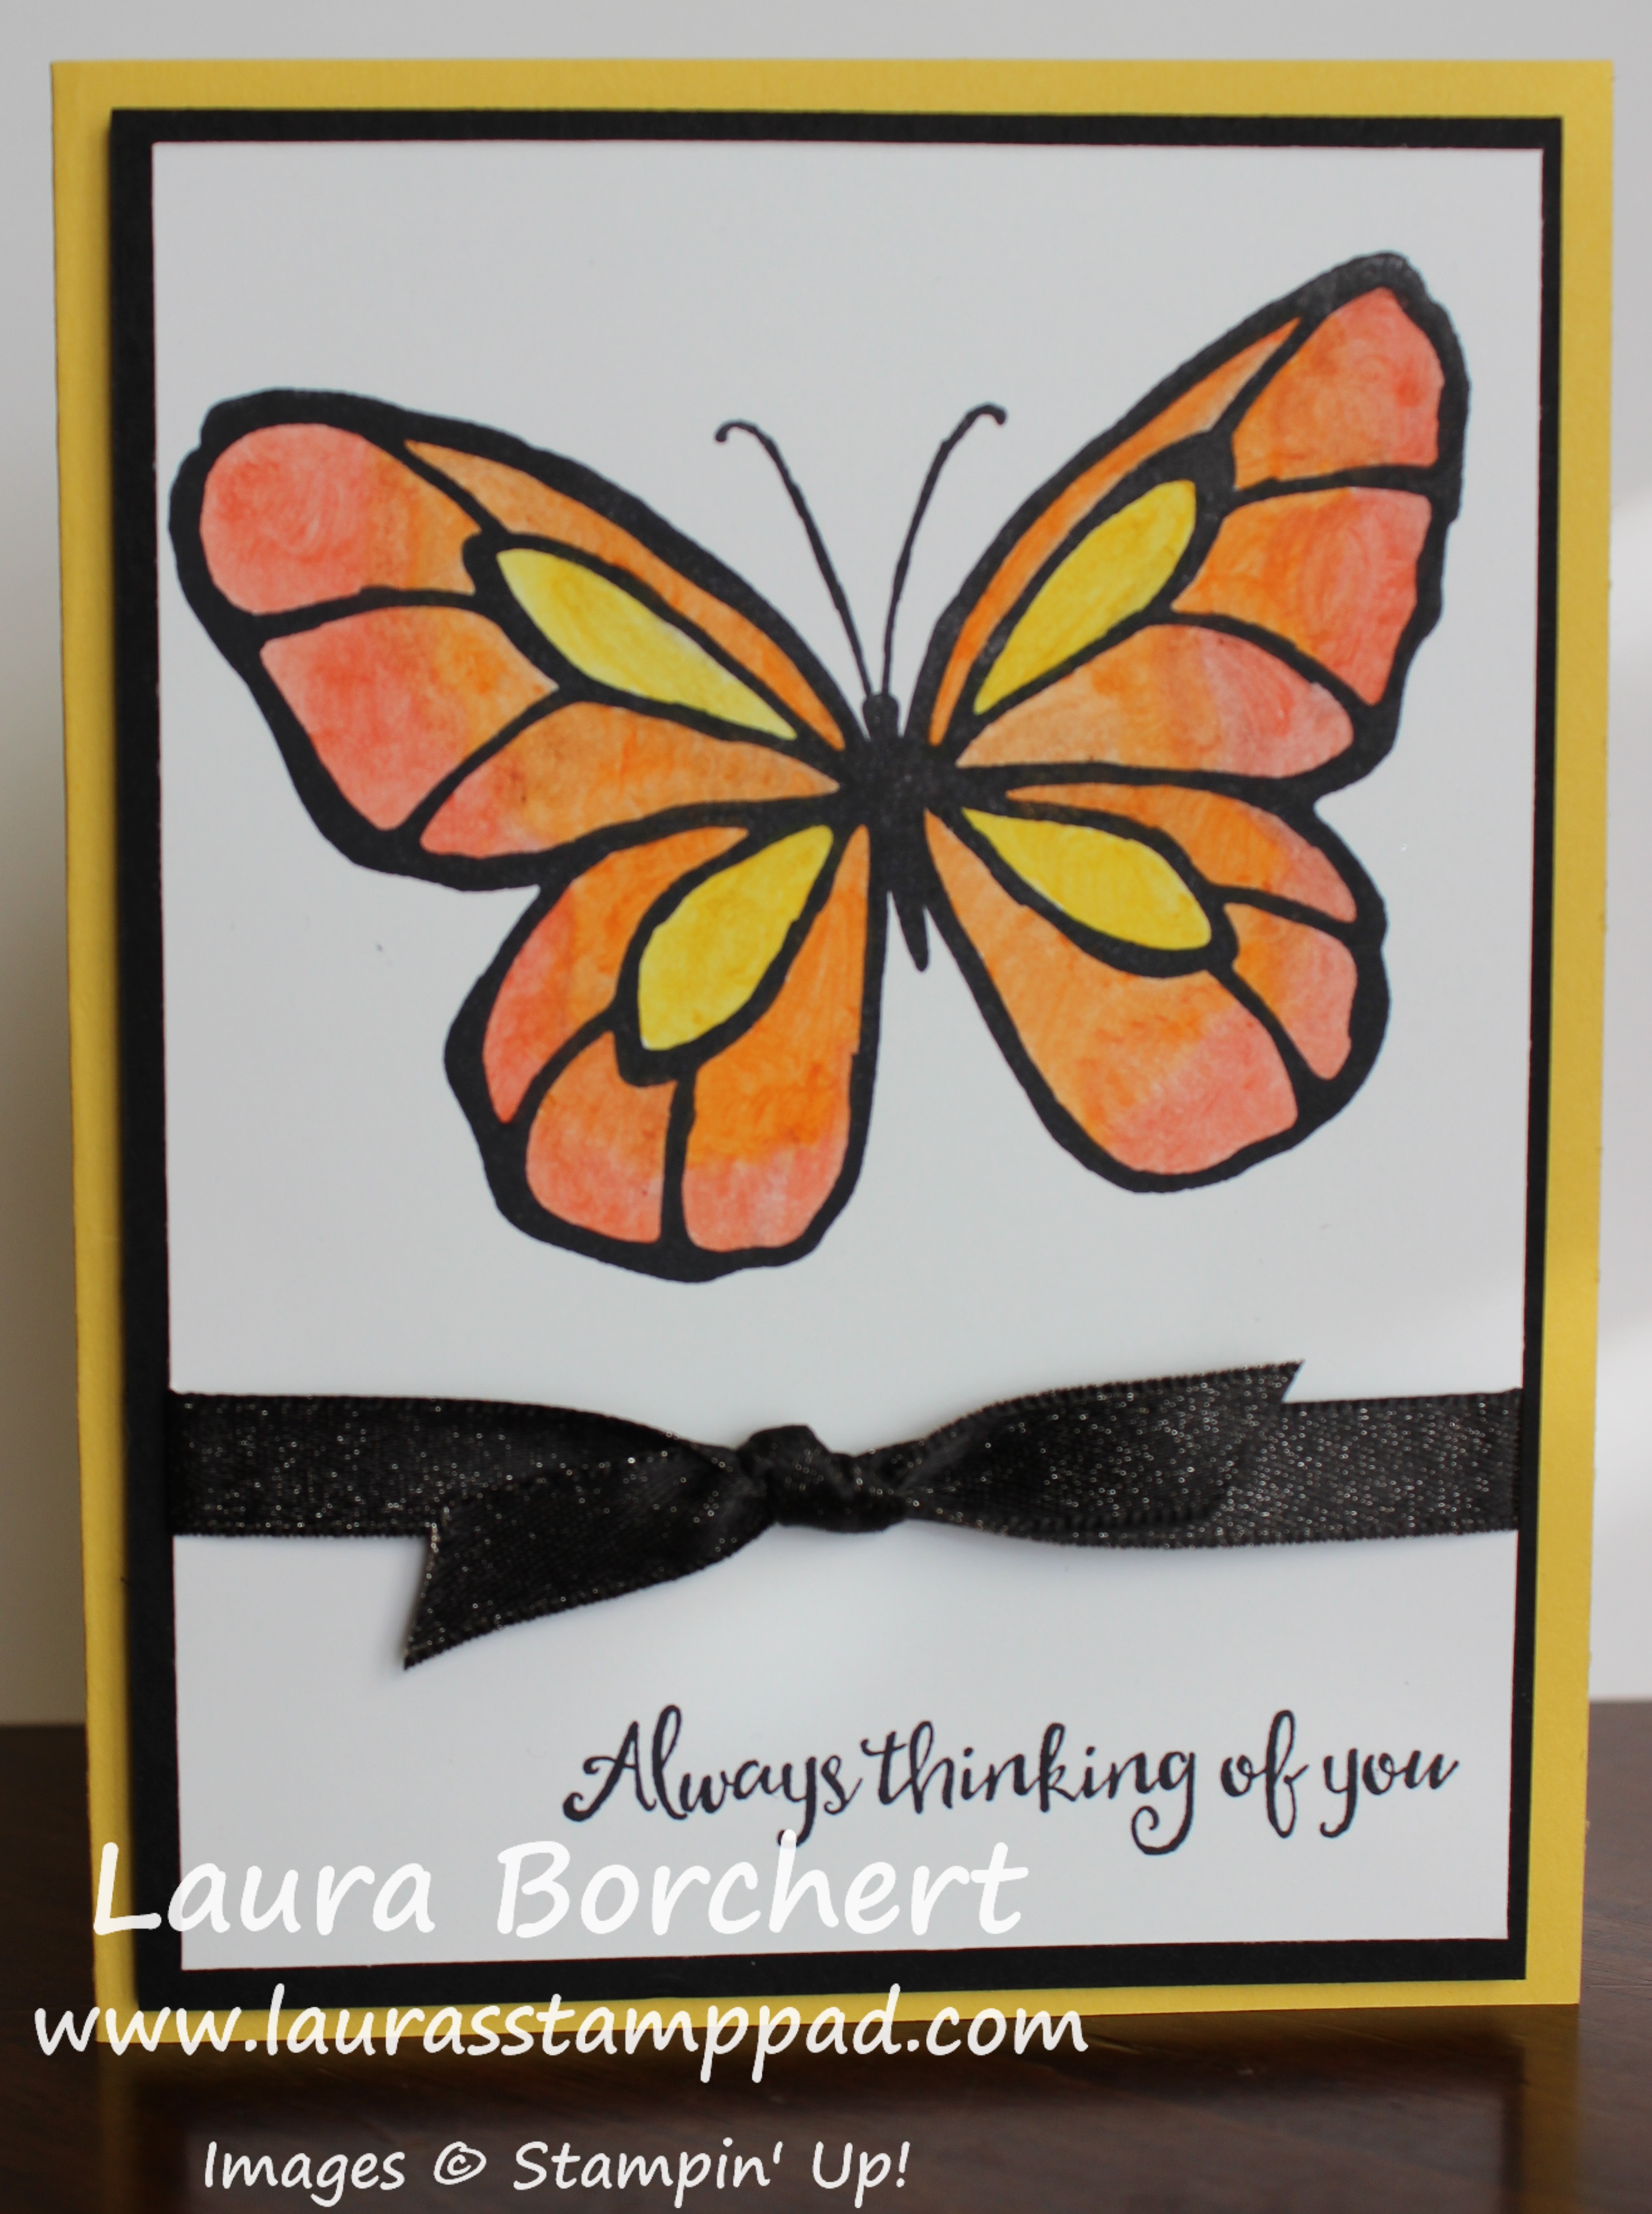
Happy Tuesday!!! You all know what that means…..I have a fabulous technique to share with you today! I’m blending butterflies with Watercolor Pencils and a Blender Pen and oh how stunning do they look……

Blending Butterflies, www.LaurasStampPad.com

Don’t you think this looks super real and gorgeous?? I love it! Then I did the blue/purple one for the video and fell deeper in love!!! There are so many ways to color stamped images and while the latest one is fun, sometimes its great to play with your favorite. I have colored this butterfly with the New Brusho Crystal Colour (see here) and now I did this one. Honestly, I think I prefer Watercolor Pencils! I try to mix things up and try it all to show you!

The card base is Daffodil Delight. Then, I took a piece of Whisper White (3-7/8″ x 5-1/8″) and stamped  the butterfly and greeting from the Beautiful Day Stamp Set from the Occasions Mini Catalog! I used Archival Black Ink since I am watercoloring. Next, I used the Watercolor Pencils and just added in some color. I used Real Red, Pumpkin Pie, and Daffodil Delight for this card!

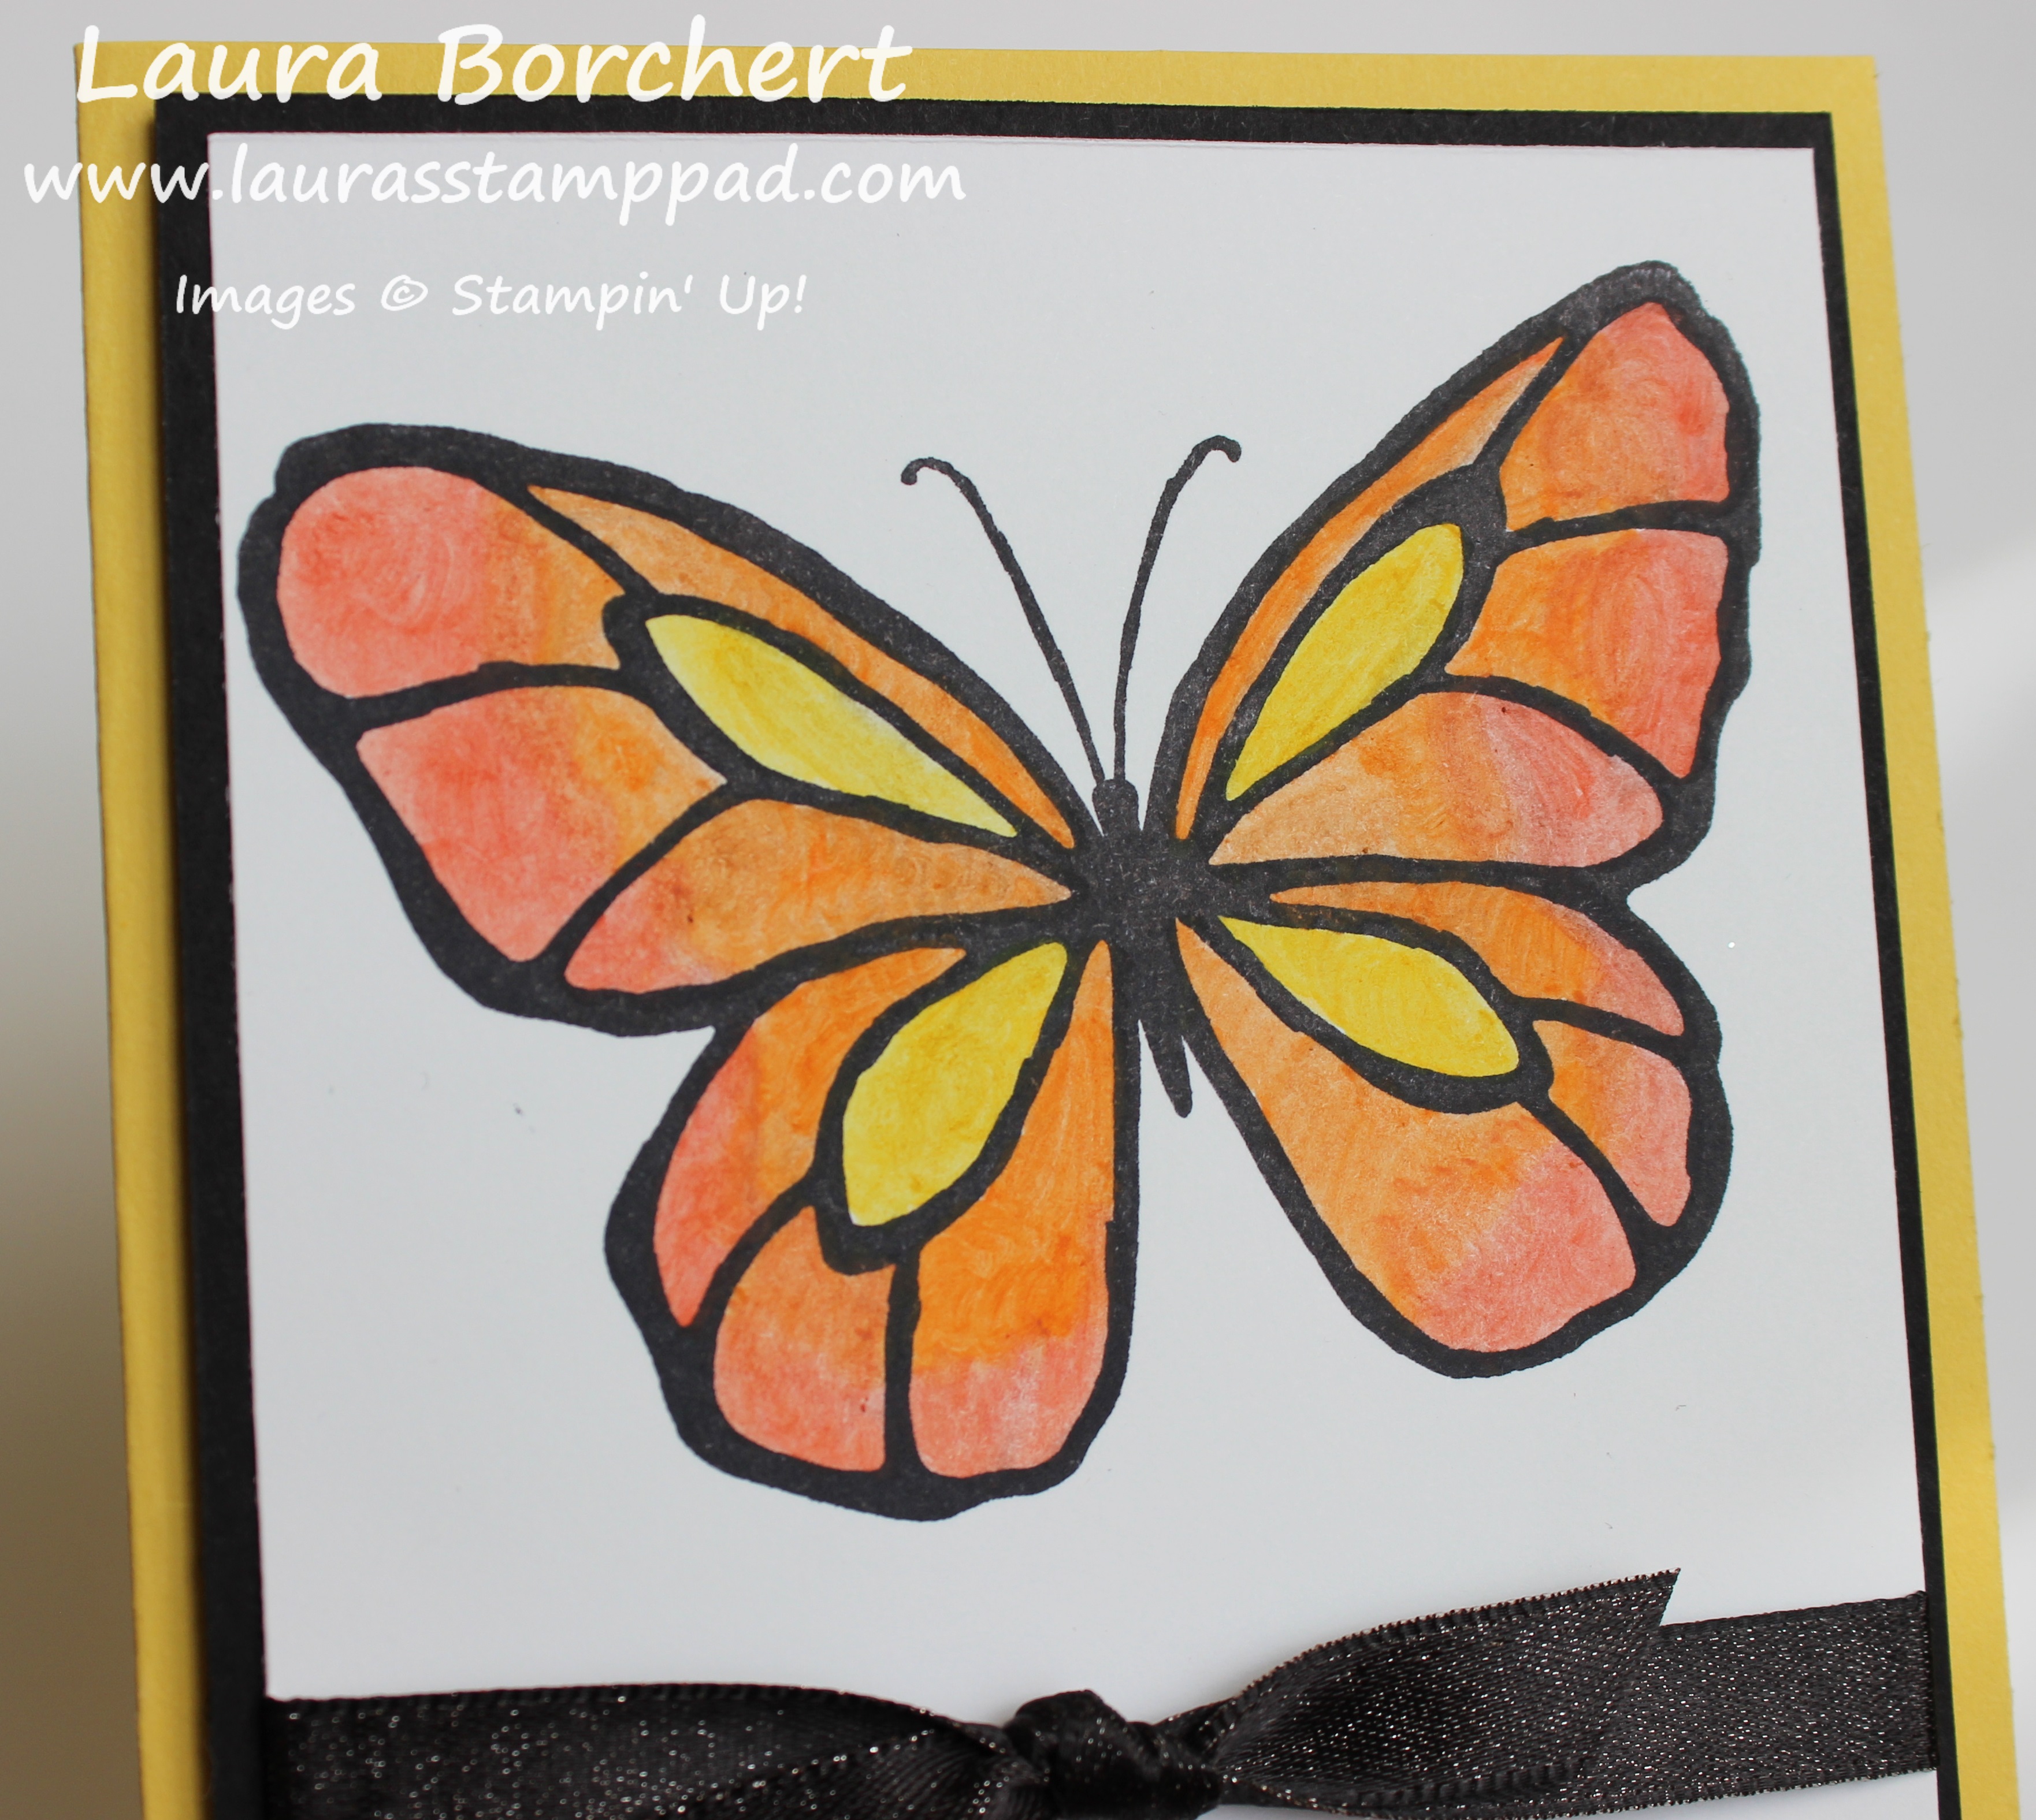
Using Blender Pens, www.LaurasStampPad.com

After adding all the color, I started with the lightest and blended with the Blender Pen. I kept the yellow in place in the center. Then I blended and smeared around the Pumpkin Pie. Making sure to clean the pen tip in between so the color didn’t super mix together. Then I blended the red starting on the outside and then smearing with the orange in middle. I just love how it turned out!

Tri Color Butterfly, www.LaurasStampPad.com

Next, I layered this piece onto some Basic Black measuring 4″ x 5-1/4″. I tied some Basic Black Shimmer Ribbon around it between the butterfly and greeting for a little pop and texture. Then I added this piece to the card front with Stampin’ Dimensionals!!!

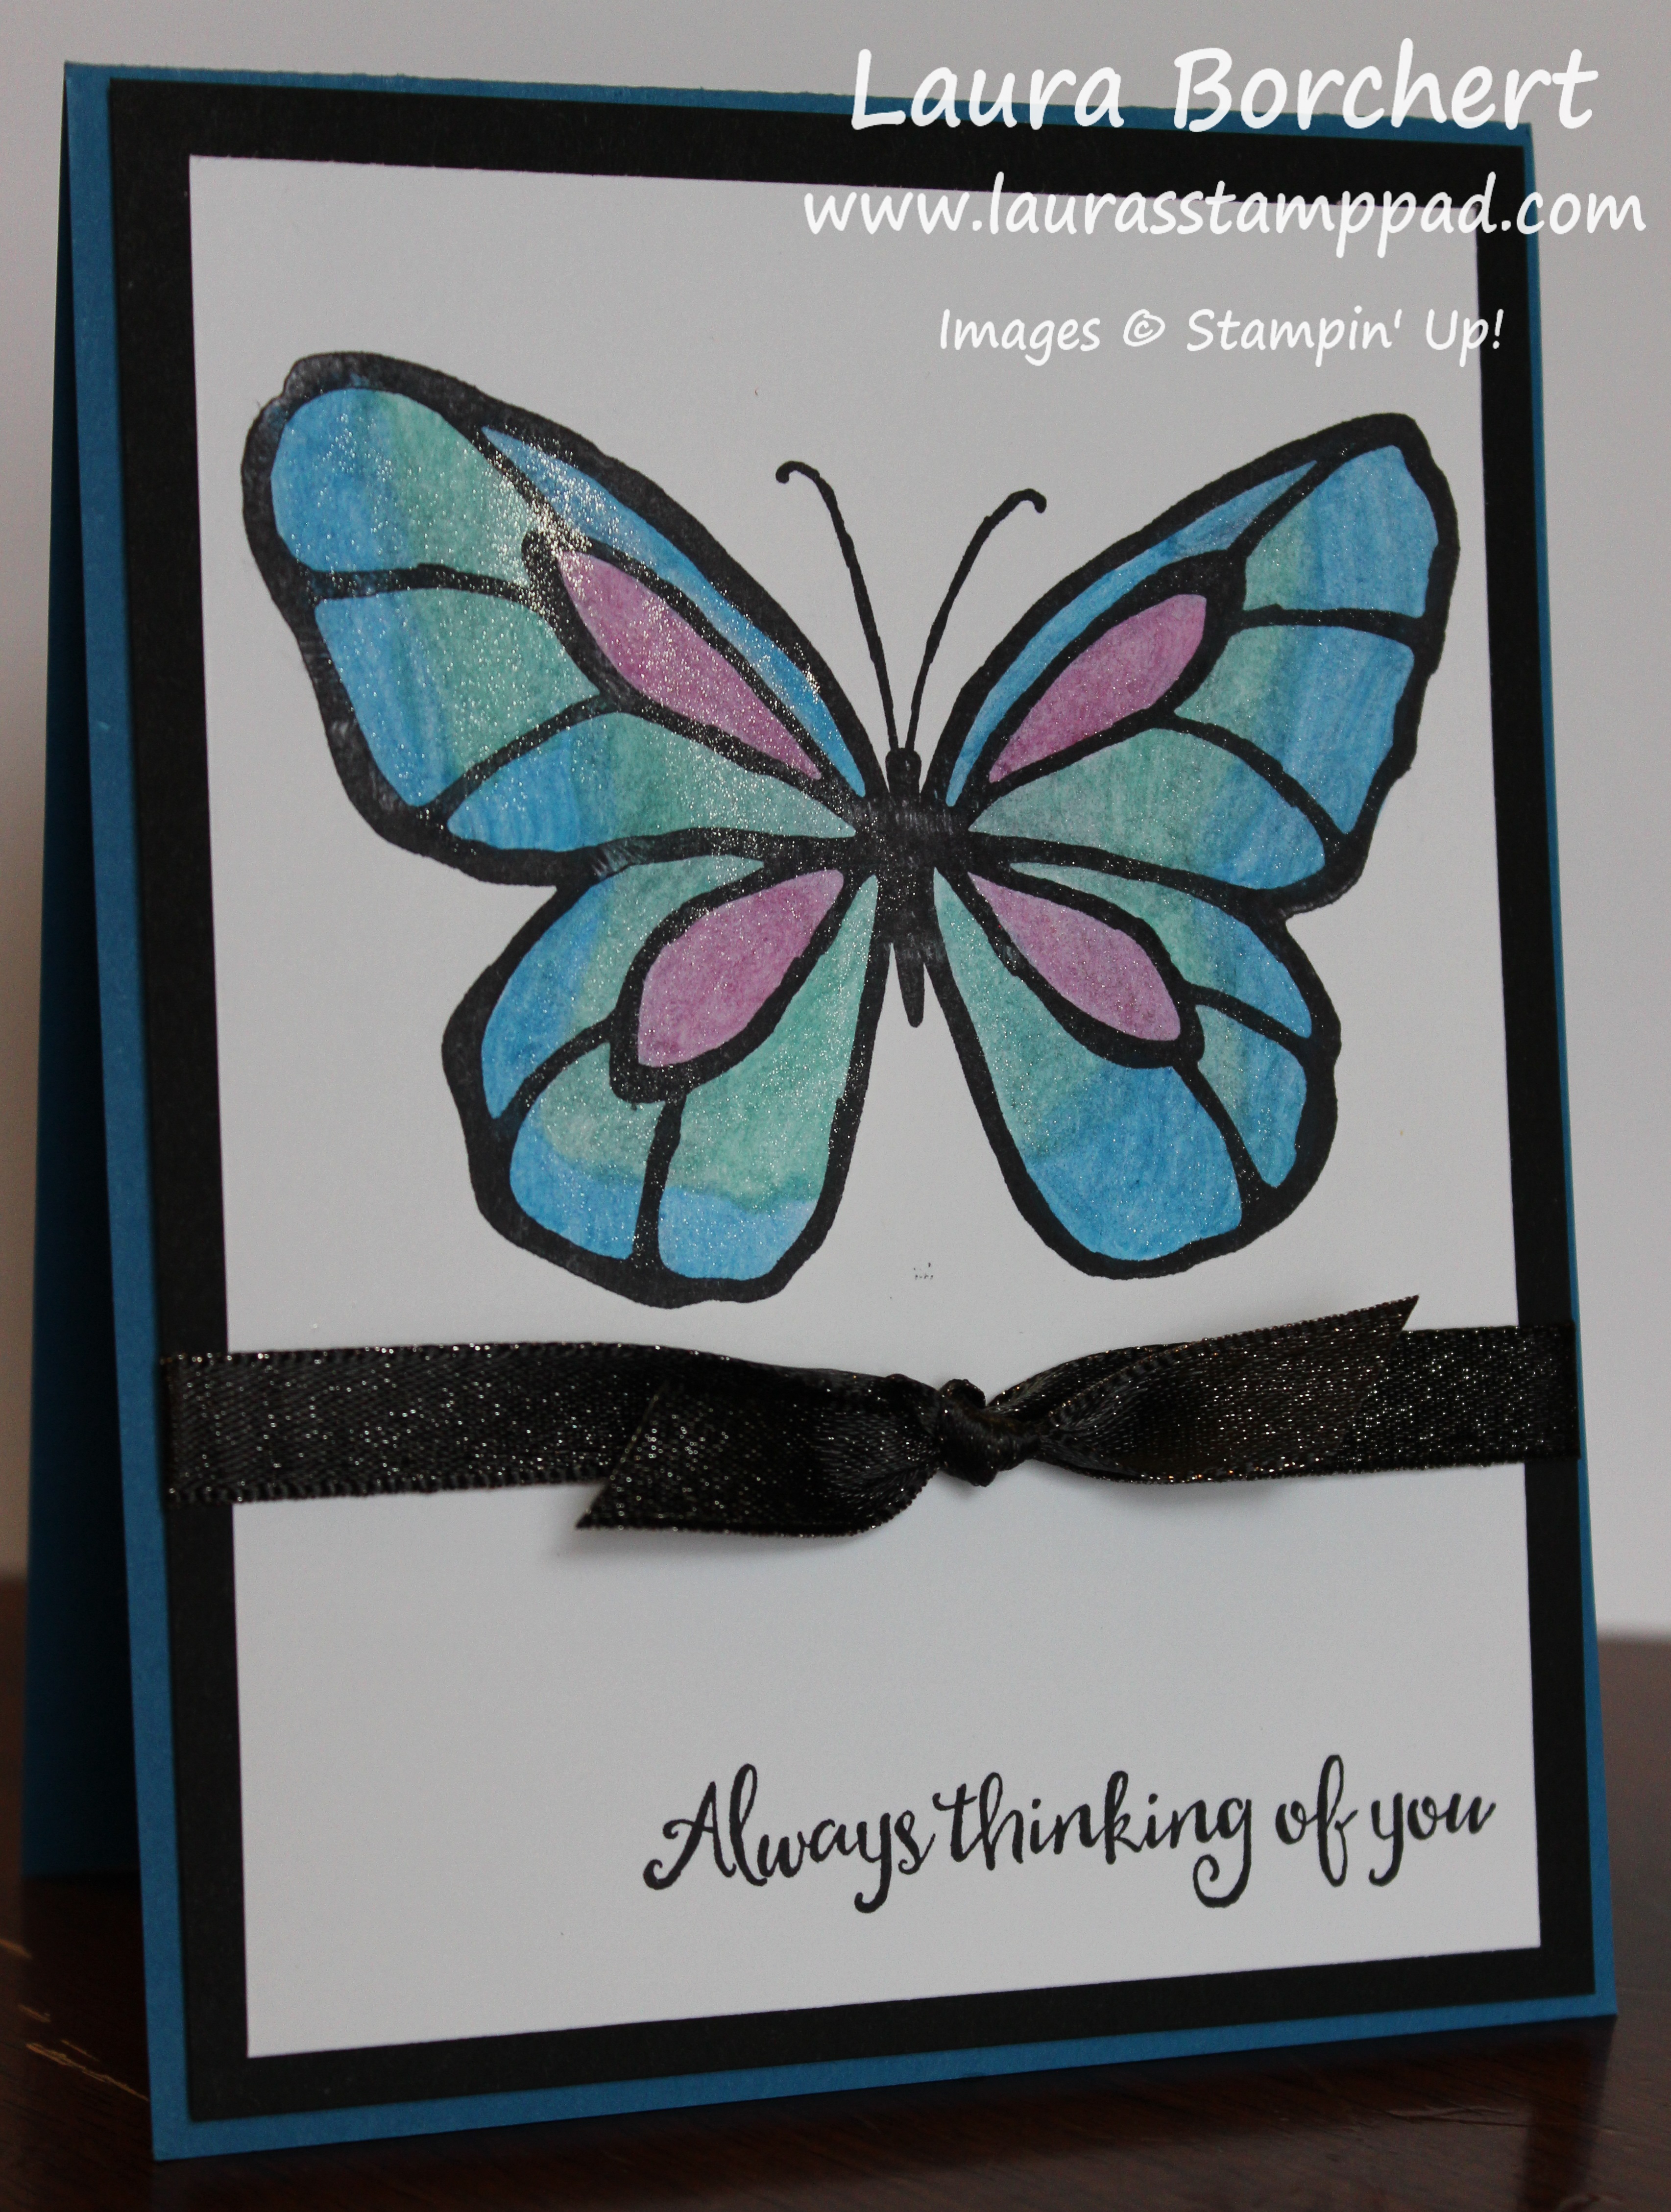
Blue Butterfly, www.LaurasStampPad.com

Here is the finished card from the one I did on the video below! I used Pacific Point, Bermuda Bay, and Rich Razzleberry for this one! LOVE IT!!! Which one is your favorite – Yellow/Red/Orange or Blues/Purple?? Let me know in the comments below!

If you would like to see this all in action, check out the Video Tutorial below or click here! Be sure to give the video a thumbs up if you liked it and don’t forget to subscribe if you are new. If you would like a notification when I post a new video, be sure to click the bell right next to the subscribe!!!

Happy Stampin’

~Laura

Product List


Technique Tuesday – Brusho Crystal Colour!!!

Posted on

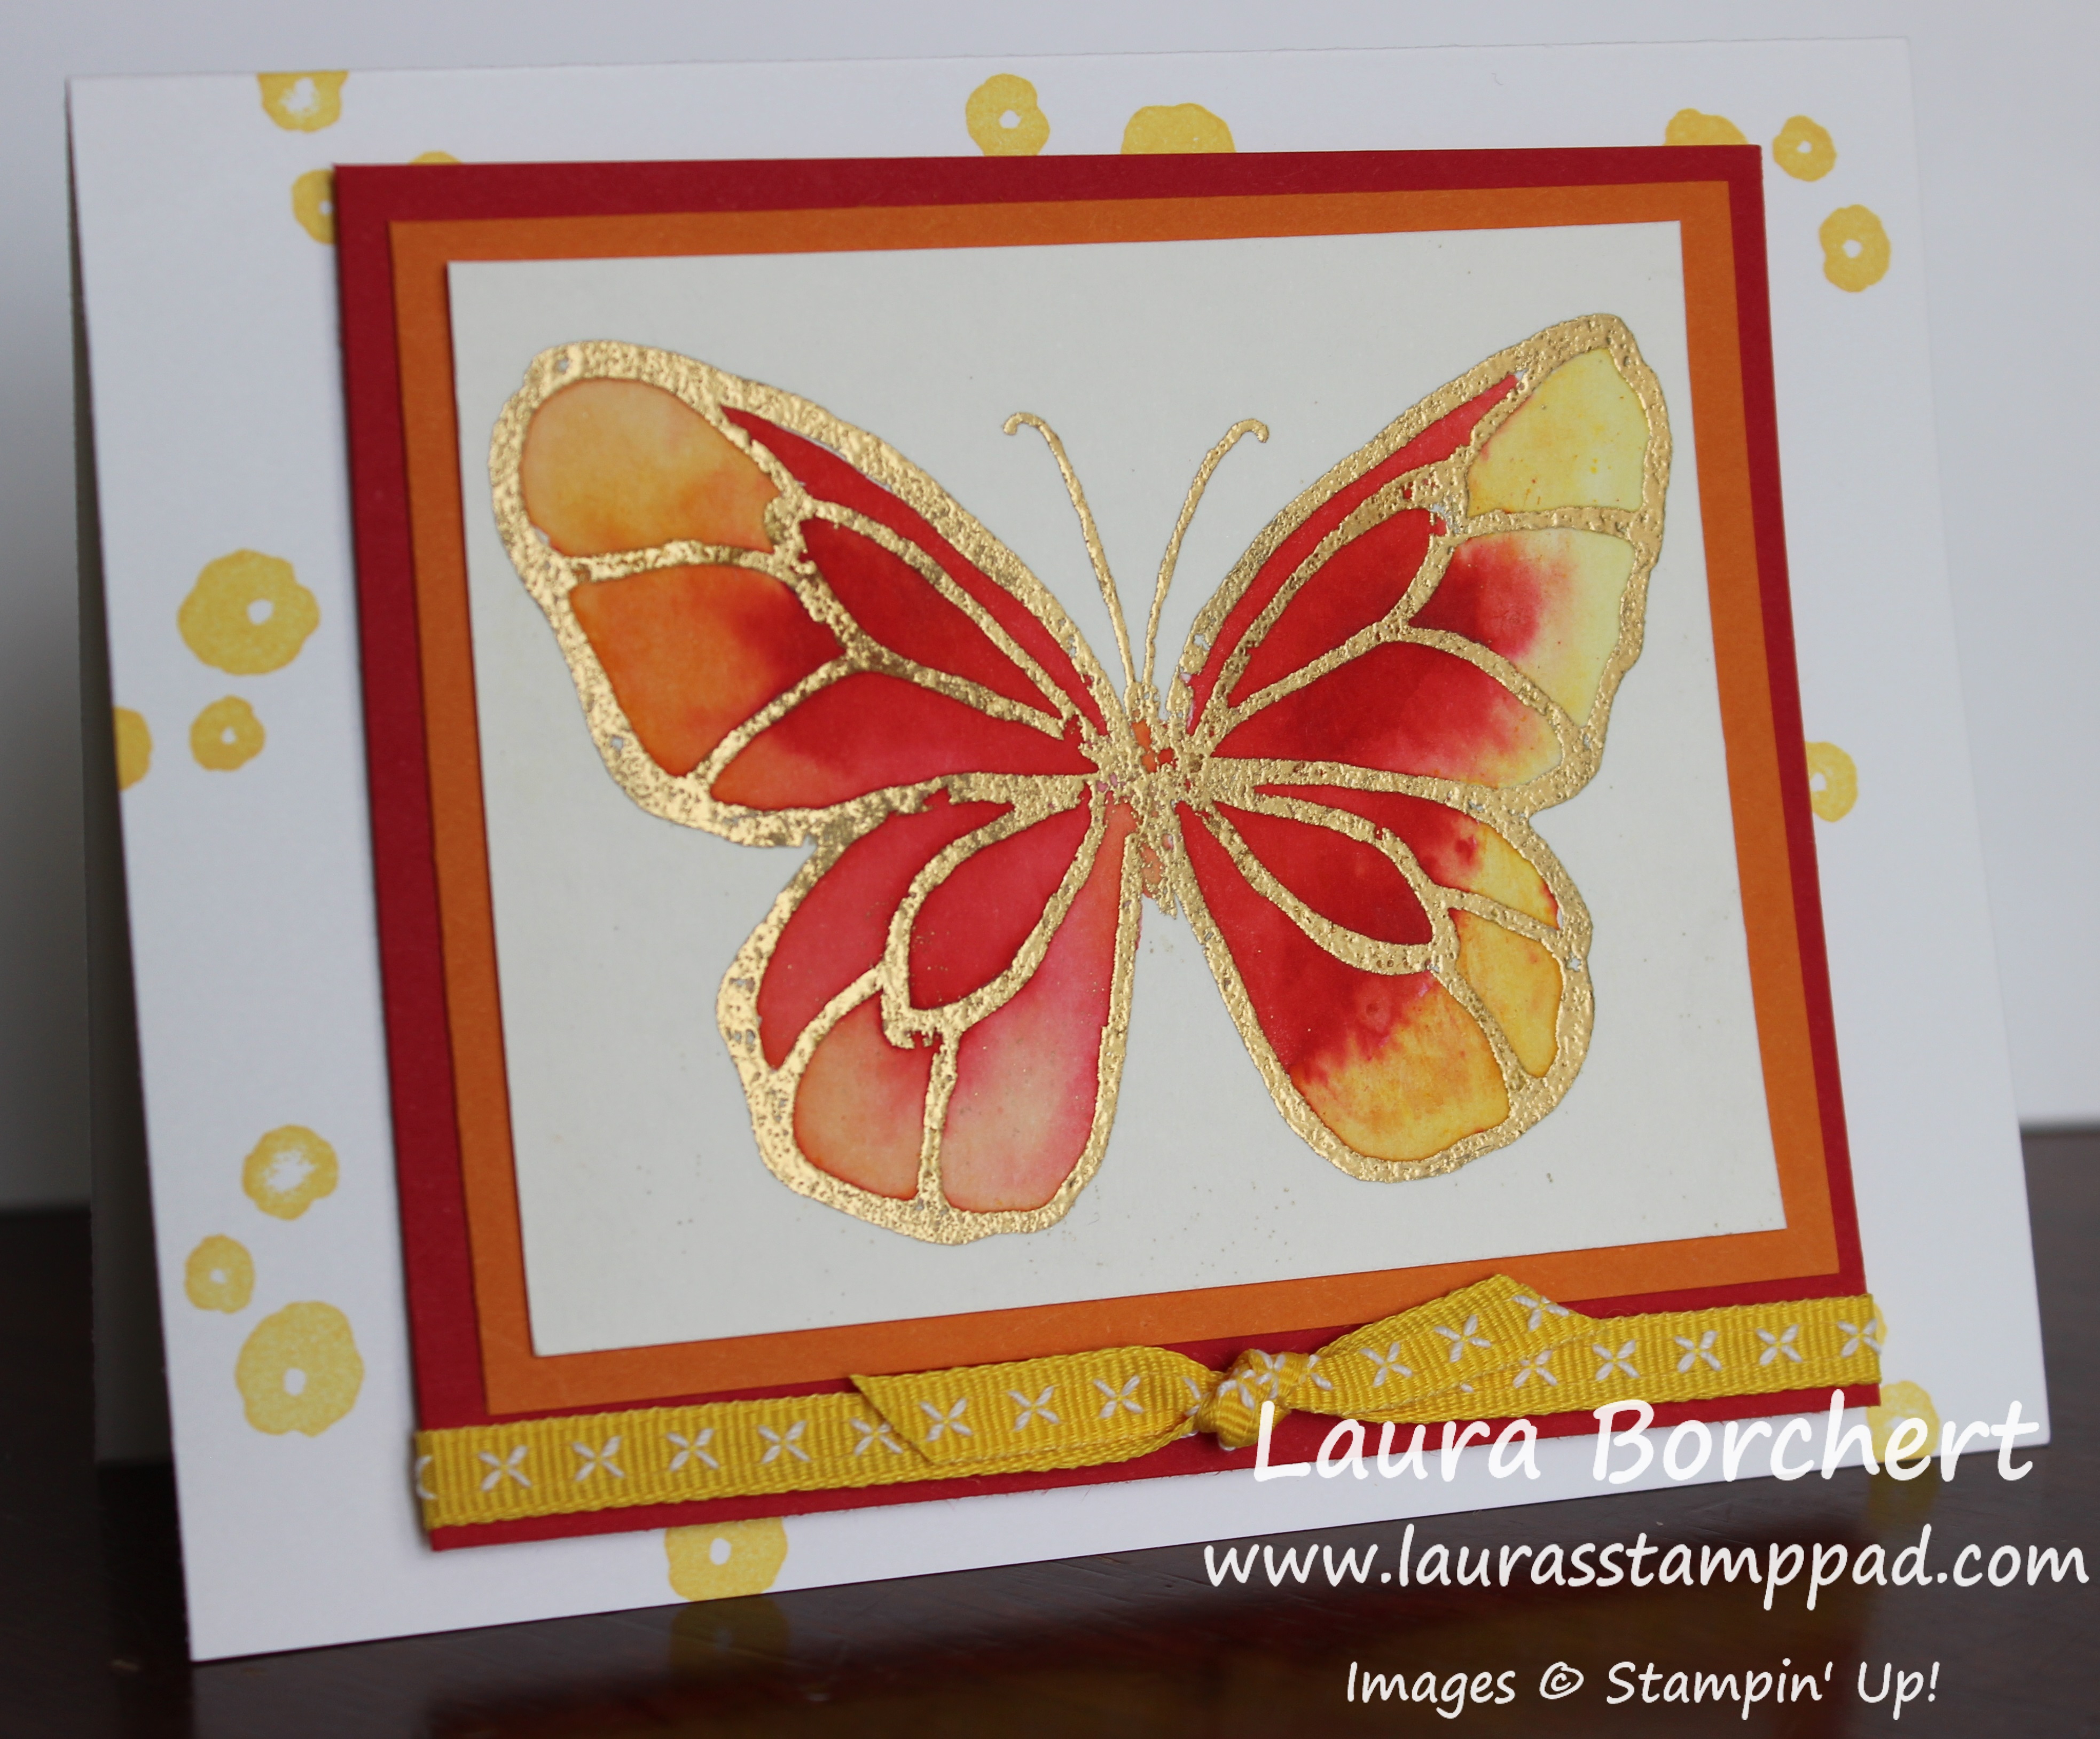
Happy Tuesday!!! That means I have a fabulous technique to share with you today! I’m showing you the NEW Brusho Crystal Colour from the Occasions Mini Catalog!

Brusho Crystal Colour, www.LaurasStampPad.com

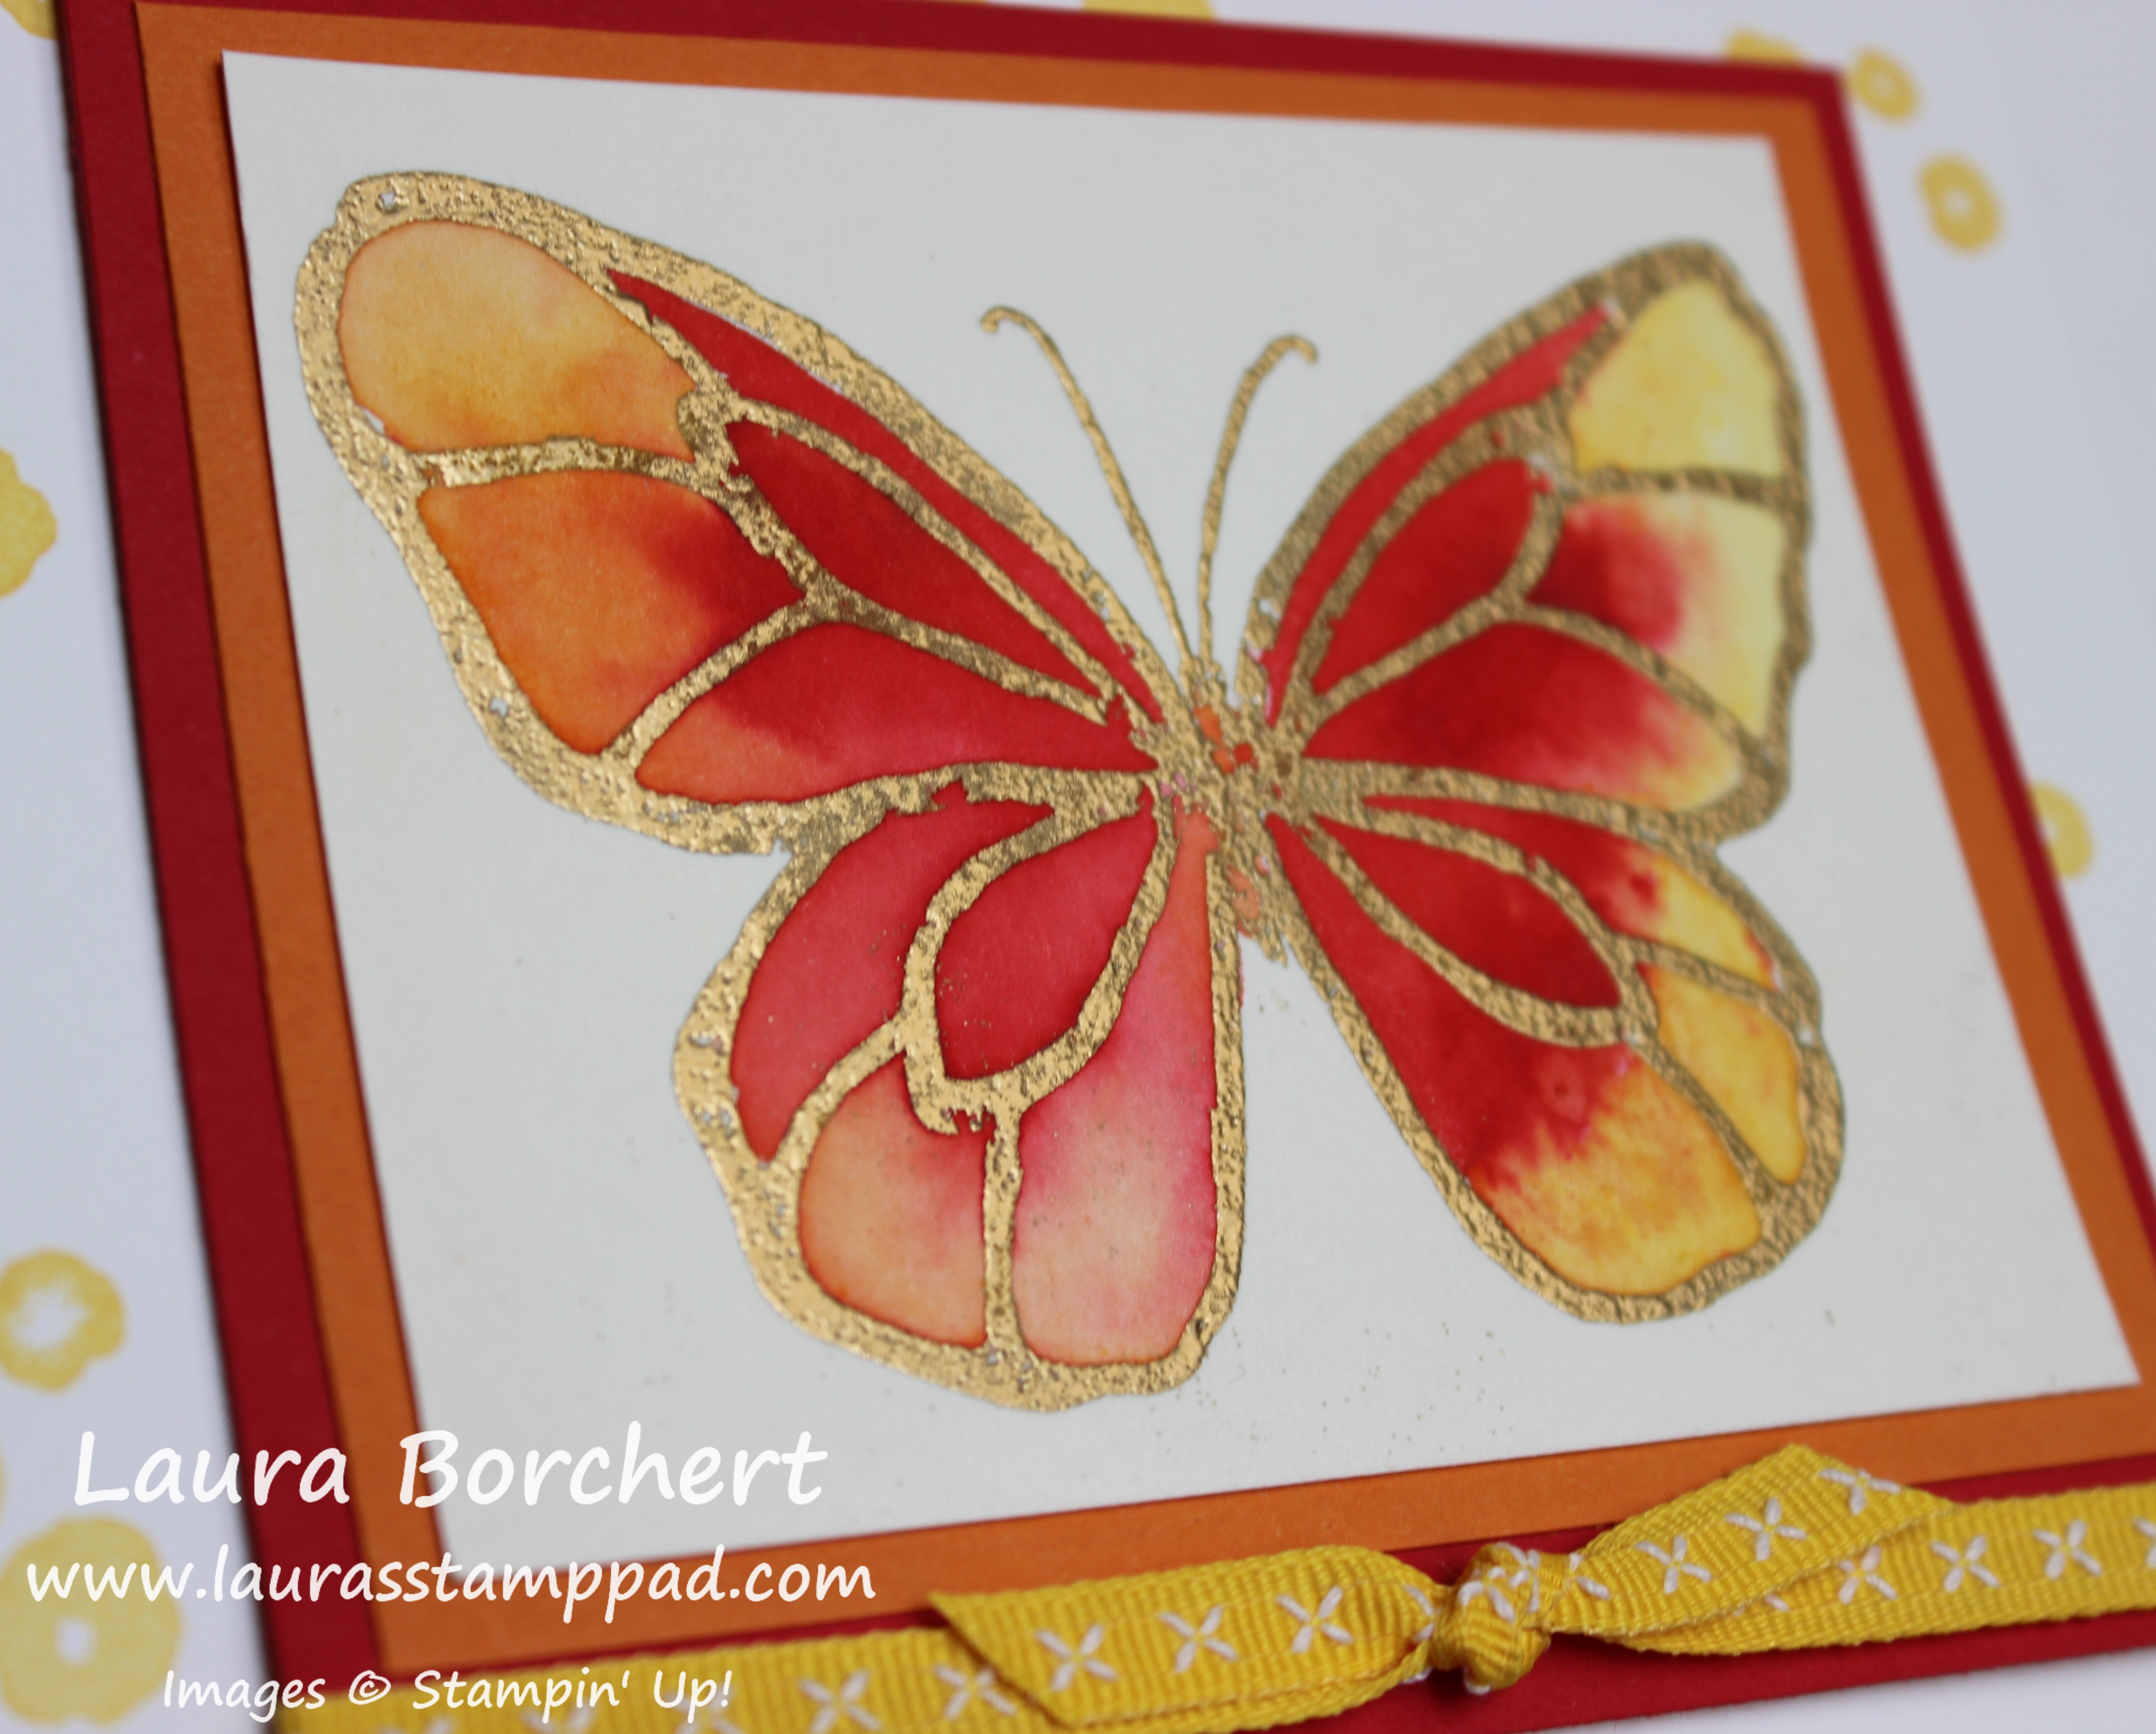
I love the bright vibrant color that this stuff creates! Look at that stunning butterfly!!! Gorgeous!

I have found that Watercolor Paper works best with the Brusho Crystal Colour since it requires a decent amount of water to dissolve it! First, I stamped the butterfly from the Beautiful Day Stamp Set in Versamark Ink and added Gold Embossing Powder! I set it with the heat tool! Now for the coloring fun, I used the Aqua Painter to wet the area of the butterfly. Using the Red (Brilliant Red), Orange (Gamboge), and Yellow colors, I tapped some onto the butterfly. With yellow on the outside, then orange, and red in the middle. The thing about tapping it on is that you don’t really know where it is going to fall or how much. This is one of those techniques that no two are going to come out the same!

Beautiful Butterfly, www.LaurasStampPad.com

After tapping the powder on, I used the Aqua Painter to blend it all together. I did wipe off the brush tip after each color to try to keep a nice fade and not just blend them all together! Be sure to allow it to dry before assembling the card. When I don’t have a lot of patience, I used the Heat Tool!

Golden Butterfly, www.LaurasStampPad.com

Next, I layered the butterfly onto Pumpkin Pie (4″ x 3-1/4″) and then Real Red (4-1/4″ x 3-3/4″) cardstock! The Real Red was cut with more on the bottom so I could add the Double Stitched Daffodil Delight Ribbon! Before adding this to the Whisper White card base, I stamped the dots from the Beautiful Day Stamp Set all around in Daffodil Delight Ink! Of course, I added the butterfly layers to the card front with Stampin’ Dimensionals for a little bit of texture!

If you would like to see this all in action, check out the Video Tutorial below or click here! Be sure to give the video a thumbs up if you liked it and don’t forget to subscribe if you are new. If you would like a notification when I post a new video, be sure to click the bell right next to the subscribe!!!

Happy Stampin’

~Laura

Product List


Even Pigs Can Fly!!!

Posted on

Happy Tuesday!!! This is a technique I have shared before but I have some more fabulous samples to share! The Stampin’ Blends are super fun to color with and easy to get lots of cool shading!! Check out these adorable little pigs….even pigs can fly!

Even Pigs Can Fly, www.LaurasStampPad.com

How cute is this little piggy?!?! Adorable! And the best part is that the wings have Wink of Stella on them so the perfect little shine!!! Eeee Thank you, Janet, for this amazing idea! I love what my stampers come up with during Stamp Club!

I started with a Whisper White card base and layered on a piece of Delightful Daisy Designer Series Paper (4″ x 5-1/4″). Next, I stamped the images from the This Little Piggy Stamp Set in Memento Black Ink. Then, I colored in the piggy with the Stampin’ Blends. I used Pink Pirouette for the pig, Smoky Slate for the wings and Crumb Cake for the feet!

Coloring the Piggy, www.LaurasStampPad.com

For the coloring, I always start with the dark Stampin’ Blends Marker and do an outline. Next, I fill in with the Light Stampin’ Blends Marker. Then I go around the overlap edge and swirl in a circular pattern till it blends together. If you stay away from the center, then you will get that light center and darker edges look. Don’t worry this takes a little practice and each one will always come our differently. Also, it’s all based on your preference too!! Just play with it and have fun!

Glitter Wings, www.LaurasStampPad.com

Look at that amazing Wink of Stella on the wings!!! Isn’t it just stunning? I love it!!! After coloring, I layered this piece onto Daffodil Delight. Then I added a little loop of Night of Navy Crinkle Seam Binding to the edge under Stampin’ Dimensionals and added it to the card front!!!

Happy Piggy, www.LaurasStampPad.com

Which little piggy card is your favorite – Happy Piggy or Sparkle Wings? Let me know in the comments below!!! Also, if you would like to see Stampin’ Blends in action, check out this video!

Today, I am sharing one of the new kits from the upcoming Occasions Mini Catalog on my YouTube Channel! You can check out the unboxing and reveal before or click here! Don’t forget to give it a thumbs up if you are excited about this kit as much as I am!

Happy Stampin’

~Laura

Product List


Technique Tuesday – Boxes & Boughs!!!

Posted on

Happy Tuesday!!! That means I have a fabulous technique to share with you today! With Christmas less than a week away, it’s all about gift packaging and last minute gifts! These boxes and boughs are sure to make things merry and bright!

Boxes & Boughs, www.LaurasStampPad.com

These acetate boxes are super fun to decorate and I have put lots of different items in there as gifts – cards, Stampin’ Dimensionals, and gift certificates!

I started by popping up the Acetate Box. It’s already scored and all so just fold on the score lines and pop it up! Next, I took some Real Red cardstock and created a belly band. I have found that scoring the cardstock doesn’t work very well because the lines sometimes aren’t exact so it fits weird. What I do is just wrap it around, slide it off and press on the fold lines. This just seems to work best for me. Then I layered on a piece of Merry Little Christmas Designer Series Paper (retiring). The paper is black and white but I sponged on some green very lightly for a little more color! I used Tear And Tape to secure the ends of the belly band together.

Gift Packaging, www.LaurasStampPad.com

Now for the decoration, I used a hot glue gun! First, I added the little Green Sprig and pressed it into the glue. Next, I created 2 loops with the Striped Ribbon and tied the center tight using the Black Baker’s Twine. This is much easier that tying it into a knot and it allows for the stripes to show. If you do a knot, it will make the one side backwards. This ribbon does have wire in it so you can mold it as needed! The Mini Ornament is secured to the bow with the Black Baker’s Twine as well. I hot glued this to the front as well. Be sure it is all on the belly band so it can still slide off. The tag was created with the Merry Little Labels Stamp Set (retiring) and coordinating Everyday Label Punch! Cute and simple gift packaging!

What would you put in this box to give to a friend or family member? Let me know in the comments below!

Today, I’m sharing a sneak peak to the 2018 Occasions Mini Catalog. Check out the Video Tutorial below or click here! Be sure to give the video a thumbs up if you liked it and don’t forget to subscribe if you are new. If you would like a notification when I post a new video, be sure to click the bell right next to the subscribe!!! Let me know if you have any tip and tricks to share in the comments below!

Happy Stampin’

~Laura

Product List


Petal Garden One Sheet Wonder!!!

Posted on

Happy Tuesday!!! That means  I have a fabulous technique to share with you and it’s a One Sheet Wonder! I know how much you all love these!!!

Petal Garden One Sheet Wonder, www.LaurasStampPad.com


I created these 6 cards using various pieces from the Petal Garden Designer Series Paper Stack. I’m going to show you how I cut and created these as well as how you can make a lot more from this one stack! Let’s get started!

Filled with Love, www.LaurasStampPad.com


You can always use the front and back of one sheet for a card like this but I went with 2 different sheets! The smaller floral piece is 3″ x 2″ and you can get 6 pieces from a full sheet of the paper with no waste!!! I layered that onto a piece of Calypso Coral measuring 3-1/4″ x 2-1/4″ and I tied a piece of Calypso Coral Sheer Ribbon. The striped piece measures 5″ x 2″ and you can get 3 of these pieces from one sheet with a small leftover piece. I layered this piece onto Pool Party (5-1/4″ x 2-1/4″). The greeting was from the Special Occasions Mini Catalog Stamp Set and I used the Everyday Label Punch for the words and the background piece! I finished off the card with a few Enamel Shapes!

Something borrowed, something blue, www.LaurasStampPad.com

The top card was created with the floral piece measuring 2″ x 5-1/2″ and the green stripes measuring 1-2″ x 5-1/2″. You can get 2 cards from each sheet with this style. I added some Rich Razzleberry Sheer Ribbon. Then I used the greeting from the Specials Occasions Stamp Set and I used the Classic Label Punch.

The lower card uses a piece of designer paper measuring 2″ x 5-1/4″. You can get 3 pieces of the designer paper from each sheet with this style! I used the Scallop Squares Framelits for this greeting and the same Special Occasions Stamp Set. I love the Silver Foil scallop and those little Metallic Enamel Shapes!

Foral One Sheet Wonder, www.LaurasStampPad.com

Next up, the card on the top, I used a piece measuring 4″ x 5-1/4″. While I love this big piece, you can only get 1 piece from each sheet. The 2 leftover pieces can be used in other styles! I added some Whisper White Classic Weave Ribbon. I added a little Old Olive Mini Chevron bow that I created using the Fork Bow technique! The greeting was stamped from the Beautiful Bouquet Stamp Set onto an oval from the Stitched Shapes Framelits!

The lower card uses a piece of designer paper measuring 2″ x 5-1/2″. You can get 3 pieces from each sheet. I layered this onto Pool Party (2-1/4″ x 5-1/2″). The greeting is from the Special Occasions Stamp Set on an oval from the Stitched Shapes Framelits. I finished off the card with a few White Perfect Accents!

Happy Birthday Doily, www.LaurasStampPad.com

This is another card that you could use the same sheet for both pieces. I went with 2 different sheets. If you use the same sheet, cut a piece measuring 5-1/4″ x 4″ and then cut it in the middle (or off if you wish for a larger piece on top or bottom). I cut the bottom piece into a 3″ x 4″ piece which you can get 2 pieces for a card like this and have leftovers. The upper piece measures 2-1/4″ x 4″. You can get 2 pieces like this from one sheet with leftovers as well. I used the Beautiful Bouquet Stamp Set for the greeting. The greeting uses the Stitched Shapes Framelits, Scallop Circle Framelits and a Water Tea Lace Doily. I added a little ribbon using the Old Olive Sheer Ribbon. This helps to cover up the over lap of the 2 papers!

Since there are 4 sheets of each paper in the stack, you can get over 50 cards using these patterns. There are also a few sheets in the stack that I didn’t use so you could use those to create even more! How fabulous is that?!?!?! I love One Sheet Wonders because they are quick and simple and require very little supplies. I used 2 stamp sets, 5 colors of ink pads, and only a few colors of cardstock! That’s why these are my fabulous!

If you would like to see this all in action, check out the Video Tutorial below or click here! Be sure to give the video a thumbs up if you liked it and don’t forget to subscribe if you are new. If you would like a notification when I post a new video, be sure to click the bell right next to the subscribe!!!

Happy Stampin’

~Laura

Product List