Technique Tuesday – Tag Topper Punch Closure on a Card!!!

Posted on

Happy Tuesday!!!!! Did that title catch your eye? That’s right, I used the Tag Topper Punch as a way to close my card!!!! Oh how I love using the punches in “out of the box” ways! It makes the punch sooo much more worth it! I won’t lie, I first looked at the Tag Topper Punches (Angled and Scalloped) and thought, “I don’t make tags that often to need a special punch.” Then I saw this adorable box, and this cute bookmark, and this amazing closure below and just HAD TO HAVE IT!

Tag Topper Punch Closes Card, www.LaurasStampPad.com

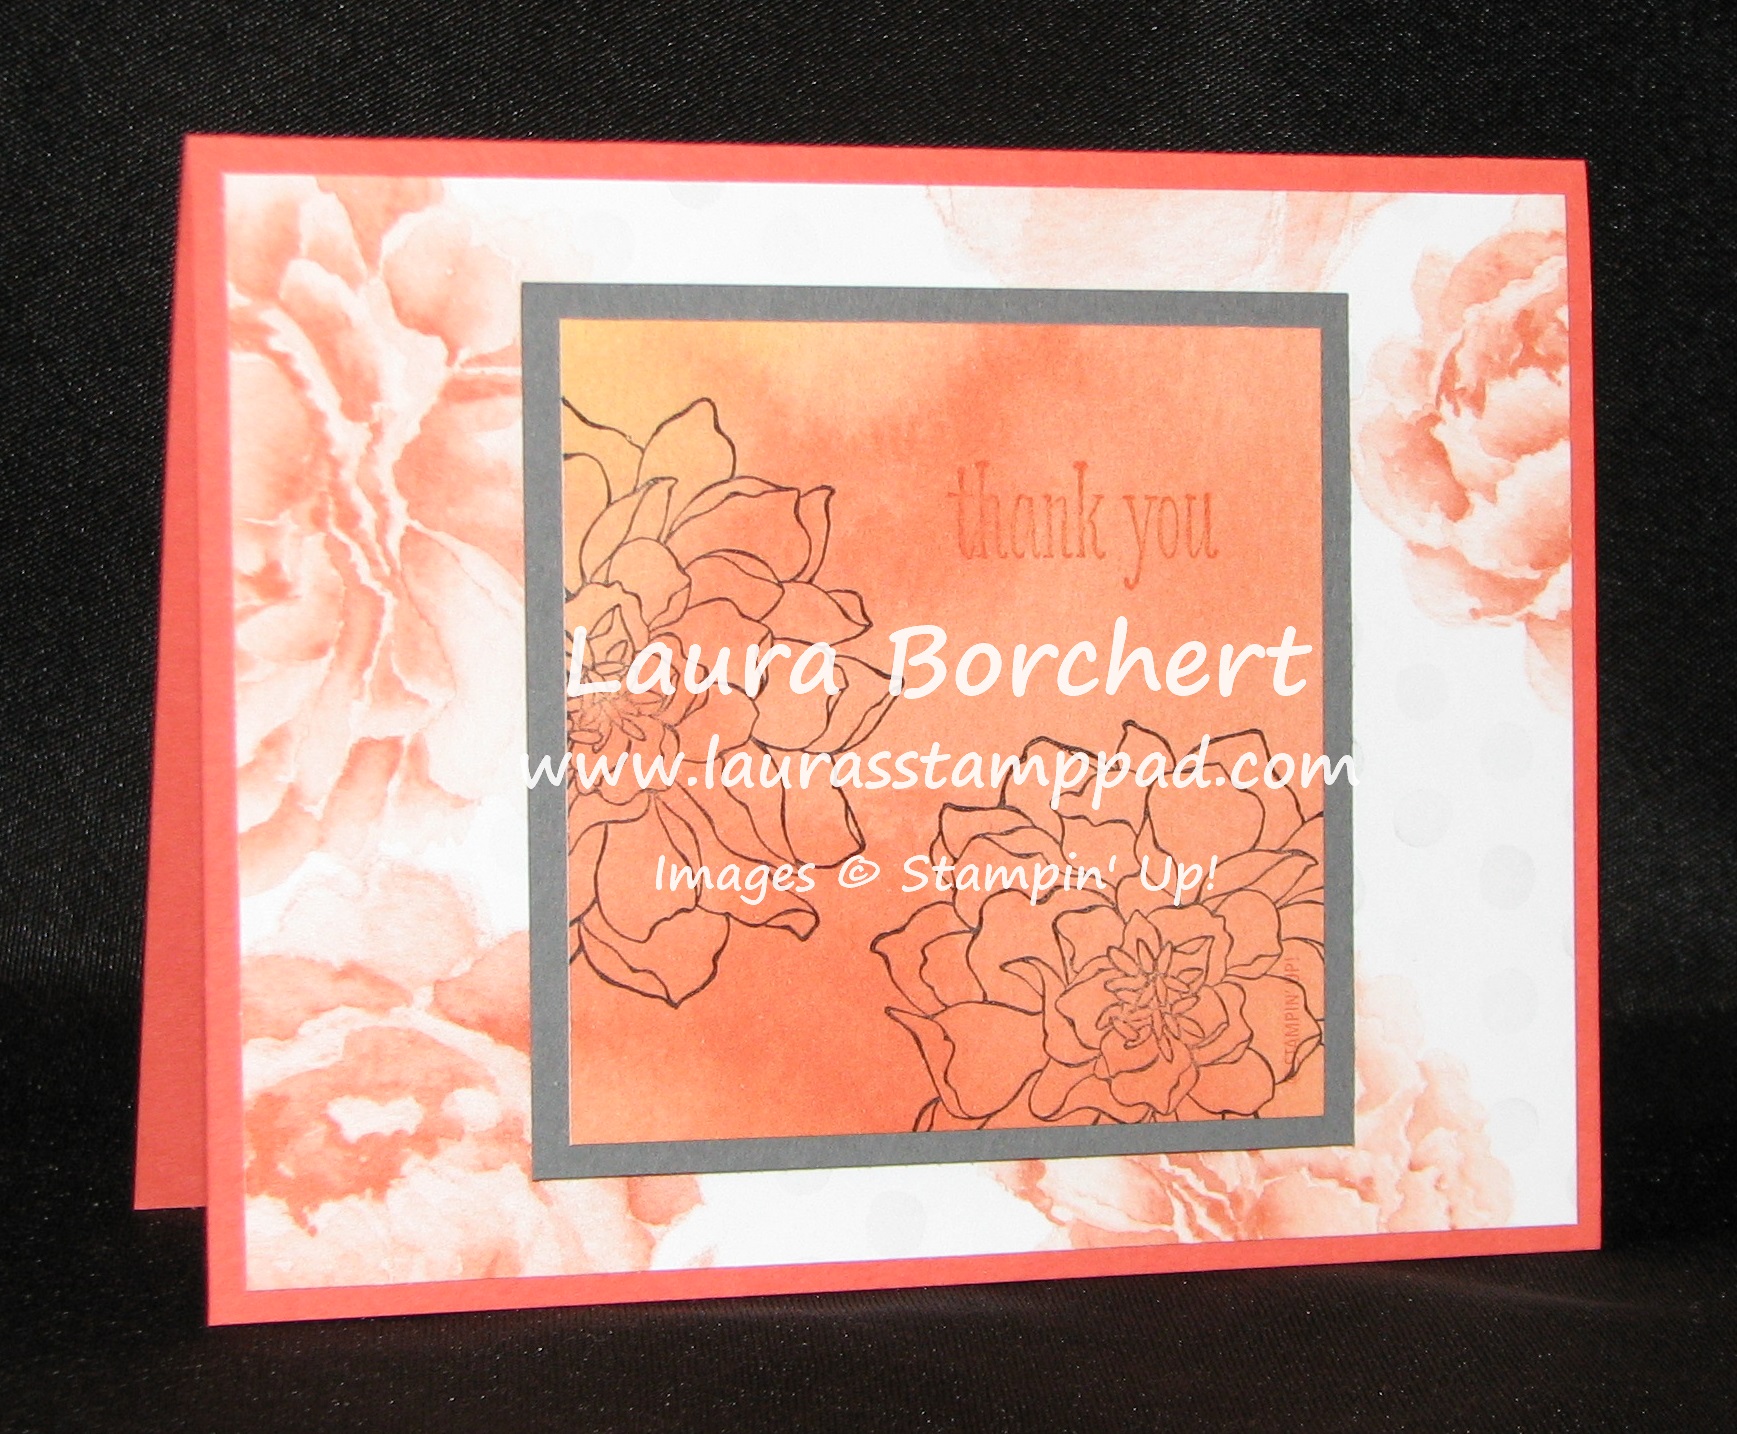
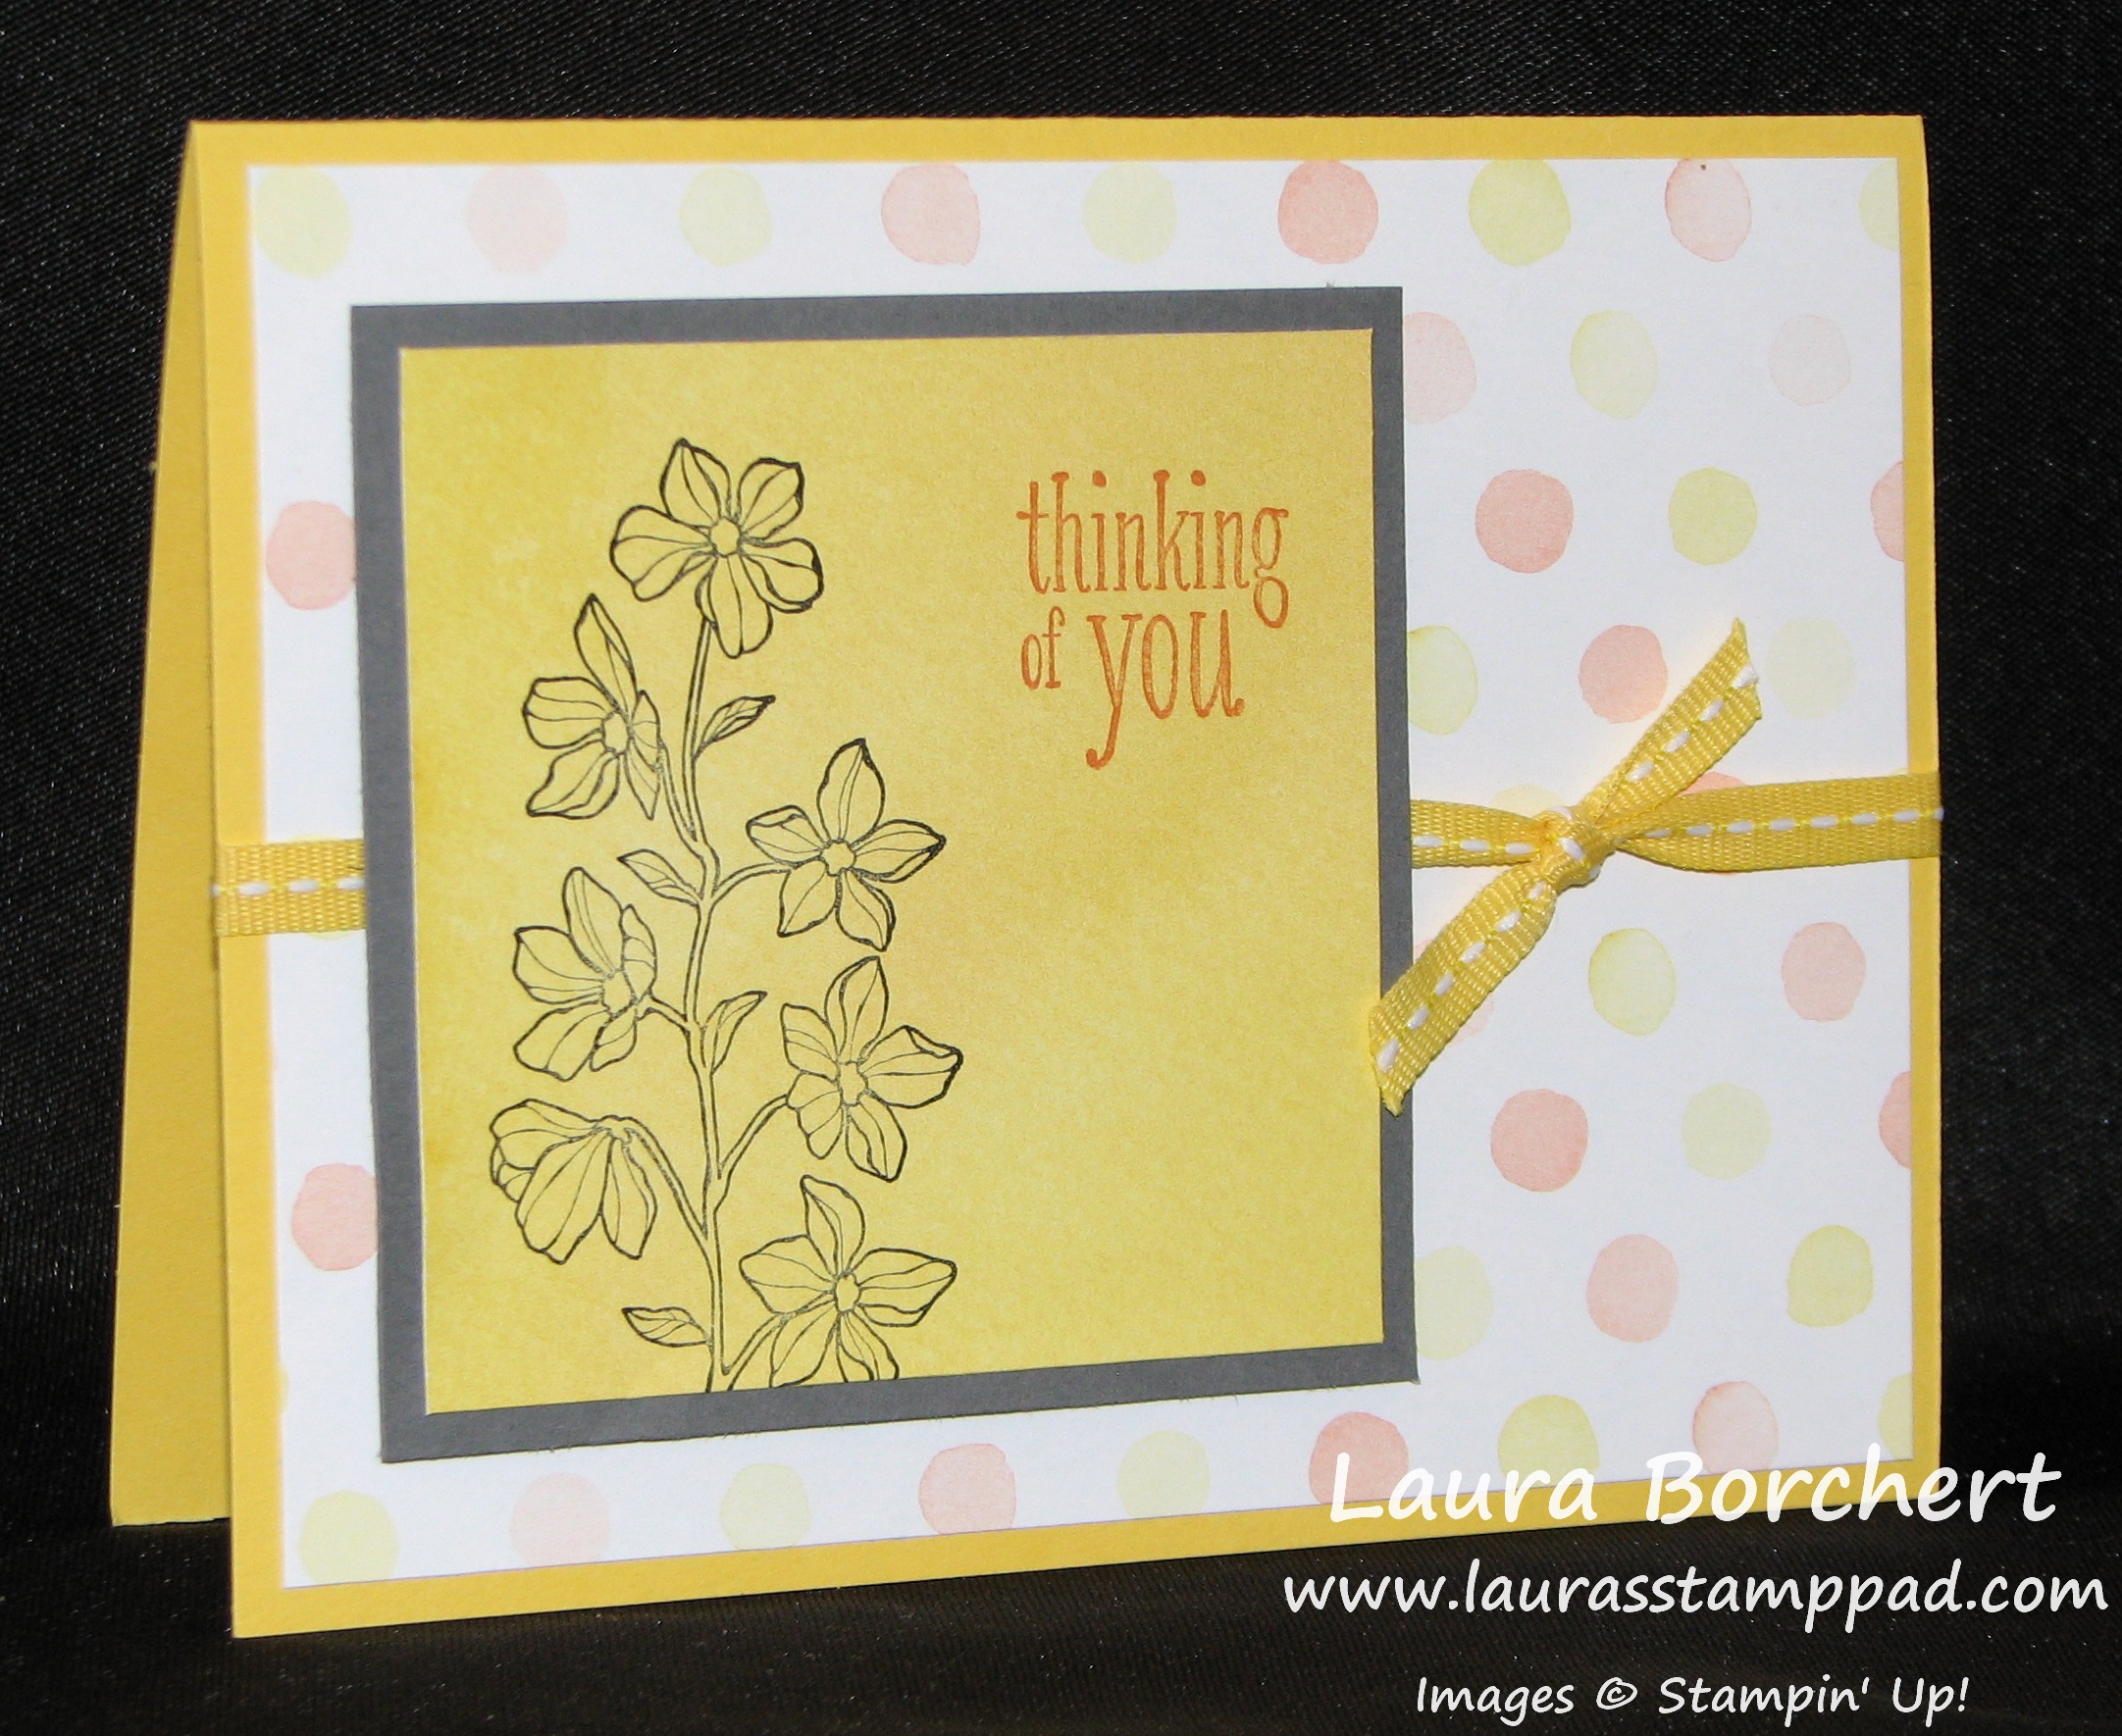
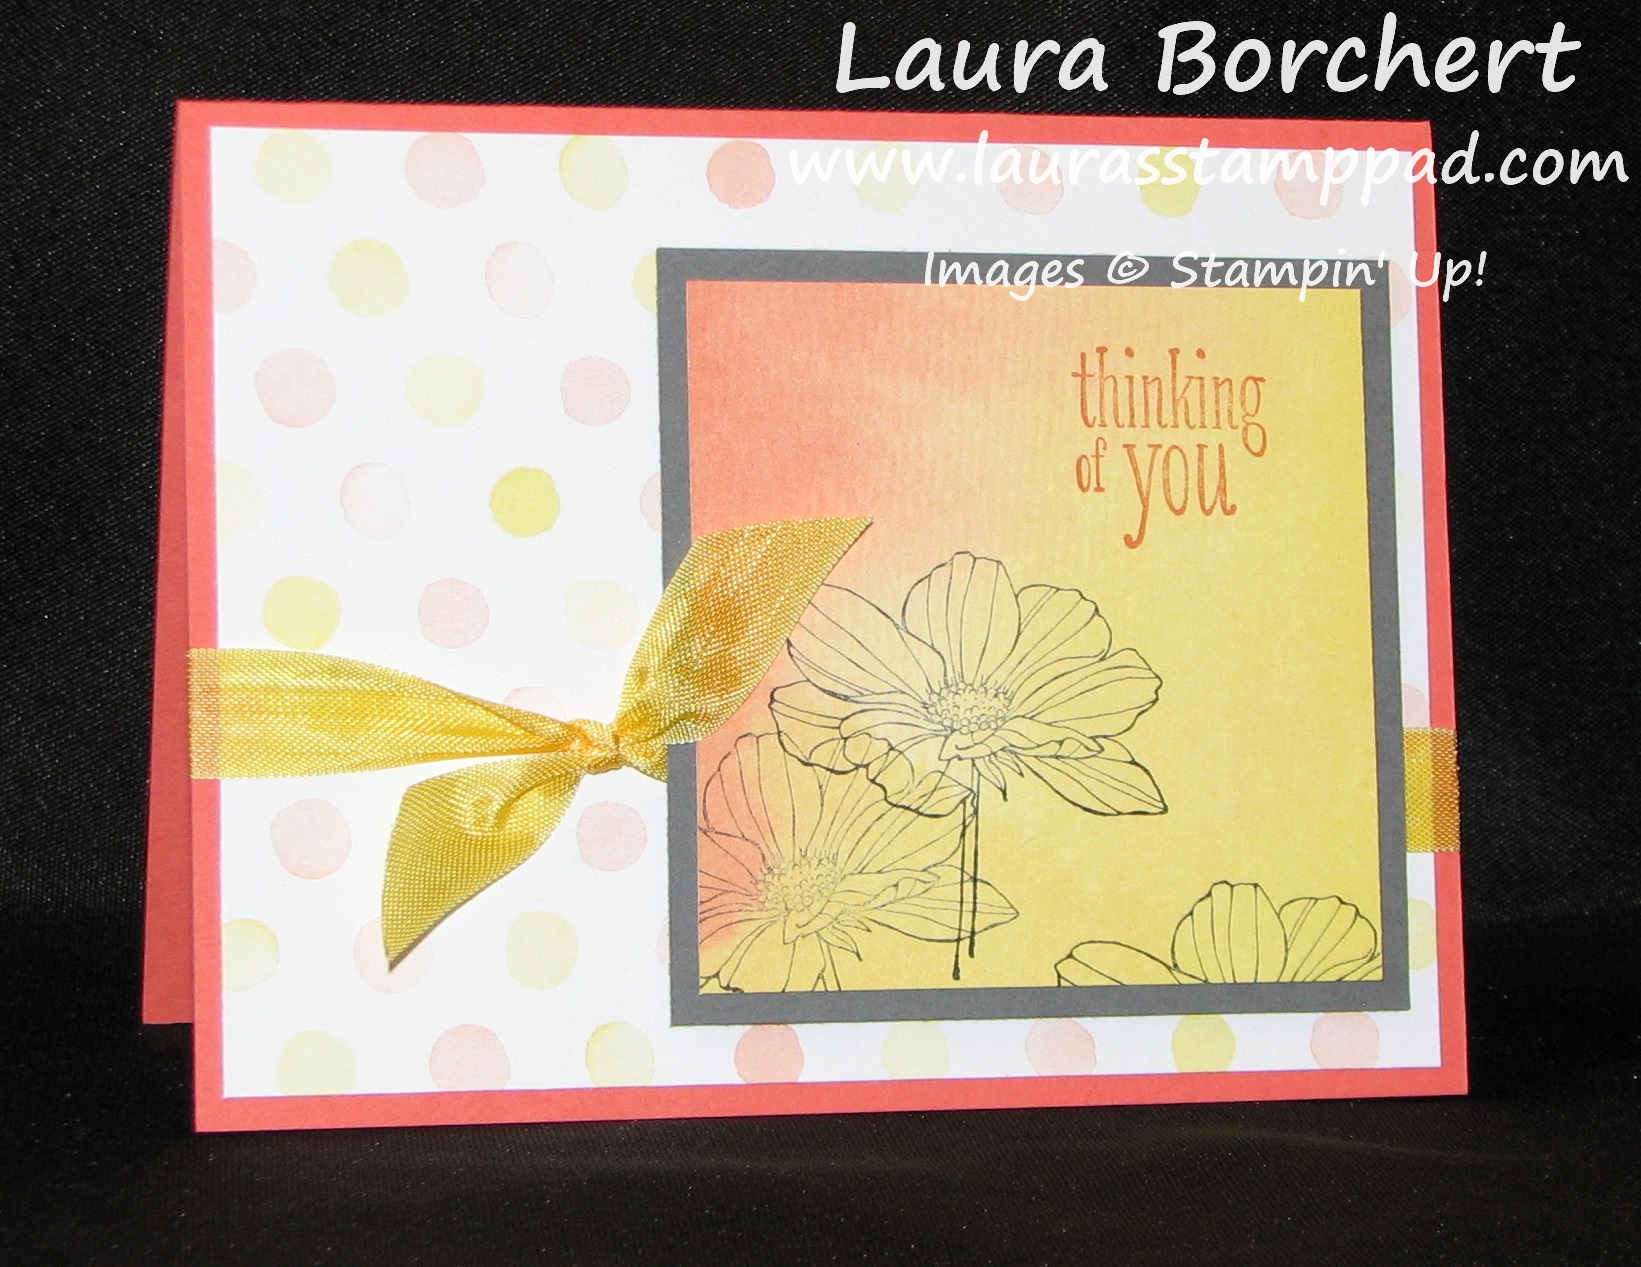
How beautiful is that??? I am loving the colors and the closure AND the Watercolor Wonder DSP!!!! 🙂 For this amazing card, all you need is a standard card base (5-1/2″ x 8-1/2″) and then with a pencil you will mark 1″ up from the bottom on the left and right side (shorter side). Then slide your piece of cardstock into the punch. You will not be using the guide but going over top of it and down into the blade area. Looking at the backside of the punch, find your little 1″ mark and line that up with the edge of the punch and PUNCH! Do this on the other side as well. Then you will put it into your Stampin’ Trimmer and cut the tabs above and below your punch. Score one of the tabs so that it will fold in and then score your card from that same scored tab side in (to the left) 4-1/4″. This will then make your card standard side and all folded and ready to decorate!!!!

Tag Topper Punch Closure Tutorial, www.LaurasStampPad.com

I hope this helps a little better! I am more of a visual person so I know it helps me!!! 🙂 I  hope you enjoyed this Tutorial and try it out! I would love to hear what you think and see some of you projects using this technique! Post in the comments below!

Tag Topper Punch Closes Card, www.LaurasStampPad.com

Had to post one more!!! Here is the card opened up!!!! Don’t forget about my Anniversary Special that I’m running! Check it out here! It ends on Friday!!!!

Happy Stampin’

~Laura


Watercolor Wonder Designer Series Paper!!!

Posted on

Do you ever have a product that you just reach for EVERY SINGLE time you sit down to stamp??? It may be a ribbon or stamp set or Designer Series Paper (DSP). For me, right now, it is the amazing Watercolor Wonder DSP!!!! Oh my, I am loving this paper and I think I have gone through at least 3 packs of it and it’s only been out since January! You can find it in the Occasions Mini Catalog which will ends on June 1st so be sure to stock up now!!!

Peaceful Petals Watercolor Wonder DSP, www.LaurasStampPad.com

Isn’t that just amazing? Although I should have stamped the greeting in Basic Gray as well rather than Calypso Coral. I used my Peaceful Petals Stamp Set which has amazing flower images (Love) and two greetings – Thank You and Thinking of You – two super useful ones!!! The best part about this card is you can make multiples very quickly. First, you will take the sheet of paper that is Calypso Coral and Daffodil Delight and cut that into 3″ x 3″ squares. You get 16 from just one sheet! Then you will layer that onto a 3-1/4″ square of Basic Gray. I then took various other sheets for the DSP pack and cut 4″ x 5-1/4″ rectangles to layer onto Calypso Coral & Daffodil Delight card bases (5-1/2″ x 8-1/2″)

Peaceful Petals Watercolor Wonder DSP, www.LaurasStampPad.com

This one uses a different flower image from the Peaceful Petals Stamp Set and the Calypso Coral greeting shows up better on the yellow! Also, I added a little Daffodil Delight Stitched Ribbon!!!

Peaceful Petals Watercolor Wonder DSP, www.LaurasStampPad.com

This one uses yet another flower from the Peaceful Petals Stamp Set and I went for some Daffodil Delight Seam Binding. I love all of the different ways you can make this card out of the same supplies!!!! LOVE IT! Be sure to get your Watercolor Wonder Designer Series Paper TODAY by clicking here!!! Also, it will qualify for my Anniversary Special that I’m running this week! Check it out here!

Happy Stampin’

~Laura


Wonderful Washi Tape!!!!

Posted on

I love playing with Washi Tape! There are so many ways you can use it and there is no need for adhesive because its sticky! Just apply in any direction, stamp a greeting and BOOM you are done!!! Check out these fabulous samples!

Washi Tape Card, www.LauasStampPad.com

I used the Watercolor Wonder Washi Tape from the Occasions Mini Catalog on this card and layered it on Baked Brown Sugar! I love how the Baked Brown Sugar goes with gold very well!!! I used the Washi Tape as little banners and just ripped the ends off which makes it even better – no scissors necessary!

Washi Tape Card, www.LauasStampPad.com

This card would be perfect for Graduation which is just around the corner. I used the Retro Fresh Washi Tape which is in the Occasions Mini Catalog as well. I stamped the greeting in Tangerine Tango in the middle and then without re-inking, stamped above and below the first greeting! There are so many colors you can get out of just one ink pad by stamping off!!!

Washi Tape Card, www.LauasStampPad.com

Father’s Day is right around the corner as well! Man cards are always hard for me because I like the color PINK and flower stamps! This is quick and simple and is the perfect man card for any occasion. I used the Epic Day Washi Tape for this one!

I hope you enjoyed these fabulous samples. You can check out more here and here! Washi Tape is perfect when you need to make multiples because it is just $4.95 for 3 Rolls! Now that’s a steal. Also, don’t forget you can order it this week and take advantage of my Anniversary Special! To celebrate my 10 years with Stampin’ Up!, when you place an online order using the HOSTESS CODE: XNYWCB4B, you will get a FREE gift from me!!!! I have Stamp Sets, Big Shot Dies, Ribbon, Designer Series Paper, and so much more that is just waiting to be in your stamp collection. But wait there’s more, I will also be drawing one lucky winner to get ALL of the Hostess Benefits!!!! Who doesn’t love FREE STUFF! This special will end on April 25th!!!

Happy Washi Tapin’

~Laura


Technique Tuesday – Fun with Foil!!!!

Posted on

HAPPY TUESDAY!!! You know what that means….I have a fabulous Technique to share with you! This week it features the NEW Foil Sheets (Silver & Gold) in the Occasions Mini Catalog! I have had so much fun with these sheets and achieved some many fabulous looks!!!! Check it out!

Embossing Foil, www.LaurasStampPad.com

How fabulous is this?? The added texture and pattern and shine is soooo fabulous! All you have to do is run it through your Big Shot with any of your Textured Impressions Embossing Folders! I used the Argyle Texture Impressions Folder! Emboss with metallic side facing up towards the side of the folder with the Stampin’ Up! logo for the image to pop-up on the shiny side! If you would like the image to be reversed, place the metallic side down, away from the logo. I added this piece of Foil onto my card with Summer Picnic Designer Series Paper on the bottom portion! I love the colors and patterns of this paper!!! I think stamped the flower from the Mixed Bunch Stamp Set and punched it out with the coordinating Blossom Punch! I cut 2 pieces of the Designer Series Paper for my little banner flags hanging out the bottom and then added a third one in Very Vanilla for my greeting which was stamped from the A Dozen Thoughts Stamp Set! What do you think? I also think that the Argyle Foil looks like diamond plate (you know those silver boxes in the back of trucks?) so I think it would make a great “man card”! More to come on that…..

Happy Stampin’

~Laura


Quick and Simple Pennant Card!!!

Posted on

Step Up Make A Wish, www.LaurasStampPad.comThis card is super simple and quick to make. The one on the left was created with a Bermuda Bay card base (cut an 8-1/2″ x 11″ sheet of cardstock in half at 4-1/4″). Then I added a little strip of Kaleidoscope Designer Series Paper (1″ x 4-1/4″) to the center of the card. Using my Perfect Pennants Stamp Set, I stamped the heart in Bermuda Bay (to give that watermark look) and I stamped the greeting in Melon Mambo. Used my handy dandy coordinating Banner Framelits (Bundle it and save 15%) to cut it out and place it in the center with dimensionals, of course! 😉 Oh, how could I forget, I added a little rhinestone too for some bling. You could change the colors around and use different Designer Series Paper and stamp set but all kinds of different cards!!! Quick and Simple!

Now the card on the right was “Stepped Up” a little! I added a layer by making my card base Whisper White and layering the Bermuda Bay onto top (4″ x 5-1/4″) and instead of the heart and rhinestone, I added Candy Dots to the greeting banner! You could keep the heart and add a Candy dot to that too! Endless possibilities! Simple cards are just as cute as the more detailed cards so don’t always feel like you need to have 15 layers and 25 embellishments on every card! I hope you try out this fabulous design layout and feel free to post it in the comments below!

Happy Stampin’

~Laura


Circle Circus!!!

Posted on

Perfect Pennants, www.LaurasStampPad.comSome days I feel like I need to join the circus….guess that is why that title came to mind for this blog post. 🙂 But on to this amazing card that is just so fun!!!! I used my super favorite Watercolor Wonder Designer Series Paper (click here and here for more samples) and Perfect Pennants Stamp Set (click here and here for samples)!! I added a little Ruffled Ribbon which is super cute and fun to use! I always use sticky strip with the Ruffled Ribbon just to make sure it holds well since I usually pull mine a little tight! I used my Circle Punches to make the greeting pop and added a few candy dots! Remember that just because a stamp set has a matching framelit or punch, you can always just do your own thing! I love the Perfect Pennants Stamp Set for the greetings and heart and star but yet sometimes I feel a little “banner-ed” out! Here I used the stamp set and circles! Always trying to think outside the box! Let me know what you latest thought outside the box was in the comments below!

Happy Stampin’

~Laura


Burlap & Blooms Wreath Kit!!!

Posted on

Burlap Wreath, www.LaurasStampPad.comWhen I first looked through the Occasions Mini Catalog, my eyes caught this amazing Burlap and Blooms Wreath Kit and I knew I had to have that for my front door wreath! It is fabulous! The kits comes with all of the flower to assemble, the burlap, the twine, the buttons, and directions! All you need is a hot glue gun! I actually comes with a thick cardboard ring for you to use but I just used the foam wreath that I have used a million times and just redecorate it! Here is another photo of the wreath that a customer of mine did and she used the cardboard wreath that comes with the kit!

Burlap Wreath, www.LaurasStampPad.com

I love how she mixed the colors of the spikey flowers….the ones that are loops of paper wrapped around each other.  So many ways you can make it different from the original and SO SPRING-Y!!!! I love it. I also went to deliver an order at a customer’s house and what was on the front door…..THIS WREATH! She had completed her’s and it was look absolutely amazing on her front door. There is still time to get your kit and make this amazing wreath….after all here in IL, Spring is still not officially here with a mix of 70 degree weather and snow this week.

Happy Hot Gluing!!!

~Laura


Kaleidoscope Kraziness!

Posted on

Happy Monday! I am going a little krazy today because it will be 70 degrees and sunny today and I couldn’t be happier (well I could if I knew we weren’t getting snow in 2 days, welcome to IL)!! But today I am showing you this fabulous card I made with the Kaleidoscope Designer Series Paper!!!

Perfect Pennants, www.LaurasStampPad.com

I love this paper for the colors – Strawberry Slush, Crushed Curry, Bermuda Bay, Basic Gray, and Basic Black! Love me some pink!!! This card was ripped and layered and tagged and stamped! I think I hit quite a few techniques in this one! I also used the Perfect Pennants Stamp Set which I love because the greetings are different and super fun and the images are amazing. There is this striped banner image, a polka dot banner image, heart, and star! LOVE! For the top of the tag, I used my Scallop Tag Topper Punch and then added a little Strawberry Slush Ruffled Ribbon. Instead of tying the ruffed ribbon, I just looped it through and then tied a little bit of Baker’s Twine around the ends to hold it in place! I really like the look of it and then you don’t have a bulky knot on your card! Win Win! I hope you enjoyed this card and it doesn’t make your eyes go krazy! 😉

Happy Stampin’

~Laura


Perfect Pennants!!!!

Posted on

Perfect Pennants, www.LaurasStampPad.comI love the greetings in the the Perfect Pennants Stamp Set AND there is a heart and star which makes it even better! Here are a few samples I created using the Perfect Pennants Stamp Set and matching Banner Framelits (Bundle it and save 15%!!!) I used Marina Mist, Wisteria Wonder, and Pistachio Pudding – perfect pastel color combination!!! Of course, I used my Sponge Daubers to add a little color to the edge of my whisper white cardstock!!! LOVE IT! I couldn’t decide which stamps to use for this card so that is why I made two – one with hearts and one with stars. And then came the greeting tag….add ribbon, add some polka dots, keep it simple. So many options!!! That is what I love about stamping and paper crafting!!! For more samples using this stamp set, click here! Post in the comments below which one you like best!!!

Happy Stampin’

~Laura


Watercolor Wonder Designer Series Paper!!!

Posted on

The Watercolor Wonder Designer Series Paper is my FAVORITE paper right now! I have been using it on millions of cards (okay maybe not millions but close…see check out this one and more are coming!)

Watercolor Wonder DSP, www.LaurasStampPad.com

I think the 2 patterns that I love the most are this one with the coral and yellow flowers and the other one in the same pattern but in indigo and green! LOVE!!! And this card was super simple, I cut a piece of the Designer Series Paper to 4″ x 5-1/4″ to layer onto my card base and then I punched out my butterflies with the Elegant Butterfly Punch and Bitty Butterfly Punch! Of course I attached those to my card with Stampin’ Dimensionals (LOVE)!!! I then added a little Calypso Coral Baker’s Twine and my greeting! I stamped the greeting from the Perfect Pennants Stamp Set onto Whisper White and then used the matching Banner Framelits to cut it out! The cool thing is you can get these two items as a bundle and save 15%! Woot Woot! I hope you liked this card and be on the lookout for more cards using the Watercolor Wonder Designer Series Paper!!

Happy Stampin’

~Laura