I love Punch Art and the many things you can create like my little lion, Kirby, Cozy Coupe, and Princess Peach!!! Today it is Legos!!!! Believe it or not, I did not make this card specifically for my husband (like all of the video game ones above). He does love Legos and could play with them for hours so it might end up going to him!!!
I started with a Whisper White card base and then took a piece of Basic Black (4″ x 5-1/4″) and ran it through the Big Shot with the Decorative Dots Embossing Folder! This gave the background the look of the lego board with all of the dots in it! For all of the lego pieces I used the 1″ Square Punch and the smaller circle from the Owl Builder Punch! I added the squares to the card with Stampin’ Dimensionals to give it some more texture. For all of the little dots on top, I used Mini Glue Dots! You can place them on the card in any pattern you wish! The colors I used were Pacific Point, Real Red, Daffodil Delight, and Cucumber Crush! To finish off the little lego pieces, I took the White Chalk Marker and added a little swish to make it look like it had shine! It is as simple as that!!!
I think my favorite part of this card is the color combination – Pool Party, Black and White!!! LOVE IT!!!!!
I started with a Pool Party card base and stamped the greeting from the Happy Birthday Everyone Hostess Stamp Set! I love the font of the Happy Birthday!!! I recommend stamping first……I did it last and made a boo boo but apparently I’m the only one who can see it!!! Leave me a comment down below if you know where it is! 🙂 For the shirt, I used a 3″ Whisper White square and put a little mark in the center along the top. Then I took my 1″ Square Punch and slide the cardstock in diagonal with that center marking in the middle. This is how I got that triangle cut out! I layered the white on a black square of cardstock measuring 3-1/4″. For the Bow Tie, I used the Bow Builder Punch and some of the Neutrals Designer Series Paper Stack! I used Mini Glue Dots to assemble the bow and adhere to the card! To finish it off, I added a few Pool Party Candy Dots!!! Pearls would have been fabulous as well!!!
What do you think? Loving the color combo like me? Would you use Pearls, Candy Dots, or Rhinestones? Let me know in the comments below!!!
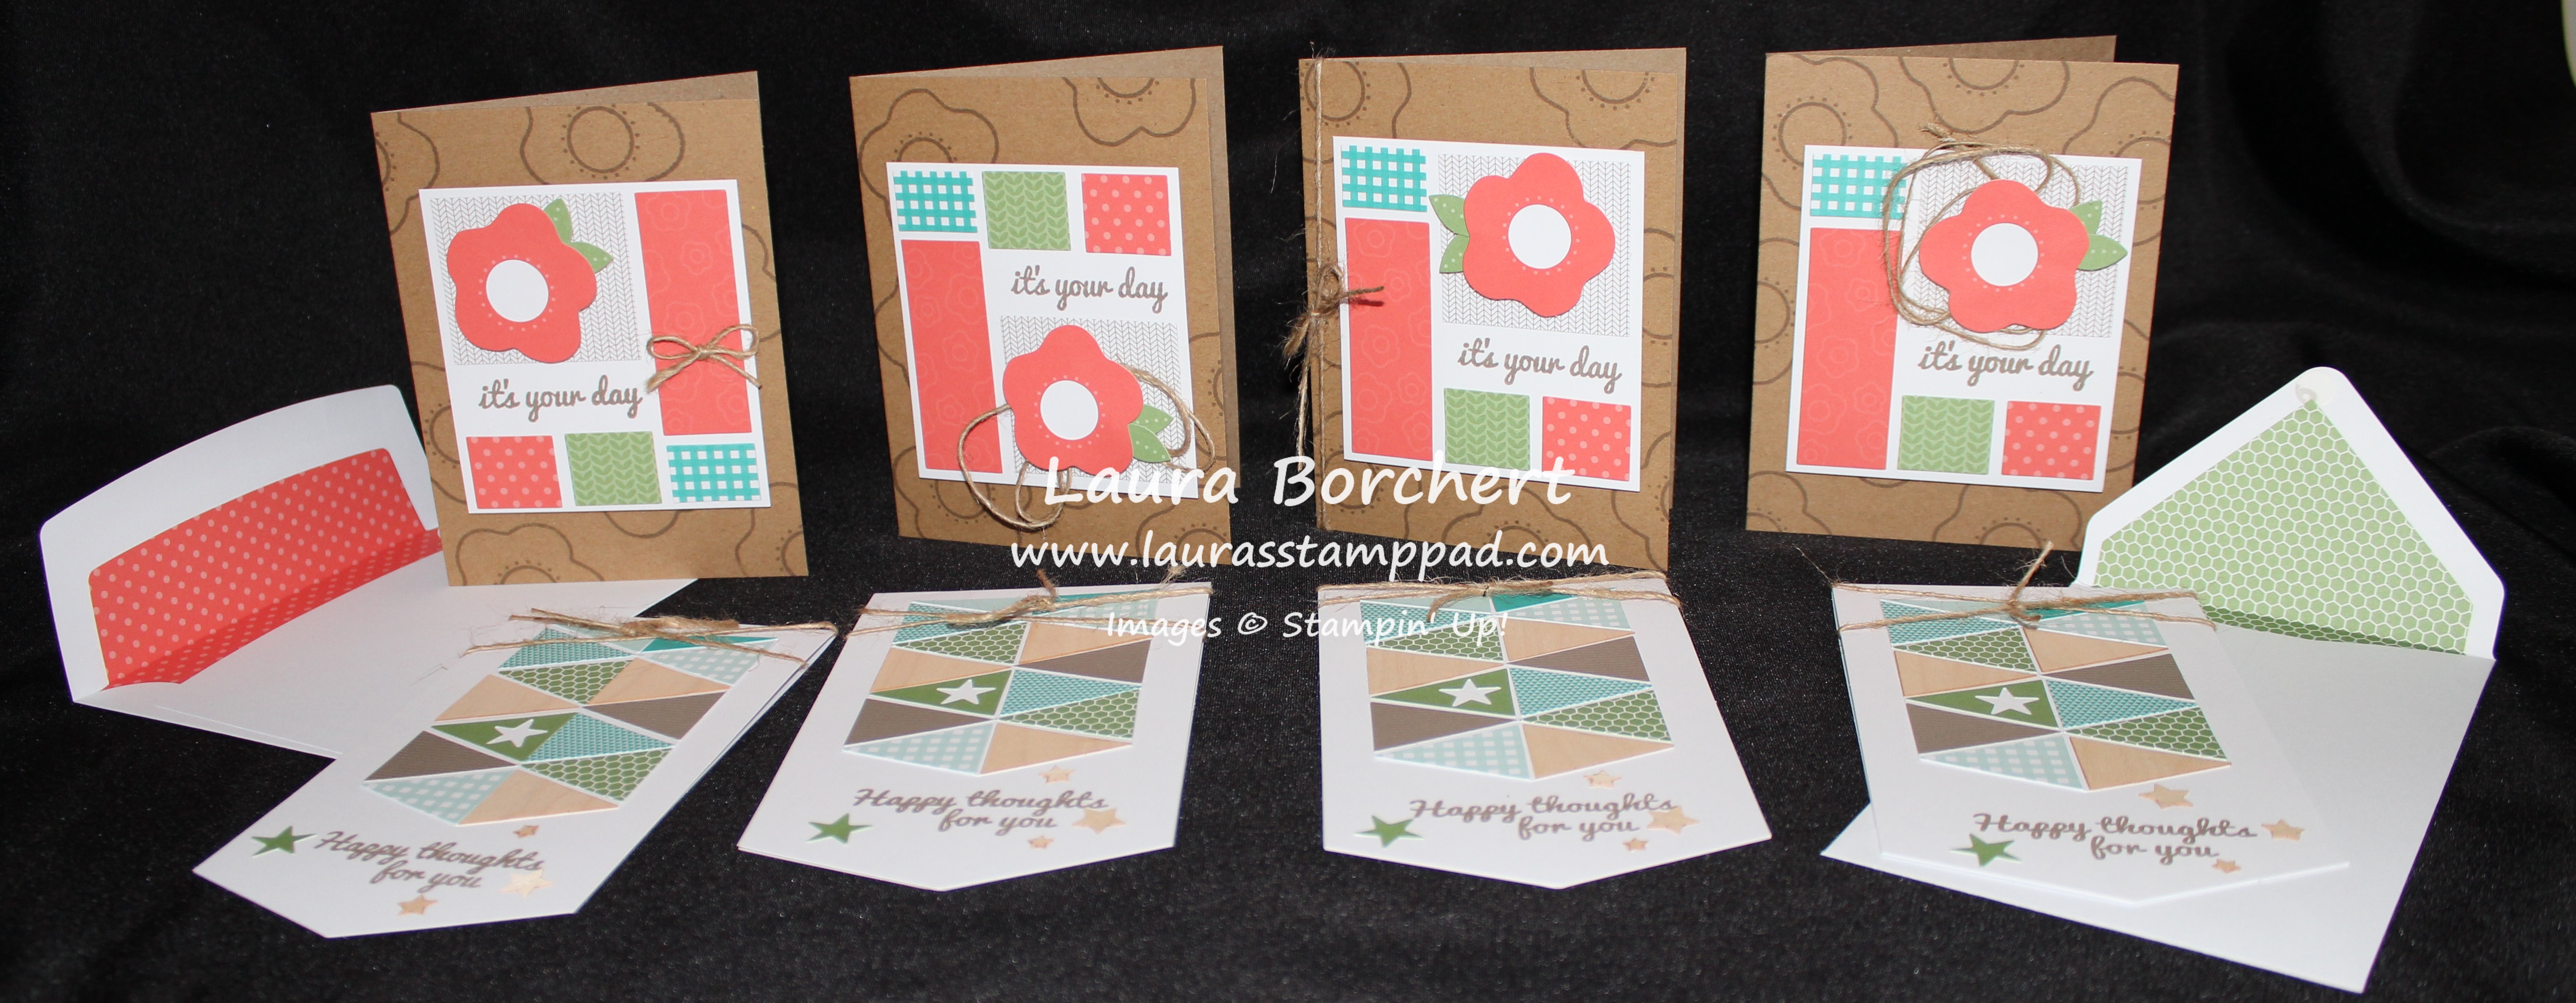
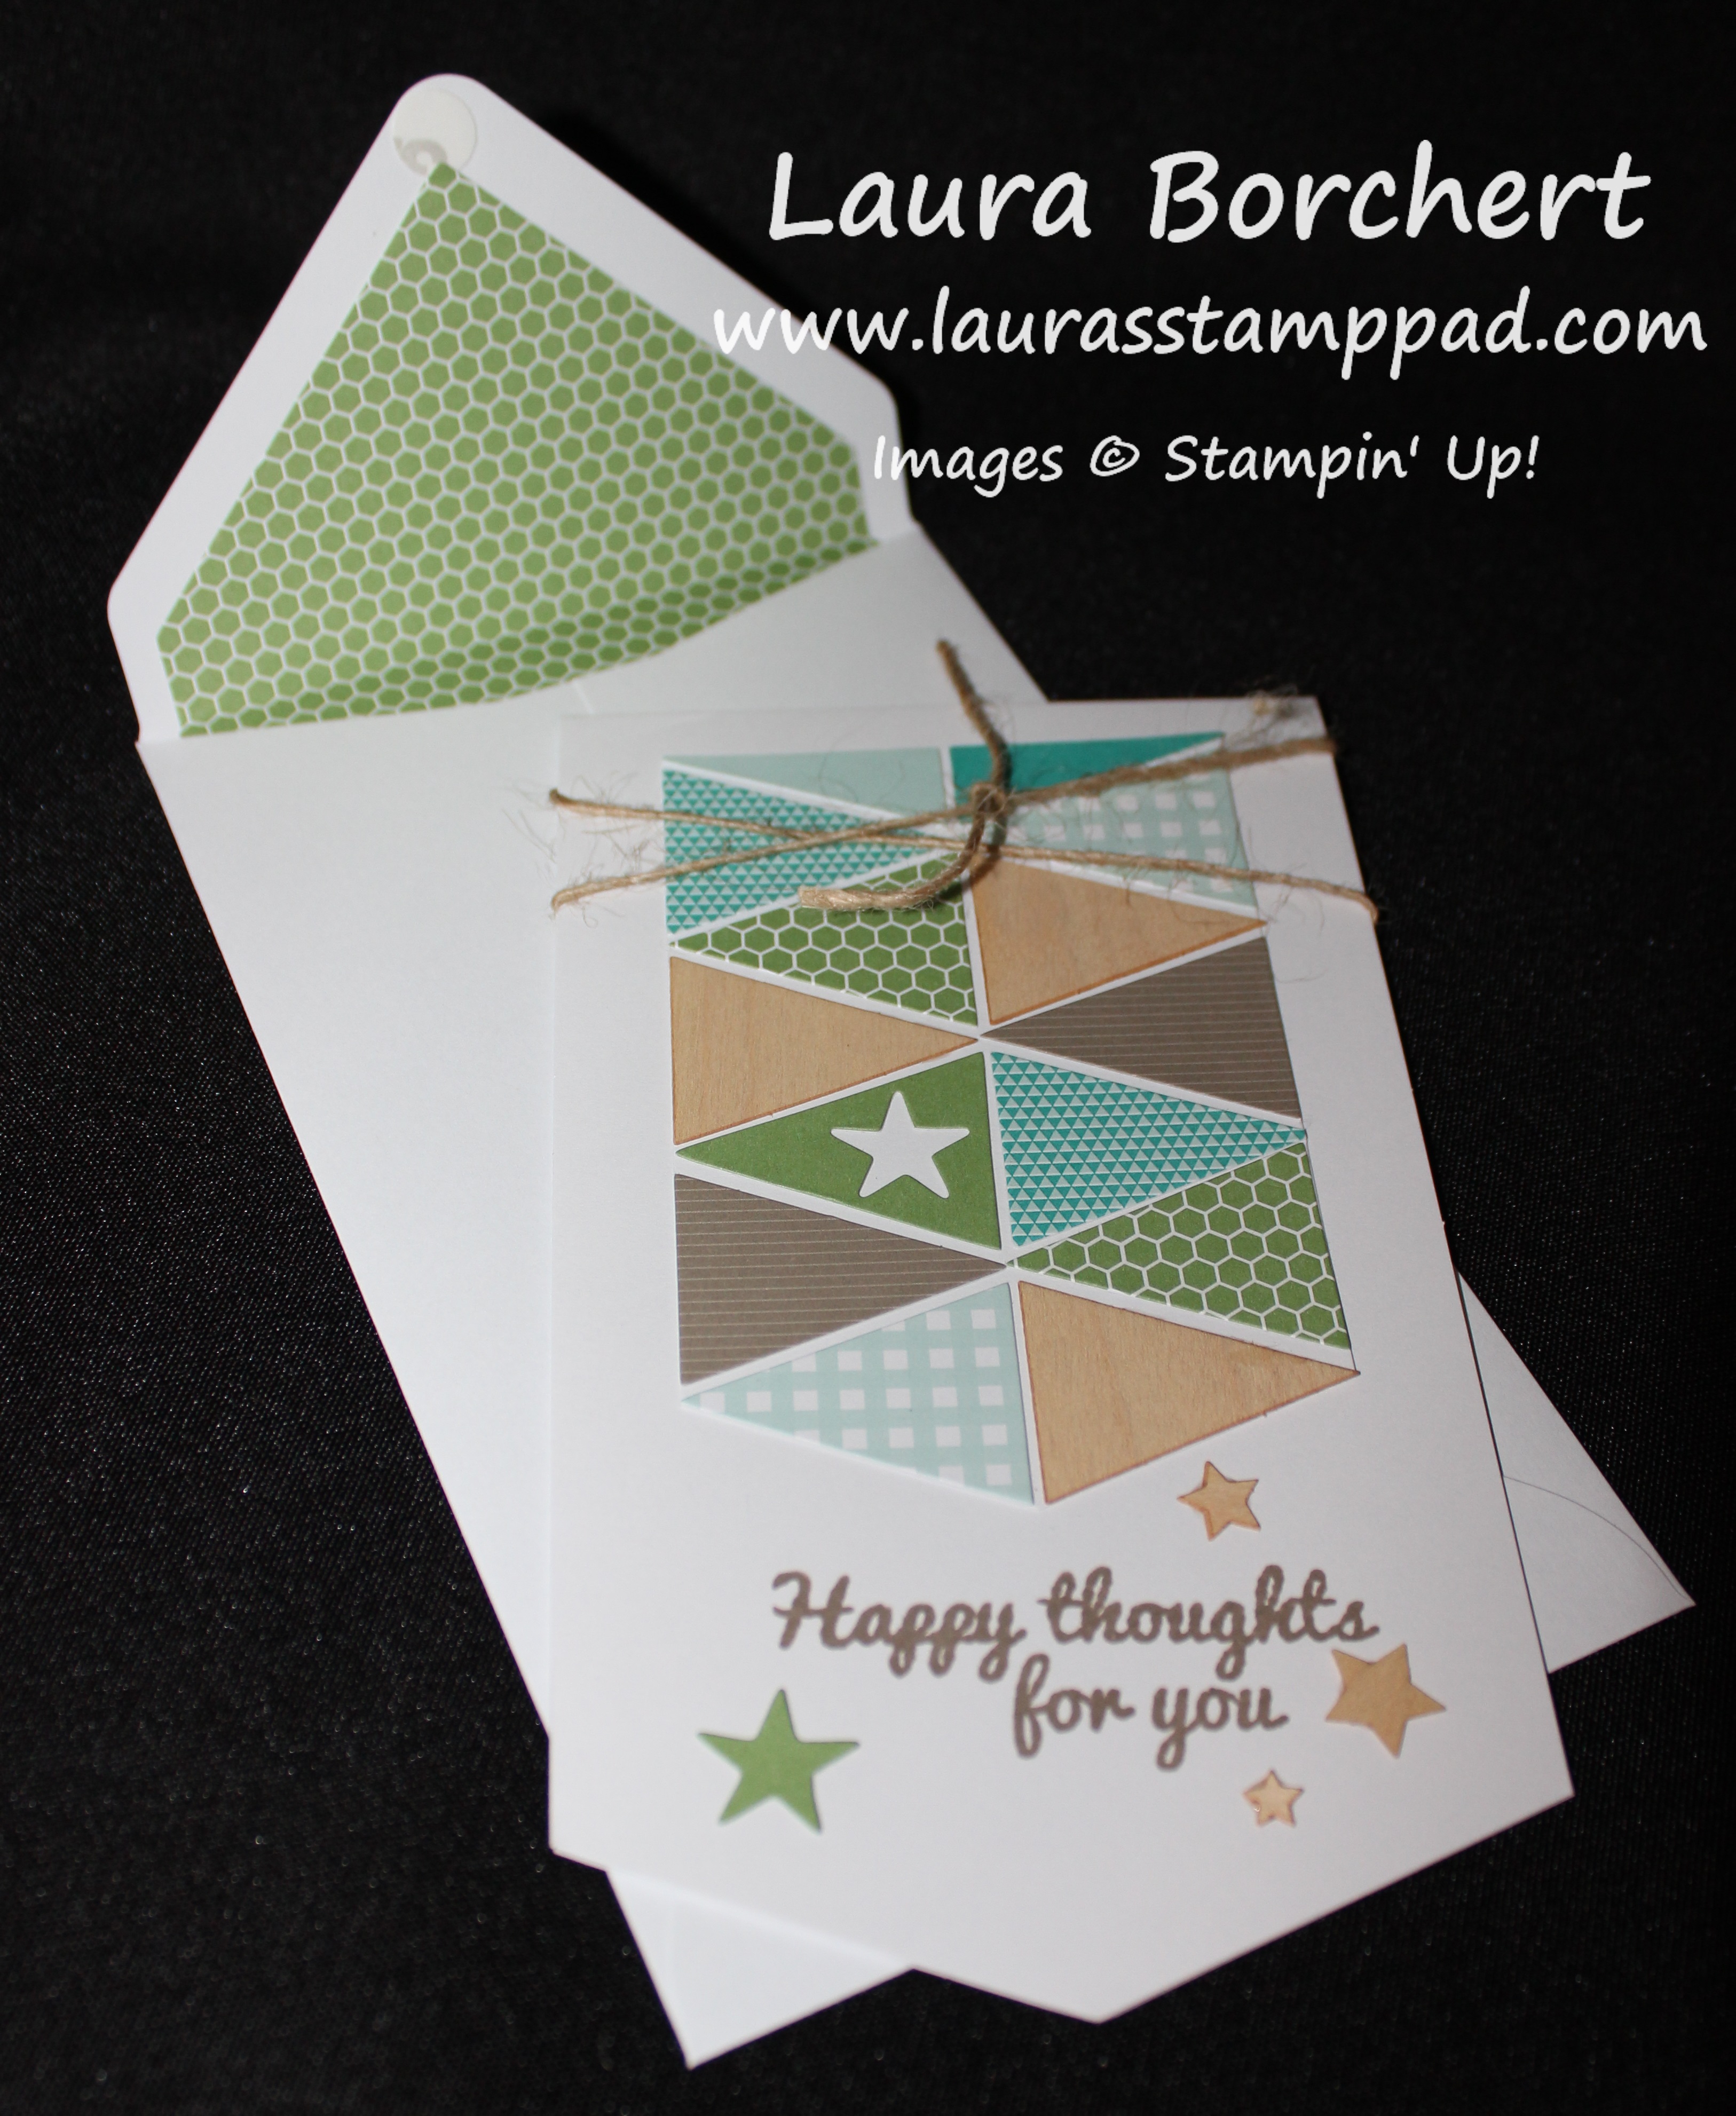
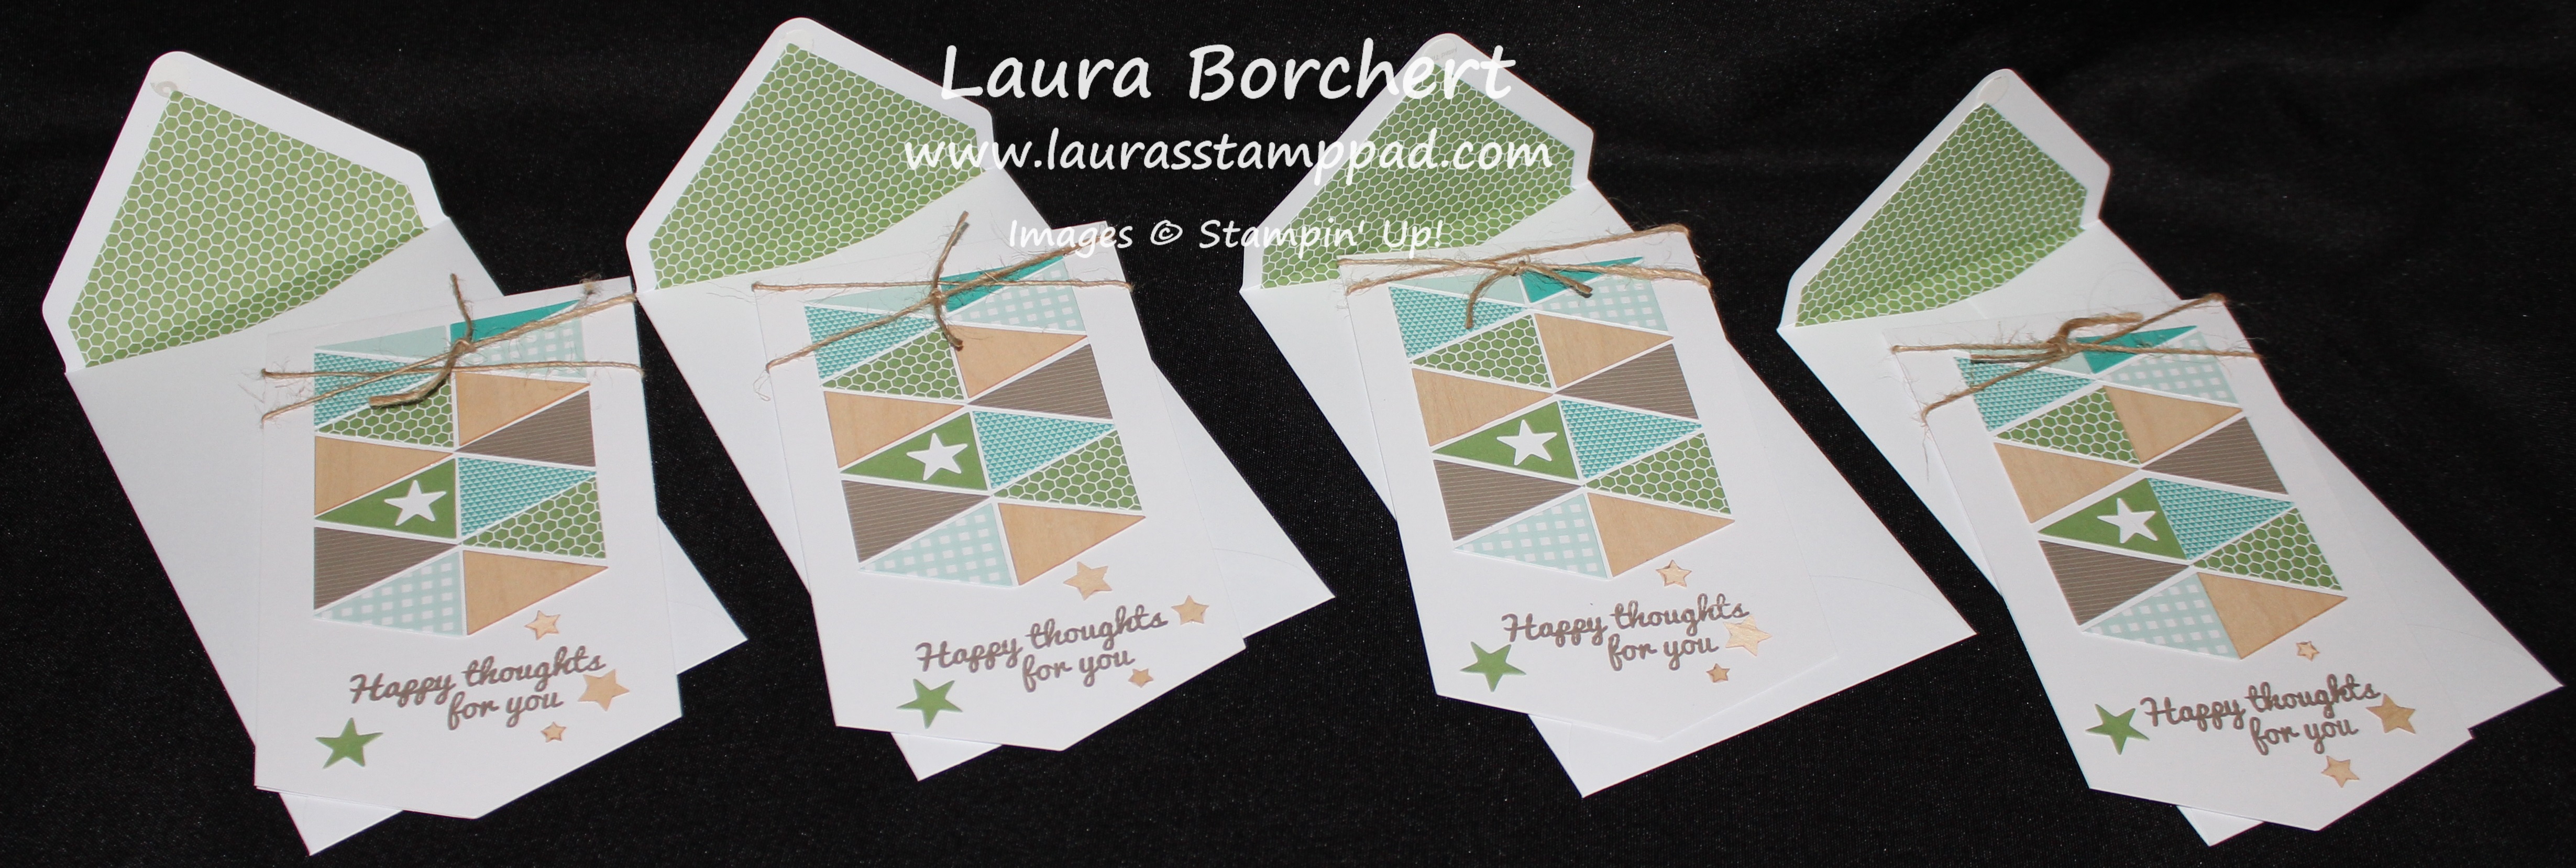
Look at all of these adorable cards from the June 2015 Paper Pumpkin Kit!!! I love how it is a perfect mix of masculine and girlie cards!!!! Also, I am in love with the adorable envelope liners. There were a total of 8 cards with envelopes, a great stamp set, and Tip Top Taupe was the ink pad. I love that Stampin’ Up did a NEW In-Color!!!! The font on the stamp set is perfect and loopy……just the way I life it!!!
Here is an upclose look at one of the coral cards. Each of those rectangles were a sticker and you could arrange them any way you wanted. Stamp your greeting, add the flower, and the twine and you are all set. I did the twine differently on each card – bow, peaking out from the flower and around the card!!! I also stamped the flower image all over on the card base! Love it!!! There were large faceted buttons for the center of the card but I am holding off on putting those on in case I need to mail the card. I will either attach it for a hand delivered card or I will use them for another project!!!
Here are all of the coral cards!!!
Here is an upclose view of the man cards! The banner style of the card is super fun and different! It also has a longer envelope! Each of the triangles were die-cut stickers and then the tan ones are wooden elements. I added the green star from the center of the one triangle to the bottom for some flare as well as the wooden element stars! Those are really thin so they will mail just fine!!! I wrapped my twine around twice and just did a knot rather than a bow so they could stay masculine! 🙂
These I did all the same!!! I loved the look and didn’t want to change it!!! That’s the thing about Paper Pumpkin; you can follow the directions and just have fun without thinking up a new idea or you can let your mind go wild and create anything you want. This day my mind was mush and I just wanted to play without thinking!!!
Be sure that you don’t miss out on the July Paper Pumpkin Kit!!! You will want to be signed up by the 10th! Click here to sign up!! Also, don’t forget that you can purchase 1,3,6, and 12 month subscriptions!! They make perfect gifts for you or a friend; or both so you can do the kits together!!! You can even earn Laura’s Loyal Stampers Points when you purchase online AND you can earn Hostess Benefits when you purchase the 12 month subscription!
If you would like to see my excitement opening the June Paper Pumpkin, you can check it out here! Be sure to subscribe to My Channel so you don’t miss out on the July Reveal!
How cute is this Dino-rrific card??? I love it!!! There are so many possibilities and color options with these dinosaurs too! I struggled with creating this card because I wanted to do it all on just this one card. I had to stop, step back, and say Laura you can make another one. Does anyone else talk to themselves while stamping?? No? Just me! Okay!
Let’s get started on how to create this masterpiece with the No Bones About It Stamp Set! I have a Cucumber Crush card base which I stamped the dino feet along the bottom in Cucumber Crush as well. I added the greeting in Memento Black Ink! Then in the middle of the card base I added a 2″ strip of Designer Series Paper from the Cherry On Top Stack! I cut out a piece of Pacific Point measuring 3″ x 3″ and Whisper White measuring 2-3/4″ x 2-3/4″! On the white piece, I stamped the greenery piece along the top in Cucumber Crush. I stamped a few times before going back to the ink pad which is how I got those various shades. Then I stamped the dino in Pacific Point. I did another sample where I stamped his bones in black and I didn’t really like that. I’m not a fan of black and blue together so I think that is why. I can’t wait to play with this set and the different colors more and more. I added the stamped white piece to the Pacific Point cardstock and then added it to the card front with Stampin’ Dimensionals. All done!! This card would be perfect for kids and kids at heart!
What colors would you stamp your dinosaurs in? Let me know in the comments below!
Happy July!!! I can’t believe it is July already….where does time go??
Today I’m sharing one of my “Man Cards” with you! This one is basic and could be used for any occasion for a guy! I started with a Crumb Cake base and then added a piece of Mossy Meadow cardstock measuring 4″ x 5-1/4″. Then I took a piece of Very Vanilla cardstock (3-3/4″ x 5″) and stamped on it. For the ombre look, I used the image from the Work of Art Stamp Set and inked it up in Mossy Meadow. Starting at the top, I stamped it and then continued to move down and stamp again without ever returning to the ink pad. So simple and yet super amazing looking!! I also stamped the greeting in Mossy Meadow. It is from the Crazy About You Stamp Set. The tree from Lovely As A Tree was stamped in Chocolate Chip! I added the stamped piece to the Mossy Meadow and wrapped some Linen Thread around it twice and tied a knot (not a bow, since it’s a man card). I added this to my card base with Stampin’ Dimensionals!!! Simple and yet fabulous and not flowers, pink or girlie!!! Love it!!!
Happy Tuesday!!! You know what that means? I have a fabulous technique to share with you today! It has a major WOW Factor and it is actually fairly simple to create!!! It makes great man cards too!! 🙂
How cool is that? The reflection of the trees in the “pond”, or whatever water it is, is just stunning!! I love it! You can do this technique with lots of different images and not just trees! Now let’s get started!
See I told you it was easy since the supply list is so short! I have a feeling you all doubt me on that! 🙂 The piece of Whisper White cardstock that I used for this one measures 4-1/4″ x 3-3/4″. I started by sponging my cardstock first. I saw this technique at Spring Into Stamping and Debbie advised to do that first! I used the Soft Sky Sponge Dauber for the very bottom (pond) with just a few passes back and forth. Then I used the Pool Party Sponge Dauber above that for the pond and at the top for the sky. The leftover (middle) section I filled in with the Wild Wasabi Sponge Dauber. I added the brown at the end; using the tree stamp as a guide for those marks! Once you have your cardstock all colored in, you will stamp the trees from Lovely As A Tree with Chocolate Chip Ink in the Wild Wasabi section of your card. Now ink up your stamp again and stamp it onto a piece of Window Sheet! Be very careful to press evenly and not slide all over. If it does, no worries, just wipe it off with a baby wipe or wet paper towel and do it again! Now you will take your window sheet, flip it over, and press it down to your cardstock either just below your already stamped trees or down further. You can do it either way, it also might depend on where your water starts. Once you lay the window sheet down, just gently press all over so the ink is touching the cardstock and soaking in! Now lift up and voila! That’s it!!! See I told you it was easy! After looking at the sample above, I decided it needed a little dirt at the pond’s edge so I went in with some brown and did a few passes!!! You could also use a darker green!
Here is another sample that I created! My pond was much smaller so I could only fit half of the trees on there. I actually think I like this one better. The card at the top made me always wonder which way was up but with this one I know!
Here is another sample that I created with the Sheltering Tree Stamp Set. I really love this one because the reflection image is sort of fuzzy looking so it really looks like a reflection in the water. I think it came out like that because it is a more solid image and the ink pooled in places on the window sheet. The Lovely As A Tree Stamp is very fine and small so it came out more clear and crisp! For the card above, I stamped the tree first and then did the Window Sheet reflection of the tree. Then I did the leave and the reflection of the leaves. I added the grass and flower stems (for more texture) to the card and then just sponged Pool Party below the grass. So I actually sponged last for this card! I added the greeting from Teeny Tiny Wishes and punched it out with the Word Window Punch and layered it onto Wild Wasabi Modern Label Punch! I added the greeting to the card with Stampin’ Dimensionals!
If you would like to see this technique in action, you can check out my Video Tutorial below! Don’t forget to give it a thumbs up if you liked it and subscribe to My Channel so you don’t miss out on future videos!
Let me know in the comment below which of these 3 you liked best! If you are planning on trying out this technique, let me know if you will be using a tree or another type of image! I can’t wait to hear all about it!
Happy Tuesday!!! I have a fabulous technique to share with you today and I’m sure you are just as excited as I am because I know you all LOVE the One Sheet Wonder Technique!!!! I just can’t get enough of this technique because it is so much fun and it is so very simple…..once you figure out the template. 🙂 hehe No worries, I have this fabulous template created for you AND a video!!!
Look at all of these cards!!!!! I was able to get 15 cards out of one sheet of the 12″ x 12″ Back to Black Designer Series Paper!!!! Love it! I also love that you can pick a color or 2, a greeting stamp set and you are all set to create! Let’s get started!!!
Of course you can pick any of your favorite greeting stamp sets or one specific greeting that you need to make lots of cards with! The colors that I used are the 2013-2015 In-Colors which are Crisp Cantaloupe, Pistachio Pudding, Coastal Cabana, and Strawberry Slush! I used the markers to color in the Back to Black Designer Series Paper on some of them!!! I love that!
Okay lets get started on the cutting on your Designer Paper first! Starting with a sheet of 12″ x 12″ Designer Series Paper, you will cut at 5-1/2″. This creates a 5-1/2″ x 12″ strip which you will then cut at the following numbers: 4-1/4″, 2-1/4″, 2″, 1-3/4″, 1-1/2″ and you will be left with a little piece that is 5-1/2″ x 1/4″. If you wanted to you could add that 1/4″ onto one of the other pieces (except the 4-1/4″ because then it wouldn’t work). Now set all of those pieces aside and pull in your leftover piece which measures 12″ x 6-1/2″. You will cut at 4-1/2″ all the way across giving you a piece measuring 12″ x 4-1/2″ and then you will cut at the following measurements: 3-1/2″, 1-1/2″, 1-1/2″, 2″, 2″, and 1-1/2 will be left. Now you can cut one of the 1-1/2″ x 4-1/2″ pieces down to just 4-1/4″ and the other one down to 4″. One of the 2″ x 4″ pieces will need to be cut in half to make Two 2″ squares. That last piece that is 4-1/2″ x 1-1/2″ needs to be cut into Three 1-1/2″ squares. All of those little pieces you cut off can be tossed or used on another project OR you can leave some of them and work with a larger piece. Now that top piece that you have left over which measures 2″ x 12″ can be used for more cards like in the set above, I cut it into Two 2″ x 4-1/4″ and the last piece is 2″ x 3-1/2″. That is how I got 15 cards. You could also use that piece as a belly band around a box or cellophane bag that you stick all of the cards in as a gift. You can do whatever you would like with that piece!!!
Now some close ups on the cards…..sorry for the long post today. I hope you are still with me! 🙂
I love the Man Cards that I created with this set, I think I could do an entire sheet of Man Cards with this technique just to get me though a few months of Birthdays!
As you can see some of the…chevron? checker?…whatever that pattern is called….I colored in with my Markers and some of them I left white!
Oh how you know I love my flowers! I colored these in with the Markers! Also, that little Coastal Cabana strip on the left side card is only about 3/4″ wide. It is a scrap piece that I had leftover from another project. Use up those scraps on simple cards like these!!!
As you can see, I didn’t color the flowers on these and they look fabulous as well!
This is the piece that was cut diagonal. You can tear it as well if you would like!
Same style of card but one is colored and one just has a border! Love them both!
I actually didn’t use that 3rd 1-1/2″ square because I added my greeting on there. You can always mix it up and cut larger pieces into little squares like this or leave it long. Mix it up and have fun with it! I love it!!!!
Here is a little Video Tutorial for you to follow along with as well! Don’t forget to subscribe to my YouTube Channel so you don’t miss out on any of the videos! Click here to subscribe!
I have 2 more sets of these fabulous One Sheet Wonder Techniques so stay tuned. If you want to see some of them that I have done in the past, click here!
Happy Tuesday!!! That means I have a fabulous technique to share with you today. While it might not require a lot of tools or create a specific effect on your project, it will create a WOW!!!!! I love One Sheet Wonder Card Sets because you can get LOTS of cards from just one sheet of 12″ x 12″ Designer Series Paper. Well today I’m going to show you how you can get about 40 cards with one pack of the All Abloom Designer Series Paper Stack. How amazing is that? Now I know 40 cards sounds like a daunting task but not when you are making multiples of the same style and when you are only sticking with a few colors.
You have seen me post about these cards over the past week. You can check out those individual posts here:
All of these cards use less than one sheet from the All Abloom Designer Series Paper Stack so that means I was able to create 4 each of these 6 cards (4 sheets of each pattern in the stack)! That makes 24 cards!!!!! Of course, all the left over scraps could be used for another card, right?
How cute are these??? All of the strips are 1/2″ wide. I started with one strip towards the middle and stuck it down. Then I just worked my way out. There is no true technique to this, just play around and stick some strips of paper down! You could do this with any scrap pieces of Designer Series Paper you have laying around! 🙂 I know you have some! Some of the cards, I stuck to a few colors and others I used all of them! After you lay a few strips down, trim the edge and you can use that piece in another spot.
I was able to create 6 cards in this style so now we are up to 30 cards from the All Abloom Designer Series Paper Stack. There is still three patterns (4 sheets each) left in the stack as well as scraps. That is where you get the last 10+ cards. You could use these to re-create some of the styles above or create something totally new. Again, after you are done using the big pieces, use the scraps for more quilt cards! Want to see this all these cards in action? Check out my Video Tutorial here! Don’t forget to Subscribe to my Channel so you don’t miss out on any future videos. HINT: More One Sheet Wonders are on the way!
One of the reasons I love this style of card making is that I knew the colors I would be working with because they are listed on the front of the All Abloom Designer Series Paper Stack so there was no guessing or wondering. I pulled out those ink pads and cardstock as well as a few of my favorite greeting stamp sets and went to work! Also, I love that I was able to create cards for all occasions – Man Cards, Girl Cards, Birthday, Sympathy, Wedding, and Just Because! Love it!!!
You all know how I struggle with Man Cards because I just love flowers, pinks, purple, and rhinestones so much! Well even though the All Abloom Designer Series Paper Stack says BLOOM in the name, I was able to create this fabulous Man Card with it! I call that a win!!!! These two patterns came from different pieces in the stack and I cut them 3/4″ wide and 4-1/4″ long. Since the paper is 4-1/2″ x 6-1/2″, I was able to get 8 strips at this size and then get 2 strips measuring 1/2″ x 4-1/4″! Love it!!! I started with a Whisper White card base measuring 4-1/4″ x 11″ and started with the bottom strip flush with the bottom and then placed the other two above it. Then I went to the top and placed the top piece flush with the top and then placed the other two below it. I stamped the greeting from Remembering Your Birthday in Island Indigo! To finish it off, I added some Linen Thread which was wrapped around twice and tied into a knot! My husband says this is the only ribbon that can be used and still call it a Man Card! 🙂
You can check out more samples (Girly Ones) using the All Abloom Designer Series Paper Stack here, here and here!
You all know how I love Birthday cards and make lots of them because I send out so many each month (gotta love a big family)!!! This card is perfect because it is gender neutral. I started off with a Crushed Curry card base and added some Bermuda Bay measuring 4″ x 5-1/4″. Then with a piece of Whisper White (3-7/8″ x 5-1/8″) and stamped the 3 Balloons from the Balloon Bash Stamp Set in the Occasions Mini Catalog! I used Crushed Curry, Bermuda Bay, and Tangelo Twist for those balloons. For the Bermuda Bay balloon, I stamped it again on a piece of scrap white and cut it out and popped it onto my card with a Stampin’ Dimensional! I love that extra little POP! Next I added a little strip of Birthday Bash Designer Series Paper along the bottom! You will adhere this first and then ink up the #HappyBirthday in Night of Navy and stamped that below the Designer Series Paper. Then you will ink up the entire image again and stamp it on a piece of scrap white and cut it out (minus the #HappyBirthday). There was no way I could cut out that bottom portion and make it look clean so that is why I stamped that directly onto my card!!! I added the HB to my card front with some Stampin’ Dimensionals and then you are ready to add this to the front of your card! You are all done. You could do this in so many different colors and styles. Do you have a scrap piece of Designer Series Paper laying around??? Of course you do! Grab that piece and the coordinating colors for your balloons and greeting! Super fabulous!!!