Beautiful Boxes!!!

Posted on

Holiday Gift Boxes, www.LaurasStampPad.com

The season of gift giving is upon us – Teacher Appreciation, Halloween, Thanksgiving, Christmas, Hanukkah and the Winter Season (people love to bake when it’s cold outside)!!! I always find that fabulous gift packaging really makes a present that much more amazing and these boxes are just that! I used some of the Kraft Gift Boxes which measure 3-1/2″ x 3-1/2″ x 2-1/2″! This is the perfect size for a gift card, cookies, trail mix, candied pecans, a little mini loaf, jewelry, nail polish/manicure set, and sooooo many more fabulous gift items! I tied the Cherry Cobbler 1″ Sheer Ribbon around the box, creating the beautiful bow! For the tag, I stamped the Merry & Bright in Cherry Cobbler. The greeting is from the Christmas Bliss Stamp Set! I am loving that set so much! The greeting is on a 1-3/4″ Square of Whisper White Cardstock. Then I brushed the edges with my Mossy Meadow Ink and Sponge Daubers. This added a little pop of the green and makes the greeting stand out! You know how I love my Sponge Daubers too! 🙂 I layered that piece on to a piece of 2″ x 2-3/4″ Crumb Cake that was punched on one end with the Scallop Tag Topper Punch! I tied the tag onto the bow with some Baker’s Twine – either Cherry Cobbler or just Whisper White! Love it!!!

If you would like to see this gift box packaging in action, check out my Video Tutorial below! Be sure to give it a thumbs up if you like it! I will be posting more gift packaging videos over the next couple of weeks so be sure to subscribe to both my blog and my YouTube Channel!

Happy Giftin’

~Laura


All Red & Green for Christmas!

Posted on

Ornaments Merry & Bright, www.LaurasStampPad.com

Do you prefer traditional red and green for your Christmas Cards? If so, this card is perfect for you!!! Those little ornaments are just adorable! I started with a Real Red card base and stamped the ornaments from the Christmas Bliss Stamp Set along the bottom of a piece of Whisper White cardstock (4″ x 5-1/4″). Since this stamp set is a Photopolymer Set it is super easy to line up those ornaments all the way across! Then I stamped the greeting from the same set in Real Red on another piece of Whisper White. I layered that onto some Sweet Taffy Designer Series Paper and that onto some more Real Red cardstock. Before adding that last layer of Real Red, I punched the bottom of it with the Scallop Edge Punch! Scallops add such a cute factor to projects! For the final touches I added some Old Olive and Real Red Candy Dots to both sides of the greeting! Adorable!!!!!

You can see more samples using the Christmas Bliss Stamp Set here and here!

Happy Stampin’

~Laura


Monster Mash!!!

Posted on

“He did the mash! He did the monster mash! The monster mash!”

Do you have that song in your head now? 🙂 You are welcome! Today I have an adorable Monster Card to share with you!

Freaky Friends, www.laurasstamppad.com

See, isn’t it just precious? This card is great for Halloween time but you could use it any time of the year for kid’s Birthdays (or adults). I know I have a few little Monsters (nieces and nephews) who would love these little monsters! All of the monsters are from the Freaky Friends Stamp Set from the Holiday Mini Catalog! I stamped them in Old Olive, Tangerine Tango, Basic Black, and Tempting Turquoise! You could do them in any color and even add googly eyes! I love googly eyes because they are just so fun! Eeee I layered my monsters onto Basic Black Cardstock and then Tangerine Tango! My card base is Tempting Turquoise. That fabulous greeting there is from the Good Greetings Stamp Set that you can earn for FREE when you have a party of $350 or more in October! There is still time to get your set for FREE! There are 19 fabulous greetings in that! I used my Word Window Punch and Modern Label Punch for the greeting so it would POP!

How many little monsters do you know that would love a card like this? Leave me a comment down below!

Happy Stampin’

~Laura


Warmest Wishes!

Posted on


Rustic Trees Christmas Bliss, www.LaurasStampPad.com

When I look at this card I see a rustic look…..am I the only one? I’m guessing because of the twine? I am not really sure. Leave me a comment down below if you agree or think I’m crazy? 🙂

Either way though I love this card and it is simple to make, especially if you are making lots and lots of them to send out to all of your friends and family! I started with a Whisper White card base and stamped the trees from the Christmas Bliss Stamp Set. It is a Photopolymer Stamp Set so you can see exactly where you are stamping and that really helped with lining up those trees. Then I took a 3″ x 5-1/4″ piece of Cherry Cobbler Cardstock and ran it through my Big Shot with the Stripes Embossing Folder. I adhered that to my card and wrapped the twine around twice before tying it into a knot. The greeting was stamped from the Christmas Bliss Stamp Set as well in Garden Green and I rounded the corners with my Corner Rounder Punch! Of course I couldn’t finish this card without some Stampin’ Dimensionals so I popped the greeting up with a few of those!

Have you started working on your Holiday Cards yet? Be sure to subscribe to my blog on the top right hand side so you don’t miss out on any more fabulous samples using this Stamp Set and others!

Happy Stampin’

~Laura


Merry & Bright!!!

Posted on

Merry & Bright Christmas Bliss, www.LaurasStampPad.com

Aren’t these cards super cute? I’m telling you, I love the blues and greens this year!!!! I used a card base of Smoky Slate for both of them and layered on some Lost Lagoon. The Designer Series Paper is from the All is Calm Paper Pack. It is the same sheet of paper – one card uses one side and the other card uses the other side! Isn’t that fabulous that you can create a similar look with the same piece of paper?!?! Love it! I added on some of the New Lost Lagoon Taffeta Ribbon. For the greeting, I stamped the Merry & Bright from the Christmas Bliss Stamp Set in Pear Pizzazz and punched it out with my Decorative Label Punch! I punched a second one in Lost Lagoon, cut it in half sideways (left to right, NOT top to bottom), and then attached the top half to the top of my greeting piece and the bottom half to the bottom of my greeting piece. That is how you get that fabulous layering effect! Simple, Adorable, and Quick!!!

Happy Stampin’

~Laura


Technique Tuesday – Halloween Wreath!!!!

Posted on

Happy Tuesday!!! You know what that means!!! I have a fabulous technique to share with you and today that is this amazing Halloween Wreath!!!

Frightful Wreath, www.LaurasStampPad.com

I love how I can have a fabulous wreath on my door for every season because Stampin’ Up has amazing kits!!! Check out my last one here! This kit comes with everything you need except a hot glue gun and a black ink pad for coloring your doilies.

Frightful Wreath Supplies, www.LaurasStampPad.com

You can see it comes with the foam wreath, the web, the black foo foo to wrap around the wreath, beads for the spider, ribbon, doilies, a sponge to color the doilies, and all the other pieces you need! I love that because it makes it super simple to just follow the directions and come up with an amazing home decor piece! BUT that doesn’t mean you have to follow the directions. I know there are a few rebels out there that like to create their own thing and that is perfectly fine as well. Now that I have assembled my wreath and looked at it each day because it on my Stamp Room door still, I have decided I’m going to change mine up. I feel like the spider is super adorable (and fake so I’m okay with him) but he blends into the black too easily. I am going to take off the greeting banner and stick the spider in the middle so he pops! Here is an upclose look at him!

Beaded Spider, www.LaurasStampPad.com

Also, I thought I would share this video in action. I’m sorry it isn’t my beautiful voice (hehehe, right) but one of the fabulous ladies at Stampin’ Up! While this kit doesn’t take that long to make, I’m sure if I made a video on it, it would be way longer than this one! 🙂

So my technique for you today is try out a kit! These kits are great to make as shown or you can add your own flare and mix it up a bit!

Happy Stampin’

~Laura


Work of Art Holiday Cards!!!

Posted on

We all know the Work of Art Stamp Set is fabulous and can be used in soooooo many ways but did you know you can use it for your Holiday Cards as well? Of course you can! Check out these amazing cads!

Work of Art Wreath, www.LaurasStampPad.com

Eeeeee I can’t help but squeal at how amazing this card is and how fabulous the Work of Art Stamp Set is. If you don’t have it already, click here for wood and here for clear and overnight the shipping (just kidding…..on the shipping part)!!! This card was created with Whisper White, Cherry Cobbler, and Mossy Meadow. I used the smaller swish image for the wreath and got the multiple shades by stamping a few times before going back to the ink pad! For the holly berries, I used my Cherry Cobbler Candy Dots from the Regals Pack. You can also color your Pearls or Rhinestones with your Cherry Cobbler Blendabilities and use them for the holly berries. Or you could use your Cherry Cobbler Dazzling Details!!!! Lots of options!

Work of Art Tree, www.LaurasStampPad.com

You didn’t seriously think there was only one way to use your Work of Art Stamp Set for the Holidays! This one uses the long swish image. I found it easiest to start at the bottom and stamp with the image half way off the paper. Ink up and move the stamp a bit farther to the left and stamp again, repeat until you are at the top of your paper! For this one I used Cherry Cobbler colored Rhinestones but you could use any of the items mentioned above as well! The greeting comes from the Bright & Beautiful Stamp Set! Love it!!!!

And to show you these cards in action, check out my Video Tutorial!!!! Be sure to give it a thumbs up if you like it and don’t forget to subscribe to My Channel so you don’t miss out on future videos!!!!


Happy Stampin’

~Laura


Technique Tuesday – Pom Pom Fun!!!

Posted on

Happy Tuesday!!! That means I have a fabulous technique to share with you and today it is making cut little Pom Poms!!!!

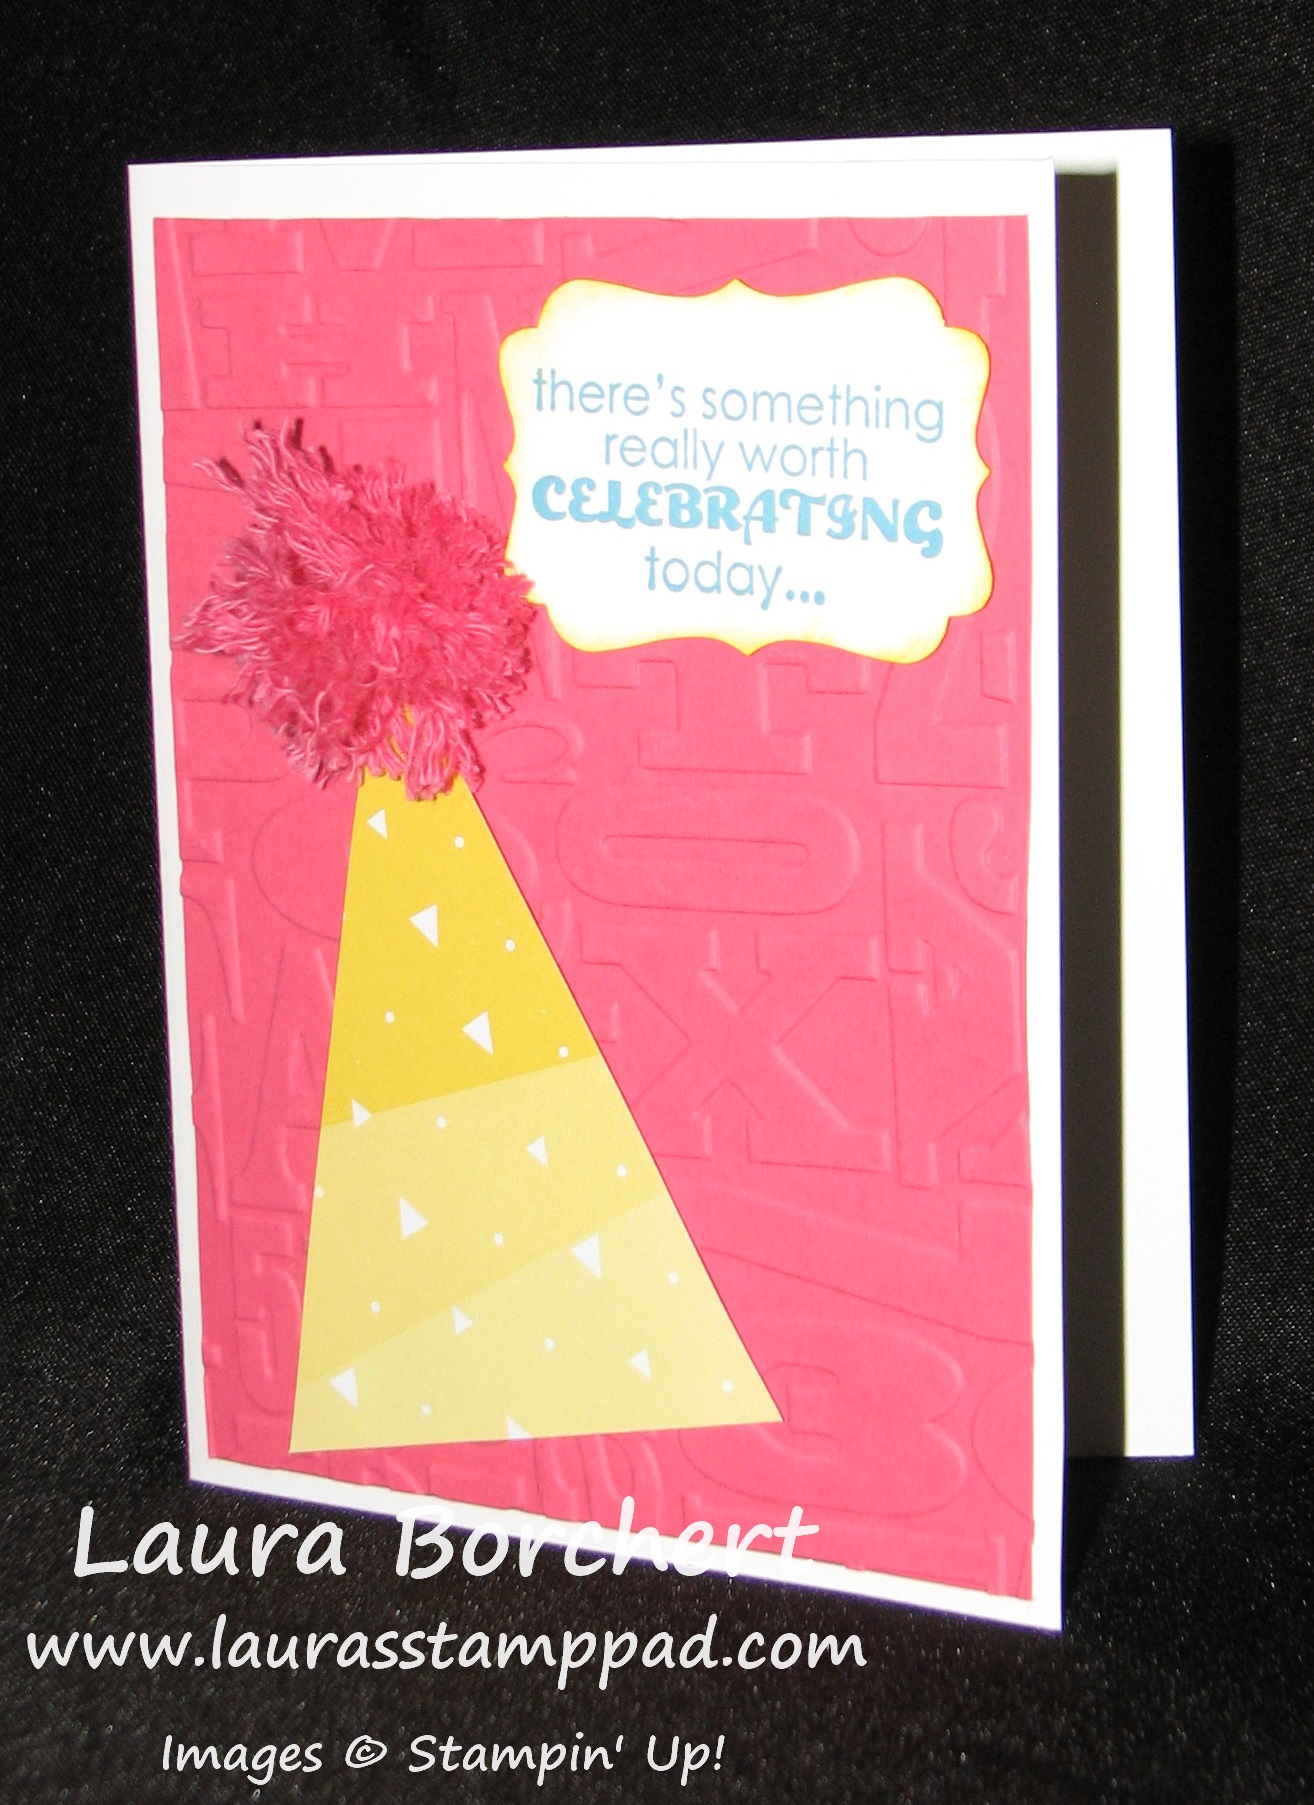
Pom Pom Party Hat, www.LaurasStampPad.com

I am loving the Pink little Pom Pom on that party hat!!!! It is just so fluffy!!! And fairly easy to make! Let’s get started!

Supplies Needed: Baker’s Twine (I prefer to use the Thick style), a fork or piece of scrap paper, and a needle

The supply list is short and a little odd but you will see! For this card, I used the Thick Strawberry Slush Baker’s Twine. Since I wanted a smaller pom pom, I just wrapped the twine around the tines of a fork about 10 times. Then you will take another piece of the twine and loop it through the middle tines and tie all of your loops together. Now you can slide the loops off of the fork and cut all of the loops. I do kind of like all of the loops too…super cute! Once you can have cut your loops, you can either stop there or take your needle and run it up each piece of Baker’s Twine to fray the ribbon into lots of smaller strands. This is the part that sometimes can take awhile and make you want to go crazy! Once you think you have done them all, you find another one. 🙂 Fluff all of the pieces and your Pom Pom is complete!!!! I attached the Pom Pom to the Sweet Taffy Designer Series Paper triangle with Stampin’ Dimensionals. I layered the party hat onto a piece of Strawberry Slush that I had run through my Big Shot with the Alphabet Press Embossing Folder! The greeting is from Remembering Your Birthday and I punched it out with my Decorative Label Punch!

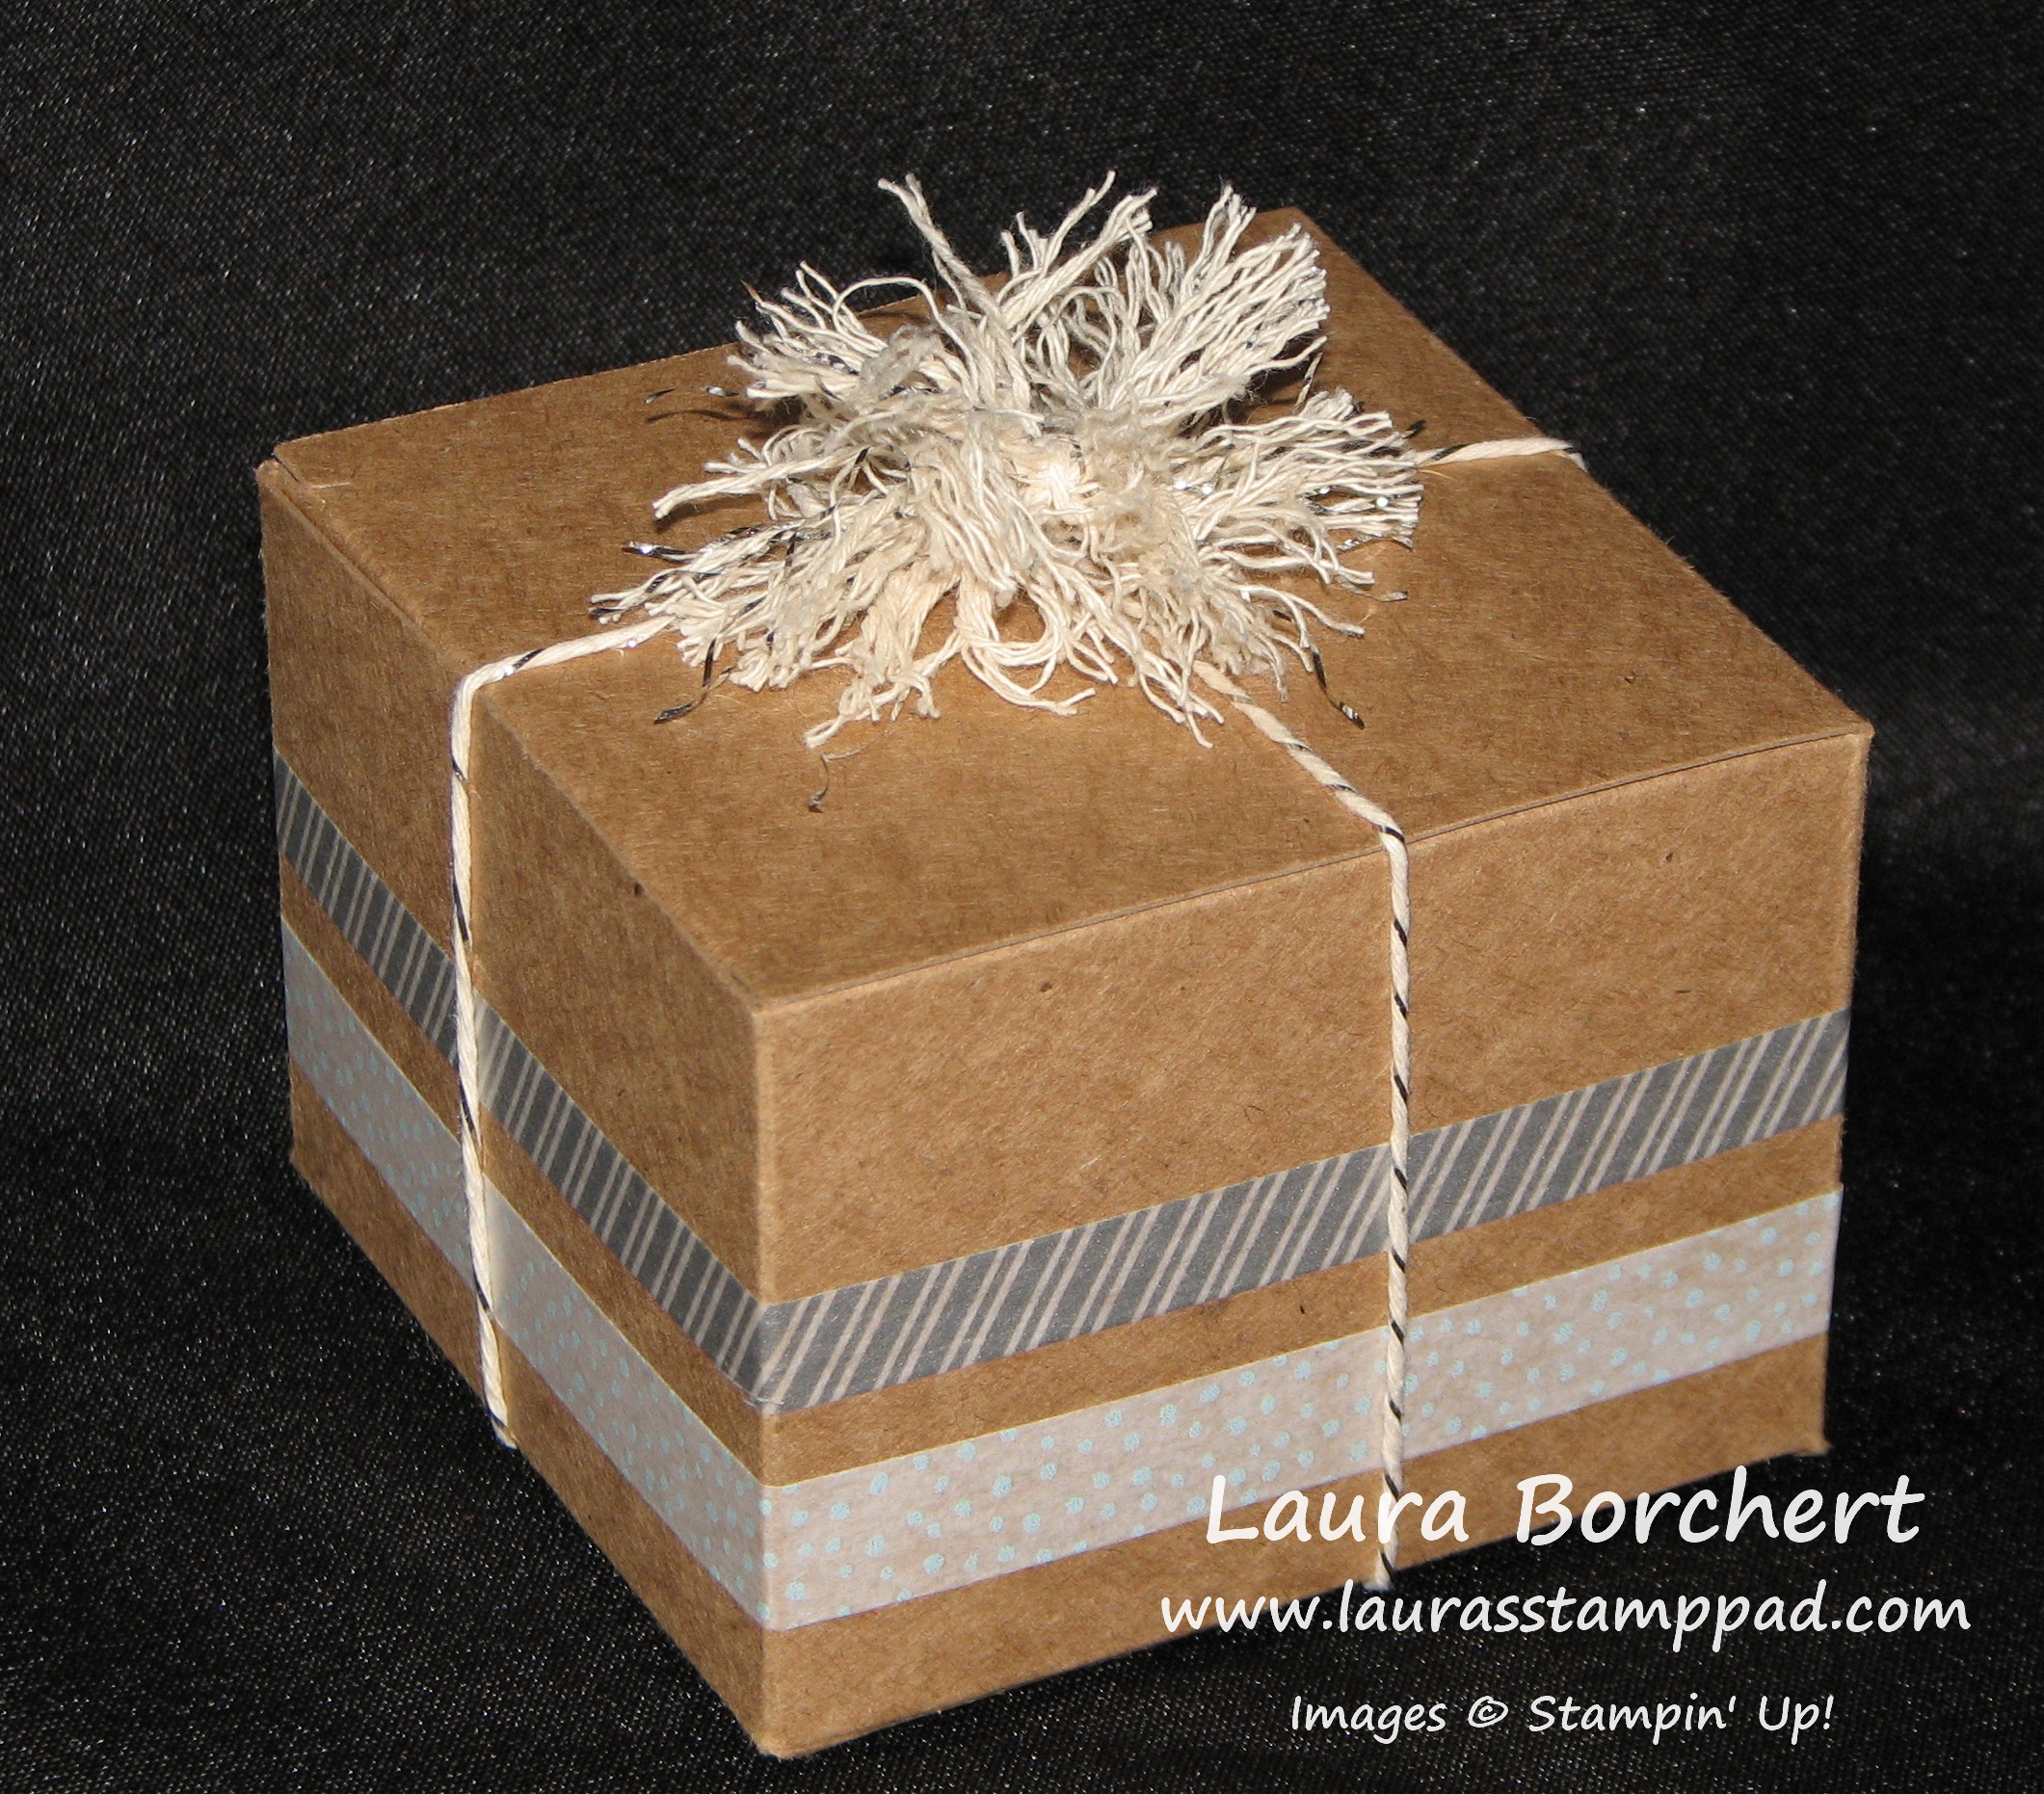
Pom Pom Box, www.LaurasStampPad.com

For this adorable gift box, I decorated it with the All Is Calm Designer Washi Tape which is super simple. Then I used the Silver Baker’s Twine for the pom pom. To make this one a little bigger, I wrapped the twine around a piece of scrap paper that was wider than the fork. Again 10 times around, slide it off and tie it in the middle, cut the loops and fray it!

To see this all in action, check out my Video Tutorial!!! Be sure to give the video a thumbs up if you liked it and don’t forget to subscribe so you don’t miss out on any future videos (like the one on Thursday 😉 )

Happy Pom Pomin’

~Laura


Christmas Bliss!!!

Posted on

Trees Merry & Bright, www.LaurasStampPad.com

I am really loving these blues and greens for the Holidays this year! Lost Lagoon and Pear Pizzazz are such warming colors and still represent winter (snowflakes and blue, trees and green). I used the Christmas Bliss Photopolymer Stamp Set! I love the images and greetings in this set and it is just $15.95! Love it!!! I used a card base of Very Vanilla and added a piece of Lost Lagoon cardstock (4″ x 5-1/4″) that I had ran through the Big Shot with my Decorative Dots Embossing Folder! For the greeting, I stamped Warmest Wishes in Lost Lagoon and the trees in Pear Pizzazz. I stamped the upper trees and then without re-inking the stamp, moved down and to the right and stamped again! 🙂 Of course, I had to add some color to the edges with my Sponge Daubers and layered this piece onto some Pear Pizzazz cardstock! Simple and Fabulous!

What are your favorite Holiday Colors – Real Red and Garden Green? Lost Lagoon and Soft Sky? Cherry Cobbler and Mossy Meadow? Leave me a comment down below!

Happy Stampin’

~Laura


Technique Tuesday – Decorative Masks!!!

Posted on

Happy Tuesday!!! You know what that means! I have a fabulous technique to share with you today! I am going to show you how to use your Decorative Masks! Also, I’ll show you how your can use your Build a Banner Masks too!!!

Ombre Polka Dot Background, www.LaurasStampPad.com

You know me and my love for the Ombre look (check out more here and here)! I just can’t get enough of it! I used my Build A Banner Polka Dot Mask for this one but you could use the Dots & Stripes Decorative Mask as well! Soft Sky, Marina Mist, and Night of Navy were the colors I sponged on with my Sponge Daubers (love)! I sponged a few rows of each and then when I went to the next darker color, I rubbed lightly over that last row of the lighter color to give it a blended look. The Happy Birthday is from the Remembering Your Birthday Stamp Set! I sponged the edges of the greeting as well and adhered that with Stampin’ Dimensionals to a 1-3/4 Circle Punched piece of Night of Navy! I ran the circle through the Big Shot with the Stripes Embossing Folder! For a little texture, I looped some Whisper White Baker’s Twine in there as well!

Stars Decorative Mask, www.LaurasStampPad.com

This one is very similar to the one above. I used my Sponge Daubers and the Hearts and Stars Decorative Mask Set! I layered that onto some Lost Lagoon and Hello Honey cardstock and added some Satin Stitched Ribbon in Lost Lagoon! I am really loving that ribbon and find myself reaching for it often! For the popped up stars, I used the small and medium stars from the Bright & Beautiful Stamp Set that is in the Holiday Mini Catalog! Of course, there is a Star Framelit so you don’t have to fussy cut those stars out! 🙂 Love it! You could do this in Red, White, & Blue or Navy and Silver would be fabulous too!

Of course, it is always easier, for me at least, to understand a technique when you see it in action. Here is a Video Tutorial for you see both the Ombre Background and Stars Decorative Mask. Be sure to give the video a thumbs up if you liked it and don’t forget to subscribe to My Channel so you never miss out when I post a new video!

Happy Maskin’

~Laura