Gather Together & Give Thanks!!!

Posted on

Gather together & give thanks…..that greeting warms my heart. I love spending time with family and friends and we always need a reminder to give thanks for the amazing blessings we have in our lives. This is just another reason Thanksgiving is my 2nd favorite holiday behind Easter!

Gather Together & Give Thanks, www.LaurasStampPad.com

This card has been a big favorite at all of my classes and of course it is….it has a flower!!! 🙂 You all know I love flowers!

I started with a Crushed Curry card base. Next I took a piece of Early Espresso (5-1/4″ x 2-1/2″) and ripped along one edge for a rough look. Be sure to rip slowly in small amounts and not just one full rip down the entire piece. I layered on a piece of the Painted Autumn Designer Series Paper (5-1/4″ x 2″). I added this piece to some Very Vanilla measuring 5-1/4″ x 4″. Next I stamped the greeting from the Painted Harvest Stamp Set in Old Olive and the dots in Lemon Lime Twist. You could stamp the dots at the end after putting it all together or you can do it now. Next, I added this to the card front!

Sunflower, www.LaurasStampPad.com

Now for the focal point of that amazing flower! I used the Painted Harvest Stamp Set and coordinating Leaf Punch (Bundle and Save 10%). The flower was stamped in Crushed Curry Ink (full strength both time) and Early Espresso for the center. I did fuzzy cut the flower which isn’t my favorite but sure looks amazing! The leaves were stamped in Lemon Lime Twist first and then Old Olive on top. Using the Leaf Punch, I punched them out! For adding it to the card front, I used Stampin’ Dimensionals to secure the leaves to the back of the flower and then to the front of the card! To finish off the card, I added a few Crushed Curry Enamel Shapes! I just love it!!!

Don’t forget you can get the Painted Autumn Designer Series Paper as part of the Buy 3, Get 1 Free Designer Series Paper Special this month!

Happy Stampin’

~Laura

Product List


Year of Cheer Suite!!!

Posted on

My favorites in the Holiday Mini Catalog are mostly from the Year of Cheer Suite!!! I just love all the bling and shine!!!

Year of Cheer Suite, www.LaurasStampPad.com

Look at all of the bling??? It’s just stunning! This card  is perfect for Thanksgiving or you could change up the greeting for any other occasion!

I started with a Whisper White card base. Next, I layered on a piece of the Year of Cheer Specialty Designer Series Paper measuring 4″ x 5-1/4″. For the greeting, I cut a piece of Whisper White (3″ x 2-1/2″) and added strips of the Year of Cheer Washi Tape. I just added a piece and ripped the ends. Before adding this to the card front, I cut a Silver Foil Snowflake in half and added it to either end.

Metallic Washi Tape, www.LaurasStampPad.com

Next, I stamped the greeting from the Paisleys & Posies Stamp Set in Basic Gray Ink onto Whisper White. I simply cut around the greeting close by so that I could pop it up over the washi tape with Stampin’ Dimensionals!!! You could use any greeting for this card based on the occasion you need a card for! I just love it!

If you would like to see the products in the Year of Cheer Suite, check out the Video Tutorial below or click here! Be sure to give the video a thumbs up if you liked it and don’t forget to subscribe if you are new. If you would like a notification when I post a new video, be sure to click the bell right next to the subscribe!!!

Happy Stampin!

~Laura

Product List


Trick or Treat Kitty!!!

Posted on

I love kitties (insert….soft kitty, warm kitty, purr purr purr) so when the Cat Punch came out I knew I wanted it. I’m not a huge Halloween person but this Trick or Treat Kitty is cute!!! I decided to get the punch and the Spooky Night Designer Series Paper and use those items for a few Halloween goodies!

Trick or Treat Kitty, www.LaurasStampPad.com

This quick and simple card is perfect for Halloween!

I started  with a Very Vanilla card base. I added a strip of Basic Black (4-1/4″ x 2-1/4″) to the left side. Next, I layered some of the Spooky Night Designer Paper on top (4-1/4″ x 2″). There are 2 sheets of the designer paper with kitties all over them in black and orange so I punched those out! It was super simple! Some of the kitties aren’t a full one but you could always use those on another project with him peaking out from a doorway or from a potted plant or on the side of a card!

Spooky Night Designer Paper, www.LaurasStampPad.com

Since some of the kitties are orange and others are black, I used the 2″ Circle Punch to punch out orange and black circles to alternate! This is a great way to use the same concept and all the kitties! I added the kitty to the circle with Stampin’ Dimensionals for a little texture. The greeting was stamped in Pumpkin Pie Ink from the Seasonal  Chums Stamp Set. I simply stamped the middle one first and then above and below without going back to the ink. To finish it off, I added some Pumpkin Pie Enamel Shapes!

Halloween Kitty, www.LaurasStampPad.com


The card will be perfect for my nieces and nephews for Halloween this year!!! I love that I can use the Spooky Nights Designer Series Paper for non-Halloween occasions as well because  the other side of the paper is more generic prints. Very versatile for all your crafting needs and for those who don’t like Halloween as much!

Do you like Halloween?? Let me know in the comments below!

Happy Stampin’

~Laura

Product List


Creating Loops of Sequins Behind Your Greeting!!!

Posted on

I have recently fallen in love with these little loops of sequins behind the greeting! It really just makes it POP and I love the little bit of bling!

Leaves of Gold, www.LaurasStampPad.com

I used the Painted Harvest Stamp Set from the Holiday Mini Catalog which is perfect for this card and SO many other fabulous ones! Stay tuned to more samples using that amazing sunflower too!

I started with an Old Olive card base! Next I took a piece of Whisper White measuring 3-3/4″ x 5″ and stamped the leaf from the Painted Harvest Stamp Set 3 times. I used Old Olive Ink for both stamped images. Since these images are textured and not solid, they really overlay perfectly! I love it! After stamping the leaves, I added the strips of the Merry Little Christmas Designer Series Paper. These strips are just 3/4″ wide and angled on each end.

Loops of Gold Sequins, www.LaurasStampPad.com

Now, it’s time for the greeting. I used the Layering Circles Framelits for the Whisper White and Gold Foil circle! I stamped the greeting from the Painted Harvest Stamp Set! After adhering the greeting to the Gold Foil circle, I flipped it over. I took a strip of the Mini Gold Sequin Trim and looped it around the backside. Using Stampin’ Dimensionals, I secured these loops in the exact spot that I wanted it. (Yes, I am an over-user of dimensionals but that’s okay!) Next I added this to the card front. Since there are always a few sequins that fall off the end, I added them around the greeting to the card front. I used the Fine Tip Glue Pen to adhere them! I just love it!!!

Product List

Happy Stampin’
~Laura

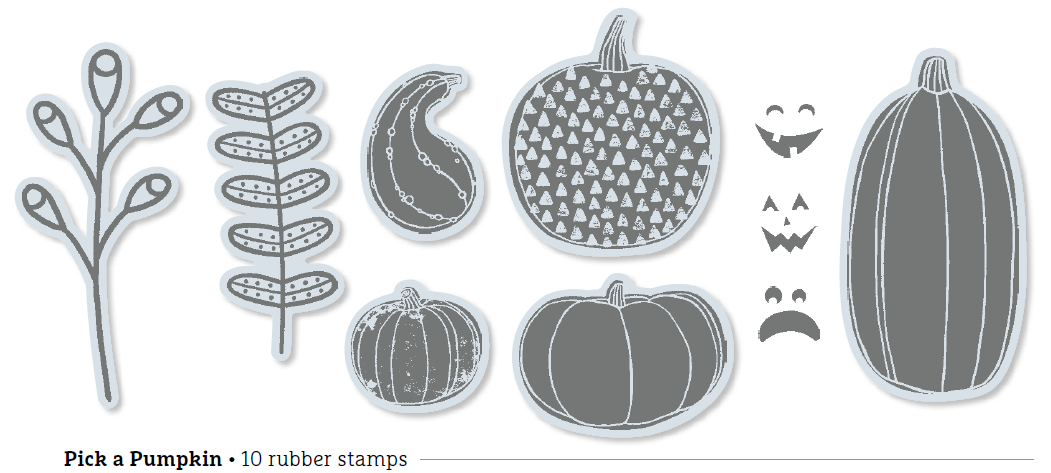
Pick A Pumpkin, www.LaurasStampPad.comDon’t forget that this stamp set – Pick A Pumpkin is the one you can earn for FREE with a $75 order! This offer is all month long. Check out all the details here!


Mini Pizza Boxes are Amazing!!!

Posted on

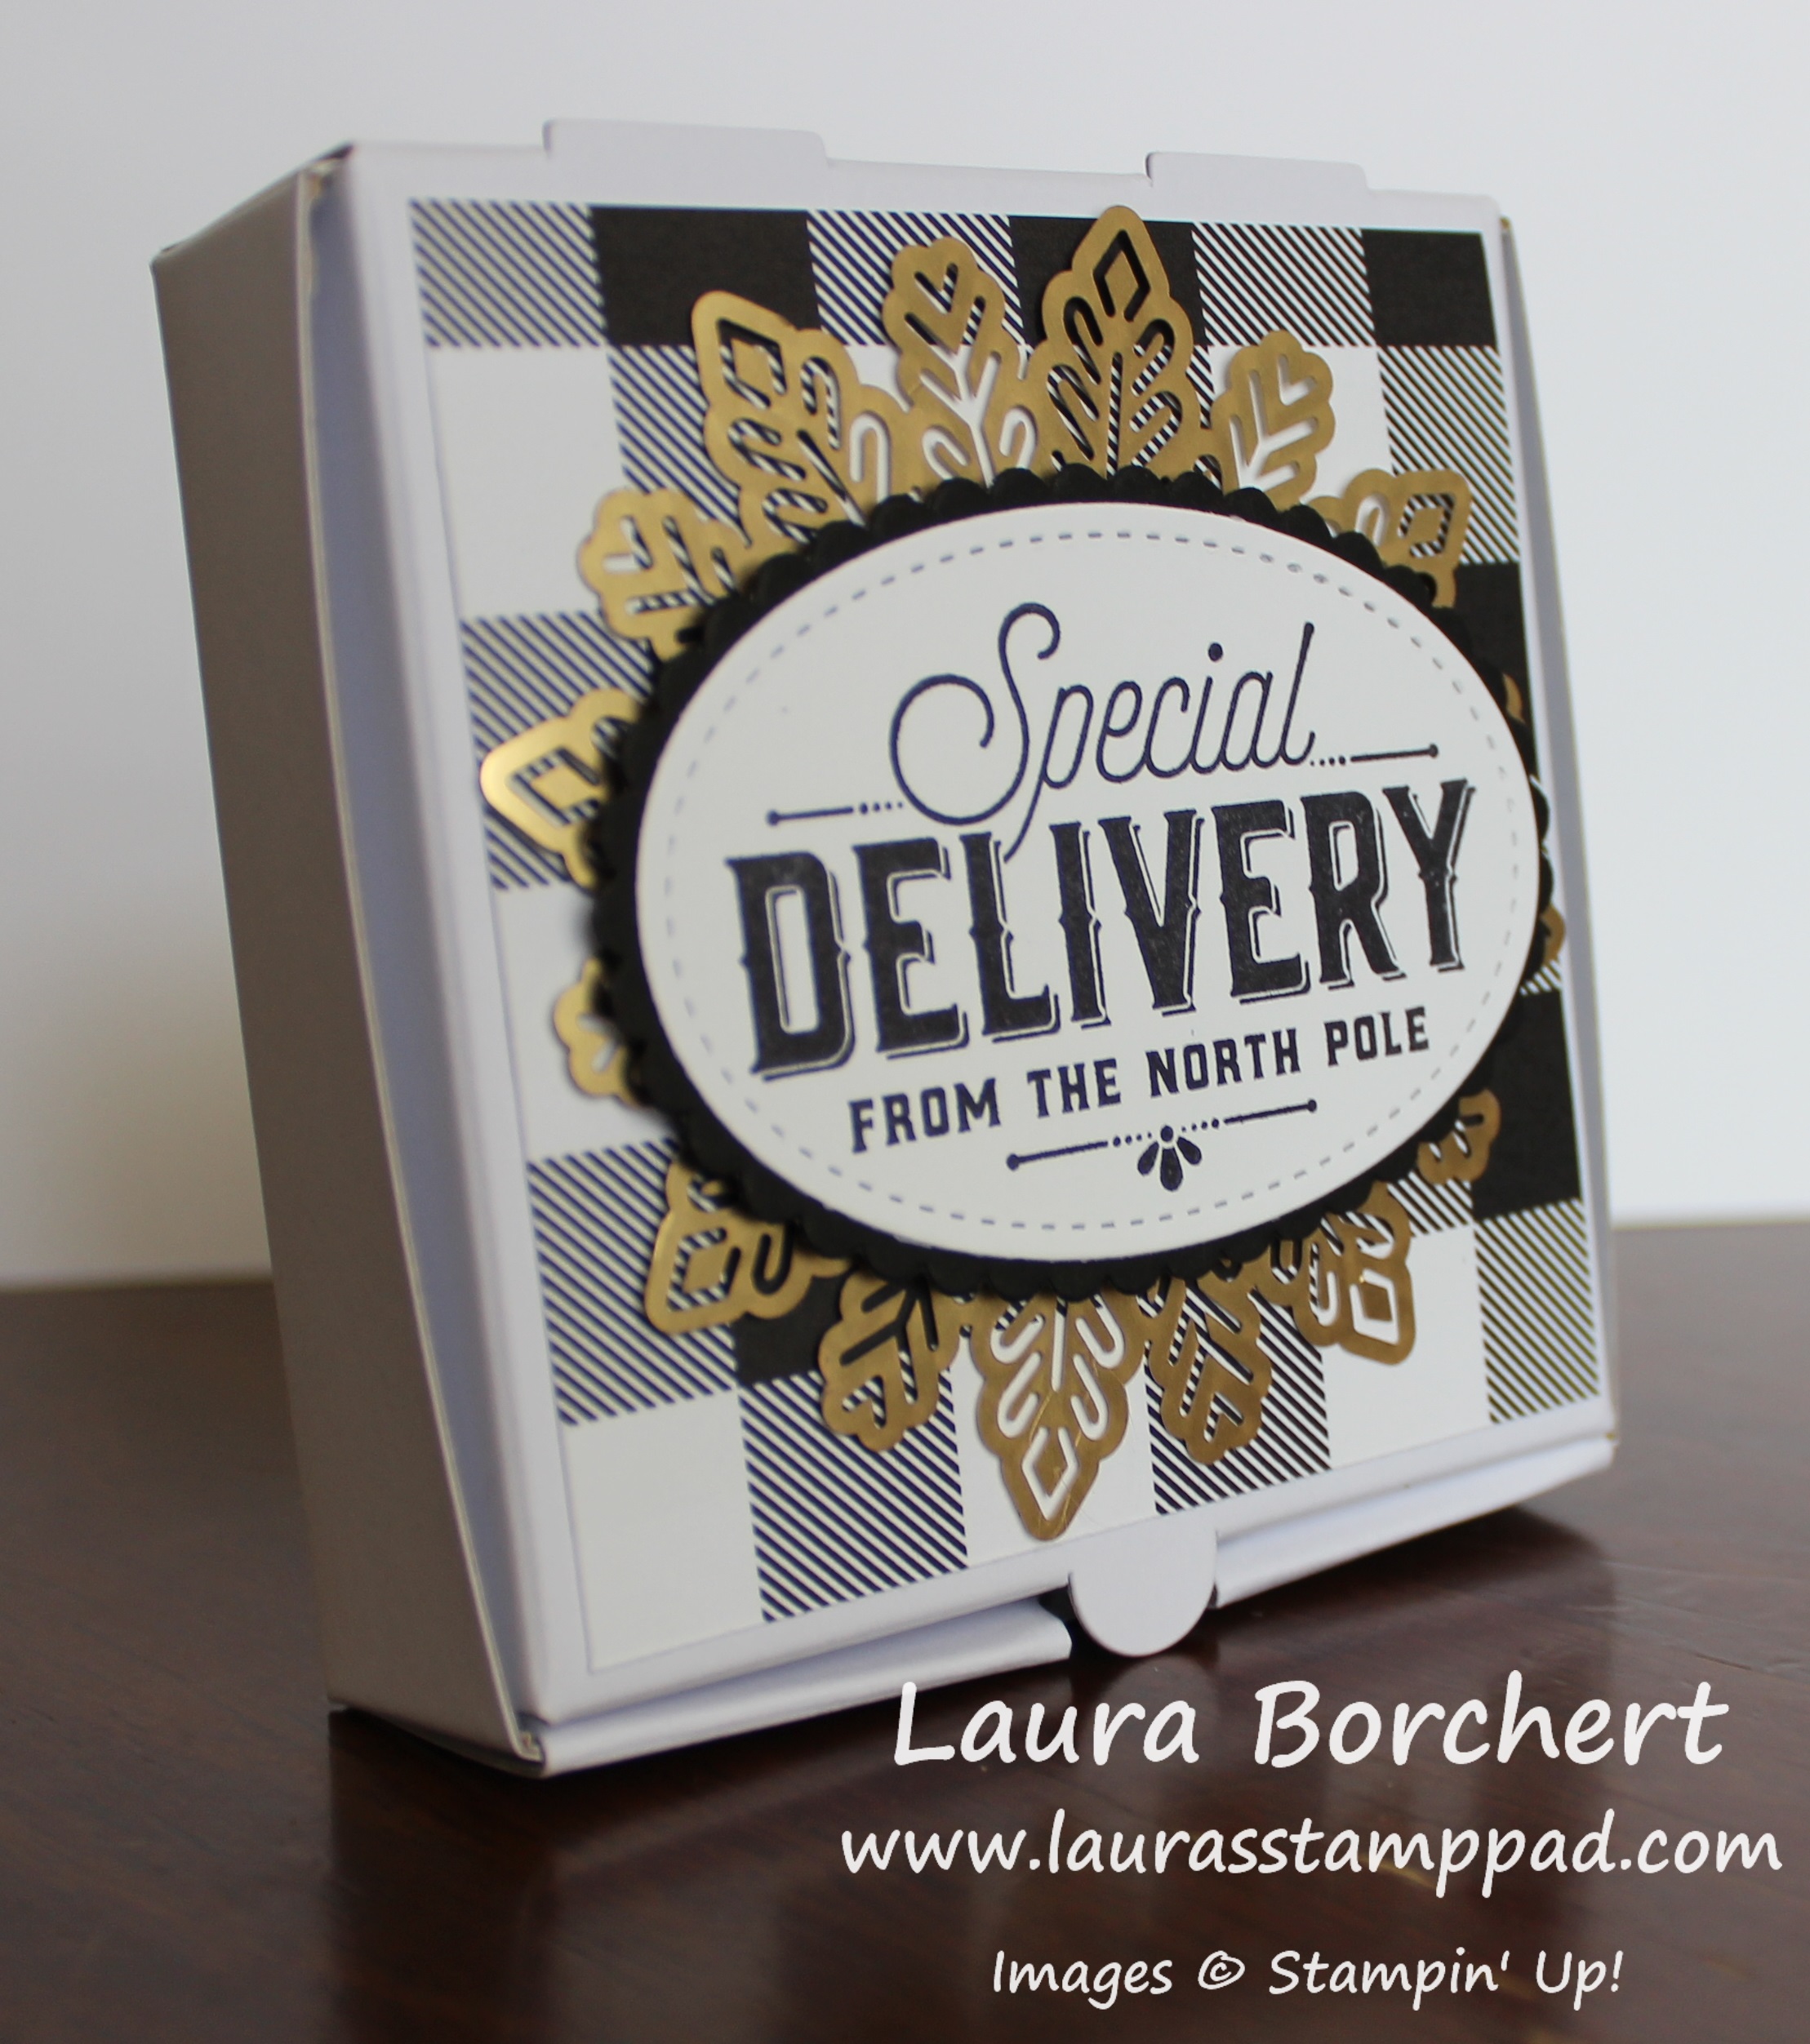
These Mini Pizza Boxes are just fabulous and adorable!!! They are in the NEW Holiday Mini Catalog and they are perfect for a gift card, cookie, or little cards /tags. Anything could go in there….and it’s calorie-free!!! 😉

Mini Pizza Boxes, www.LaurasStampPad.com

These Mini Pizza Boxes are precious and decorating them is so simple! You can either just decorate the top square or wrap ribbon all around or do a belly band!

I folded the little Pizza Box on the score lines and popped it together. Be sure the shiny, plastic side is on the inside. This is to make it food safe! Next I added a piece of Merry Little Christmas Designer Series Paper. Then I placed one of the gold Foil Snowflakes in the center. For the greeting, I used the Layering Ovals Framelits and Stitched Shapes! I love layering these 2 styles together. They are just fabulous! The greeting was stamped in the middle from the Merry Little Labels Stamp Set! There are lots of great greetings in that set to pick from! I added the greeting to the box with Stampin’ Dimensionals!

Special Delivery, www.LaurasStampPad.com

Simple switch out the Designer Series Paper and the greeting and this would be perfect for any occasion! Check out other fabulous gift packaging idea in yesterdays post! There is a video tutorial as well!

Product List


What do you all think about the new product lists that I’m showing for each project shown? Do you like this better? Let me know in the comments below!

Happy Stampin’

~Laura


Pick A Pumpkin, www.LaurasStampPad.comDon’t forget that this stamp set – Pick A Pumpkin is the one you can earn for FREE with a $75 order! This offer is all month long. Check out all the details here!


Pumpkin Spinner Card!!!

Posted on

Last week I shared with you the Reindeer Spinner Card for Christmas but today I’m sharing this Pumpkin Spinner Card!!!

Pumpkin Spinner Card, www.LaurasStampPad.com

You can check out all the instructions for this card as well as seeing a Video Tutorial by clicking here!!! I figured I wouldn’t explain it all again but I will let you know the colors and dimensions as this one is a bit different!

I started with a Pumpkin Pie card base (5-1/2″ x 8-1/2″) and layered on a piece of Very Vanilla (4-1/8″ x 5-3/8″). For the next layer, I used Cajun Crazy (3-1/2″ x 4-1/2″) and a piece of the Painted Autumn Designer Paper (3-1/8″ x 4-3/8″). There is a smaller border showing on this card with each layer. This can be modified to whichever you prefer!

Painted Autumn Designer Paper, www.LaurasStampPad.com

Now for the little pumpkin spinner part, I stamped it from the Seasonal Chums Stamp Set! This is a fun set the Holiday Mini Catalog. Next, I colored the pumpkin with Watercolor Pencils and a Blender Pen. Using the coordinating Seasonal Tags Framelits, I die cut them out (Bundle & Save 10%). Since I don’t need the tag portion, I snipped off the string hole and the fold. Now there is a front and back pumpkin. I added Fast Fuse to the back of both. Next, I placed some Copper Metallic Thread down the center and pressed it between the 2 pumpkins.

Inside Spinner Card, www.LaurasStampPad.com

For the inside on this one I really struggled with deciding what I wanted to use. I bet I spent 10 minutes contemplating using a solid cardstock or another pattern from the Painted Harvest Designer Series Paper. I settled with Soft Sky cardstock! Love it!!! Again, be sure to check out the Video Tutorial I did so you can see it all in action! Be sure to wind it up before sending it out! Then when the recipient opens the card, the little pumpkin will spin around and around!!!

Product List

Happy Stampin’

~Laura

Pick A Pumpkin, www.LaurasStampPad.comDon’t forget that this stamp set – Pick A Pumpkin is the one you can earn for FREE with a $75 order! This offer is all month long. Check out all the details here!


Watercolor Christmas Project Kit!!!

Posted on

The Watercolor Christmas Project Kit from the Holiday Mini Catalog is simple and adorable! If you want to send out hand made cards but you are just too busy this time of year, this kit is for you!

Watercolor Christmas Project Kit, www.LaurasStampPad.com

There are 20 total cards in this kit in 4 different designs. I love the gold foil envelopes as well!!! A little tip for the envelope liners is to score the lip before putting it in the envelope. When I stuck it in and just folded the lip, the foil creased all over and didn’t look as nice. I simply placed the liner in my Stampin’ Trimmer and scored it, placed it in the envelope and added a bit of adhesive to the lip to hold them together. They turned out much nicer this way!

Season Of Cheer, www.LaurasStampPad.com

I think this one is my favorite….it’s a hard decision! I love that swirl of Gold Mini Sequin Trim! This card was simple with stamping the greeting on the bottom and added the layers. I secured the sequin trim with Stampin’ Dimensionals and added it to the card front!!!

Christmas Kit, www.LaurasStampPad.com

I love the Emerald Envy stripes on this card! There were a few gold sequins that fell off when I cut the strips so I added them around the greeting with the Fine Tip Glue Pen. This was also because I had a little boo boo ink spot to cover up! 🙂 It really makes the greeting POP and I kind of wish I did it to the other one too!

Merriest Christmas Wishes, www.LaurasStampPad.comI love the little holly berries on this one. Of course, I used the Fine Tip Glue Pen for all of the “randomly placed sequins” (aka in the same spots as the photo instructions)!

Holiday Wreath, www.LaurasStampPad.com

This kit has definitely given me some more ideas on how to use sequin trim. Look how just a little strip makes that greeting stand out. I love it!!!

Product List

Of course there are actually 5 of each design for a total of 20 cards but I just showed off 2 of each! I think this is a great kit for quick and simple holiday cards. This time of year can be crazy so enjoy stamping without the fuss and pick up the Watercolor Christmas Project Kit!

If you would like to see this all in action, check out the Video Tutorial below or click here! Be sure to give the video a thumbs up if you liked it and don’t forget to subscribe if you are new. If you would like a notification when I post a new video, be sure to click the bell right next to the subscribe!!!

Happy Stampin’

~Laura


Technique Tuesday – Spinner Cards!!!

Posted on

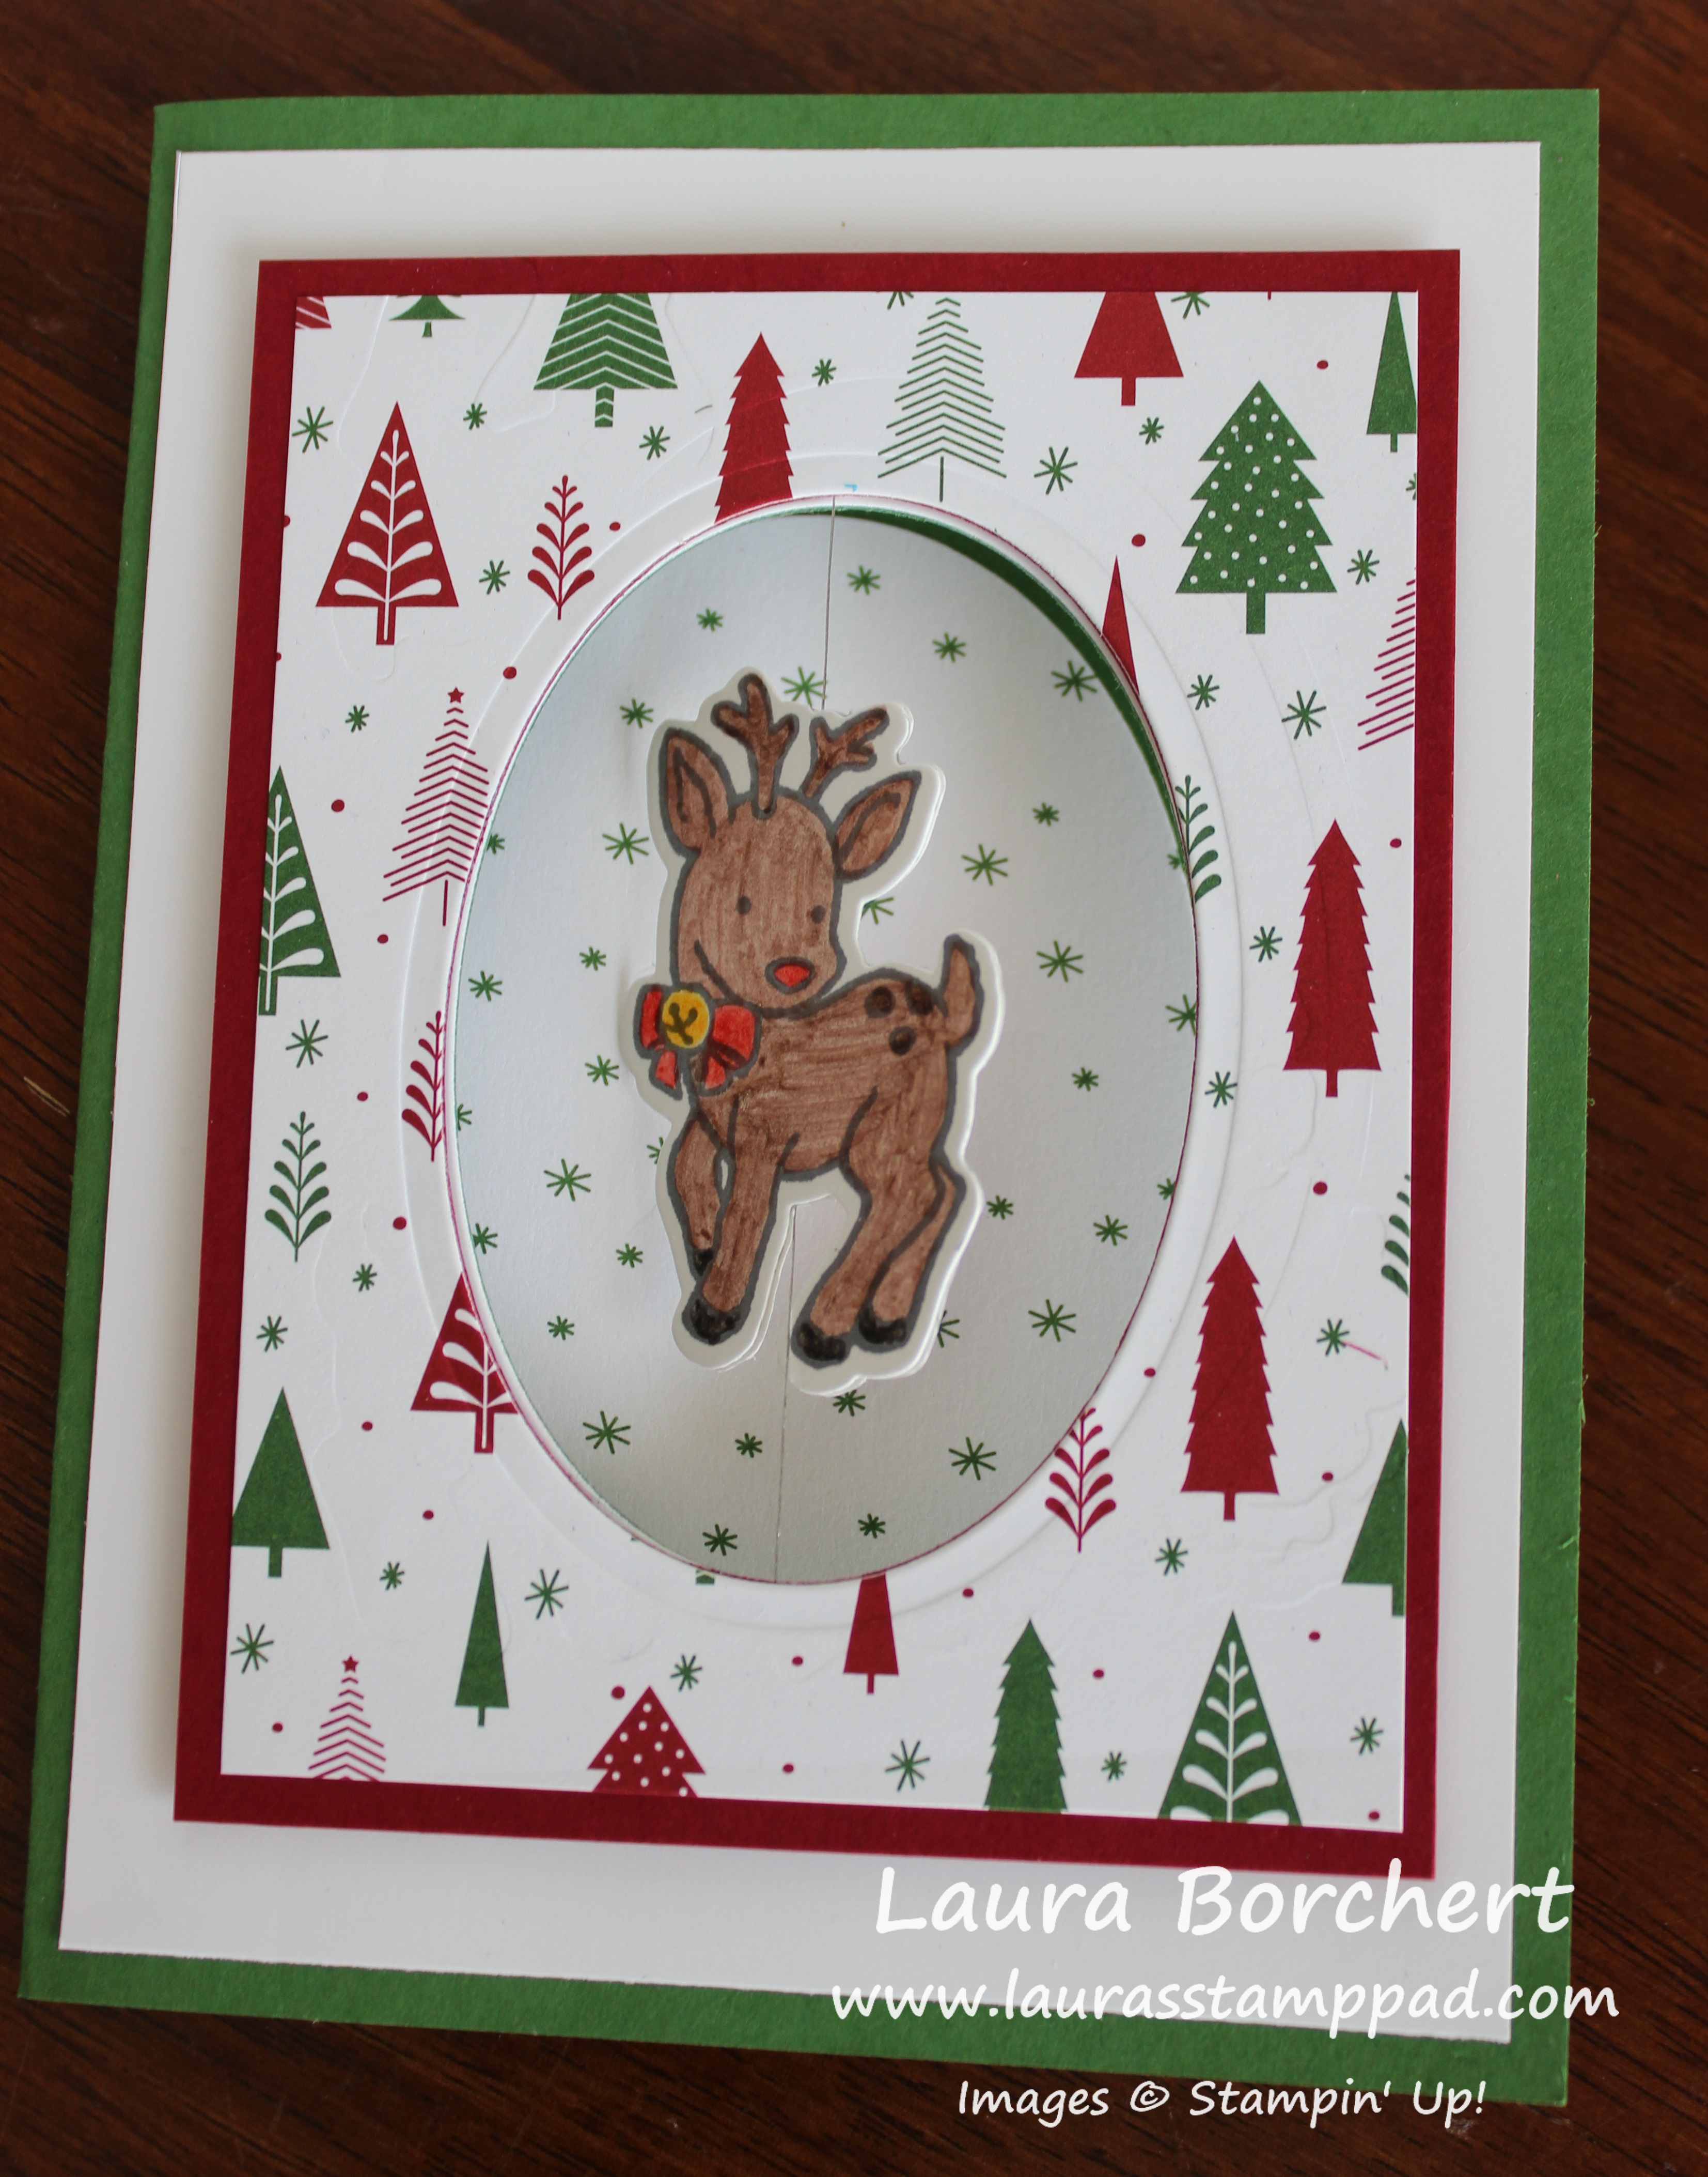
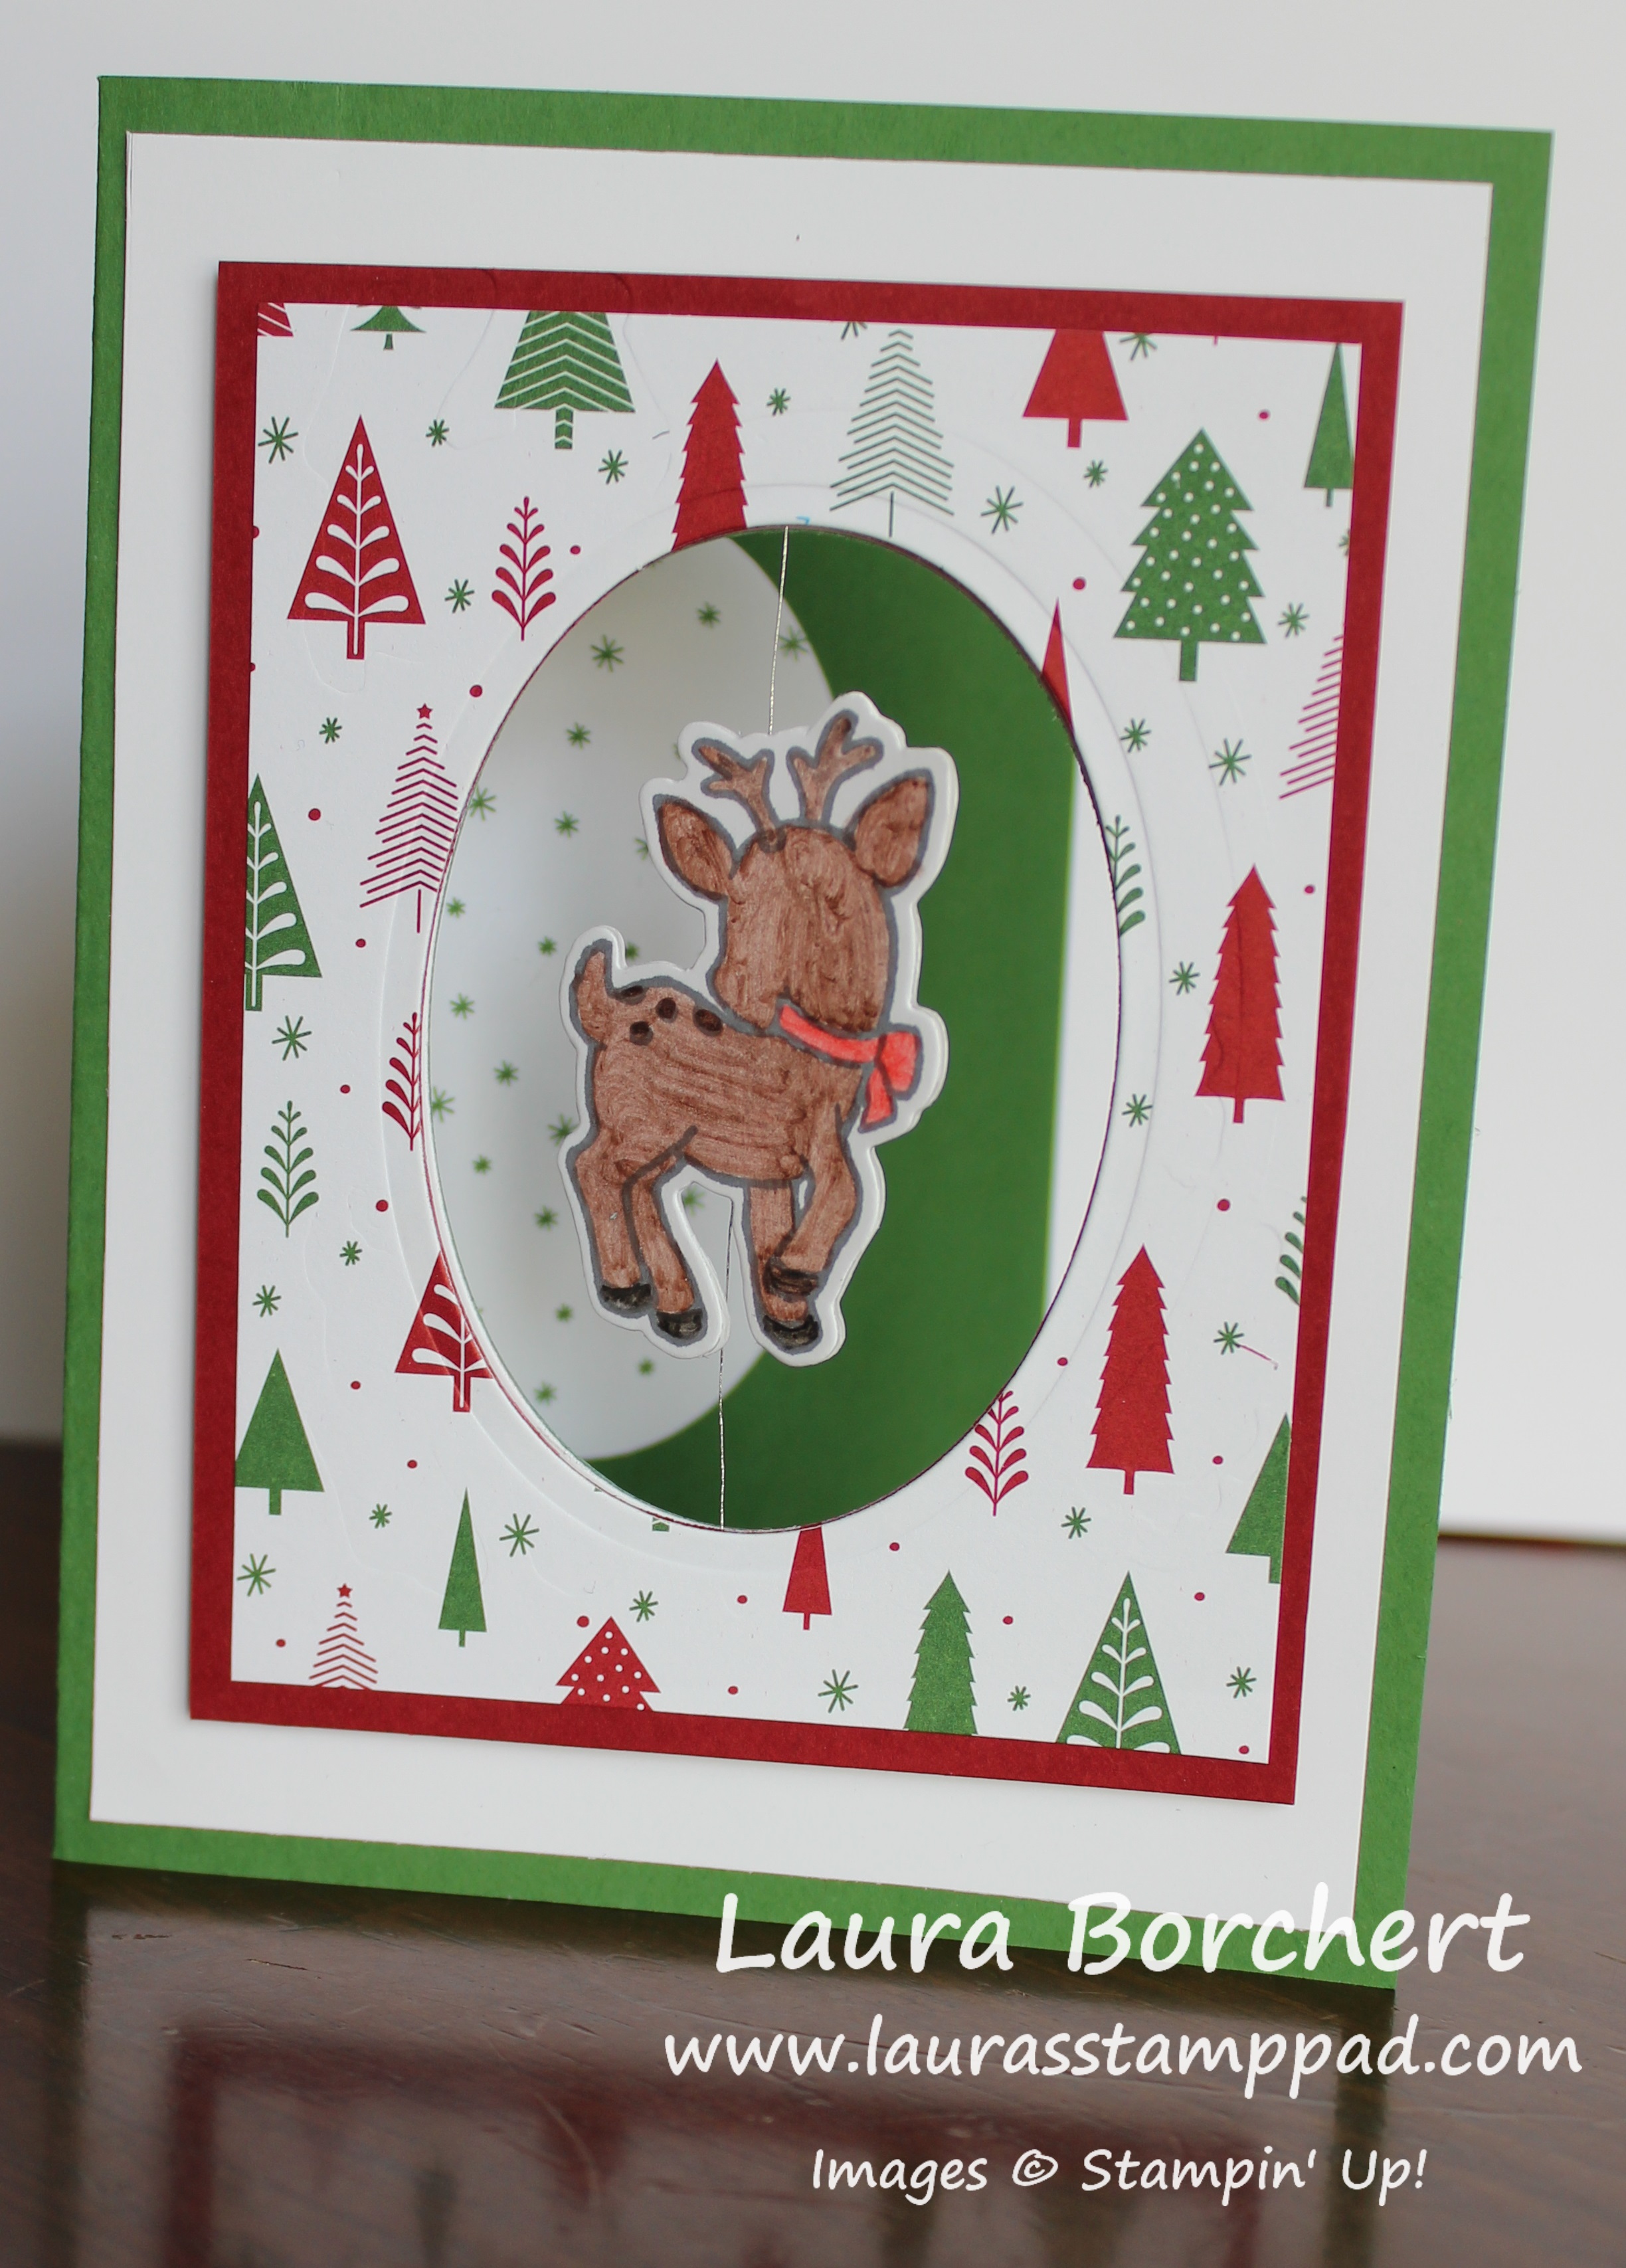
Happy Tuesday!! That means I have a fabulous technique to share with you today and it’s a major WOW!!! This spinner card is just soooo cool. Be sure to watch the video to really see it in action!

Spinner Card, www.LaurasStampPad.com

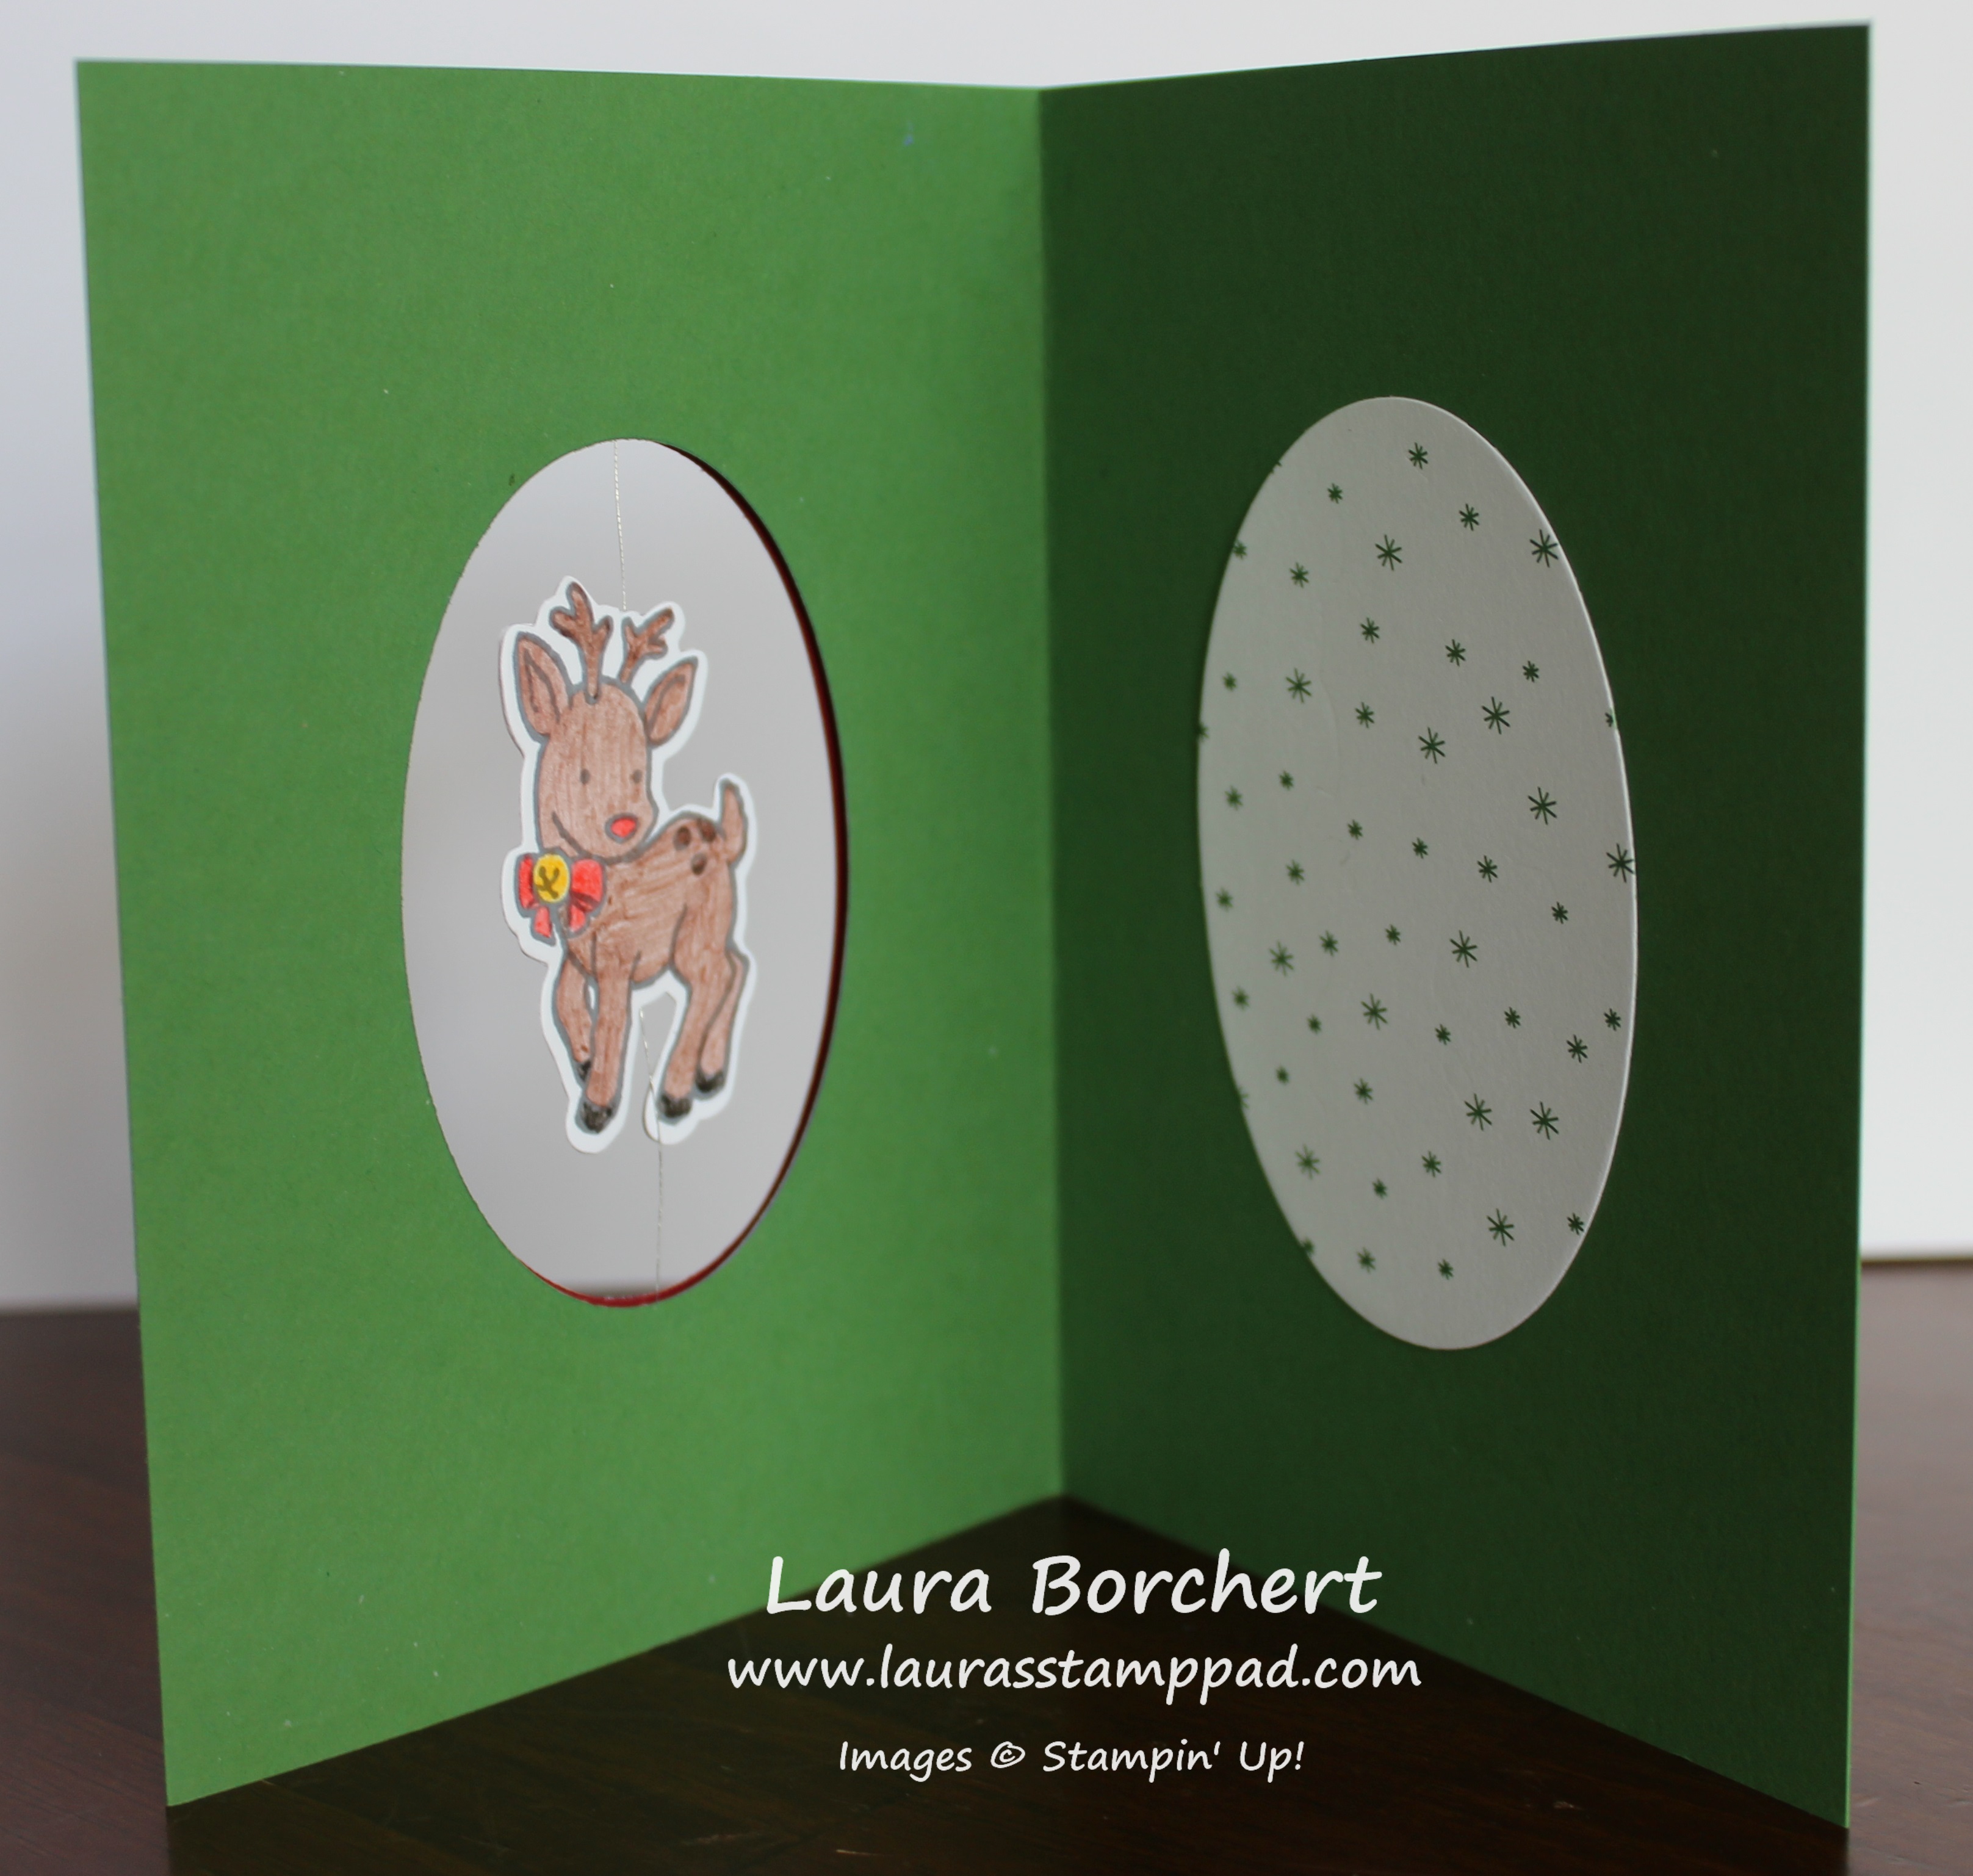
Traditional red and green and just so precious with that little reindeer!!! Thank you to Jessica Ingold for this amazing idea! Let’s get started!!!

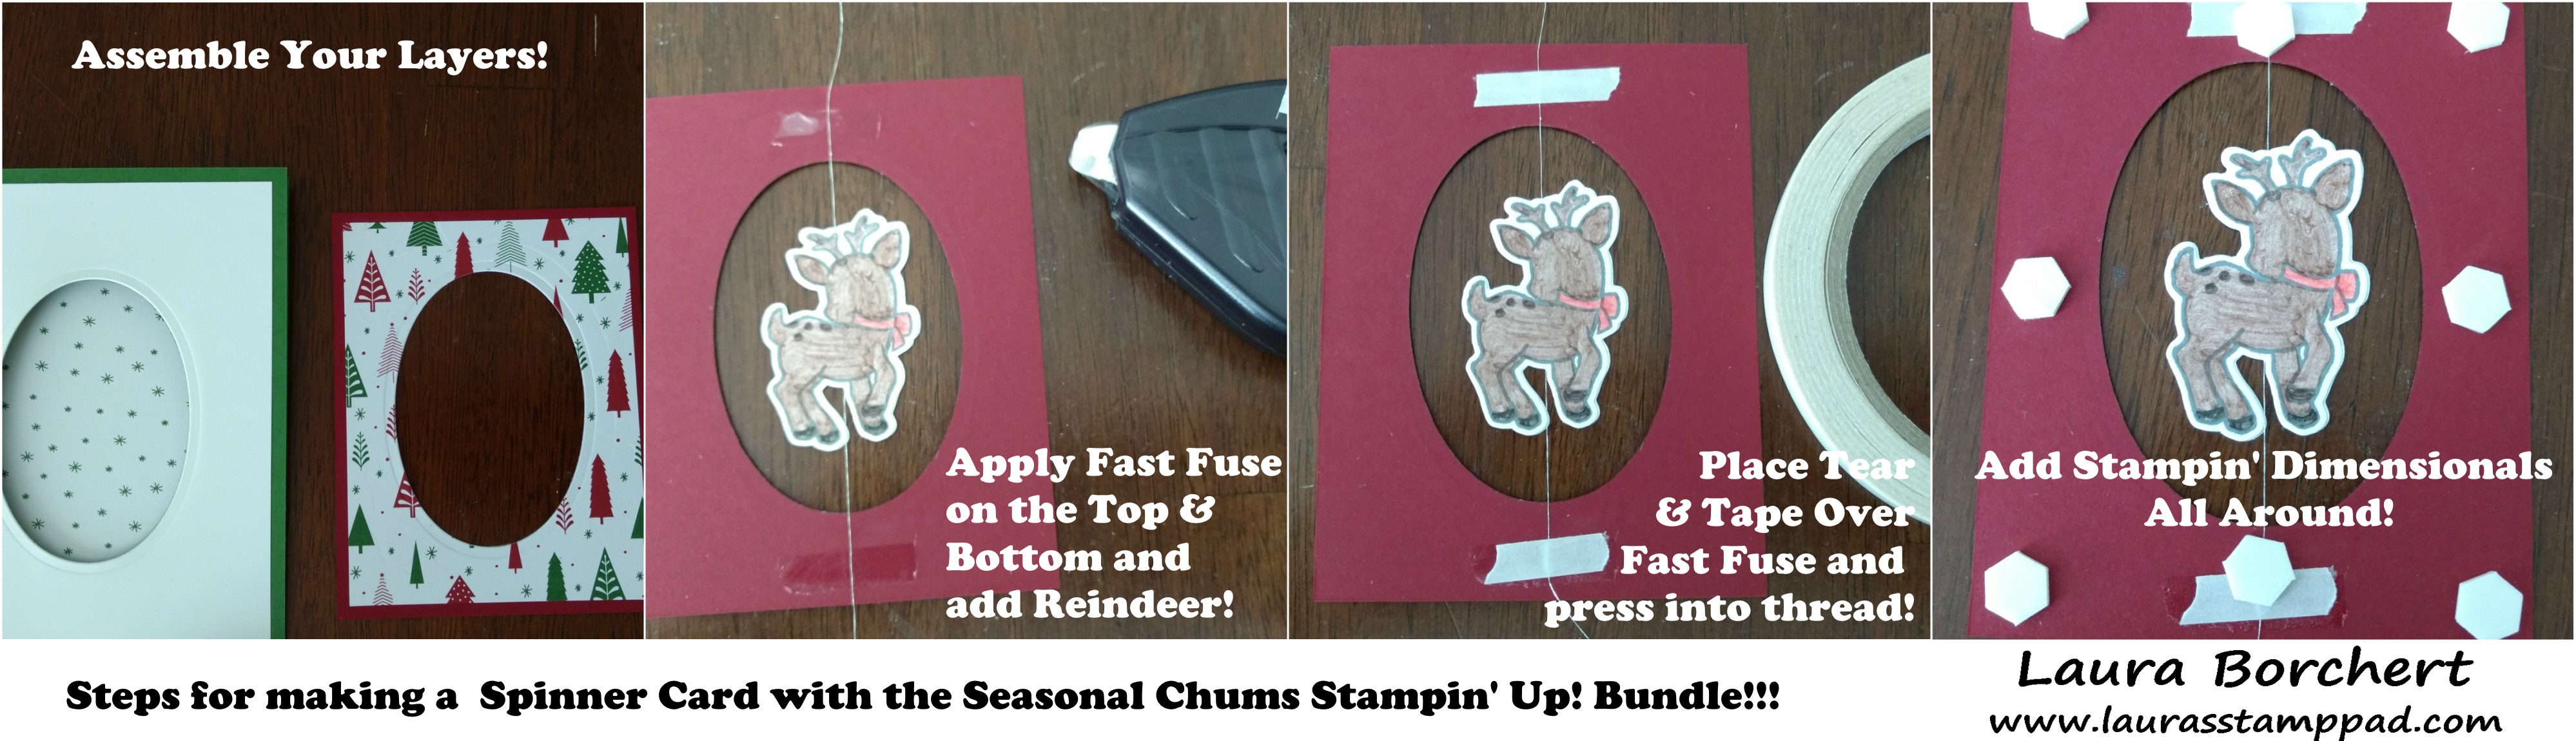
I started with a Garden Green Card Base (5-1/2″ x 8-1/2″) and layered on a piece of Whisper White (4″ x 5-1/4″). Be sure to only put adhesive around the edges and then you can use your cut out ovals for another project. Next, I layered Cherry Cobbler (3-1/2″ x 4-1/2″) and a piece of the Be Merry Designer Paper (3-1/4″ x 4-1/4″) together. Using the Layering Ovals Framelits (3rd largest), I die cut an oval in the center. I placed this on top of my card base in the center and traced with a pencil around the middle of the oval. This helps to line up the oval on the card base layers. Be sure to open the card up when running the base through the Big Shot with the Layering Ovals Framelits. Again using the 3rd largest oval for this piece as well.

Be Merry Designer Paper, www.LaurasStampPad.com

Now let’s work on that little reindeer spinner part. I stamped the reindeer from the Seasonal Chums Stamp Set from the Holiday Mini Catalog. Next, I colored him with Watercolor Pencils and a Blender Pen. Using the coordinating Seasonal Tags Framelits, I die cut them out. Since I don’t need the tag portion, I snipped off the string hole and the fold. Now there are 2 separate reindeer. I added Fast Fuse to the back of both reindeer. Next, I placed some Silver Metallic Thread down the center and pressed it between the 2 reindeer.

Spinner Card Tutorial, www.LaurasStampPad.com

Now to assemble the spinner. I added a small strip of Fast Fuse to the top and bottom of the oval (cherry cobbler layer). Next, I pressed the thread into it, making sure it was nice and tight. (Be sure your reindeer and designer paper are both in the same direction so your trees aren’t upside down.) Then I took some Tear And Tape and placed it over the thread and covering the Fast Fuse strip. Now it is time to assemble the card! I added Stampin’ Dimensionals all around the Cherry Cobbler layer and placed it on the card base, lining up the ovals.

Layering Ovals Framelits, www.LaurasStampPad.com

For the inside, I die cut the 2nd largest oval from the Layering Ovals Framelits and placed  it in the center to give a nice background for the reindeer! Now just wind up the reindeer and close the card! When the recipient opens the card, the little reindeer will spin and twirl around!!!

If you would like to see this all in action, check out the Video Tutorial below or click here! Be sure to give the video a thumbs up if you liked it and don’t forget to subscribe if you are new. If you would like a notification when I post a new video, be sure to click the bell right next to the subscribe!!!

Happy Stampin’

~Laura

Product List


Birthday Bash Recap!!!

Posted on

Happy Monday!!! I hope you are having a wonderful day whether you have today off or not! I thought I would do a Birthday Bash Recap!!! It was such a wonderful day…..month!!!

Birthday Bash Recap, www.LaurasStampPad.com

 I had a wonderful Birthday complete with unicorn cupcakes, gifts, cards, and amazing people! Each year, I like to have a Birthday Stamp Class and this year the 2 happened to fall on the same day! We all enjoyed laughs, cupcakes, and presents! These amazing ladies really know how to make me feel special!! My online special was a bit hit as well. I’m glad all of you were able to celebrate with me. Thank you so much for your sweet comments!!! I really appreciate each and every one of you!

Lil April, www.LaurasStampPad.com

Of course I have to share the card that my husband made for me!!! You can see some of his past creations (and my April version) here, here, and here! If you know me well, you know I LOVE (big puffy heart love) monkeys. Brad got me this little Beanie Boo this past spring and we named it April! I think it looks just like her! He used various Circle Punches! The greeting was stamped with the No Bones About It Stamp Set for the means! I thought he was super clever to find that! Handmade cards have so much love in them! This card melts my heart! 🙂

With the Holiday Mini Catalog out, I thought I would do a fun party showcasing all the amazing-ness! I’m doing this party online so that those who live near and far can participate! Check out the Holiday Mini Catalog here and check out the party on Facebook where I will be showcasing lots of samples, products, and fun! The party started today and will run through Wednesday. Click here to join in the fun!!!

Happy Stampin’

~Laura


Pick A Pumpkin!!!

Posted on
Happy September!!! Happy Friday and Happy Holiday Mini Catalog 2017!! There is so much fabulous stuff going on today! Of course I wanted to reveal the Pick A Pumpkin Stamp Set which is the one you can earn for FREE this month!
Pick A Pumpkin, www.LaurasStampPad.com
~  FREE PICK A PUMPKIN STAMP SET!!!  ~
PLACE an order of $75.00 or more (before shipping and tax) thru my on-line store (click here to start shopping) between now and the end of August and enter the host code VMSDHKS9 in the lower left corner when looking at your Shopping Bag! When you do this, you will earn the NEW Pick A Pumpkin Stamp Set that is in the Holiday Mini Catalog for FREE. This offer is exclusively available for orders placed through me. You will receive your Free Stamp Set in the mail. It will arrive separate from your order placed online.

 NOTE: If your order is $150 or more (before shipping and tax), you should NOT enter the code.  You will automatically qualify for the free Pick A Pumpkin Stamp Set, as well as earn Stampin’ (HOST) Rewards.
You will also earn Laura’s Loyal Stampers Stickers for this order!!! Woot Woot!
To see the entire Holiday Mini Catalog online, click here – Holiday Mini Catalog 2017! I have been playing with these products for a few weeks now and they are fabulous! I love the Year Of Cheer Suite with all that bling. Also, don’t forget to join my Online Party on Facebook where I will be showcasing lots of samples, products, and fun! The party begins on Monday. Click here to join in the fun!!!
I hope you all have an amazing, safe Holiday weekend! See you back here on Monday!!!
Happy Stampin’
~Laura