Pretty Label Punch & Layered Circles!!!

Posted on

This greeting really pops with the Pretty Label Punch and layered circles! I just love how it all coordinates together!Pretty Label Punch & Layered Circles, www.LaurasStampPad.com

Look at how that greeting just POPS! I got this idea from the talented, Mary Ellen Stites! Thanks M.E.! Let’s get started!

I started  with an Elegant Eggplant card base. Next, I took on a piece of Lemon Lime Twist (4″ x 5-1/4″) and ran it through the Big Shot in the Layered Leaves Texture Impressions Embossing Folder. A little tip with these super deep impression folders is to spritz the paper with a little water before running it through the folder. This allows the fibers in the paper to press into the folder without having those lines and creases. I added a strip of the Whisper White Classic Weave Ribbon and just tacked the ends on the back side!

Now for that fabulous greeting!!! I used the Label Me Pretty Stamp Set and coordinating Pretty Label Punch (Bundle & Save 10%). Here is a list of each layer I used:

1″ Circle Punch for top layer thank you greeting

1-1/4″ Circle Punch for the green wreath portion

1-3/8″ Circle Punch for the Wisteria Wonder layer

Pretty Label Punch for the wider floral layer

1-3/4″ Circle Punch for the Elegant Eggplant base layer

A few tips along the way. I ended up using a marker to color in the Thank You greeting because the 1″ Circle Punch still leaves a hint of that wreath around it when it is punched out. That seemed to bother me so I just inked up the greeting only and it worked better. Always stamp first and then punch it out so you can center it much easier! The colors I used were Elegant Eggplant, Lemon Lime Twist and Wisteria Wonder! I added Stampin’ Dimensionals between the Wisteria Wonder circle and floral Pretty Label Punch. Also, I used them to adhere the greeting to the card! To finish it off, I added some bling with the Gold Faceted Gems.

If you would like to see this all in action, check out the Video Tutorial below or click here! Be sure to give the video a thumbs up if you liked it and don’t forget to subscribe if you are new. If you would like a notification when I post a new video, be sure to click the bell right next to the subscribe!!!

Happy Stampin’

~Laura

Need Mittens in Alaska, www.LaurasStampPad.com

Don’t forget you can get the Smitten Mittens Stamp Set for FREE with a $75 order placed before August 31st!!! Click here for more details!


Technique Tuesday – Perfectly Line Up the Poinsettia!!!

Posted on

Happy Tuesday!!! You know that means I have a fabulous technique for you!!! Today, I’m going to show you how to perfectly line up the Poinsettia for die cutting with the Carols of Christmas Bundle! (Stamp Set and Framelits, Bundle and Save 10%)

Perfectly line up the Poinsettia, www.LaurasStampPad.com

I am loving the Tranquil Tide deep green look of this card with that little bit of gold bling! Yet, I still did a Very Vanilla base so you can write on the inside easily with any style of pen!

I started with a Very Vanilla card base and layered on a piece of Tranquil Tide measuring 4″ x  5-1/4″. Next, I took 2 strips of the Eastern Palace Designer Series Paper (1″ x 3-3/4″) and added them to the top and bottom. Now for the greeting, I used a piece of Very Vanilla measuring 3-3/4″ x 3-1/4″. I stamped the greeting and leaves in Tranquil Tide Ink from the Carols of Christmas Stamp Set. For the leaves, I rotated each one around so they looked different for each flower! Next, I added this piece to the card front in the middle!

Deck the Halls Pointsettia, www.LaurasStampPad.com

Now for the poinsettia flowers, it is important to stamp them all in the same direction to make it easier to die cut them. This took me awhile to get it all lined up so here are my tips.

Lining Up the Poinsettia, www.LaurasStampPad.com

First, I lined up the actual stamp with the one on the stamp case. I noticed that the arrow on the stamp was not in the same place as the lined up image. At least it isn’t where I would have lined it up at. So I took a Sharpie Marker and added a dot. Now each time I stamp, I make sure that blue dot is at the top of my paper. When stamping the flowers, be sure to leave a little bit of space between each one. The framelit is rather wide and it will cut into the next one if it is too close. Since there are 2 corner poinsettia framelit, I placed one on the stamp case and lined it up. Then I made 2 little marks with a Sharpie Marker on the top and bottom petal so I knew which one to grab for. This has made it so much easier to use!!!

After stamping the poinsettia in Real Red and die cutting them out, I added them to the corners of the greeting on top of the leaves. I used Mini Stampin’ Dimensionals to give some texture and pop to the card!

If you would like to see this all in action, check out the Video Tutorial below or click here! Be sure to give the video a thumbs up if you liked it and don’t forget to subscribe if you are new. If you would like a notification when I post a new video, be sure to click the bell right next to the subscribe!!! If you would like to see more samples using the Carols of Christmas Bundle (Save 10%), click here and here and stay tuned for more!

Happy Stampin’!

~Laura

Need Mittens in Alaska, www.LaurasStampPad.com

Don’t forget you can get the Smitten Mittens Stamp Set for FREE with a $75 order placed before August 31st!!! Click here for more details!


Technique Tuesday – Creating Snowy Evergreen Trees!

Posted on

Happy Tuesday!!! You all know that means I have a fabulous technique for you! I’m showing you creating snowy evergreen trees with Embossing Paste! It’s super fabulous!

creating snowy evergreen trees, www.LaurasStampPad.com

This card is so amazing! I just love it!!! The texture and snow on those trees looks so real! Eeee! 🙂

I started with a Whisper White card base. Next, I layered on Real Red (4″x 5-1/4″) and Whisper White (3-3/4″ x 5″). Using the Card Front Builder Thinlits, I die cut the double and the single tree in Garden Green. I added these to the top half of the card and then placed the Wood Textures Designer Series Paper piece over the tree bottoms.

Now for adding snow to the trees. I used 2 of the Palette Knives; one to scoop out some and one to apply it on. Since it dries so quickly, I didn’t want to leave the tub of Embossing Paste open while working. Using the second Palette Knife, I pulled a bit of the paste off and just lightly touched the edges of the tree. Just a few light dabs all over the trees is all you need! It gives that light snowy look. Be sure to tap a little in the middle of the tree so it’s all around and not just on the sides.

Embossing Paste Snow, www.LaurasStampPad.com

For the greeting, I stamped it from the Carols of Christmas Stamp Set in Real Red Ink onto Whisper White. I die cut the greeting with the Layering Squares Framelits as well as the Gold Foil layer. I added the greeting to the card with Stampin’ Dimensionals. To finish off the card, I added a Gold Metallic Enamel Star to the top of the one tree!

Greeting Layer, www.LaurasStampPad.com

I spent a long time trying to figure out how to layer the greeting. Here are some of the ideas I was playing with – Garden Green, Silver Foil, Gold Foil, or Crumb Cake! Which one would you pick? Let me know in the comments below!

If you would like to see this all in action, check out the Video Tutorial below or click here! Be sure to give the video a thumbs up if you liked it and don’t forget to subscribe if you are new. If you would like a notification when I post a new video, be sure to click the bell right next to the subscribe!!! If you would like to see more samples using the Carols of Christmas Bundle (Save 10%), click here and stay tuned!

Happy Stampin’

~Laura


Check Out The Bundle of Love Specialty Paper!!!

Posted on

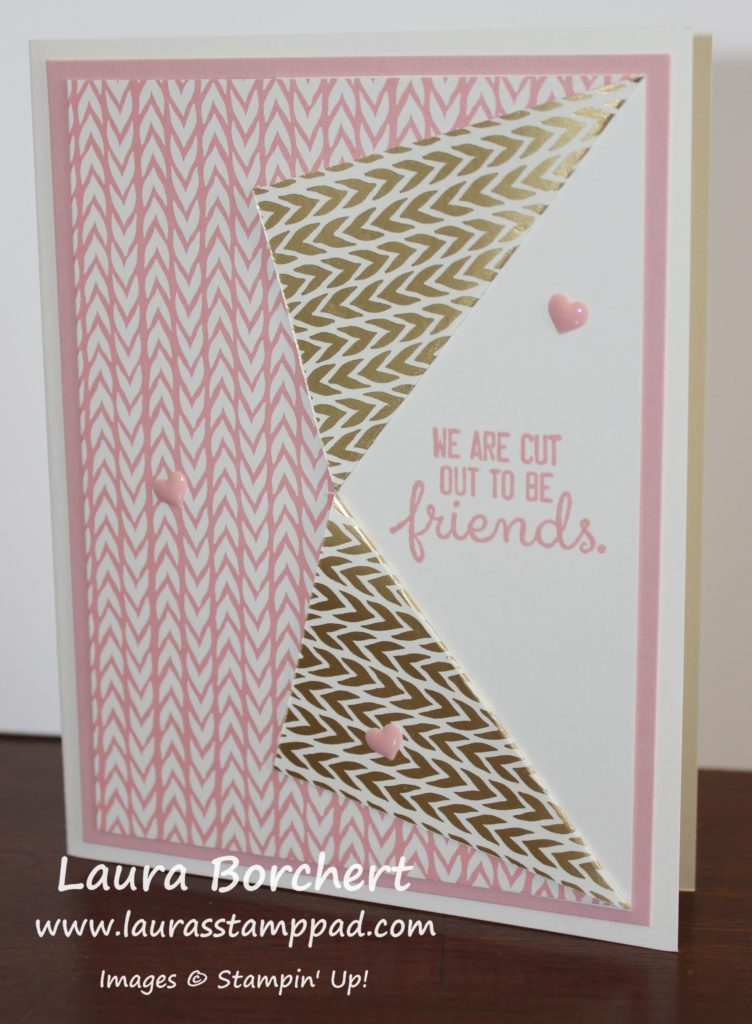
The Bundle of Love Specialty Paper is just stunning with the soft pink and blue on one side and the same pattern on the back in gold foil! It is just stunning and makes it hard to decide which side to hide. This is why I’m using it for cards that show both sides like this one!!!

Bundle of Love Specialty Paper, www.LaurasStampPad.com

You may remember this card concept from a few months ago which you can check out here! I thought of that card concept right away when looking at this designer paper so you can showcase both sides! It’s perfect!!!

I started with a Very Vanilla card base. Then for the Peek-A-Boo Designer Paper Technique, I used a piece of the Bundle of Love Specialty Designer Paper measuring 3-3/4″ x 5″. Along the long 5″ side, find the middle (2-1/2″) and cut in 2″. Now I just folded the triangles back from the corner of the Designer Paper to the that cut line! It’s as simple as that!!! I did add a little bit of Snail Adhesive to hold my triangles back and in place!

To complete the card,  I took a piece of 2-1/4″ x 5″ Very Vanilla and adhered it to the back of the Designer Paper on the side with the Peek-A-Boo. Just add a little bit of Snail Adhesive to the back of the Designer Paper, place the corners of the Designer Paper on the edge of the Very Vanilla and press down. I stamped the greeting from the Crafting Forever Stamp Set in Pool Party Ink. Next, I layered this piece onto Pool Party cardstock measuring 4″ x 5-1/4″ and added it to the card base. The Peek-A-Boo portion can be on the right or left or top or bottom depending on how you want to stamp the greeting. I finished it off with some Enamel Shapes to some texture and more pops of color!

Pink Friends, www.LaurasStampPad.com

Here I did it in Blushing Bride using the same designer paper! Which color do you prefer?? Let me know in the comments below! Also, did you notice how the greeting coordinates with the technique….cut out??? 🙂 I love it!

You can check out the video tutorial I did on this technique last time by clicking here!

Happy Stampin’

~Laura


Perfect Purple Rose Fit For A Queen!!!

Posted on

This amazing perfect purple rose fit for a queen was made for my amazing cousin who is a QUEEN! 🙂 Oh I’m so incredibly excited for her to win our local county fair pageant! Small side note: I LOVE pageants so very much…watch them, take notes, take photos with Queens everywhere I go. Yeah, all of that! Now, I’m related to one so of course I made her a fabulous card to congratulate her!

Perfect Purple Rose, www.LaurasStampPad.com

While this card looks fairly simple even with all the extra details…..it took me forever to make. I really struggle when I have something in mind for someone special and try to get it just perfect. I colored 4 different roses for this one! First it was the wrong color, then I fussy cut one out and didn’t like it, and then I ruined one putting Gold Wink of Stella on top. TIP: Gold Wink of Stella comes out rather yellow. I have used the clear and love it. For this card, since I used Gold Foil, I thought I would use Gold Wink of Stella for a gold shimmer (clear with gold shimmer). I was wrong. In the end, it came out amazing and that’s all that matters!!!

I started with a Rich Razzleberry card base. Next, I took a piece of Whisper White (3-3/4″ x 5″) and stamped the rose from the Graceful Garden Stamp Set in Basic Gray Ink. I like to use gray for that softer look! Then I colored the flower in with the Watercolor Pencils and Blender Pens. Once it dried, I went back through with the pencil to highlight the edges for more detail!

Purple Rose Detail, www.LaurasStampPad.com

Next I layered this onto a piece of Gold Foil Paper (4″ x 5-1/4″). Before layering on the gold, I used the Corner Rounder Punch to soften all of the edges. Using the Gold Metallic Edge Ribbon, I placed a piece across the card front and securing the ends to the back with Stampin’ Dimensionals. Before adding the bow, I stamped the greeting from the Happy Birthday Gorgeous Stamp Set in Rich Razzleberry Ink. Then I took another piece to make a bow and secured that on with Mini Glue Dots. This ribbon is stunning! I love it! Try it out in my Ribbon Share! Click here for details!

I adore you, www.LaurasStampPad.com

Now for the inside of the card! Since Rich Razzleberry is such a dark color, I thought I would put a piece of white in there. Well why not decorate that piece too?!?! I stamped the rose and greenery from the Graceful Garden Stamp Set. I decorated the envelope as well to match!

Rose Envelope, www.LaurasStampPad.com

It all turned out so fabulous!! I love it!!! Do you enjoy making special cards for someone or do you tend to make cards and then pick the best one for people? I’m usually the second one but every once in awhile I go all out!!! Let me know which you are in the comments below!

Happy Stampin’

~Laura


Technique Tuesday-Golden Happy Birthday!!!

Posted on

Happy Tuesday!!! Happy 4th of July!!! Today I have a fabulous technique to share with you. This golden happy birthday with roses all over is just stunning! You know how I love bling with flowers and pink!!! Amazing!

Golden Happy Birthday, www.LaurasStampPad.com

Isn’t this card just stunning with that glimmer wording?? I love it! It was fairly simple to create as well!!

I started with a Sweet Sugarplum card base. Next I layered on a piece of Berry Burst (4″ x 5-1/4″) with Stampin’ Dimensionals. Since this card didn’t have a lot of dimension, I thought I would pop up a layer! Also, Berry Burst and Sweet Sugarplum look amazing together! Finally for the top layer, I used a piece of Whisper White measuring 3-3/4″ x 5″. The first step is to die cut the greeting in Gold Glimmer Paper with the Happy Birthday Framelit. I added the greeting to the card with a Sponge and Multi Purpose Liquid Glue but the Fine Tip Glue Pen works too!

Now for the beautiful roses, I used the Happy Birthday Gorgeous Stamp Set (Bundle & Save 10%)! For the bigger rose, I used Sweet Sugarplum Ink and stamped off once for the solid image. I used full strength ink for the outline image. For the smaller rose, I used Berry Burst and the same technique! Be sure to fall off the cardstock and stamp all around so it looks like the pattern is continuous. I used Old Olive Ink for the leaves. The mini leaves, I stamped twice before going back to the ink to get that variation in color. Once I was done with the flowers, I added this to the card base!

Birthday Roses All Over, www.LaurasStampPad.com

So I thought I would share with you the first card I made which I stamped all over the background first. Then I placed the greeting on top and it just didn’t POP like I wanted. I tried again by adding the greeting first and stamping around the greeting and it worked out so much better! Just thought I would share my boo boo card as well so you could see it doesn’t always come out right the first time but we keep on trying! 🙂

If you would like to see this all in action, check out the Video Tutorial below or click here! Be sure to give the video a thumbs up if you liked it and don’t forget to subscribe if you are new. If you would like a notification when I post a new video, be sure to click the bell right next to the subscribe!!!

Happy Stampin’

~Laura


To Think Of You Is To Smile!!!

Posted on

To Think Of You Is To Smile is the perfect greeting for any occasion greeting card! I would love to get a card like this on a special occasion or just a random day!!! Wouldn’t you?!?!

To Think Of You Is To Smile, www.LaurasStampPad.com

Also, I’m loving the color combination of Melon Mambo, Lemon Lime Twist and Pool Party. Isn’t it perfect together?

I started with a Melon Mambo card base and adhered a strip of Lemon Lime Twist Fresh Florals Designer Series Paper across it. IMPORTANT TIP: Only add adhesive on the outside edges of the designer paper since the middle will be die cut. Next, I used the Eastern Medallion Framelits to die cut out that fabulous image. I placed the framelit in the middle of the designer paper strip. After die cutting, I snips the edges of the designer paper to take it off the design and reveal the Melon Mambo. This is why it is easier if there isn’t adhesive in the middle! 🙂

Now it is time for the greeting! Using the Layering Circles Framelits, I die cut out one in Whisper White and one in Lemon Lime Twist. Next, I stamped the circle and greeting from the Eastern Beauty Stamp Set onto the Whisper White circle and layered them together. Bundle the Stamp Set and Framelits together and save 10%! Using the Gold Metallic Thread, I wrapped it around my fingers about 10-15 times. Then I pulled the loops off my fingers, twisted into a figure 8, and placed them on the back of the greeting. Using Stampin’ Dimensionals, I secured the thread exactly where I wanted it to flare out! Then I peeled off the backing and place it in the center of my card!

For the final step, I placed a piece of Pool Party cardstock (4″ x  5-1/4″) on the inside front panel of the card. Be sure to only add adhesive around the edges of the cardstock so there isn’t any adhesive peaking through the die cut image.

Are you in love with the Eastern Palace Suite like I am? Let me know in the comments below. If you aren’t, check out these samples here, here, and here and then you just might be!!! 🙂

Happy Stampin’

~Laura


My Favorite Card Right Now!!!

Posted on

Happy Monday!!! I just have to share with you my favorite card right now! I don’t know what it is about this card but when I first saw it, I fell in love so hard. The idea is from the amazing, Sara Douglas and I just had to recreate it. It’s so amazing!!! I hope you love it too! My Favorite Card Right Now, www.LaurasStampPad.com

Isn’t this card just stunning with all the images coming together to make this masterpiece?? I’m loving it so hard right now!!! I really need to try different color combinations to really see what I can come up with! Let me know some combinations to try in the comments below!

I started with a Tranquil Tide card base. Next I took a piece of Very Vanilla (4″ x 4-1/4″) and die cut out the pieces in the circle with the Eastern Medallion Framelits. There are 2 different ones in the set and I just picked one; either would work! Then I started stamping with the Eastern Beauty Stamp Set (Bundle & Save 10%). First, I stamped the circle in the center and the greeting! Second, I stamped the 3 dots between each of the double triangles. I found that rotating the cardstock for each stamped image was best. When I tried to angle around myself, I ended up with the dots a little diagonal. Finally, I stamped  the triangle of dots between each of the row of dots. While it does look pretty intimidating, just do each section and take your time, it will all come together and look amazing!

Collage Stamping, www.LaurasStampPad.com

I just love how the more you stamp, the more it evolves into this cool image! Now it is time to assemble. I wanted the die cut portion to really pop out so I added a square of Tranquil Tide (3″ x 3″) to the center of the Eastern Palace Designer Series Paper (4″ x 5-1/4″). I added some Gold Ribbon around the stamped Vanilla piece with a Mini Tassel tied into the bow! Next, I added the stamped Vanilla piece to the Designer Paper with Stampin’ Dimensionals, securing the ribbon under the Dimensional. Using the Gold Vinyl Stickers, I added a border piece above and below the Vanilla stamped piece. I just love it!!!

I hope this gives you more inspiration for ways to use the Eastern Palace Suite. You can check out other samples here, here, and here!

Happy Stampin’

~Laura


Technique Tuesday-Layering the Eastern Palace Suite!!!

Posted on

Happy Tuesday!!! Today’s technique is all about laying the Eastern Palace Suite!!! I used the Eastern Medallion Framelits, Eastern Beauty Stamp Set, and Gold Vinyl Stickers for this amazing card! Isn’t it beautiful?!?!

Layering Eastern Palace Suite, www.LaurasStampPad.com

The layers and details of this card just give such a WOW factor. I know this isn’t a card I would make every day for every occasion. It’s always fun to go above and beyond for that one special card sometimes. Let’s get started!

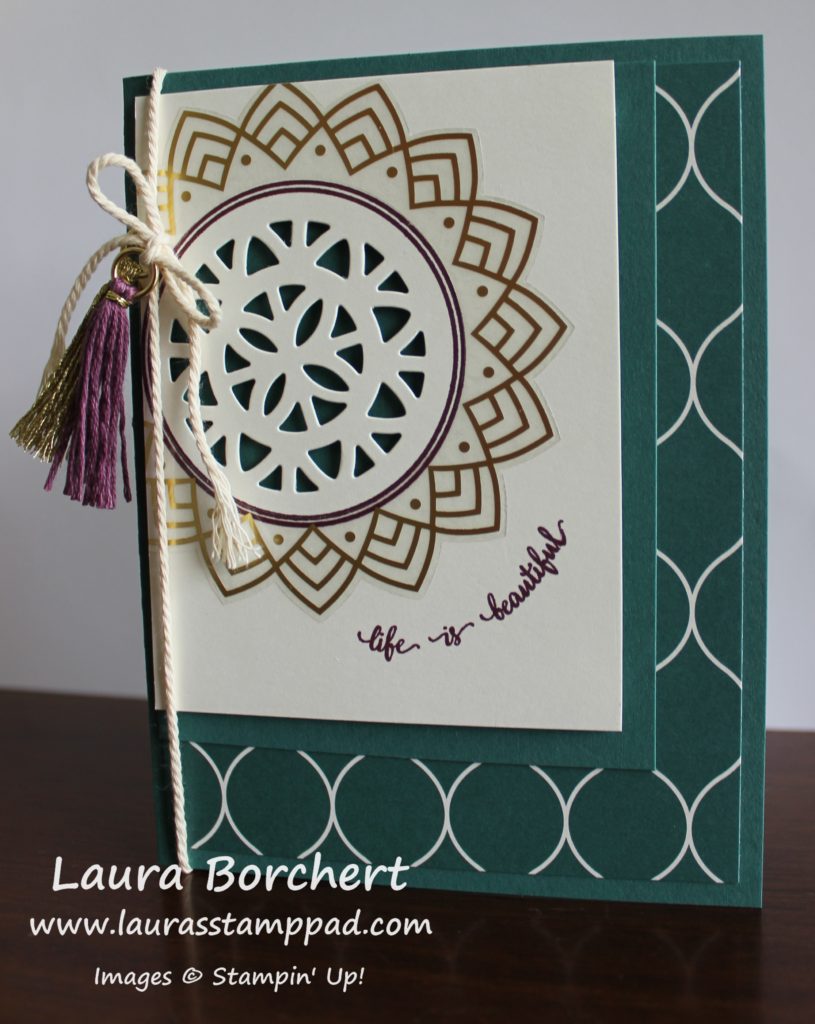
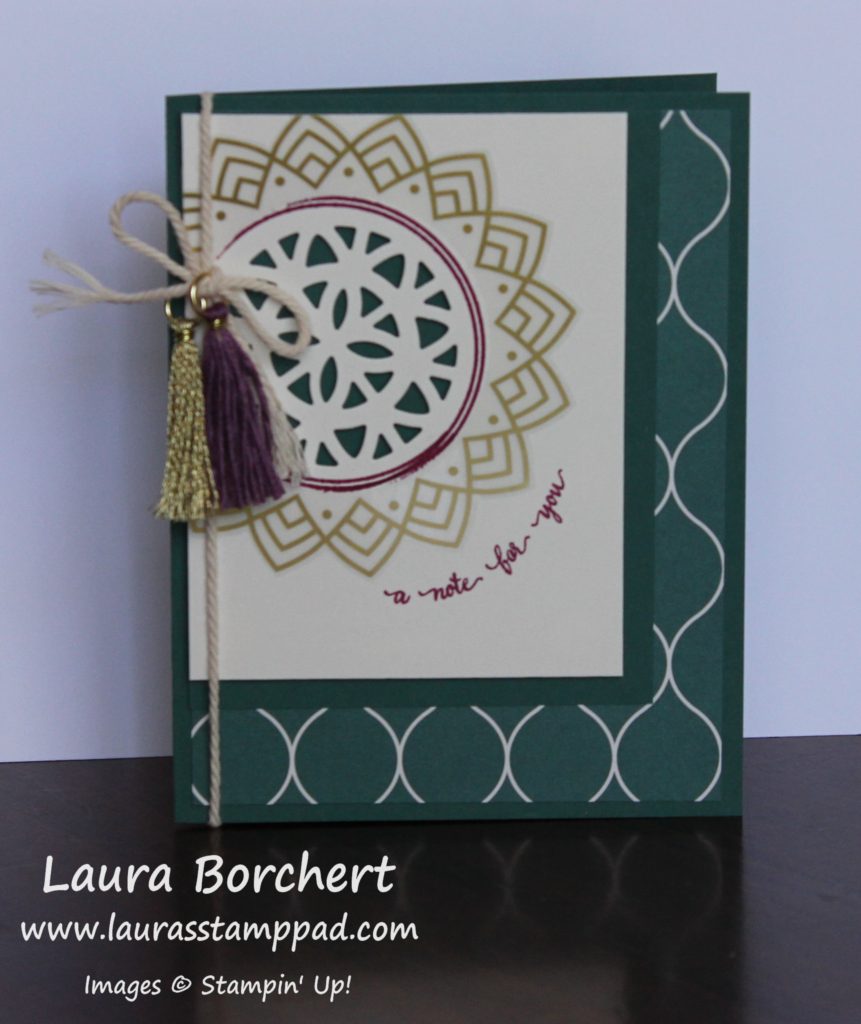
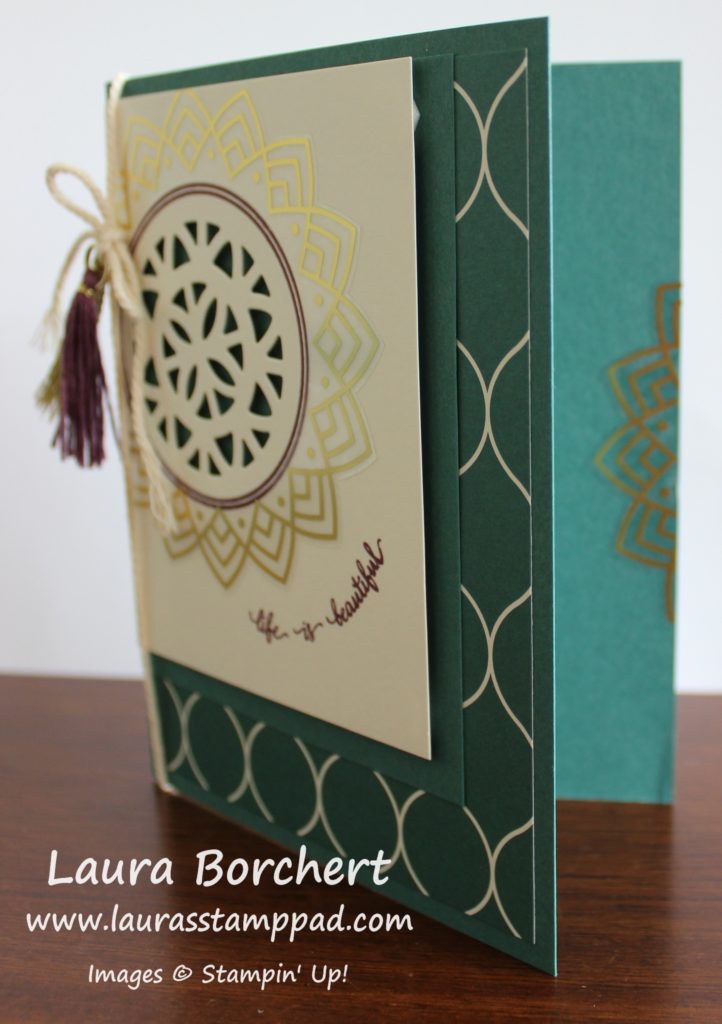
I started with a Tranquil Tide card base and layered on a piece of the Eastern Palace Designer Series Paper (4″ x 5-1/4″). Next, I took a piece of Very Vanilla (3-1/4″ x 4-1/4″) and die cut out the circle in the upper left corner. I used the small circle and the next layer up circle from the Eastern Medallion Framelits. There are lots of different cut out creations you can make. Then I stamped the circle from the Eastern Beauty Stamp Set (Bundle & Save 10%) in Fresh Fig Ink. Now it’s time to put on the Gold Vinyl Sticker. The sticker will fall off on the left side and maybe the top depending on where the die cuts were placed. It’s important to do these layers in this order because otherwise this happens…..

A Note for You, www.LaurasStampPad.com

Notice how the stamped circle is messy and missing a portion on the left hand side, that’s because I stamped after the sticker. The circle fits like just perfectly or doesn’t fit just perfectly so stamping afterwards is not a good deal. Some of the stamped image went onto the sticker and then just smeared off. By stamping first, it is underneath the sticker and peaks through perfectly no matter what! I stamped the greeting from the Eastern Beauty Stamp Set after adding the sticker so I knew it would be placed at the edge of the image!

Now it is time to assemble! I layered the stamped vanilla piece onto a piece of Tranquil Tide (3-1/2″ x 4-1/2″) flush with the upper left corner with Stampin’ Dimensionals. The dimensionals give that nice little peekaboo for the die cut potion. Next, I layered this onto the card base, again placing it flush with the upper left corner. To finish off the card, I tied some Vanilla Baker’s Twine around the card and added 2 of the Mini Tassels.

Gold Vinyl Inside, www.LaurasStampPad.com

Since I didn’t want to waste that little piece of Gold Vinyl Sticker that I trimmed off. I placed it on the inside of the card for a little decoration piece! I love it!

If you would like to see this all in action, check out the Video Tutorial below or click here! Be sure to give it a thumbs up if you liked it and be sure to subscribe if you are new! I post a new video every Tuesday and Thursday! Also, check out more samples using the Eastern Palace Bundle here, here, and here!

Happy Stampin’

~Laura


Berry Burst and Gold Were Made For Each Other!!!

Posted on

Okay so I know I love pink so Berry Burst makes me happy but I really think Berry Burst and Gold were made for each other! I’m also more of a silver girl that gold too but this card is just stunning!!! 🙂

Berry Burst and Gold Were Made For Each Other, www.LaurasStampPad.com

Isn’t this card just stunning?!?! It is super simple to create too which is just icing on the cake….cupcake! Let’s get started on this beauty!

I started with a Very Vanilla card base. Next, I took a piece of Berry Burst measuring 3-1/4″ x 3-1/4″ and die cut the flower image from the Eastern Medallion Framelits in the center. Then I placed one of the flowers from the Gold Vinyl Stickers pack in the center. One other thing that I did before layering this onto the Gold Foil was pop each of the petals forward. Of course this will lay flat again once they are in an envelope but this helps make them shine a bit more! Using Stampin’ Dimensionals, I popped up this layer on Gold Foil Paper measuring 3-1/2″ x 3-1/2″. Next, I added this to the card base centered at the top!

For the greeting, I really struggled with popping it up and going all out or doing something simple. I went with simple and I like it! I stamped the greeting from the Eastern Beauty Stamp Set in Berry Burst Ink. The card did need a little more than just that greeting so I added some more Gold Vinyl Stickers. Gold Enamel Shapes would probably look fabulous as well!

This card is simple and stunning! I just love the colors and texture! What color combination do you like to use with Gold? Or Silver? Let me know in the comments below! I love Silver and Navy!

Don’t forget about the Double Laura’s Loyal Stampers Stickers for all online order this week using the Hostess Code: 2GH4Z9WH. This offer ends on Friday! Click here to start shopping!

Happy Stampin’

~Laura