March 2017 Paper Pumpkin – Bunny Buddies!!!

Posted on

You all know I LOVE Paper Pumpkin because of the fun surprise each month. The March 2017 Kit – Bunny Buddies is soooo amazing! Even more than I originally thought…..look at everything I made!!! Don’t forget today is the last day to sign up for the April Kit! There is a free gift in there to celebrate Paper Pumpkin’s 4th Birthday! I can’t wait to see what it is!!! Click here to sign up TODAY to get the April kit!

Bunny Buddies, www.LaurasStampPad.com

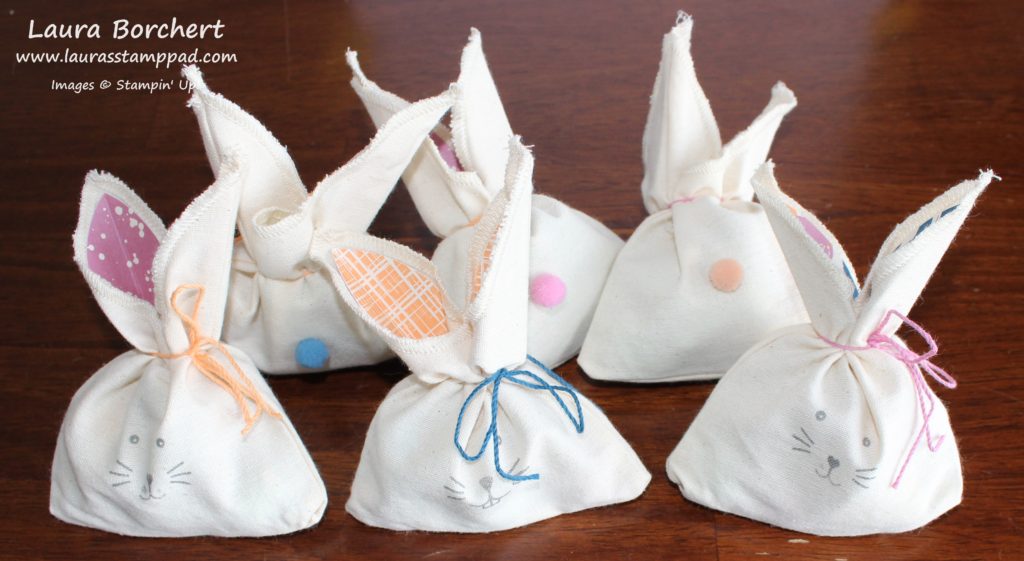
The kit came with all these amazing goodies to make 9 treat bags and 9 mini cards with envelopes. Bunnies are the theme which is perfect for Easter and Spring. The stamp set had lots of fun greetings so you could mix it up. Check out the reveal of the kit here! I made the 9 little bags for my nieces and nephews with candy inside! I didn’t add the little clothespin and greeting because I figured they wouldn’t care or even notice.

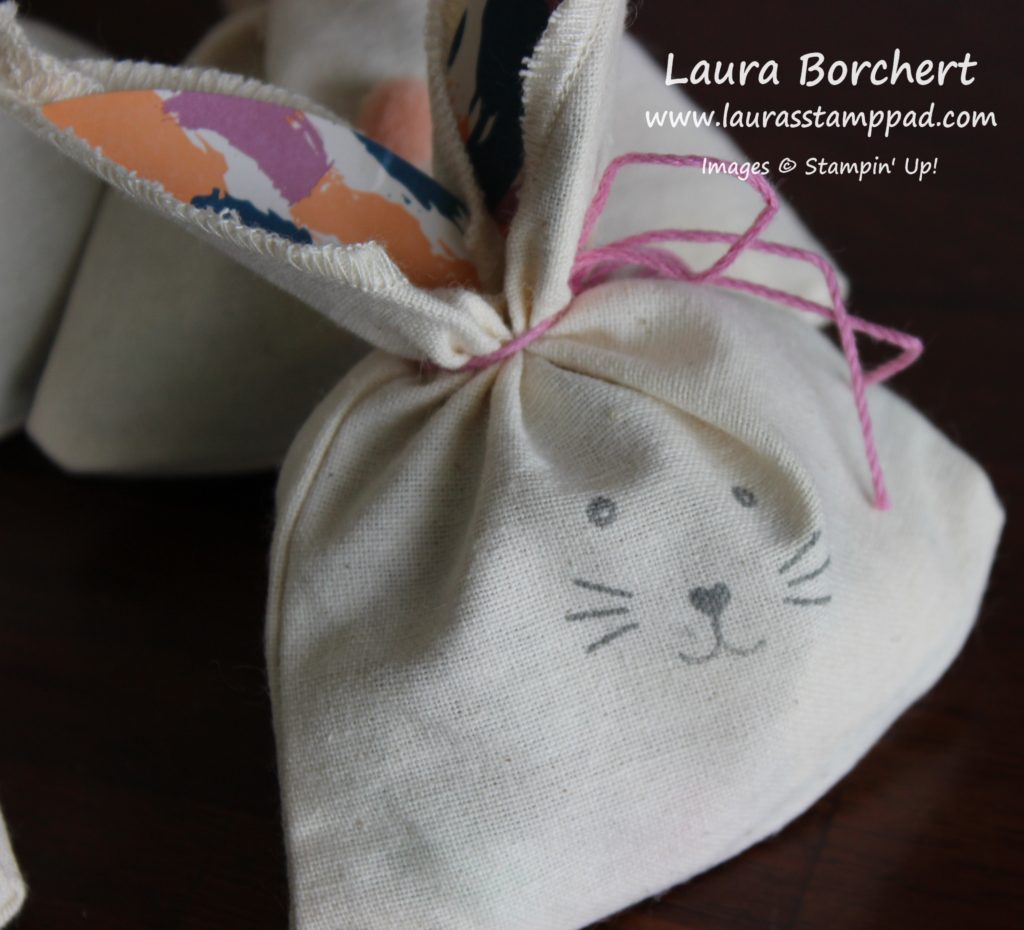
Easter Bunny Treat Bags, www.LaurasStampPad.com

Look how adorable these are!!! TIP: Press lightly with the stamp in the ink pad and onto the canvas bag or you will end up with a little extra gray than you anticipated! 🙂

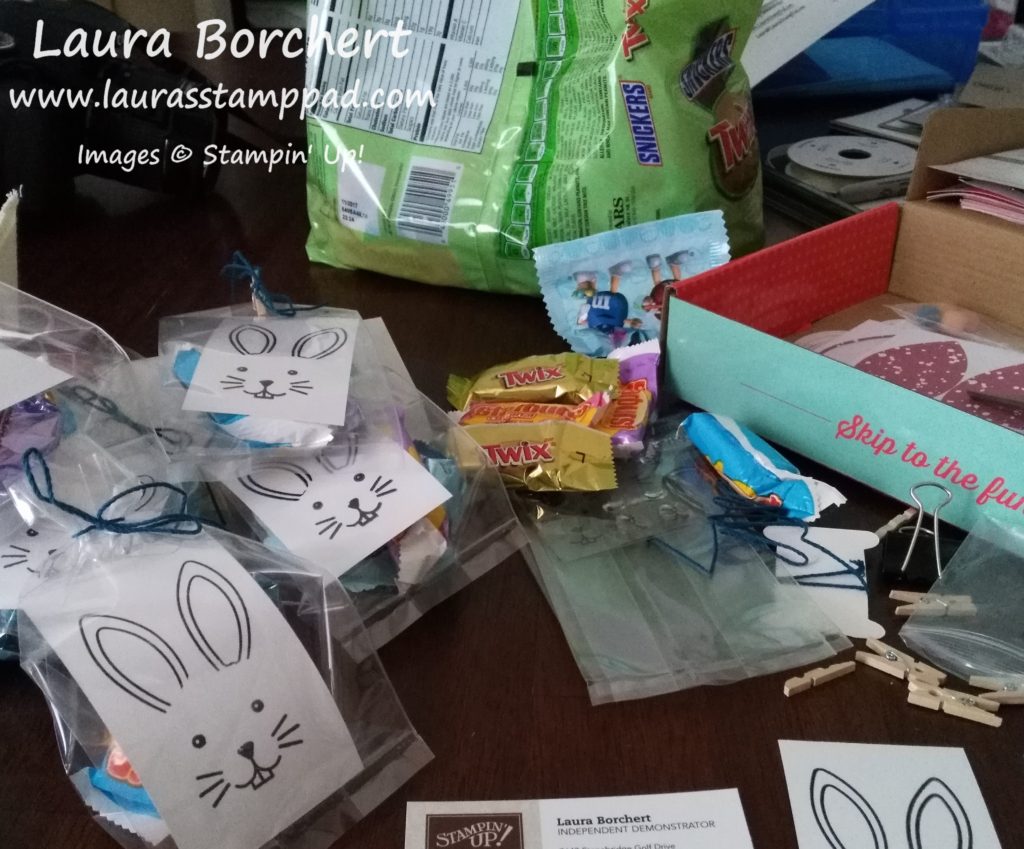
Paper Pumpkin Desk Mess, www.LaurasStampPad.com

Then because I bought the biggest bag of candy possible and couldn’t resist wanting to eat it all, I thought I would make more treat bags using others I had on hand!

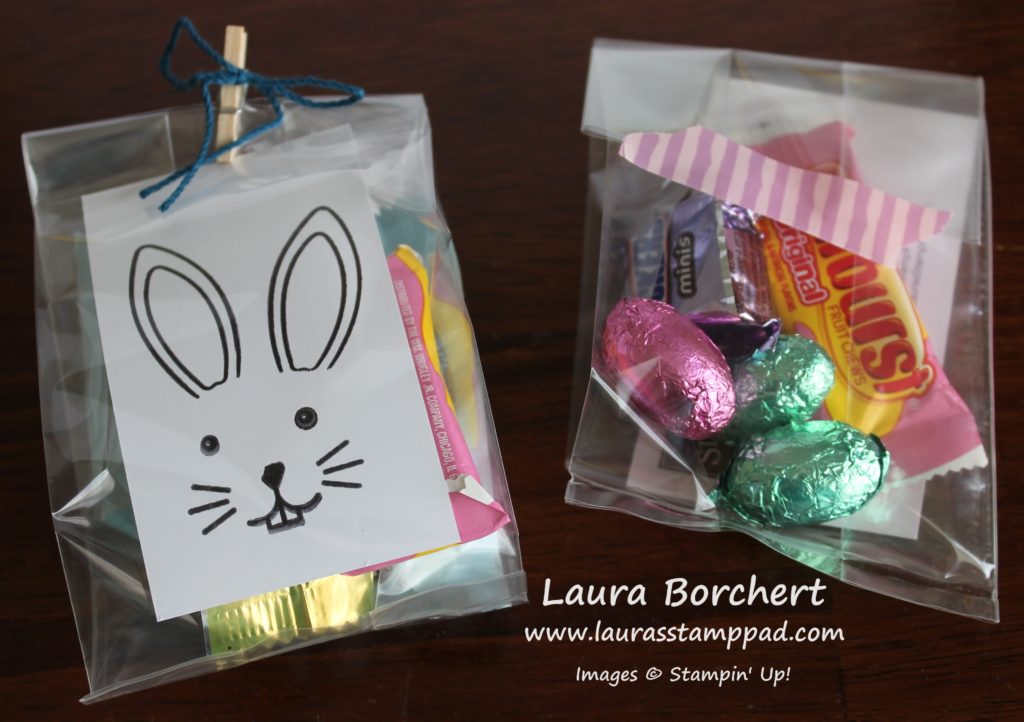
Bunny Bags, www.LaurasStampPad.com

Next, I used the small Gusseted Cellophane Bags, added some candy and stamped the bunny face! I used up the clothespins with some of the Baker’s Twine tied around it and when I ran out of those I used some Playful Palette Washi Tape. These were so simple and quick to create! I love them!

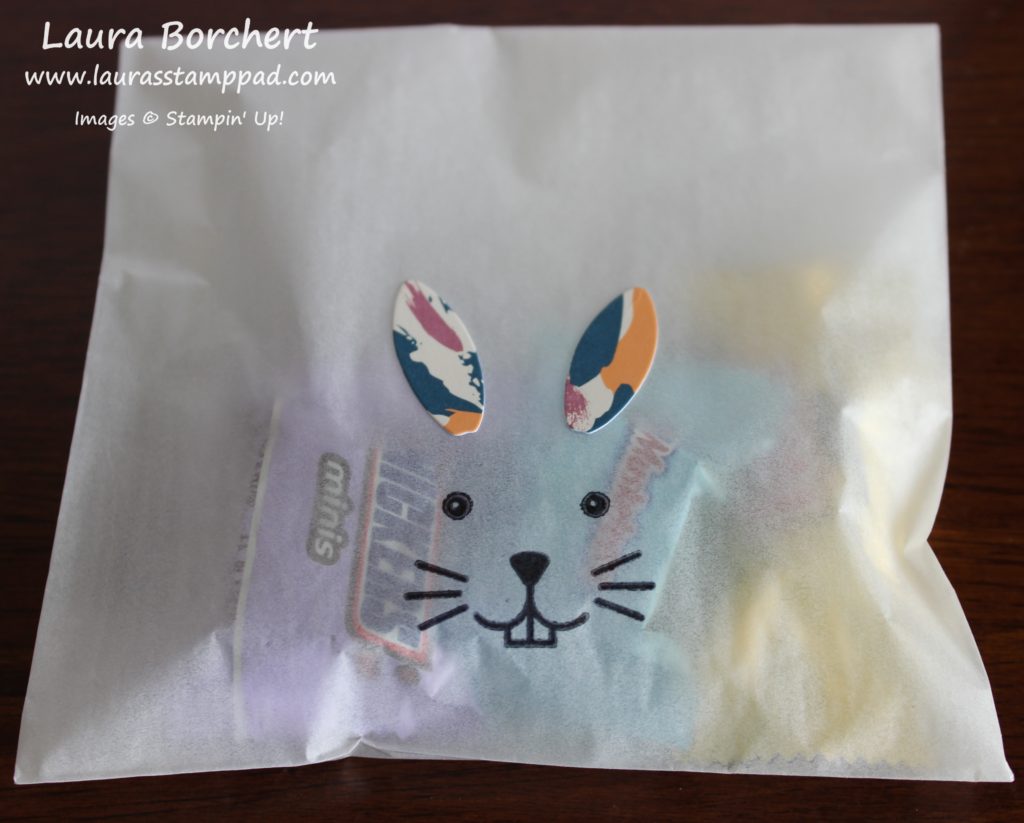
Glassine Bunny Treats, www.LaurasStampPad.com

When I ran out of the gusseted bags, I used a few of the Glassine Gift Bags I had. I just stamped right onto the bag and used some leftover bunny ear stickers!

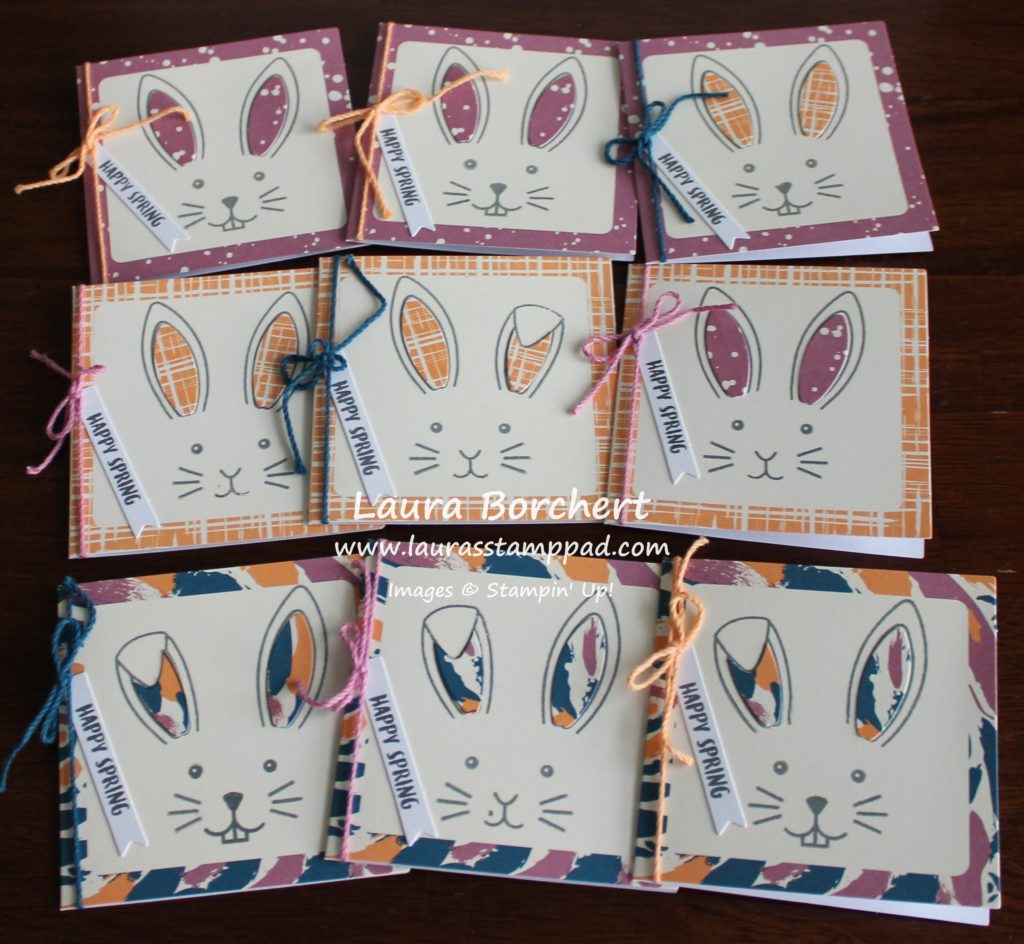
Spring Bunny Cards, www.LaurasStampPad.com

Okay, I almost forgot the 9 cards from this kit as well! Now you know why I am blown away with everything I got out of this kit!! Aren’t these little cards adorable! I created the folded over bunny ear by stamping it on the sticker and cutting it out! Just like this…

HowToCutBunnyEars, www.LaurasStampPad.com

The March Kit is my favorite one of the year so far; love it!!! I can’t believe how much I was able to create with the products in this kit and the stamp set! I love how Paper Pumpkin comes with enough to complete the kit as well as extras to use on other projects! Don’t forget today is the last day to sign up for the April Kit! It is going to a fabulous one since Sara Douglas, Stampin’ Up CEO created it AND there is a free gift in there to celebrate Paper Pumpkin’s 4th Birthday! WOOT WOOT! Click here to sign up TODAY to get the April kit!

Happy Stampin’

~Laura

Don’t forget that Thursday is the last day to get in the Ink Pad Giveaway!!! Click here to learn more and click here to start shopping with the Hostess Code: FCCVREYF. I can’t wait to draw the winners name on Friday!!! I’m so excited!!

Valentine Treat Boxes!!!

Posted on

Clear Treat Box, www.LaurasStampPad.com

Valentine’s Day is a little over a week away so it is time to start getting those treat ready and cards created! You can see some samples of cards here and here! I did another Treat Package that is fabulous here! Today, we are creating these little treat boxes!!! Precious and super sweet….hehe get it…..chocolate is sweet! 🙂

The base for this box is Clear Tiny Treat Boxes which come with 16 in the pack! For the inside decoration, I used some of the Sending Love Designer Series Paper. I cut it into a 2″ x 6″ piece and scored it just a smidge over 2″ and then from that score line a smidge less than 2″. The reason for this is because the box is 2″ so when you score at exactly 2″ it is kind of tight in the box. I placed the paper into the box and added the chocolate treats. Yum!!!

Valentine's Day, www.LaurasStampPad.com

I added some ribbon around the box and tied it into a box using the Sending Love Designer Ribbon which comes with both white and red ribbon. This is perfect because then you can really mix and match with the different designer paper patterns! I left mine without a tag because I will be passing them out to various people – friends, family, and people I see all week this week at the grocery store, Post Office, etc. You could always add a tag using your favorite stamp set that has hearts or a To:/From: or you can use the fabulous Sealed with Love Stamp Set!

Do you make Valentine’s Treats for your kid’s classroom, friends, family, or strangers?? Let me know in the comments below!

Happy Stampin’

~Laura


Valentine’s Day Triangle Treats!!

Posted on

Triangle Treat Pockets, www.LaurasStampPad.com

How cute are these little treat holders??? The don’t require any adhesive either which makes them super fabulous! All you need is a 6″ x 6″ piece of Designer Paper. For the one on the left, I used the Sending Love Designer Series Paper which is already in 6″ squares! For the one on the right, I used the Carried Away Designer Paper which is one of the Sale-A-Bration items you can get for Free with every $50.00 order! This paper is in 12″ square sheets so you will need to cut it down!!!

For these little treat pockets, you will fold your 6″ Square diagonal corner to corner to make a large triangle. With the point at the top and the other 2 points at either sides, fold the each of the side point across the front to the opposite side, straight across. Then fold the top little triangle down over your overlapped triangles. This final step is what holds everything in place!!

Triangle Treats Tutorial, www.LaurasStampPad.com

You can always squeeze the sides to pop it open and even press the bottom flat a little bit! Quick, simple and super cute! Now to fill it with some goodies! I used one of the 3″ x 6″ Gusseted Cellophane Bags to hold the chocolate treats! I tied some ribbon around the top into a bow using the Sending Love Ribbon Combo Pack which has red and white ribbon in it!

Treat Pocket, www.LaurasStampPad.com

These treat bags are perfect for classroom treats for Valentine’s or any other holiday. You could use these for a child’s birthday party or any type of party! I plan on using mine for my nieces and nephews Valentine’s Treats as well as a few to pass around randomly to share the love in February!!! 🙂

Balloon Treat Pocket, www.LaurasStampPad.com

Which one is your favorite? Let me know in the comments below – Valentine’s Day or Hot Air Balloons??

Happy Stampin’

~Laura


Birthday Calendar for Every Year!!!

Posted on

Birthday Calendar, www.LaurasStampPad.com

I was asked about a Birthday Calendar from a friend of mine and was super excited to make one for her! I have one that Stampin’ Up sold many years ago. IT IS AMAZING!!! A Birthday Calendar has all the dates for each month listed on each page. You will just put the name of the person on the date of their month on the correct month – August 29th – Laura Borchert!!! 🙂 The awesome thing about this calendar is that you can use the same one each year unlike a traditional calendar that has the days of the week on it since those change!!! 

I created a Template in Microsoft Word but just adding numbers and lines, 2 columns per page. You can check it out here – Birthday Calendar Template! You will need to print 6 of these! You will then cut the Whisper White cardstock in half at 4-1/4″ and punch a hole in the upper left corner with the 1/8″ Handheld Punch! To get them all in the same spot, I punched 3 or so all together, then I took one of those and laid it on 3 others to use as a template of where to punch the next set. To put them all together, I just used a metal ring but first we have to decorate!!!

Q1, www.LaurasStampPad.com

I used the Perpetual Birthday Calendar Stamp Set for all of the months and decorations! I used the banner from the Thoughtful Banners Stamp Set. I used the coordinating Duet Banner Punch to punch them out (Bundle & Save 10%). I used Pacific Point for January, Real Red for February, and Pumpkin Pie for March!

Q2, www.LaurasStampPad.com

I used Emerald Envy for April, Wisteria Wonder for May, and Crushed Curry for June! Each of the images can be mixed and match to whatever you wish to use for that month!

Q3, www.LaurasStampPad.com

For July I did the banner in Real Red and the stars in Night of Navy Ink. Of course I had to do Melon Mambo flowers for August because that’s my birthday month!!! September was done in Mint Macaron.

Q4, www.LaurasStampPad.com

October was done in Cajun Craze Ink. November was done in Cherry Cobbler Ink and December was done in Cherry Cobbler Ink and Garden Green Ink.

All the Seasons, www.LaurasStampPad.com

It’s so much fun to just randomly stamp all over in different patterns! So colorful and cheerful for all year long! Now all you need to do is add in the names of all of your loved ones!!!

You should totally try this out or even make them for your friends and family. They are a great gift!! Let me know if you have a Birthday Calendar in the comments below!

Happy Stampin’

~Laura


November 2016 Paper Pumpkin – Wonderful Winterland!!!

Posted on

paper-pumpkin Blue Box, www.LaurasStampPad.com

The November Paper Pumpkin arrived and I was even more excited that normal (if that’s possible) because the box was different!!! It was this stunning two-toned blue beauty!!! Love it!!!! Then I opened it up and saw the amazing goodies inside which you can check out here in my Unboxing Video! It came with TWO ink pads!!!!

snowy-town-card-envelope, www.LaurasStampPad.com

These are just so incredibly stunning. This is probably my favorite kit this year……although I can’t remember each kit but I LOVE THIS. These little cards are super easy to put together and look so amazing and real with the layers and dimension. First you will stamp the little trees in the stamp set over the trees die-cut out. It is super simple to do since the stamps are photopolymer! Also, add you greeting at this time as well. Then you will assemble each layer!

3D Snowy Village, www.LaurasStampPad.com

Did anyone else squeal at the mini Stampin’ Dimensionals in the kit??? I sure did! You know my love for them anyway but they are so little and adorable! Add Dimensionals to the white piece with trees and add it to the blue hill with 1 house (house on the left). Then add more Dimensionals to the back and add it to the blue hill with lots of houses (houses on the right). I placed my dimensionals so they weren’t directly on top of each other. So if I put one in the bottom corner on one layer, I put it up top on the next layer. Next you will stamp the snowflakes on the card front, add the vellum with the glue dots and then layer on your village scene! Finish it off with sequins and the Baker’s Twine!!!

Happy Holidays, www.LaurasStampPad.com

I just love them so much! They look like a real village of beautiful houses in the winter time. That frosted look from the vellum, the sequin shine, and the dimension of the village! Best kit ever!!!! Then there is the cute blue envelopes as well!!! I totally sent these out already as some of my Christmas Cards!!! I finished this up this week! How about you? Do you send out Christmas Cards? Are you done yet? How many do you send out?? Let me know in the comments below! I would love to hear what you do! 🙂

You can sign up for the December Paper Pumpkin Kit HERE! Be sure to do so before the 10th! Paper Pumpkin also makes a great gift. You can sign up and get the December Kit to wrap and place under the tree or you can purchase a Subscription in 1,3,6, or 12 months so they can pick when they would like to receive the kits!!! Click here to get a subscription!!!

Happy Stampin’

~Laura

yearendcloseout_shareables_eng_2

Don’t forget to shop the Year End Clearance Sale!!! Click here to check out the fabulous products!!!


Technique Tuesday – Hand Sanitizers!!!

Posted on

Happy Tuesday!!! That means I have a fabulous technique to share with you and this one is perfect for this time of year – gift giving!!! These little hand sanitizers are perfect for stocking stuffers, Secret Santa, and hostess gifts…..but they are perfect for all year long as well!

Hand Sanitizer, www.LaurasStampPad.com

Aren’t they fabulous??? I got the idea from Meg Loven who shared this at one of our Team Meetings!! They are perfect for sitting on your desk, coffee table, or even in your purse!!! Let’s get started!

SUPPLIES NEEDED: Cardstock, Designer Series Paper, Favorite Greeting, Punches or Framelits, Embellishments

Starting with a piece of cardstock measuring 1-7/8″ x 11″, you will score at 2″, 3″, 6-1/4″, 7-1/4″, 9-1/2″, & 10-1/2″. You can get lots of these out of one sheet of 8-1/2″ x 11″ which is awesome. TIP: If you are using all of the 8-1/2″ x 11″ sheet of cardstock, be sure to score the entire sheet and then cut it into strips, this will save time and less scoring. 🙂 Fold on all of the score lines. On the end with the 1/2″ tab, you will need to punch out a hole for the top of the hand sanitizer to fit though. I used the 3/4″ Circle Punch and slide in it, centered it, and made sure I was just over that first score line and into the 2nd “box”. Now that you have your hole in there, add some Fast Fuse Adhesive to that 1/2″ flap, place your hand sanitizer in there and adhere it to the back panel. I like to use Fast Fuse or Tear & Tape for this because it has a nice strong hold. If you would like, add some Washi Tape around the neck of the bottle to coordinate with your decoration and designer paper! Now you can decorate with Designer Paper of your Choice. You will need 3 pieces measuring 1-5/8″ x 3″ (back panel), 1-5/8″ x 2″ (bottom front), and 1-5/8″ x 1-3/4″ (top flap). You can always add these pieces before putting the hand sanitizer in but just be sure you have them right side up if the pattern requires that. I used Pop of Pink Designer Paper, Presents & Pinecones Designer Paper, Affectionately Yours Designer Paper, and Candy Cane Lane Designer Paper in all of the samples pictured.

reindeer sanitizer, www.LaurasStampPad.com

For the decoration, you can use your favorite greeting or image. For the one above and the gingerbread man, I used the Cookie Cutter Christmas Stamp Set and coordinating Cookie Cutter Builder Punch (Bundle & Save 10%). The Be Joyful is from the Merriest Wishes Stamp Set. I really just had so much fun playing with different greetings, designer paper, and ribbons! For the decoration, I added it to the bottom half of the hand sanititzer and added it with Stampin’ Dimensional on the lower portion only. This is so the top flap can slide under the greeting/reindeer/image and hold closed. You could also use a little piece of velcro too!

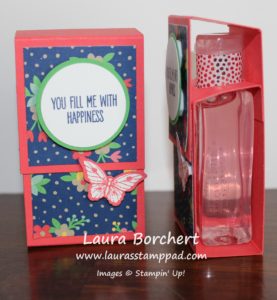
fill-me-with-happiness, www.LaurasStampPad.com

This one uses the Papillon Potpourri Stamp Set and Bitty Butterfly Punch! Let me know which one your favorite is in the comments below. I’m thinking my favorite is the butterfly and reindeer ones!!

If you would like to see this all in action, check out the Video Tutorial below or click here! Be sure to give it a thumbs up if you liked it and don’t forget to subscribe if you are new! I post videos every Tuesday and Thursday!

Happy Stampin’

~Laura

Only 2 more days left to get a chance at winning a Big Shot!!! Check out all the details here!!!

Big Shot Code:HSQJBEPD, www.LaurasStampPad.com


Fabulous Holiday Gifts!!!

Posted on

Black & Pink Gift Bag, www.LaurasStampPad.com

Tis the season of gift giving! Part of gift giving is the gift packaging. While the packaging isn’t the main event, it is still a big part of it and why not make it fabulous??

I got these little bags from the dollar store with some hand sanitizers in them! I always like having some in my purse and they are cute little gifts that you can give for hostess gifts, secret santa, and so much more. Stay tuned to see those all decorated next week! 🙂 I thought I could decorate these little bags as gift card holders, money holders, or any other small gifts! Cute and simple!!

The bags are 4″ x 4″ so I took a piece of cardstock measuring 3-3/4″ x” 8″ and scored it at 4″. I folded it in half and slide it inside the bag. This will hide the gift in the packaging.

gingerbread-bag, www.LaurasStampPad.com

For the front, I took a piece of Designer Series Paper and adhered it on with Fast Fuse. That adhesive is super strong and will hold tight. The bags at the top use the Pop of Pink Designer Series Paper and the ones just above use Candy Cane Lane Designer Series Paper. I stamped the To/From from the Tin of Tags Stamp Set but those images are in many different sets so you can pick your favorite. I punched out the tag with the Decorative Label Punch and then punched a hole in the corner with the Handheld 1/8″ Punch! I attached the punch with some Metallic Thread to the handle. I used Silver Metallic Thread and Silver Glimmer Ribbon for the ones at the top. For the Gingerbread Houses, I used Candy Cane Lane Baker’s Twine and Red Metallic Thread.

navy-copper-bags, www.LaurasStampPad.com

This one uses the Petals & Paisleys Designer Series Paper with that Copper Foil in it. Love it. For the tag, I used Copper Metallic Thread and Rich Razzleberry Ribbon from the Ribbon Trio Pack.

Do you like decorating a lot with your gift packaging or go with something simple?? Let me know in the comments below! I sometimes like to go all out and other times I think how it will be ripped up and thrown out in no time so I don’t want to go all out. For more gift packaging ideas, check out these here, here, and here!

Happy Stampin’

~Laura

rulergram, www.LaurasStampPad.com

Want to impress your friends and family this holiday season? Check out my Cut For Christmas offer to get your holiday cards done fast!


October 2016 Paper Pumpkin – Season of Gratitude

Posted on

october-2016-paper-pumpkin, www.LaurasStampPad.com

Oh my goodness, check out these beauties!!! I have recently started playing more with Shaker Cards so I was excited to see this kit!!! Check out more shaker cards here and if you would like to see my excitement for this kit as I reveal it, click here! The sequins in this kit are just stunning!!!

october-pp-2016, www.LaurasStampPad.com

Here are all of the goodies that came in the kit – stamps, Chocolate Chip Ink, card bases, envelopes, sequins, Baker’s Twine, and adhesives!!! Everything you need which is fabulous for beginners and lots of stamping fun which is perfect for any crafter!!

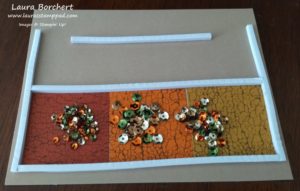
shaker-card-insides, www.LaurasStampPad.com

After stamping the crackle image on each of the colored squares, I adhered them to the card base and added the Adhesive Foam Stripes provided! Then I poured in the 3 sizes of gorgeous sequins!!! Then I placed the top (vanilla leaves) over the sequins with the window sheet over the open leaves.

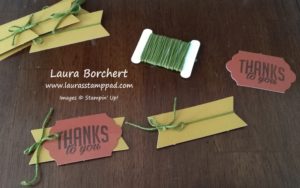
thank-you-banners, www.LaurasStampPad.com

I always am in need of Thank You Notes so I stamped all of my banners with the same greeting from the set. Even after tying all of the banners, I still had all of that Baker’s Twine left. How amazing!?!?!

fall-card, www.LaurasStampPad.com

Aren’t they fabulous??? I’m not even a huge fan of fall but, oh my goodness, the sequins have stolen my heart!

season-of-gratitude, www.LaurasStampPad.com

The coordinating envelopes have a fabulous matching inside. I am so in love! You totally do not want to miss another month of Paper Pumpkin! Click here to get signed up for the November Paper Pumpkin Kit! Once you are a subscriber, you can purchase past kits as well! Click here to check out those kits…including this fabulous one!

Happy Stampin’

~Laura

Big Shot Code:HSQJBEPD, www.LaurasStampPad.com


Designer Tin of Cards!!!

Posted on

designer-tin-of-cards, www.LaurasStampPad.com

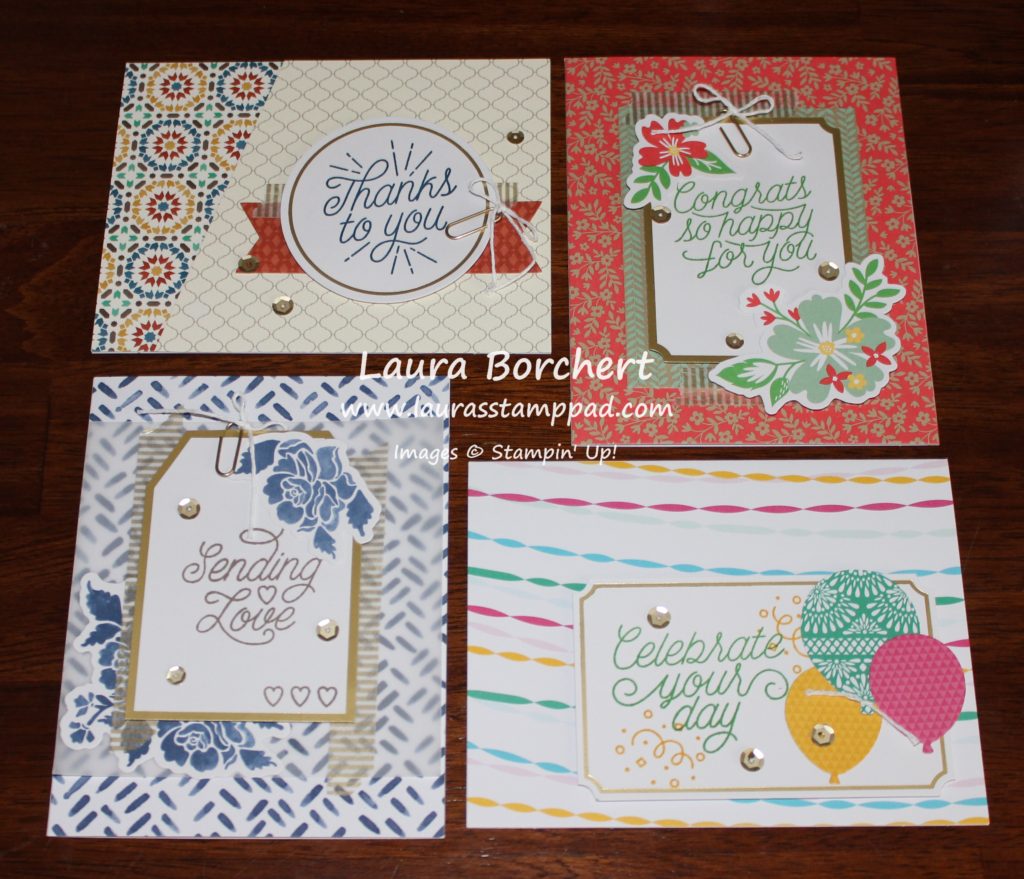
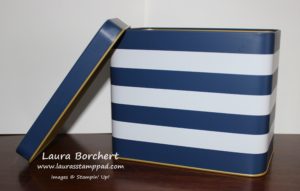
Check out these amazing cards in the Designer Tin of Cards Kit!!! I kind of like how this card kit has a big array of colors using the different patterns from the Designer Series Paper Packs! There are some regals, brights, and subtles! I LOVED the Tin of Cards from last year. You can check that out here. I knew I needed this kit as well. After all the little tin is super cute and I feel like I need to collect them all! Last year it was mint and white and this year it is navy and white!!!

navy-white-tin, www.LaurasStampPad.com

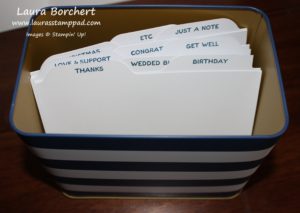
Isn’t it amazing??? I love it! There are dividers in the kit so you can stamp the titles from the Designer Tin of Cards Stamp Set on them and create the perfect tin of cards to keep yourself or give as a gift!!!

card-storage, www.LaurasStampPad.com

There is a category for all of the cards you need throughout the year!!!! Now onto the cards in the Designer Tin of Cards Kit!

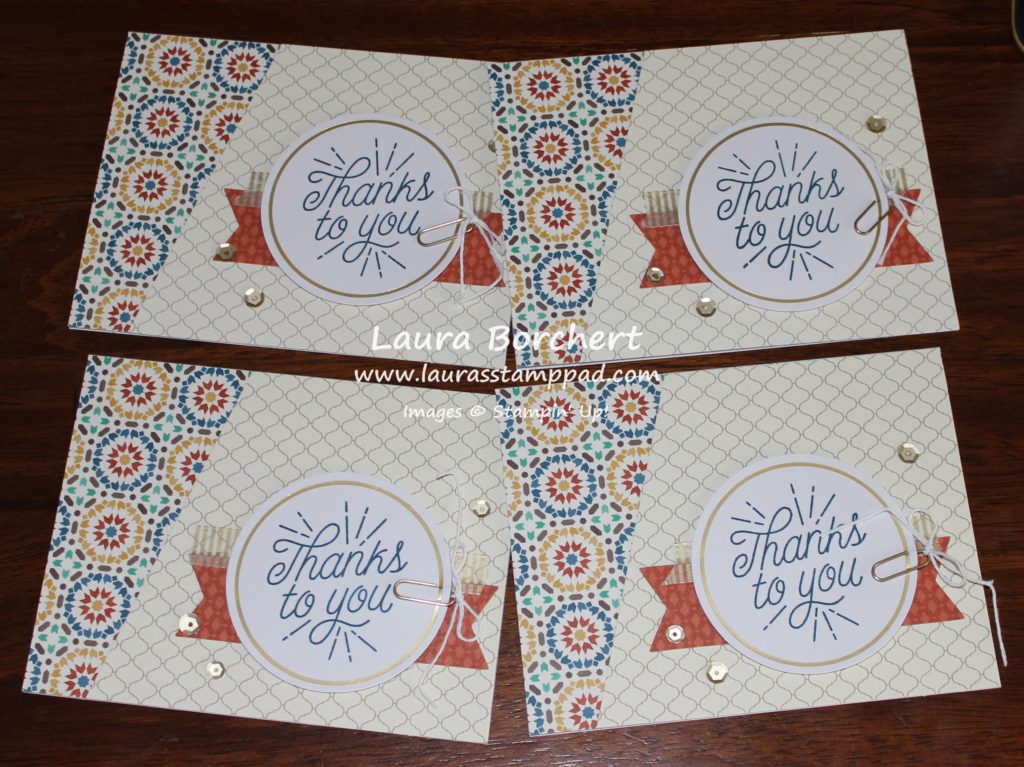
thanks-to-you, www.LaurasStampPad.com

This set of cards uses the pattern/theme from the Moroccan Designer Series Paper (part of the Buy 3, Get 1 Free Special!). I stamped the greetings from the Designer Tin of Cards Set. I adhered the sequins on with the Fine Tip Glue Pen!

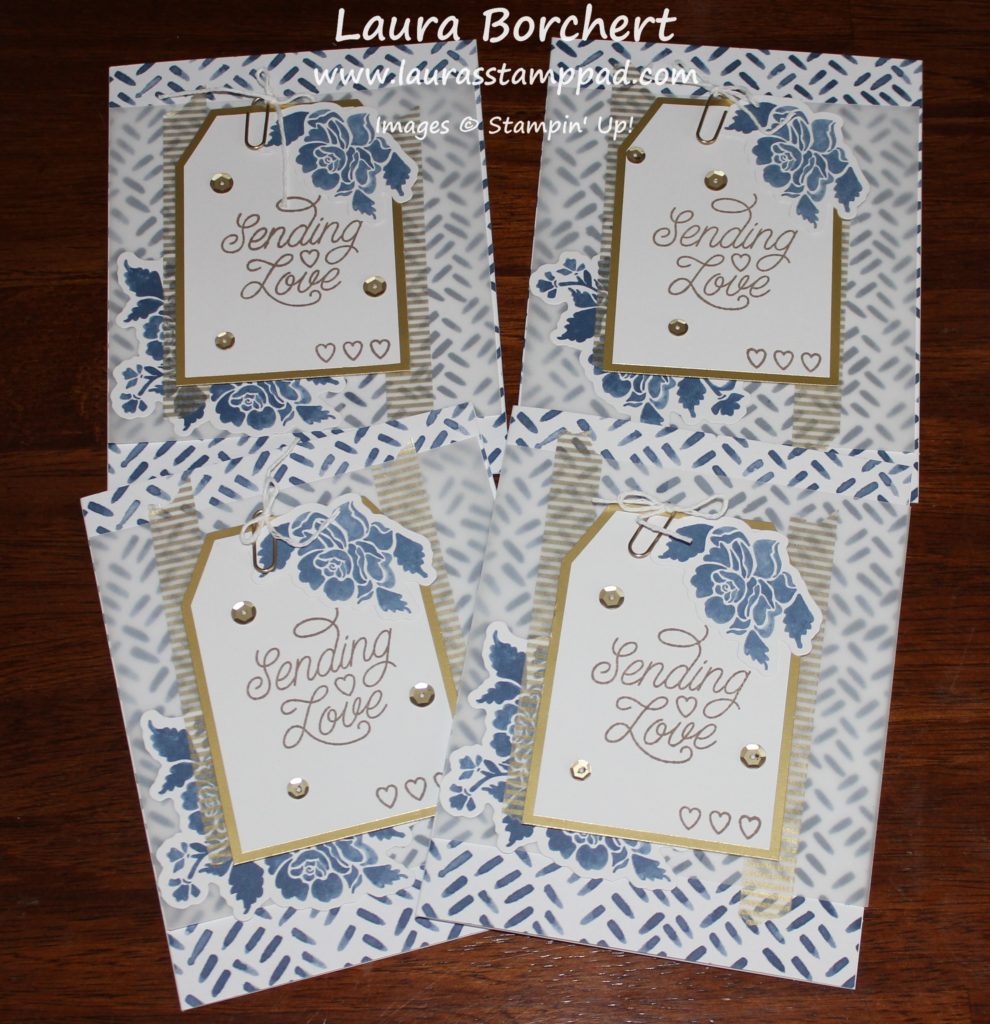
sending-love, www.LaurasStampPad.com

I really really like these cards. There is something about that simple navy and white look with a little touch of gold! So beautiful!!! This set of cards uses the style from the Floral Boutique Designer Series Paper (part of the Buy 3, Get 1 Free Special).

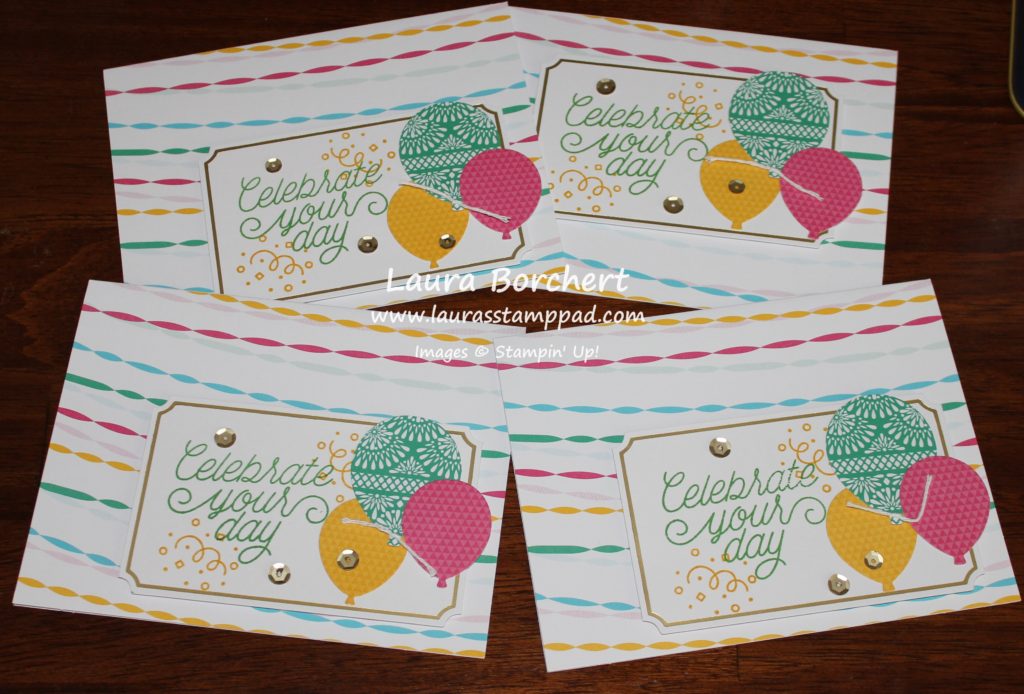
celebrate-your-day, www.LaurasStampPad.com

I love these cards because of the bright colors. I am realizing I really need some of the Festive Birthday Designer Series Paper (part of the Buy 3, Get 1 Free Special), which is what this style is from.

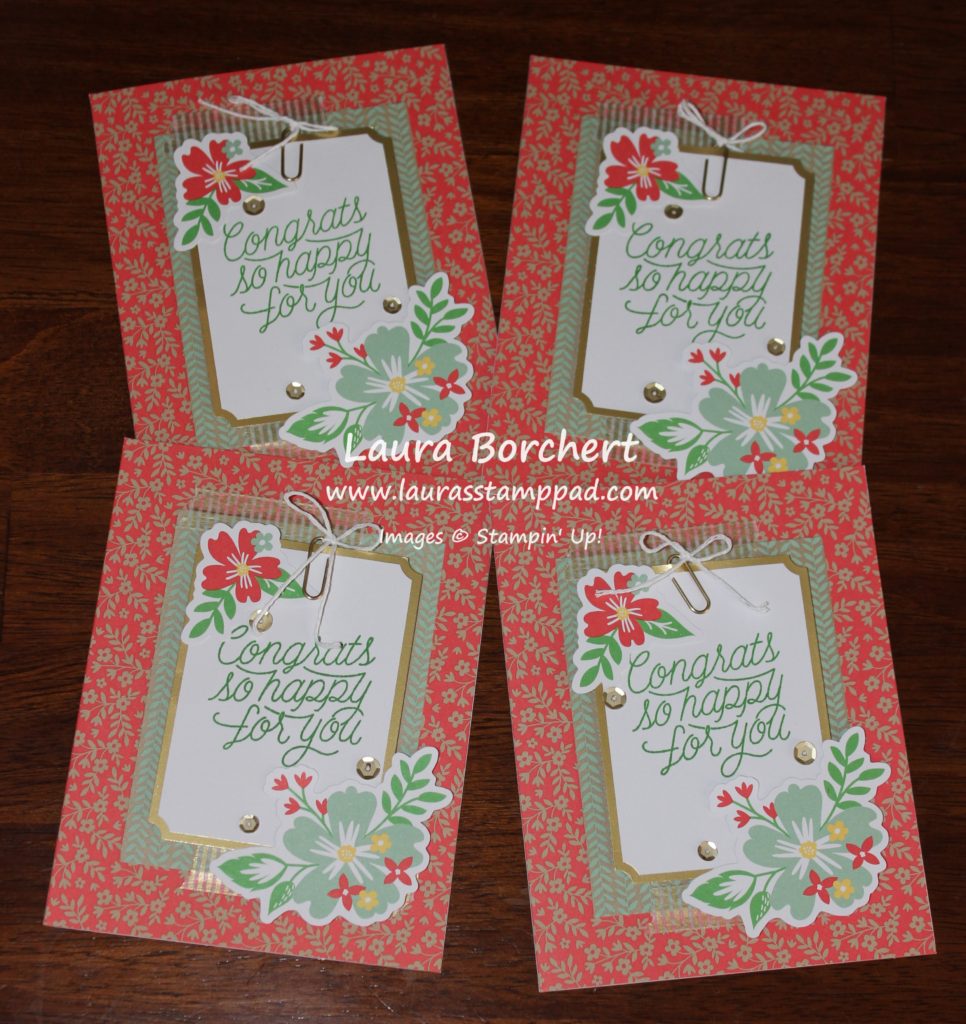
congrats-so-happy-for-you, www.LaurasStampPad.com

These cards use the Affectionately Yours Specialty Designer Paper theme and they are perfect for graduation, wedding, engagement, and so much more!

Which one is your favorite??? Let me know in the comments below! I really enjoyed making these cards and love the samples. The hardest part was trying the bows onto the paper clips but the rest was super easy and fun!!!

If you would like to see the unboxing and reveal of this kit, check that out here or click below! Don’t forget to give it a thumbs up if you liked it! Be sure to subscribe if you are new as I post every Tuesday and Thursday!!!

Happy Stampin’

~Laura

Seasonal Offer, www.LaurasStampPad.com

Check out this fabulous offer for the Holiday Season!!!


Halloween One Sheet Wonder!!!

Posted on

Halloween One Sheet Wonder, www.LaurasStampPad.com

Halloween is right around the corner and I know how much you all love One Sheet Wonders!!! By request from one of my YouTube Subscribers, I have created a Halloween One Sheet Wonder that includes cards and treats!!! I love this set and it is perfect for having a few cards on hand to send to loved ones and a few treats for trick-or-treats or nieces and nephews in my case!!! Let’s get started!

One Sheet Wonder Template, www.LaurasStampPad.com

Here is the template I used for this Halloween Set. You might remember that the bottom row is the same as the other template. You can check out samples of that here, here, here, and here! I used the bottom row for all of the 6 cards.

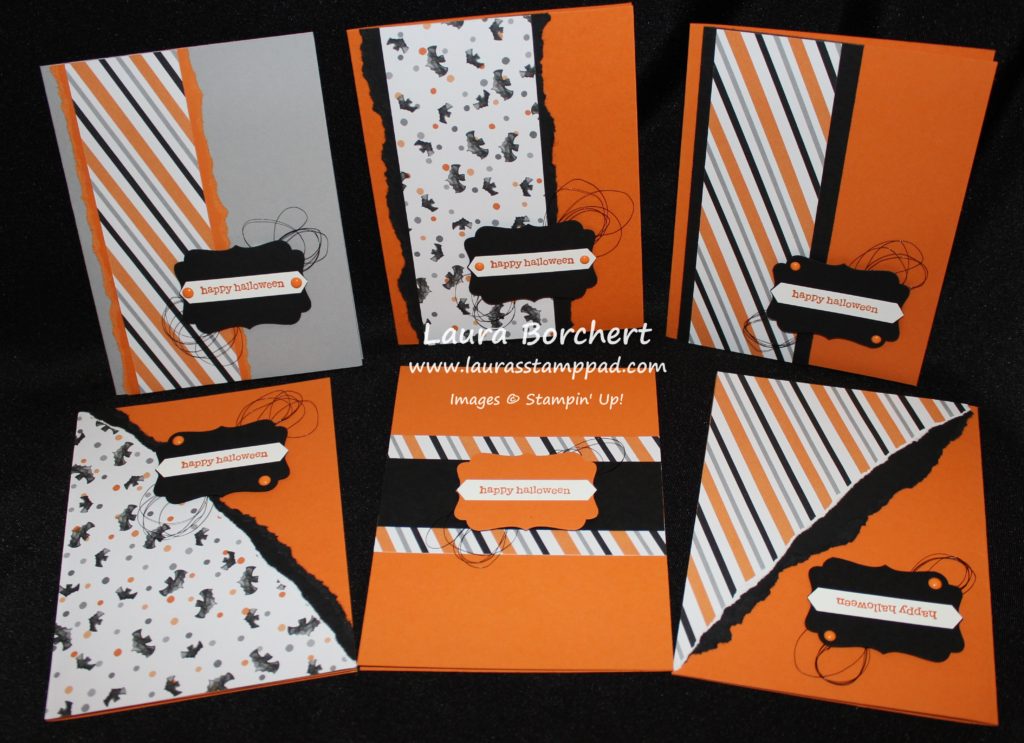
6 Cards One Sheet Wonder, www.LaurasStampPad.com

The paper I used is from the Holiday Mini Catalog and it is called Halloween Night. Since I am not a huge Halloween fan, I purchased this paper and used a all occasion greeting set I have on hand and made these beauties. I used Pumpkin Pie and Smoky Slate for the card bases and pulled out some Basic Black scraps for layering. TIP: The black just lines the edge of the Designer Paper, not the entire portion. This is how you can use up those little pieces of scraps. The bottom middle card was created using the 1-3/4″ x 5-1/2″ and I cut it to 4-1/4 to go sideways on the card. Since it wasn’t that wide, I cut it in half and added a piece up high and down low and put a strip of Basic Black in the middle! 😉 See there are so many ways you can create fun cards with the One Sheet Wonder Technique! The greetings were all stamped with the Teeny Tiny Wishes Stamp Set and punched out with the Classic Label Punch. I wanted a larger greeting to pop more on the card so I layered that onto the Decorative Label Punch and added loop of Metallic Black Thread behind it. I added some Enamel Shapes to a few of them! I love those things!

6 Treat Boxes in One Sheet Wonder, www.LaurasStampPad.com

The top row is for these adorable treat boxes using the Clear Tiny Treat Boxes. I took each of those 2″ x 6″ pieces and scored them just a hair below the 2″ mark and 4″ mark so they would fold into the box. Since the box is 2″, you want to go a smidge less so it fits inside. Pop the Designer Paper into the box and add candy! For the outside decoration, I used Burlap Ribbon and Thick White Baker’s Twine. I stamped the For You from the Perfectly Wrapped Stamp Set and punched it out with the Classic Label Punch. I thought it looked too long for the tiny box so I cut one end off, punched a hole with the 1/8″ Handheld Punch and tied it to the treats with Black Metallic Thread. Love it! They do hold a decent amount of candy but they are so adorable!!!

So 6 cards and 6 treat boxes from 1 sheet of 12″ x 12″ Designer Paper is super fabulous and if you want to see the Video Tutorial of all of this, check out the one below or click here! Don’t forget to give it a thumbs up if you liked it and be sure to subscribe if you are new!

Happy Stampin’

~Laura

Don’t forget about the Paper Pumpkin BOGO Sale for new subscribers!!! Click here to get started and be sure to enter the Promo Code: BOGO  Offer ends on October 10th!

PP_BOGO_Facebook_US, www.LaurasStampPad.com