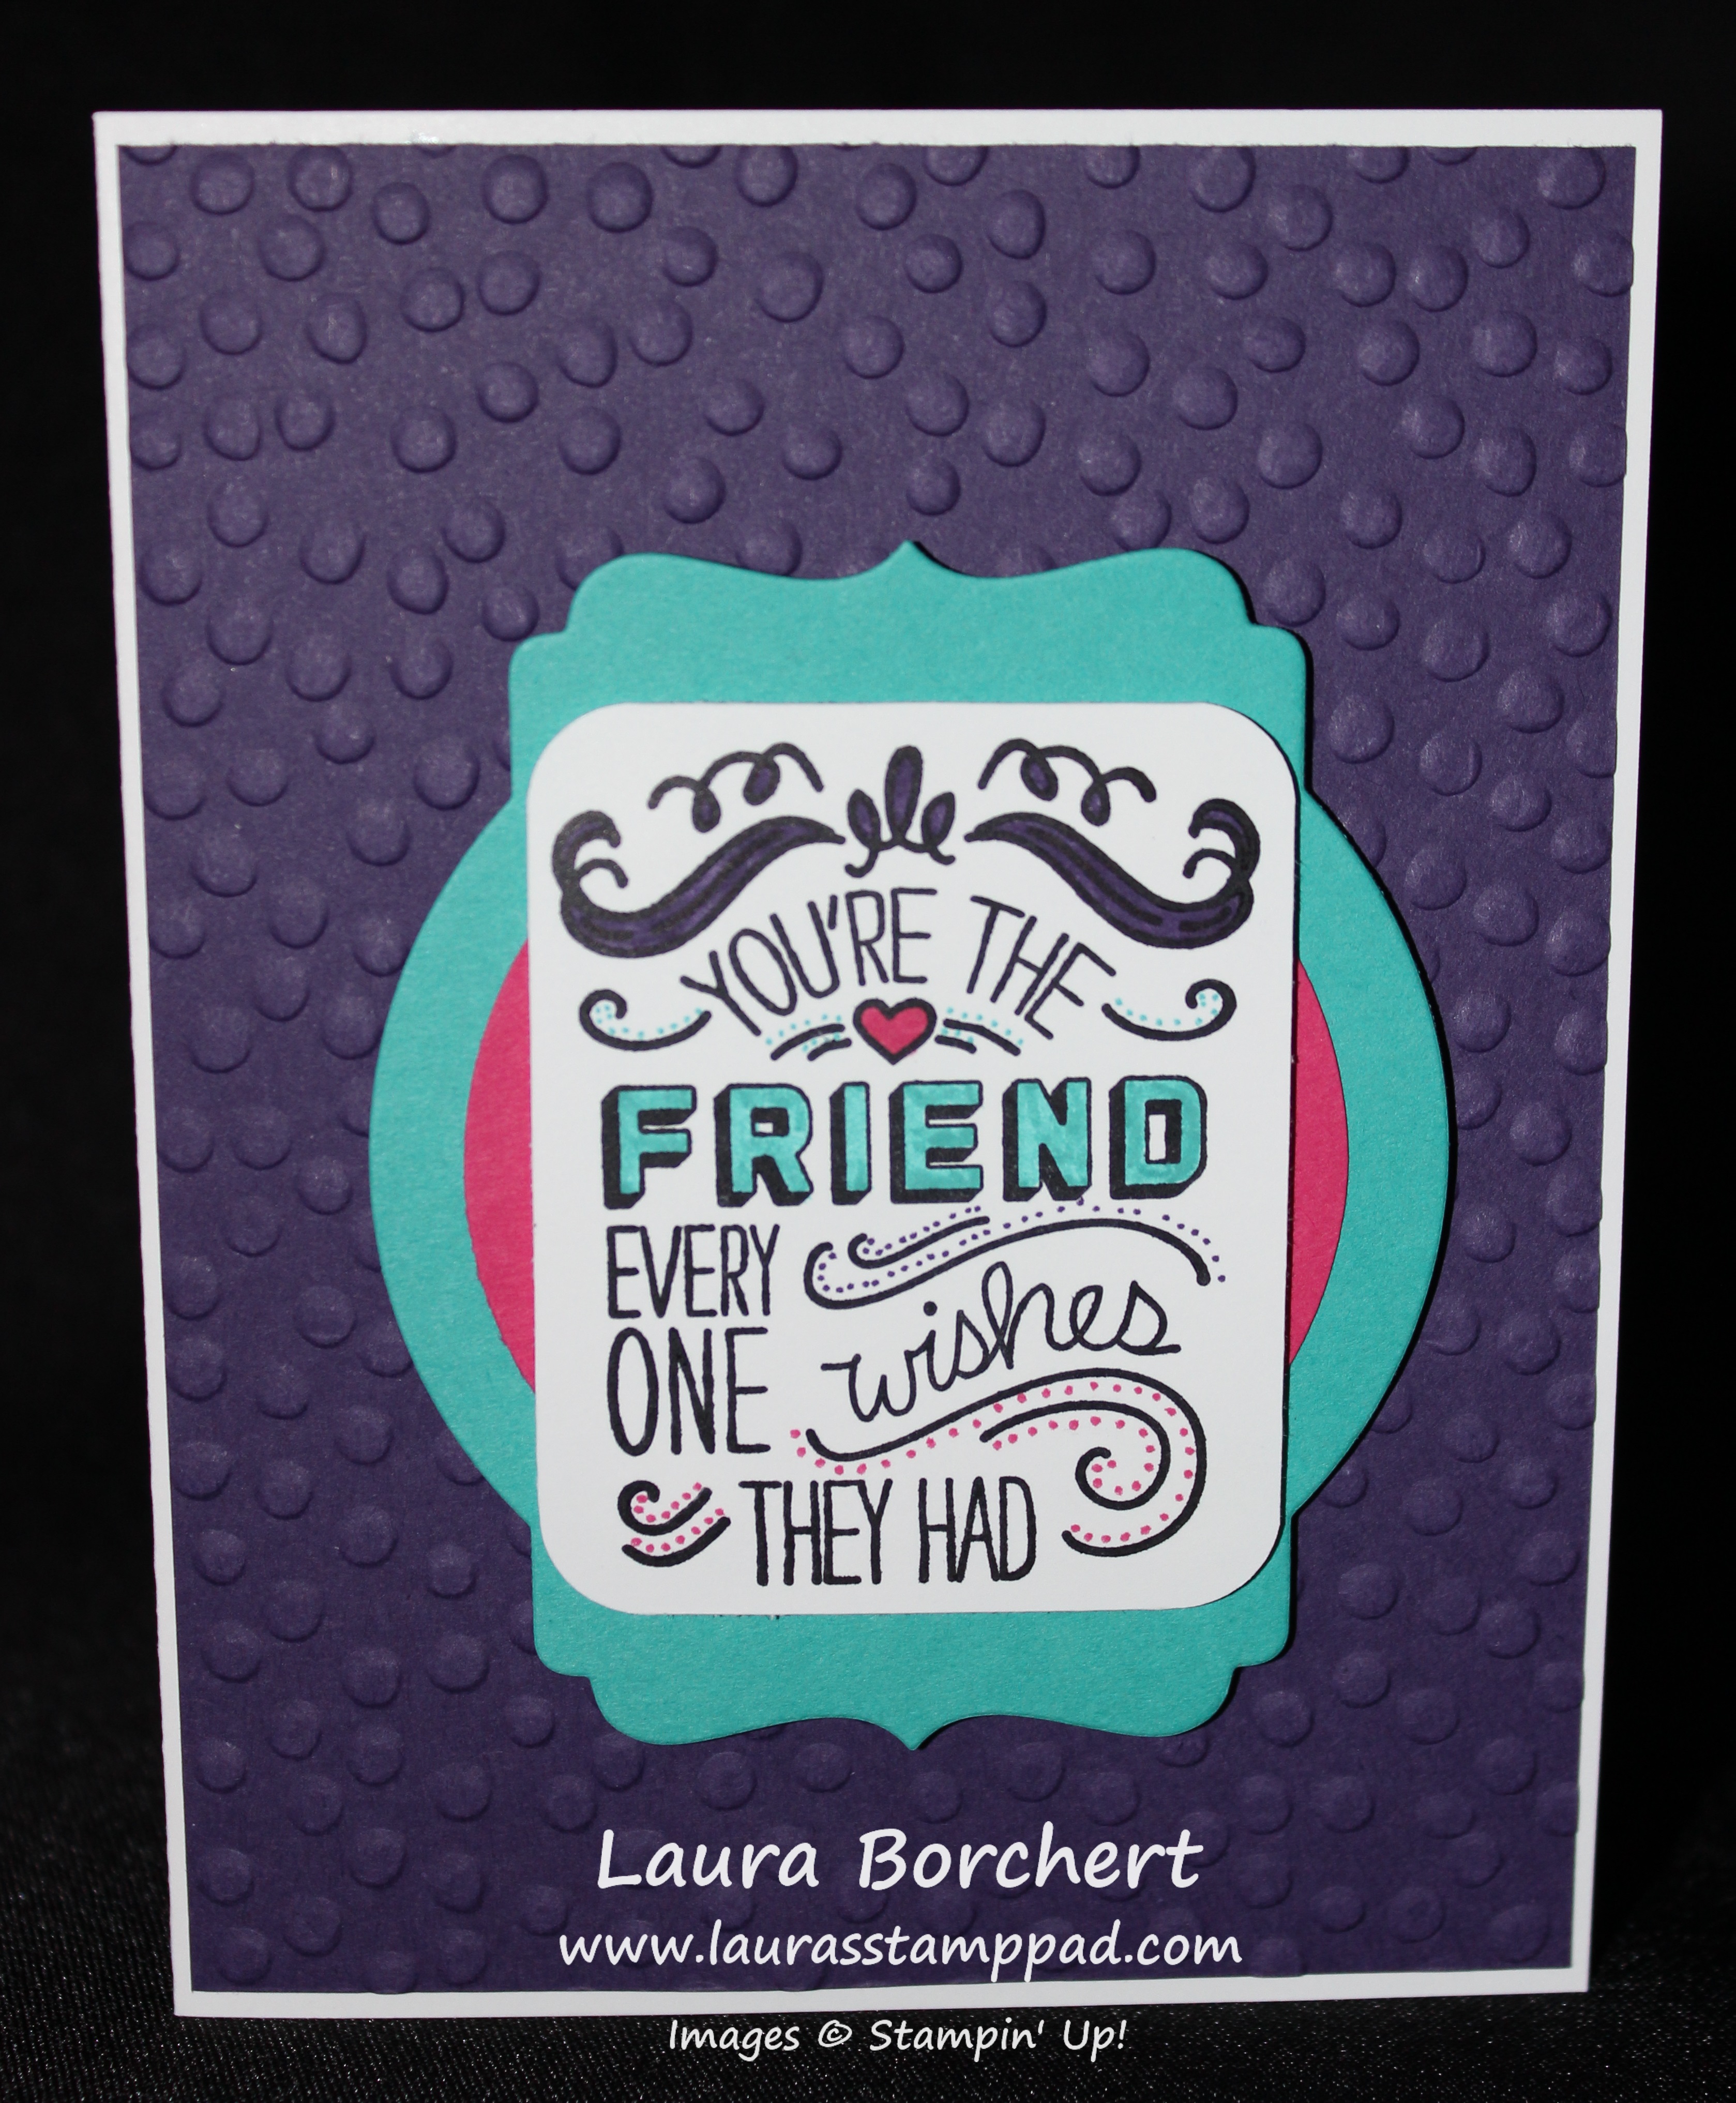
I’m going to say that I love pink, purple, and teal because I grew up in the 80’s with Lisa Frank! 🙂 Anyone else out there with here??? Leave me a comment down below….if there are no comments, I will know I’m all alone!
I had so much fun with this quick and simple card. I started with a Whisper White card base and added a piece of Elegant Eggplant that was embossed with the Decorative Dots Embossing Folder. I stamped the greeting from the Friendly Wishes Stamp Set onto a scrap piece of white cardstock with Stazon. I colored it with my Markers adding in the dots and extra flare! Isn’t it fabulous! Then came the tough part……how do I want to layer it? I couldn’t punch it out with the Circle Punch because it didn’t fit. I couldn’t layer it on a smaller Deco Label Framelit because it didn’t fit. So this is what I came up with! I cut the scrap piece down and rounded the edges with the Project Life Corner Rounder Punch. Then I die cut one of the labels with the Deco Label Framelit (2nd from the smallest) in Bermuda Bay and punched out a Melon Mambo circle with the 2-1/2″ Circle Punch! Of course I had to add in soome Stampin’ Dimensionals – holding the greeting rectangle to the circle and holding the Bermuda Bay to the card front! I love how it turned out!!!!
Happy Friday everyone!!!! Can you believe that May is almost over and June is coming??? That is just so crazy to me! What is even more crazy is the NEW CATALOG IS COMING and I just can’t wait. Only 3 more full days! Eeeeeeee It’s like Disney (even though I have never been)!!!! Until then we can look at this adorable little thing! This little adorable owl is sure to brighten your Friday!!!
I created him with the Curvy Keepsake Die and used various punches for all of his features – Circle Punches, Scallop Circle Punch, Flower Medallion Punch (beak) and the Oval Framelits for his body! Just precious! He would be perfect for a baby shower or for little treats when you are visiting the baby at the hospital! 🙂 All together now…..Awwwwww!
Of course it just isn’t a Friday without the Weekly Deals!
I just recently moved my Flower Bouquet that I created with the Build A Bouquet Kit to a new spot in my kitchen and it just lovely. It really brightens up the room! You can check out my post on that here! The Painted Blooms Designer Series Paper is sooooo lovely! You will want to add some of that to your cart before it is gone on June 3rd but this sale price ends on Monday! You can see some projects using that here and here!
I hope you all have a wonderful weekend!!! I know I will!
ONE MORE WEEK till the new catalog is here!!!! The excitement is building and I just can’t wait to share all the new catalog items with you!!!! Eeeee! Here is one sample that I have created. Can you pick out the new items????
1. New In-Color – Delighful Dijon (card base)
2. Stamp Set – Friendly Wishes
3. Designer Series Paper – Bohemian Designer Series Paper (DSP)
I am really loving this new DSP because the colors are just beautiful with shades of purples and teals! Love it! I layered the DSP (4″ x 5-1/4″) onto the Delightful Dijon card base. For the greeting, I stamped it in Blackberry Bliss and added the little designs on the side in Island Indigo! I die cut it out with the Deco Label Framelits! I layered the greeting piece (2nd largest) with the largest Deco Label die cut in Blackberry Bliss! Of course, I had to add some dimension with a few Stampin’ Dimensionals!
I can’t wait to share more samples! Some of the projects I have created are just so stinking cute! Cupcakes, Ice Cream Cones, Trees, Balloons, and so much more! 🙂 Also, LOTS of bright colors and you know how much I love that!
I hope you all are having a wonderful Monday. Happy Memorial Day to you and may you safely celebrate this Holiday!
I was asked by the local Library to create a craft at a Volunteer Luncheon that they were having as a Thank You to these lovely ladies! The theme was butterflies and here is what I came up with!!!
The other project that everyone got to make was 1 of these bookmarks! I started with a piece of Whisper White cardstock measuring 5-1/2″ x 2″. The tops were punched out using the Scallop Tag Topper Punch and Ornate Tap Topper Punch!
Both of these projects were lots of fun to create and simple enough for those who have never crafted before. It was a wonderful time celebrating all the amazing things these women do at the Library and they really enjoyed the afternoon! I had so much fun!
Happy Tuesday!!! That means I have a fabulous technique to share with you! This technique is beautiful and uses up your scraps! Woot Woot!!! Also, don’t forget that Mother’s Day is only 2 weeks away!
I am loving this card even though I am usually a silver girl but gold and pink are amazing together!!! Mother’s Day is right around the corner and this card is perfect because you can make a Happy Birthday Card and then use the negative of the Happy for your Mother’s Day Card! So let’s get started!!!
You will start off with a card base of Blushing Bride measuring 5-1/2″ x 8-1/2″! Then taking a piece of Gold Glimmer Paper measuring 4-1/2″ x 2″, run that through the Big Shot with the Happy Thinlit from the Hello You Thinlits. NOTE: You can bundle and save 15% when you purchase the Hello You Thinlits and Crazy About You Stamp Set! Woot Woot. I have found that the best way to have these Thinlits pop out of the die super easy is to place an un-used dryer sheet onto your Standard Cutting Pad (clear pads), then place the Glimmer Paper, then the Thinlit, and then the top Standard Cutting Pad. By doing this, the dryer sheet pulls that Happy right out of there super easy! Thank you one of my stampers for that trick. I was always doing it with a used dryer sheet in between the Thinlit and Gold Glimmer Paper. That works too but it is so much better underneath! For this card, you will be using the negative of the Happy but be sure to save the Happy for another project. You can save all of those little centers of the letter to adhere in or you can toss them OR you can use some of them as candle flames!!!! See there is a way to use all of your scraps. You will layer the Gold Glimmer Paper onto a piece of Whisper White measuring 3-1/2″ x 5″. You can either do it straight or you can tilt it to one side. Below the Happy, I stamped Mother’s Day from the Crazy About You Stamp Set in Blushing Bride. Now you can adhere this to your card front. I tilted mine for a different look! I really like it!!!
To finish it off, I punched a few flowers in Blushing Bride and Pink Pirouette with the Petite Petals Punch and the flower from the Itty Bitty Punch Pack. I brushed the edges with my Sponge Daubers. LOVE THEM! I added those to the card with Stampin’ Dimensionals and put a Pearl in the center!
Here is a sneak peak at the coordinating card which uses the Happy wording….check back next week for that tutorial!
For more samples using the Hello You Thinlits and Crazy About You Stamp Set, check out this post and this post!
You all know how I love flowers so why I didn’t purchase the All Abloom Designer Series Paper Stack much sooner, I don’t know! A few weeks ago this fabulous paper stack was on the Weekly Deals and I was tempted even though I have tons of Designer Series Paper. It is so true though….you can never have enough! I’m super excited about this paper and fell in love right away! Over the next week or so you will see lots of samples that I have created with this amazing paper!!!! The best part is you can create 4 or more of these cards with just one package of this paper! The stack includes 4 each of 12 designs and each card I created using only one piece! So let’s get started….
For the cards above, I started with a Whisper White card base measuring 4-1/4″ x 11″. The All Abloom Paper piece measures 4″ x 5-1/4″ and I used the 2″ Circle punch to cut out the circle. My original was with the circle on the side but one of my class attendees wanted her circle in the middle so I tried that out too! I’m not sure which one I love more!!! Before adhering the Designer Series Paper, place it on the card front and stamp your greeting. This was help with the placement of the image but not bump into the stamp as it might once adhered since I used Stampin’ Dimensionals! I used the greeting from the Petite Pairs Stamp Set. I love the coordinating greetings. You can use both of them or just one of them or stamp the second one on the inside! Once the greeting is stamped, you can attached the Designer Series Paper with dimensionals. I put one on each corner and then a few around the circle to keep that area popped up as well! Then I finished it off with a few butterflies die cut and embossing using the Beautiful Wings Embosslit Die and the Big Shot! Also, I added a little bow using the Blushing Bride Baker’s Twine and adhered it with a Mini Glue Dot! Simple, fabulous, and this card could be used for lots of different occasions!
Be sure to check back for more samples using the All Abloom Designer Series Paper Stack or you can subscribe in the upper right corner of the page and you won’t miss any posts!!!
Spring is here and that means I needed a new wreath for my front door!!! You can see some of my past wreaths here and here! I am loving butterflies and they are the epitome of Spring to me! I am still using the 1-1/4″ Burlap Ribbon as a base around my foam wreath. I used the Butterfly Thinlets from the Occasions Mini Catalog to create all of the butterflies in Daffodil Delight, Pumpkin Pie, Melon Mambo, and Tempting Turquoise! I hot glued the butterflies to the burlap and added a little bit of Dazzling Details to a few of them! I love it! It is so fresh and bright!!!!
What is on your wreath? Do you like decorating a wreath for every season?
I love this card….do you know why? Looking at everything but the greeting it says Illini!!! I will always bleed Orange and Blue as I graduated from the University of Illinois!!! Love it!!! I used Tangelo Twist for my card base, Night of Navy layered (4″ x 5-1/4″) and then some Birthday Bash Designer Series Paper (3-3/4″ x 5″). I love the gold flecks in the paper because it just adds the perfect flare. I added more flare but cutting out some Gold Foil with the Labels Collection Dies and Big Shot. Then I stamped the greeting in Bermuda Bay with the stamp from the Balloon Bash Stamp Set. You can check out other samples here and here! I added the greeting with Stampin’ Dimensionals for a little pop and dimension! Love it!!! This is a great gender neutral card as well! You know how I struggle with man cards!!! 🙂 What is your favorite color combination for man cards? Leave me a comment down below!
Happy Tuesday!!! That means I have a fabulous technique to share with you today!!! Please note that Blendabilities are no longer available with Stampin’ Up! because there was a product issue BUT I know many of you have them so I want to share these cool ideas with you!!!
How fabulous is this card? AND it is a man card!!! Love it!!!!!
For this card, I used a Whisper White card base of 4-1/4″ x 11″ and then I cut a piece of Window Sheet measuring 4″ x 5-1/4″. I took the Window Sheet and placed it over some of the diagonal design from the Birthday Bash Designer Series Paper. You could use any type of Designer Series Paper that is stripes, or polka dots or any other design! I used this as my template to dry the lines with the Night of Navy and Old Olive Blendabilities (alcohol markers)!!!! They aren’t straight and they aren’t perfect and some are thick and some are thin but it is okay! Made with love and not perfection! 🙂 I love it all messy though which is super different because I normally like clean, simple, and straight. I used Sticky Strip to adhere the Window Sheet along the top of the card and then covered it up with the Pear Pizzazz Cotton Ribbon. LOVE IT!!! The greeting is from the Remembering Your Birthday Stamp Set!!!
Here is another card that I created by coloring on a Window Sheet. For this one, I embossed the Window Sheet with the Polka Dot Embossing Folder! Then I colored some of the dots with the Coastal Cabana Blendabilities. I will say this only really works with certain images. I tried it with the flowers in the Lovely Lace Embossing Folder and it failed. The markers make streaks and swirls so the images need to be small and not detailed. I used the Crazy About You Stamp Set and coordinating Hello You Framelits (Bundle & Save) for the greeting. I added some Silver Glimmer Paper for a little bling on the bottom! Love it!!!
If you want to see this in action as well as other things you can color, check out my Video Tutorial here!
To see the cards with the Epoxy Stickers, click here! I hope you enjoyed these ways to use your Blendabilities and I hope Stampin’ Up comes out with a new alcohol marker because they are lots of fun!
Happy St. Patrick’s Day and Happy Tuesday !!! You know what that means…I have a fabulous technique to share with you! I’m super excited about this one because it includes flowers (Eeee) and PINK (EEeeee)!!!! How amazing is this card????
I love this so much that I almost want to frame it just to look at beautiful pink flowers everyday!!!! Now lets get started on how I created this beautiful masterpiece!!!
My card base in the card above is Melon Mambo (8-1/2″ x 5-1/2″) with a piece of Pink Pirouette layered on top (4″ x 5-1/4″). Then my Whisper White cardstock measures 3-3/4″ x 5″. You can always omit the second layer and have your Whisper White measure 4″ x 5-1/4″. Using your Lotus Blossom Stamp Set you will start to stamp your flowers all over (click here to see a how to video). I used Pink Pirouette and Melon Mambo for the sample above and stamped 6 flowers. I guess I totally ignored my “decorating in odd numbers” rule! Opps! 🙂 Once you have all of your flowers stamped, using the #3 flower image, stamp it on a piece of scrap paper and cut out the flower. You will then use this as a mask to cover up that center bottom flower when you are adding your stem. This is so you don’t stamp on top of it and create a mess on top of that flower! It also gives the illusion of a vase of flowers in the front and back. Once you are done stamping your stems it is time to add your vase. Using my Oval Framelits and my Big Shot, I cut out the #4 oval…..fourth from the biggest and fourth from the smallest!!! You will then cut off the top and the bottom of the oval. I started by cutting one end and then placing it on my card to see how much I needed to cut off the other end. It will always vary depending on how low your flowers are on your cardstock! Before adhering the vase to my card, I brushed the edges with my Sponge Dauber (LOVE) to give that darker look and make it seem more rounded and 3D!
For this sample, I used Hello Honey as my card base and Island Indigo as my vase! The flowers were stamped in Island Indigo/Lost Lagoon and Tangelo Twist/Hello Honey! The stems were done in Mossy Meadow! So many color options for your vase and just fabulous looking for any occasion. To see this in action, I created a Video Tutorial for you!!! Be sure to give it a Thumbs Up if you like it!!!!
Don’t forget that you can earn the Lotus Blossom Stamp Set with every $50 (US) you purchase from now till the end of March – only 15 more days!!! Place your order online by clicking here and you will earn points as one of Laura’s Loyal Stampers!!!