Technique Tuesday – Irresistibly Yours!!!

Posted on

Happy Tuesday!!!! I hope you are having a fabulous week and this technique makes it even better!!! 🙂 Today, I’m going to show you how to use the Irresistibly Yours Designer Series Paper that you can get for FREE through Sale-A-Bration when you place a $50 (US) order! The catalogs shows the paper like this!

Irresistibly Yours DSP

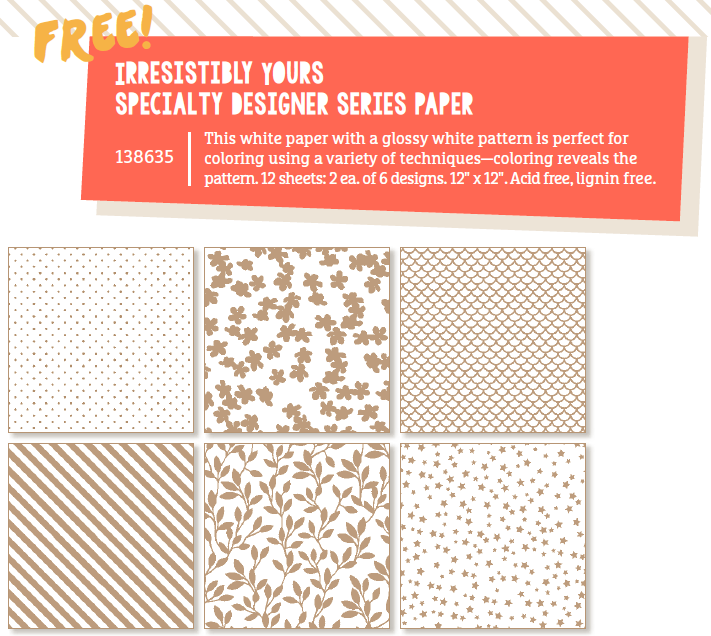
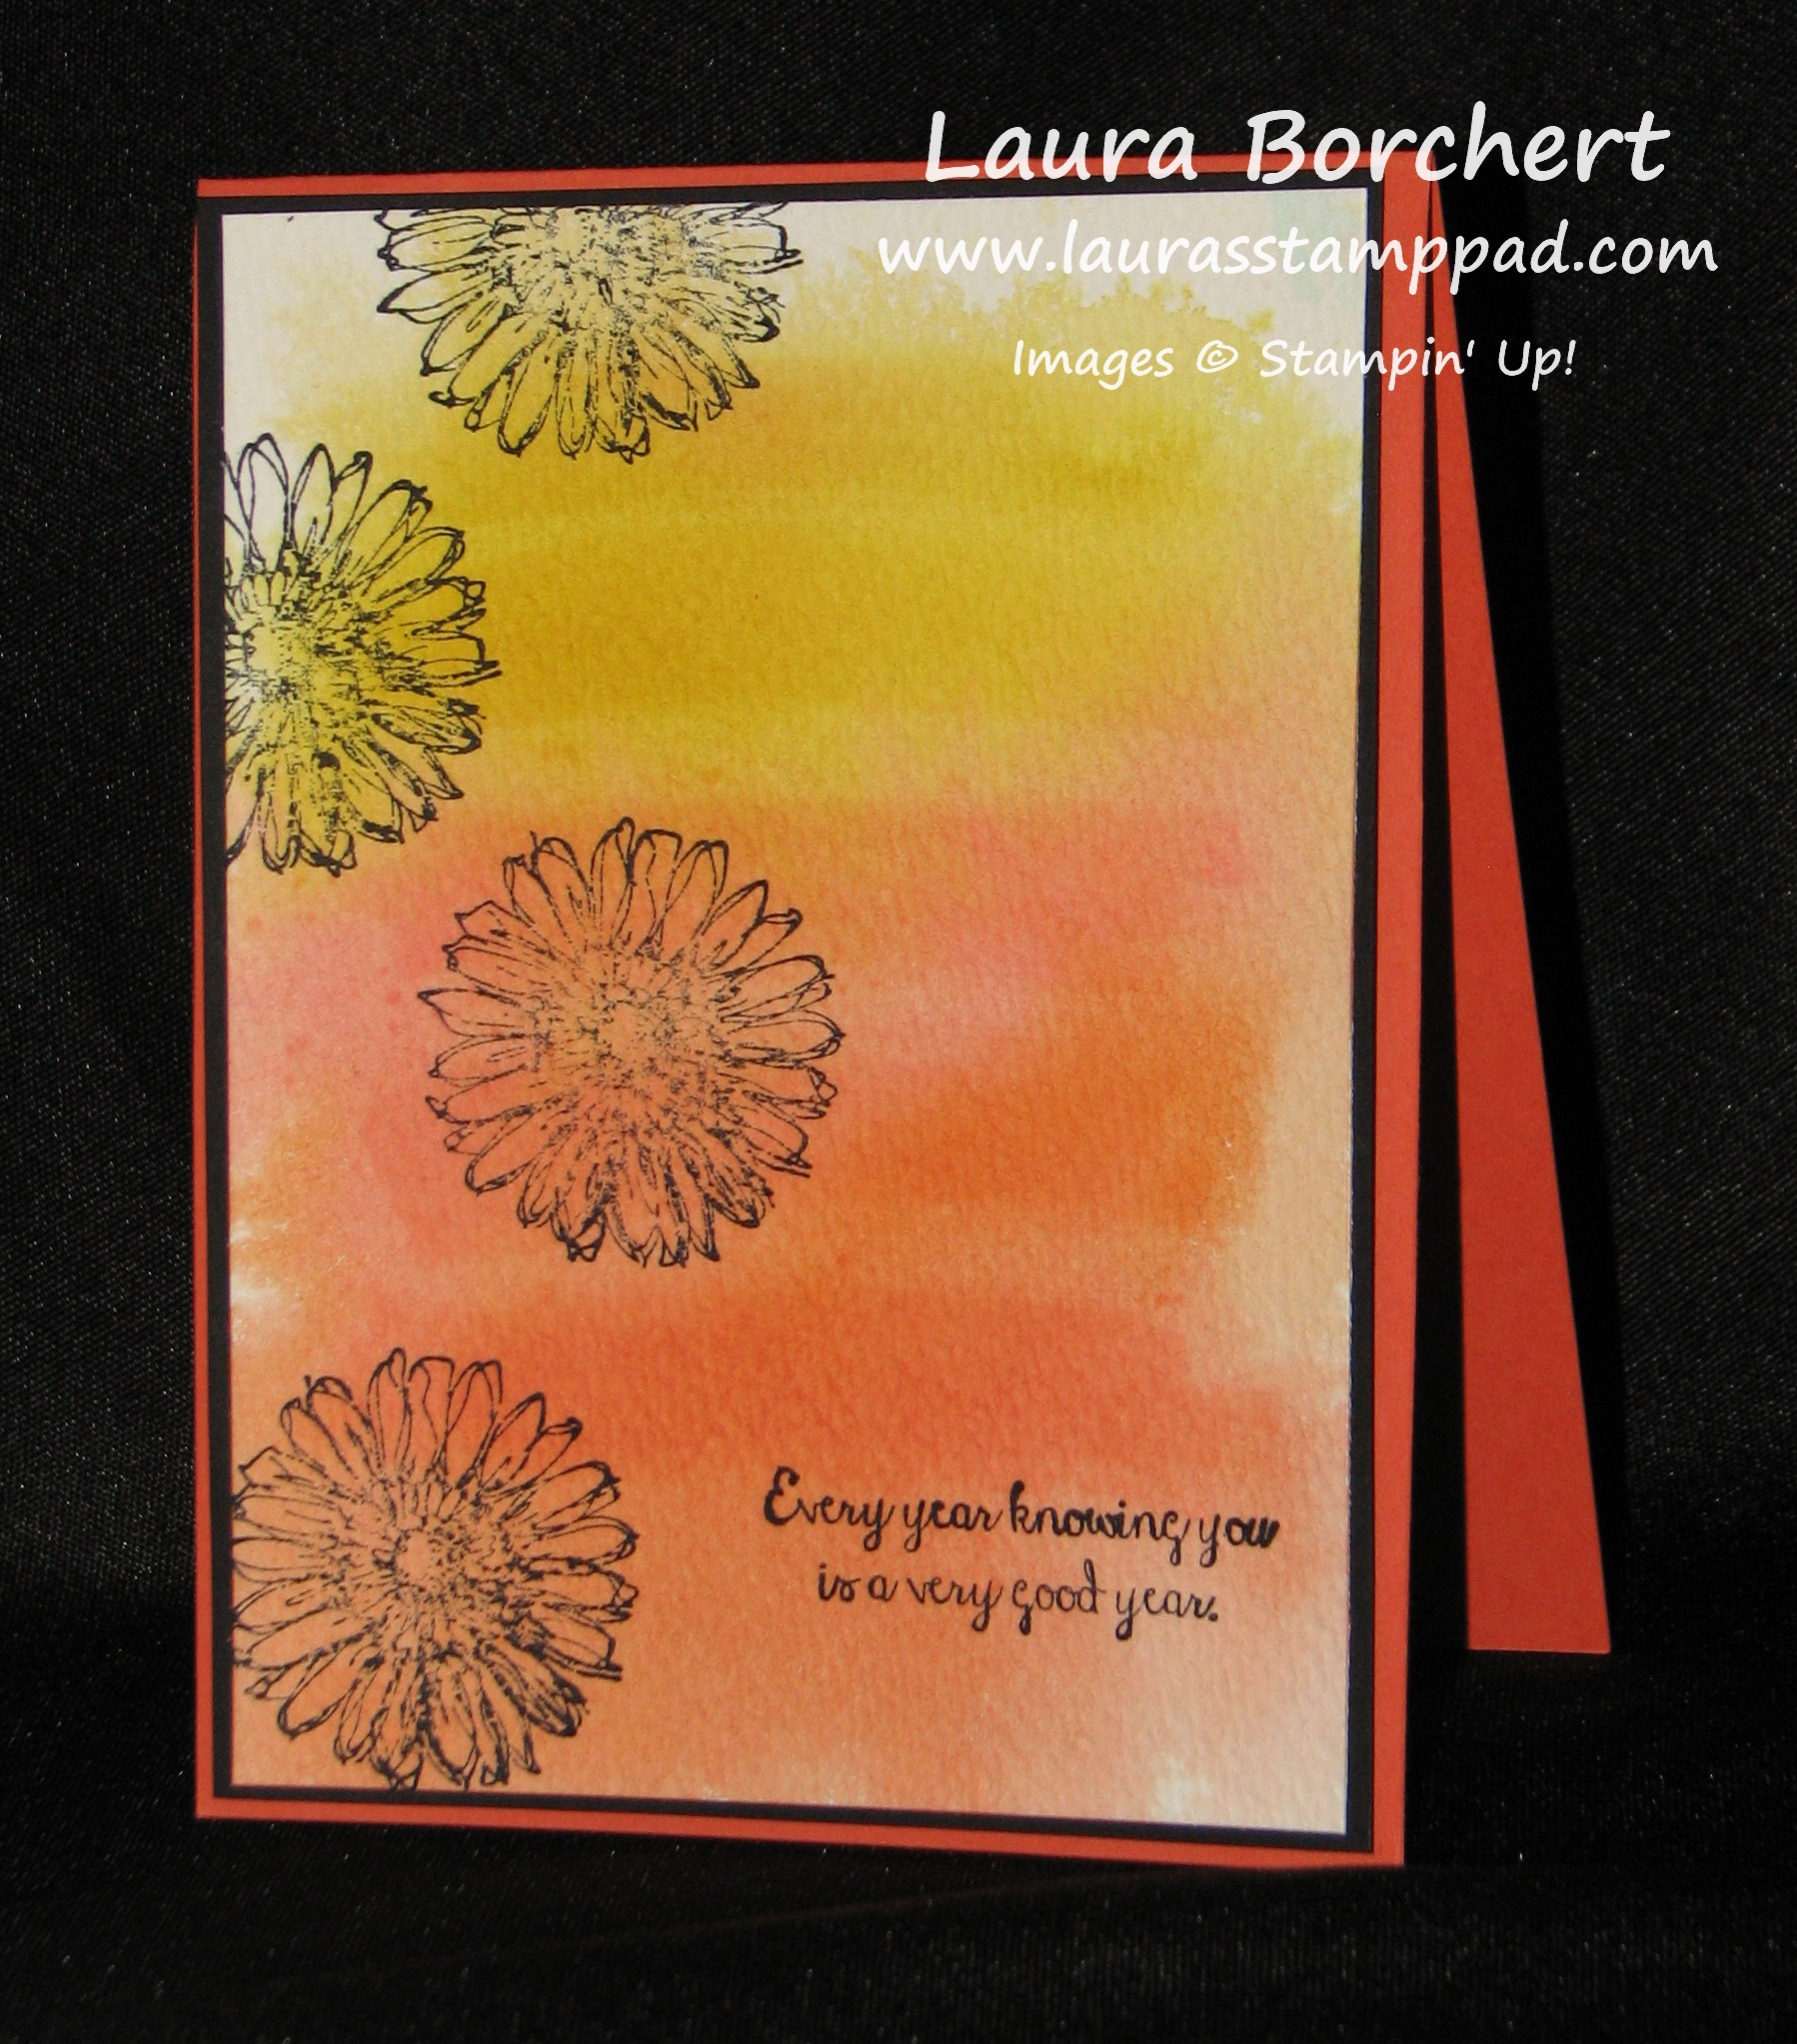
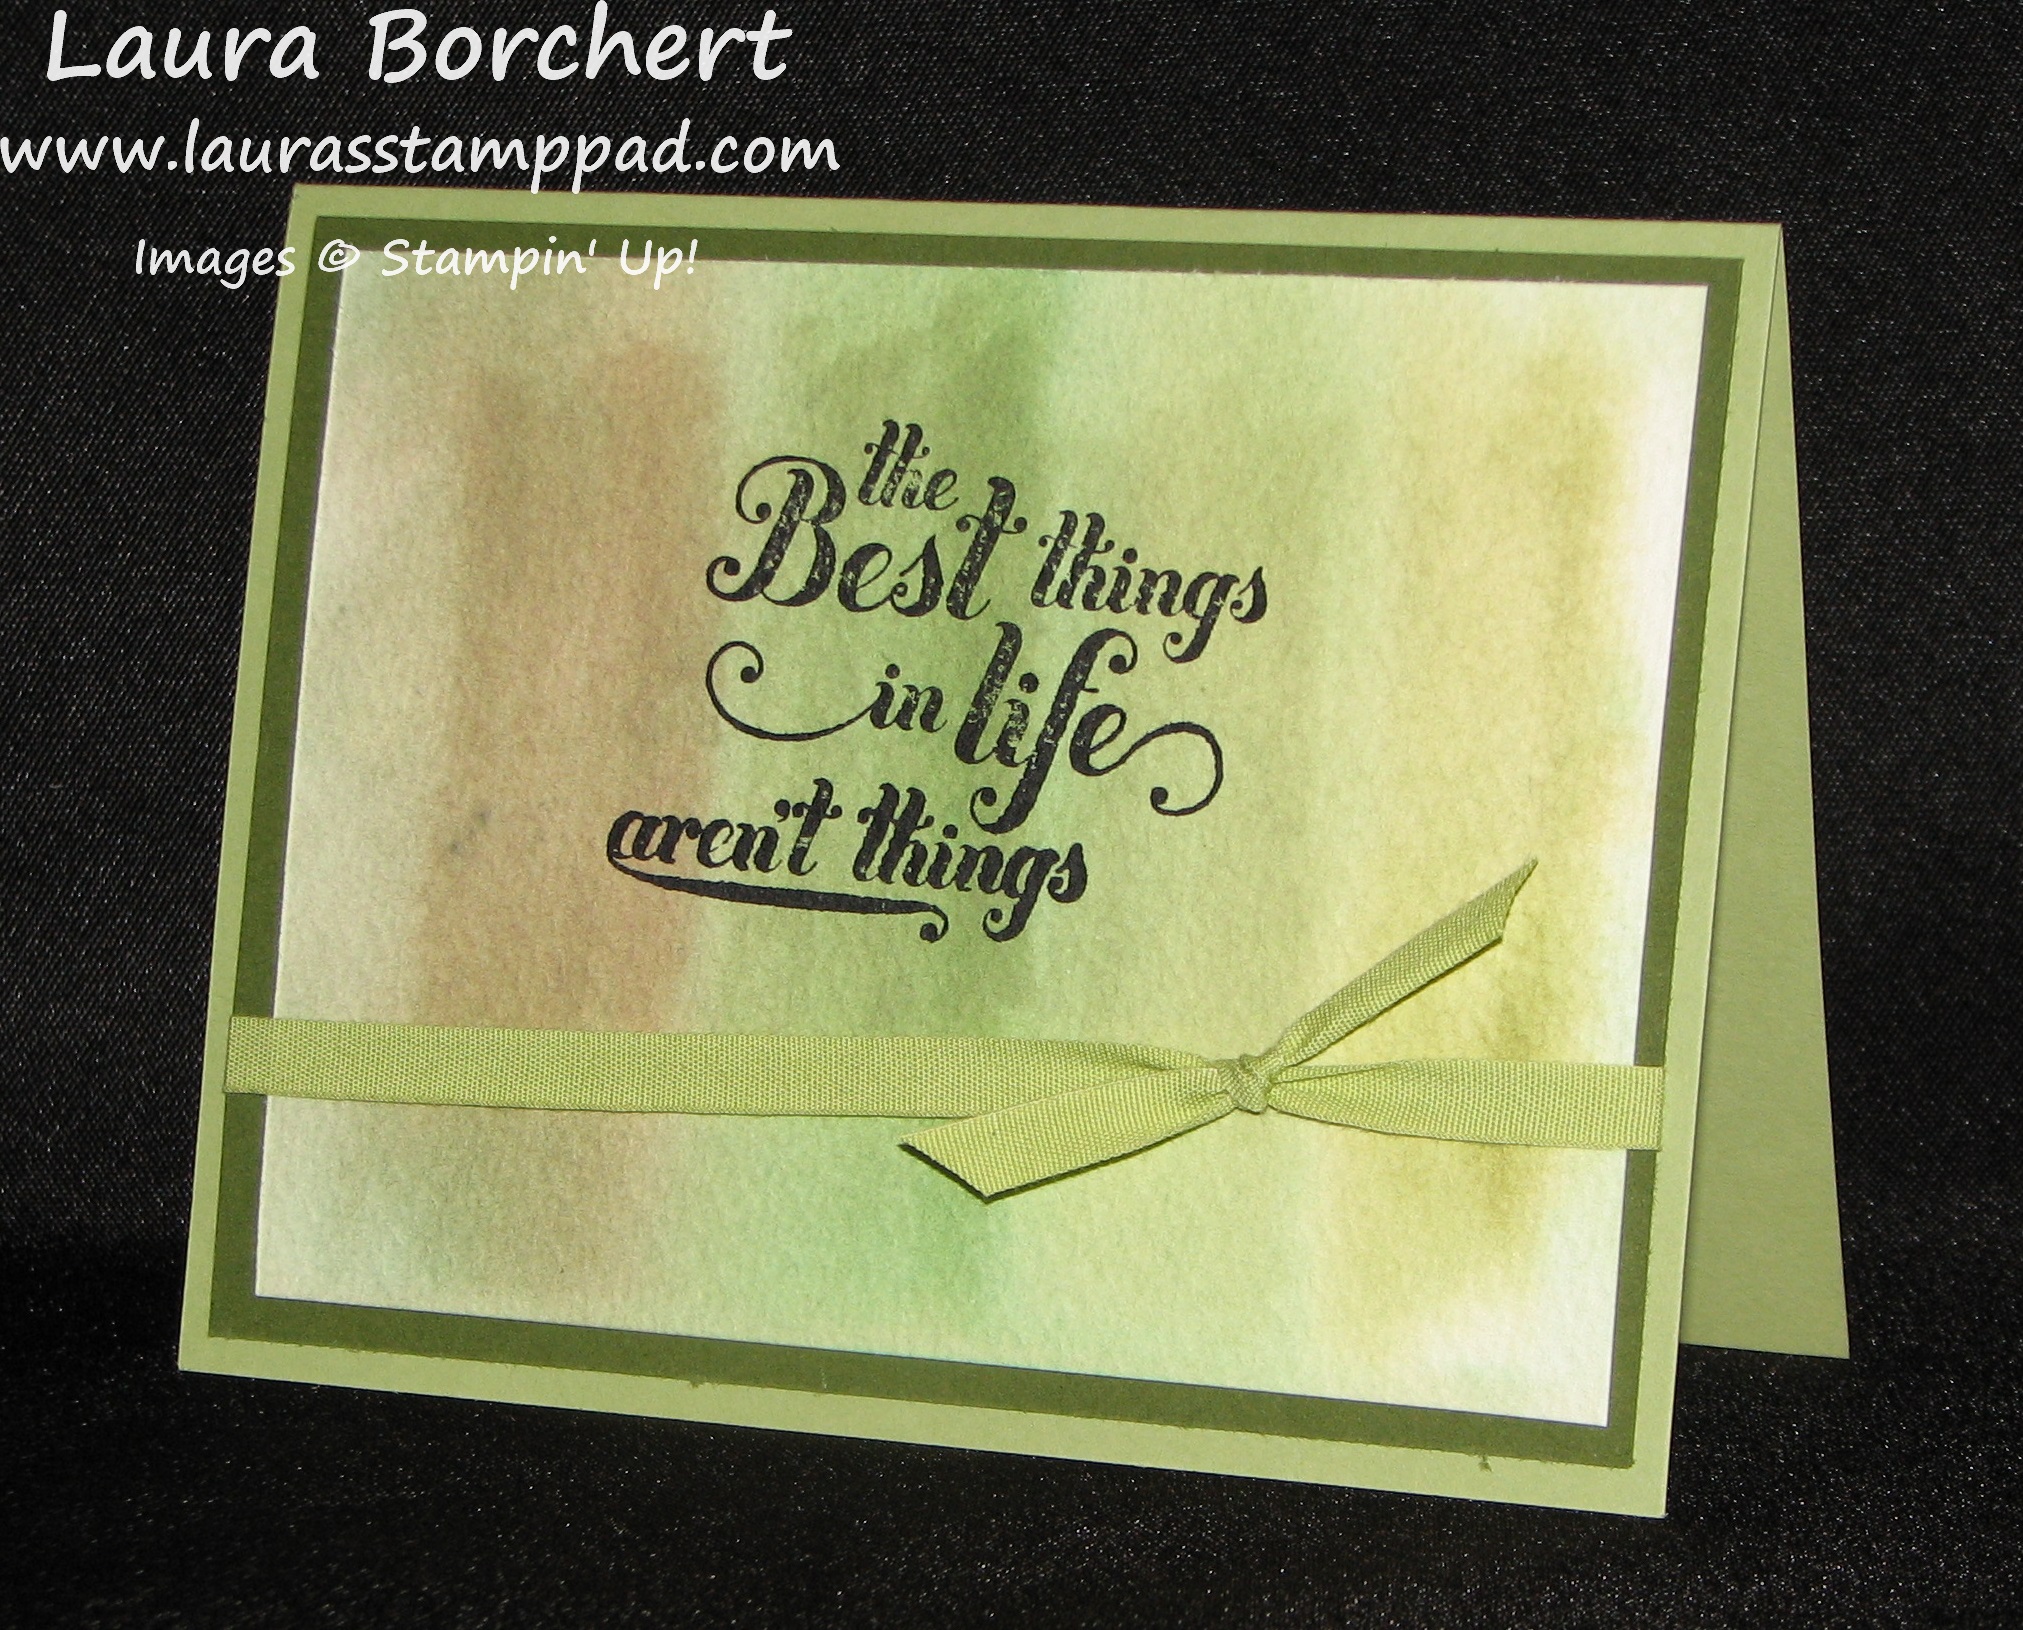
When you first see this, you may be confused and think it is tan and white paper. Really, it is white paper with the images you see in tan clear embossed onto the paper. You can’t really photograph clear on white (as you can see in my video) so Stampin’ Up! is showing it like this! Since this paper is clear embossed, you can add color to the paper and it will only pick up the color on the white areas and not on the clear embossed images. You can add your color with Spritzers, Sponge Daubers, Sponges, Brayer, Markers, Blendabilities, and stamping! It is sooooo much fun to add color and see the image show up. It is like being a child again and painting in one of those books that you add water and the image appears. (Just me?)

Spritz Emboss Resist, www.LaurasStampPad.com

SUPPLIES NEEDED: Irresistibly Your Designer Series Paper, Spritzers, Stamps, Embellishments

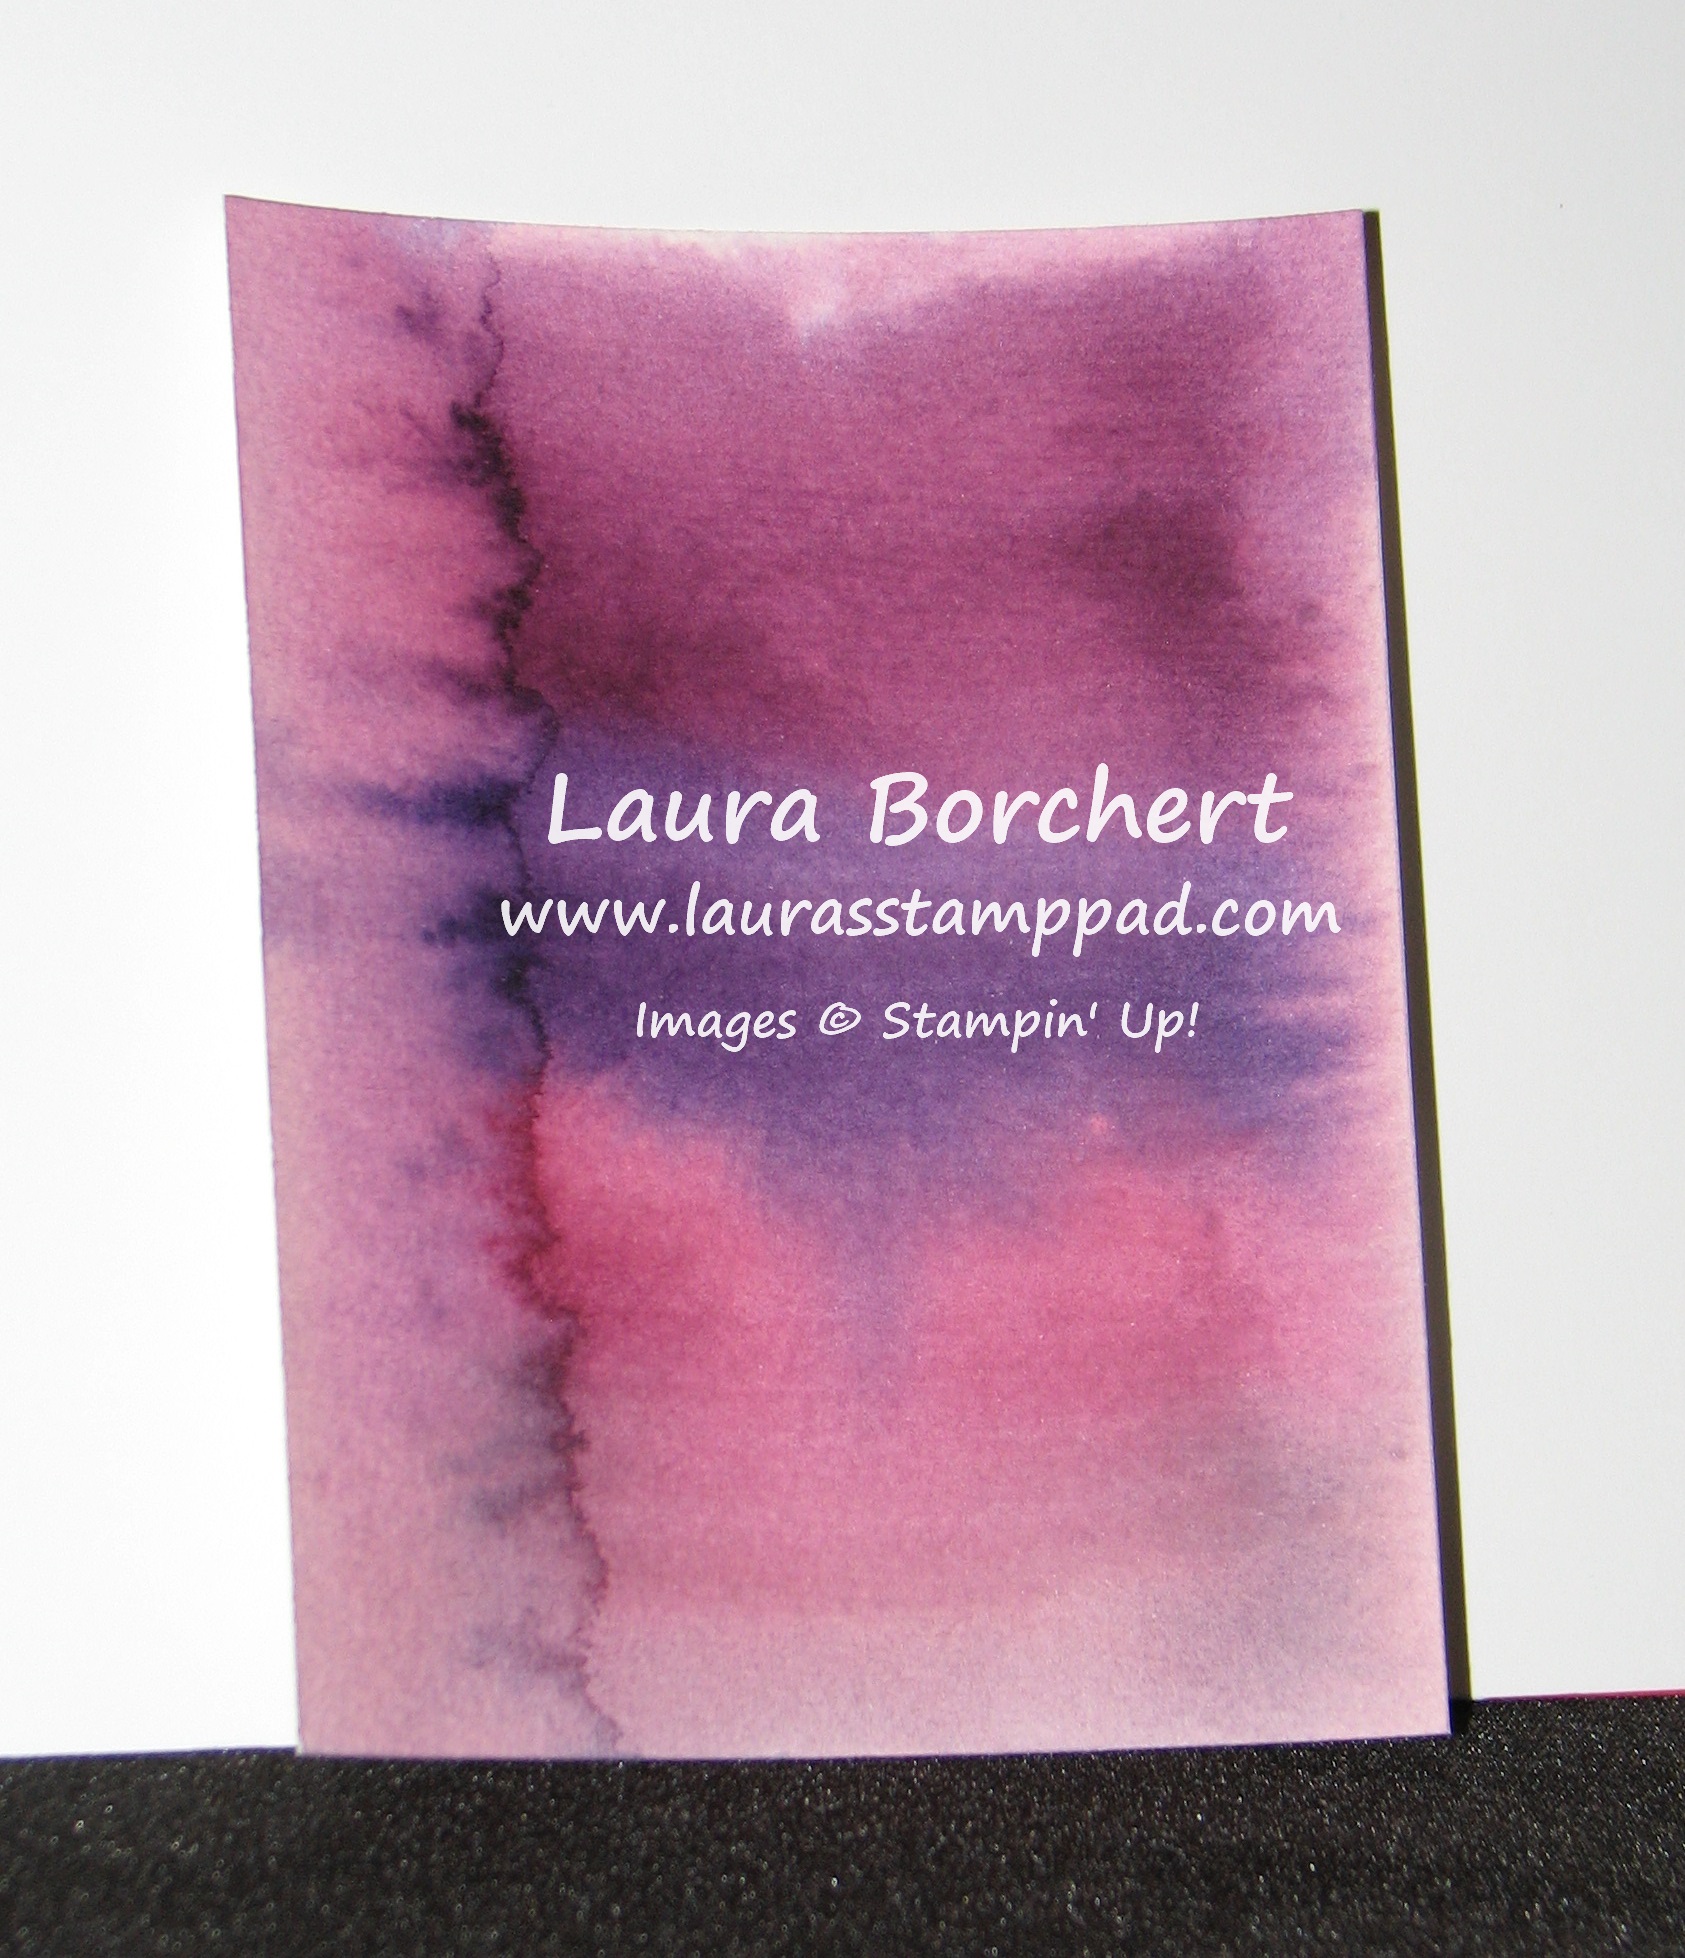
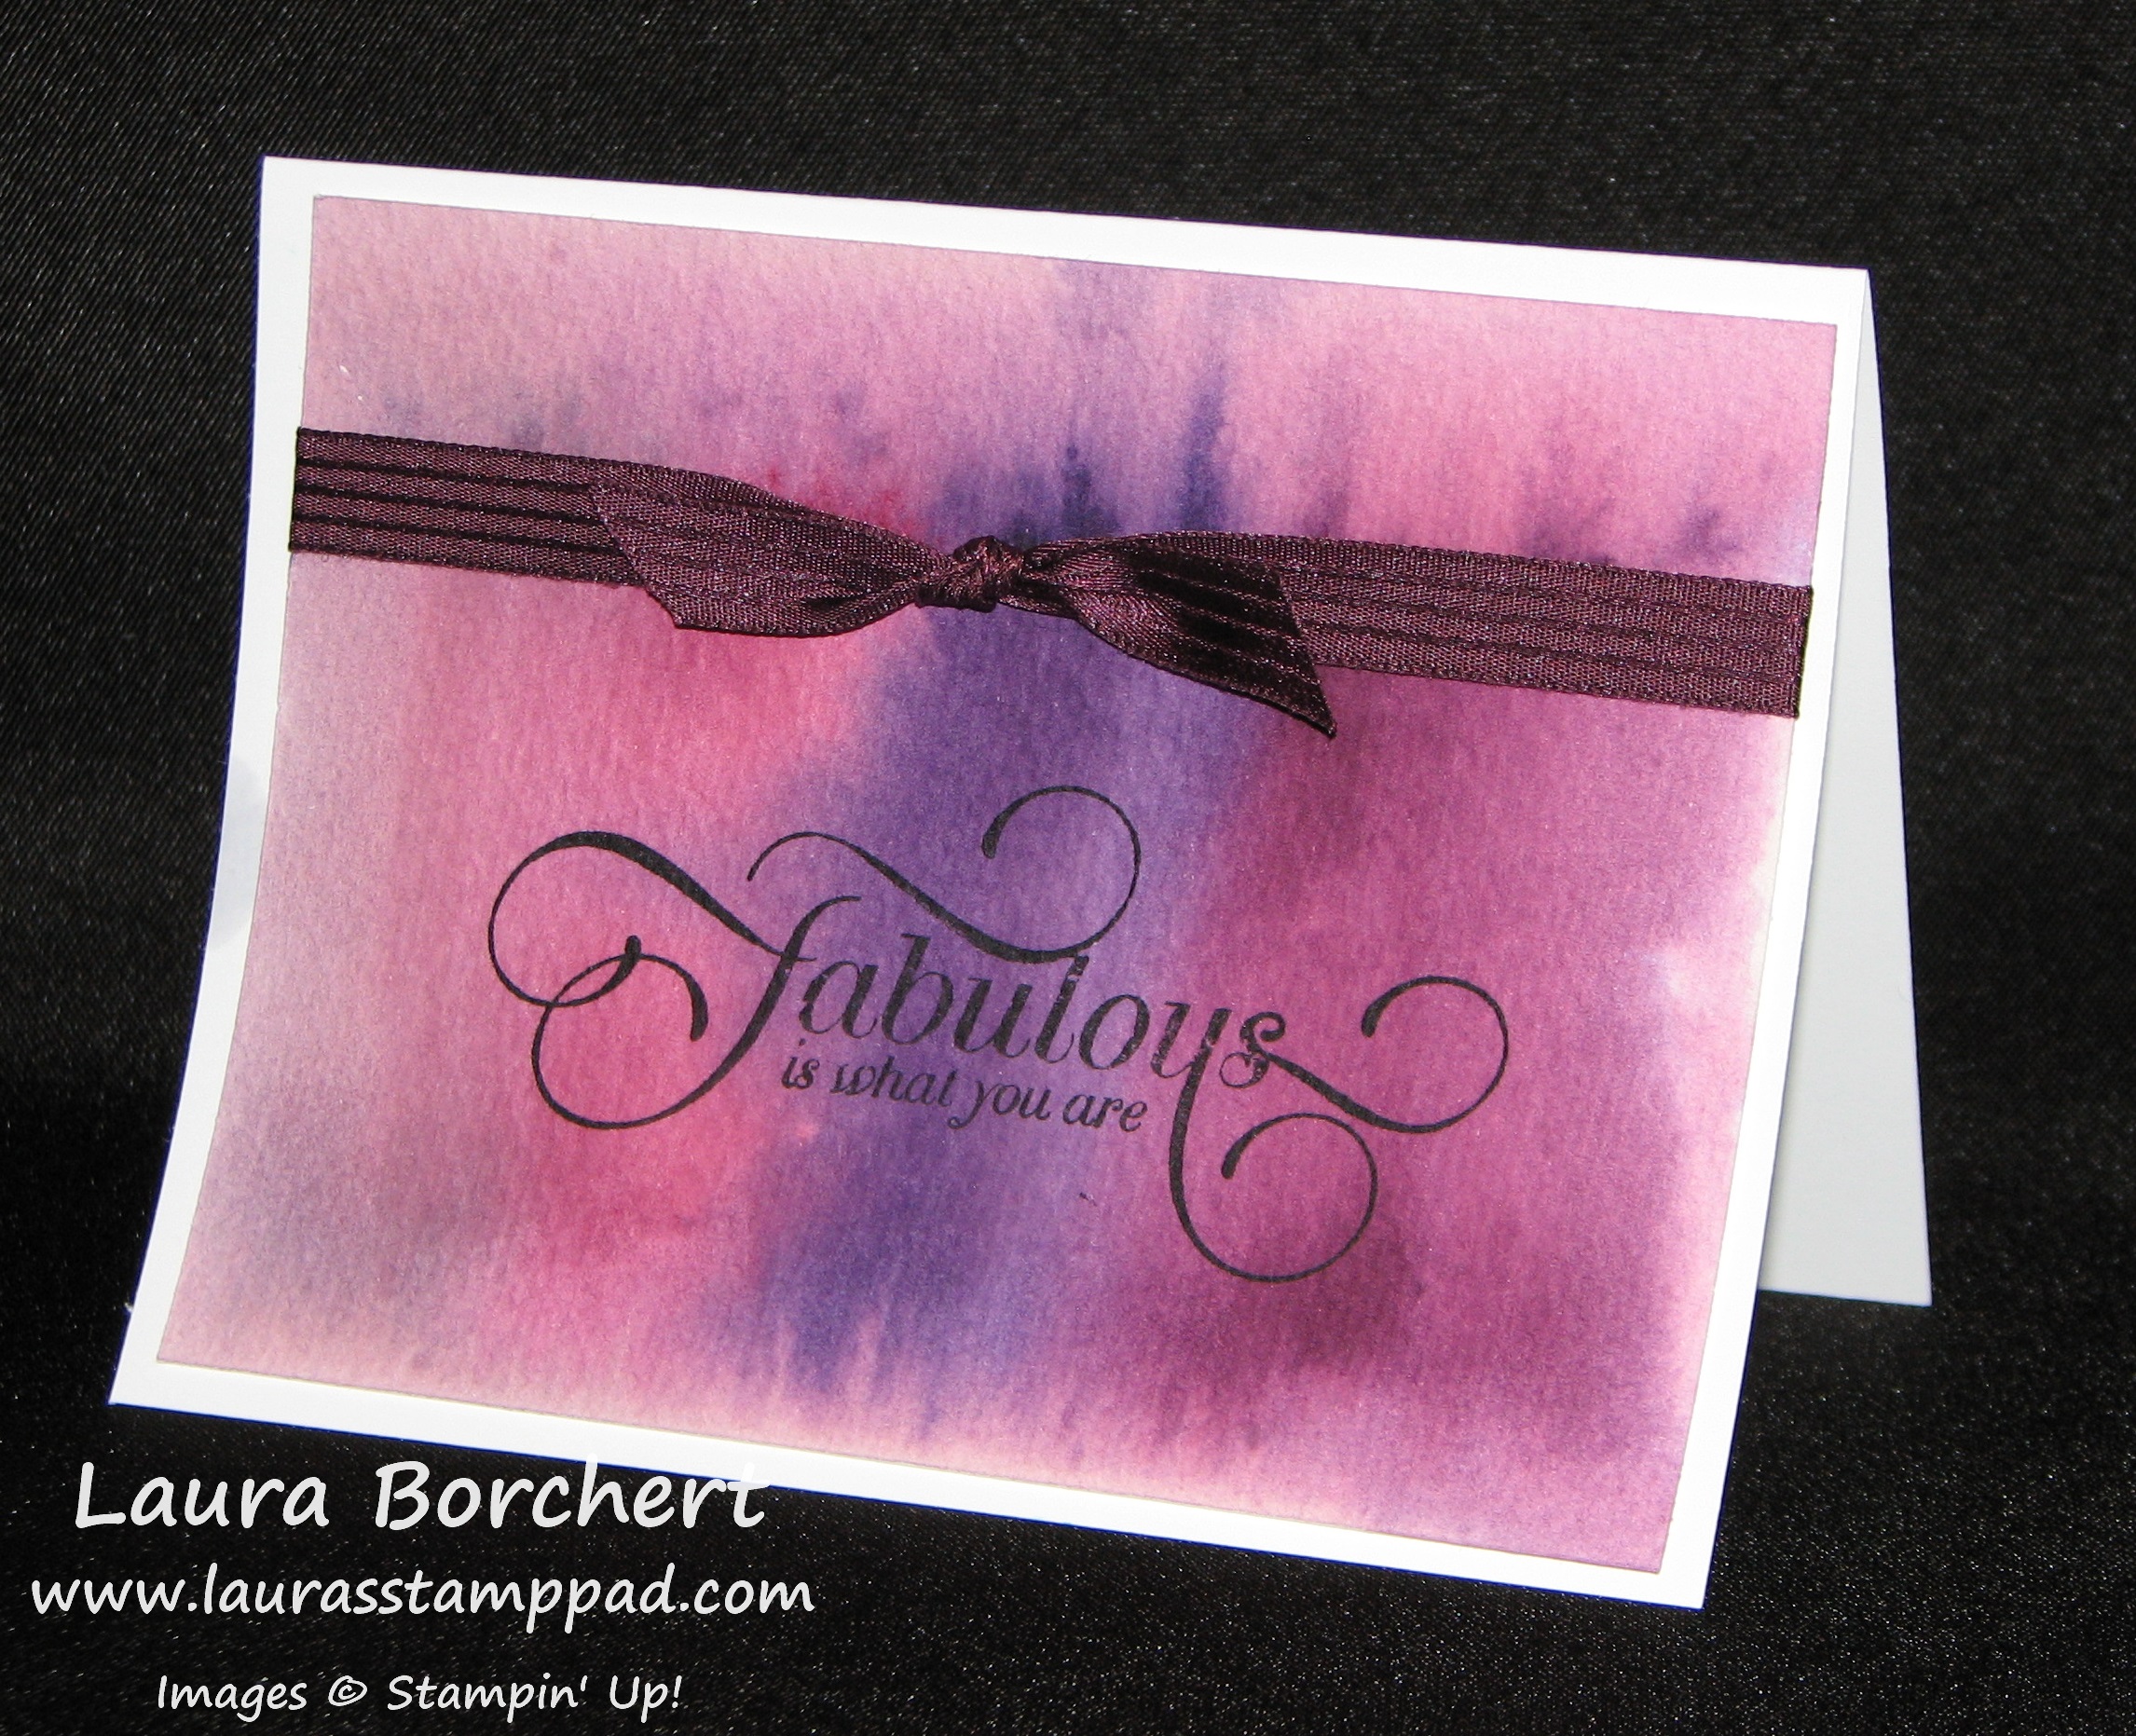
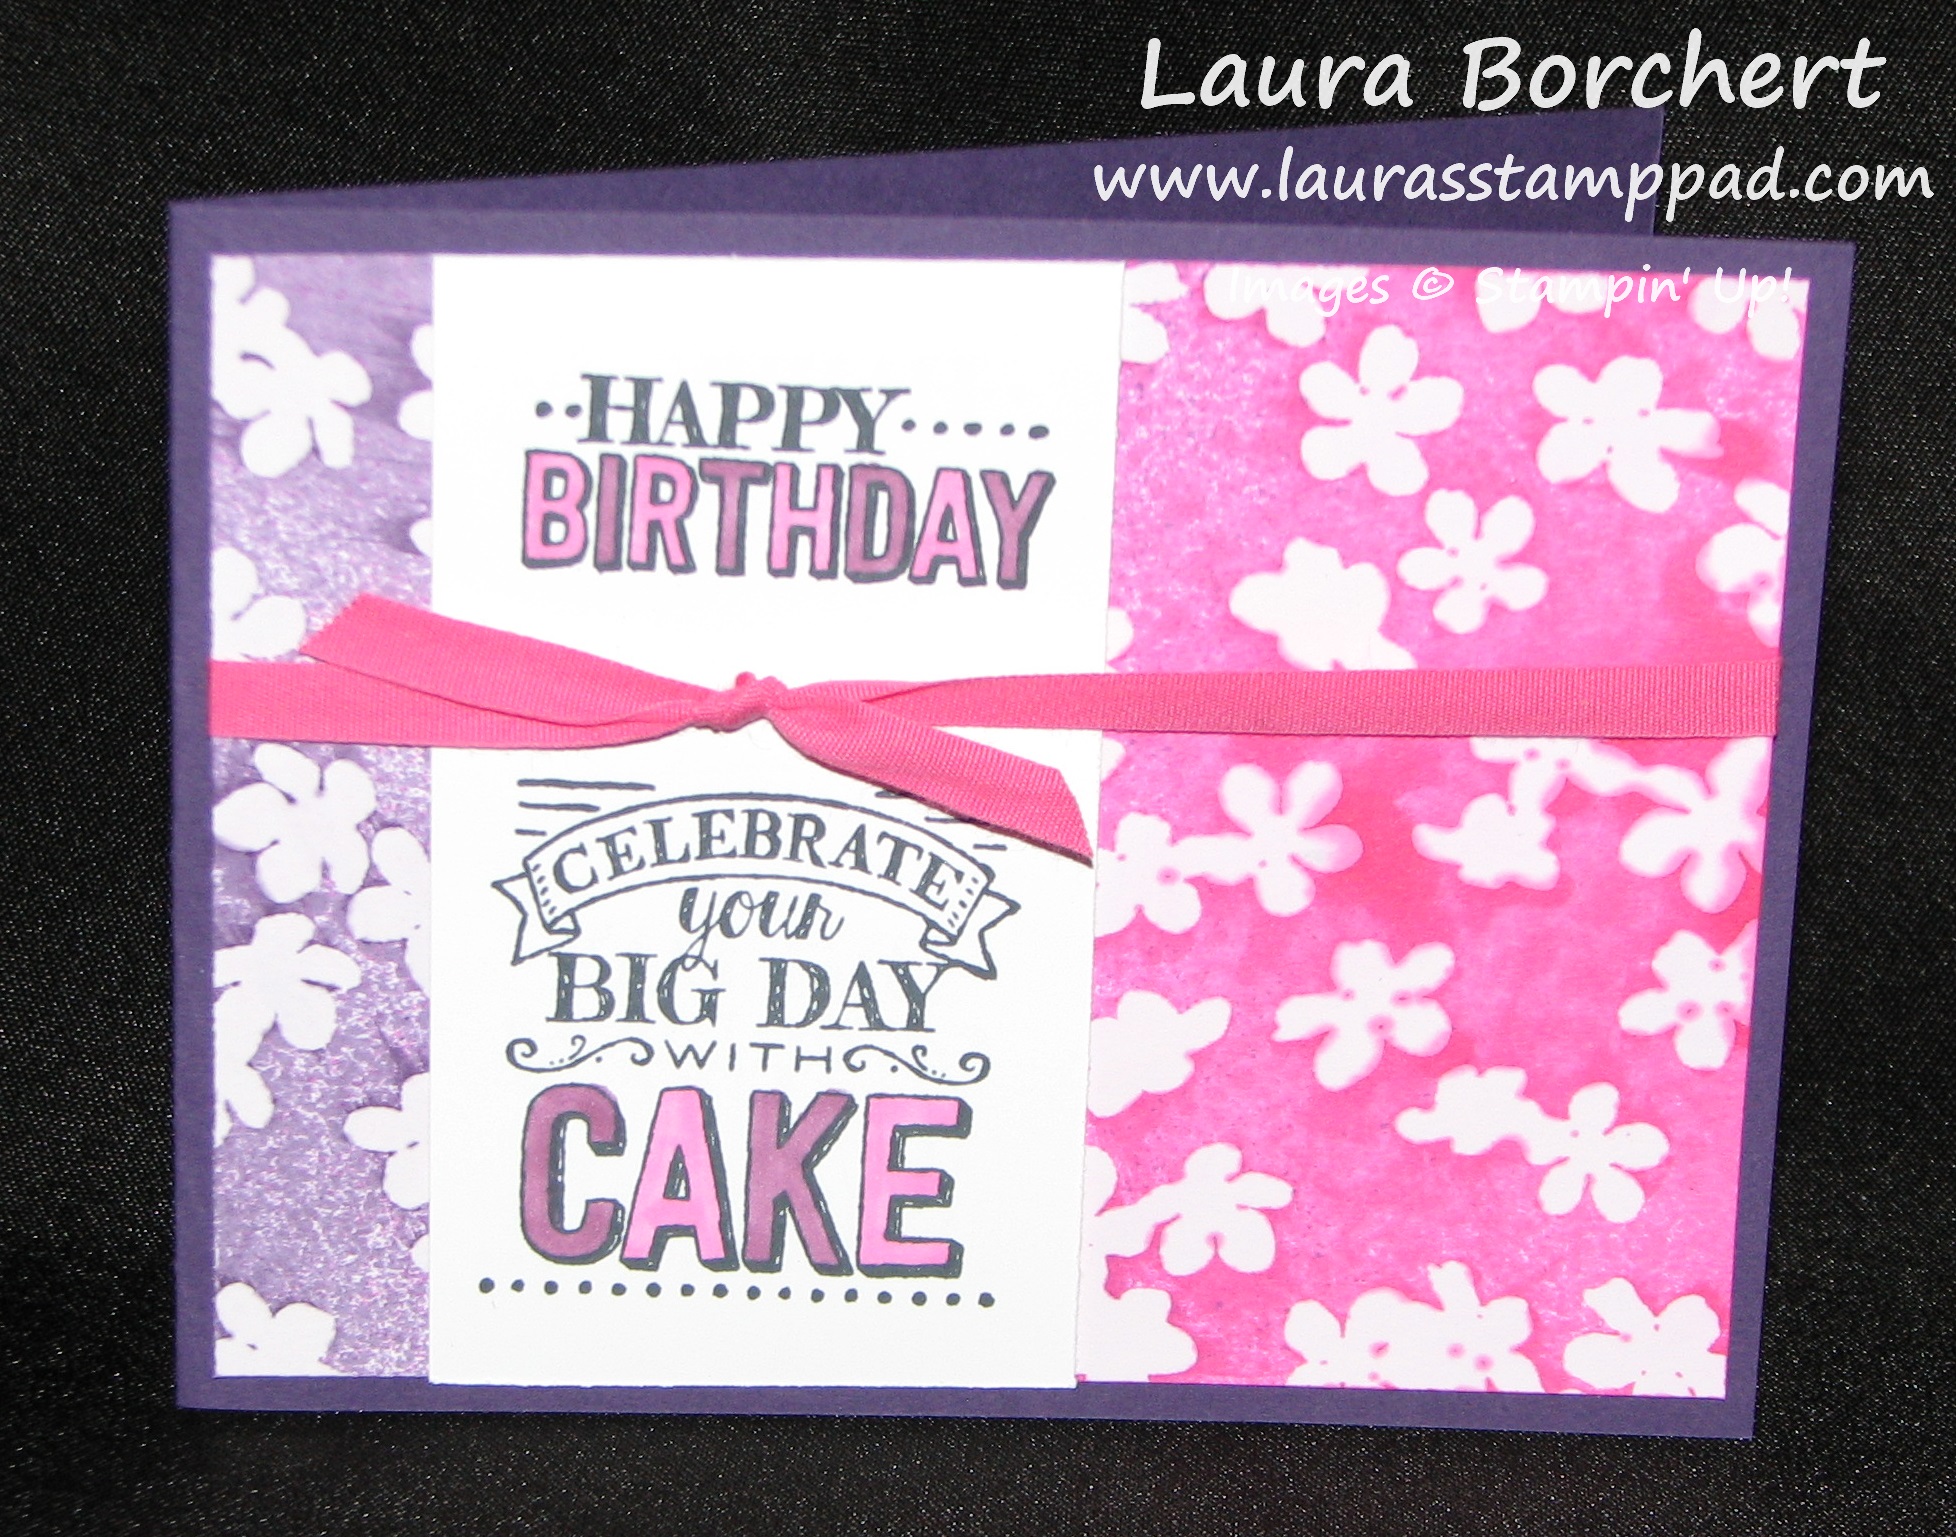
Yeah it’s that simple! You can get this emboss resist look with just this paper. If you created this yourself, you would need Cardstock, VersaMark, Heat Tool, and Embossing Powder. I cut my Irresistibly Yours paper into 4″ x 5-1/4″ and placed it into a box for spritzing. I look the look of Spritzing but it scares me every time because I tend to get messy! 😉 I spritzed the right with Melon Mambo and the left with Elegant Eggplant. (Mix re-inker and alcohol (70 Proof or less) in a Spritzer). Underneath the greeting is the overlap or dots and spritz. I wasn’t sure if I liked that look or not so I covered it with my greeting. You could always show that off and move your greeting down. My greeting is from the Big Day Stamp Set which is also a Sale-A-Bration item! I am loving this stamp set. I colored in the letters with my Rich Razzleberry & Melon Mambo Blendabilities! You can earn those for FREE with Sale-A-Bration as well! I finished off the card with some Melon Mambo Cotton Ribbon! Here is another photo of this card!

Spritz Emboss Resist, www.LaurasStampPad.com

If you would like to see this in action, check out my Video Tutorial below! Don’t forget to give it a thumbs up if you liked it and be sure to subscribe so you don’t miss out on any other videos I create!

Be sure to check back later this week to see more samples using the Irresistibly Your Designer Series Paper!

Happy Stampin’

~Laura


Birthday Bash!!!!

Posted on

I am loving the Big Day Stamp Set in the Sale-A-Bration brochure! It is so much fun to play with and you know I make lots and lots of Birthday Cards each year. Check out this amazing card style!!!

Big Day Birthday Girl, www.LaurasStampPad.com

You know I love PINK and this is just precious!!!! I started with a Crumb Cake card base and then added a Top Note piece of Sweet Taffy Designer Series Paper! The Top Note is one of my favorite dies….I love the shape and that stitched edge! Then I took the Clear Block I and placed the Birthday Greeting on top, the Cake on the bottom, and the Cake Greeting in the middle. This way I can stamp with all at the same time. I had to stamp the candle separate because otherwise it would have been floating on top of the cake. I stamped these images with the Memento Ink because I colored them in with the Melon Mambo Blendabilities. If you are using Markers, just be sure to stamp with your Stazon Ink. This was all stamped on a piece of Whisper White cardstock measuring 2-1/4″ x 5-1/4″ and then layered on a piece of Melon Mambo measuring 2-1/2 ” x 5-1/2″. I added this to my card front with Stampin’ Dimensionals! For a little more flare, I added some Linen Thread to the left side and added a few tags. One tag has the Ice Cream Greeting stamped on it and the other is a piece of Sweet Taffy Designer Series Paper…..using up those scraps! 🙂

Big Day Birthday Boy, www.LaurasStampPad.com

Of course I did a boy version as well! I used the Sweet Taffy Designer Series Paper again and my Coastal Cabana Blendabilities! I can’t wait to try this out in many other colors and Designer Series Paper Packs! If you try out this card, be sure to send me pictures! I would love to see what you come up with! Also, I wanted to give a shout out to Julie Davison for this amazing idea!!!!

If you would like to get this Big Day Stamp Set for FREE, you can do so by placing a $50 or more order between now and March 31st! Click here to place your order and check out the items you can earn for FREE here – Sale-A-Bration!

Happy Stampin’

~Laura


Christmas Bauble!!!

Posted on

Christmas Bauble, www.LaurasStampPad.com

This Christmas Bauble Stamp is so simple and yet so much fun! It is a single stamp and really that is all you need! How fabulous is this card? I stamped the bauble on Whisper White cardstock in VersaMark and then poured Silver Embossing Powder over it. Heated it with my heat tool and then let the magic begin! I played with my Cherry Cobbler Blendabilities a little and then was sad that I didn’t have the Old Olive set as well. No worries, I got out my markers. I will saw that the Blendabilities were more fun and you can’t see the stroke lines like you can with markers! Either way though, this card is fabulous! After coloring it, I cut it out with my Labels Collection Framelits and my Big Shot, added some Stampin’ Dimensionals and popped it on my card! My card base is Crumb Cake and the center strip is Cherry Cobbler ran through the Big Shot with the Perfect Polka Dot Embossing Folder!

Christmas Bauble, www.LaurasStampPad.com

Here is another one using my Lost Lagoon Marker and I left out the Cherry Cobbler strip. I just played around with it to see what I liked the best. I prefer the top one! What about you?

If you love to color, this is so much fun and you NEED the Blendabilities Markers! 🙂

Happy Stampin’

~Laura


The Newborn King!!!

Posted on

Manger Newborn King, www.LaurasStampPad.com

This stamp set- The Newborn King is just fabulous….especially if you like to color! 😉 I played with my Blendabilities and this stamp set one afternoon and created these fabulous creations!

NewBorn King Blendabilities, www.LaurasStampPad.com

It was so much fun but took lots of patience and you know me…..easily distracted and ready to move on! It was super fun and turned out amazing but we all know that making 200 Christmas Cards with this scene colored all over is just not on my To-Do List! So I came up with the card above! I started with a Night of Navy card base, cut 2 pieces of Whisper White measuring 4″ x 5-1/4″ and brushed all of the edges with my Night of Navy Sponge Dauber. LOVE! I then stamped the manger scene in Night of Navy (toward the top). Of course what is a Laura Creation without some bling so I added a little strip of Silver Glimmer Paper to the bottom portion. I put the manger scene on the card front and put the other one on the inside. Also, I stamped the star in the top left corner on the inside Whisper White piece and added the greeting! Perfect! I think the hardest part of this card was the Sponge Dauber portion….and that’s not hard, it’s FUN! 🙂

I hope you enjoyed this card and be sure to tell me about your Christmas Cards or current project you are working on! I would love to hear about it so leave me a comment down below!

Happy Stampin’

~Laura


Ways to Use Your Blendabilities!!!

Posted on

I am loving my Blendabilities Markers! They make coloring so much fun and there are so many ways to use them!!!

Blendabilities Flower Shop, www.LaurasStampPad.com

How many ways did I use my Blendabilities on the card above? If you guessed 4 then you are correct! I colored my ribbon, my rhinestones, my flower and created the polka dots! How fabulous is that!

For the Ribbon, I started with a piece of Whisper White Organza Ribbon and the lightest Rich Razzleberry Marker. Start coloring on the right side to about half way in, then take the darkest marker and start on the left and color to the middle where it meets the lightest color. Now take your medium marker and color the middle section overlapping over both the dark and light shades. This gives a fabulous ombre look to your ribbon! You know how I love me some ombre! 🙂

For the Rhinestones, just color one rhinestone with each of the 3 markers! It is as easy as that!

For the Flower, I stamped this one from the Flower Shop Stamp Set with my Memento Pad. Then starting with the darkest color, I started coloring the tips of all of the petals, then I grabbed the lightest color and colored the center of the flower and a little out. Finally, take your medium marker and color the middle, overlapping both the dark and lightest colors. I have also done it where I color with the darkest and lightest marker only and use the lines in the flower to color one section light, the next dark. Once I was done coloring, I took the Color Lifter and ran it along those tight lines. The Color Lifter sorta bleaches out the area so this gave a lighter look in those areas! Of course after coloring the flower, I used my Pansy Punch to punch it out!

For the Polka Dots, I adhered my flower to the Whisper White square with Stampin’ Dimensionals. Then using the lightest marker start dotting all around the flower with a few farther out. Then take your medium marker and dot around the light dots and a few father out. With the darkest marker, dot randomly farther out. This will give the look that the dots fade out. I’m not the best with random so mine doesn’t really give that illusion but some come out better than others! 🙂

I put it all together with some Melon Mambo and Rich Razzleberry cardstock with a layer of Sweet Taffy Designer Series Paper in there! I love the bright colors and the way the flower pops! So cute! What is your favorite way to color with your Blendabilities? Leave me a comment down below!

Happy Stampin’

~Laura


Work of Art Holiday Cards!!!

Posted on

We all know the Work of Art Stamp Set is fabulous and can be used in soooooo many ways but did you know you can use it for your Holiday Cards as well? Of course you can! Check out these amazing cads!

Work of Art Wreath, www.LaurasStampPad.com

Eeeeee I can’t help but squeal at how amazing this card is and how fabulous the Work of Art Stamp Set is. If you don’t have it already, click here for wood and here for clear and overnight the shipping (just kidding…..on the shipping part)!!! This card was created with Whisper White, Cherry Cobbler, and Mossy Meadow. I used the smaller swish image for the wreath and got the multiple shades by stamping a few times before going back to the ink pad! For the holly berries, I used my Cherry Cobbler Candy Dots from the Regals Pack. You can also color your Pearls or Rhinestones with your Cherry Cobbler Blendabilities and use them for the holly berries. Or you could use your Cherry Cobbler Dazzling Details!!!! Lots of options!

Work of Art Tree, www.LaurasStampPad.com

You didn’t seriously think there was only one way to use your Work of Art Stamp Set for the Holidays! This one uses the long swish image. I found it easiest to start at the bottom and stamp with the image half way off the paper. Ink up and move the stamp a bit farther to the left and stamp again, repeat until you are at the top of your paper! For this one I used Cherry Cobbler colored Rhinestones but you could use any of the items mentioned above as well! The greeting comes from the Bright & Beautiful Stamp Set! Love it!!!!

And to show you these cards in action, check out my Video Tutorial!!!! Be sure to give it a thumbs up if you like it and don’t forget to subscribe to My Channel so you don’t miss out on future videos!!!!


Happy Stampin’

~Laura


Flower Fun Mini Cards!!!

Posted on

Mini Cards with Blendabilities, www.LaurasStampPad.com

These cards are just little 3″ x 3″ ones! Decorating them is so much fun because you only have a little area to work with! I used my Rich Razzleberry Blendabilities for the background on the right and left! Starting with the lightest color, move back and forth like you are making a splotch of color. You will go about half way across the 2-1/2″ x 2-1/2″ piece of cardstock. Then taking the darkest color and start from the top coming down to the middle. Finally with the medium color blend in the middle on top of the dark and light colors. This will give you a nice ombre look fading from light to dark. Then you will layer that onto a piece of Rich Razzleberry measuring 2-3/4″ x 2-3/4″ and then onto the card base of 3″ x 6″ (folded in half). I stamped the greetings from A Dozen Thoughts with my Memento Pad. I punched a few flowers from the Itty Bitty Punch Pack our of the Sweet Taffy Designer Series Paper.

For the middle card, I started with my Melon Mambo base (3″ x 6″) and layered Rich Razzleberry (2-3/4″ x 2-3/4″) and then Sweet Taffy Designer Series Paper (2-1/2″ x 2-1/2″). For the greeting, I stamped on a piece of 3/4″ x 2-1/4″ Whisper White Cardstock with Memento and the A Dozen Thoughts Stamp Set. For the banner tips, I cut straight down in the middle and then from both corners diagonally to that center cut. This helps you get even tips and not have one longer. For the flower, I stamped the flower from the Flower Shop Stamp Set onto Vellum, punched it out with the Pansy Punch and colored the back side with my Rich Razzleberry Blendabilities! I used the darkest and lightest marker! I didn’t blend as much as I usually do but instead just did certain petals light and others dark. I attached it to my card with a Stampin’ Dimensional and then added a Pearl which I also colored with my Blendabilites! I love how you can color so many different materials with your blendabilities. Be sure to check out this post to see even more way!

Happy Stampin’

~Laura


Technique Tuesday – Masking, Coloring, & More!!

Posted on

Happy Tuesday!!! I have an amazing technique or tip for you today! It is SUPER simple and the outcome is amazing! You will think, why didn’t I think of that!

Flower Shop Blendabilities, www.LaurasStampPad.com

So you may be looking at this card thinking it is Pink and includes Flowers so it looks like Laura’s favorite card. But that’s not the fabulous part! Look closer at the flower – both the purple one and the black background ones! The black ones don’t overlap and have this amazing garden/3D effect. The purple one has some fabulous shading which was done with my Rich Razzleberry Blendabilities and those leaves are just another flower punched out in Old Olive! How fabulous! Not let’s get started on how I got this amazing look!

For the background, all you do is stamp your first flower (Flower Shop Stamp Set) on the piece of Whispe White cardstock! Now taking the coordinating Pansy Punch, punch a flower from a piece of scrap paper and place it on top of the stamped flower. Now stamp all around the flower. This mask prevents the stamped image from overlapping and creates that amazing look. Move your mask around to cover up other flowers as you move across the paper! Yep, it’s that easy to get that amazing look! 🙂 For the card below, I created an entire background because I just couldn’t get enough of this amazing look!

Flower Shop Blendabilities, www.LaurasStampPad.com

For the flower, I stamped it with my Memento Pad onto a piece of Whisper White cardstock and punched it out with the Pansy Punch. I used my Rich Razzleberry Blendabilities but only the lightest one and darkest one. I colored the entire flower with the lightest one and then went over the lines of the stamped image with the darkest one. I love using the Blendabilities on my Flower Shop images because I find the images to be so easy to color. This image already has the lines for shading dark and a few of the other images have perfect lines or petals that make shading simple! I’m not the best artist with coloring unless I have these images that make it super easy! 🙂 Love it!

For the leaves, all you need to do is stamp the same flower image that you used for the flower onto a piece of Old Olive cardstock. Punch out the flower with your Pansy Punch and then cut 2 petals out and attach it to the back of your flower! It’s that simple!

To see all of these techniques in action, check out the Video Tutorial that I created! be sure to give it a Thumbs up if you enjoyed the video and want to see more! Also, don’t forget to subscribe to My Channel so you don’t miss out on any future videos!

Happy Stampin’

~Laura


Technique Tuesday – Post It Note Holders!!!

Posted on

Happy Tuesday!!!! I know it kind of feels like Monday since yesterday was a Holiday but trust me it’s Tuesday! Woot Woot for skipping on Monday!!!! I have a fabulous technique to share with you today! These items make perfect gifts for co-workers, teachers, friends and just about anyone!

Post-It Note Holders, www.LaurasStampPad.com

Of course you can make more masculine ones for those teachers and co-workers who are men but everyone uses Post-It Notes!!!

SUPPLIES NEEDED: Post-It Notes, Cardstock, Embellishments (Whisper White Organza Ribbon, Window Sheet, Vintage Faceted Buttons, Heat Tool, Stazon, Blendabilities)

Starting with a piece of cardstock that measures 3-1/4″ x 7″, you will score along the 7″ side at 3-1/4″ and 3-3/4″. These are the folds to wrap around your post-it note. Go ahead and add some adhesive to the back of your post-its and stick them inside your base! Now for the decoration on the front, I layered a piece of Sweet Taffy Designer Series Paper (2-3/4″ Square) onto a piece of Old Olive (3″ Square). Then I took 2 pieces of Whisper White Organza Ribbon that were 4″ long and placed them in a “T” pattern on top of my Designer Series Paper! Wrap the ends to the back and adhere to the front of your Post-It Holder base. For the flower, I stamped a flower from the Flower Shop Stamp Set with my Stazon onto a piece of Window Sheet. Be careful not to wiggle or smear your image and be sure to set this aside for a minute to dry. Once it is dry, flip it over to the backside and using your Blendabilities Markers, you will color the flower! I used the Rich Razzleberry Blendabilities and used the darkest color! Once that is complete, punch out your flower with the Pansy Punch. While waiting for it to dry a bit, you can stamp the same flower with Stazon onto a piece of Old Olive cardstock and punch it out. Then with a pair of Paper Snips, cut out 2 of the petals and these will be use as leaves for your flower! For a faux glass look and to have your petals curl up a bit, you can heat your window sheet flower with your heat tool. Hold your heat tool about 1-2 inches away from the flower and after a bit (first it needs to heat up) you will start to see the Window Sheet melt and curl. Be careful not to burn yourself. Now it is time to assemble your flower. Attached your leaves with a little bit of Snail or a Mini Glue Dot and then attach your flower to your card with a Mini Glue Dot. Now you can attach your Vintage Faceted Button with a Mini Glue Dot as well. If you wish to color your button first, you may do so with your Blendabilities! Then I colored a pearl with my Blendabilities and placed that in the center of the button! Don’t you just love all the things and way you can color with your Blendabilities! LOVE IT!!! Super cute and a great gift to give!

I hope you enjoyed this technique and try it at home!!! Let me know what you think or how yours came out in the comment below!

Happy Stampin’

~Laura


Watercoloring with your Markers!!!!

Posted on

I love my big box of markers! I take them with me to every event I do because if I forget a stamp pad, I still have my markers. They are great for a multi-colored look on your stamps, coloring in and now watercoloring!!!!

Watercolor with Markers, www.LaurasStampPad.com

The colors in the card are like that of a sunset (sunrise, neither?)!!! The various shades of yellow, coral, red, and orange and the messiness of the colors that you just can’t achieve if you tried. That’s what watercoloring is all about – you can never do the same look twice and you never know how it will come out!

To create this card, I started with a 4″ x 5-1/4″ piece of Watercolor Paper and took my markers (Daffodil Delight, Calypso Coral, Tangerine Tango, and Pumpkin Pie) and colors swatches. I did the colors in lightest to darkest and colored them either matching up or with a small gap. Once you have your swatches colored, you will spritz it with water or alcohol (70 Proof or less so the alcohol doesn’t eat the plastic in the spritzer). Spritz the heck out of it and you can either let it do it’s thing, pick it up and tilt it around to allow it to bleed, or use your finger to move the ink around. Set it aside and allow it to dry completely before assembling it to your card. When using watercolor paper, I like to use Fast Fuse or Sticky Strip to adhere it to my card because it holds nice and strong even when the paper is curling! To complete my card, I layered my Watercolor Paper onto a piece of Basic Black (4-1/8″ x 5-3/8″) and then onto a Tangerine Tango card base (4-1/4″ x 11″). For the stamping, I used my Bloom with Hope Hostess Stamp Set which has amazing flowers (perfect for watercoloring or blendabilities) and great sayings! Of course, you will want to stamp on your watercolor paper with Stazon Ink so it won’t bleed!

Here is another Sample that I created using shades of Purple – Blackberry Bliss, Elegant Eggplant, Rich Razzleberry, and Perfect Plum! Remember how I said you never know how it might turn out…..how this happened I do not know!

Purple Markers Watercoloring, www.LaurasStampPad.com

I thought about cutting it off but I didn’t want an awkward size of paper for my card. When I was showing my stampers, some loved it and some did not. They gave me the idea to cover it with ribbon so…..

Purple Markers Watercoloring, www.LaurasStampPad.com

See even the ones you think didn’t turn out, still look amazing!!!! Here I added some Satin Stitched Ribbon in Blackberry Bliss & the greeting from Million & One!!!

Marker Watercolor, www.LaurasStampPad.com

Here is another sample that I did with shades of Green – Pear Pizzaz, Old Olive, Garden Green & Mossy Meadow!

To watch this technique in action, check out my Video Tutorial by clicking here or the video below! Don’t forget to give it a thumbs up if you like it!!!

Happy Watercolorin’

~Laura