Christmastime is Here!!!

Posted on

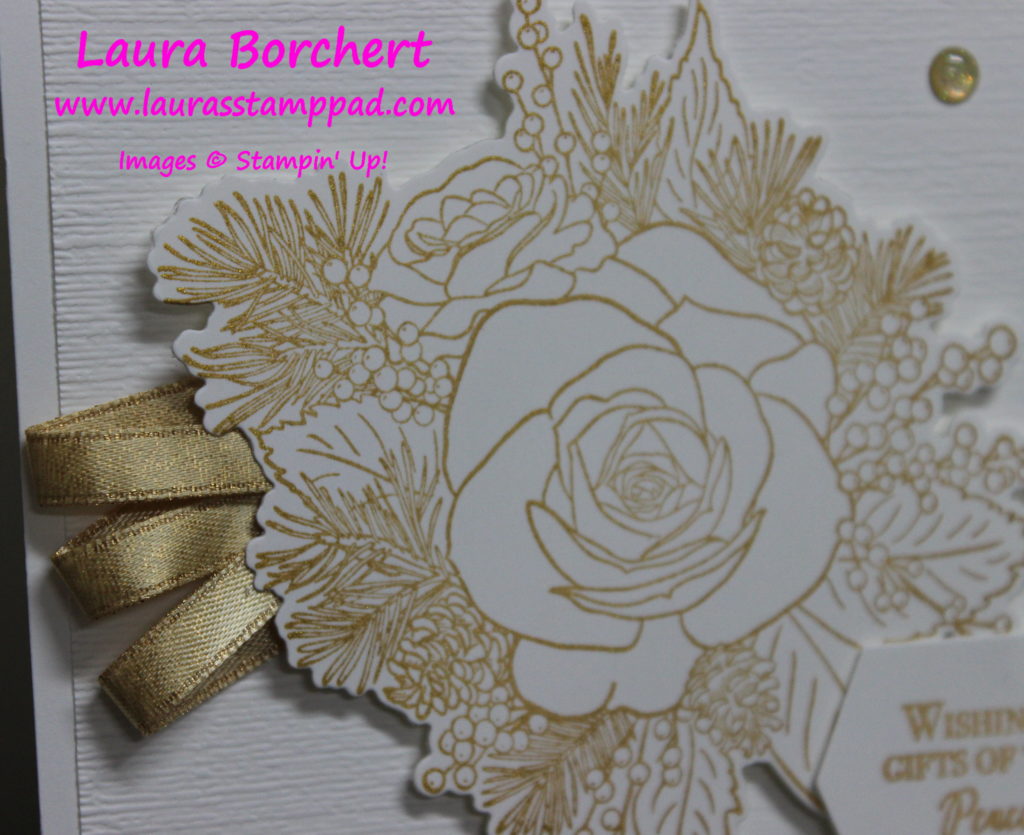
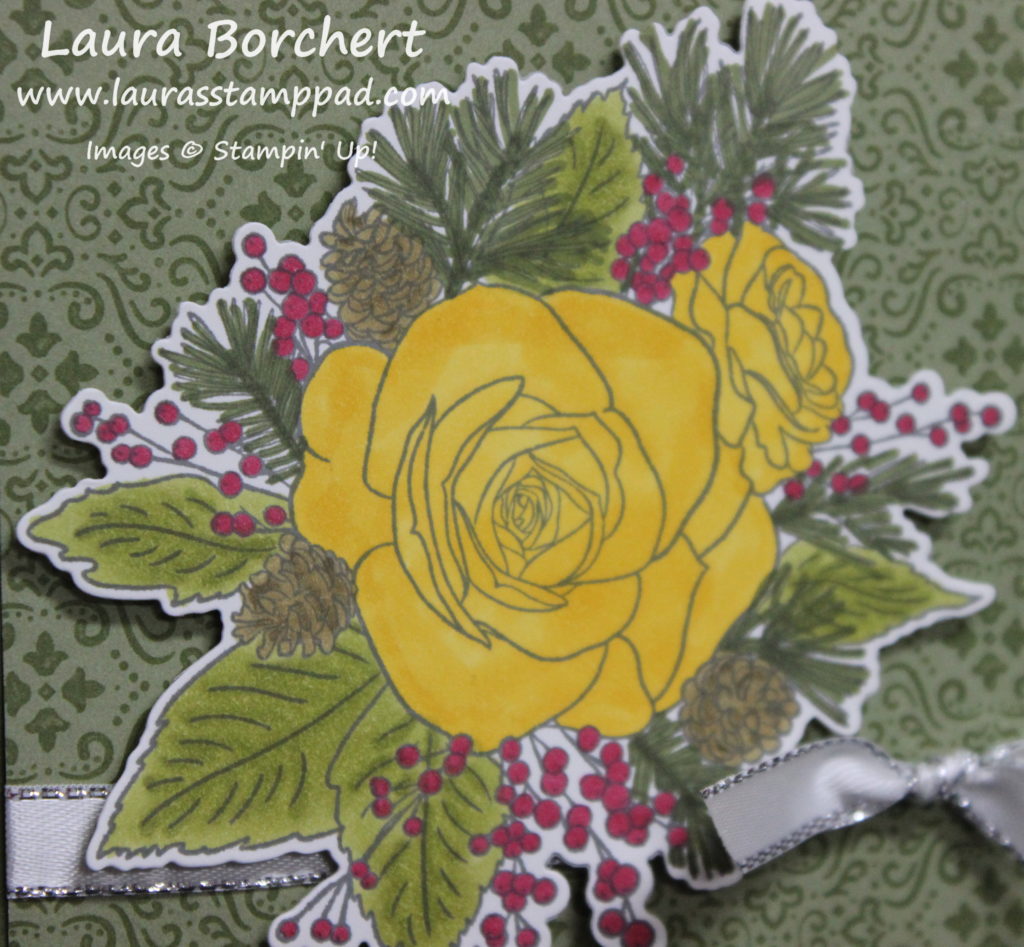
Happy November 1st! I still can’t believe it myself. What freaks me out more is the title of this post and how Christmas is around the CORNER….not here yet. 🙂 BUT Stampin’ Up is releasing a special Christmastime is Here Bundle!!!

Christmastime is here, www.LaurasStampPad.com

How beautiful are these products?? Gold, gold, gold! For some reason I am so drawn to these gold pieces more than usual. They are the perfect yellow/golden hue and I LOVE IT!!! To see a full reveal of these products, check out this video!

Today, I’m showing how fun and simple it is to stamp each of the images to fit and color in the gorgeous Christmas Rose bouquet. Photopolymer stamps really are fabulous for 2-step stamping! I love it! Of course, you can always color in the images with your favorite coloring tools too!

The Christmastime is Here Bundle is available starting TODAY and only while supplies last so don’t delay! I don’t know how long it will be available. To be honest, when it first came out I thought it was pretty and of course got it because it’s flowers. Now that I’ve played with it though I’m in love and thinking it might go fast!!! Click the supplies below to get your bundle today!

If you would like to watch me stamp from the Christmastime is Here Bundle, check out the video below or click here! Be sure to give the video a thumbs up if you liked it and don’t forget to subscribe if you are new. If you would like a notification when I post a new video, be sure to click the bell right next to the subscribe!!!

Happy Stampin’

~Laura

Product List
Christmastime Is Here Suite Bundle (English)
$112.50
Christmas Rose Stamp Set (English)
$38.00
Mossy Meadow Classic Stampin' Pad
$7.50
Cherry Cobbler Classic Stampin' Pad
$7.50
Soft Suede Classic Stampin' Pad
$7.50
Poppy Parade Classic Stampin' Pad
$7.50

Apple of My Eye!!!

Posted on

Happy Wednesday!!! This card is perfect for teachers, get well, and so much more. After all, you could send it to anyone as the apple of my eye!!!

Apple of My Eye, www.LaurasStampPad.com

This super cute card had fun fold to it as well. The green center piece with the apple opens up and then a little red flap opens down! There are little greetings with each flap too! Thank you to Deb Snyder for the inspiration for this fabulous card!

I started with a piece of Real Red measuring 4-1/4″ x 8-1/2″ and I scored it at 5-1/2″. This creates the little flap on the bottom that folds up. Next, I took a piece of Mint Macaron measuring 9″ x 3-1/4″ and folded it in half at 4-1/2″. The front flap of this piece was then embossed with the Pinewood Planks Embossing Folder. Then I added this to the inside of the red card base. I find that Tear & Tape is best because it has a nice strong hold for a flap that is going to be pulled on a lot.

A+ Teacher, www.LaurasStampPad.com

Next, I create the fun half apple and greeting using the Harvest Hellos Stamp Set and coordinating Apple Builder Punch! For the greeting, I used the Timeless Label Punch! The apple was colored with Real Red Stampin’ Blends and Soft Suede Stampin’ Blends. Be sure that this piece is positioned underneath the Mint Macaron flap.

For the front of the card, I created the apple by adding some of the Toile Tidings Designer Series Paper to a strip of Real Red cardstock. Then I stamped the apple over the top of this and punched it out. That is how you get the perfect half and half apple. The stem was done in Soft Suede and the leaf in Mint Macaron. Then to seal the overlap of paper on the apple, I added a mini strip of Mint Macaron Ribbon. The mini bow was then created with the Fork Bow Technique! This was all added to the front of the card with Stampin’ Dimensionals! So fun and fabulous!!!

If you would like to make this amazing card, check out the supplies listed below! Don’t forget that the Free Stamp Set of the Month is your choice between Day of Thanks and Perfectly Plaid! If you would like to see more samples using the Harvest Hellos Bundle, click here.

Happy Stampin’

~Laura

Product List

Technique Tuesday – Double Fold!!!

Posted on

Happy Tuesday!!! It’s been a month since we closed on the house and I think FINALLY I’m starting to get back into a routine/groove. Maybe?!?!?! Either way, I have a fabulous double fold technique to share with you today that is super cute!!!

Double Fold, www.LaurasStampPad.com

This card uses the Come to Gather Suite from the Holiday Mini Catalog. I am super loving the blues and greens this season. It’s a nice change from the typical reds, oranges, and yellows.

Come To Gather, www.LaurasStampPad.com

Since I did a full video tutorial on this double fold card, I’ll post a link to that below rather than typing out the full directions!

Also, don’t forget that the Free Stamp Set of the Month is your choice between the Day of Thanks Stamp Set and the Perfectly Plaid Stamp Set! Click here to start shopping! Stay tuned for the November Free Stamp Set of the Month!

Free Stamp Set of the Month, www.LaurasStampPad.com

If you would like to watch me make this fabulous card, check out the video below or click here! Be sure to give the video a thumbs up if you liked it and don’t forget to subscribe if you are new. If you would like a notification when I post a new video, be sure to click the bell right next to the subscribe!!!

Happy Stampin’

~Laura

Product List

September 2019 Paper Pumpkin!!!

Posted on

Happy Monday!!! The September 2019 Paper Pumpkin saves the day! I was able to put these together so quickly for Halloween treats. Still shooting for Auntie of the year with treats for my nieces and nephews! 🙂

September 2019 Paper Pumpkin, www.LaurasStampPad.com

I love that these boxes are big enough to hold regular candy but small enough not to break the bank! Candy is so expensive it seems. After assembling the boxes, I added the little tags. I didn’t stamp on the background like the instructions said because I thought that wasn’t necessary! They are still super cute!

Skeleton Treat Boxes, www.LaurasStampPad.com

I did go super simple for the kid’s treat boxes because after all we know they just want the treats! Using the die cut skeletons from the kit, I added one so the side of the box.

There are so many extras in the September 2019 Paper Pumpkin Kit to create the treat boxes, cards, and so much more! I love that Paper Pumpkin makes holidays simple and I have plenty of goodies for other projects too!

If you would like to try out Paper Pumpkin and have it save you for your next holiday or project, click here to sign up now! If you want to see past kits, click here!

Happy Stampin’

~Laura


24 Hour Stamp Sale!!!

Posted on

Happy Wednesday! Not only is it the middle of the week and we are getting closer to the weekend but Stampin’ Up is having a 24 Hour Stamp Sale TODAY!!!!!!

24 Hour Stamp Sale, www.LaurasStampPad.com

Today only, you can get select stamp sets at 15% off. Woot Woot!!! Click here for a complete list of the stamp sets on sale!

My favorite stamp sets that are on sale are the Beautiful You Stamp Set & A Good Man which are super fun for coloring or even just stamping for a silhouette look! Click here, here and here for some samples using those!

Rooted in Nature and Love What You Do are 2 other stamp sets that are on sale!!! Click here, here, and here for ideas on these amazing stamp sets!

Then for a few that I will be purchasing today because I can’t pass up a good deal and these have been on my list! That would be the Crackle Paint Stamp Set and the I Say Hello Stamp Set. I’m sure there will be a few others too!!!

What stamps are on your wish list that you can’t wait to get??? Let me know in the comments below! Also, remember that this is just a 24 Hour Stamp Sale so click here to start saving! Tomorrow it will all be over!

Happy Stampin’

~Laura

PS: Hopefully I’ll be back to regular blogging soon. Finding a new routine at the new house is taking longer than I thought. We are also finishing up a few projects too! BUT on the bright side we are pretty much completely moved and unboxed!!!


I’m Still Here!!!

Posted on

Happy Tuesday everyone!!! I’m still here…..omg moving with a 1 year old is not easy. She is getting into everything, wandering all over and we are trying not to trip over her. She also has been a bit confused and clingy since we have been all over the place. Some days I have been packing and unpacking cars/boxes/houses with a 24 pound child strapped to my back. Needless to say I’m exhausted! So I thought I would chill on the couch with all of you while she naps! 🙂 I miss you all!

I'm still here, www.LaurasStampPad.com

Here is a fun and simple Fall card for any occasion this time of year! You could easily change the greeting to Happy Birthday or Thinking of You! The inspiration for this card came from Karla Endris. I feel in love with it the moment I saw it!

I started with a Crumb Cake card base. Next, I took 2 pieces of Very Vanilla measuring 4″ x 5-1/4″. One is for the front and the other is for the inside. First I stamped the greeting on the front piece from the Harvest Hellos Stamp Set. Next, I embossed it in the Subtle Embossing Folder. It is easier to stamp first on a smooth surface to get a cleaner look. The embossing gives a little bit of texture to the card. Then I added a piece of the Come to Gather Designer Series Paper to the left hand side and added it to the card front.

The pumpkins were stamped in Basic Black and punched out with the Apple Builder Punch. This coordinates perfectly with the Harvest Hellos Stamp Set and you can Bundle & Save 10%! The pumpkins are Crushed Curry, Cajun Craze, and Pumpkin Pie! The stem was done in Soft Suede & the leaf in Old Olive. I added a little twine from the Come to Gather Ribbon Pack. To finish off the card, I added a few Rhinestones from the Holiday Rhinestones Pack. Another option is to use the Pumpkin Pie Stampin’ Blends Marker and color your regular rhinestones. This works perfectly when you are making a lot and you run out! 🙂

Check out some other samples using the Harvest Hellos Bundle by clicking here! Have a wonderful day!!! I’m back to unpacking now that I have checked in to say I’m still here! Happy Stampin’

~Laura

Product List

October 2019 Free Stamp Set of the Month!!!

Posted on

Happy October!!!! We are still in the moving process so send all the good vibes and prayers our way! I wanted to jump on and let you all know the October 2019 Free Stamp Set of the Month!!! Drum roll please………

October 2019 Free Stamp Set, www.LaurasStampPad.com

You get to pick!!!! The options this month are the Day of Thanks Stamp Set or the Perfectly Plaid Stamp Set! I had lots of requests for both and I couldn’t decide so I went with both! 🙂 They are perfect for upcoming holidays and have greetings to use all year long! The Perfectly Plaid Stamp Set also has a coordinating punch and designer series paper! Of course, the turkey is perfect for Thanksgiving or even nature cards which would make the perfect masculine birthday card! These stamps are perfect for lots of different occasions!

When you place an order of $75 or more in the month of October 2019, you will get one of these sets for FREE! If you place your order online, just send me a message with your choice or I will reach out to you! It will be sent from me and not come with your actual order! Click here to start shopping and earning the October 2019 Free Stamp Set of the Month!!!

Don’t forget that orders in increments of $40 earn Laura’s Loyal Stampers Stickers too! Woot Woot!

Back to packing and unpacking boxes and moving everything!!! Happy Stampin’

~Laura


It’s Closing Day!!!

Posted on

Happy Friday everyone! It’s Closing Day…..finally! I feel like this day was never going to come. We close on our first home this morning and start moving. Time to put all of my lists and planning into action!

It's Closing Day, www.LaurasStampPad.com

Here it is!!!! We are so excited and ready to start moving the boxes and chaos from one house to the next. This weekend we will be cleaning and doing a few things around the house. Then starting on Monday I will be moving items over and unpacking. I’m starting with the kitchen, bathrooms, and closets. We also want to do as much of Claire’s room as possible so that on our first night there her room looks similar. Then next weekend we are doing the official move of furniture and big items.

Stay tuned as I will be trying to do Facebook Lives during the move to show the packing up of 1 Stamp Room and unpacking into the NEW Laura’s Stamp Pad. The new place is about 3 times the size of my current stamp area. I can not wait!!!! It will be a work in progress because as I get settled I will see what I need and want to do with the space. If you have any suggestions, ideas, or tips, let me know in the comments below! I am open to all of them! If you have a favorite shelf or storage piece, let me know!

I hope you all have a wonderful weekend and if you would like to send happy vibes, prayers, or ju-ju our way for a safe and smooth move, that would be amazing! I’m off to sign a million papers!!! It’s Closing Day!

Don’t forget the Buy 3, Get 1 Free Paper Special this month! Only a few more days of this offer! Click here, here, and here to check out samples using some of the papers!

Happy Stampin’

~Laura


Laura’s Quick Tips: Removing Cardstock!!!

Posted on

Happy Thursday!!! Today, I have another one of Laura’s Quick Tips for you all! This one is on removing cardstock from your framelits/dies/thinlets. Sometimes the cardstock can get stuck in there and it is frustrating and sometimes results in it ripping when you try to take it out! Here are some tips to help you out!

Removing Cardstock Tip, www.LaurasStampPad.com

There are 2 things that I like to use when removing cardstock from my dies. The first one is the Take Your Pick Tool which has a few different tips to use. My favorite is the “pancake flipper” end. When I have a die like the Stitched Nested Labels that holds the cardstock in each of those stitched holes along the edge, it can be difficult to get it out. If you punch it out quickly sometimes the stitching rips or you end up with pressure spots on the label. To help with this, I simply slide the pancake flipper under the edge all around and slightly rotate it so it’s popping the cardstock out. Keep working your way around the end die until the cardstock is out. This is much less frustrating and keeps the die cut cardstock all pretty!

The other tool I use is Post It Note tape. This is the perfect amount of sticky without ripping the cardstock. It comes out smoothly and can be used over and over. When die cutting the embossed leaves from the Gathered Leaves Dies, there are no holes in the dies to push out the cardstock if it gets stuck. Simply press the Post-It Note tape to the back and lightly tug. This will pull out the leaf perfectly intact!

I hope you found these super helpful and try them out yourself! If you have a fun tip that you would like to share, let me know in the comments below!

If you would like to see the way I’m removing cardstock in action check out the video below or click here! Be sure to give the video a thumbs up if you liked it and don’t forget to subscribe if you are new. If you would like a notification when I post a new video, be sure to click the bell right next to the subscribe!!!

Happy Stampin’

~Laura

Product List

Season of Thanks!!!

Posted on

Tis the Season! The Season of Thanks! I am LOVING these blues and greens together and feel like I’ve fallen in love! Stampin’ Up really nailed it with the Come to Gather Suite!!! What do you think? Let me know in the comments below!

Season of Thanks, www.LaurasStampPad.com

I am so in love with this card. It is elegant, Fall, and full of love! That’s perfect in my opinion!

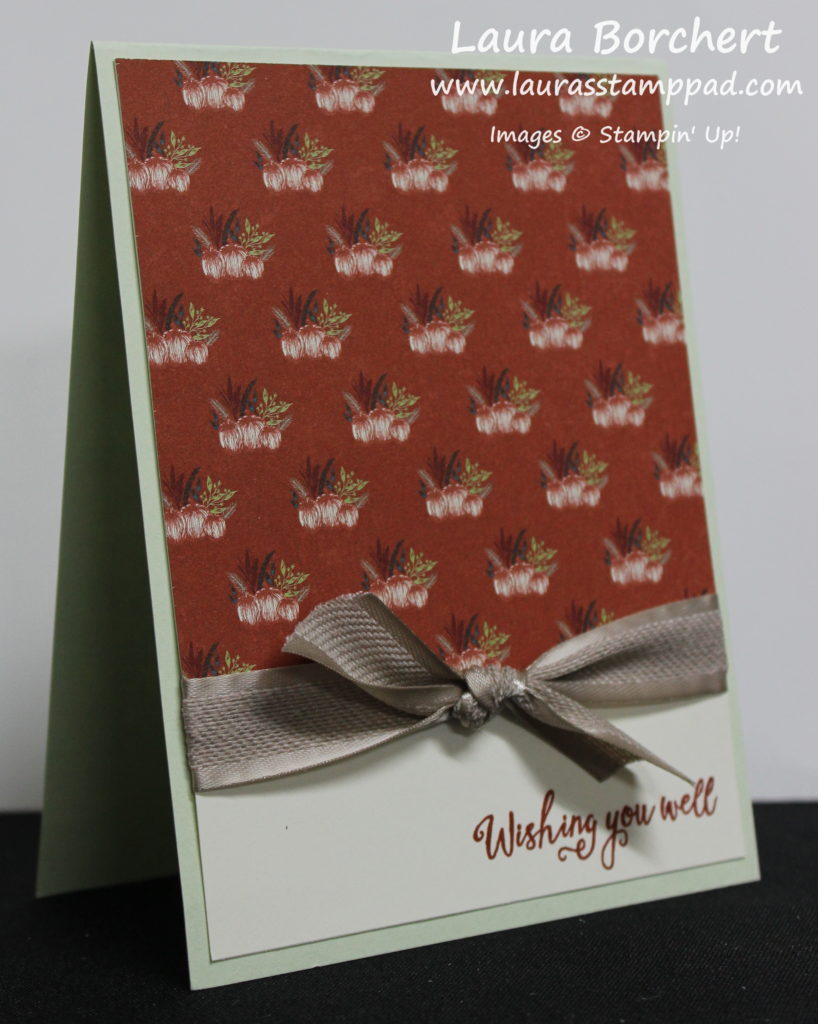
I started with a Soft Sea Foam card base. Next, I took a piece of the Come To Gather Designer Series Paper measuring 4″ x 5-1/4″ and layered it onto the front. Then I added a dab of adhesive in the center and pressed the strip of ribbon into it. This ribbon is from the Come to Gather Ribbon Pack. It is always best to add the adhesive to the cardstock than to the ribbon, it just sticks better that way!
Gather Together Stamp Set, www.LaurasStampPad.com

For the greeting, I stamped it from the Gather Together Stamp Set in Pretty Peacock Ink. Be sure to stamp it on the far right side so there is room for the leaves and pumpkin on the left. This was stamped on a Very Vanilla Stitched Label! Those things are so beautiful and I love using them for all different styles of cards. On the left hand side, I adhered 2 textured leaves that were die cut from the coordinating Gathered Leaves Dies. Then I stamped the pumpkins in Soft Sea Foam and die cut those out as well. I added this entire piece to the card front over the ribbon with Stampin’ Dimensionals. To finish it off, I added a few Basic Sequins for some bling!

Come to Gather Suite, www.LaurasStampPad.com

For the inside of the card, I added some pumpkins and another greeting from the Gather Together stamp set! It’s just perfect!!!

If you would like to make this Season of Thanks card, click on the supplies listed below to get started! Also, a big thank you to all of you for checking out my blog and following me on this crafting journey! Hugs to you all!

Happy Stampin’

~Laura

Product List