Work of Art Holiday Cards!!!

Posted on

We all know the Work of Art Stamp Set is fabulous and can be used in soooooo many ways but did you know you can use it for your Holiday Cards as well? Of course you can! Check out these amazing cads!

Work of Art Wreath, www.LaurasStampPad.com

Eeeeee I can’t help but squeal at how amazing this card is and how fabulous the Work of Art Stamp Set is. If you don’t have it already, click here for wood and here for clear and overnight the shipping (just kidding…..on the shipping part)!!! This card was created with Whisper White, Cherry Cobbler, and Mossy Meadow. I used the smaller swish image for the wreath and got the multiple shades by stamping a few times before going back to the ink pad! For the holly berries, I used my Cherry Cobbler Candy Dots from the Regals Pack. You can also color your Pearls or Rhinestones with your Cherry Cobbler Blendabilities and use them for the holly berries. Or you could use your Cherry Cobbler Dazzling Details!!!! Lots of options!

Work of Art Tree, www.LaurasStampPad.com

You didn’t seriously think there was only one way to use your Work of Art Stamp Set for the Holidays! This one uses the long swish image. I found it easiest to start at the bottom and stamp with the image half way off the paper. Ink up and move the stamp a bit farther to the left and stamp again, repeat until you are at the top of your paper! For this one I used Cherry Cobbler colored Rhinestones but you could use any of the items mentioned above as well! The greeting comes from the Bright & Beautiful Stamp Set! Love it!!!!

And to show you these cards in action, check out my Video Tutorial!!!! Be sure to give it a thumbs up if you like it and don’t forget to subscribe to My Channel so you don’t miss out on future videos!!!!


Happy Stampin’

~Laura


Beautiful Wedding Card!!!

Posted on

Big News Wedding Card, www.LaurasStampPad.com

This card just screams elegance and beauty (although if it was elegant it wouldn’t be screaming, right?)!!! I used the fabulous Big News Stamp Set for the greeting!!! For the background, I used a piece of the Park Lane Designer Series Paper which has flowers all over it! I then punched 2 flowers with my Pansy Punch and off set them for a fuller flower look. I finished it off with Gold Sequins all over the greeting, the center of the flower and hanging out from the behind the flower as well! I use Mini Glue Dots to attach my sequins to my project! Remember, place the sequin or cardstock on the glue dot and then lift them both off the paper. If you try to pull the glue dot off with your hands, it will lose it’s shape and might not want to come off your finger. 😉

I hope you enjoyed this and you can check out more fabulous cards with the Big News Stamp Set here, here and here!

Happy Stampin’

~Laura


Technique Tuesday – Pom Pom Fun!!!

Posted on

Happy Tuesday!!! That means I have a fabulous technique to share with you and today it is making cut little Pom Poms!!!!

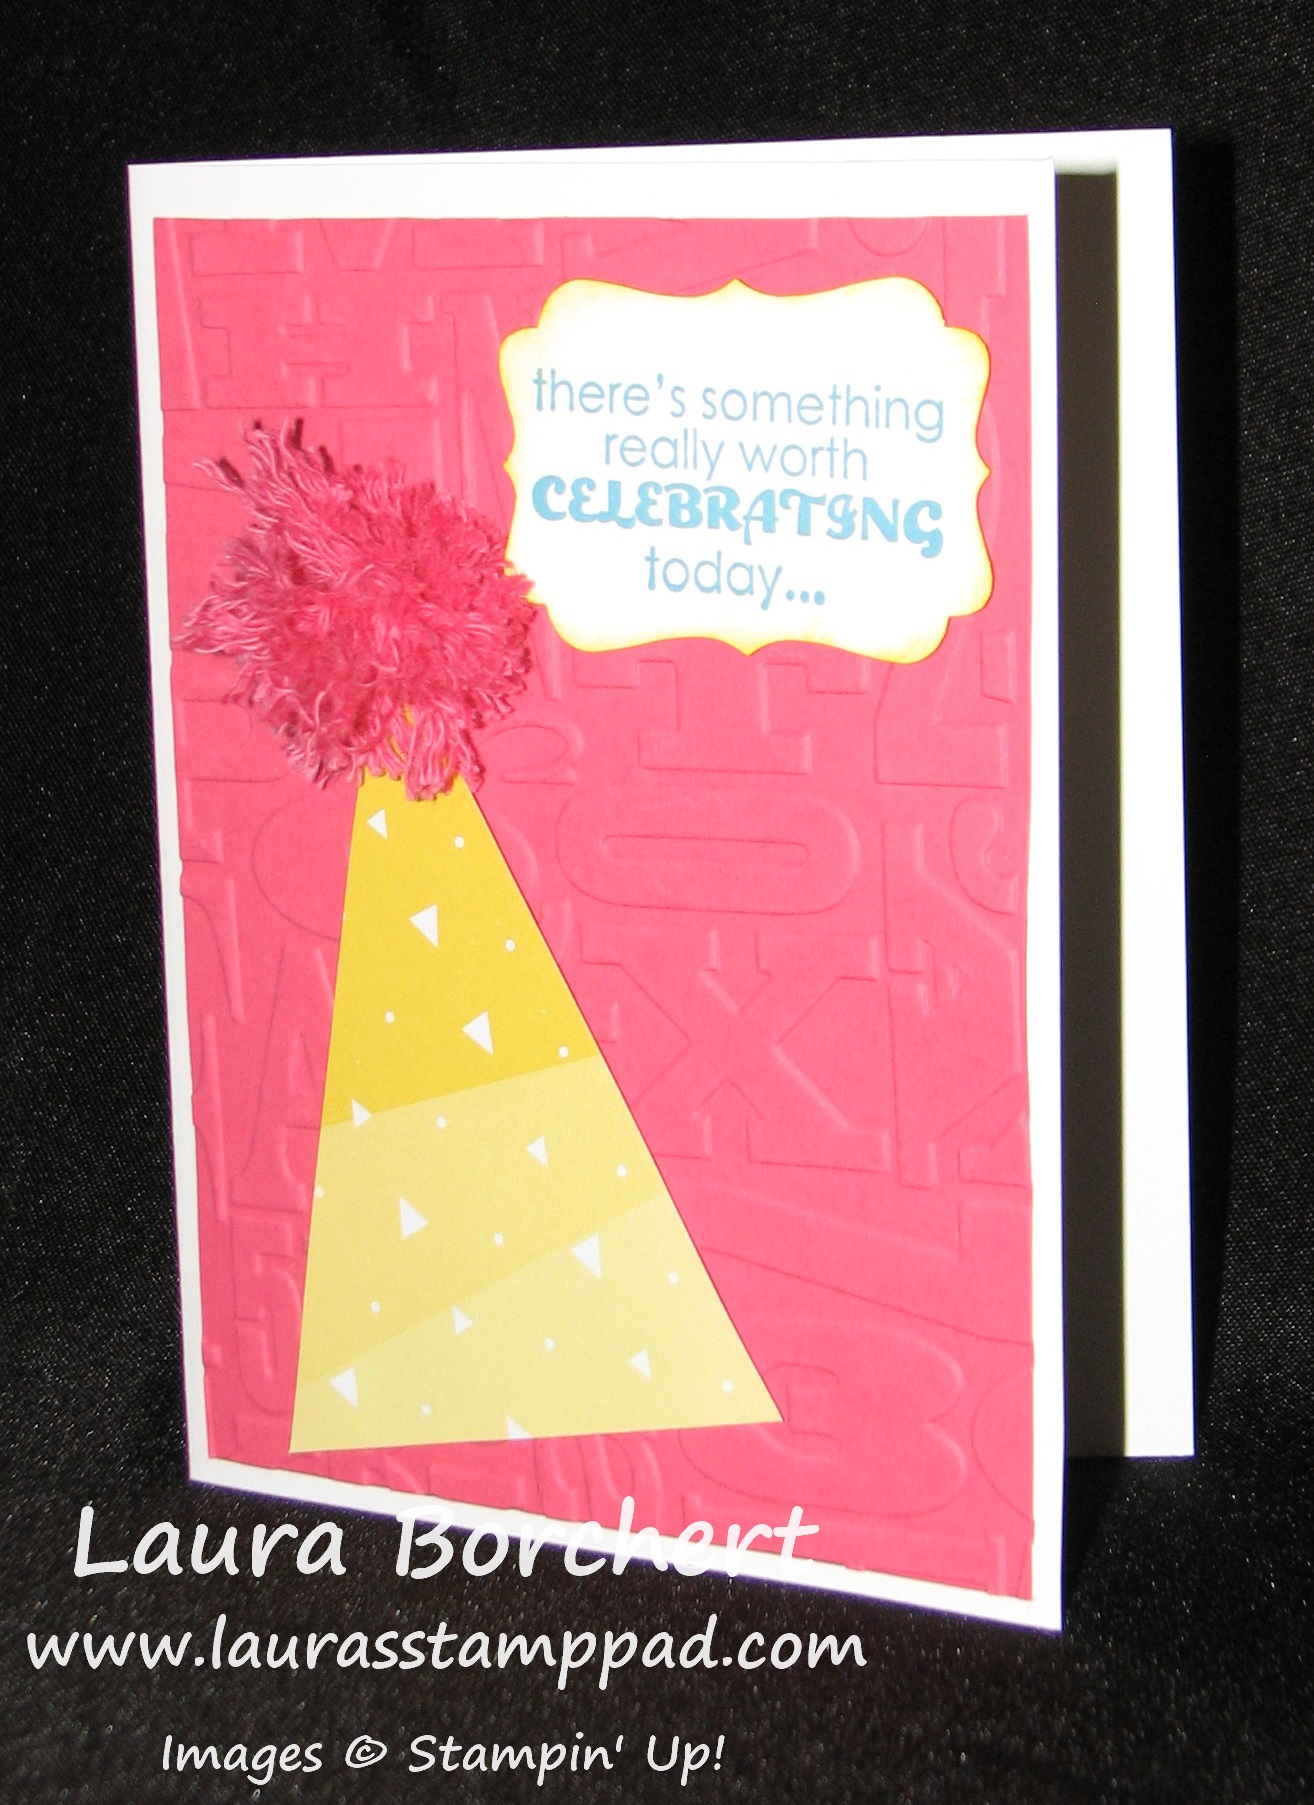
Pom Pom Party Hat, www.LaurasStampPad.com

I am loving the Pink little Pom Pom on that party hat!!!! It is just so fluffy!!! And fairly easy to make! Let’s get started!

Supplies Needed: Baker’s Twine (I prefer to use the Thick style), a fork or piece of scrap paper, and a needle

The supply list is short and a little odd but you will see! For this card, I used the Thick Strawberry Slush Baker’s Twine. Since I wanted a smaller pom pom, I just wrapped the twine around the tines of a fork about 10 times. Then you will take another piece of the twine and loop it through the middle tines and tie all of your loops together. Now you can slide the loops off of the fork and cut all of the loops. I do kind of like all of the loops too…super cute! Once you can have cut your loops, you can either stop there or take your needle and run it up each piece of Baker’s Twine to fray the ribbon into lots of smaller strands. This is the part that sometimes can take awhile and make you want to go crazy! Once you think you have done them all, you find another one. 🙂 Fluff all of the pieces and your Pom Pom is complete!!!! I attached the Pom Pom to the Sweet Taffy Designer Series Paper triangle with Stampin’ Dimensionals. I layered the party hat onto a piece of Strawberry Slush that I had run through my Big Shot with the Alphabet Press Embossing Folder! The greeting is from Remembering Your Birthday and I punched it out with my Decorative Label Punch!

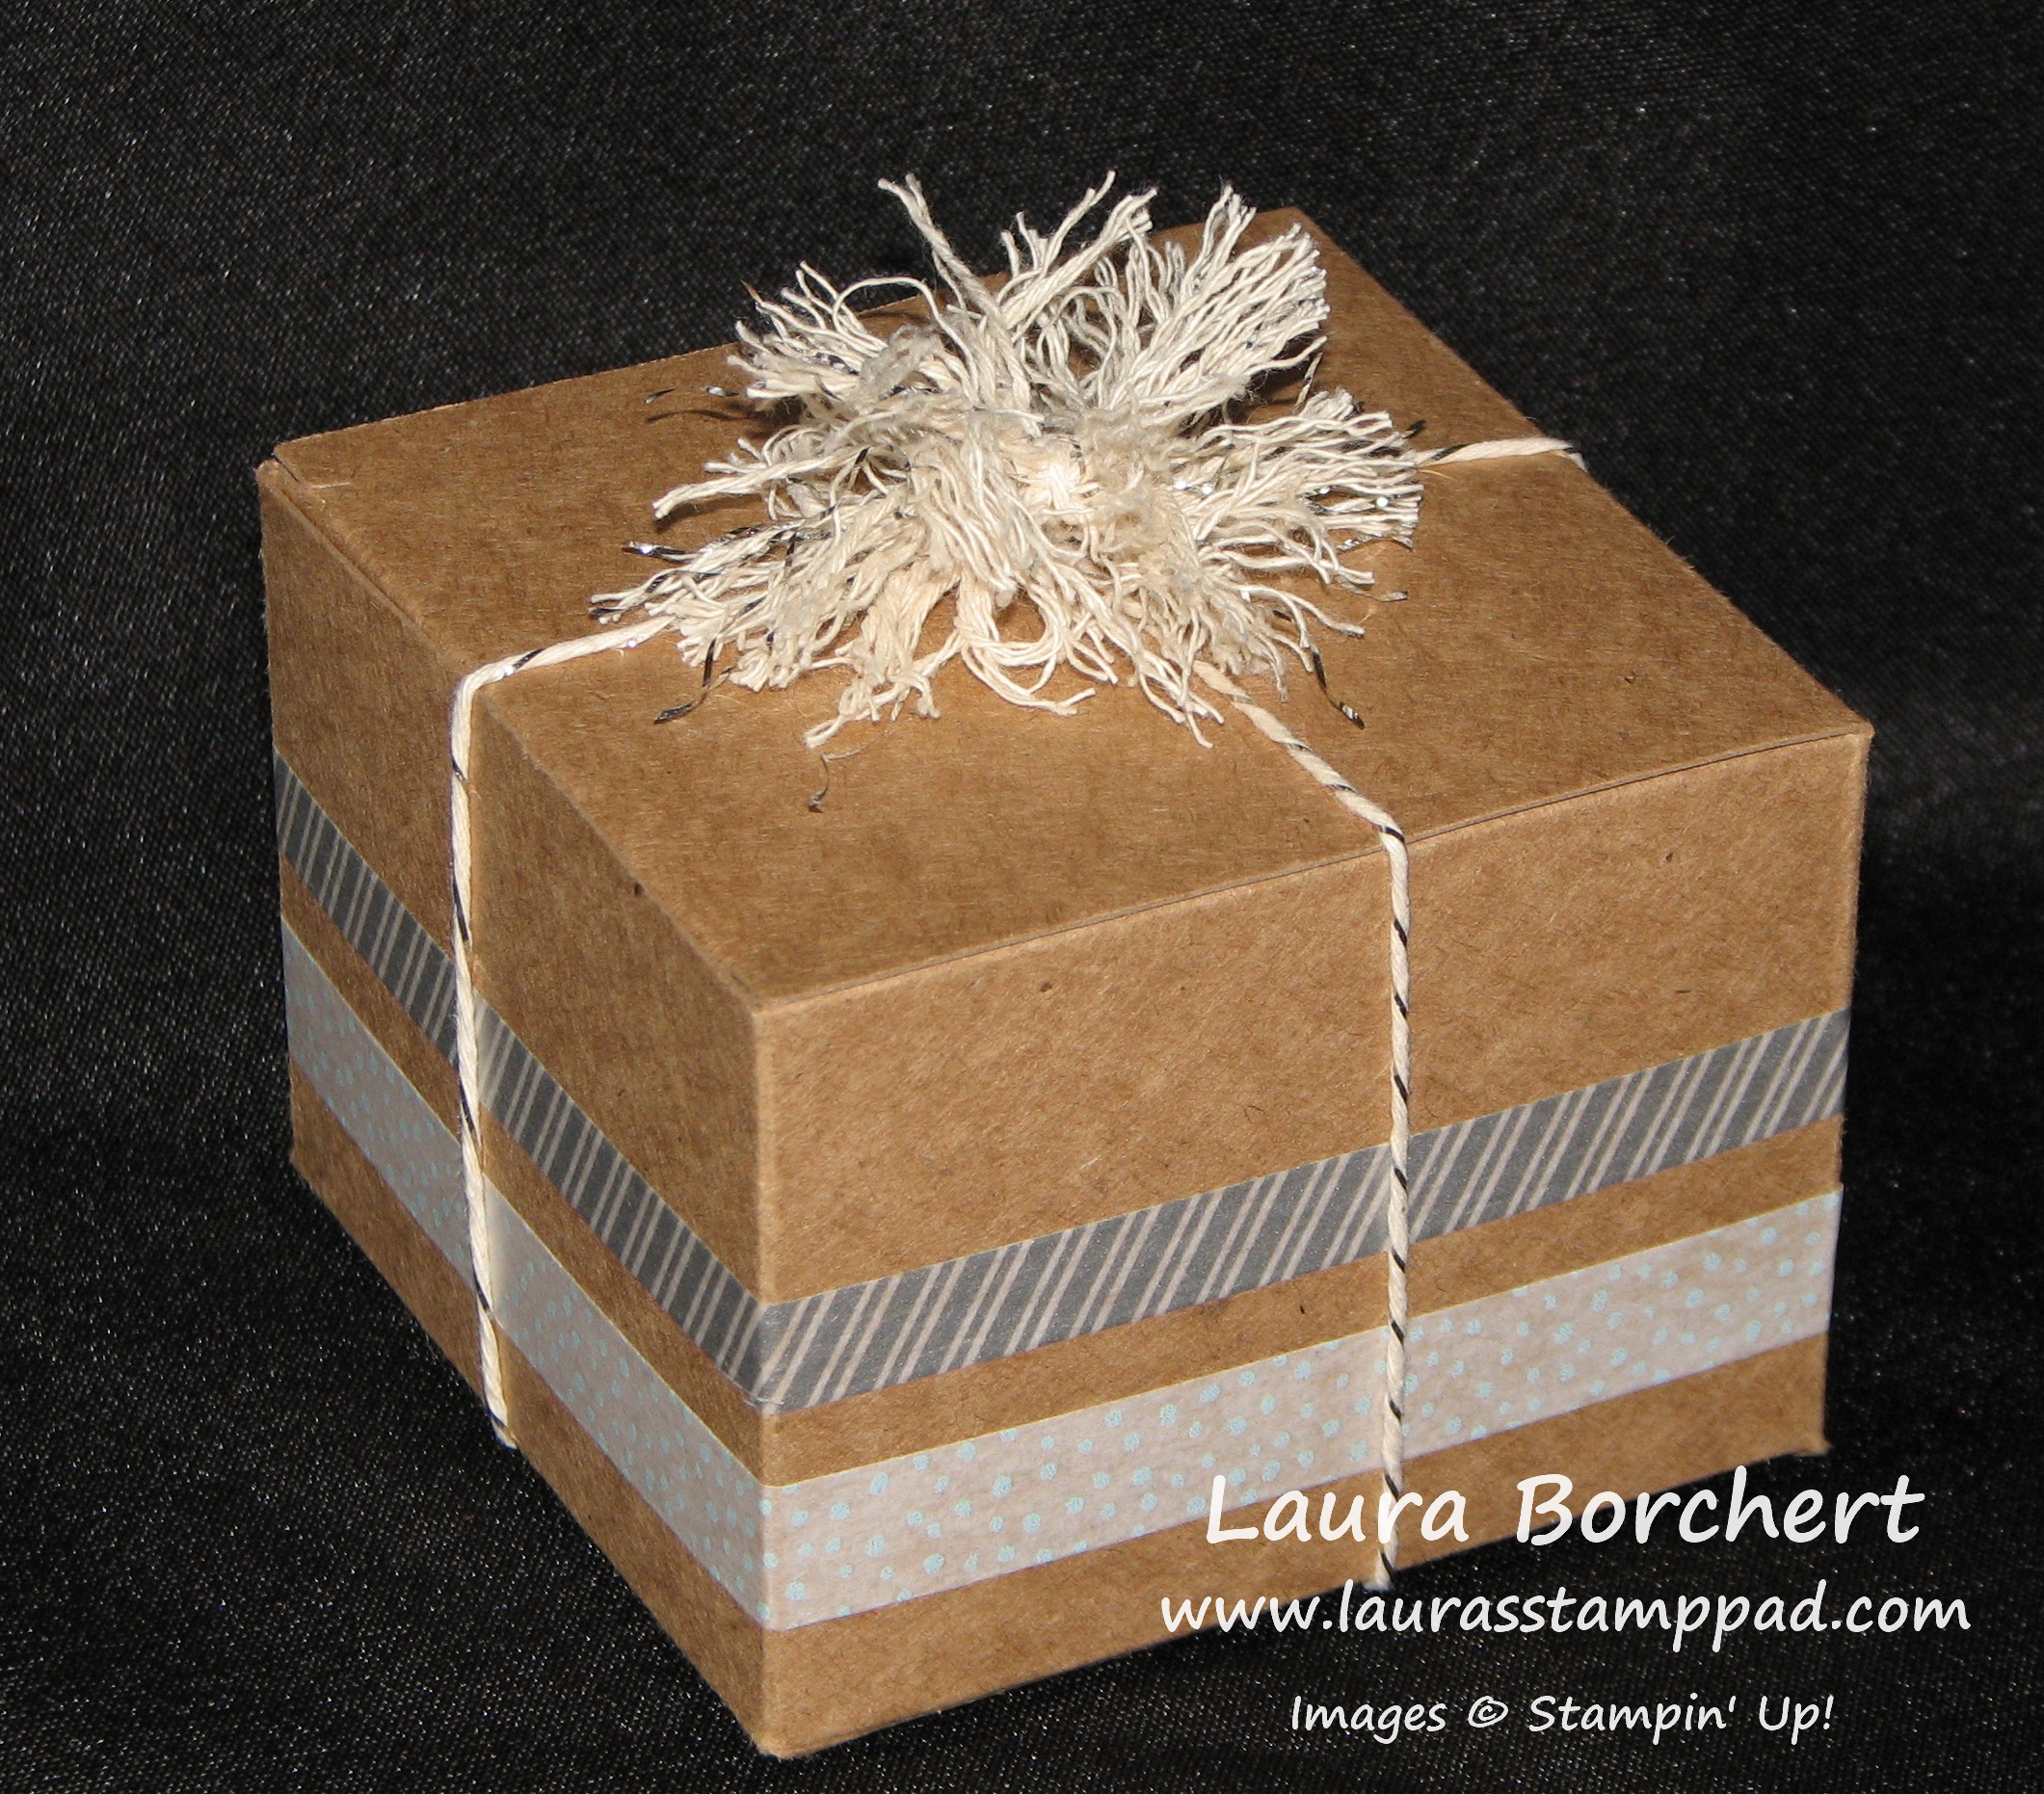
Pom Pom Box, www.LaurasStampPad.com

For this adorable gift box, I decorated it with the All Is Calm Designer Washi Tape which is super simple. Then I used the Silver Baker’s Twine for the pom pom. To make this one a little bigger, I wrapped the twine around a piece of scrap paper that was wider than the fork. Again 10 times around, slide it off and tie it in the middle, cut the loops and fray it!

To see this all in action, check out my Video Tutorial!!! Be sure to give the video a thumbs up if you liked it and don’t forget to subscribe so you don’t miss out on any future videos (like the one on Thursday 😉 )

Happy Pom Pomin’

~Laura


It’s Not About The Number, It’s The Memories!

Posted on

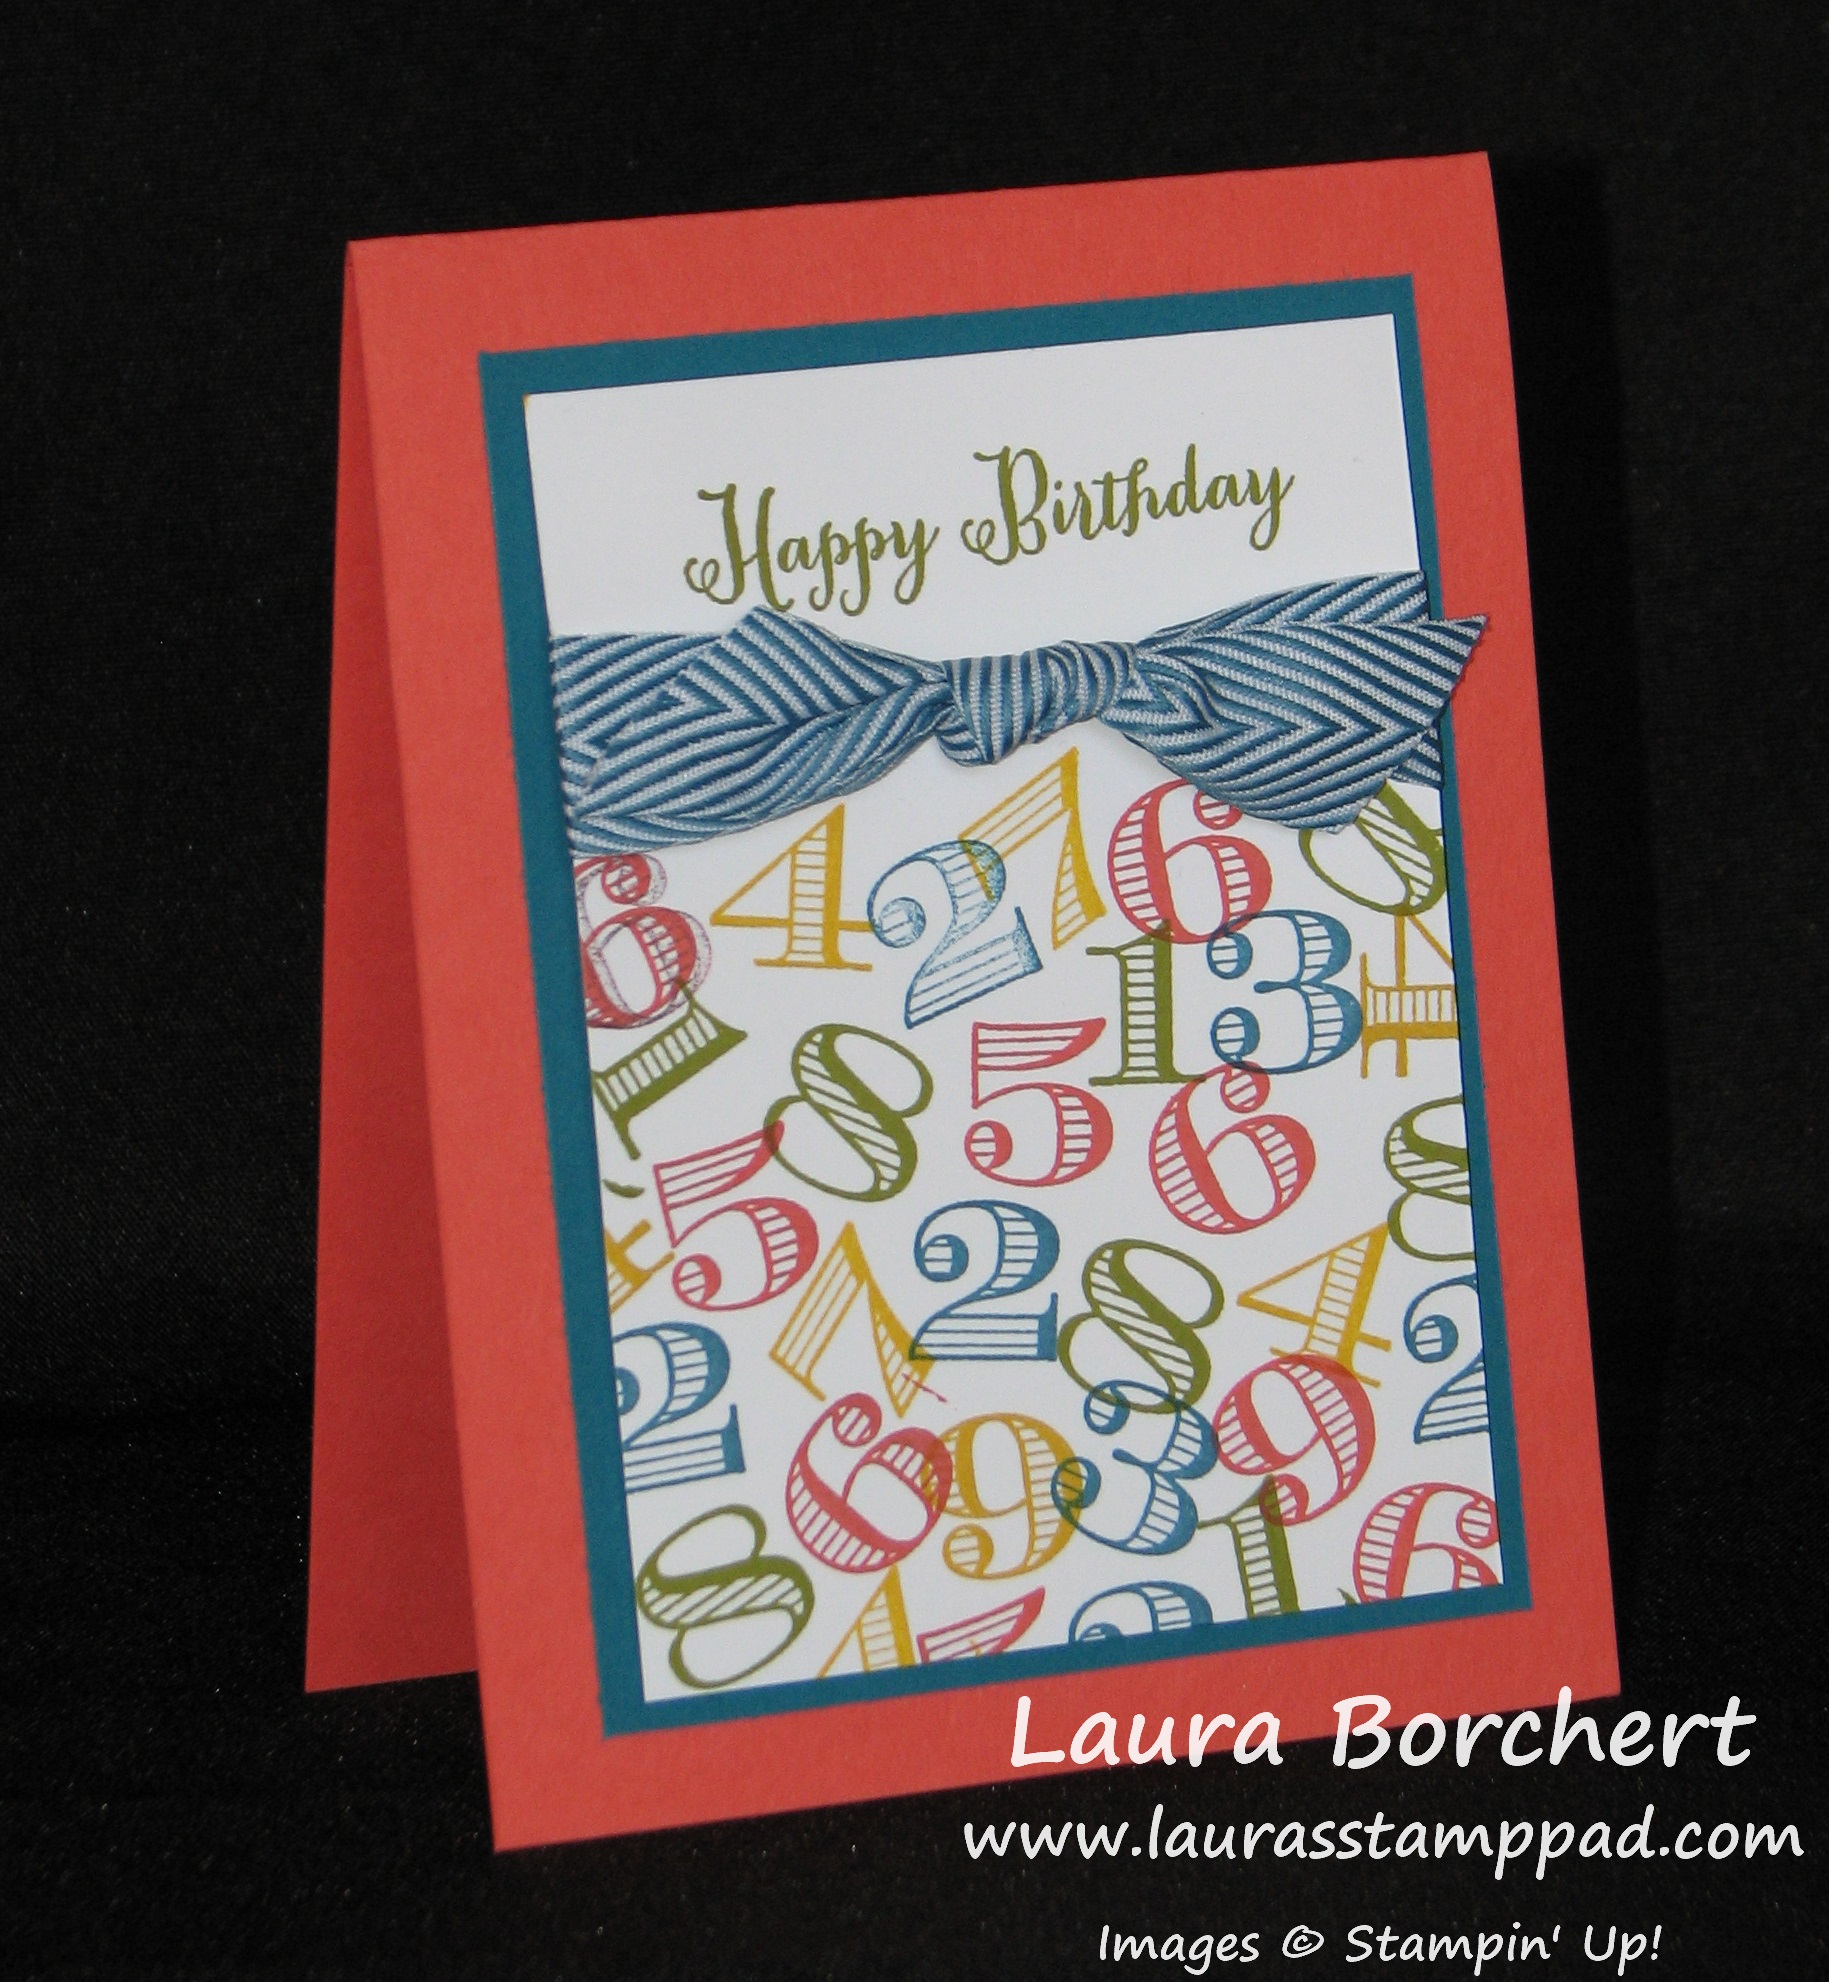
Memorable Moments, www.LaurasStampPad.com

Birthdays are very special! Everyone has one and it is a day to celebrate YOU and all the memories you have created each year! I love how this card represents the many years. This card doesn’t specify which year you are on but shows many numbers to make a colorful background! I love it!!!! I used the Memorable Moments Stamp Set for all of the numbers and the greeting is from Remembering Your Birthday! I used Island Indigo, Crushed Curry, Old Olive, and Calypso Coral Ink Pads for all of the numbers and stamped about 4 of each number in various colors.Of course, I had to add in a little ribbon and I picked the Chevron Island Indigo Ribbon for this one! I like how the ribbon separates the greeting from the colorful numbers!

I hope you enjoyed this card and try out this color combination on your next project! And remember it is not about the number, it is about the memories you make each year! 🙂

Happy Stampin’

~Laura


Fabulous Friday!!!

Posted on

Happy Friday!!! I am pumped for the weekend to finally be here because we are having a our Annual Family Reunion and celebrating lots of Birthdays! I love weekends that involve lots of family time! That means lots of pictures too!! 😉 But first, I have some amazing things to share with you!

Good Greetings, www.LaurasStampPad.com

Look at all of these amazing greetings for the upcoming holidays! LOVE IT! And I love the font!!! You can earn this stamp set for FREE when you have a party/private class/collect orders from friends/or place an order yourself of $300.00 or more. This is on top of the regular Hostess Benefits that you will earn! 19 Stamps for FREE! I still have a few dates left for you to gather your friends and have me bring the stamping fun!!!! Click here for availability.

weekly deals 9.14

The fabulous Weekly Deals for this week! You know Gold Is In so be sure to stock up on that ribbon! Also, I love my Label Card Thinlits Die which makes amazing Swing Cards!!!! You can check those out here and here!

I hope you all have a wonderful weekend and I will see you next week!!!! Happy Stampin’

~Laura


Work of Art Background!

Posted on

We all know how AMAZING this Work of Art Stamp Set is….if you don’t check out this post, this one, this one, and this one and come back! Most of the cards I have done so far have been bright and colorful! Well today I thought I would take it down a notch and create something calming and thoughtful!

Thoughts & Prayers Work of Art, www.LaurasStampPad.com

Isn’t it amazing? Very calming and thoughtful, right? Also, I love how when I use the Work of Art Stamp Set the cards give a super WOW look but they are very simple to create! My card base is Chocolate Chip and I layered a piece of Very Vanilla (4″ x 5-1/4″) on top. I stamped the Work of Art swish in Soft Sky, Coastal Cabana, and Lost Lagoon (sort of an Ombre Look 😉 ) I then stamped the Tree and Greeting from the Thoughts and Prayers Stamp Set. This is an amazing stamp set because of the beautiful tree and flower branch but also the greetings are amazing. They are exactly what you want to say when you don’t know what to say! I love them!

Be on the lookout for more samples using the Thought & Prayers Stamp Set! What is your favorite stamp set that is very calming?

Happy Stampin’

~Laura


Christmas Bliss!!!

Posted on

Trees Merry & Bright, www.LaurasStampPad.com

I am really loving these blues and greens for the Holidays this year! Lost Lagoon and Pear Pizzazz are such warming colors and still represent winter (snowflakes and blue, trees and green). I used the Christmas Bliss Photopolymer Stamp Set! I love the images and greetings in this set and it is just $15.95! Love it!!! I used a card base of Very Vanilla and added a piece of Lost Lagoon cardstock (4″ x 5-1/4″) that I had ran through the Big Shot with my Decorative Dots Embossing Folder! For the greeting, I stamped Warmest Wishes in Lost Lagoon and the trees in Pear Pizzazz. I stamped the upper trees and then without re-inking the stamp, moved down and to the right and stamped again! 🙂 Of course, I had to add some color to the edges with my Sponge Daubers and layered this piece onto some Pear Pizzazz cardstock! Simple and Fabulous!

What are your favorite Holiday Colors – Real Red and Garden Green? Lost Lagoon and Soft Sky? Cherry Cobbler and Mossy Meadow? Leave me a comment down below!

Happy Stampin’

~Laura


Technique Tuesday – Decorative Masks!!!

Posted on

Happy Tuesday!!! You know what that means! I have a fabulous technique to share with you today! I am going to show you how to use your Decorative Masks! Also, I’ll show you how your can use your Build a Banner Masks too!!!

Ombre Polka Dot Background, www.LaurasStampPad.com

You know me and my love for the Ombre look (check out more here and here)! I just can’t get enough of it! I used my Build A Banner Polka Dot Mask for this one but you could use the Dots & Stripes Decorative Mask as well! Soft Sky, Marina Mist, and Night of Navy were the colors I sponged on with my Sponge Daubers (love)! I sponged a few rows of each and then when I went to the next darker color, I rubbed lightly over that last row of the lighter color to give it a blended look. The Happy Birthday is from the Remembering Your Birthday Stamp Set! I sponged the edges of the greeting as well and adhered that with Stampin’ Dimensionals to a 1-3/4 Circle Punched piece of Night of Navy! I ran the circle through the Big Shot with the Stripes Embossing Folder! For a little texture, I looped some Whisper White Baker’s Twine in there as well!

Stars Decorative Mask, www.LaurasStampPad.com

This one is very similar to the one above. I used my Sponge Daubers and the Hearts and Stars Decorative Mask Set! I layered that onto some Lost Lagoon and Hello Honey cardstock and added some Satin Stitched Ribbon in Lost Lagoon! I am really loving that ribbon and find myself reaching for it often! For the popped up stars, I used the small and medium stars from the Bright & Beautiful Stamp Set that is in the Holiday Mini Catalog! Of course, there is a Star Framelit so you don’t have to fussy cut those stars out! 🙂 Love it! You could do this in Red, White, & Blue or Navy and Silver would be fabulous too!

Of course, it is always easier, for me at least, to understand a technique when you see it in action. Here is a Video Tutorial for you see both the Ombre Background and Stars Decorative Mask. Be sure to give the video a thumbs up if you liked it and don’t forget to subscribe to My Channel so you never miss out when I post a new video!

Happy Maskin’

~Laura


Ombre Blues!!!

Posted on

So I learned about the Ombre look a little over a year ago and have LOVED it ever since. My husband giggles because he says I say ombre in a funny way. I’m sure I do!!! 🙂

Webster’s Dictionary defines Ombre as having colors or tones that shade into each other; the color is graduated from light to dark! 

Ombre Blue Work of Art, www.LaurasStampPad.com

Here is my latest ombre creation – of course with the Work of Art Stamp Set! The images in that set make the ombre effect so amazing and simple! Also, I only had to get out ONE stamp pad for the look! I just inked up the image and stamped on the bottom, middle and top without re-inking! This technique really gives you endless colors with just one ink pad! So the next time you are thinking you need a lighter blue or green or pink than what you already have, just stamp off onto a piece of scrap paper and then stamp on your project!

This card uses Coastal Cabana and Whisper White cardstock! I stamped with Coastal Cabana and Basic Black! With my Baker’s Twine, I wrapped it around twice and tied a double knot. Then I took a needle and frayed the ends so they would look more full and puffy! Super Cute!

Do you like the Ombre look? Which color is your favorite to use for this technique? Leave me a comment down below! For more samples using this technique click here!

Happy Ombre-in’

~Laura


Fabulous Friday!!!!

Posted on

Happy Friday, All! Boy this week felt like it drug on a little longer than normal, or is that just me?

Let’s get into the amazing deals for this week starting with this NEW Photopolymer Stamp Set – You’re Wonderful!!!! It is a favorite in my book because it contains flowers and fabulous greetings! Woot Woot!

You're Wonderful Set, www.LaurasStampPad.com

I love how you can mix and match the greetings and you can even leave out the Wonderful completely like in the sample below!

You're Wonderful Samples, www.LaurasStampPad.com

The Weekly Deals this week are amazing because it includes PUNCHES! I really think punches are an amazing tool because they are easy to use, fairly small to store and there are endless possibilities with them! Check out this post and this post. Another fabulous punch tip with the New Tree Punch, cut off the tip and turn it around and you have a picnic basket. (more on this later!)

weekly deals 9.8

I hope you all have a fabulous weekend! I’ll be attending a Stampin’ Up Event on Saturday and celebrating a friend’s birthday on Sunday! Bring on the weekend! 🙂

Happy Stampin’

~Laura