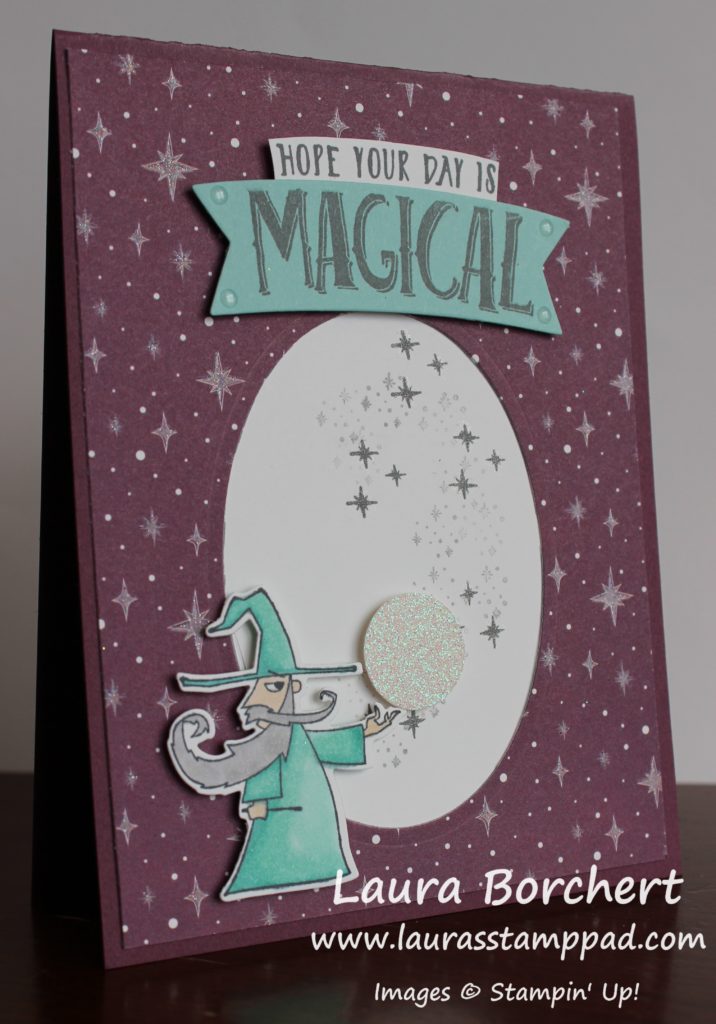
I have been having so much fun with the Myths & Magic Suite. You can see other samples here, here, and here! Now, today, I’m sharing a wizard with a crystal ball card!!!
I love the color combination of Fresh Fig and Pool Party. Also, all of that bling and shine is just amazing and makes this card even more magical!
I started with a Fresh Fig card base measuring 11″ x 4-1/4″. Next, I took a piece of the Myths & Magic Designer Series Paper (4″ x 5-1/4″) and die cut an oval in the middle (side to side) and towards the bottom (to allow for the greeting up top). I used the Layering Ovals Framelits! Then, I took a piece of Whisper White big enough to cover the hole and stamped the 2 star images from the Magical Day Stamp Set in Basic Gray Ink. I stamped the larger star in full strength and the smaller cluster of stars was stamped off once for a lighter look! Then I added this piece to the card front!
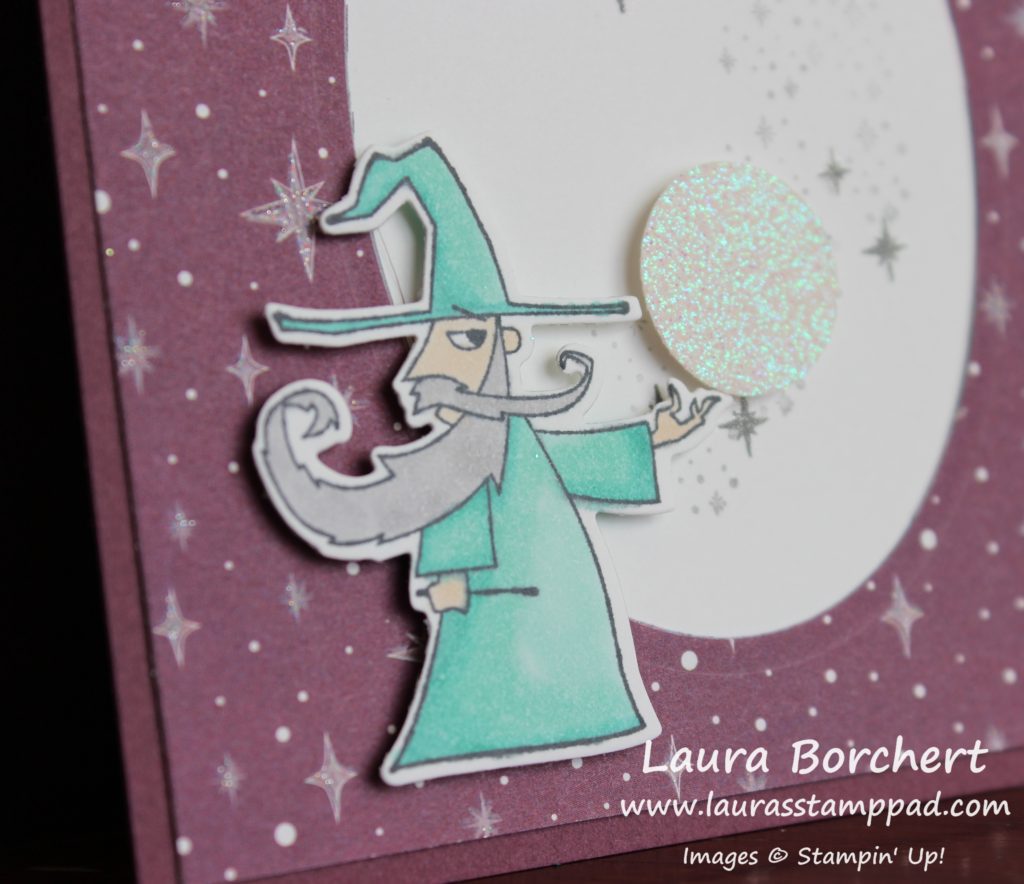
Now for the amazing wizard and his crystal ball!! I stamped him onto Whisper White in Memento Black Ink and colored him with Stampin’ Blends. I actually used the Light Bermuda Bay and Dark Pool Party. These colors just seemed to be the right darkness/brightness I was looking for. Smoky Slate was used for the hair and Ivory for his face and hands! Using the coordinating Magical Mates Framelits (Bundle & Save 10%), I die cut him out and added him to the card front with Stampin’ Dimensionals. His crystal ball was punched out with a circle punch and the Myths & Magic Glimmer Paper. This can be redeemed as a Free Item for Sale-A-Bration so you can get all of these goodies!! I added the crystal ball with Stampin’ Dimensionals as well!
For the greeting, I stamped it from the Magical Day Stamp Set in Basic Gray near the edge of a piece of Pool Party cardstock. Then using the banner in the Magical Mates Framelits, I die cut it out. If you are worried about it moving as you put it through the Big Shot, just add a little post it note to hold it in place. Then I stamped the greeting again on a piece of scrap Whisper White (mostly just the top part of the greeting). Next, I cut it out on the sides and top freehand and left the extra on the bottom portion so that I could use that to help me line up the greeting with the Pool Party one. I placed them together and used Stampin’ Dimensional to secure them together and add it to the card front! I love the dual color for the greeting! It really makes it pop! To finish it off, I added some Epoxy Shapes to the corners of the greeting!
Get the Magical Day Bundle and these fun products and enjoy a FREE Sale-A-Bration item before it all ends on Saturday! Click the product list below to start shopping!
If you would like to see this all in action, check out the Video Tutorial below or click here! Be sure to give the video a thumbs up if you liked it and don’t forget to subscribe if you are new. If you would like a notification when I post a new video, be sure to click the bell right next to the subscribe!!!
Happy Stampin’
~Laura
Product List


