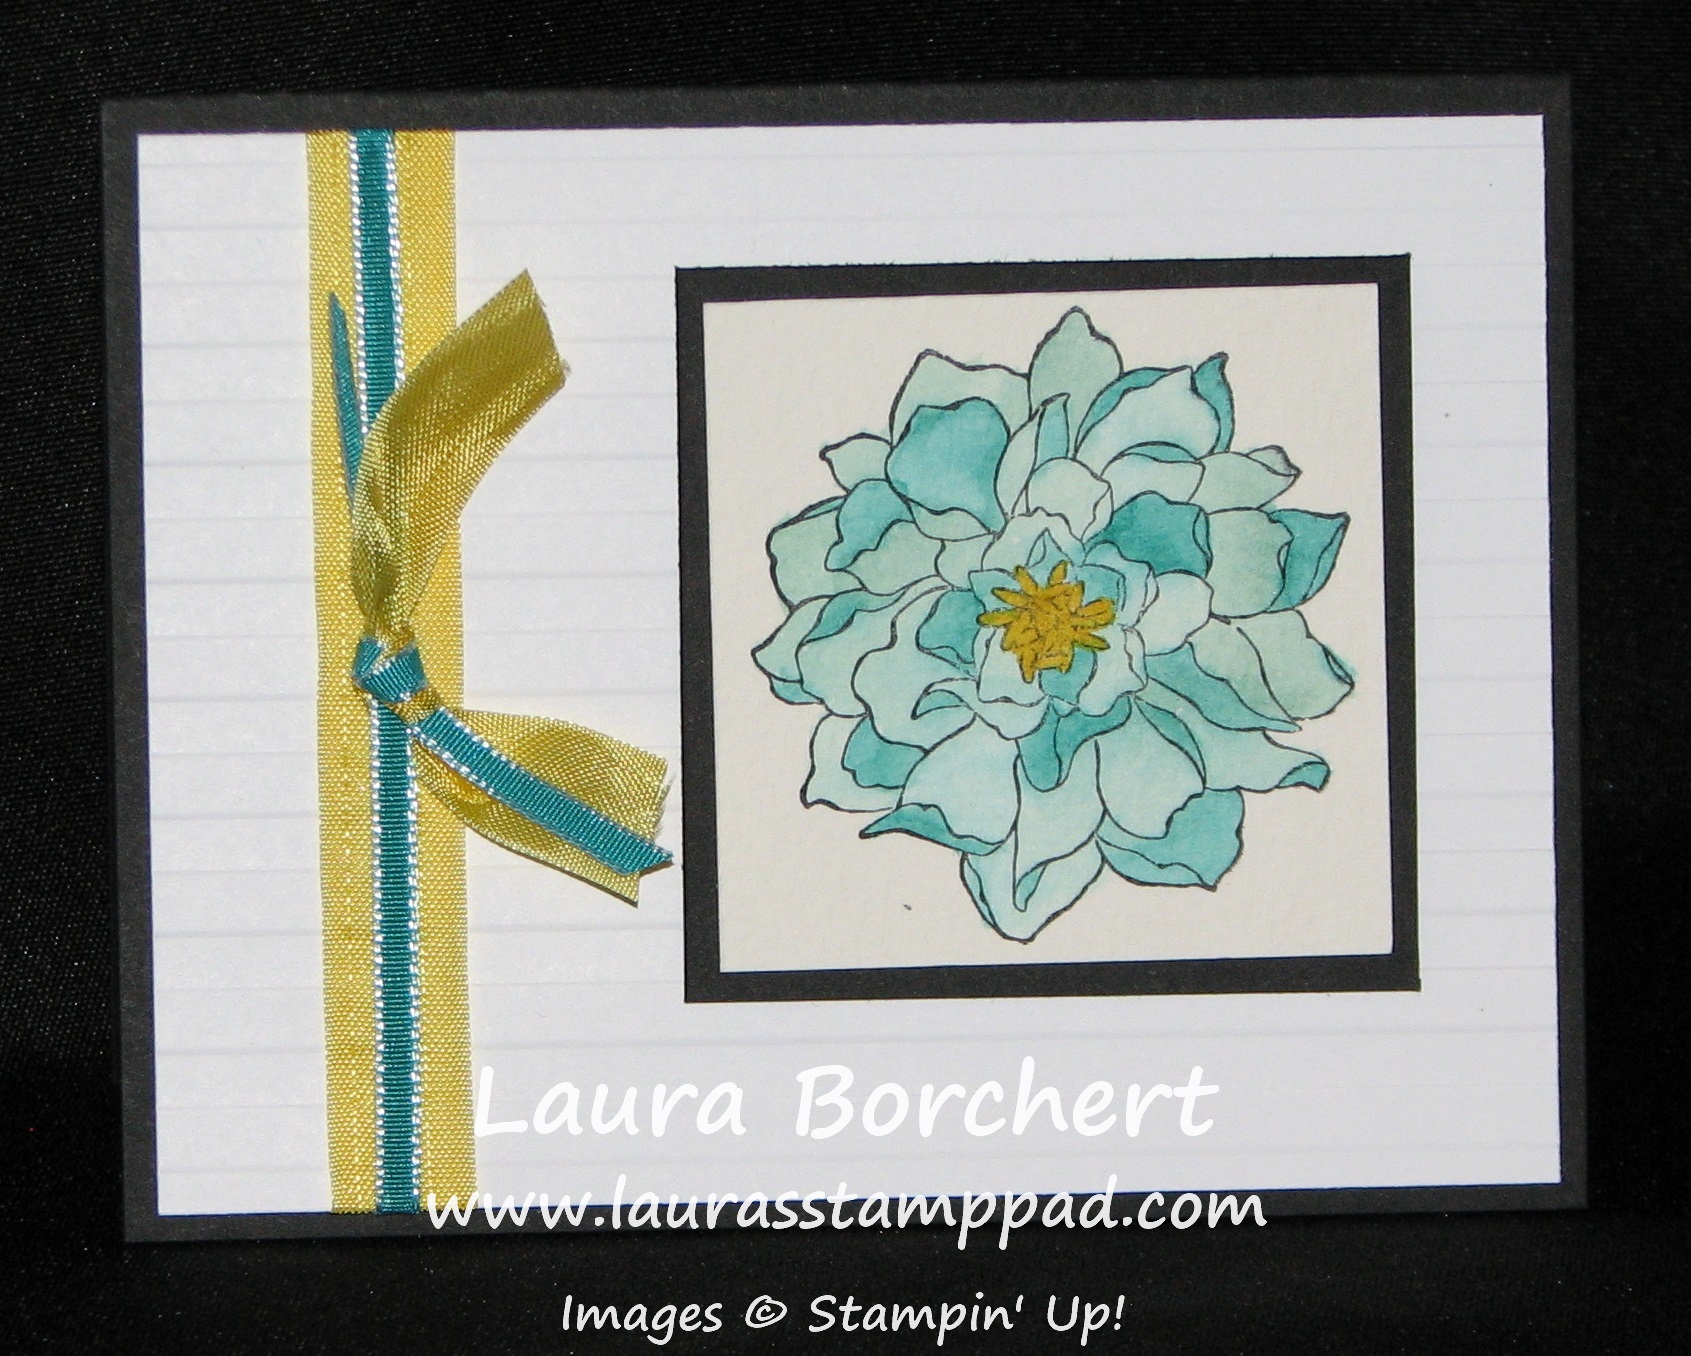
I LOVE this stamp set….I mean it has flowers in it so of course I do! Peaceful Petals is lots of fun for stamping, coloring in, watercoloring, and so much more! For this amazing card, I stamped the image on Watercolor Paper and then using my Blender Pens, I added Coastal Cabana and Bermuda Bay ink to make that gorgeous flower! I love the color scheme too so this card is filed in the fabulous card file for sure! Another favorite technique I like to do is layer a bright color with black and white. The contrast really makes it POP and I love it! For the ribbon, I tried something new. I laid the Daffodil Delight Seam Binding on my cardstock and layered Bermuda Bay 1/8″ Taffeta Ribbon on top of it (adhering the ends to the back). Then I took 2 pieces (one of each) about 5 inches long and tied them together around the layered pieces. I haven’t tried mixing my ribbons like that but I’m liking the look! What do you think? Leave me a comment below!
Hello Hello!!! I hope everyone is having a wonderful week! It is Wednesday so we are half way to the weekend! 🙂 I wanted to share with you this fabulous way to get a watercolor look without a cup of water and a paintbrush! Some may call this faux watercoloring but most of the watercolor projects I do are faux!
How beautiful is that? I think it is amazing! This is one of the flower stamps from Peaceful Petals in the Occasions Mini Catalog! Love it!!!! What you will do is color the stamp with your markers using the thicker tip (that way you get pink flowers and green stems). Then you will take one of your Spritzers filled with water and spritz it.
Now here is the tricky part where each one comes out different. I recommend spritzing 1 or 2 times and not real close to the stamp so that only the little mist of the spritz hits the stamp. When you spritz more or less, close or far away, each time you will get a different look. Then I stamp the image down onto Watercolor Paper! Again you can either hold it for a mini second and then lift or you can hold it for 10 seconds and let the color run into the watercolor paper more. Another fun tip…..have 2 pieces of Watercolor Paper available and after you stamp the first time, stamp again. Sometimes it comes out better than the first one or lighter but still amazing, either way you just got 2 amazing images out of one coloring!!! WOOT WOOT! In the photo above, I held it for a mini second and got that amazing image. Then I took lighter colors (Pink Pirouette & Pistachio Pudding) than the original colors (Melon Mambo and Garden Green) and colored in the flowers and stem. That one is my favorite!
This one here was stamped and I held it for 10 seconds, letting the colors run more into the paper. As you can see the flowers are more solid (filled in) and I didn’t color those in. Some may like that look, other may not! It is all about the art of watercolor!!!
Did you notice that pink and green ribbon on these 2 cards? Where did that come from??? I COLORED IT!!! Check out this post on how to create amazing colored ribbon! I hope you enjoyed this watercolor idea and try it out yourself! For more tricks on watercoloring check out this post and this post! Let me know what you think in the comment down below!!!!
This card makes me feel like an artist and painter and let me tell you I am far from that. I don’t have the patience! But my Grandpa was a true artist with oil painting, watercolor, chalks, pencils, you name it! I feel like this is a little bit of him coming out in me and that makes me smile! 🙂 This card was created with the Peaceful Petals Stamp Set from the Occasions Mini Catalog! Oh how I can’t resist a flower stamp set! I used Elegant Eggplant for my card base and embossed the background with my favorite folder – Perfect Polka Dot! For the flower image, I used watercolor paper and my Stazon Ink so the image wouldn’t bleed when I started coloring it in. For coloring in the flower, I used an Aqua Painter and then re-inker ink for the Ink Pads. Aqua Painters are not my favorite because I tend to squeeze too much and have one big watery mess. But every once in awhile patience comes to me and I create a masterpiece like this one! LOVE IT! I love it so much I don’t want to send it out….do you ever have that problem? Or is that just me? I hope you try it out and see what amazing artwork you can create with just a little ink and water! For more ways to watercolor, check out this post and this post!
This paper is so beautiful and fun to use for springy cards…or any other type of card. I am looking forward to spring A LOT though! Check out this fabulous sample that was created by a fellow demonstrator of mine – Mary Ellen Stites!
The Note Cards and Envelopes are fabulous because you get 20 printed cards and envelopes for just $12.95! All you really need to do is add a greeting for a complete card! You can also decorate it up a little with some ribbon or embellishments!
So many fabulous ways to create a watercolor look without ever getting out some water or waiting for you masterpiece to dry! I hope you try out watercoloring though because it is super fun! Check out some ways to watercolor here!
Happy Tuesday!!!! That means I have a fabulous Technique to share with you! This week I’m going to show you some watercoloring techniques! There are so many different ways to watercolor and tools to use like regular cardstock and Watercolor Paper, Blender Pens and Aqua Painters, reinkers and markers, and so much more!
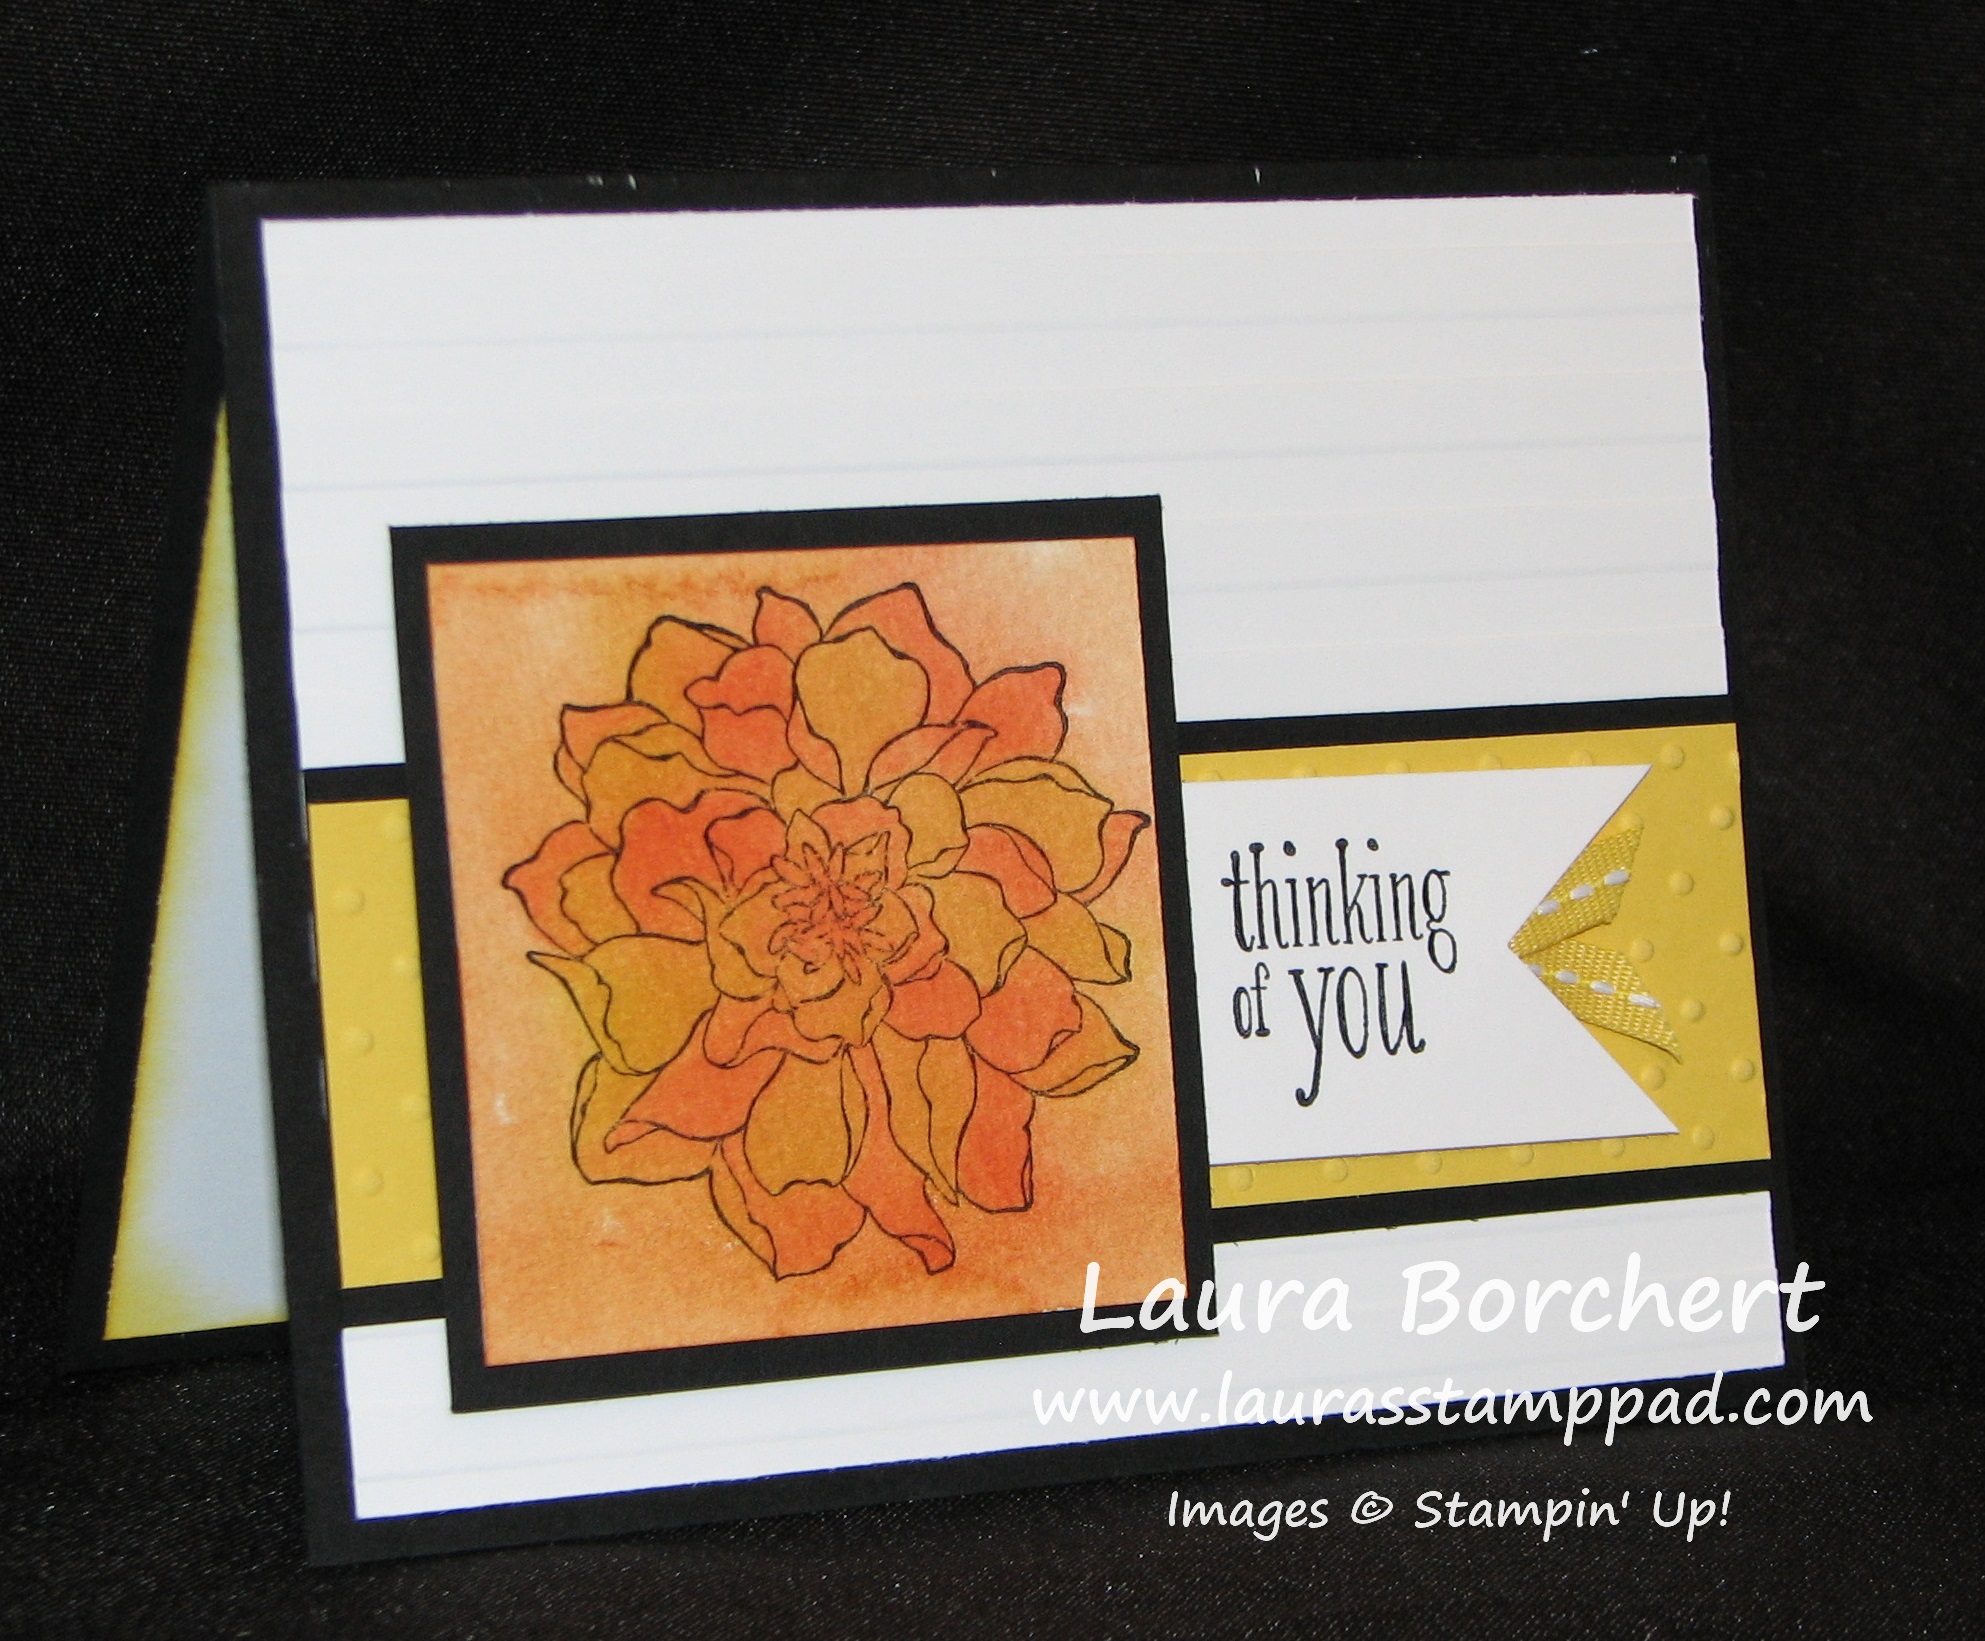
This is for the card pictured above! First you will stamp your image with Stazon onto your Watercolor Paper! I love using flowers for watercoloring partially because I LOVE flower stamps and partially because they are so much fun to watercolor! You will need to use Stazon Ink because this ink is permanent and will not bleed when you spritz it with water! After it is stamped, I took my Daffodil Delight and Pumpkin Pie markers and colors the flower in. Once you have colored the entire flower, you will spritz it with water generously and tilt the piece of paper so that the colors run to the edge and bleed all over. This will then need to sit aside till it dries before assembling your card!
Here is another Watercolored Card! This card uses our Naturals Composition Designer Series Paper – most amazing paper ever because it comes pre-embossed!!!! There are 2 sheets of the following: music notes, damask, flowers (pictures above), notebook lines with a flower image in the corner, woodgrain, and filigree. It is so much fun to color with this paper! For this card, I used my Aqua Painter (filled with water) and picked up color from a reinker drop and then painted on this card. The embossing helps to keep the water contained in the image. I have also done a similar card but used just markers on the paper and it came out just as beautiful! Using the markers gives it a darker, bolder color which I LOVE because I love bold colors. I know there are people out there who like a lighter color and a more watercolor look though! 🙂
I hope you try out watercoloring. You don’t have to be an artist to do watercoloring….trust me I am not an artist and I have a lack of patience for the drying process but I can still do it so you can too!!! Check out other watercolor project here! Try it out and let me know how it goes in the comments below!!!
It is Tuesday and so I’m sharing a fabulous technique with you!!! This week it is Color Blocking!!!
I had so much fun with this technique and every time I did it it came out different so you end up with lots of different looks! All you need is some Ink Pads, Clear Block, and Watercolor Paper! Take your ink pad and press it onto the clear block, if using more than one color, just apply color to one spot starting with the lightest color and slowly going darker as you fill in the block! Then the next part of the technique can be done differently!! !You can spritz the inked clear block with alcohol, water, or even Stamp Cleaner (it was handy and I couldn’t find my alcohol spritzer). You can spritz the Watercolor Paper until it is moist or you can do neither of these! I never really found a huge difference. Although when you spritz the clear block, if you tilt the block, the colors will run and blend a little (could be a good look or could become ehh). Also, be sure to hold the clear block to the paper for a good 30 seconds, allowing time for the ink to soak into the paper. I did this technique on a few scraps of Watercolor Paper and then on some full size pieces. After I was done, I just cut them into pieces for all of these different cards I made above! The colors I used were Calypso Coral, So Saffron, Pool Party and Early Espresso!!! Another tip, when I stamped the FABULOUS stamp on the Watercolor Paper, I had a hard time getting the image to come out clear because of the texture in the paper. But that’s when the markers come in handy!!! I just colored in the lettering in spots that were lighter than I wanted! I hope you try out this fabulous technique! Enjoy!