So much texture!!!

Posted on

Flower Texture Layers, www.LaurasStampPad.com

I feel like I mention it a lot but texture on a card can really make it go from nice to FABULOUS! This card is fabulous for sure to me! I love all of the textures with the doily, ribbon loop, and embossed cardstock. Do you think it is too much? Let me know in the comments below if you like texture or not!!!

I started with a Wisteria Wonder card base and stamped the greeting from You’ve Got This in Basic Black on the bottom. Then I took a piece of Cucumber Crush and ran it through the Big Shot in the Elegant Dots Embossing Folder and adhered it to the card on the right side. I added a 1/3 piece of a White Tea Lace Doily to the edge of the Cucumber Crush. You can cut the doily into 3 pieces and really get the most out of each one! 🙂 For the flower, I stamped it from the You’ve Got This Stamp Set in Stazon Black onto Watercolor Paper. I used an Aqua Painter to color in the flower in Wisteria Wonder, Rich Razzleberry, and Cucumber Crush! I love how it turned out with the shading and all. Watercoloring is something that usually something I feel like I either nail it or it’s ehhh! After the flower was completely dry, I layered it onto Tip Top Taupe with Tear and Tape because I like to use a strong adhesive to really hold down the watercolor paper since it isn’t always flat. I added a little loop of Cucumber Crush Lace Trim to the right hand lower side of the flower before adding it to my card front. This is a great way to use those little scraps at the end of a roll or that you trimmed off from another project! Love it!!!

You can check out more samples using this stamp set here, here and here!

Happy Water Colorin’

~Laura


Technique Tuesday – Coloring & Embossing!!!

Posted on

Happy Tuesday!!! You know what that means…..I have a fabulous technique to share with you today!!! Today I am showing you a little watercoloring, a little heat embossing and a lot of FUN!!! A shout out to Mary Ellen who gave me the inspiration and idea for this card!!! Thank you so much! I loved your sample and couldn’t wait to try it out!

#UROCK, www.LaurasStampPad.com

See how fun this card is!!!! It is so colorful and bright and makes me smile every time I look at it. So let us dive in and get started!

SUPPLIES NEEDED: Watercolor Paper, Aqua Painter, Ink Pads, VersaMark, Alphabet Stamp Set, Embossing Powder, and Heat Tool

You will start off with a piece of Watercolor Paper measuring 3-3/4″ x 5″ and lightly wet the entire piece with the Aqua Painter. It should not be dripping wet but lightly glistening. This will allow the color to soak in and the colors to bleed better! Now you can pick your colors and using your Aqua Painter paint on a swish of color. In the sample above, I used Pumpkin Pie, Daffodil Delight, Melon Mambo, Elegant Eggplant, Cucumber Crush and Tempting Turquoise! Once you are done with one color, just run the Aqua Painter clean on a paper towel and move to the next color. Be sure not to squeeze the Aqua Painter because then you will have too much water and your colors will come out super light. Once all of your colors are on, you can go back and add a little more in spots if you wish. Now you need to set it aside to dry completely or you can use your Heat Tool to speed up the process!!!

Silver Heat Embossing, www.LaurasStampPad.com

Once it is dry, you can stamp your letters on with VersaMark Ink. TIP: Be sure that your VersaMark Pad is inked very well because you want to make sure you have plenty on the stamp so it gets into the rough surface of the Watercolor Paper. I used the Layered Letters Alphabet Stamp Set which I am loving right now. The images and font are perfect!!! Once you have your letters stamped, you can pour on the embossing powder of your choice. I used Black Embossing Powder for the sample at the top and Silver for the one above! Now you will heat with your Heat Tool until it is set. TIP: Don’t wave the heat tool around. Point it in one spot until it heats up and starts to melt, then move it along until it is all melted. If you swing it around, it won’t heat evenly or as quickly. Now you are ready to assemble to your card. I layered mine onto Basic Black and then a Cucumber Crush card base! I love how the black really makes it pop!!!!

Watercoloring & Embossing, www.LaurasStampPad.com

If you would like to see this in action, check out my Video Tutorial below!! Be sure to give it a thumbs up if you liked it!!!

What would you spell out on your card?? A Name? #???? Let me know in the comments below!!

Happy Stampin’

~Laura


Technique Tuesday – Coloring with Aqua Painters!!!

Posted on

Happy Tuesday everyone!!! Today I have a fabulous technique to share with you!!! Every once in awhile I pulling out my Aqua Painter Marker and enjoy coloring…..usually flowers!!! Check out this beauty!!!

Aqua Painter Coloring, www.LaurasStampPad.com

I love Black and White with a POP of color….any color!!! Isn’t this card just amazing??? Now let’s get started!

SUPPLIES NEEDED: Whisper White Cardstock, flower or other line image stamp, Ink Pads, Aqua Painter, Stazon Ink

For this card, I did not use Watercolor Paper. I used regular Whisper White cardstock! I inked up the flower from the You’ve Got This Stamp Set in Stazon Black and stamped it onto a piece of scrap Whisper White cardstock! Then I used Tangelo Twist and Cucumber Crush Ink Pads to color the flower in. To keep my ink pads clean, I just take a clear block and stamp it into the ink pad and use that as my color palette. When using the Aqua Painter, be sure not to squeeze the barrel of the pen because that makes lots of water come out and you get a puddle on your project. Lightly swipe some ink from clear block color palette and then start coloring your image. The more you use it, the more the ink starts to get lighter and lighter, because of this you can start on the edges of your image and when the color is lighter, move into the middle. This will give more of a watercolor look. Once you are done with one color, just squeeze the barrel to allow more water to come out and wipe it into a paper towel. Then move to your next color. For the yellow center, I used a Crushed Curry Marker. I like a nice bold yellow color so I prefer to use the marker. You can set this aside to dry while you prepare your card. The card base if Tangelo Twist and then I layered a piece of Basic Black (4″ x 5-1/4″) on top with Stampin’ Dimensionals. Then with a piece of Whisper White (3-3/4″ x 5″), stamp the same flower image from the You’ve Got This Stamp Set along the left side and top. Be sure to angle the flowers around for a slightly different look. I found that the more I overlapped the flower, the more of a mess it looked but that’s all up to you! The greeting is from the Happy Birthday Everyone Hostess Stamp Set. Oh how I love that large scroll-y font! Now for the “fun” part……fussy cutting that beautiful flower you colored!!! Once you are done cutting it out, you can add it to your card with Stampin’ Dimensionals! TIP: Cut some of the dimensional edge for those little leaves and tiny areas!!! Love it!!! I could create this card in every color!!!

Purple Watercolor Flower, www.LaurasStampPad.com

To see this in action, check out the Video Tutorial here!!! Don’t forget to give it a thumbs up if you liked it and be sure to Subscribe to My Channel so you don’t miss any other videos!!!

Happy Colorin’

~Laura

Technique Tuesday – Beautiful Bokeh!!!

Posted on

Happy Tuesday!!! That means I have a fabulous technique to share with you and this one is exactly that….fabulous!!! I’m sure you have heard of or see the Bokeh look before. It is those shiny blotches of light in a photograph. So the real definition is the visual quality of the out-of-focus areas of a photographic image, especially as rendered by a particular lens. See you know what I mean, right?

Bokeh Technique, www.LaurasStampPad.com

Isn’t this just gorgeous??? I used Tempting Turquoise and Rich Razzleberry for the background and the greeting is from the Feel Goods Stamp Set! This style I got from a fellow demonstrator Mary Ellen! You can check her out here and see her tutorial on this technique here! I love the idea of using Painter’s Tape to hold down your Watercolor Paper and it gives that perfect trim!!!

Bokeh Technique, www.LaurasStampPad.com

Here is another look at this technique!!! With this one, I just added a few brush strokes of ink (Island Indigo and Pool Party) to some Watercolor Paper with my Aqua Painter. After it dried, I used the Wondrous Wreath Berry Stamp to create the dots. I added the dots with Whisper White Craft Ink! How fabulous?!?! The greeting is from the A Dozen Thoughts Stamp Set! I layered it with the Oval Punch and Scallop Oval Punch! Here is another sample using Perfect Plum and Elegant Eggplant. I added some Dazzling Details and the dots were created with Whisper White Ink and my pencil eraser!!!

Bokeh Technique, www.LaurasStampPad.com

Want to see this in action?? Check out my Video Tutorial below! Be sure to give it a thumbs up if you like it!!!

I hope you try out this technique and let me know how it goes. I would love to see your creations. You could do this technique in a million different colors and get a different look with each! Love it!

Happy Bokehin’

~Laura


Watercolor Winter Too!

Posted on

If you missed yesterday’s post, be sure to check that out here! Today I’m going to share the other 2 cards in the kit as well as a few other samples and ideas! Have I said I loved these cards yet? I love these cards! 🙂

Watercolor Winter Kit, www.LaurasStampPad.com

Watercoloring this little sled in Cherry Cobbler was super fun! It brought back memories of sledding down the hills on our runner sled as a kid! 🙂 Ahhhh! The card base already had the white dots on the upper half of the card. I adhered the vellum snowflake from the kit with some Snail Adhesive in the center. I didn’t worry about putting a lot of adhesive on it because I wanted it to flare on the ends and it was going to be on the bottom layer. Next you will add the sled and then the Bermuda Bay banner. I stamped the greeting from the Watercolor Winter Too Stamp Set! Then I added the gold strip and the Baker’s Twine that comes in the kit! Finish it off with a few sequins for a little bling!

Watercolor Winter Kit, www.LaurasStampPad.com

Many of my stampers who come to my classes say mine is always perfect and how come their’s doesn’t look like mine…..can you find my mistake? The snowflake is cut off on top! See everyone makes mistakes and I would say most don’t even notice! I forgot to add the vellum snowflake until after I put the letters on and there was no way I was adjusting them since it took me a year and half to put them on! This was my favorite card in looks but least favorite in patience. Wowza those letters weren’t easy! The directions say to color them with Bermuda Bay and then while they are still intact on the sheet, add adhesive and lay the twine down. Then you can pop the letters through and they are all set on the twine. I’m going to bet I used too much glue, didn’t wait to let it dry long enough or all of the above but that didn’t work. 🙂 Once it was all over though it created a fabulous card!

Watercolor Winter Kit, www.LaurasStampPad.com

Now this card I created with the leftover vellum piece that the snowflake was cut out of. I used my Sponge Dauber to color it with Bermuda Bay Ink and it turned out fabulous! Be gentle around the tips of the snowflake. I adhered that to a Whisper White card base, added some White Satin Ribbon and a greeting from Endless Wishes Stamp Set!!! Love it!

Extra Watercolor Samples, www.LaurasStampPad.com

Here are few other cards that I created a little differently. To be honest, I didn’t like that the twine was more vanilla and the cards were white so I didn’t use it and will save it for another project! I love how these all turned out!!!! I hope that you try out the Watercolor Winter Simple Created Kit and please share your ideas and samples with me! I would love to see what you come up with!

Happy Watercolorin’

~Laura


Technique Tuesday – Watercolor Winter Cards!!!

Posted on

Happy Tuesday!!!! I have a fabulous technique to share with you today!!!! When I first looked at the Holiday Mini Catalog, I was intrigued by the Watercolor Winter Simply Created Card Kit! The cards were so cute and different! And while watercoloring isn’t my favorite technique I do like to do it every once in awhile! I’m glad I did!!!

Watercolor Winter Kit, www.LaurasStampPad.com

These cards are just so detailed and amazing with the watercoloring! I will also note that you DO NOT have to be good at watercoloring to do this! Trust me! 🙂 The kit comes with all of the supplies as well as a paint brush. I did use my Aqua Painter a little because I liked that it already had water in it! For the card above, you will watercolor the trees with Old Olive and then add the Gold Glimmer Paper to the back of it! I used my Multi-Purpose Adhesive to adhere some of these items to the card  – trees and Happy gold greeting. The stamped Holidays greeting is from the Watercolor Winter Too Stamp Set. Also, you can hardly tell in the photo but the Whisper White rectangle is actually wood-grain embossed for you already! 🙂 Love it!

Watercolor Winter Kit, www.LaurasStampPad.com

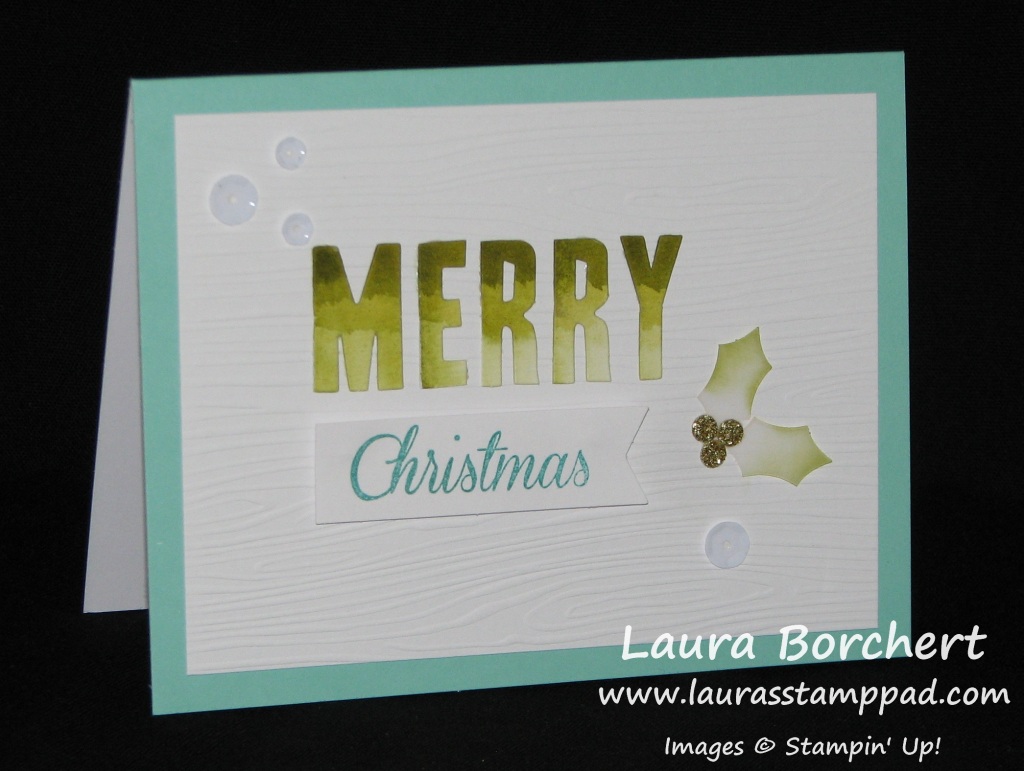
You can see the wood-grain embossing on this one more! 🙂 The letters MERRY were watercolored with Old Olive. I found it best to do a light layer of green all over the letters and then slowly add a little more color to the top half. It will bleed a little up and down. Then get a little more ink and touch just the top. I think mine turned out really well on this sample…..no so much on a few others. 🙂 The holly leaves were already die-cut in vellum and I didn’t like how they didn’t show up well white on white so I added some Old Olive with my Sponge Dauber! Again I used the Watercolor Winter Too Stamp Set and added the Gold Glimmer dots and sequins!

Stay tuned and be sure to come back again tomorrow to see more cards from this kit!!!! Also, Stampin’ Up did a fabulous video showing this kit so you can check that out here!!!!

Happy Watercolorin’

~Laura


Technique Tuesday – Make Your Own Stencil!

Posted on

Happy Tuesday!!! That means I have a fabulous technique to share with you today!!! I’m going to show you how to create your own stencils because how cute is this card?

Punch Stencil Card, www.LaurasStampPad.com

Okay so I know this card is super cute already because its PINK, has flowers, has some bling, and says the word sprinkles in the greeting! Love it! Now let me know tell you how to create this amazing card!

Supplies Needed: Itty Bitty Punch Pack, Scrap Paper, Watercolor Paper or regular cardstock, Sponge Dauber, Blender Pens, or a Maker

I used the Flower from the Itty Bitty Punch Pack for my sample but you could really use any punch image. Punch the image from a piece of scrap paper! This is not your stencil! For the sample above, I used Watercolor Paper and my Blender Pens to get the look! You could use regular cardstock and a marker or your SPONGE DAUBERS! You know how I love my sponge daubers. I then moved the stencil all over the paper for a random look (some falling off the edges or in the corners). Also, I used my sponge daubers for the edge of the greeting just to add a little color! How simple is that? So you may be asking, why can’t you just punch the image in any color of cardstock for the same look? You can most certainly do that as well. It would give a more textured look because each punched image would be raised up! So many fabulous possibilities!!! Here is another sample created by Vel at one of my stamp classes!!!!

Punch Stencil Card, www.LaurasStampPad.com

I love the colors together! So beautiful and the Daffodil Delight really pops and brightens the card up! This card is sure to brighten anyone’s day! We both used the Remembering Your Birthday Stamp Set for our greetings! Both cards have a coordinating greeting on the inside as well! I hope you try this out with some of your punches and leave a comment down below or send me your photos! I would love to hear and see what you come up with!

Happy Stampin’

~Laura


Watercoloring with your Markers!!!!

Posted on

I love my big box of markers! I take them with me to every event I do because if I forget a stamp pad, I still have my markers. They are great for a multi-colored look on your stamps, coloring in and now watercoloring!!!!

Watercolor with Markers, www.LaurasStampPad.com

The colors in the card are like that of a sunset (sunrise, neither?)!!! The various shades of yellow, coral, red, and orange and the messiness of the colors that you just can’t achieve if you tried. That’s what watercoloring is all about – you can never do the same look twice and you never know how it will come out!

To create this card, I started with a 4″ x 5-1/4″ piece of Watercolor Paper and took my markers (Daffodil Delight, Calypso Coral, Tangerine Tango, and Pumpkin Pie) and colors swatches. I did the colors in lightest to darkest and colored them either matching up or with a small gap. Once you have your swatches colored, you will spritz it with water or alcohol (70 Proof or less so the alcohol doesn’t eat the plastic in the spritzer). Spritz the heck out of it and you can either let it do it’s thing, pick it up and tilt it around to allow it to bleed, or use your finger to move the ink around. Set it aside and allow it to dry completely before assembling it to your card. When using watercolor paper, I like to use Fast Fuse or Sticky Strip to adhere it to my card because it holds nice and strong even when the paper is curling! To complete my card, I layered my Watercolor Paper onto a piece of Basic Black (4-1/8″ x 5-3/8″) and then onto a Tangerine Tango card base (4-1/4″ x 11″). For the stamping, I used my Bloom with Hope Hostess Stamp Set which has amazing flowers (perfect for watercoloring or blendabilities) and great sayings! Of course, you will want to stamp on your watercolor paper with Stazon Ink so it won’t bleed!

Here is another Sample that I created using shades of Purple – Blackberry Bliss, Elegant Eggplant, Rich Razzleberry, and Perfect Plum! Remember how I said you never know how it might turn out…..how this happened I do not know!

Purple Markers Watercoloring, www.LaurasStampPad.com

I thought about cutting it off but I didn’t want an awkward size of paper for my card. When I was showing my stampers, some loved it and some did not. They gave me the idea to cover it with ribbon so…..

Purple Markers Watercoloring, www.LaurasStampPad.com

See even the ones you think didn’t turn out, still look amazing!!!! Here I added some Satin Stitched Ribbon in Blackberry Bliss & the greeting from Million & One!!!

Marker Watercolor, www.LaurasStampPad.com

Here is another sample that I did with shades of Green – Pear Pizzaz, Old Olive, Garden Green & Mossy Meadow!

To watch this technique in action, check out my Video Tutorial by clicking here or the video below! Don’t forget to give it a thumbs up if you like it!!!

Happy Watercolorin’

~Laura


Technique Tuesday – Watercoloring and Embossing!!!

Posted on

Happy Tuesday!!! That means I have a fabulous technique to share with you today!!!! I will be showing you emboss resist and watercoloring! I love love love these colors together because they are so bright and cheery!!!!

Emboss Watercolor, www.LaurasStampPad.com

SUPPLIES NEEDED: Watercolor Paper, VersaMark Ink, Stamp Set, Embossing Powder, Heat Tool, Aqua Painter and Ink Pads

You will want to start out with a piece of Watercolor Paper. The piece I have for the project above is 4″ x 2″. Stamp your image or greeting in VersaMark and then onto your watercolor paper. Be sure to press firmly so that the VersaMark gets in the texture of the paper. I used the greeting from the Big News Stamp Set. Then you will apply embossing powder and heat it with your Heat Tool. I used Gold Embossing Powder on this one and Silver on the sample in the video! 😉 Once it has cooled, you will take your Aqua Painter and your ink pad and paint on your color! Of course, the color and water will resist for the image and only appear around the image. This gives an awesome background. I used Melon Mambo, Bermuda Bay and Pumpkin Pie. If you are using similar colors and want them to bleed together you can overlap them, otherwise just swipe close to the color but not on top of it! This gives an amazing focal point to your project. You can always do this with flowers, greetings, or any other type of image! Here I did it in Silver Embossing Powder!

Silver Emboss Resist, www.LaurasStampPad.com

If you would like to watch a Video Tutorial of this technique, click here or watch below! Don’t forget to give the video a thumbs up if you like it! 🙂 Also, be sure to subscribe to my channel so you don’t miss out on any other videos that I post!

If you try this out at home, be sure to send me a picture! I would love to see what you come up with and see your ideas!

Happy Stampin’

~Laura


Technique Tuesday – Watercolor Ray of Sunshine!!!

Posted on

Happy Tuesday!!!! That means I have a fabulous technique to share with you today and it includes the best stamp set ever – Work of Art!!! You probably could have guessed that one, right? 😉

Work of Art Sunshine, www.LaurasStampPad.com

Supplies Needed: Work of Art Stamp Set, Watercolor Paper, Spritzer with Water, Island Indigo Ink, Daffodil Delight Ink, Pear Pizzaz Ink, Coastal Cabana Ink, and Soft Sky Ink, Sequins, Itty Bitty Punch Pack

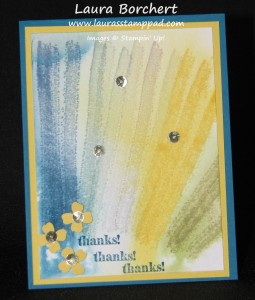
Starting with a piece of Watercolor Paper measuring 3-3/4″ x 5″, you will stamp the long image from the Work of Art Stamp Set 2-3 times in each color. I started straight up and down with Island Indigo, then Coastal Cabana, Soft Sky, Daffodil Delight, and Pear Pizzazz. As you go along, you will want to angle them like rays of sunshine! Then you will need to place the paper into a box or on a towel and spritz ALL OVER! I really mean all over. The colors will start to run and bleed and that’s a good thing. The piece of paper will also start to curl and that’s okay! This will take some time to dry or you can use your Heat Tool! Once it is completely dry, it is time to assemble! I added it to a piece of Daffodil Delight (4″ x 5-1/4″) and then my card base of Island Indigo (4-1/4″ x 11″). I stamped the Thanks three times from the Lots of Thanks Stamp Set! I added a few Daffodil Delight flowers from the Itty Bitty Punch Pack and some Gold Sequins (adhering them with Mini Glue Dots). Of course when working with watercolor, no two will come out alike so don’t worry if your’s doesn’t look exactly like mine. For a Video Tutorial on this fabulous technique, click here or check out the video below!

Happy Stampin’

~Laura