Technique Tuesday – Spritz with Care!!!

Posted on

Happy Tuesday!!! You all know that means I have a fabulous technique to share with you today! I also have a warning…….spritz with care! 🙂

Spritz with Care, www.LaurasStampPad.com

So this happened at stamp class and yes I did scream when I did it. The ladies all thought I saw a bug or something…..which I would have screamed over that as well. I spritzed and it was not pointed out but instead up and went all over my finger/hand/arm and all. Somehow I did save my clothes though! 🙂 All is good and it cleaned up very well!

Spritzed Daisy, www.LaurasStampPad.com

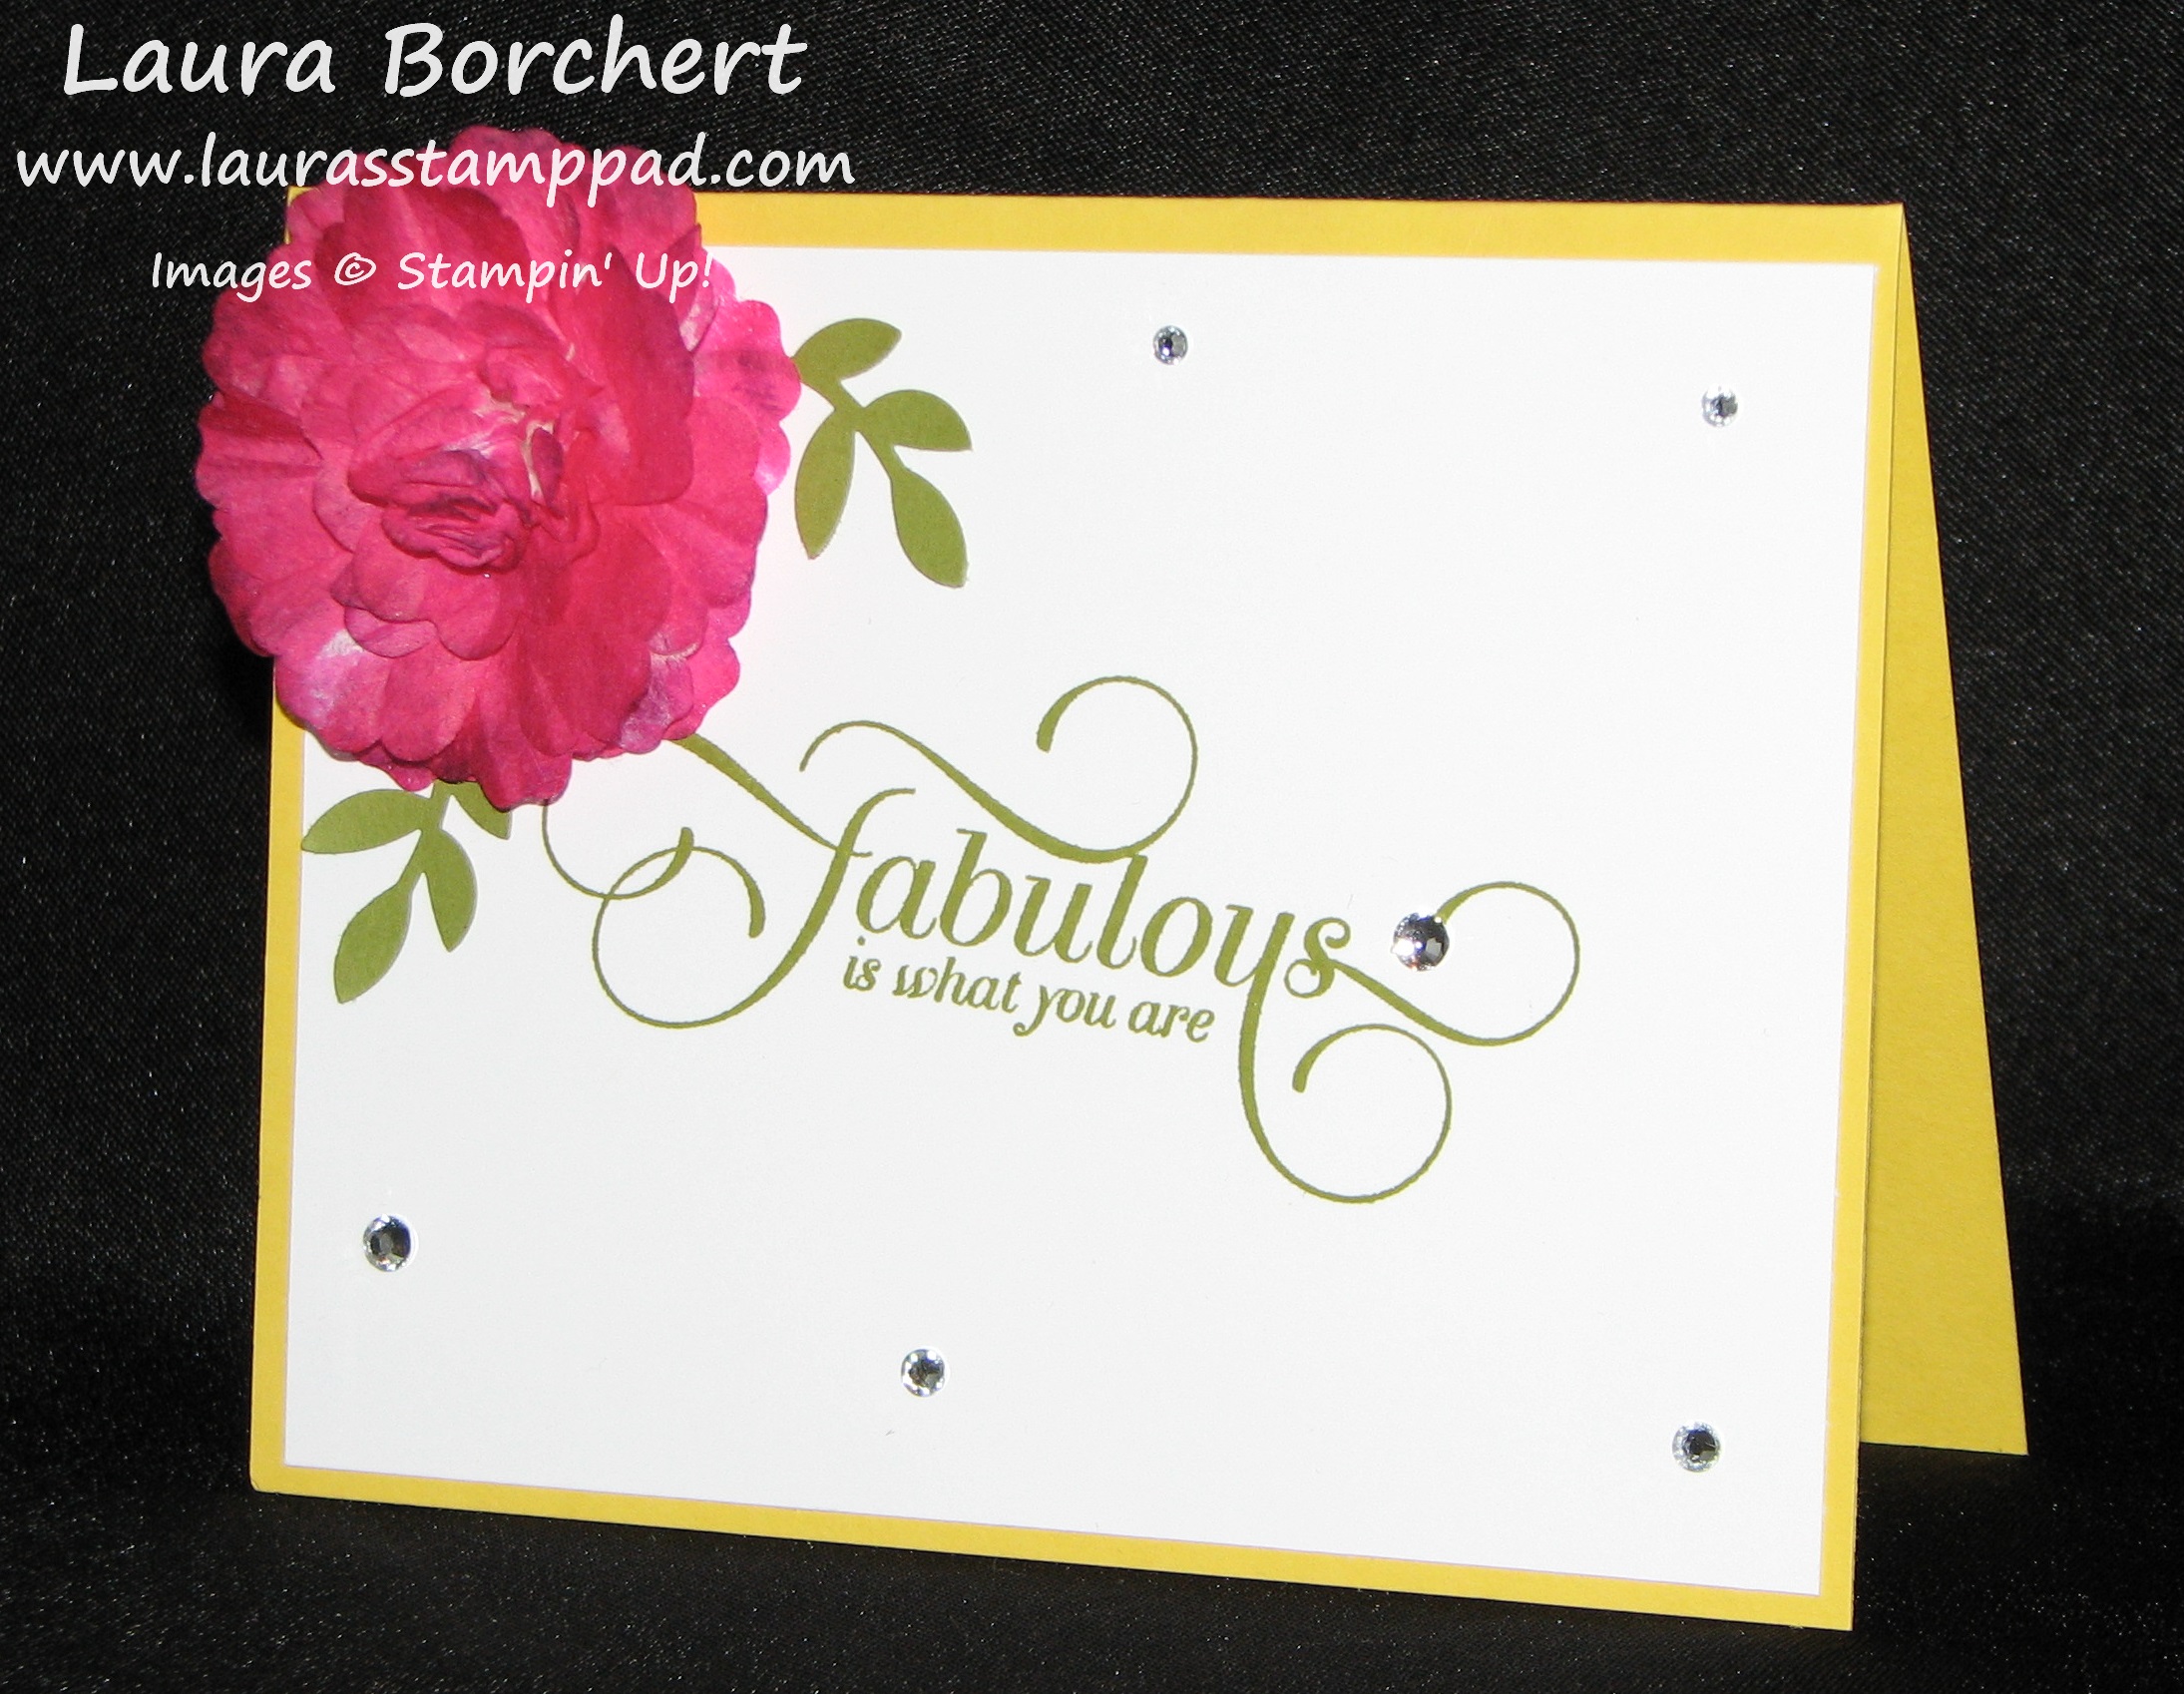
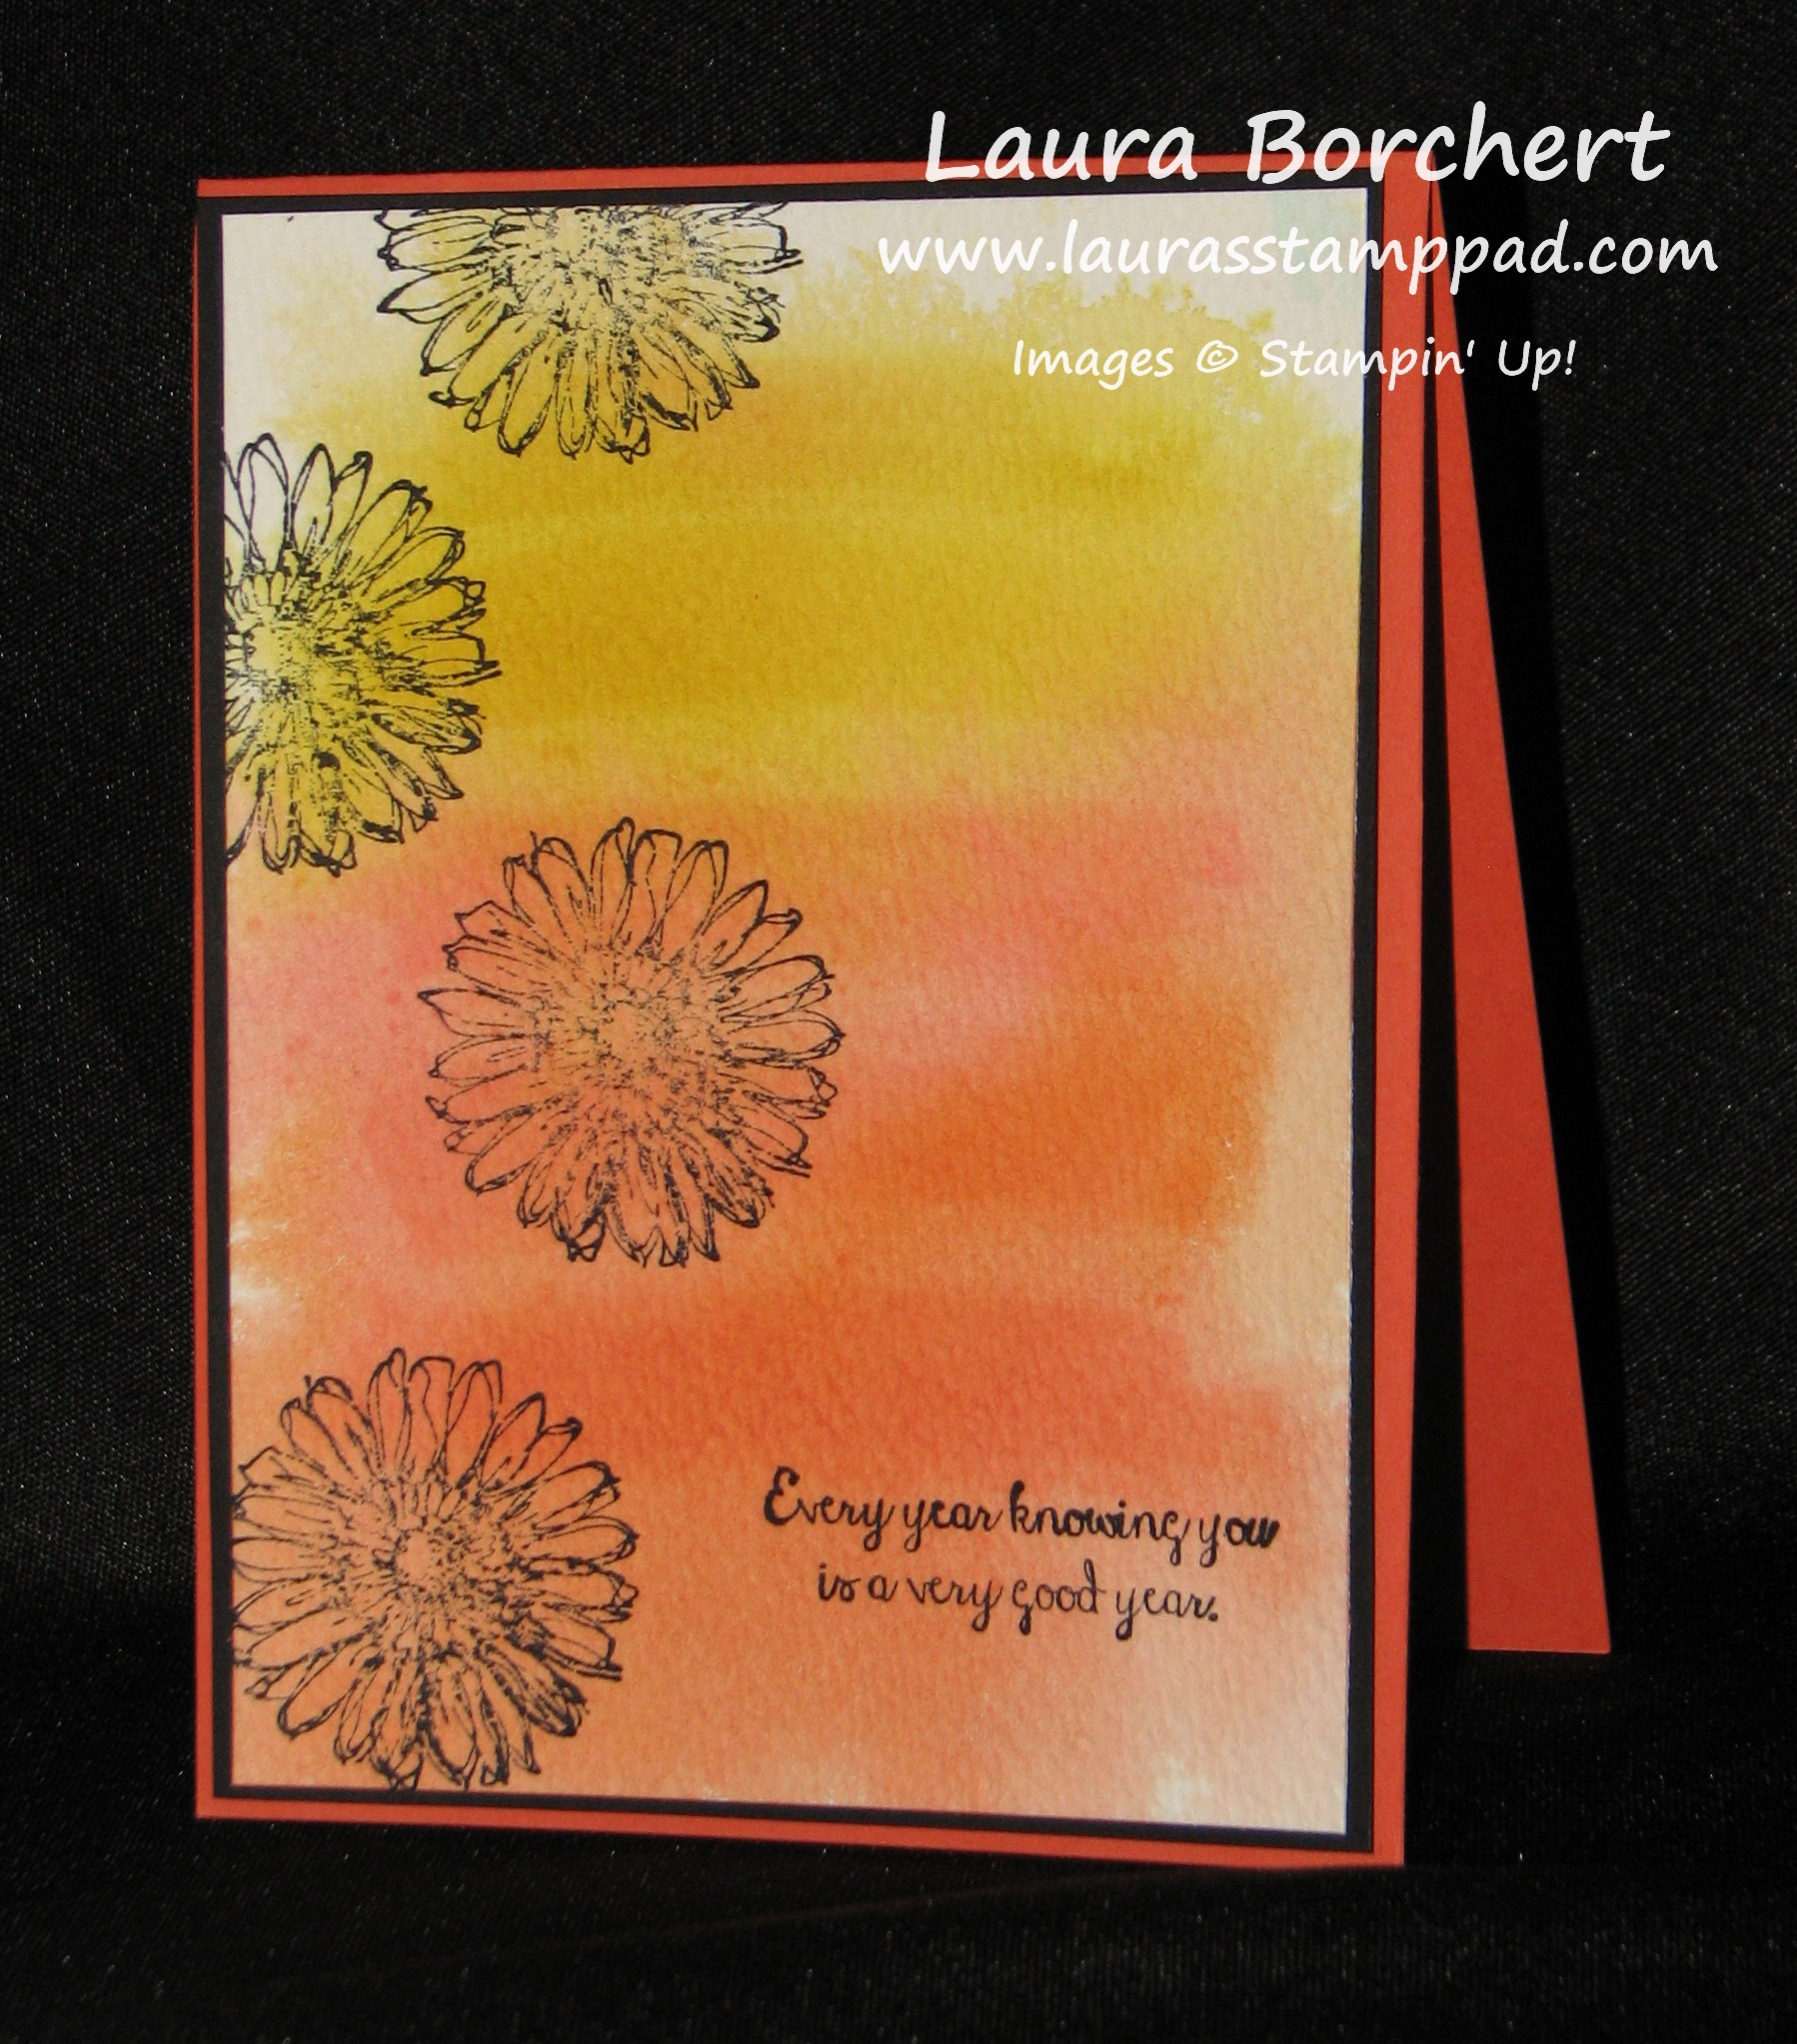
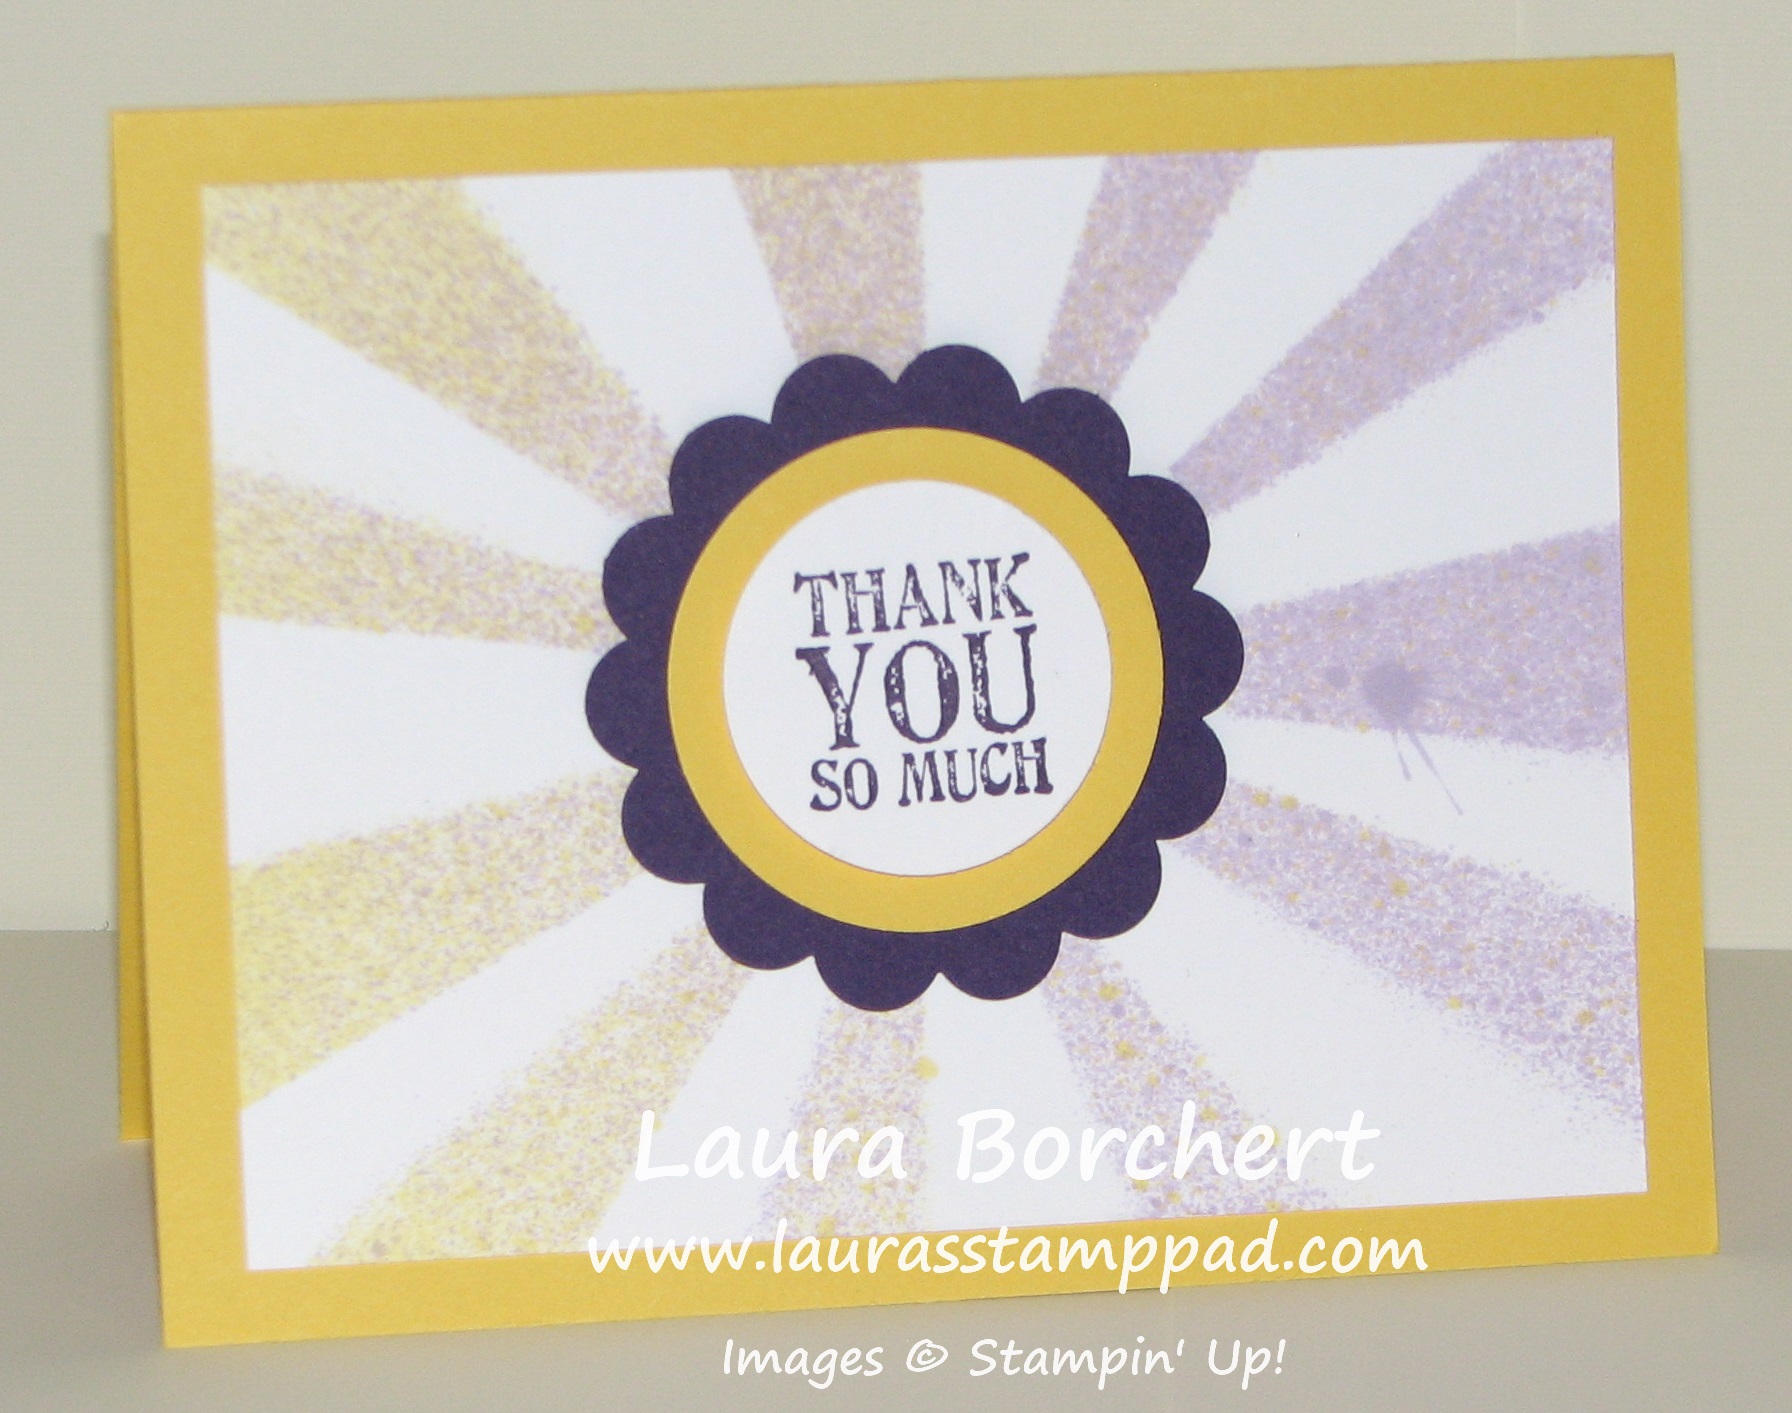
Isn’t this background super fabulous??? I just love flower and this cool background looks like it has texture and all.

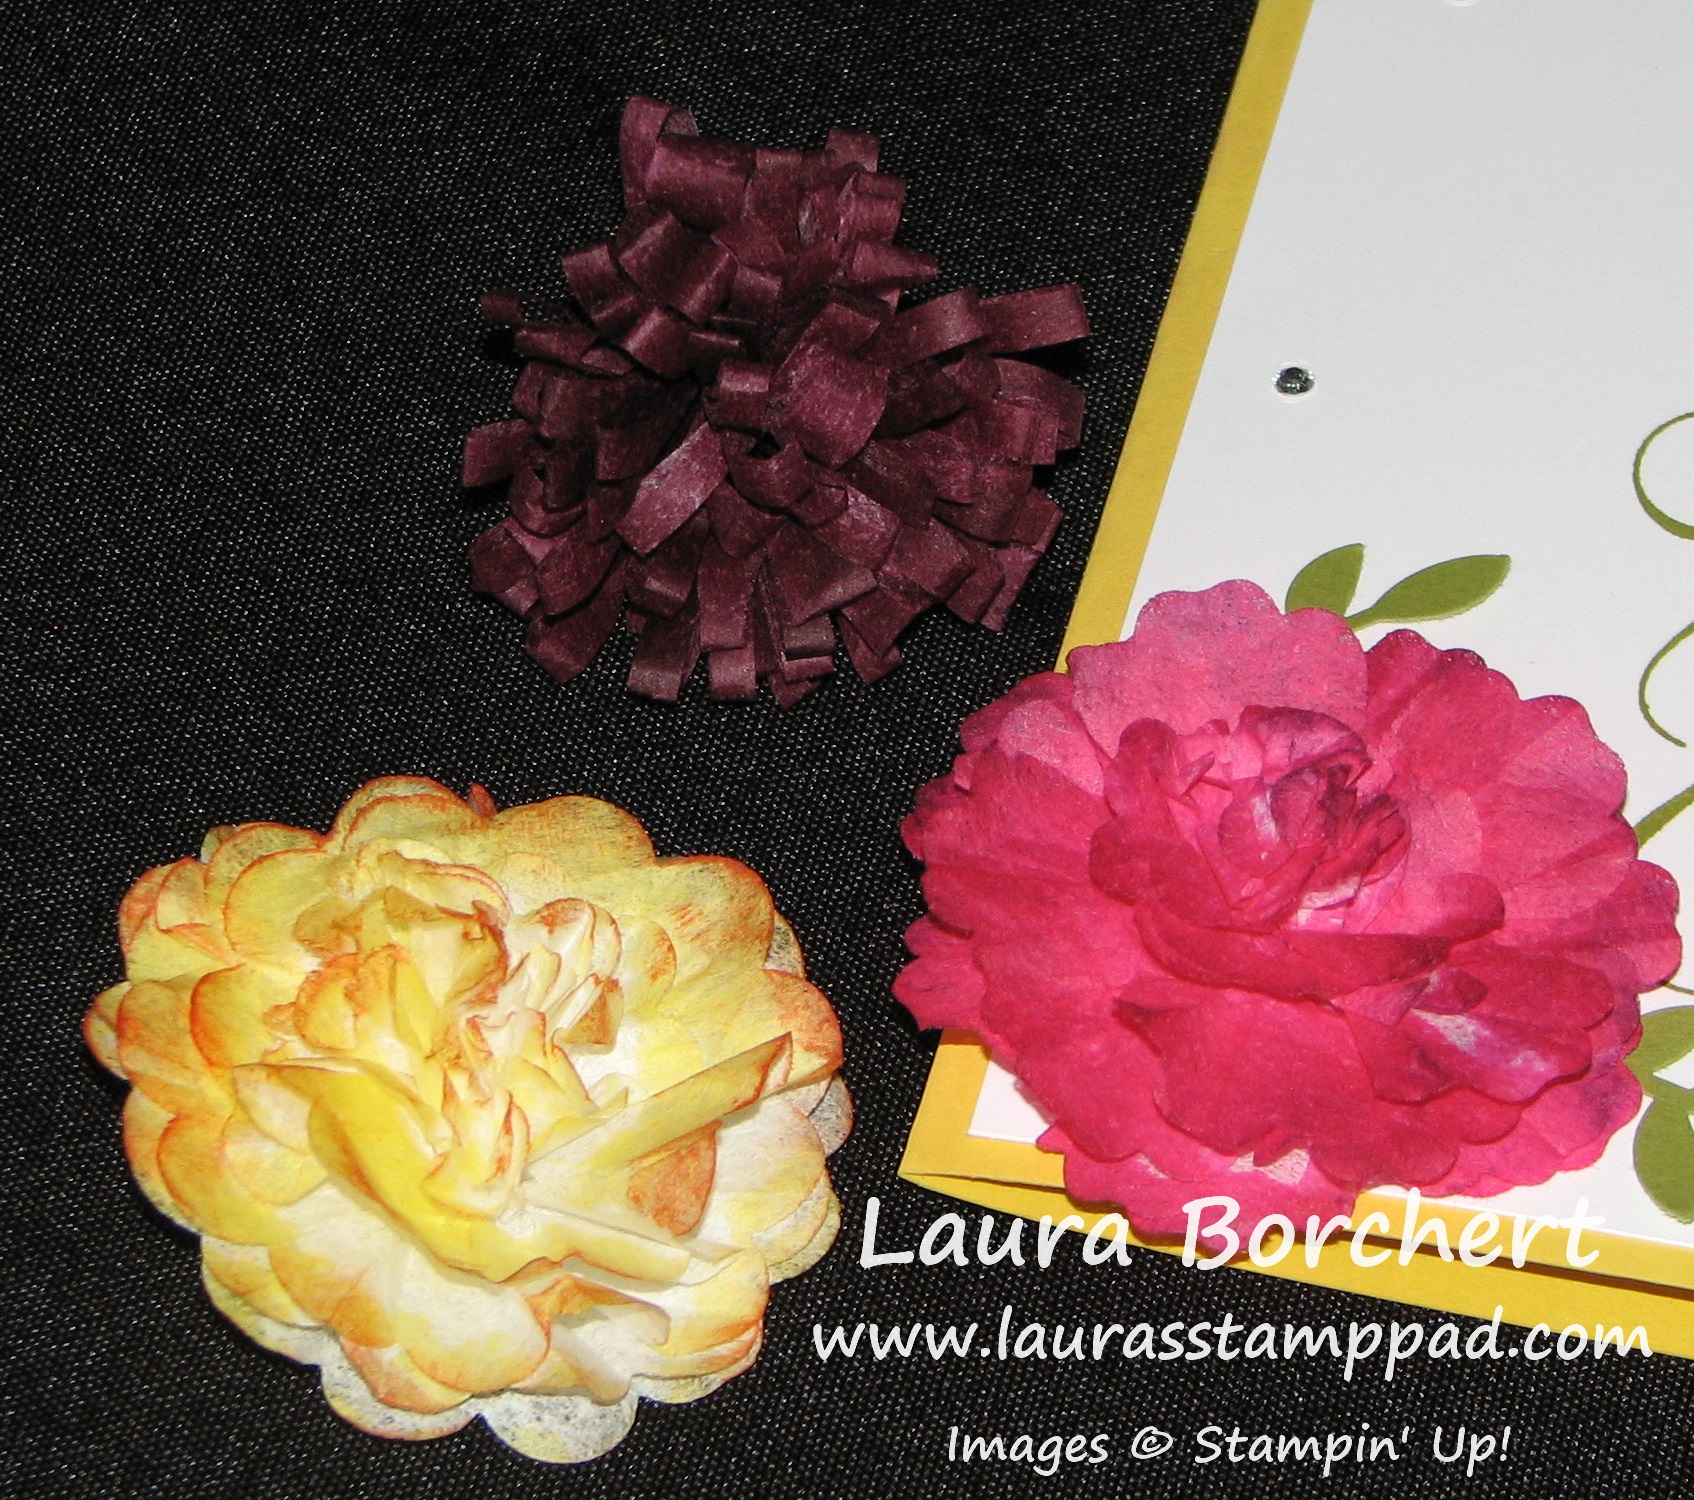
I started with a Crushed Curry card base. Next, I took a piece of Whisper White (4″ x 5-1/4″) and placed it in a box for spritzing. I punched out 2 flowers with the Daisy Punch using the thicker cardboard stuff that comes in a pack of Designer Paper. It’s that white backing piece! I used this because then I’m not wasting cardstock and it holds up well for doing multiples. The 2 punched daisies were glued together in the center and off set to create this full beautiful flower. I placed one flower up high and one down low and spritzed with Night of Navy (Night of Navy and Alcohol mixture 70 Proof or less). Now the background is complete and once it was dry, I added it to the card base.

White Daisy, www.LaurasStampPad.com

Next, I tied some Night of Navy Crinkle Seam Binding around the center. For the centers of the flowers, I took a piece of Crushed Curry cardstock and spritzed with a little Daffodil Delight and a little Pumpkin Pie. Then I punched out the circles. I love how that little bit of spritzing adds so much to the center to make it come to life! For the greeting, I used the Petal Palette Stamp Set and the Pretty Label Punch. For that added layer of Crushed Curry to the greeting, I simply punched a second one and cut it in half, adding half to the top and half to the bottom.

My Video Tutorial below shows this all in action as well as a few “mistakes” or things that I didn’t think worked as well. Check out the Video Tutorial below or click here! Be sure to give the video a thumbs up if you liked it and don’t forget to subscribe if you are new. If you would like a notification when I post a new video, be sure to click the bell right next to the subscribe!!!

Happy Stampin’

~Laura
Product List


Hooray It’s Your Day!! (Part 2)

Posted on

Sunshine Template, Hooray It's Your Day, www.LaurasStampPad.com

Welcome back!!! Today is Part 2 of the Hooray It’s Your Day Card Kit from the Occasions Mini Catalog! If you missed Part 1 yesterday, you can check that out here!!

I LOVE this card….which is why I paired it with the Melon Mambo envelope! <3 It was super fun to make and you can make tons of them because the template in the kit is reuse-able! Again, I used my Sponge Daubers for this one rather than the included spritzer. I like to have more control over my color  and get a strong line image. I love the bright colors and bold look of this sun! You could always do it in other colors as well. Many of my stampers at the class I held on this kit did Melon Mambo. They sure know the way to my heart! 🙂 TIP: If you drop your sponge dauber down at the center circle of this template and rub out on each ray you will get a fabulous ombre look. It will be really dark around the center and lighten up as you go out! It looks amazing!!! I stamped my greeting from Age Awareness and add all the little goodies which were provided in the kit. I would love to do this card with a greeting stamped in the middle of the sun and maybe some Dazzling Details! That would be awesome too!!

Scallop Template, Hooray It's Your Day, www.LaurasStampPad.com

Now for the final card! This card comes scored and cut with that little tab! How cute is that? I used the scallop template for this one and used my Spritzer with Melon Mambo Re-inker in it (Alcohol 70 Proof or less and as few or many drops of re-inker you wish). I love the look of this card as it makes me think of a mermaid but you can see how the lines are very distinct and the colors vary across the card. It looks cool but the OCD in my goes a little crazy. When there is a spot that doesn’t have ink or enough ink, I spritz and spritz and then over do it. Ehhh What are you going to do? Remember less is more! 🙂 I added the wooden greeting and the tag. The little flowers came in the kit but are white so I pounced a few times on them with my Daffodil Delight Sponge Dauber and make them yellow! 🙂 Love it! Here is another photo showing that tab look of this card!

Scallop Template, Hooray It's Your Day, www.LaurasStampPad.com

I was really impressed with all of the goodies that were included in this kit and how amazing the cards are! I really loved making them and seeing what my other stampers came up with in the class!

Hooray It's Your Day Kit

Here is another snapshot of all of the supplies! And here is 1 set of all of the cards. The kit makes 5 each of these!

Hooray It's Your Day Card Kit, www.LaurasStampPad.com

Be sure to get your kit before it is gone on June 2nd! Click here to get yours! I hope you enjoyed these and if you make these cards and add your own flare I would love to see what you come up with! Please share in the comments below!

Happy Stampin’

~Laura


Hooray It’s Your Day!! (Part 1)

Posted on

File Folder Card, Hooray It's Your Day, www.LaurasStampPad.com

This is just one of the fabulous cards you can create from the Hooray It’s Your Day card kit from the Occasions Mini Catalog (which ends on June 2nd)! I had some much fun with this kit and I made a lot of modifications! Remember, you don’t have to follow the instructions on these kits! The kit comes with 5 each of 4 different designs for a total of 20 cards including envelopes. I think the envelopes are my favorite part – Bermuda Bay, Melon Mambo, Wild Wasabi, and Daffodil Delight! LOVE THEM!!!!

Hooray It's Your Day Kit

Look at all these goodies!!! Of course the spritzer and mask templates can be used over and over again. Also, there is tons of Washi Tape on that roll and I didn’t come close to using it all. Love it! Okay so let’s get down to the fun stuff!!! I will be showing 2 cards today and the other 2 tomorrow! 🙂

File Folder Card, Hooray It's Your Day, www.LaurasStampPad.com

Here is another photo of the File Folder Card! This is super cute and the file folder style is really popular right now. Still not sure if it is my thing but I’ll go with it! TIP: When sealing your Wild Wasabi pocket for the file card to go in, you need to stay really, really close to the edge. Even staying close, I had to cut down my file card. Another option would be to use your washi tape to seal the ends by wrapping it around the side. This would allow for plenty of room for your file card! Then you can decorate as you wish with the thought bubbles, washi tape, wooden stars, and star clip! I used the Crazy About You Stamp Set for this card. (I didn’t purchase the coordinating stamp set – Hooray It’s Your Day and just used a few of my favorite greeting sets!) Also, I didn’t add any color to this one…..I noticed that a few days later that mine didn’t look like the sample in the kit photo! 🙂

Gift Card Holder, Hooray It's Your Day, www.LaurasStampPad.com

I love love love this one because it is an emboss resist card. The card comes already embossed on the front with that fish tail look.What do you call that pattern? Let me know in the comment below! I actually used my sponge daubers on this card rather than the spritzer. You know how much I love those things. Then for the tag, I stamped the greeting from Age Awareness and added a little Washi Tape and Silver Glimmer Paper (included in the kit). The other cool thing about this card is it comes with a gift card holder built in. All of the score lines are created and you just need to add a little adhesive (Fast Fuse works best) on the outer edge! Check this out! Perfect for a Graduation card!!!

Gift Card Holder, www.LaurasStampPad.com

Now you have to wait until tomorrow to see the other 2 cards in the kit. Be sure you are subscribed to my blog in the upper right hand corner and you will receive an email of my blog post so you don’t miss out! See you tomorrow!

Happy Stampin’

~Laura


Technique Tuesday – Irresistibly Yours!!!

Posted on

Happy Tuesday!!!! I hope you are having a fabulous week and this technique makes it even better!!! 🙂 Today, I’m going to show you how to use the Irresistibly Yours Designer Series Paper that you can get for FREE through Sale-A-Bration when you place a $50 (US) order! The catalogs shows the paper like this!

Irresistibly Yours DSP

When you first see this, you may be confused and think it is tan and white paper. Really, it is white paper with the images you see in tan clear embossed onto the paper. You can’t really photograph clear on white (as you can see in my video) so Stampin’ Up! is showing it like this! Since this paper is clear embossed, you can add color to the paper and it will only pick up the color on the white areas and not on the clear embossed images. You can add your color with Spritzers, Sponge Daubers, Sponges, Brayer, Markers, Blendabilities, and stamping! It is sooooo much fun to add color and see the image show up. It is like being a child again and painting in one of those books that you add water and the image appears. (Just me?)

Spritz Emboss Resist, www.LaurasStampPad.com

SUPPLIES NEEDED: Irresistibly Your Designer Series Paper, Spritzers, Stamps, Embellishments

Yeah it’s that simple! You can get this emboss resist look with just this paper. If you created this yourself, you would need Cardstock, VersaMark, Heat Tool, and Embossing Powder. I cut my Irresistibly Yours paper into 4″ x 5-1/4″ and placed it into a box for spritzing. I look the look of Spritzing but it scares me every time because I tend to get messy! 😉 I spritzed the right with Melon Mambo and the left with Elegant Eggplant. (Mix re-inker and alcohol (70 Proof or less) in a Spritzer). Underneath the greeting is the overlap or dots and spritz. I wasn’t sure if I liked that look or not so I covered it with my greeting. You could always show that off and move your greeting down. My greeting is from the Big Day Stamp Set which is also a Sale-A-Bration item! I am loving this stamp set. I colored in the letters with my Rich Razzleberry & Melon Mambo Blendabilities! You can earn those for FREE with Sale-A-Bration as well! I finished off the card with some Melon Mambo Cotton Ribbon! Here is another photo of this card!

Spritz Emboss Resist, www.LaurasStampPad.com

If you would like to see this in action, check out my Video Tutorial below! Don’t forget to give it a thumbs up if you liked it and be sure to subscribe so you don’t miss out on any other videos I create!

Be sure to check back later this week to see more samples using the Irresistibly Your Designer Series Paper!

Happy Stampin’

~Laura


Technique Tuesday – Filter Paper Flowers!

Posted on

Happy Tuesday!!!! You know what that means…..I have a fabulous technique for you! Have you heard of Filter Paper or seen it in the catalog and wondered how do you use that?? Well today I’m going to show you a few ways to use it!!!

Creped Filter Paper Flowers, www.LaurasStampPad.com

How fabulous is this card? Eee And it says Fabulous!!!!! 🙂 I love it! That amazing 3D flower was created with the Filter Paper. Let’s get started on how to create it.

Supplies Needed: Filter Paper, Punch or Framelit, Handheld Hole Punch, Brad or Staple

For the flower above, I punched out 4 Blossom Punch Filter Flowers and 4 Pansy Punch Flowers. TIP: When punching the Filter Paper, it helps to place a piece of scrap paper in there as well to make it more stiff and punch better! You can punch at least 4 layers and 1 layer of scrap at a time! Now you will lay all of your flowers on top of each other and you can either staple them in the center or add a Brad after punching a hole with your Handheld Punch! Now one by one pull the flowers up and scrunch to the center. You will repeat this until all flowers have been scrunched to the center. Now you can fluff it until you get the desired look. At this point, you can spritz your flower using re-inker and alcohol or water or you can leave it white and brush the edges with your Sponge Daubers. In the photo above, I spritzed the flower with Melon Mambo, let it dry and then gently touched the edges with my Elegant Eggplant Sponge Dauber to get those dark tips and color variation. I attached the flower to a card with some leaves from the Bird Builder Punch peaking out from behind and the amazing greeting if from Million & One!!!!

You can also color your Filter Paper before you get started with Sponge Daubers, Spritzers, or some ink and a Brayer!

Creped Filter Paper Flowers, www.LaurasStampPad.com

Another style of flower is the Rich Razzleberry flower above. For that flower, I used a Brayer to add the Rich Razzleberry Ink to my Rectangle piece of Filter Paper. I used a piece measuring 3″ x 12″. Once it was dry, I applied Sticky Strip to the long end of the Filter Paper, folded the filter paper over to meat the Sticky Strip. This creates a tube (kind of). Then with your Fringe Scissors, cut all along that loop of folded over Filter Paper. Be sure to only cut half-three quarters of the way down do you are cutting a piece off. Now you will apply another piece of sticky strip all along the bottom (below the loops). Starting at one end, you will roll the Filter Paper onto itself around and around to create this flower. Are you completely lost? I think I would be….so here is a Video Tutorial for you to watch! 🙂 I hope you are liking this videos. Be sure to give me a thumbs up if you are!!!!

Happy Stampin’

~Laura


Puddles of Ink!!!!

Posted on

Who doesn’t love inky fingers? Wait, am I the only one who does LOVE inky fingers? 🙂 Ahh It washes off eventually and it is just so much fun being messy! Well this technique I am going to show you is for sure messy but so much fun and super cool!

Ink Dropper Card, www.LaurasStampPad.com

Disclaimer: No 2 Watercolor Cards come out alike! Playing with watercolors is always a toss up on the outcome! 

I felt I needed to put that disclaimer out there because I can’t really teach you how to achieve this EXACT look because they all come out different. I’m not going to lie this one did come out amazing – I love the colors, I love those white spots on the top left, it’s perfect to me! I have done a few others and my fellow stampers like the ones I don’t like and don’t like the ones I do like so you never know what you might get! Okay let me tell you about this technique!!!

I started with some re-inkers and my Silicone Mat! In the card above I used Pool Party, Coastal Cabana, Bermuda Bay, and Tempting Turquoise! Drop dots of the re-inker all over the silicone mat. You can make some of the drops touch or keep them all apart. Then you will take a Spritzer with alcohol or water and give it about 5 spritzes or so. Enough to add some liquid to the mat and to make a few dots bleed a little. Then you will place your Watercolor Paper right on top. Feel free to instantly pick it back up for lots of white areas, press it all around and let ink really soak in, or press in only a few spots. Now you will pick it up and turn it over to see what you have!

Reinker Watercolor, www.LaurasStampPad.com

Again here you can set it aside to dry, tilt it around to mix the colors, use your finger to move some color around and fill in white spots, whatever you decide! You can also get multiple watercolor pieces out of one set of re-inker drops. Just lay another piece down! I have also added a few drops of a preferred color or added a few spritzes to get it more wet! Here is another set that I did in Melon Mambo, Pumpkin Pie, and Hello Honey! I thought I would love these but for the most part….ehhh not my favorites!

Reinker Watercolor, www.LaurasStampPad.com

I will have a Video Tutorial for you to see this technique in action, but we decided to stay an extra day on vacation so I will be posting the video later today! 🙂 Thank you for understanding!!! Be sure to subscribe to my Channel though so you don’t miss out on this one and other videos!

Happy Spritzin’

~Laura


Watercoloring with your Markers!!!!

Posted on

I love my big box of markers! I take them with me to every event I do because if I forget a stamp pad, I still have my markers. They are great for a multi-colored look on your stamps, coloring in and now watercoloring!!!!

Watercolor with Markers, www.LaurasStampPad.com

The colors in the card are like that of a sunset (sunrise, neither?)!!! The various shades of yellow, coral, red, and orange and the messiness of the colors that you just can’t achieve if you tried. That’s what watercoloring is all about – you can never do the same look twice and you never know how it will come out!

To create this card, I started with a 4″ x 5-1/4″ piece of Watercolor Paper and took my markers (Daffodil Delight, Calypso Coral, Tangerine Tango, and Pumpkin Pie) and colors swatches. I did the colors in lightest to darkest and colored them either matching up or with a small gap. Once you have your swatches colored, you will spritz it with water or alcohol (70 Proof or less so the alcohol doesn’t eat the plastic in the spritzer). Spritz the heck out of it and you can either let it do it’s thing, pick it up and tilt it around to allow it to bleed, or use your finger to move the ink around. Set it aside and allow it to dry completely before assembling it to your card. When using watercolor paper, I like to use Fast Fuse or Sticky Strip to adhere it to my card because it holds nice and strong even when the paper is curling! To complete my card, I layered my Watercolor Paper onto a piece of Basic Black (4-1/8″ x 5-3/8″) and then onto a Tangerine Tango card base (4-1/4″ x 11″). For the stamping, I used my Bloom with Hope Hostess Stamp Set which has amazing flowers (perfect for watercoloring or blendabilities) and great sayings! Of course, you will want to stamp on your watercolor paper with Stazon Ink so it won’t bleed!

Here is another Sample that I created using shades of Purple – Blackberry Bliss, Elegant Eggplant, Rich Razzleberry, and Perfect Plum! Remember how I said you never know how it might turn out…..how this happened I do not know!

Purple Markers Watercoloring, www.LaurasStampPad.com

I thought about cutting it off but I didn’t want an awkward size of paper for my card. When I was showing my stampers, some loved it and some did not. They gave me the idea to cover it with ribbon so…..

Purple Markers Watercoloring, www.LaurasStampPad.com

See even the ones you think didn’t turn out, still look amazing!!!! Here I added some Satin Stitched Ribbon in Blackberry Bliss & the greeting from Million & One!!!

Marker Watercolor, www.LaurasStampPad.com

Here is another sample that I did with shades of Green – Pear Pizzaz, Old Olive, Garden Green & Mossy Meadow!

To watch this technique in action, check out my Video Tutorial by clicking here or the video below! Don’t forget to give it a thumbs up if you like it!!!

Happy Watercolorin’

~Laura


How to Watercolor with Your Spritzers!!!

Posted on

Hello Hello!!! I hope everyone is having a wonderful week! It is Wednesday so we are half way to the weekend! 🙂 I wanted to share with you this fabulous way to get a watercolor look without a cup of water and a paintbrush! Some may call this faux watercoloring but most of the watercolor projects I do are faux!

Watercolor with Spritzers, www.LaurasStampPad.com

How beautiful is that? I think it is amazing! This is one of the flower stamps from Peaceful Petals in the Occasions Mini Catalog! Love it!!!! What you will do is color the stamp with your markers using the thicker tip (that way you get pink flowers and green stems). Then you will take one of your Spritzers filled with water and spritz it.

Watercolor with Spritzers, www.LaurasStampPad.com

Now here is the tricky part where each one comes out different. I recommend spritzing 1 or 2 times and not real close to the stamp so that only the little mist of the spritz hits the stamp. When you spritz more or less, close or far away, each time you will get a different look. Then I stamp the image down onto Watercolor Paper! Again you can either hold it for a mini second and then lift or you can hold it for 10 seconds and let the color run into the watercolor paper more. Another fun tip…..have 2 pieces of Watercolor Paper available and after you stamp the first time, stamp again. Sometimes it comes out better than the first one or lighter but still amazing, either way you just got 2 amazing images out of one coloring!!! WOOT WOOT!  In the photo above, I held it for a mini second and got that amazing image. Then I took lighter colors (Pink Pirouette & Pistachio Pudding) than the original colors (Melon Mambo and Garden Green) and colored in the flowers and stem. That one is my favorite!

Watercolor with Spritzers, www.LaurasStampPad.com

This one here was stamped and I held it for 10 seconds, letting the colors run more into the paper. As you can see the flowers are more solid (filled in) and I didn’t color those in. Some may like that look, other may not! It is all about the art of watercolor!!!

Did you notice that pink and green ribbon on these 2 cards? Where did that come from??? I COLORED IT!!! Check out this post on how to create amazing colored ribbon! I hope you enjoyed this watercolor idea and try it out yourself! For more tricks on watercoloring check out this post and this post! Let me know what you think in the comment down below!!!!

Don’t forget about the Stampin’ Up Retiring Products, My Anniversary Special and FREE SHIPPING going on this week!

Happy Stampin’

~Laura


Technique Tuesday – Coloring Ribbon!!!

Posted on

Have you ever looked at your ribbon stash and thought none of those colors go with this project? Well now you don’t have to worry! You can color your white ribbons to any color you desire!!!

Color Ribbon with Markers, www.LaurasStampPad.com

How simple is that? I have seen that when coloring on my Whisper White Organza Ribbon, the color comes out darker than the marker. When I colored on the Whisper White Taffeta Ribbon, it came out lighter. You could always allow it to dry and then go back and add more. Here is another sample using Pistachio Pudding!

Color Ribbon with Markers, www.LaurasStampPad.com

This is a fabulous way to get a ribbon to match ANY project you might be making without having to buy every single color out there!!! You can also use your Spritzers to color the ribbon. Just add alcohol (less than 90%) and some drops of re-inker. I prefer using alcohol over water because it dries quicker and you all know I don’t have the patience for watching it dry slowly. 😉 I hope you try this out and enjoy today’s Technique!!!

Don’t forget about my Anniversary Special that I’m running this week! Check it out here!!!

Happy Stampin’

~Laura


Technique Tuesday – More Color Bursting Fun!

Posted on

Happy Tuesday!!! So awhile back, I did a Technique Tuesday about the Starburst Technique or Color Burst! Check it out here! Well I have TWO more ways that you can Color Burst! You know once you find a Technique, you keep playing and crazy things happen! Check it out!

Starburst Stamping Technique, www.LaurasStampPad.com

While I super loved my Pink and Fabulous card, this one is probably my second favorite! I love the colors and the glimmer paper and the Technique! All you need to do is create a template. I used the cardboard piece that comes in a package of Designer Series Paper, punched out any size of Circle scrap paper and place it in the center. Then with a ruler draw lines from that center circle to the edge. Once you have all of your lines drawn, you will cut out every other section, like this:

Color Burst Templates, www.LaurasStampPad.com

You don’t have to worry that the center is not a perfect circle because that is where you will put your greeting or decoration on your card. Also, if you go in too far then it will be super flimsy and won’t hold up for lots of cards/projects! For the card above, I laid this template onto my card front and stamped the Festive Flurry snowflakes in Pool Party all over. Then I added thin pieces of Glimmer Paper. For the greeting, I used the Merry Little Christmas Stamp Set and Smoky Slate ink!

Now you can use this same template and do a completely different look by spritzing your card front like this one here!

Starburst Spritzing Technique, www.LaurasStampPad.com

Just lay your template down and spritz away with one color or many colors! I hope you have enjoyed this technique! Try it out and leave me a comment with your creation or which one you liked the most!

Happy Color Burstin’

~Laura