Perfect for Under The Tree!!!

Posted on

I have a fabulous Gift Packaging idea to share with you today and it will look amazing Under the Tree!!!

Large Gift Box Punch Board, www.LaurasStampPad.com

The Under the Tree Specialty Designer Series Paper in the Holiday Mini Catalog is perfect for boxes. It is heavier than typical Designer Series Paper so it holds up much better (and you stylus will punch through the paper)! It is beautiful as well. One side is kraft and white patterned and the other side has a color (Cherry Cobbler, Garden Green & Early Espresso)!

Under the Tree Paper, www.LaurasStampPad.com

See isn’t it beautiful! I used my Gift Box Punch Board to create these boxes! The one pictured above is the largest box which uses a 12″ x 12″ piece of paper and the box is 4″ x 4″ x 4″. I used some Cherry Cobbler Chevron Ribbon to wrap around the box. For the tag, I used a piece of Cherry Cobbler cardstock and punched the end with the Scallop Tag Topper Punch. On the Whisper White cardstock, I stamped a few snowflakes in Cherry Cobbler Ink as well as the greeting from Endless Wishes Stamp Set. I took my Sponge Dauber and added a little bit of Garden Green to the edges! I attached the tag to the Chevron Ribbon with some Whisper White Baker’s Twine!

Gift Box Punch Board, www.LaurasStampPad.com

For this box, I added some Lost Lagoon Satin Stitched Ribbon and a little tag! For the tag, I used the Scallop Tag Topper Punch and my Work of Art Stamp Set! Love that set! Also, you can’t really tell in the photo but I added some bling with my Dazzling Details along the chevron pattern!

I made a Video Tutorial for you so you can see these boxes made in action! Be sure to give it a thumbs up if you like and don’t forget to subscribe to My Channel so you don’t miss any other videos in this series!

Happy Giftin’

~Laura


Technique Tuesday – Cafe Bag Creation!

Posted on

Happy Tuesday!!!! That means I have a fabulous technique to share with you today!!!! Since the Holiday are upon us that means that there will be lots of gift giving – teacher gifts, neighbor gifts, friends gift, family gifts and everyone in between! Why not make the gift packaging just as special as the person you are giving it to!

Stars Cafe Bag, www.LaurasStampPad.com

I am loving these Cafe Bags which are in the Holiday Mini Catalog because they are the perfect size and they come plastic lined which is great for putting homemade treats in them! Love it!!! Now lets tell you how to re-create it!

Supplies Needed: Cafe Bags, Decorative Mask, Sponge Daubers, Ink, Ribbon, and Tag

I left the Cafe Bag all folded up like it comes and laid my Stars Decorative Mask over top! Using my Whisper White Ink and Sponge Dauber, I colored in all of the stars! NOTE: When using Whisper White Ink (Craft), it takes a little bit longer to dry so set that aside while you create your tag! For my Tag, I used some scrap Mossy Meadow and Whisper White cardstock. For the banner tips, I cut up in the center of the end and then from the corner to that center cut line! This gives you even banner tips! I used the Endless Wishes Stamp Set for the snowflakes and greetings! They are stamped in Lost Lagoon Ink! I love how you can mix and match the greetings in that stamp set – just perfect! Once your bag is dry, you can fill it and then roll down the top and secure the tabs! Wrap some Lost Lagoon Satin Ribbon around it and tie a bow or knot! I attached the tag with a Mini Metallic Clothespin! Adorable! Quick and Simple for any of your gift giving this season! The bag below uses Blackberry Bliss Satin Stitched Ribbon and a tag from the Tag A Bag Accessory Kit! The greeting is from the Work of Art Stamp Set! Love it!

Petite Cafe Bag, www.LaurasStampPad.com

If you would like to see this gift bag creation in action, check out the Video Tutorial that I created for you! Be sure to give it a thumbs up if you like it and want to see more in this Gift Packaging Series!

Happy Giftin’

~Laura

Work of Art Holiday Cards!!!

Posted on

We all know the Work of Art Stamp Set is fabulous and can be used in soooooo many ways but did you know you can use it for your Holiday Cards as well? Of course you can! Check out these amazing cads!

Work of Art Wreath, www.LaurasStampPad.com

Eeeeee I can’t help but squeal at how amazing this card is and how fabulous the Work of Art Stamp Set is. If you don’t have it already, click here for wood and here for clear and overnight the shipping (just kidding…..on the shipping part)!!! This card was created with Whisper White, Cherry Cobbler, and Mossy Meadow. I used the smaller swish image for the wreath and got the multiple shades by stamping a few times before going back to the ink pad! For the holly berries, I used my Cherry Cobbler Candy Dots from the Regals Pack. You can also color your Pearls or Rhinestones with your Cherry Cobbler Blendabilities and use them for the holly berries. Or you could use your Cherry Cobbler Dazzling Details!!!! Lots of options!

Work of Art Tree, www.LaurasStampPad.com

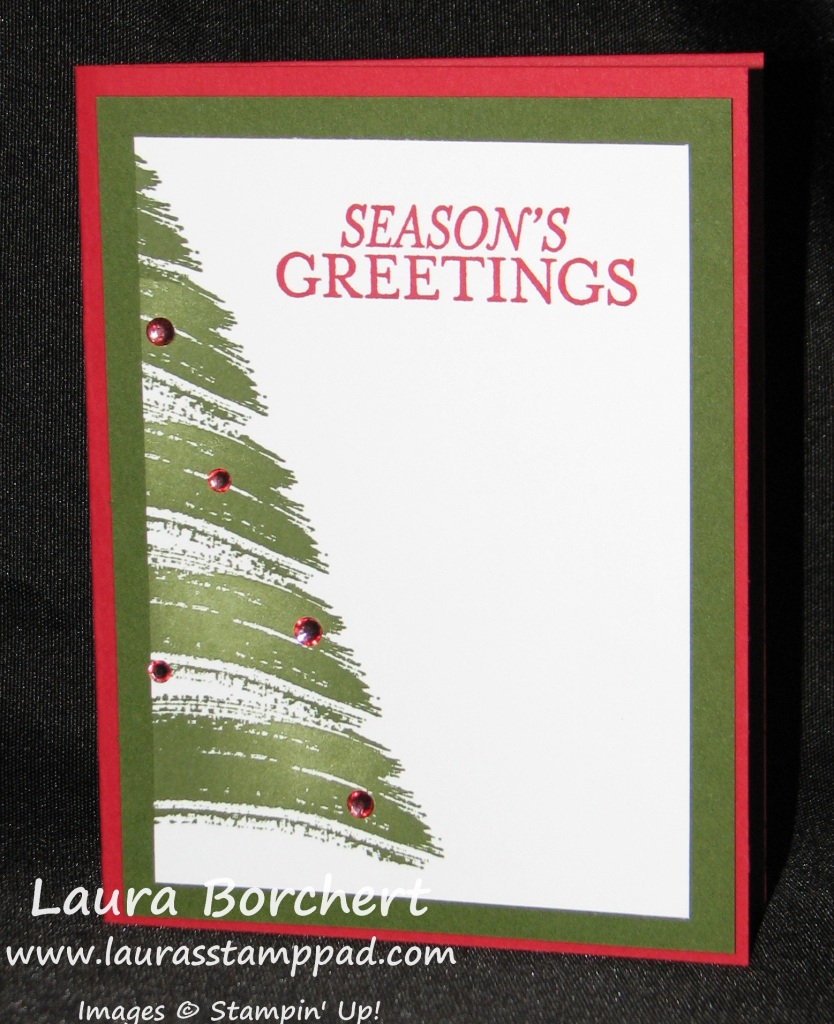
You didn’t seriously think there was only one way to use your Work of Art Stamp Set for the Holidays! This one uses the long swish image. I found it easiest to start at the bottom and stamp with the image half way off the paper. Ink up and move the stamp a bit farther to the left and stamp again, repeat until you are at the top of your paper! For this one I used Cherry Cobbler colored Rhinestones but you could use any of the items mentioned above as well! The greeting comes from the Bright & Beautiful Stamp Set! Love it!!!!

And to show you these cards in action, check out my Video Tutorial!!!! Be sure to give it a thumbs up if you like it and don’t forget to subscribe to My Channel so you don’t miss out on future videos!!!!


Happy Stampin’

~Laura


Work of Art Background!

Posted on

We all know how AMAZING this Work of Art Stamp Set is….if you don’t check out this post, this one, this one, and this one and come back! Most of the cards I have done so far have been bright and colorful! Well today I thought I would take it down a notch and create something calming and thoughtful!

Thoughts & Prayers Work of Art, www.LaurasStampPad.com

Isn’t it amazing? Very calming and thoughtful, right? Also, I love how when I use the Work of Art Stamp Set the cards give a super WOW look but they are very simple to create! My card base is Chocolate Chip and I layered a piece of Very Vanilla (4″ x 5-1/4″) on top. I stamped the Work of Art swish in Soft Sky, Coastal Cabana, and Lost Lagoon (sort of an Ombre Look 😉 ) I then stamped the Tree and Greeting from the Thoughts and Prayers Stamp Set. This is an amazing stamp set because of the beautiful tree and flower branch but also the greetings are amazing. They are exactly what you want to say when you don’t know what to say! I love them!

Be on the lookout for more samples using the Thought & Prayers Stamp Set! What is your favorite stamp set that is very calming?

Happy Stampin’

~Laura


Ombre Blues!!!

Posted on

So I learned about the Ombre look a little over a year ago and have LOVED it ever since. My husband giggles because he says I say ombre in a funny way. I’m sure I do!!! 🙂

Webster’s Dictionary defines Ombre as having colors or tones that shade into each other; the color is graduated from light to dark! 

Ombre Blue Work of Art, www.LaurasStampPad.com

Here is my latest ombre creation – of course with the Work of Art Stamp Set! The images in that set make the ombre effect so amazing and simple! Also, I only had to get out ONE stamp pad for the look! I just inked up the image and stamped on the bottom, middle and top without re-inking! This technique really gives you endless colors with just one ink pad! So the next time you are thinking you need a lighter blue or green or pink than what you already have, just stamp off onto a piece of scrap paper and then stamp on your project!

This card uses Coastal Cabana and Whisper White cardstock! I stamped with Coastal Cabana and Basic Black! With my Baker’s Twine, I wrapped it around twice and tied a double knot. Then I took a needle and frayed the ends so they would look more full and puffy! Super Cute!

Do you like the Ombre look? Which color is your favorite to use for this technique? Leave me a comment down below! For more samples using this technique click here!

Happy Ombre-in’

~Laura


Poppin’ Pastels!!!!

Posted on

Work of Art, www.LaurasStampPad.com

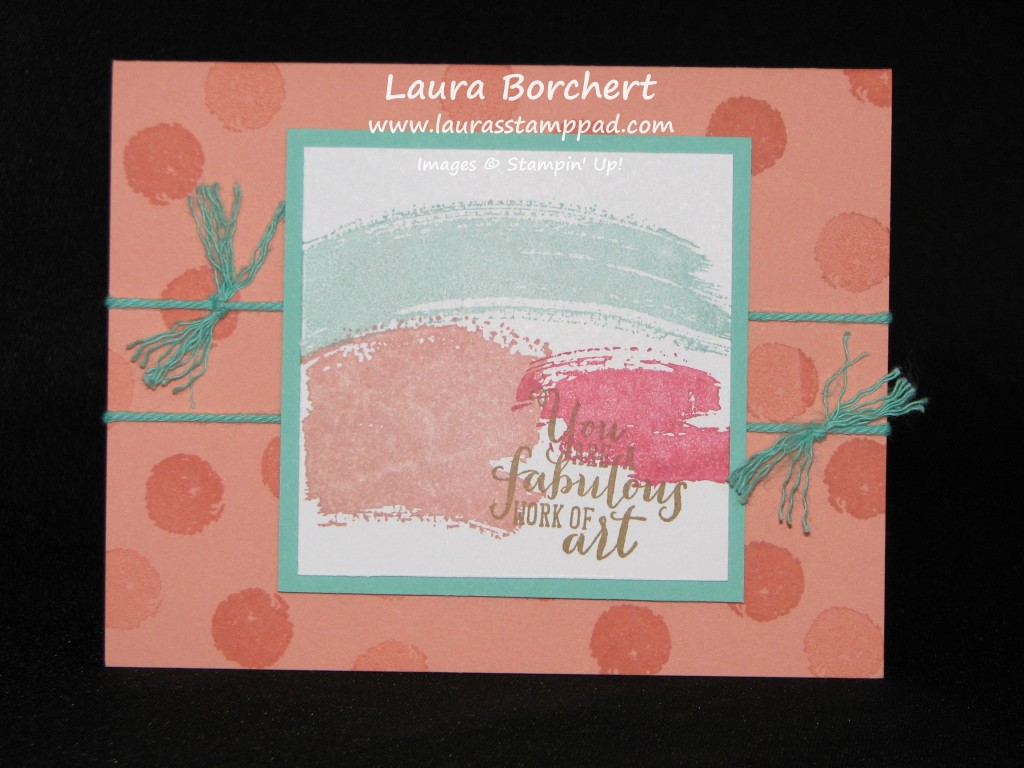
Are you tired of the Work of Art Stamp Set? No, yeah me neither!!! The possibilities are endless with this set! LOVE IT! You can check out more samples here, here, and here! This card uses all of the 2013-2015 In Colors except Pistachio Pudding. I used Coastal Cabana, Crisp Cantaloupe, and Strawberry Slush for all of the swish marks (that’s the technical term, right?)! Then I stamped the greeting in Baked Brown Sugar! For the background, I stamped the circle image from the stamp set in Crisp Cantaloupe onto Crisp Cantaloupe cardstock! I finished it off with some Thick Baker’s Twine in Coastal Cabana! After I tied the twine, I frayed the ends to get a fuller, pom pom look! What do you think? Is this your favorite one? Leave me a comment down below!

Happy Stampin’

~Laura


Technique Tuesday – Big Shot Promotion!

Posted on

Happy Tuesday and Happy Big Shot Week here on my blog! Click here to see yesterday’s post! Today I’m going to show you an amazing technique with your Big Shot and Embossing Folders! Don’t forget about the amazing Big Shot Promotion Stampin’ Up! has going on this month! Today we are going to talk about using your Embossing Folders with your Big Shot! I love embossing my projects because I really think it takes a simple card to a WOW card with just the crank of the Big Shot!

Decorative Dots Work of Art, www.LaurasStampPad.com

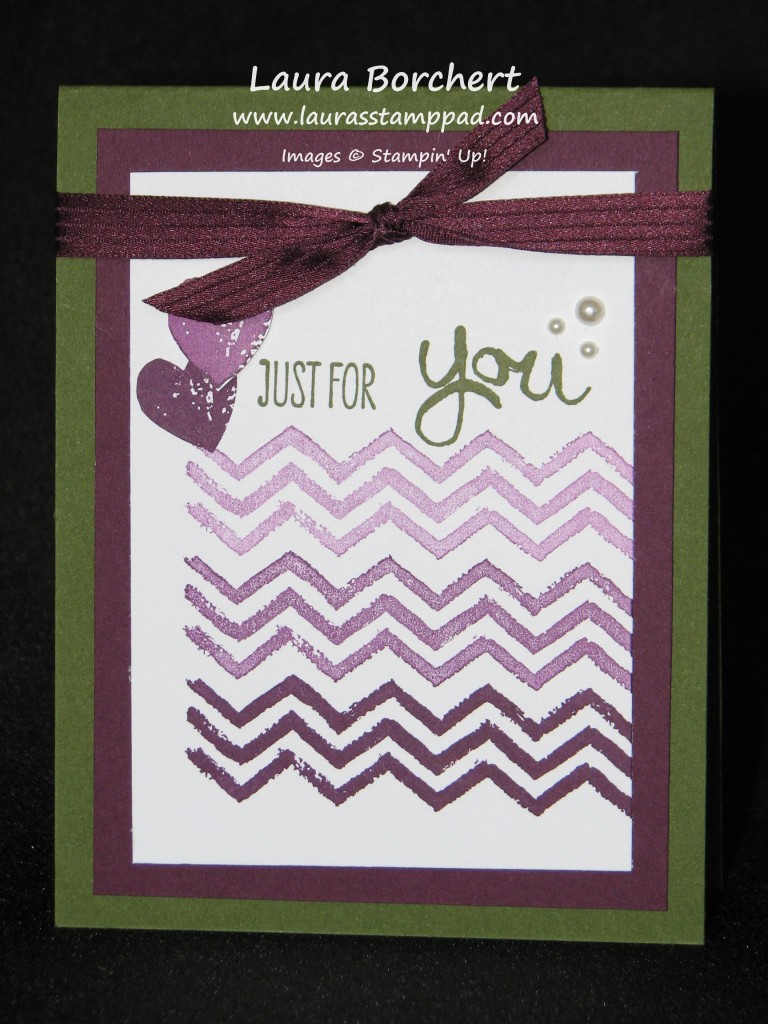
Okay first off check out this amazing card! LOVE IT! It is soooo simple too! I just used a 4-1/4″ x 11″ piece of Whisper White Cardstock and stamped the amazing flower with my Work of Art Stamp Set! I used Blackberry Bliss & Mossy Meadow Ink (for the various shades of purple I stamped a few times before going back to the ink pad)! Then I placed the card front into the Decorative Dots Embossing Folder and ran it through my Big Shot! How amazing?!?! I love it! No adhesive required! 🙂

Lucky Stars Inked Folder, www.LaurasStampPad.com

Now this one was done a little differently! I used the NEW Lucky Stars Embossing Folder which is coming out in the Holiday Mini Catalog on August 28th! I opened up the embossing folder and on the side where the stars pop up I lightly tapped my ink pad over top! You don’t want to press too hard or the ink will go down into the flat area of the embossing folder. Now you will place your piece of cardstock into the non-inked side and close the folder. You can either close the folder and just press and viola you are done or you can close it and run it through the Big Shot for a colored and textured look! I then assembled this piece onto Daffodil Delight Cardstock and Night of Navy card base! I used my Night of Navy Marker to color the Whisper White Organza Ribbon to match! Check out this post for more on that! The greeting is from the Petite Pairs Stamp Set which I punched out with my Decorative Label Punch and added a few punched stars from the Itty Bitty Punch Pack! Check out the video tutorial below to see this in action!!! Don’t forget to give it a thumbs up if you like this video and want to see more! Click the subscribe button so you don’t miss out on more Big Shot Videos this week!

Only 13 more days to get your Big Shot and a Free Bundle! Check back tomorrow for some more Big Shot Fun!

Happy Stampin’

~Laura


Lots & Lots of Circles & Dots!

Posted on

Work of Art Circles, www.LaurasStampPad.com

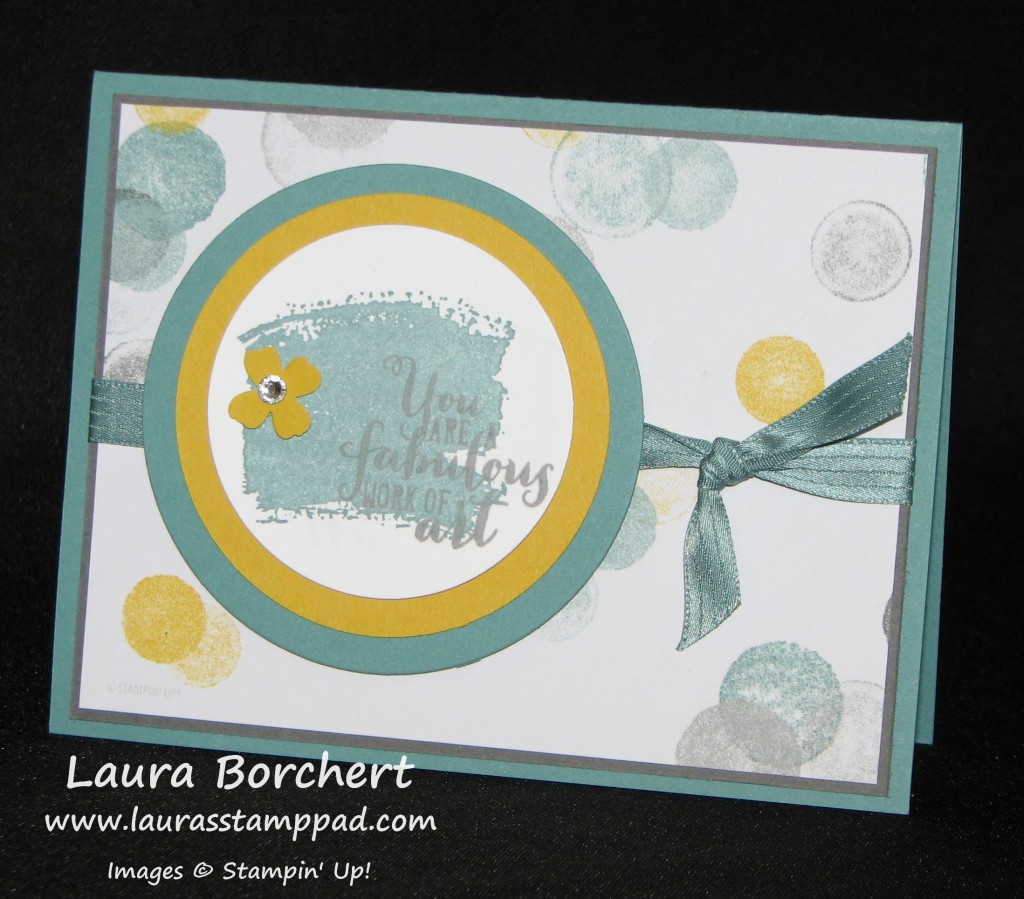
 I love everything about this card – Polka Dots on the Moonlight Designer Series Paper, the Work of Art Stamp Set, Satin Stitched Ribbon, Itty Bitty Punch Pack flower, and a Rhinestone! I used my Circle Framelits which are perfect for layering because of the graduating sizes. I am just blown away at all of the different looks, styles, and images you can achieve with the Work of Art Stamp Set! It is just amazing! If you don’t have your own set by now, click here to get it today!!! You can check out more samples here, here, and here or you can always click on the Work of Art tag on your right to see all the samples! And I’m not done yet! There are lots more that I can’t wait to share with you!!!!

Happy Stampin’

~Laura


Technique Tuesday – Coloring Ribbon!

Posted on

Happy Tuesday!!! That means I have a fabulous technique to share with you! This technique is one of those Ah Ha moments! If you need a specific color of ribbon and either don’t have it on hand or the ribbon doesn’t come in that color….no worries anymore! All you need is Whisper White Satin or Organza Ribbon or another type of white ribbon!

Ribbon Coloring, www.LaurasStampPad.com

See how I have matched the ribbon to the card! It’s so much fun!

Supplies Needed: White Ribbon (Satin, Organza, Baker’s Twine, Seam Binding, & Cotton), Markers or Spritzers or Sponge Daubers

Now this technique has the Ah Ha moment because you only need a few supplies and it is the easiest thing ever to color your ribbon. You will wonder why you hadn’t thought of this before. You can color your ribbon either by coloring it with your markers, tapping your sponge dauber in the ink and rubbing it on, or spritzing it with your Spritzer. For the Spritzer, you will just add Re-inker and Alcohol (70 Proof or less) and spritz away! 🙂 I have found that the colors sometimes come out lighter or darker than you may expect so sometimes you might need to go light or pick a lighter color to match your project!

In the photo above, I used my Crisp Cantaloupe, Rich Razzleberry, and Rose Red Markers to color the Organza Ribbon! For the card on the right and left, I used my Work of Art Stamp Set (LOVE), Small Butterfly Punch, Moonlight Designer Series Paper Stack, and Rhinestones! For the middle card, I used the Hello There Hostess Stamp Set!

Ribbon Coloring Technique, www.LaurasStampPad.com

Here I used my Red Marker on the Organza Ribbon and the Spritzer on the Satin Ribbon.

I hope you try this out the next time you need a specific color of ribbon! Let me know what you think in the comments below!

Happy Colorin’

~Laura


Amazing Work of Art!!!

Posted on

Okay so you have seen my Work of Art Note Cards which were amazing and simple! I just stamped on Note Cards so there was no adhesive or layers! You can check them out here and here! NOW, I’m going to show you more amazing cards with the Work of Art Stamp Set and these have layers and embellishments and more!!!!

Work of Art, www.LaurasStampPad.com

This is probably one of my Top Favorites! I really love them all but I think that Blackberry Bliss is my favorite In-Color so the cards that use that color are always on top! This card uses Blackberry Bliss as well as Mossy Meadow for all of the paper and ink! I used some of the new 3/8″ Stain Stitched Ribbon on here which I love because it is like half elegant and satin and half….mmm…not elegant? I don’t know how to describe it! It can be used for both looks and work out great! (if any of that made sense) The lighter heart was actually stamped, cut out, and popped up on dimensionals for little extra texture.

Work of Art, www.LaurasStampPad.com

This is my second top favorite!!! I love the hearts and Polka Dots from the Moonlight Designer Series Paper. I used Hello Honey and Blackberry Bliss ink and cardstock! I used that fabulous Satin Stitched Ribbon again and a few Rhinestones! I love the various shades of color you can achieve with a little stamping off or continuous stamping! So fabulous!!!

Be on the lookout for more Work Of Art cards! I just can’t put this stamp set down! If you don’t have this set yet, CLICK HERE to get yours now!!!!

Happy Stampin’

~Laura