How to Create A Two in One Daisy Card!!!

Posted on

Today I’m going to show you how to create a two in one daisy card. I used the NEW Daisy Delight Stamp Set and coordinating Daisy Punch! I love being able to use punched out pieces for a second card right away otherwise I forget I have it and it never gets used!Two in One Daisy Card, www.LaurasStampPad.com

This card is a quick and simple Note Card that uses Designer Series Paper and a simple punch! Let’s get started on this one!

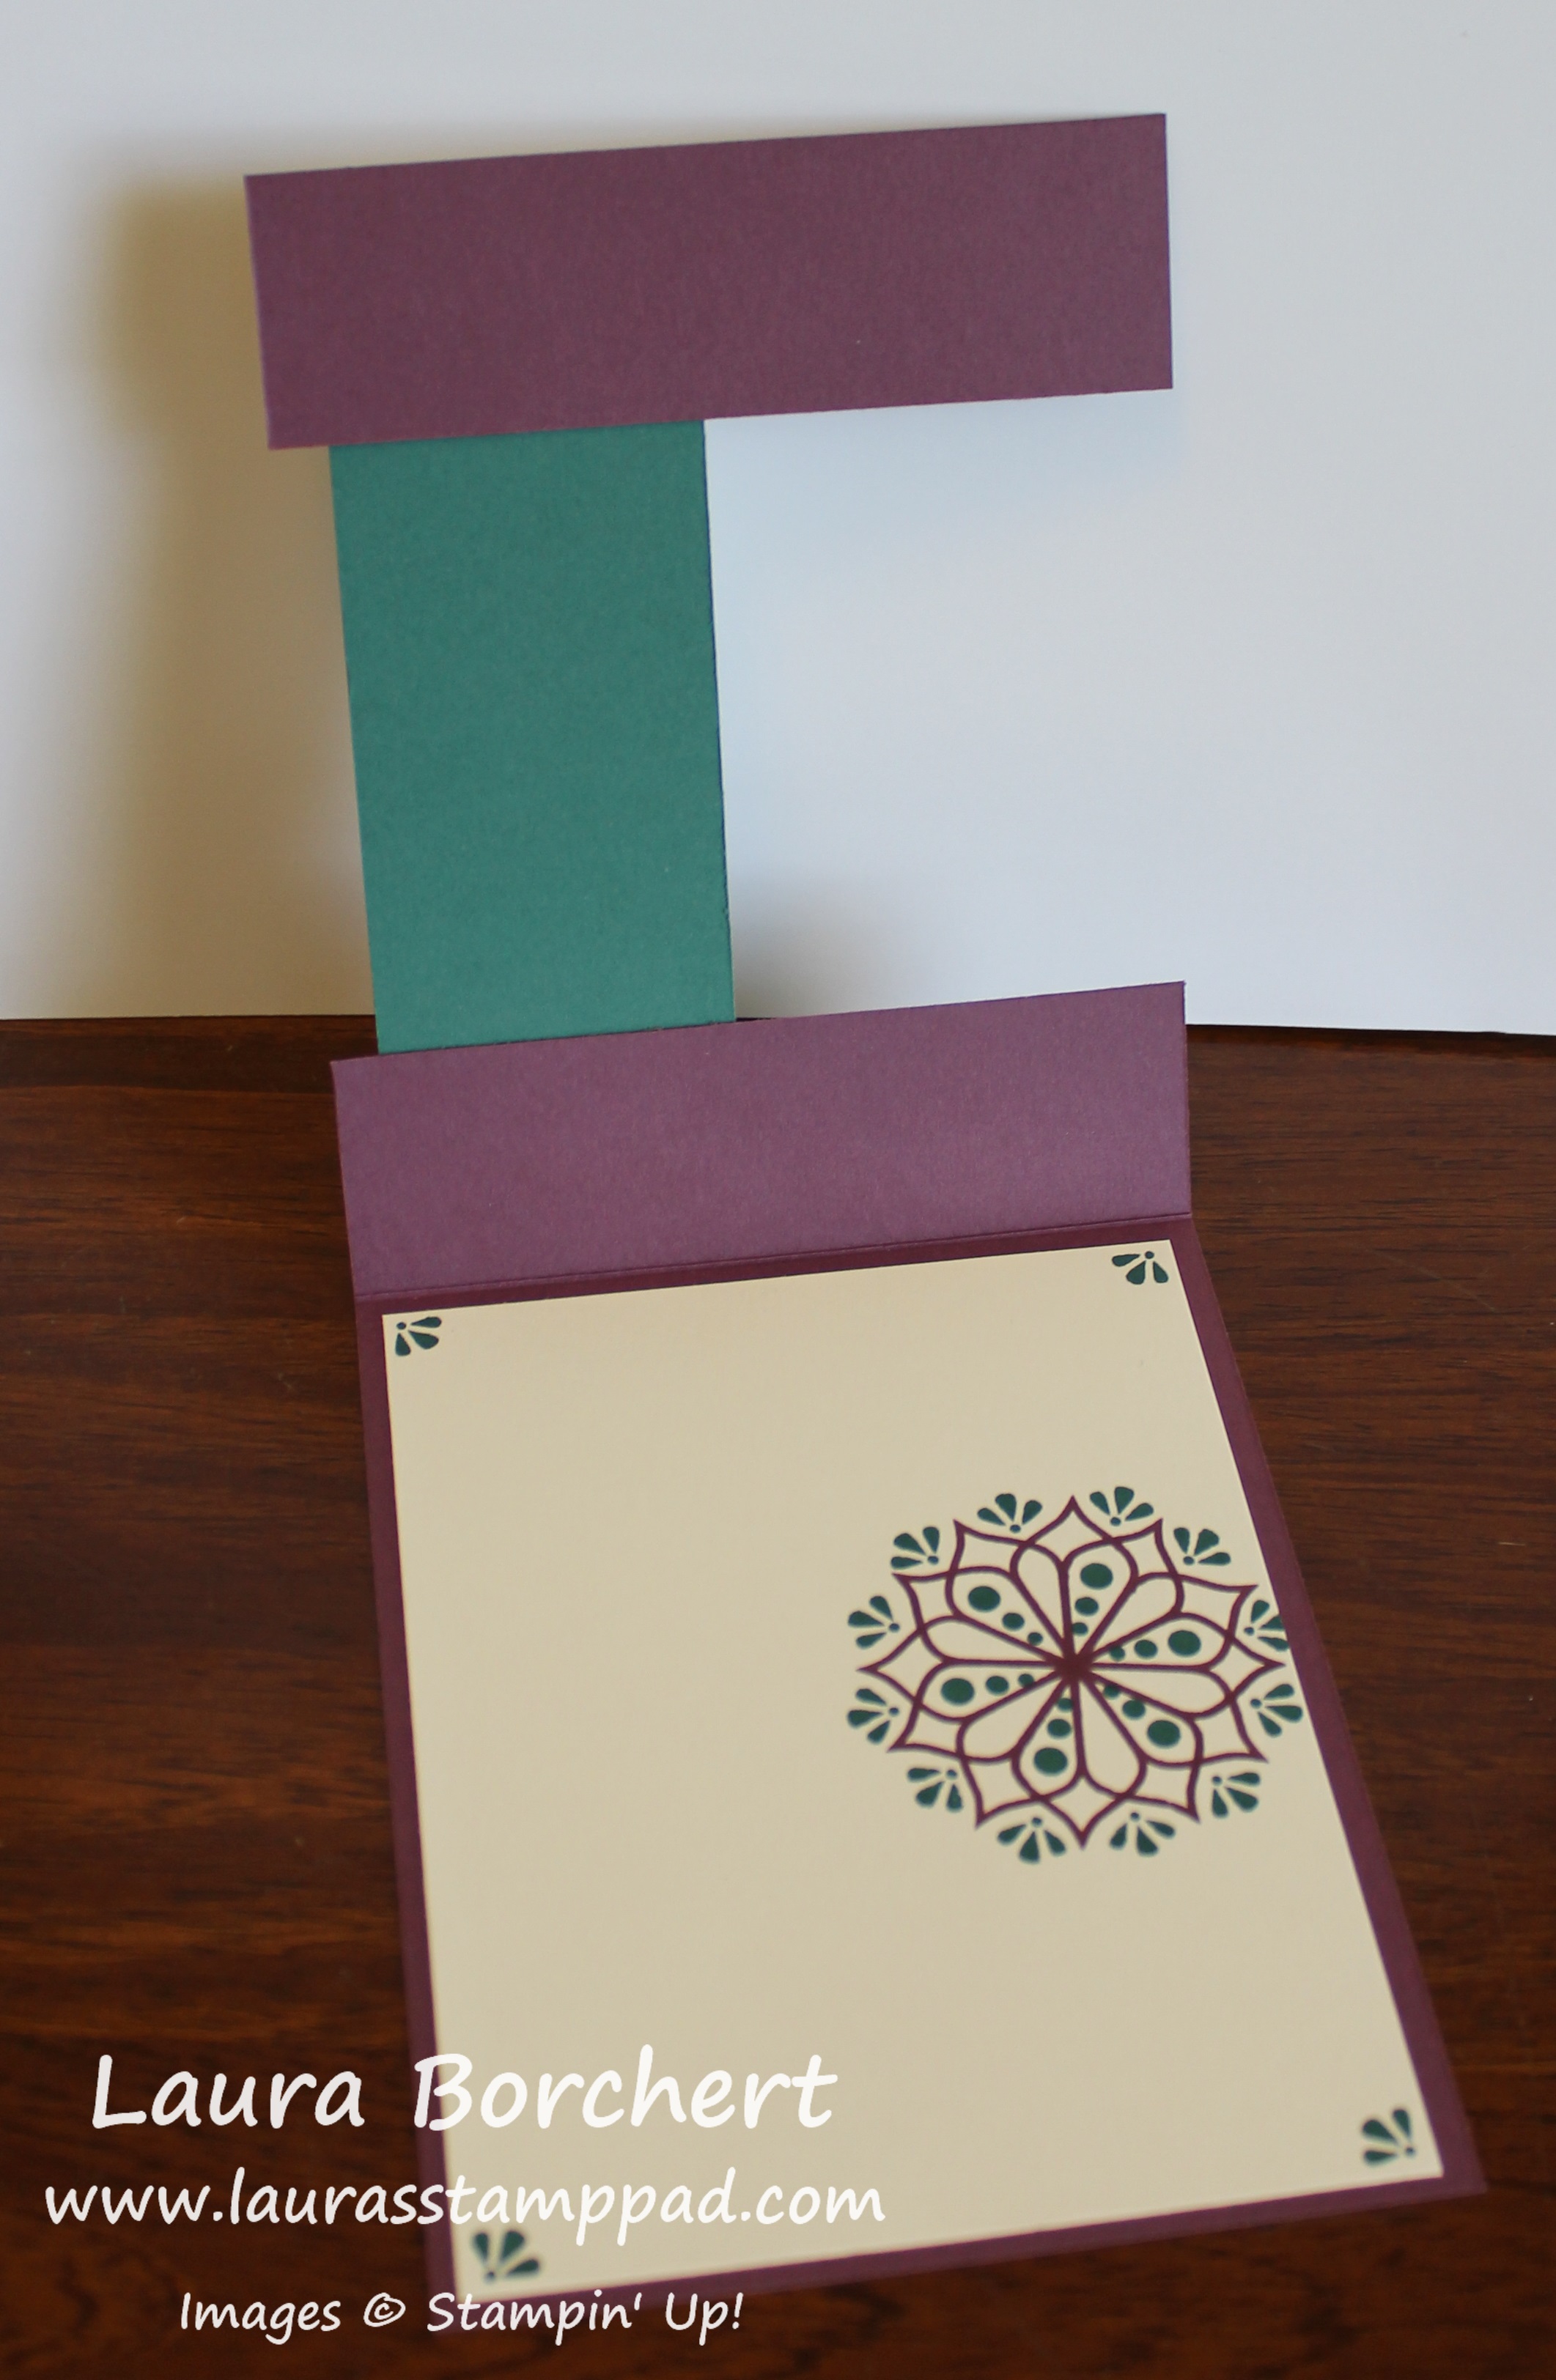
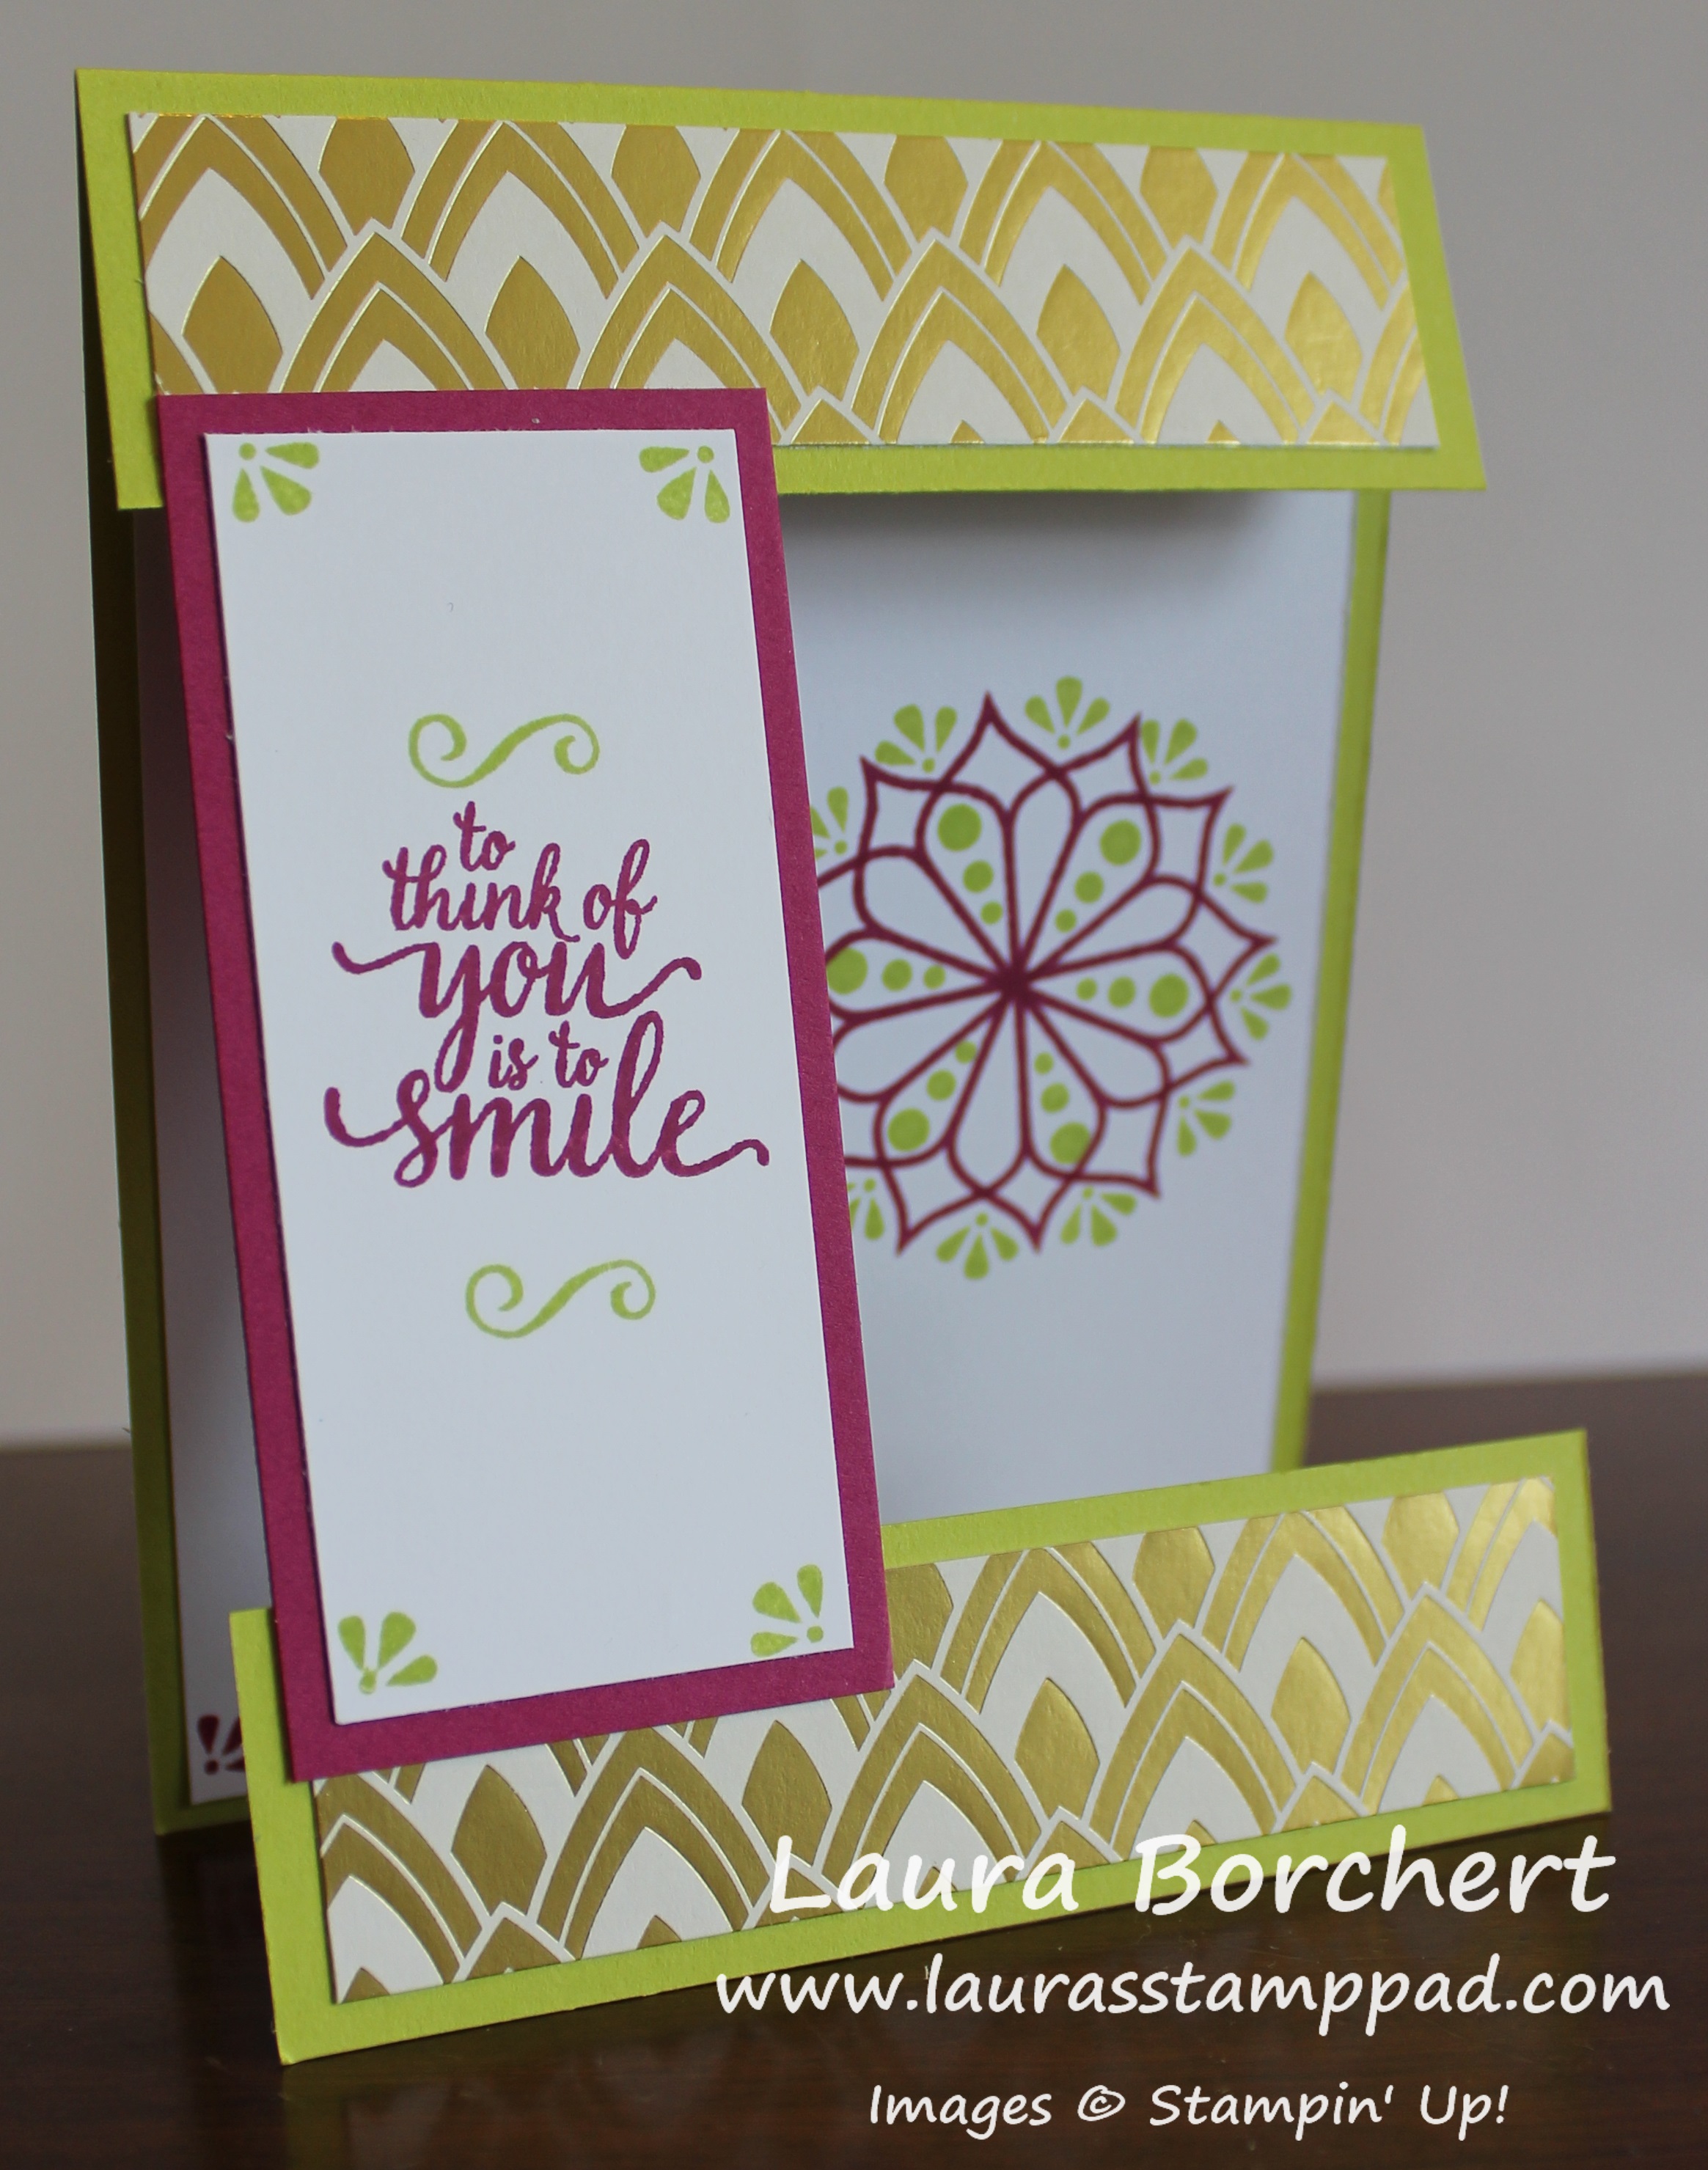
I started  with a Whisper White Note Card & Envelope for this card. These things are a bit smaller than a regular sized card but quick and simple as they come together. The card base is already scored so that’s a bonus too! They come 20 to a pack. Next, I layered on a piece of Delightful Daisy Designer Series Paper measuring 3-1/4″ x 4-3/4″. Now for the top piece, I took a piece of Whisper White (3″ x 4-1/2″) and stamped the daisy and greeting from the Daisy Delight Stamp Set in Calypso Coral Ink. TIP: Be sure the petal of the daisy is straight up a down, it will go into the punch super easy this way.

I kept the punched out daisy for card #2! Finally I added the punched and stamped piece to my card front with Stampin’ Dimensionals so it would have that 3D look! I finished off the card with a Gold Faceted Gem in the middle of the daisy! All done with the first card!

Daisy Punch Out Card, www.LaurasStampPad.comYou will have to stay tuned till Monday to see card #2 that uses that punched out daisy! But if you just can’t wait, check out my Video Tutorial below or click here! Don’t forget to give it a thumbs up if you liked it and be sure to subscribe if you are new! I post a new video every Tuesday and Thursday!

Let me know in the comments below if you like to make cards like this that use one part for one card and the leftovers for another card! Do you save all of your leftovers and scraps or toss them?

Happy Stampin

~Laura


Technique Tuesday – Creating an Open Shutter Card!!!

Posted on

Happy Tuesday!!! Today’s amazing technique is all about creating an open shutter card. The greeting just pop out behind the camera shutter look as you open it up! Check it out below and be sure to watch the Video Tutorial to see in all in action!!Creating Open Shutter Card, www.LaurasStampPad.com

Okay so you thought I would show the amazing WOW factor in this first picture, huh? Did you scroll down and check it out??? That’s okay I would have too! let’s get started on this beauty! I got the idea for this card from Frenchie Martin who is amazing! Thank you for this great card idea!

I started with a Whisper White card base measuring 5-1/2″ x 8-1/2″ and scored  it at 2-1/8″ x 6-3/8″ for the gate fold! For the front panels, I cut 2 piece of Night of Navy measuring 5-1/4″ x 1-7/8″. Then I layered on some of the Delightful Daisy Designer Series Paper measuring 5″ x 1-5/8″. The belly band  that wraps around the card is Night of Navy measuring 1″ x 11″. I didn’t actually score it but instead just wrapped it around the card and pressed on the edges. Then I unwrapped it and used a Bone Folder on the creases. This works best I think because otherwise it seems mine is too tight or too loose. Next, I used Tear And Tape to secure the belly band because it’s a nice strong adhesive. I cut the end into banner tips for a little fun texture! Next, I took a piece of Whisper White (3/4″ x 4″) and stamped the greeting from the Daisy Delight Stamp Set. I added the banner tips  on the right and secured it to the belly band, cutting off any extra on the left hand side.

Half Open Shutter Card, www.LaurasStampPad.com

Now it’s time for the amazing inside of the card – the Open Shutter part! I cut 2 pieces of Daffodil Delight cardstock measuring 4″ x 3-1/2″ and scoring 1/2″ in along the 4″ side. This creates the little tab to adhere the shutter pieces. On the opposite side of the score line, measuring half way up (half of 3-1/2″ is 1-3/4″) put a dot with a pen. Then measuring 2″ in, place another dot. This is so you know how far in to cut your banner tips. I cut from the corner to that 2″ in dot. After doing one of them, I just placed  it over the other one as a template. The less measuring the better, right? 🙂 Now the shutter pieces are ready!

Open Shutter Card, www.LaurasStampPad.com

Isn’t it beautiful?!?!?! Now that we created the shutter pieces, it’s time to do that middle piece. I took a piece of Whisper White (3″ x 5-1/2″) and layered on some Delightful Daisy Designer Series Paper (2-3/4″ x 5-1/4″) before die cutting a 2-1/2″ circle out of it. I used the Layering Circles Framelits but you could use a punch too! Then I added Stampin’ Dimensionals along the very top and very bottom of the piece and placed it in the center of the card. The dimensionals lift up this piece so the shutter can slide underneath! Now for adding the shutter pieces, I put Tear And Tape all along the 1/2″ tab, slide the left on under the daisy piece. With it lined up flush with the score line/fold in the card and centered up and down, I closed the left panel of the card. This will then grab onto that adhesive and secure the left shutter. For the right side, I did the same thing but there are a few tips.

Be sure that your banner tips are both under the left side banner tips. They can’t be one up/one down or it won’t close correctly. Another tip is to be sure that the banner tips aren’t peaking out on the left side because it is uneven. They should be hiding perfectly below the left side.

Now that the shutter is complete, I opened up the card completely and stamped the greeting! I used the coordinating greeting from the Daisy Delight Stamp Set in the center! It is best to stamp this after creating the shutter so that you are sure it will fit and peak out in the right spot.

If you would like to see this all in action, check out the Video Tutorial below or click here! Don’t forget to give it a thumbs up if you liked it and be sure to subscribe if you are new. You won’t want to miss Thursday’s video!

Happy Stampin’

~Laura


Loving the Soft Saying All Inclusive Card Kit!!!

Posted on

Stampin’ Up! has a NEW All Inclusive Card Kit called Soft Saying and it’s fabulous!!! The thing I love the most is that it’s perfect for the beginner because it includes everything. It’s perfect for the seasoned stamper because it’s so beautiful and fun!

Loving Soft Saying Inclusive Card Kit, www.LaurasStampPad.com

Look at all of these beautiful cards! The color scheme isn’t one that I would pick on my own but I do love it. Of course there are flowers in there so I’m happy! There are 20 total cards in this kit with envelopes. The stamp set is perfect for all occasions and it’s always great to have another clear block and Basic Gray Ink!

Mini Cards, www.LaurasStampPad.com

Here are the 2 sets of mini cards in the kit for a total of 4 cards! These cards are 3″ squares. The card bases came printed with that watercolor wash. I added the Washi Tape and stamped the greetings and some leaves/flowers! Next, I added the die cut leaves with a little bit of Fine Tip Glue Pen. Many times though, I just placed a Stampin’ Dimensional over the ends to secure it and placed the greeting on top.

Note Cards, www.LaurasStampPad.com

These are the note card size and there are 8 total in this size! I love the colors of the flowers and gold but also the simple more masculine cards as well! Again, you can see that I used the Washi Tape to secure the die cuts and used very little Fine Tip Glue Pen. It made putting these cards together very quickly!!! My favorites here are the gold rose in the upper left corner and the gray strips in the lower left corner!

Large Cards, www.LaurasStampPad.com

These are the large cards and there are 8 total! Of course, my favorite is the floral die cut and pin in the upper left corner. I loved that the floral die cut had a large enough border that I could put the adhesive there. It was super simple! The greetings are amazing and my favorite is “I’m happy you’re in my life.” I will say there was Lemon Lime Twist Baker’s Twine in the kit and I just didn’t care to use it. I did add it here and there following the instructions in the kit but there are a few I didn’t use it. It’s all about adding in your own flare and I know I’ll use that twine in other projects!

Leftovers, www.LaurasStampPad.com

Next up I wanted to show off all the leftover pieces that can be used on future projects! I have leftover labels (or extras if you make a mistake), twine, and washi tape. Then there are the non-consumables – stamps, ink, and clear block that can be used many many times over! I love it! There is also a Refill Kit that you can purchase to make even more cards! The refill kit comes with all of the supplies in the full kit minus the stamps, ink, clear block, and striped box.

If you would like to see the complete unboxing and reveal of this kit, check out my Video Tutorial below or click here! Don’t forget to give it a thumbs up if you liked it and be sure to subscribe if you are new!

Happy Stampin’

~Laura


Tempting Techniques – Color Block Card Making!!!

Posted on

Happy Tuesday!!! You know what that means…..I have a fabulous technique to share with you today! This color block card is a super fun and a great style for lots of different card types!

Color Block Card Making, www.LaurasStampPad.com

How fabulous is this card?!?! I just love the color combination and how simple it is. You can adapt this card style to any stamp set. I simply measured the greeting and lawn chair and that’s how I determined the size of the rectangles! Simple! Let’s get started on the dimensions for this one!

I started with a Whisper White card base. Next I cut some Whisper White for both the greeting (3″ x 2″) and the chair (2″ x 2-1/4″)! For the chair from the Colorful Seasons Stamp Set, I used Chocolate Chip Ink for the base and Berry Burst for the fabric. Since this is a Photopolymer Stamp Set, it was easy to line up the chair. There are notches in the chair as well that help! 🙂 For the greeting, I stamped it in Old Olive Ink!

Now it is time to layer and assemble the card! I layered the chair onto Old Olive (2-1/4″ x 2-1/2″) and the greeting onto Berry Burst (3-1/4″ x 2-1/4″). Next I took a piece of Old Olive Color Theory Designer Series Paper (4″ x 5-1/4″) and wrapped some ribbon around it and into a knot. I used the New Berry Burst Finely Woven Ribbon which I love because it’s not bulky! It’s perfect! I layered this onto the card base and then added the greeting with Snail and the chair with Stampin’ Dimensionals!

I’m loving this summery card look and the Colorful Seasons Stamp Set! There is just so many amazing images and greetings. You can check out another sample here!

If you would like to see this all in action, check out the video tutorial below or click here! Don’t forget to give it a thumbs up if you liked it and be sure to subscribe if you are new!!!

Happy Stampin’

~Laura


NEW 2017-2019 In-Colors!!!

Posted on

Happy June!!! That means the NEW Annual Catalog is out and the reveal of the NEW 2017-2019 In-Colors!!!! I am in love with them and the more I play with them the more I love them! For now, my favorites are Berry Burst and Lemon Lime Twist!!!

2017-2019 In-Colors, www.LaurasStampPad.com

Look at all of these fabulous cards created with the NEW Fresh Florals Designer Series Paper Stack. The patterns for this paper are the same as the now retired Floral Boutique Designer Series Paper. Let’s take a look at the cards and designs!!!

Berry Burst, www.LaurasStampPad.com

Let’s start with my favorite color – Berry Burst!!! I used Whisper White card bases for all of these and layered on the Fresh Florals Designer Series Paper (4″ x 5-1/4″).

Lemon Lime Twist, www.LaurasStampPad.com

Here is my second favorite color out of the 2017-2019 In-Colors – Lemon Lime Twist. Next, I used the Label Me Pretty Stamp Set and coordinating Pretty Label Punch (Bundle & Save 10%) for the greeting. This is my new favorite label punch to replace the Decorative Label Punch!

Fresh Fig, www.LaurasStampPad.com

These cards are made with Fresh Fig! This is a beautiful deep purple; very similar to the retired Blackberry Bliss!

Tranquil Tide, www.LaurasStampPad.com

Tranquil Tide is this weird green color that sometimes look like a nice deep forest green and other times I feel like it looks like it has blue in it. Either way I think it will be amazing for Christmas Cards and Man Cards!

Powder Pink, www.LaurasStampPad.com

The final color is Powder Pink which is a super soft baby pink. It’s so perfect for that soft pastel look but also accents really well with darker pinks and many other colors.

Which color is your favorite new 2017-2019 In-Color?? Let me know in the comments below!

Remember that there are tons of different items that come in these new colors! The Ink Pads are sold individually or as a bundle of all 5 which saves you $5.00! The cardstock comes in individual packs as well as a multi-pack. There are markers sold as a set too! Now for the best thing of all, there are Bitty Bows which are just so precious. If you don’t like making bows, these are perfect for you! They already have adhesive on the back too! The bows are so perfect for any project!!!

Ready to start shopping in the new catalog, click here! Use the Hostess Code: 2GH4Z9WH and you will earn Double Laura’s Loyal Stampers Stickers!!!

If you would like to see all of these items in action, check out the Video Tutorial below or click here! Don’t forget to give the video a thumbs up if you liked it and be sure to subscribe if you are new!

Happy Stampin’

~Laura


Technique Tuesday-Creating a Perfect Beach Scene!

Posted on

Happy Tuesday…..but feels like Monday! Today I’m sharing with you this amazing technique of creating a perfect beach scene! I am using the NEW Colorful Seasons Bundle from the 2017-2018 Annual Stampin’ Up Catalog which comes out on Thursday!!!!! Woot Woot! I so can’t wait!!!

Creating a Perfect Beach Scene, www.LaurasStampPad.com

How amazing is this card?!?!?! I just love it for that amazing greeting, the calming blues, and the relaxing chairs. Can you feel the sun on your face or cool ocean breeze just looking at this card? I think I can! Let’s get started on how I created it!

I started with a Whisper White card base. Next, I layered a piece of the ombre Dapper Denim from the Color Theory Designer Series Paper Stack onto some Dapper Denim cardstock (4″ x 5-1/4″). Then I stamped the greeting, Just Breath from the Colorful Seasons Stamp Set in Dapper Denim. That greeting is just amazing. I added this to the card from with Stampin’ Dimensionals for a little pop!

Creating Sand, www.Laurasstamppad.com

Now for creating a perfect beach scene, it’s time to make the sand. I took a piece of Crumb Cake (2″ x 5-1/8″) and placed it in a box to spritz. Spritzing can be messy so I use a box on it’s side to spritz into. I place the cardstock laying down flat (on the side of the box since it’s sideways). Using a Spritzer with alcohol and Chocolate Chip Re-Inker, I spritzed the bottom of the box, allowing the spray of it to drop down onto the Crumb Cake. This way the cardstock just has little dots of ink all over and not a direct splatter of ink. Also, another BIG TIP is be sure to use an alcohol of 70 proof or less. If it is higher, it will start to break down the plastic in the spritzer and it will clog.

After spritzing, I ripped the Crumb Cake in half and layered it together on the bottom of the card front. Those amazing adirondack chairs are from the coordinating Seasonal Layers Framelit. I die cut them in Whisper White and added them to the card front with the Fine Tip Glue Pen. I put the adhesive on the bottom rectangle piece as well as the arms of the chair. This allows the top of the chair to pop out a bit since it isn’t secured down and it looks more 3D! I just love it!!!

Just Breathe, www.LaurasStampPad.com

Here is another version of the same card but fewer layers. This is the simple version and the stepped up version is at the top! For this card, I used a Soft Sky card base and stamped directly onto it. Then I added the sand and chairs below. Which card do you prefer – the simple or stepped up?

If you would like to see it all in action, check out the video tutorial below or click here! Don’t forget to give it a thumbs up if you liked it and be sure to subscribe if you are new!!!

Get ready for the NEW catalog on June 1st! It’s so fabulous!!!!

Happy Stampin’

~Laura


Floral Boutique One Sheet Wonder!!!

Posted on

Happy Memorial Day! Thank you to all of the Men and Women who have served and are currently serving in our Armed Forces. I’m excited to share with you another fabulous One Sheet Wonder with the Floral Boutique Designer Series Paper!!! I know how much you all love these and I love the Beautiful You Stamp Set that I used for these! 🙂

Floral Boutique One Sheet Wonder, www.LaurasStampPad.com

Look at all of these beautiful cards! I just love that girl stamped (in any pose) as she adds so much to the card with just a simple stamp! All of these cards use the same pattern at the One Sheet Wonder I did last week with the Eastern Palace Suite. Click here to check those out! Now on to each of these cards!

Floral Boutique Designer Series Paper, www.LaurasStamppad.com

After cutting the piece of Designer Series Paper into four 6″ squares, I took one and cut it into four 3″ squares. Then I created each of these cards with those piece. I used Whisper White, Night of Navy, and Marina Mist as my card bases and accent pieces. For the greetings, I used the Beautiful You Stamp Set and the retiring Birthday Blast Stamp Set.

Beautiful You, www.LaurasStampPad.com

Next, I took another 6″ square and cut it into nine 1-1/2″ squares. Some of them I cut in half and some of them I left the full size. I added some Rhinestones, Silver Metallic Thread, and Whisper White Ribbon as accents.

Dancing Girl, www.LaurasStampPad.com

For these cards,  I used one of the 6″ squares and cut it into 1-1/2″ x 5-1/2″ strips. I used up some scraps of cardstock that were ripped to add as a little layer behind the designer paper!

One Sheet Wonder, www.LaurasStampPad.com

For the last 4 cards in the Floral Boutique One Sheet Wonder, I cut the 6″ square into three 4″ x 2″ piece and the leftover piece is 2″ x 5-1/2″. I love how quick and simple these cards are to create. Using just 2 stamp sets and 1 ink pad, there were very few options for me to think over. The clean up was very minimal as  well!

If you would like to see this all in action, check out the Video Tutorial here!

I hope you all have a wonderful day! Don’t forget that the retiring items will no longer be available after May 31st! Click here to make sure you aren’t missing out on anything! The NEW Catalog starts on Thursday!

Happy Stampin’

~Laura


Creating a Partial Front Peek Through Card!!!

Posted on

I fell in love with this card style when I got a swap card last November at Stampin’ Up! OnStage. The partial front peek through is just so cool because you can see the inside of the card! Check this out!!!!

Partial Front Peek Through, www.LaurasStampPad.com

See how the front of the card is only on the top, bottom, and left hand side. The inside of the card is peeking through on the right hand side! Super fun and cool and goes perfectly with the Eastern Palace Suite. Check out these cards for more ideas using this Suite. So let’s get started!!!

I started with a piece of Fresh Fig measuring 6-3/4″ x 4-1/4″ and scored it at 5-1/2″ to create the card base. Next I cut another piece of Fresh Fig measuring 1-1/4″ x 4-1/4″ for the bottom portion. The middle section that connects the top and bottom is Tranquil Tide (1-3/4″ x 3-3/4″). I layered on some of the Eastern Palace Designer Series Paper with that gold foil! Tip: Be sure that the pattern goes in the same direction on the top and bottom!

Since I didn’t want the front of my card to fall apart, I used Tear And Tape, which is super strong, to attach the front. The Tear And Tape is the perfect slim amount too! I placed that on the top and bottom of the Tranquil Tide and pealed off the top. The sample above wasn’t done like this but I found that in the others I created it was best to line up the edge of the Tranquil Tide with the edge of the Designer Paper and place it on the top portion just enough to cover the tape. Next, place the bottom portion of the card lined up on the bottom of the card, peel off the adhesive and close the card to adhere it to the bottom.

Eastern Medallion, www.LaurasStampPad.com

Now that the partial front is complete, let’s stamp. I took a piece of Very Vanilla measuring 1-1/2″ x 3-1/2″ and stamped the greeting and decoration using the Eastern Beauty Stamp Set. All the little decoration pieces in that set are super fun! Afterwards, I added that to the partial front piece. For the inside, I took a piece of Very Vanilla measuring 4″ x 5-1/4″ and placed it inside the card. I didn’t adhere it just yet, just in case I made a boo boo.

Medallion, www.LaurasStampPad.com

Closing the front of the card, I stamped the flower image in the opening. This way I knew it would be peaking through in the right spot! After stamping the first flower, I was all set to stamp the rest of the images so I pulled the cardstock out. For the flower, I inked it up again and stamped it over the top of the other one but rotated around just a bit. Then I filled in with the other fun images!

Lime & Berry, www.LaurasStampPad.com

This was the sample I created in the video!!! I love the colors and it was super fun to create! If you would like to see it all in action, check out the video tutorial below or click here! Don’t forget to give it a thumbs up if you liked it and be sure to subscribe if you are new!!

Happy Stampin’

~Laura


Tempting Techniques – Eastern Elegance One Sheet Wonder!

Posted on

Happy Tuesday!!! Today, I’m sharing an amazing technique with you – Eastern Elegance One Sheet Wonder! I know how much you all love One Sheet Wonders so here is another fabulous one! I am loving the Eastern Elegance Suite! It’s beautiful!

Eastern Elegance One Sheet Wonder, www.LaurasStampPad.com

How amazing and beautiful are these cards?!?!?! I just love them and they were so quick to create because I used just 4 Ink Pads, 1 Stamp Set, 1 Framelit Set, and just a few colors! I used all Whisper White Cards Bases….except that one in Dapper Denim! 🙂 Now let’s get started on the cutting and assembling!

Eastern Palace Greetings, www.LaurasStampPad.com

I started off by making lots of greeting tags. The Eastern Beauty Stamp Set has so many fabulous images to create the coolest greetings! I die cut them with the coordinating Eastern Medallion Framelits and they were ready to grab and go when I was assembling the cards! The colors I used were Tranquil Tide, Fresh Fig, and Lemon Lime Twist which are all NEW In-Colors!!!

3x3 Squares, www.LaurasStampPad.com

I started out with a 12″ x 12″ piece of Eastern Palace Designer Series Paper and I cut it into 6″ x 6″ squares. With one of the squares, I cut it in half both ways creating four 3″ squares. Finally I cut 2 of those in half diagonally to create the top cards above and just used them as a square for the bottom two cards. I used a little bit of coordinating Fresh Fig and Tranquil Tide cardstock for layering. The stamps are from the Eastern Beauty Stamp Set!

2x2 Squares, www.LaurasStampPad.com

Next, I took another 6″ Square and cut it into nine 1-1/2″ squares. I added those to the cards above in different ways with greetings and some of the Gold Vinyl Stickers to decorate!!! That gold tassel is just fabulous as well and not super bulky either! Bonus!

One Sheet Wonder, www.LaurasStampPad.com

The next 6″ Square was cut at 4″. Then with the 4″ x 6″ piece, I cut it into three 1-1/2″ x 4″ strips. With the leftover piece of 2″ x 6″, I sniped off that last 1/2″ and used it for the lower right corner card. The other 3 pieces are perfect for layering across your card as a center band! I used Dapper Denim, Fresh Fig, and Tranquil Tide for layering on these cards!

Eastern Beauty, www.LaurasStampPad.com

For the final 6″ Square, I cut it at 5-1/2″. Using the 5-1/2″ x 6″ piece, I cut at 1-1/2 (along the 6″ side) to create four 1-1/2″ x 5-1/2″ strips. I really loved using the amazing stamp set to create background, borders, and greetings! The gold stickers are pretty amazing too for a little pop of bling!!! You can  get all the items I used in this One Sheet Wonder in the Premier Bundle of the Eastern Palace Suite! I mean everything, even the Very Vanilla cardstock and envelopes which come FREE! This bundle is super fabulous and only available this month! Next month, each item will be sold individually and you won’t get the freebies!

To check out this One Sheet Wonder in action, see the Video Tutorial below or click here! Don’t forget to give it a thumbs up if you liked it and be sure to subscribe if you are new!!!

Happy Stampin’

~Laura


Creating a Belly Band with the So Detailed Thinlits!!!

Posted on

Today, we are creating a belly band!!! Using the So Detailed Thinlits, you can make a belly band or just a focal point on the front of your card! You may remember me showing off this card here which is just the focal point! Today, I’m showing you the belly band!

Creating a Belly Band, www.LaurasStampPad.com

You can see how both of these cards look fairly similar. The card on the left is the one I posted before with the band across the front only. The card on the right has the belly band sitting on top. It will slide over the card securing it closed. The recipient would slide off the belly band and open the card.

I started with a Soft Sky card base and added a piece of Falling In Love Designer Series Paper to the front! Using the flowers from the So In Love Stamp Set, I stamped a few onto the designer paper all over the card front. I used Soft Sky Ink. I did more little flowers on this card since the focal point will be slid off when the open the card. Next, I die cut the little belly band in Very Vanilla with the So Detailed Thinlit Dies. I, also, cut a piece of Very Vanilla cardstock measuring 1-3/8″ x 4-1/4″. Using my score blade on the Stampin’ Trimmer, I scored the tabs on the die cut piece to make it easier to fold them back. You can always use a ruler and Bone Folder or just bend them back. Next, I added Tear & Tape to the tabs and placed it on the rectangle vanilla piece. A few tips is that you want to make sure your belly band fits your card. One way to make sure is to adhere it together while it is on the card or just make sure there is extra room on both sides.

Belly Band, www.LaurasStampPad.com

Using the coordinating So In Love Stamp Set, I stamped the greeting in the center of the belly band. Then I finished off the card with a bow using the 1/4″ Very Vanilla Satin Ribbon. I adhered to the card using Mini Glue Dots!!!

If you would like to see this all in action, check out my Video Tutorial below or click here! Don’t forget to give it a thumbs up if you liked it and be sure to subscribe if you are new. I post a new video every Tuesday and Thursday!

Happy Stampin’

~Laura