Technique Tuesday – Botanical Gardens!!!

Posted on

Happy Tuesday!!! You all know that means I have a fabulous technique to share with you today! This one is super simple and yet super fabulous!!! Check this out!!!

Botanical Blooms, www.LaurasStampPad.com

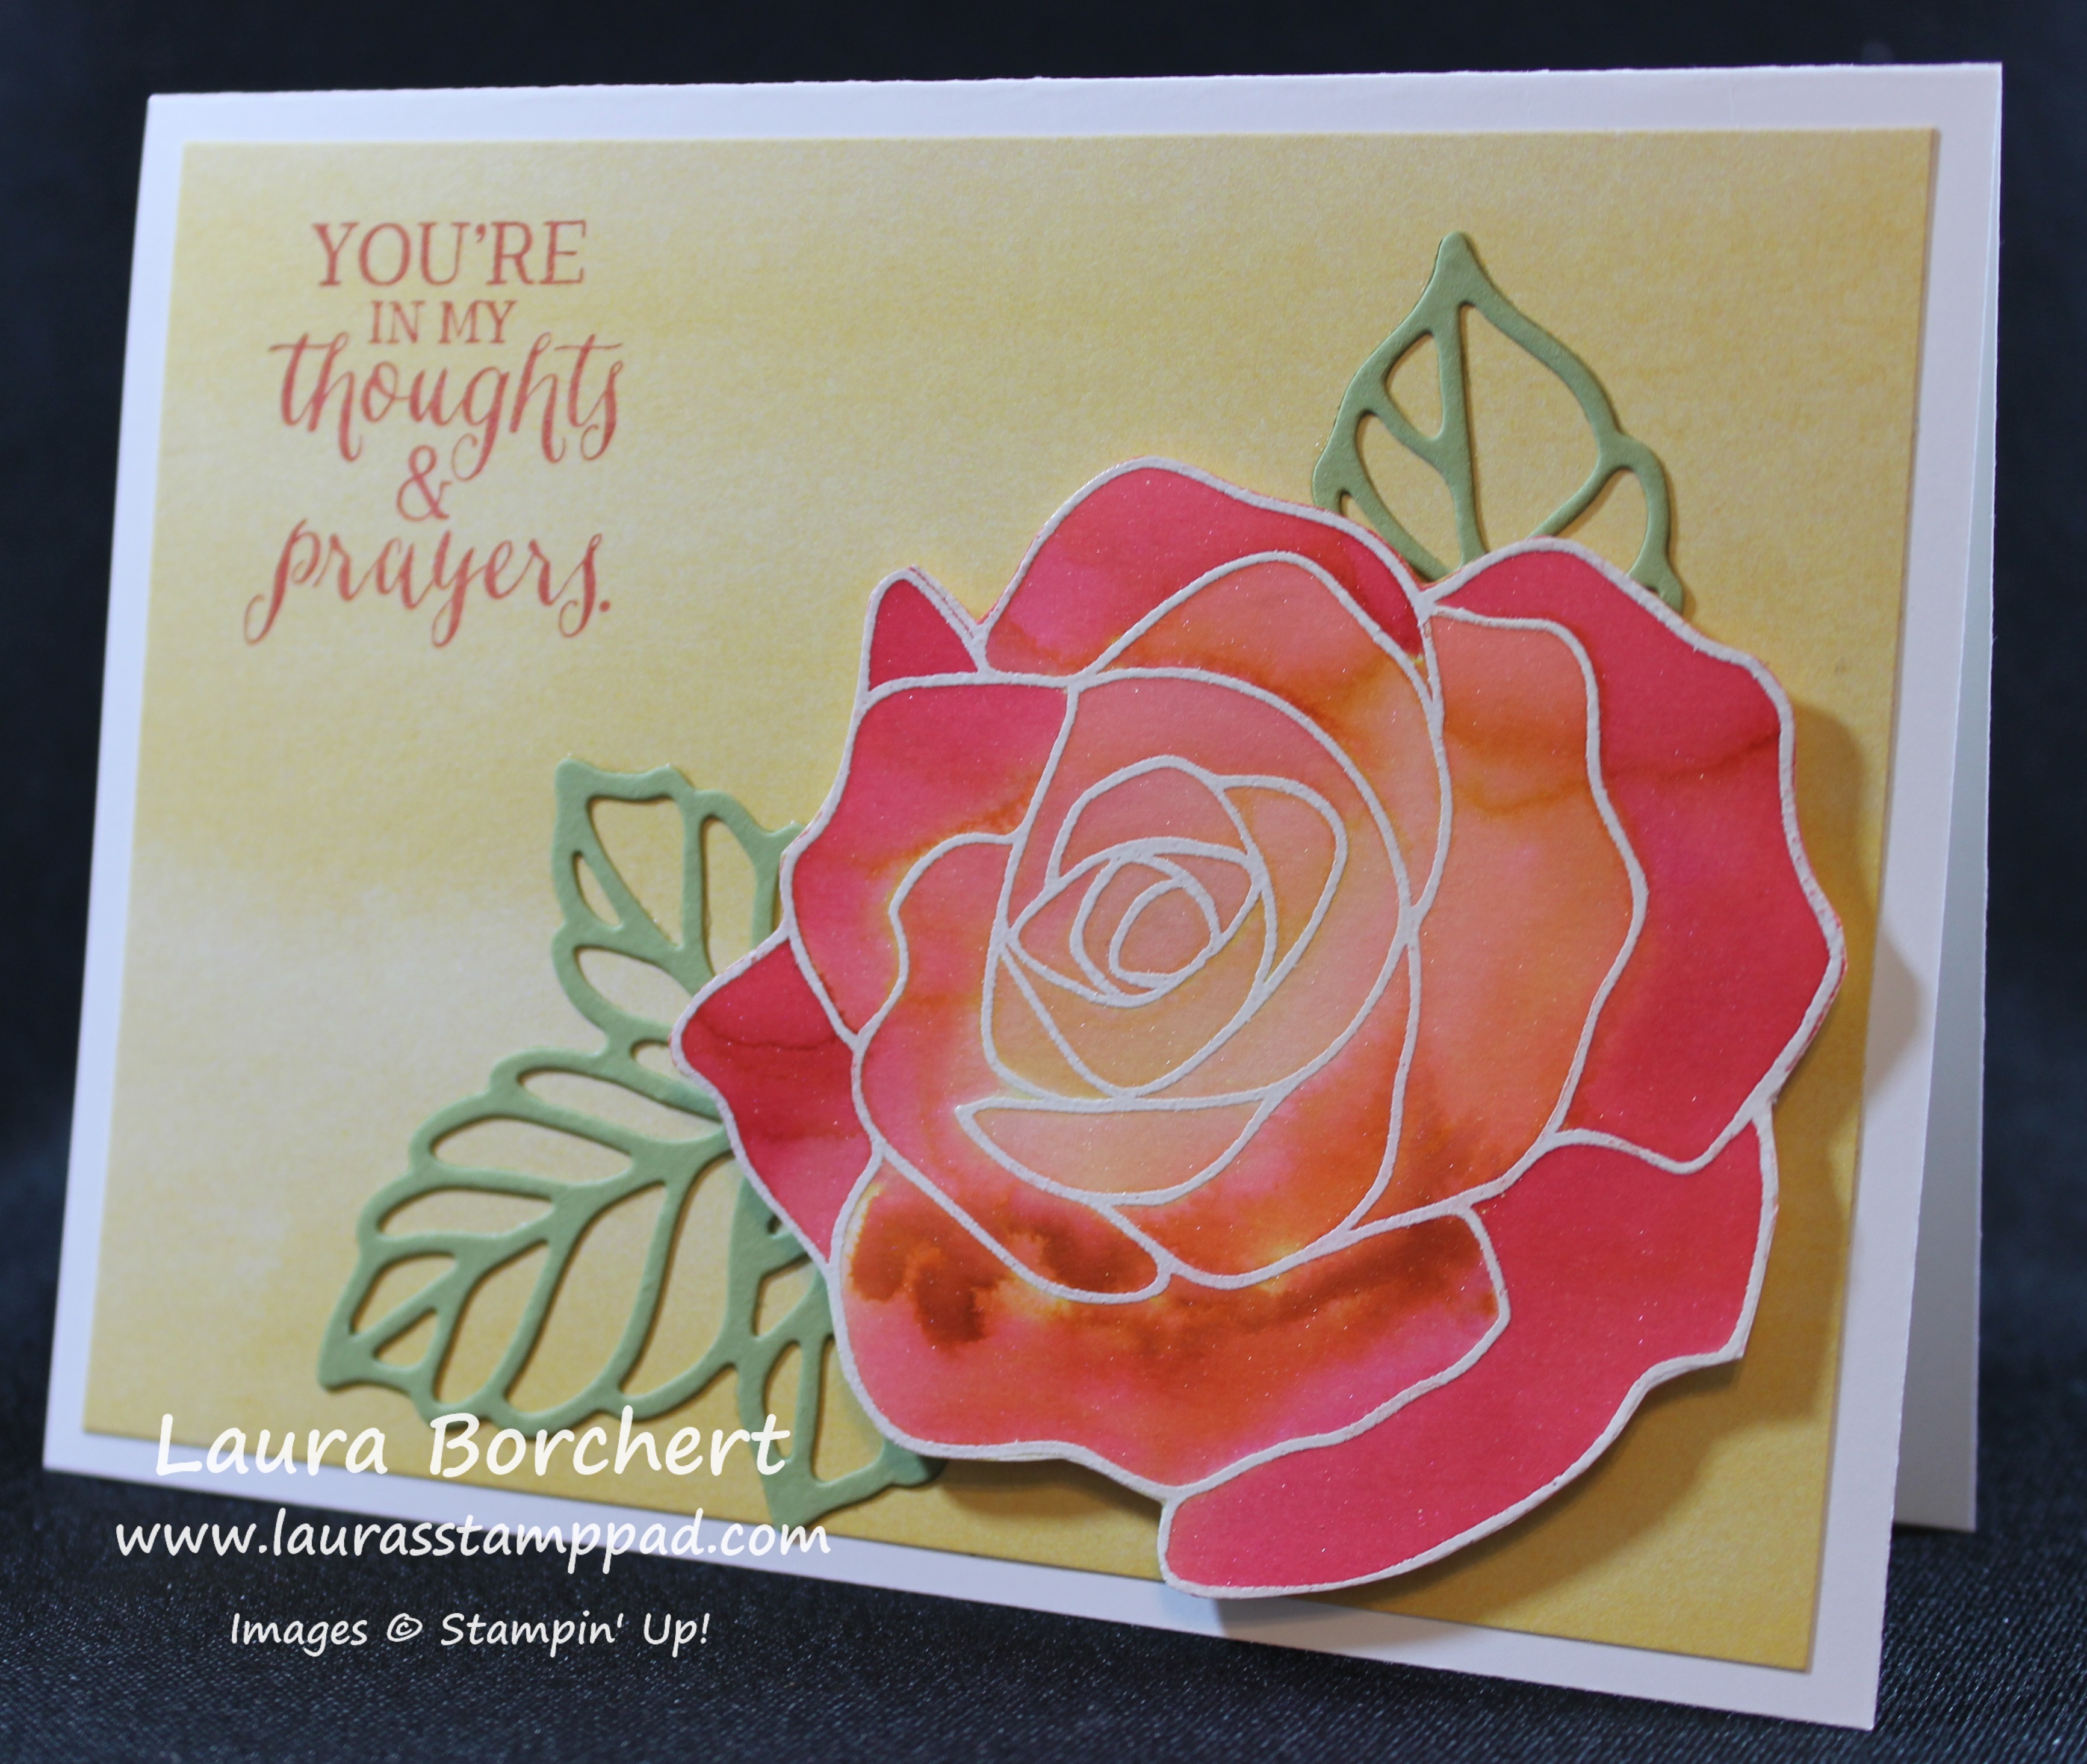
Isn’t this card fabulous? You are probably looking at it thinking what’s the technique! It’s the Designer Series Paper! I used the Botanical Gardens Designer Series Paper and Botanical Blooms Stamp Set but you are going to want the entire Bundle and Save 15% which includes the Botanical Builder Framelits as well! Love all of these products! Plus if you order it before the end of the month you will get a Sale-A-Bration item for FREE! Let’s get started!

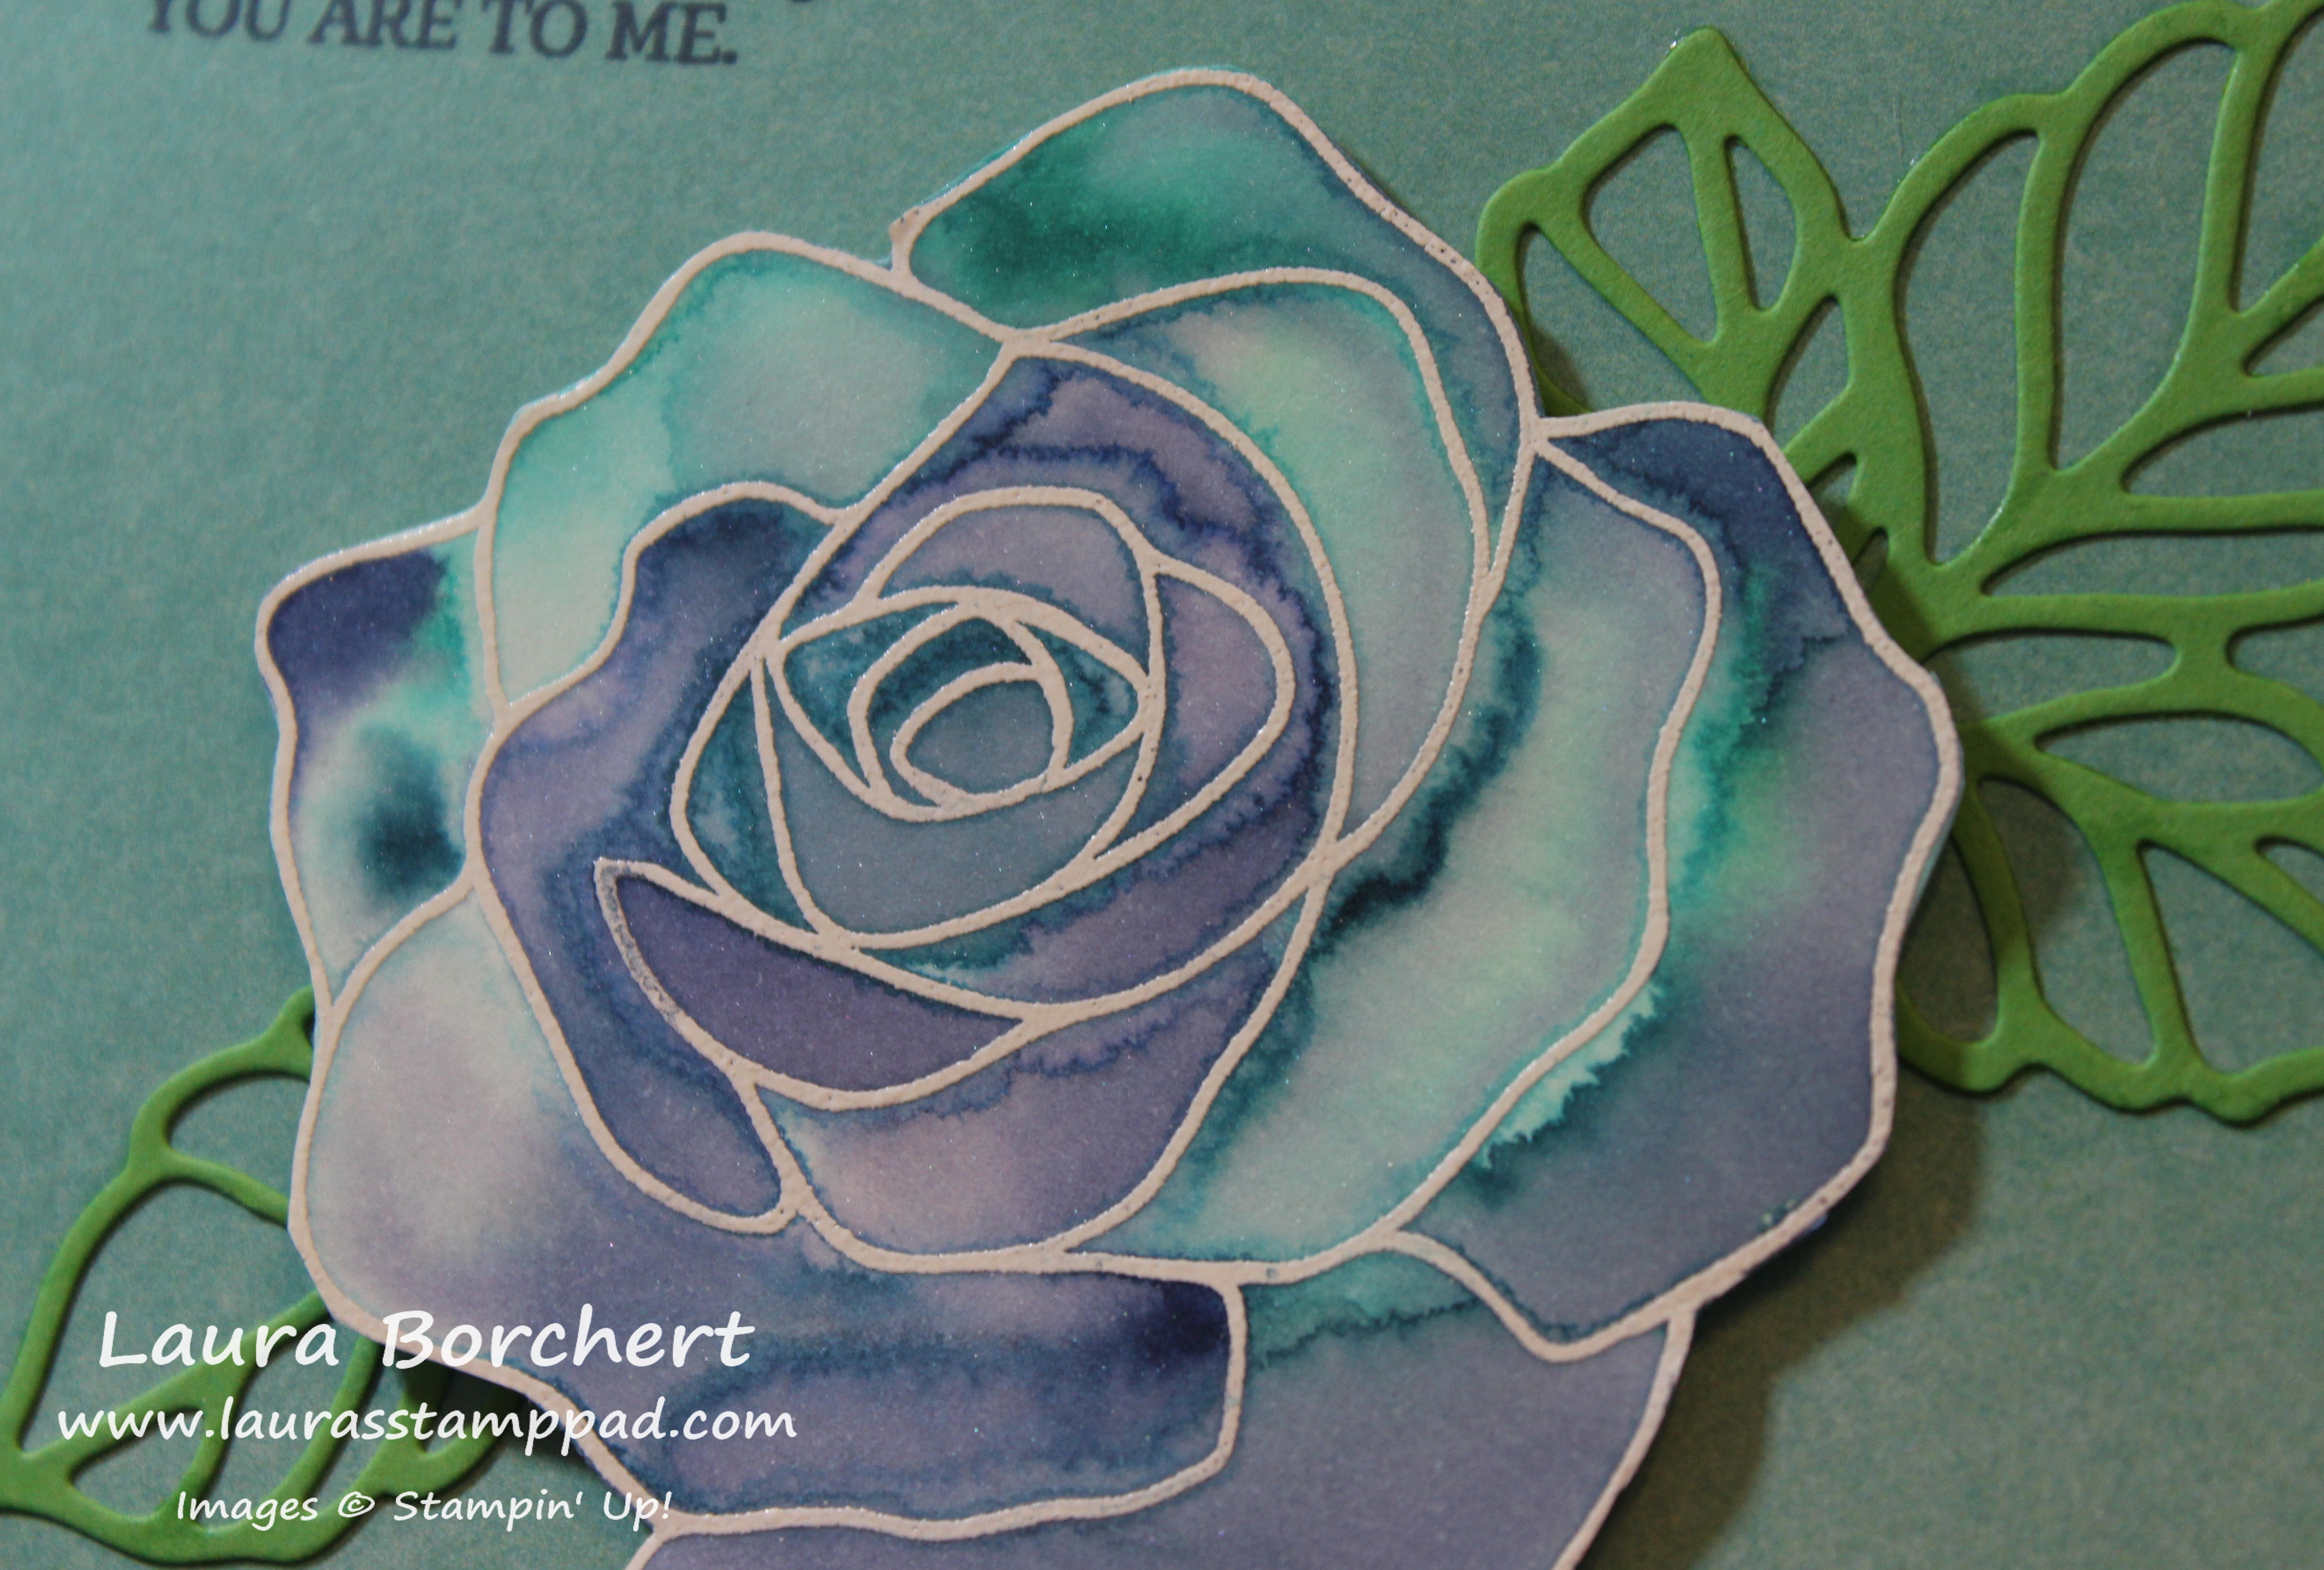
The Botanical Blooms Stamp Set coordinates with the Designer Series Paper so you can stamp the leaf veins and centers of the flowers to add more texture and interest to the flowers. It really makes the paper POP! I love it! It goes from cute to WOWZA!!!

Stamping on Paper, www.LaurasStampPad.com

For the card above, I added the Designer Series Paper to a Hello Honey card base. Then I wrapped some Linen Thread around the card a few times and tied it in a knot! I like the jungle look that the thread gives! For the greeting, I used the Rose Wonder Stamp Set and stamped it in Cajun Craze. I punched out the Whisper White with the 2″ Circle Punch and layered it onto Mint Macaron punched out with the 2-3/8″ Scallop Circle Punch. I added the greeting to the card with Stampin’ Dimensionals.

If you would like to see this in action, check out my Video Tutorial below or by clicking here! Don’t forget to give it a thumbs up if you liked it and subscribe to my channel – Laura’s Stamp Pad so you don’t miss out when future videos are posted!

Stay tuned for a lot more samples using the Botanicals Bundle!!!

Happy Stampin’

~Laura


Tempting Techniques – Sponged Roses!!!

Posted on

Happy Tuesday!!! You know what that means! I have a fabulous technique to share with you today! It is super fabulous because it combines lots of things I love – flowers, bling, and sponge daubers!!! Woot Woot!

Sponged Rose, www.LaurasStampPad.com

Look at this beauty!!! You can do this technique in any color you wish for that stunning look! Let’s get started!

SUPPLIES NEEDED: Sponge Dauber, Rose Garden Framelits, Big Shot, Die Brush, Fine Tip Glue Pen, Rose Wonder Stamp Set

To get started, you will need to take a piece of scrap Whisper White cardstock and run it through the Big Shot with the rose image from the Rose Garden Framelits. Once that is die cut, you can use the Die Brush to pop it out of the framelit, pop out all the little pieces and get all the little “hairs” off. Now using the leftover outline of the image as a template, place it on a piece of Whisper White measuring 4″ x 5-1/4″. You can place it on there half off or in any corner. It is all up to you. Then with a Sponge Dauber and your color choice, POUNCE the ink onto your card. You won’t want to rub or brush because it could make your template move. For this sample, I used Wild Wasabi for the leaves and Rose Red for the flower. Just add the color all around and stop at the breaking point of the leaves and flower. It is okay if some spots look darker than others. The variation in color really looks fabulous once it is all complete. Now that you are done adding color to the cardstock, I then took the Wink of Stella Brush and added glitter to the entire rose.

Wink of Stella Rose, www.LaurasStampPad.com

Then you can add the die cut rose. I used the Fine Tip Glue Pen to adhere the rose on. This is the perfect glue!! Now you can add any greeting that you would like. I really think this card is perfect for all occasions! I used the Rose Wonder Stamp Set (Bundle & Save 15%). I stamped the frame and greeting in Basic Black and die cut it with the Rose Garden Framelits! I added it to the card front with Stampin’ Dimensionals. Love it!!!

If you would like to see this in action, check out my Video Tutorial below or click here! Don’t forget to give it a thumbs up if you liked it!!!

What color would you make your rose??? I think I want to do a Melon Mambo one next or maybe Elegant Eggplant!!!

Happy Stampin’

~Laura


Technique Tuesday – Color Blocking!!!

Posted on

Happy Tuesday everyone!!! I have a fabulous technique to share with you today and it’s as simple as ink and clear blocks!!! You can use this technique with lots of different stamp sets and occasions! Let’s get started!!!

Color Blocking, www.LaurasStampPad.com

How amazing is this card? It is perfect for any occasions which is why I didn’t want to put a greeting on it. I love it! I got the idea from Rachel Palmieri. I tried to modify it a little to add my own flare and I didn’t like any of them. Rachel did it wonderfully and I went with it!!

SUPPLIES:  Clear Block E, Ink Pads, Spritzer

You can really use any size of Clear Block that you wish but I went with Block E because I thought it was a great size for a scene. I pressed the Wild Wasabi Ink Pad onto the bottom 1/3 of the clear block. Then I took the Soft Sky Ink Pad and pressed it onto the top 2/3 of the clear block. You will want to get close to the green but you don’t need to touch. Then taking the Lost Lagoon Ink Pad, you will press it along the edges of the blue. Be sure that you are angling the ink pad a little and not just inking the side of the clear block. Then with a Spritzer filled with water, you will want to spritz the clear block. Don’t spritz directly at it but instead a few inches away and allow the mist to fall onto the block. Then you will flip the clear block over and stamp it onto a piece of Very Vanilla cardstock (3-3/4″ x 5″). Hold for a few seconds to allow the ink to soak in. Your paper may curl a bit because of the water and that’s okay. Once it has dried, you can stamp onto your cardstock. I stamped the flowers from the Flowering Fields Sale-A-Bration Stamp Set in Basic Gray for a softer look. I layered this piece onto Lost Lagoon measuring 4″ x 5-1/4″ and then onto a Mint Macaron card base with Stampin’ Dimensionals! I love it!!!

Watercolor - Close Up, www.LaurasStampPad.com

Here are a few tips and tricks that I wanted to share with you.

  1. You will want to spritz with water as it achieves the best look. I tried with no water and it looked very light and small dots.
  2. I tried with Alcohol in hopes it would dry faster (you all know I don’t have patience). It didn’t work. It dried too fast and the colors did fill in like they do with water.
  3. Be sure to flip the clear block over and hang it directly upside down while you determine the center of the cardstock or something else. You don’t want to hold the clear block on it’s side or tilted because then the colors will drip/run into each other.

If you would like to see this technique in action, check out my Video Tutorial below or by clicking here! I show all of the samples that didn’t work as well! 🙂 Be sure to give it a thumbs up if you liked it!

Happy Stampin’

~Laura


Technique Tuesday – Easter Lamb!!!

Posted on

Happy Tuesday!!! You all know what that means!!!! I have a fabulous…and adorable…technique to share with you today!!! This little Easter Lamb is just precious!!! When I first saw him in the Occasions Mini Catalog, I knew I had to have him! My favorite holiday is Easter so that is perfect. Plus I thought you could omit the Easter greeting and use it for Baby, Baptism, and Children’s Birthday Cards!!! He’s just so cute!!!

Easter Lamb, www.LaurasStampPad.com

See what I mean??? I love it!!! Let’s get started!

SUPPLIES NEEDED: Easter Lamb Stamp Set, Blender Pens, Archival Basic Black Ink, and Ink Pads of your choice

I started off by stamping the Easter Lamb Stamp in Archival Basic Black onto Whisper White cardstock. You will want to use this ink or Stazon Black Ink because these won’t run when you are coloring. Then I took the Blender Pens and little touched them into the ink to color in the scene! I used Pear Pizzazz for the grass. I used Blushing Bride for the ears and cheeks. I used Chocolate Chip for the hooves. I used Pool Party for the background. I will say it was all really easy and fun except for the background. I really struggled with that on each one because it came out different each time. You really need a light touch and be okay with random streaks. 🙂

Blender Pen Coloring, www.LaurasStampPad.com

I really like how this one turned out and I think I like the grass colors just on the sprigs and not all filled in. They are both super cute though. I layered the lamb onto Pool Party cardstock. I added Stampin’ Dimensionals to the back. I added a small piece of Whisper White Seam Binding and just added dimensionals on top to hold it in place. I placed this onto a piece of So Saffron. I did use some of the Sale-A-Bration Artistically Yours Designer Series Paper but there wasn’t enough to make multiples. I put it all onto a Whisper White card base!

If you would like to see this in action, check out the video below or click here!!! Don’t forget to give it a thumbs up if you liked it and Subscribe so you don’t miss out on future videos!

Do you send out Easter Cards? How would you use this stamp set? Let me know in the comments below!

Happy Stampin’

~Laura


Technique Tuesday – Floating Watercolor!!!

Posted on

Happy Tuesday!!! I have a super fun technique to share with you today!!! It includes watercoloring so remember that each one will turn out differently and it requires some patience….but the look is AMAZING!!! Check this out!!!

Blue Roses, www.LaurasStampPad.com

I honestly think this blue one is my favorite even though I don’t know if I have ever seen a blue rose like this. I just love it!!!

Okay so let’s get started. You will need a piece of Shimmery White cardstock for the rose. This cardstock is thicker than regular Whisper White but not as thick as Watercolor Paper so it works perfectly. It always has that beautiful shimmer which is fun! I stamped the rose from the Rose Wonder Stamp Set in VersaMark onto the cardstock. No need to worry about the leaves since you will cut them off. Then you will pour White Embossing Powder over the it and using the Heat Tool, set the powder. Now you will need to pick your colors and add a little drop of re-inker to a clear block or press the block into the ink pad to get some color. Then you are all set with your image, you will spritz the heck out of it with water. I mean like puddles on top of your image. Using an Aqua Painter, lightly touch the ink and then touch the tip of the Aqua Painter into one of the puddles on the flower. You can start with a light color on the outside or inside whichever you prefer. For the rose above, I used Bermuda Bay, Island Indigo, and Night of Navy. When you touch the color to the water, you will see it spread out all over. If it doesn’t but instead seem really dark and like it soaked into the paper, you need more water. You can either squeeze the Aqua Painter or spritz again. Add color as much as you would like. A good tip for myself is….If you think it needs a bit more, STOP! I tend to do a little more here and then there and it ends up messing up. Also, it will dry differently then it looks right now too! You can either set it aside to dry OR you can tip it a bit and allow it to dry like that. This allows the excess water to run to one side and dry darker in those spots. I prop it up on a clear block.

Floating Watercolor, www.LaurasStampPad.com

Once it is all dry, you can cut it out along the border of the embossing flower and add it to your card front. I used the Rose Garden Framelits (Bundle & Save 15%) to die cut the leaves in Cucumber Crush. I used a Whisper White card base and some of the Artistically Yours Designer Series Paper from Sale-A-Bration! I stamped the greeting from the Rose Wonder Stamp Set!

Red Roses, www.LaurasStampPad.com

For this rose, I used Real Red, Tangerine Tango and Daffodil Delight. I love how it turned out. The leaves on this one were die cut in Pear Pizzazz!

Watercolor Technique, www.LaurasStampPad.com

For this one, I used Blushing Bride, Watermelon Wonder, and Elegant Eggplant. You can see those really dark purple spots….that was where I didn’t have enough water and the paper just soaked up the color strongly. I used Mossy Meadow for the leaves on this one. I also used the Curvy Corner Trio Punch as well.

If you would like to see this technique in action, check out the video tutorial below or click here. Don’t forget to give it a thumbs up if you liked it and subscribe so you don’t miss any future videos!

Which color combination is your favorite? Let me know in the comments below! The blue one is my favorite!

Happy Stampin’

~Laura

Built for Free Using: My Stampin Blog


Technique Tuesday – Rose Wonder!!!

Posted on

Happy Tuesday!!! You all know what that means….I have a fabulous technique to share with you today!!! I loved the Rose Wonder Stamp Set and coordinating Rose Garden Framelits (Bundle & Save 15%) once I first laid eyes on them! I love the beautiful flowers and the greetings…..oh my goodness. I reach for this stamp set for every card I create because the greetings are PERFECT!!!

Thoughts & Prayers, www.LaurasStampPad.com

This is a very simple and yet so beautiful card that is perfect for many different occasions!!! I created this one as a Sympathy and Thinking of You and the other sample is Birthday! I love it!!! You can also play with different colors for even more fun! Let’s get started!

For this card, all you need is cardstock, ink, Fine Tip Glue Pen and the Rose Wonder Bundle! I cut a piece of Very Vanilla Cardstock measuring 4″ x 5-1/4″ and placed it on the Precision Base Plate. I placed the large rose die on the paper where both of the leaf ends are very close to the edge or falling off. Then run this through the Big Shot. You can run it through 1-2 times to make sure you have that nice even cut. Then the best way to get the image out of the die and to pop out all of the cut out piece, you will want to use the Die Brush. Check out how amazing it is here! That thing is best thing ever! Love it!!! You will want to keep the negative/corner of the cardstock of the Rose as well. I used a Lost Lagoon card base and adhered the corner piece to the top right hand corner of the card front. Then using the Fine Tip Glue Pen, I add adhesive to the Rose and placed it right next to that corner piece. In some places it is closer and in others, it is farther away and that’s okay. You don’t need to coat the entire back of the rose. I mostly did the edges and a few spots in the middle, then placed it down and held it for 15-30 seconds. Then if there are a few spots still popping up, just add a little underneath and press it down again. I used Lost Lagoon ink for the greeting from the Rose Wonder Stamp Set! Here is another sample!

Birthday Roses, www.LaurasStampPad.com

I thought it would be fun to use two colors – Elegant Eggplant and Pink Pirouette. I love how it turned out. I think a light and dark blue would be fabulous as well! Since the cardstock is so dark, I decided to add the greeting to the bottom left corner! I also added a few pearls in the center of the rose for a little bling! I love it!

If you would like to see this in action, check out the video below or click here! Don’t forget to give it a thumbs up if you liked it and be sure to subscribe so you don’t miss out on Thursday’s video as well! 🙂

Let me know in the comment below which color combination you like the most or what color combination I should try next!

Happy Stampin’

~Laura


Technique Tuesday – Watercolor Wildflowers!!!

Posted on

Happy Tuesday! I am so stinking giddy about sharing this card with you today! I LOVE IT! It’s so soft and beautiful. I know I know, it’s not my usual bright colors but it is flowers! 😉 The technique I’m sharing with you is a little watercoloring with the Aqua Painter. I know many might not like it or have never tried it so I’m going to share some tips and tricks today!!!
Sending Smiles, www.LaurasStampPad.com

This card also screams Spring with the pastels and blooming flowers. Oh how I am counting down the days still Spring – 47 more days!!! Let’s get started on this beauty!!!!

SUPPLIES NEEDED: Aqua Painter, Basic Gray Archival Ink (or Stazon), your choice of colors

I took a piece of Whisper White cardstock measuring 4″ x 5-1/4″ and stamped each of the flowers from the Flowering Fields Sale-A-Bration Stamp Set. I used every image in the set except the butterfly and I really should have added him in. That would have been amazing! I stamped all of the flowers with Basic Gray Archival Ink which you can use for watercoloring. I liked the softer look of the gray verses a black. It is okay if the flowers don’t all line up along the bottom because the greeting banner is going to cover that up! Now that your images are stamped, it is time to color. I have found that when using an Aqua Painter, you don’t need to squeeze it at all. The water will gently come out as you color. I also found that just barely touching it to the paper is best for those fine lines. I tend to press hard but then the brush tip bends and it becomes really wide and all over the place. Just a light touch to the paper works best. If you don’t like making a mess on the inside of your ink pads to create a color palette, just press a clear block into the stamp pad and use that as your color palette and then rinse off when you are done. You can always add re-inker to the clear block as well. I used Pear Pizzazz for my stems. The flowers are (left to right) Wisteria Wonder, Hello Honey, Pear Pizzazz, Marina Mist, Pear Pizzazz, and Calypso Coral. Another tip that I have is allow it to dry a little and then go back and add accents or more color. Don’t think that you have to get the perfect look with one swipe. Have fun with it!!! For the greeting I stamped it in Basic Gray onto Pear Pizzazz from the Greatest Greetings Stamp Set. This card could really have any type of greeting on it! I added a little piece of Tea Lace Doily to the bottom of the banner and adhered it to the card with Stampin’ Dimensionals! By adding just a little piece of the doily, I can get 3, sometimes 4 of these out of one doily. I love getting the most out of my supplies!

If you would like to see this in action and how I used the Aqua Painter, check out the Video Tutorial below or click here! Don’t forget to give it a thumbs up if you liked and subscribe so you are notified when I post the next one!

Let me know in the comments below which you prefer – Aqua Painter, Blender Pens, Marker, or not a fan of coloring!!!

Happy Stampin’

~Laura


Technique Tuesday – Curvy Corner Trio Punch!!!

Posted on

Happy Tuesday!!! You know what that means…..I have a fabulous technique to share with you today! Today it’s all about the Curvy Corner Trio Punch. Some tips and ideas on how to use this punch and the fun you can have with it!

Curvy Corner Trio Punch, www.LaurasStampPad.com

How beautiful and simple is that card? I love how those decorative corners allow more of the Calypso Coral to show through. It really stands out so much more! If you would like to see a sample using the other corner, click here! Let’s get started!

I started with a Calypso Coral card base. I took a piece of Whisper White measuring 4″ x 5-1/4″ and punched all 4 corners with the Curvy Corner Trio Punch and then added it to the card front. Using a piece of the Wildflower Fields Designer Series Paper (1-1/2″ x 5-1/4″) from the Sale-A-Bration Promotion, I placed that down the center. For the greeting, I used a piece of Whisper White (2-1/2″ x 1-1/2″ and stamped the greeting from the Rose Wonder Stamp Set in Basic Black. Oh how I love the greetings in this set! Then I took one of the flowers from the Flowering Fields Sale-A-Bration Stamp Set and stamped it in the background in Calypso Coral. I stamped a few times before going back to the ink to give a lighter look and those various shades. I layered this piece onto Basic Black measuring 2-3/4″ x 1-3/4″. I added the greeting to the card with Stampin’ Dimensionals! I love it!

Blessing To Me, www.LaurasStampPad.com

If you would like to see a Video Tutorial on the Curvy Corner Trio Punch, check it out below or click here! Don’t forget to give it a thumbs up if you liked it!

Happy Stampin’

~Laura


Technique Tuesday – 3 Step Stamping!!

Posted on

Happy Tuesday everyone!!! That means I have a fabulous technique to share with you. Three Step Stamping, Masking, and Flowers make this technique oh so amazing!!! Check this out!!!

Layered Flowers, www.LaurasStampPad.com

These colors scream SUNSHINE and BRIGHTER DAYS!!! I think it is the perfect card for a Sympathy, Just Because, or Get Well Soon because it is so bright and cheery! It would make a great card for any occasion though! This card uses the What I Love Sale-A-Bration Stamp Set! You can earn this set for FREE with a $50 order.

This card just needs stamps and ink and cardstock like any other card. I started with two pieces of Whisper White measuring 4″ x 5-1/4″ and 3″ x 4-1/4″. Add a little dab (little) of Snail Adhesive to the back of the smaller one and place it in the center of the larger one. We will be stamping over the 2 layered pieces at the same time. Now using the What I Love Stamp Set, I stamped the flowers randomly all over the layered paper. I used Tangerine Tango, Pumpkin Pie, and Daffodil Delight for the 3 flower images. You will notice that the flower stamps have a little arrow. That arrow is to help you line up your images. Take note of where that arrow is every time you stamp and lining up the next one will be easier. For example, if you stamp the first one (the online image in the darkest ink) with the arrow pointing up, be sure to stamp the next two images with the arrow pointing up. The second stamp is the full solid flower which is stamped in a lighter shade or a stamped off image of the first color. The third stamp is the smaller solid image and this one can be just about any color – lighter, darker, or totally different. Don’t worry if you images aren’t lined up completely because I found that with the rounded edges and flower look, it’s okay to be off. It creates sort of a watercolor look and that’s okay! Remember you stamped projects are make with love, not perfection and you are your biggest critic. 🙂 Once you are done stamping, you will separate the two white pieces and layer the smaller one onto a piece of Tangerine Tango measuring 3-1/4″ x 4-1/2″. You can place the larger layer onto your card front of Daffodil Delight. I added some Daffodil Delight Cotton Ribbon to the smaller piece and adhered it down with Stampin’ Dimensionals. For the greeting, I used the Rose Wonder Stamp Set from the Occasions Mini Catalog. This stamp set is AMAZING! It has flowers and some of the most beautiful greetings for all occasions. I love the font. I love the sayings. I love this stamp set. Get your’s now so you can play along with me in all the samples I’m creating with it. I stamped the greeting onto Whisper White and punched it out with the Decorative Label Punch. I layered it with a Daffodil Delight punch as well (tutorial on that here). I added the greeting with Stampin’ Dimensionals as well! Love it!

If you would like to see the 3-Step Stamping in action, check out the Video Tutorial below or by clicking here! Be sure to give it a thumbs up if you liked it and let me know what color combination you would use for your card!

Happy Stampin’

~Laura


Technique Tuesday – Confetti Fun!!!

Posted on

Happy Tuesday!!! That means I have a fabulous technique to share with you today!! We will be coloring on an embossed image and it is so much fun!!! Check this out!

Sponged Embossed Confetti, www.LaurasStampPad.com

How cute…or manly….is this card? I think this would make a great Man Card and many would probably say a Man Card isn’t described as cute. 🙂 You could use any combination of colors to match the occasion. You could do school colors for a graduation card, wedding colors for wedding or the recipients favorite color for Birthday, Just Because, or Thank You!!! I love it!!

SUPPLIES NEEDED: Embossing Folder, Sponge Daubers, Ink Pads

I took a piece of Whisper White cardstock measuring 4″ x 5-1/4″ and ran it through the Big Shot in the Confetti Embossing Folder from the Occasions Mini Catalog! Then I took my Sponge Dauber and Ink Pads and lightly brushed over the embossed portion. I went in a circular motion to keep in little sections but you could always go back and forth or whichever way you like best. I used Pacific Point, Pumpkin Pie, and Cucumber Crush for this card! Then I placed it onto a Cucumber Crush card base. Since the center is smooth in this folder, I used my Oval Framelits for the greeting! I stamped the greeting from the Party Wishes Stamp Set in Pacific Point. I stamped it on Whisper White and layered it onto Pumpkin Pie. You could always just stamp the greeting directly onto the embossed piece! The greeting is attached to the card front with Stampin’ Dimensionals! How simple is that? I love it!

Colored Confetti, www.LaurasStampPad.com

If you would like to see this in action, check out the Video Tutorial below or by clicking here! Don’t forget to give it a thumbs up if you liked it and be sure to subscribe so you don’t miss out on any future videos!

Happy Stampin’

~Laura