My Mom’s Frog Birthday Card!!!

Posted on

Mom's Birthday Card, www.LaurasStampPad.com

My Mom’s Birthday was earlier this month and this is the card I created for her! She actually fell in love with this stamp set and bought it for me so we could make cards with it. (Note to self: we still need to do that!) 🙂 I started playing with this set and the New Watercolor Pencils and knew this was the perfect set for her card!

I started with a Crumb Cake card base and then I layered a piece of Old Olive cardstock (4″ x 5-1/4″) on top. I took a piece of Whisper White (3-3/4″ x 5″) and lightly brushed over it with a Sponge Dauber. I did Old Olive Ink on the bottom 1/3 and Pool Party Ink on the upper 2/3. I added a strip of Pool Party Stitched Satin Ribbon across the top and then added it to the card base. For the frog and the wheelbarrow, I stamped them from the You’re Sublime Stamp Set in Basic Gray onto scrap Whisper White.

Wheelbarrow, www.LaurasStampPad.com

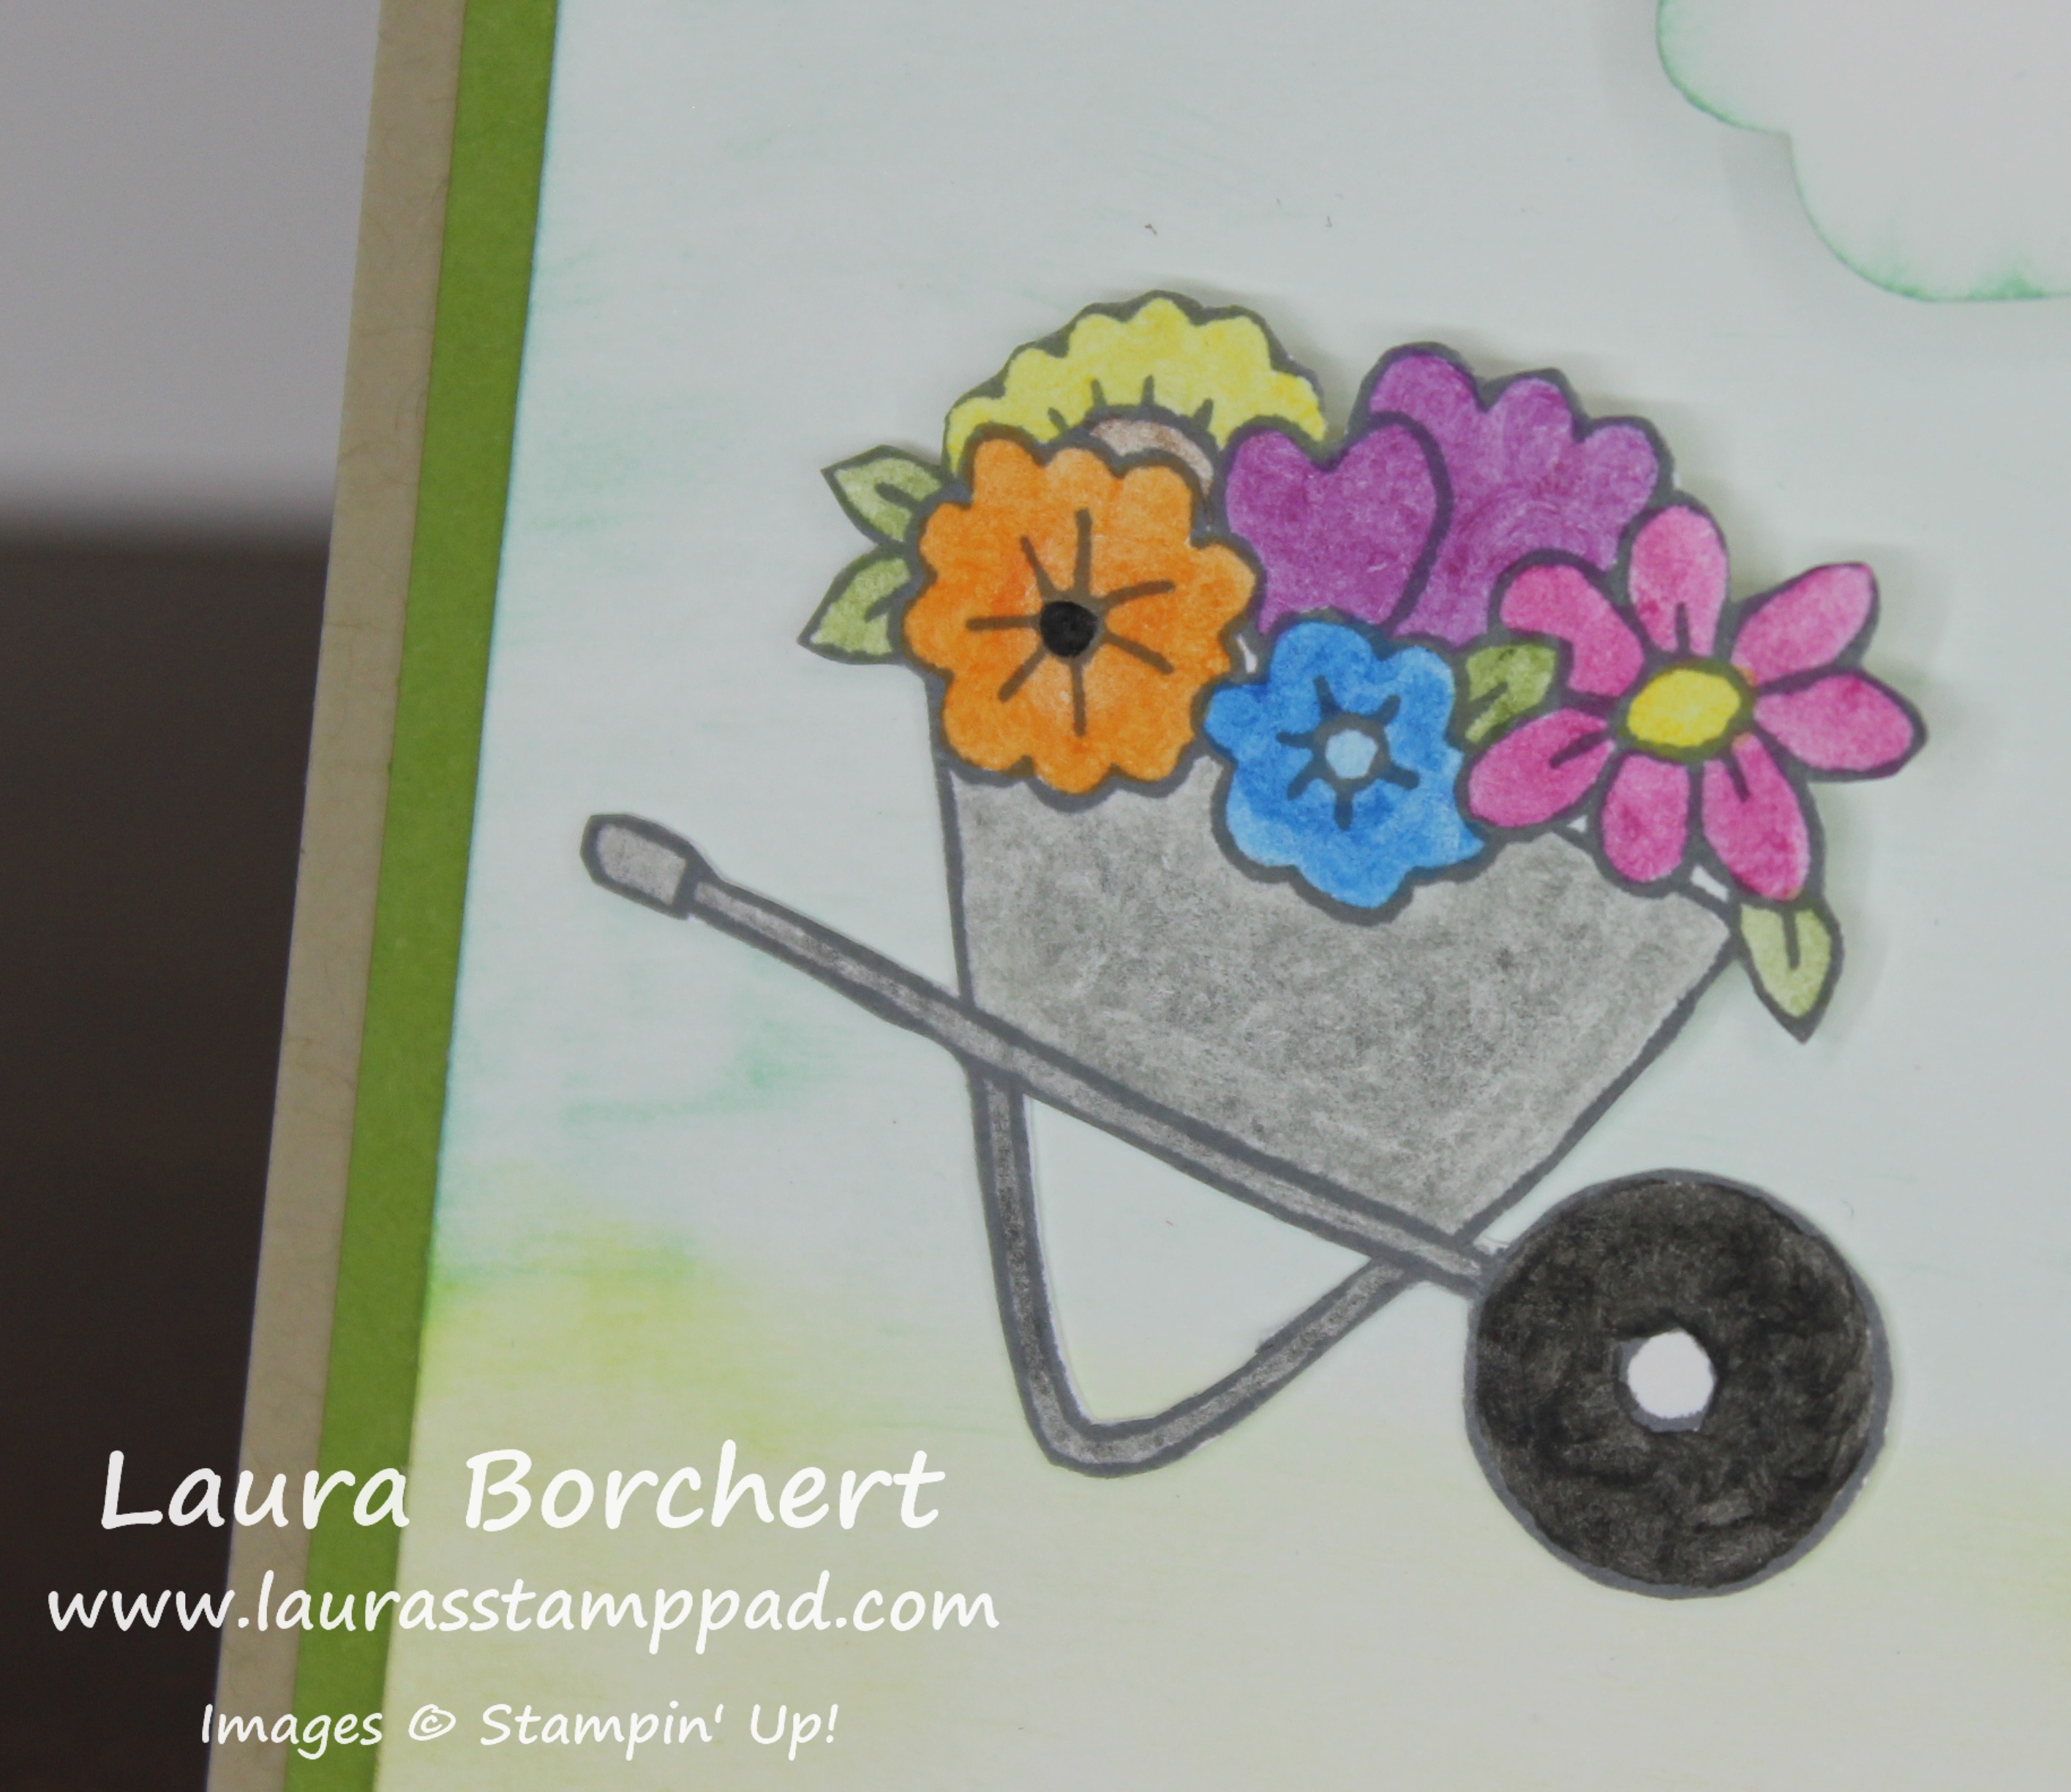
I used the Watercolor Pencils to color in a bit and then I took a Blender Pen and swirled around to move the color and fill in! Once it was all colored, I fussy cut out both images and adhered them to the card base with Stampin’ Dimensionals.

Lil Froggy, www.LaurasStampPad.com

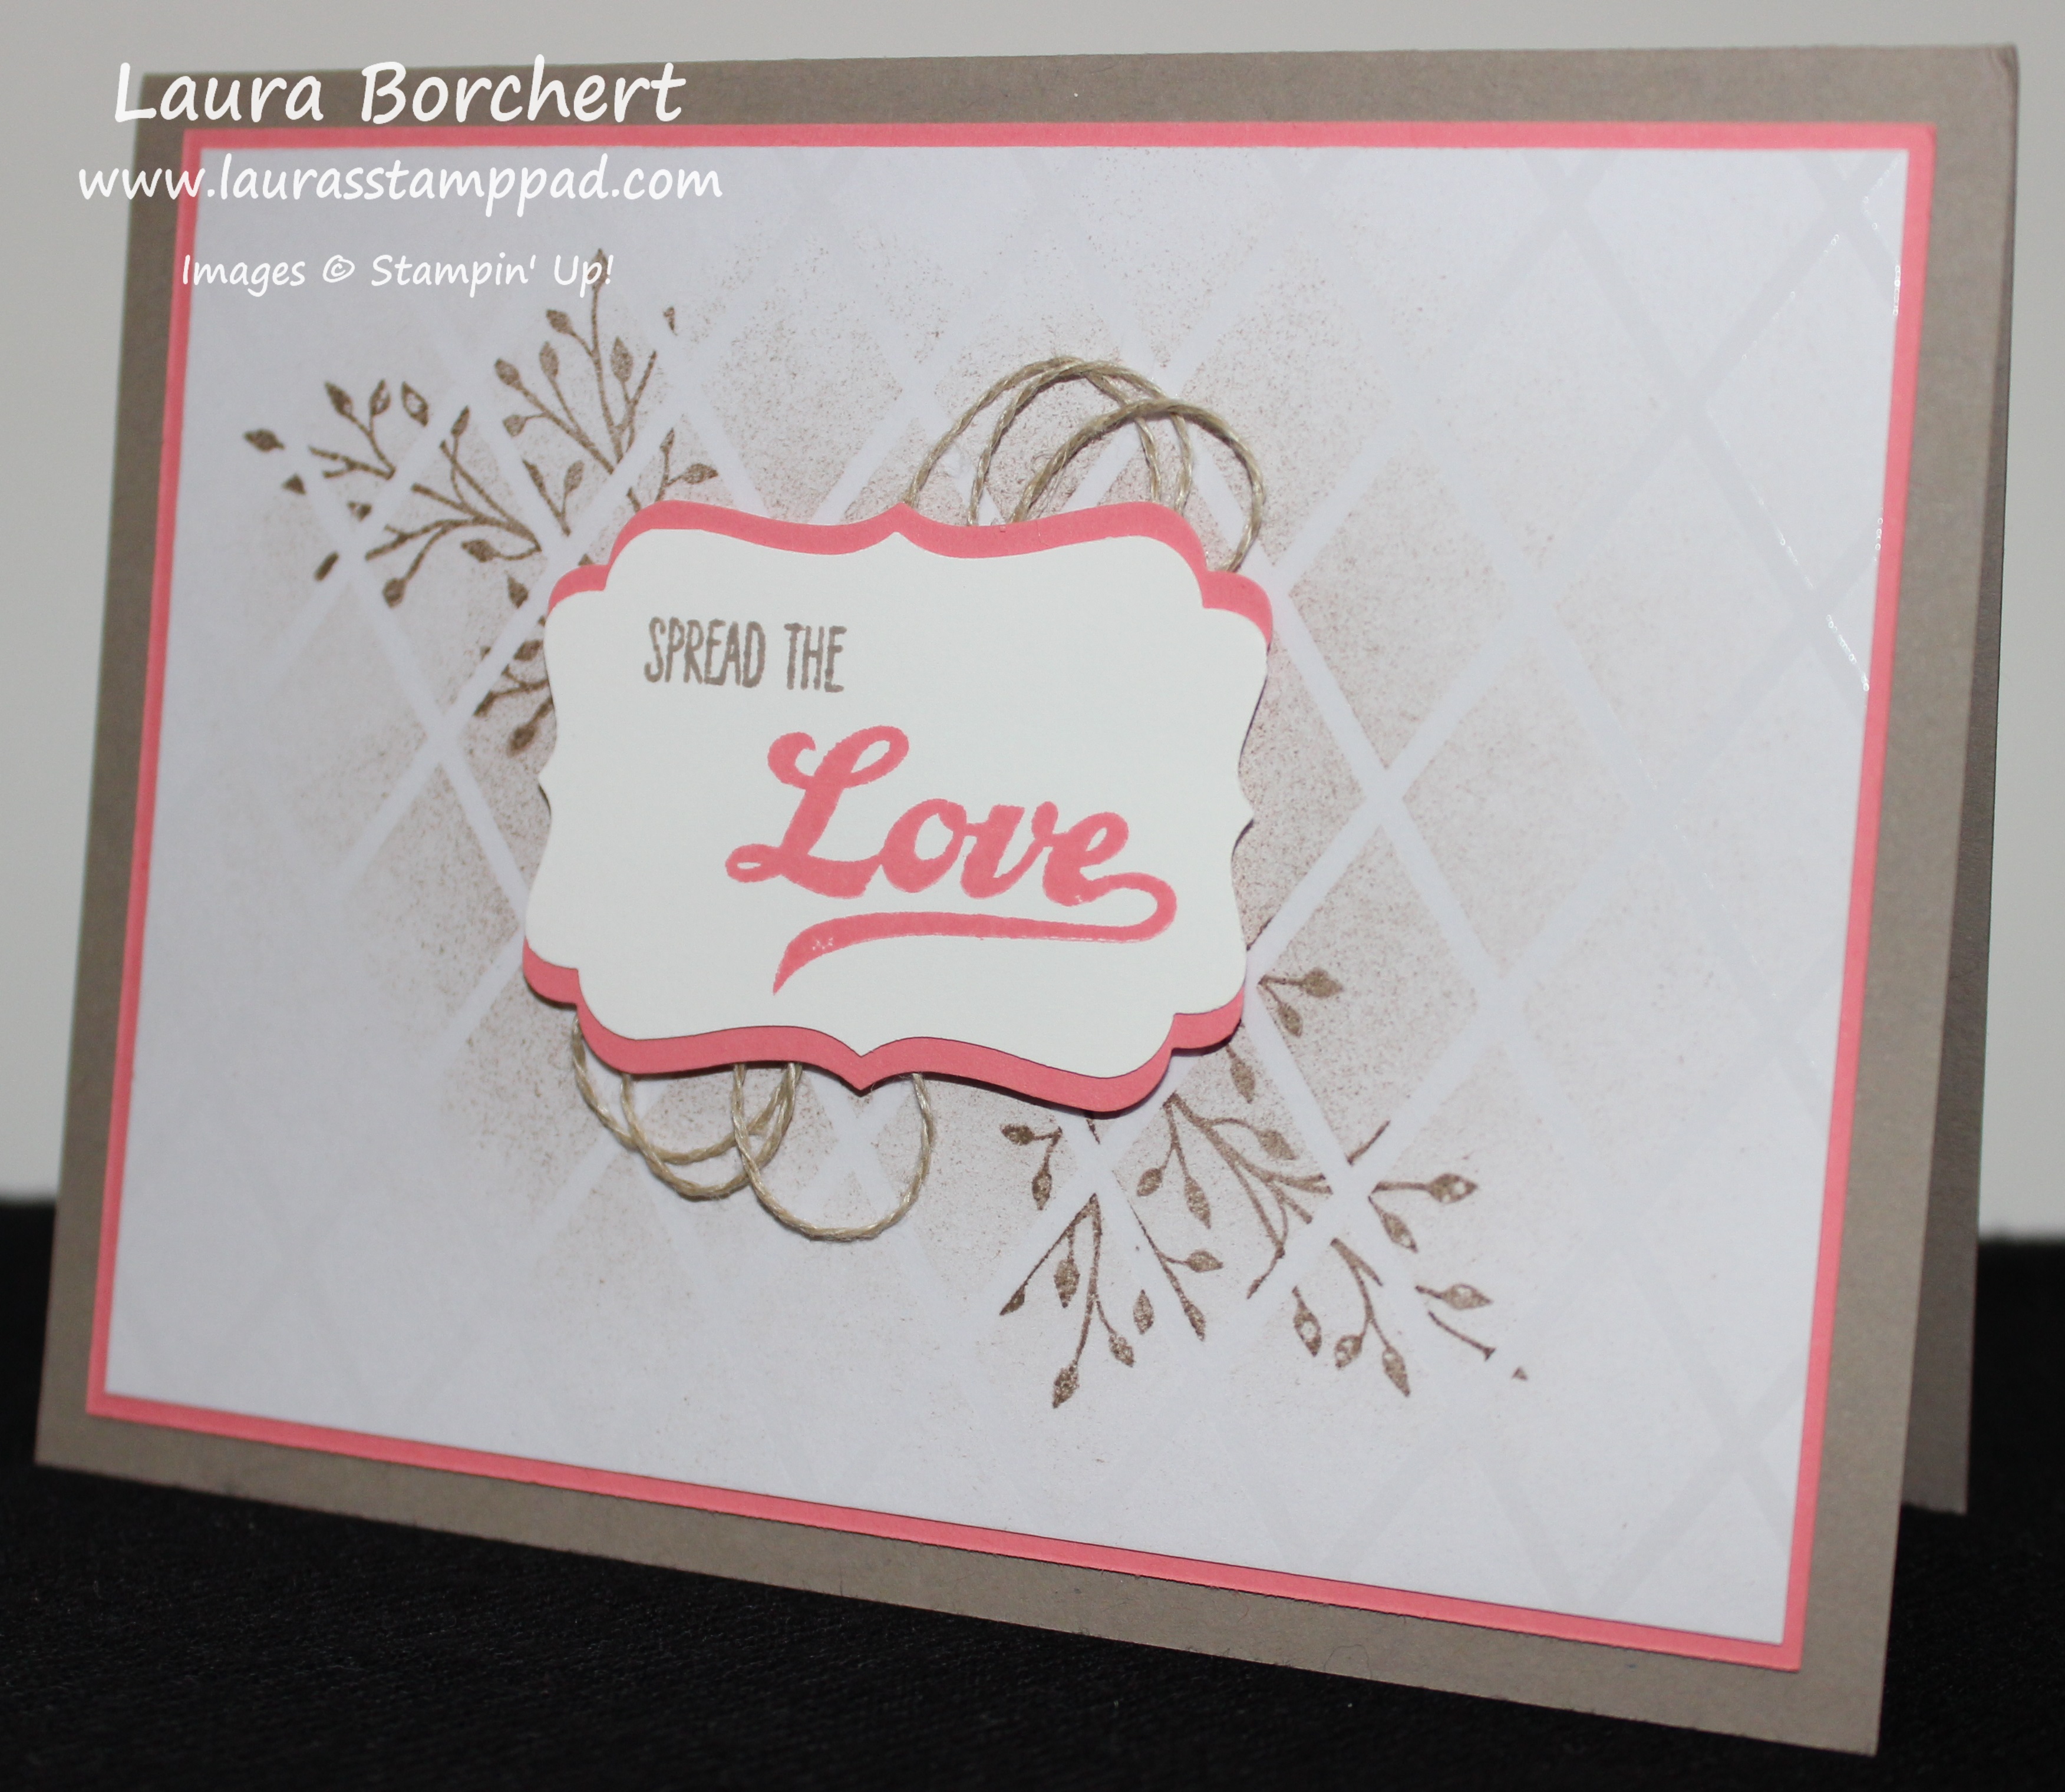
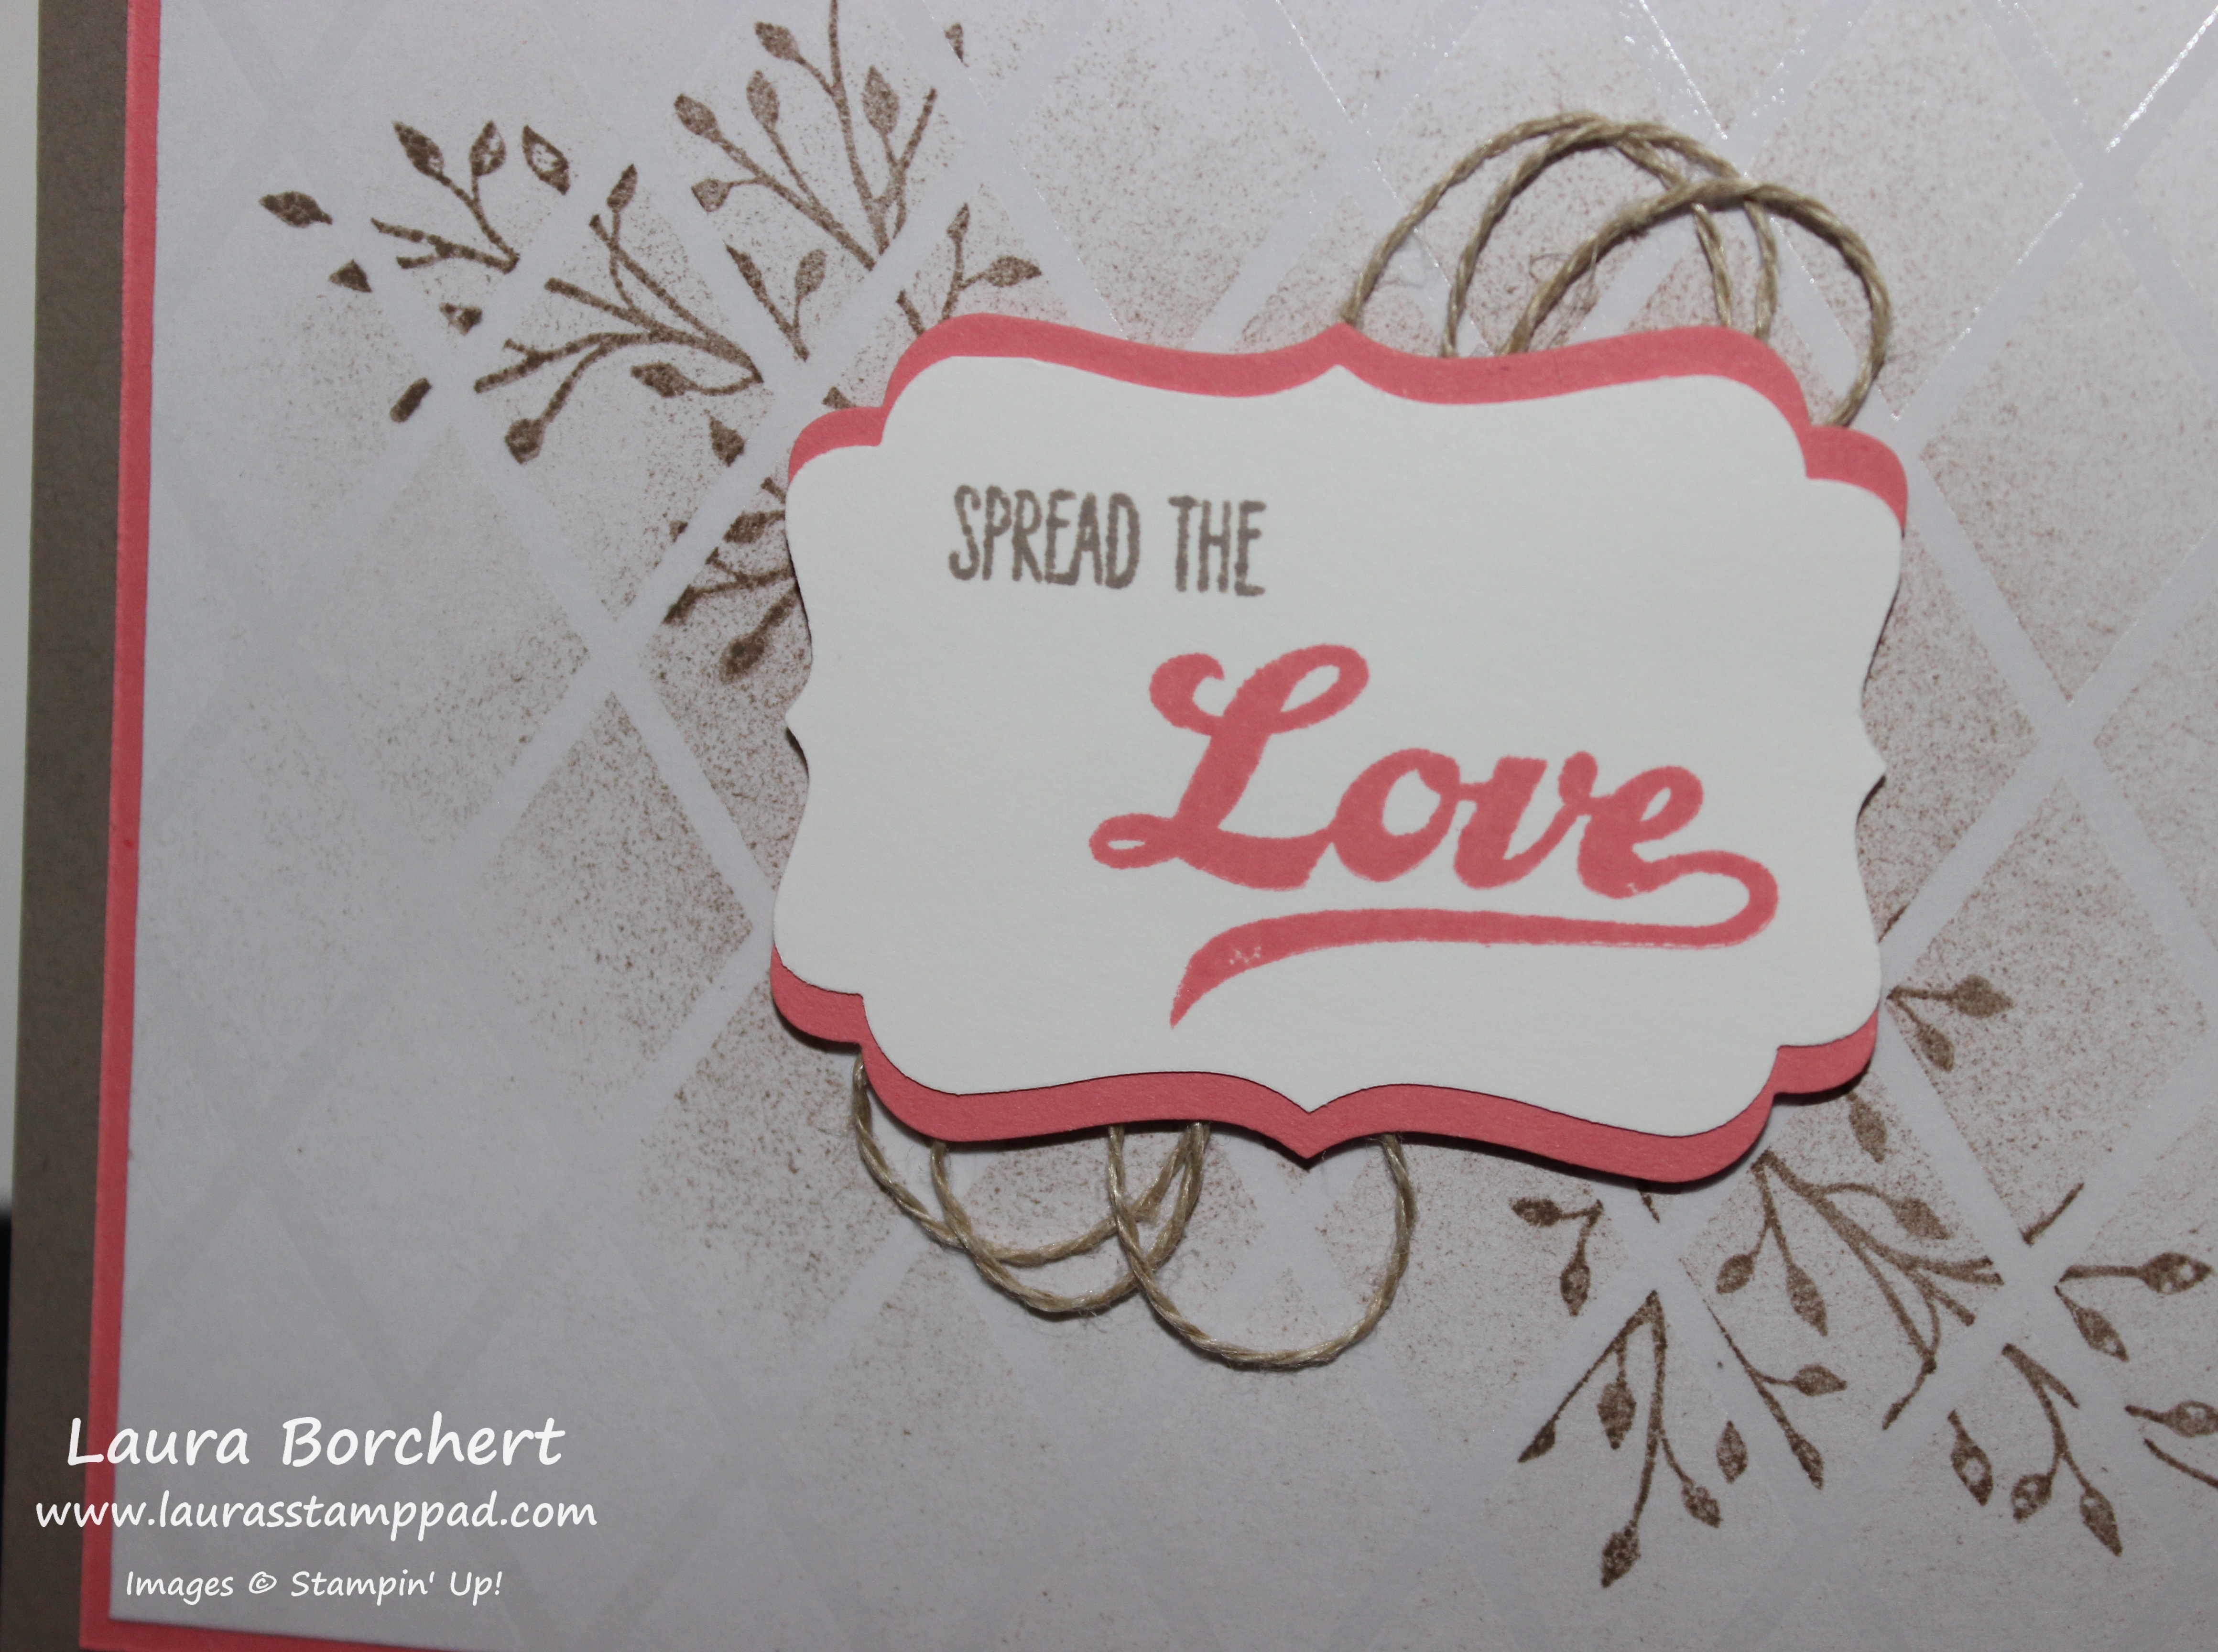
For the greeting, I stamped it from the Number of Years Stamp Set in Old Olive Ink. I punched out the greeting with the Decorative Label Punch. Then I sponged the edges with Pool Party and added it to the card front with Stampin’ Dimensionals too! I love it! I think it turned out perfectly. My Mom loves nature and has a huge garden. This was fabulous!

Do you like making cards specifically for a special someone or do you just make general cards for everyone?? Let me know in the comments below!

Happy Stampin’

~Laura


Technique Tuesday – Fall Sunrise!!!

Posted on

Happy Tuesday!!! I hope you are all having a wonderful week so far! Today I’m going to brighten it with a fabulous sunrise! Check out this beautiful card!!!

fall-sunrise, www.LaurasStampPad.com

This card gives me all the feels – cool crisp air, dew on the grass, beautiful leaves in every color, cuddling up in a hoodie, and pumpkin pie everything!!! 🙂 Hopefully you too! Let’s get started!

I started with a Crumb Cake card base and layered on a piece of Cajun Craze (5-1/2″ x 2″). The Petals & Paisley Designer Series Paper has the perfect fall colors and patterns for any project! I layered a piece of that over the Cajun Craze. It measures 5-1/4″ x 1-3/4″). I stamped the greeting from the Garden in Bloom Stamp Set in the upper left corner in Chocolate Chip Ink. Now it is time to work on the focal point. I took a piece of Very Vanilla cardstock (2-1/4″ x 3″) and started by stamping the grass along the bottom. I used the Totally Trees Stamp Set from the Holiday Mini Catalog. The long snake like image was inked in Garden Green, stamped off once and stamped on the bottom of the vanilla cardstock. I did it three times. Then I took the small circle and the sun rays and stamped them in Crushed Curry. Make sure to place a little piece of paper along the green grass to mask the bottom of the circle so it doesn’t stamp onto the grass and instead look like it’s coming up over the horizon. For the tree, I stamped it in Chocolate Chip Ink. Then I took the leaves and stamped them once in Crushed Curry and then again a little off set in Cajun Craze. You could also ink up the leaves in Crushed Curry and then use a Sponge Dauber to add a little Cajun Craze in a few spots. This gives that beautiful array of fall colors to the leaves! I layered this piece onto Garden Green cardstock (2-1/2″ x 3-1/4″) and added it to the card front with Stampin’ Dimensionals. Isn’t it stunning for all of your fall occasions!?!?!

If you would like to see this all in action, check out the Video Tutorial below or click here! Be sure to give it a thumbs up if you liked it and don’t forget to subscribe if you are new! The Totally Trees Stamp Set is lots of fun for all seasons and occasions but also you can use the images to create fun backgrounds!

Happy Stampin’

~Laura


Technique Tuesday – Z Fold Frenzy!!!

Posted on

Happy Tuesday!!! Can you believe it? The last Tuesday of September is here already but that also means I have a fabulous technique to share with you today. This one is super fun with a very high wow factor and it is super simple!!! Today I am showing the simple Z Fold Card and tomorrow I will be showing the Double Z fold card!!!

Single Z Fold, www.LaurasStampPad.com

Perfect for Fall and super fun!!! Let’s get started!

I started with a Crumb Cake card base measuring 11″ x 4-1/4″ and scored it at 2-3/4″ and 5-1/2″. These are the measurements of folding the card base in half for a normal card and then folding the front of the card back (in half) to create the “Z”. Now it is time to decorate. The front panel has a layer of Cajun Craze cardstock measuring 2-1/2″ x 4″ and Very Vanilla measuring 2-1/4″ x 3-3/4″.

Totally Trees, www.LaurasStampPad.com

The inside panel has a layer of Cajun Craze cardstock measuring 5-1/4″ x 4″ and Very Vanilla measuring 5″ x 3-3/4″. I stamped with the Totally Tree Stamp Set from the Holiday Mini Catalog. For the grass, I stamped the snake looking image in Garden Green (stamped off once) and went 3 layers high. For the inside panel, you will need to stamp the majority on the left and then just fill in on the right. Overlapping is fine because it just adds more color variation. Once you have your base green, take the grass stamp and stamp in full strength Garden Green Ink all over to fill in. This gives great texture to the yard. I stamped the trees in Crumb Cake Ink. Then for the leaves, I took the full tree leaf image and inked it up in Delightful Dijon and then pounced on the stamp with a Cajun Craze Sponge Dauber. Just pounce in 3-4 spots on the stamp and then stamp it down over the trees. This will give that variation of color for the leaves without having to stamp a few times. After stamping the base leaves, I took the small 4 leaf stamp and added in leaves falling and on the ground in Delightful Dijon, Cajun Craze, and Cherry Cobbler. The greeting is from the Tin of Cards Stamp Set and I stamped it in Delightful Dijon Ink. Now you have a fabulous fall card for any occasion!

Fall Leaves, www.LaurasStampPad.com

If you would like to see the Z Fold and Double Z Fold in action, check out the Video Tutorial below or click here. Don’t forget to give it a thumbs up if you liked it and be sure to subscribe if you are new. Subscribe to my blog here as well so you don’t miss the Double Z Fold card tomorrow!

Happy Stampin’

~Laura


Technique Tuesday – Purple & Gold!!!

Posted on

Happy Tuesday!!! That means I have a fabulous technique to share with you today – heat embossing! Many of you may know all about heat embossing but I thought I would talk about the tools, steps of heat embossing and tips along the way as a refresher and for those who have never done it before!!!
Purple & Gold, www.LaurasStampPad.com

Purple and Gold are so rich and fabulous. I love that deep color…..and you know I am a “Brights” girl!!! I played with some masking techniques on this one and I have some tips for you.

I started with a piece of Whisper White measuring 4″ x 5-1/4″ and I masked off the square. This can be any size or shape you would like. TIP: Use printer paper and not a Post-It Note because the sticky from the Post-It stays on the cardstock enough to hold embossing powder. So just cut strips of paper and lay them in a square or cut a square out of a piece of paper. Be sure to secure your cardstock to your surface as well as securing the mask to the surface. You don’t want the cardstock to move underneath your mask and you don’t want your mask to move. For this card, I actually colored in the square with a Sponge Dauber and Elegant Eggplant Ink but you could always use a Sponge Brayer! You can add as much color as you want for the perfect shade. Keep going if you want a darker look. Be sure to allow the ink to dry before embossing since you are adding so much ink in one spot. After a minute or so of drying (or use the Heat Tool to dry it), now it is time to emboss. Start by running the Embossing Buddy over the cardstock to get rid of an static on your cardstock. Tap off an excess powder and then stamp your image in VersaMark Ink. I stamped the flourish from the Flourishing Phrases Stamp Set. After stamping the image, you will pour the embossing powder of your choice over the image. I used Gold Embossing Powder. Tap off the excess powder and heat the image with your Heat Tool. TIP: Don’t wave the heat tool over your image because that is just dispersing the heat and then it will take longer. Start on one side or corner and once it starts to melt, just move your way around the image slowly until it is all melted. The first time you use the tool each time will take a bit longer than if you embossed 5 at one time because it takes a bit to warm up. So if you are making multiples, the first one might take a minute to melt but the rest will take 45 seconds.

Gold Flourish, www.LaurasStampPad.com

Now that you have your image embossed it is time to finish it off. I stamped the greeting from the Number of Years Stamp Set and added some Gold Metallic Thread for texture and a little more gold!

If you would like to see Heat Embossing in action, check out the Video Tutorial below or click here. Be sure to give it a thumbs up if you liked it and don’t forget to subscribe if you are new!

Do you like heat embossing on your projects? Let me know in the comments below! It is one of those techniques that looks amazing but sometimes you don’t want to haul out the tools or you forget because they are all in the drawer. I like embossing a lot on holiday cards because it looks so fabulous!

Happy Stampin’

~Laura


Fancy Flourish!!!

Posted on

Flourish Sugarplum, www.LaurasStampPad.com

Happy Friday!!!! We made it through the week and are ready for the weekend! I thought I would share a quick and simple card that could be used for many different occasions. It can also be created in a large array of colors!!! It is all up to you….or what you have on hand!

I started with a Sweet Sugarplum card base. I took a piece of Whisper White (3-3/4″ x 5″) and stamped the flourish image from the Timeless Textures Stamp Set all over the background. I started with the image that is below the greeting. You want to pick a center location but not the exact middle. This is because starting at the side is hard to see a true pattern to follow and finding the dead center is too hard. So I picked the lower middle-ish area. Stamp the one down, then stamp above and below it. Then stamp to the left of it “centered” between the two in that first row. So it should look like you have up and down rows of the image that are off-set. I hope that makes sense! 🙂 For the greeting, I used a scrap piece of white measuring 1″ x 3-3/4″ and stamped the greeting from the Love & Affection Stamp Set. I thought it needed a little more to stand out so I brushed the edges with a Sponge Dauber and Sweet Sugarplum Ink. This is a great way to add color and make it look like it is layered cardstock but it isn’t. I added the greeting to the card and finished it off with a few Pearls! Simple and fabulous! I really like the monochromatic look of this card. It makes it super simple and a lot less items to pull out when creating.

Do you prefer monochromatic cards or ones with lots of colors? Let me know in the comments below!

Happy Stampin’

~Laura


Fireflies in Summertime!!!

Posted on

Fireflies in a Jar, www.LaurasStampPad.com

I found this sample on Pinterest and fell in love so hard, I had to buy the Star Confetti Punch just for this card! I wish I could give credit to the amazing person who created it but there wasn’t a watermark or link. So whoever it was, just know I LOVE it and thank you so very much for the idea!!!

I started with a Crushed Curry card base. Then I cut two pieces of Gold Foil Paper measuring 4″ x 1-1/2″ and two pieces of Night of Navy cardstock measuring the same. I punched out the navy piece with the Star Confetti Punch and then glued it onto the Gold Foil with the Fine Tip Glue Pen. Next, I took a piece of Whisper White cardstock (4″ x 5-1/4″) and stamped the green stem from the Jar of Love Stamp Set in Pear Pizzazz along the bottom 1-1/2″ up. I placed the navy piece to the side of the white as a guide for how high I needed to stamp. I stamped the jar and the lid from the Jar of Love Stamp Set in Night of Navy Ink. I stamped the fireflies/lightening bugs in Basic Black Archival Ink all over the card. I colored in the bug booty with a Crushed Curry Marker and then I took a Sponge Dauber in Crushed Curry and added the glow! Now that you are done stamping, you can adhere the stars to the top and bottom and then adhere this piece to the card base! How simple and fabulous?!?!?!

Lightening Bugs, www.LaurasStampPad.com

Lightening bugs remind me of summer. As kids, we always use to catch them and put them into a jar every evening. We played outside all summer long until it was dark out and then we had to go in to take a bath and go to bed. I love summer time so much and wish it wasn’t coming to an end!

Happy Stampin’

~Laura

Don’t forget about the Paper Pumpkin BOGO Sale for new subscribers!!! Click here to get started and be sure to enter the Promo Code: BOGO

PP_BOGO_Facebook_US, www.LaurasStampPad.com


Technique Tuesday – Masking a Scenery!!!

Posted on

Happy Tuesday everyone!!! We made it through Monday and now it’s time to check out this amazing technique! I am loving the new Sponge Brayers and all the fun you can have with them! Check out this beauty using the masking technique!!!

Masking Scenery, www.LaurasStampPad.com

That simple, yet amazing color of green grass and blue sky just makes this card so beautiful! I love it. Then you have those white lines of where the color stops and it just looks perfect!

SUPPLIES NEEDED: Sponge Brayer, Marina Mist Ink, Pear Pizzazz Ink, Lovely As A Tree Stamp Set

You will start with a piece of Whisper White (4″ x 5-1/4″) and mask off a section of the cardstock for your coloring and trees. Make sure it is wide enough to stamp the trees. You can use scrap paper as a mask but I found Post-It Note Tape so it is sticky paper tape (that comes off without ripping your cardstock) that holds perfectly. Thank you to Kim Schultze for all the tips and tricks at a recent demonstrator gathering! 🙂

Post It Note Tape Masking, www.LaurasStampPad.com

I added the top piece level with the top of the cardstock and the top of the tape. Then for the second piece I went down about 3/4 of the way of the cardstock. Again, you can go as wide as you wish, just make sure it is big enough for your stamped image. Then you will take a Sponge Brayer and Marina Mist Ink and add it to the top half of the masked off space. Just lightly roll over the ink and then lightly over the cardstock until you get the desired color. Pressing hard won’t make the color darker, just keep going back to the ink for a darker color. Once you have the desired blue, you will move to the bottom section of the masked space and add Pear Pizzazz Ink. Be sure to overlap the colors a bit so it fades nicely together and doesn’t look like stripes of blue and green. Once you have your desired shade of green, you are all set. You can remove the scrap paper or Post-It Note Tape and complete your card. I stamped the trees from Lovely As A Tree in Chocolate Chip. The greeting is from the Thoughts & Prayers Stamp Set. I thought it needed a little bit more so I cut a small piece of Burlap Ribbon and added it to the top left corner. I adhered it on the front with a little Tear & Tape and secured it on the back with Stampin’ Dimensionals. I added more dimensionals on the back and adhered it to the Marina Mist card base!

I love it! This makes a great man card but also a simple and elegant card for thinking of you, sympathy, and just about any occasion. It is such a beautiful scenery! You could always use this same technique to create a colorful background and stamp flowers over the top or any other favorite image. Stay tuned as I have a lot more masking samples to share with you! 🙂

If you would like to see this technique in action, check out the Video Tutorial below or click here. Don’t forget to give it a thumbs up if you liked it and be sure to subscribe if you are new!

Happy Stampin’

~Laura

Don’t forget about the Paper Pumpkin BOGO Sale for new subscribers!!! Click here to get started and be sure to enter the Promo Code: BOGO

PP_BOGO_Facebook_US, www.LaurasStampPad.com


Precious Ombre Pinks!!!

Posted on

Ombre Sponge Brayer, www.LaurasStampPad.com

I loving the Pink and Yellow combination of this card with that little pop of copper bling in the washi tape!!! I love it!!!

I started with a piece of the Irresistibly Yours Designer Series Paper measuring 5″ x 3-3/4″. I used 3 different colors for the background (although it is hard to tell). The colors are Flirty Flamingo, Calypso Coral, and Watermelon Wonder and I added them ot the designer paper with a Sponge Brayer. I went diagonal and just rolled over the paper until I got the shade I loved. Remember pressing hard into the ink or onto your paper won’t make the color become darker. Just lightly roll in the ink and then lightly over the paper. If you want darker, just repeat that same move. Be sure that when you are moving to the next color, you will want to overlap the colors so they blend and don’t look like stripes. After you are done adding your color, wipe off the excess ink with a paper towel to make the embossed image POP! I added some of the Affectionately Yours Designer Washi Tape along the bottom (copper dots). Then, I layered this onto Daffodil Delight (4″ x 5-1/4″) and then onto a Flirty Flamingo card base! I die cut the flower from the May Flowers Framelit Set in Watermelon Wonder and added it to the front of the card with the Fine Tip Glue Pen! For the greeting, I used the Greatest Greetings Stamp Set and punched it out with the Classic Label Punch. I added the greeting to the card with Stampin’ Dimensionals! I love it! This card would be perfect for any occasion – baby, birthday, wedding, just because!!!

What color combination would you use for this card? Pinks like mine? Blues? Greens? Purples? Multi-color? Let me know in the comments below!!!

Happy Stampin’

~Laura

Don’t forget about the Paper Pumpkin BOGO Sale for new subscribers!!! Click here to get started and be sure to enter the Promo Code: BOGO

PP_BOGO_Facebook_US, www.LaurasStampPad.com


Ridiculously Happy!!!

Posted on

Ridiculously Happy, www.LaurasStampPad.com

This is so me right now!!! My Birthday Month is in full swing. I just got home from a fabulous family vacation at the lake. Demonstrators can pre-order Holiday Mini Catalog items!!! PS: If you can’t wait till next month, you can join Stampin’ Up and pre-order Holiday Mini items in your Starter Kit. Click here to get more information or reach out to me any time! 🙂 August makes me ridiculously happy!!!!

For this card, I started with a Crushed Curry card base. Then I cut a piece of Elegant Eggplant measuring 4-1/8″ x 5-3/8″, a piece of Irresistibly Yours Designer Series Paper measuring 4″ x 4″ and Whisper White measuring 4″ x 1-1/4″. I stamped the greeting from the Love & Affection Stamp Set onto the Whisper White piece. Then I added some flowers to either side which are from the Falling Flowers Stamp Set. This stamp set has the same flower images as the Designer Series Paper. I added the Whisper White to the top section of the Elegant Eggplant. Then I took the Irresistibly Yours Designer Paper and colored in the flowers with my markers – Elegant Eggplant, Crushed Curry, and Emerald Envy. I thought it needed more color so I lightly rolled over the entire piece with the Sponge Brayer and Emerald Envy Ink. Afterwards, I thought I shouldn’t have done that over the Crushed Curry because it turned it sort of dirty. I let all of my class attendees know this and many used an orange or pink rather than the yellow and they turned out amazing!!!! I love how you can add color in so many different ways to this paper. Don’t forget to wipe off excess ink with a paper towel. Now that you are done coloring, you can adhere this piece to the lower portion of the eggplant cardstock (overlapping the white). I added a piece of Emerald Envy Ruched Ribbon around the split in paper and then added it to the card front! I love it!

Let me know in the comments below what your favorite way to color the Irresistibly Yours Designer Series Paper – stamping, Sponge Dauber, Sponge Brayer, Marker, or Spritzer? My favorite is the Sponge Brayer. Click here or here for more samples.

Happy Stampin’

~Laura


Technique Tuesday – Stamp Resist!!!

Posted on

Happy Tuesday!!! I hope you are all having an amazing week! I have a fabulous technique to share with you today!!! I am in love with this card so hard – the colors, the sweet greeting, and the amazing look!!! I hope you love it too!

Spread The Love, www.LaurasStampPad.com

Isn’t it amazing??? I love how the branches look like they are behind a fence or something with that emboss resist!! Let’s get started on how simple this card is!

SUPPLIES NEEDED: Irresistibly Yours Designer Series Paper, Sponge Brayer, Greetings & Embellishment of Choice

I started with a piece of the Irresistibly Yours Designer Series Paper measuring 5″ x 3-3/4″ and Tip Top Taupe Ink. Using a Sponge Brayer, you will start in the middle and roll out half way, turn, start in the middle and roll out half way. This is how I got that rustic/dirty center but kept the edges fairly clean. I went all the way around the card from the middle and then at the end I lightly went over the entire piece of cardstock just for a light look. Then I used the branch from the Jar of Love Stamp Set and inked it up in Tip Top Taupe and stamped it diagonal to the upper left and lower right. You will want to make sure that the entire tail end of the branch doesn’t stamp down because it might show on the other side of your greeting. If you go with a larger greeting, you will be fine. Be sure to wipe off any excess ink with a paper towel as it sometimes pools on top of the embossed portion. Then I layered it onto a piece of Flirty Flamingo (5-1/8″ x 3-7/8″) and then onto a Tip Top Taupe card base. Now you can add your greeting of choice. I went with the Jar of Love Stamp Set since it was already out. I stamped the “Love” in Flirty Flamingo and the “Spread The” in Tip Top Taupe onto Whisper White scraps. I punched it out with the Decorative Label Punch and added a layer of Flirty Flamingo behind it. Click here to see how easy it is to do that. I added a few loops of Linen Thread behind the greeting and secured it with Stampin’ Dimensionals. I love it for that rustic, sweet, messy look!!!

Emboss Resist, www.LaurasStampPad.com

If you would like to see this in action, check out the Video Tutorial below or click here! Don’t forget to give it a thumbs up if you liked it and be sure to subscribe if you are new!!!

If you would like to see more samples using the Irresistibly Yours Designer Series Paper, stay tuned. I have been playing with this paper a lot and have some great samples to share!!!

Happy Stampin’

~Laura

Click here to start shopping and earning Bonus Bucks through the end of July!

Bonus Days