Hey Chick Sale-A-Bration Stamp Set!!!

Posted on

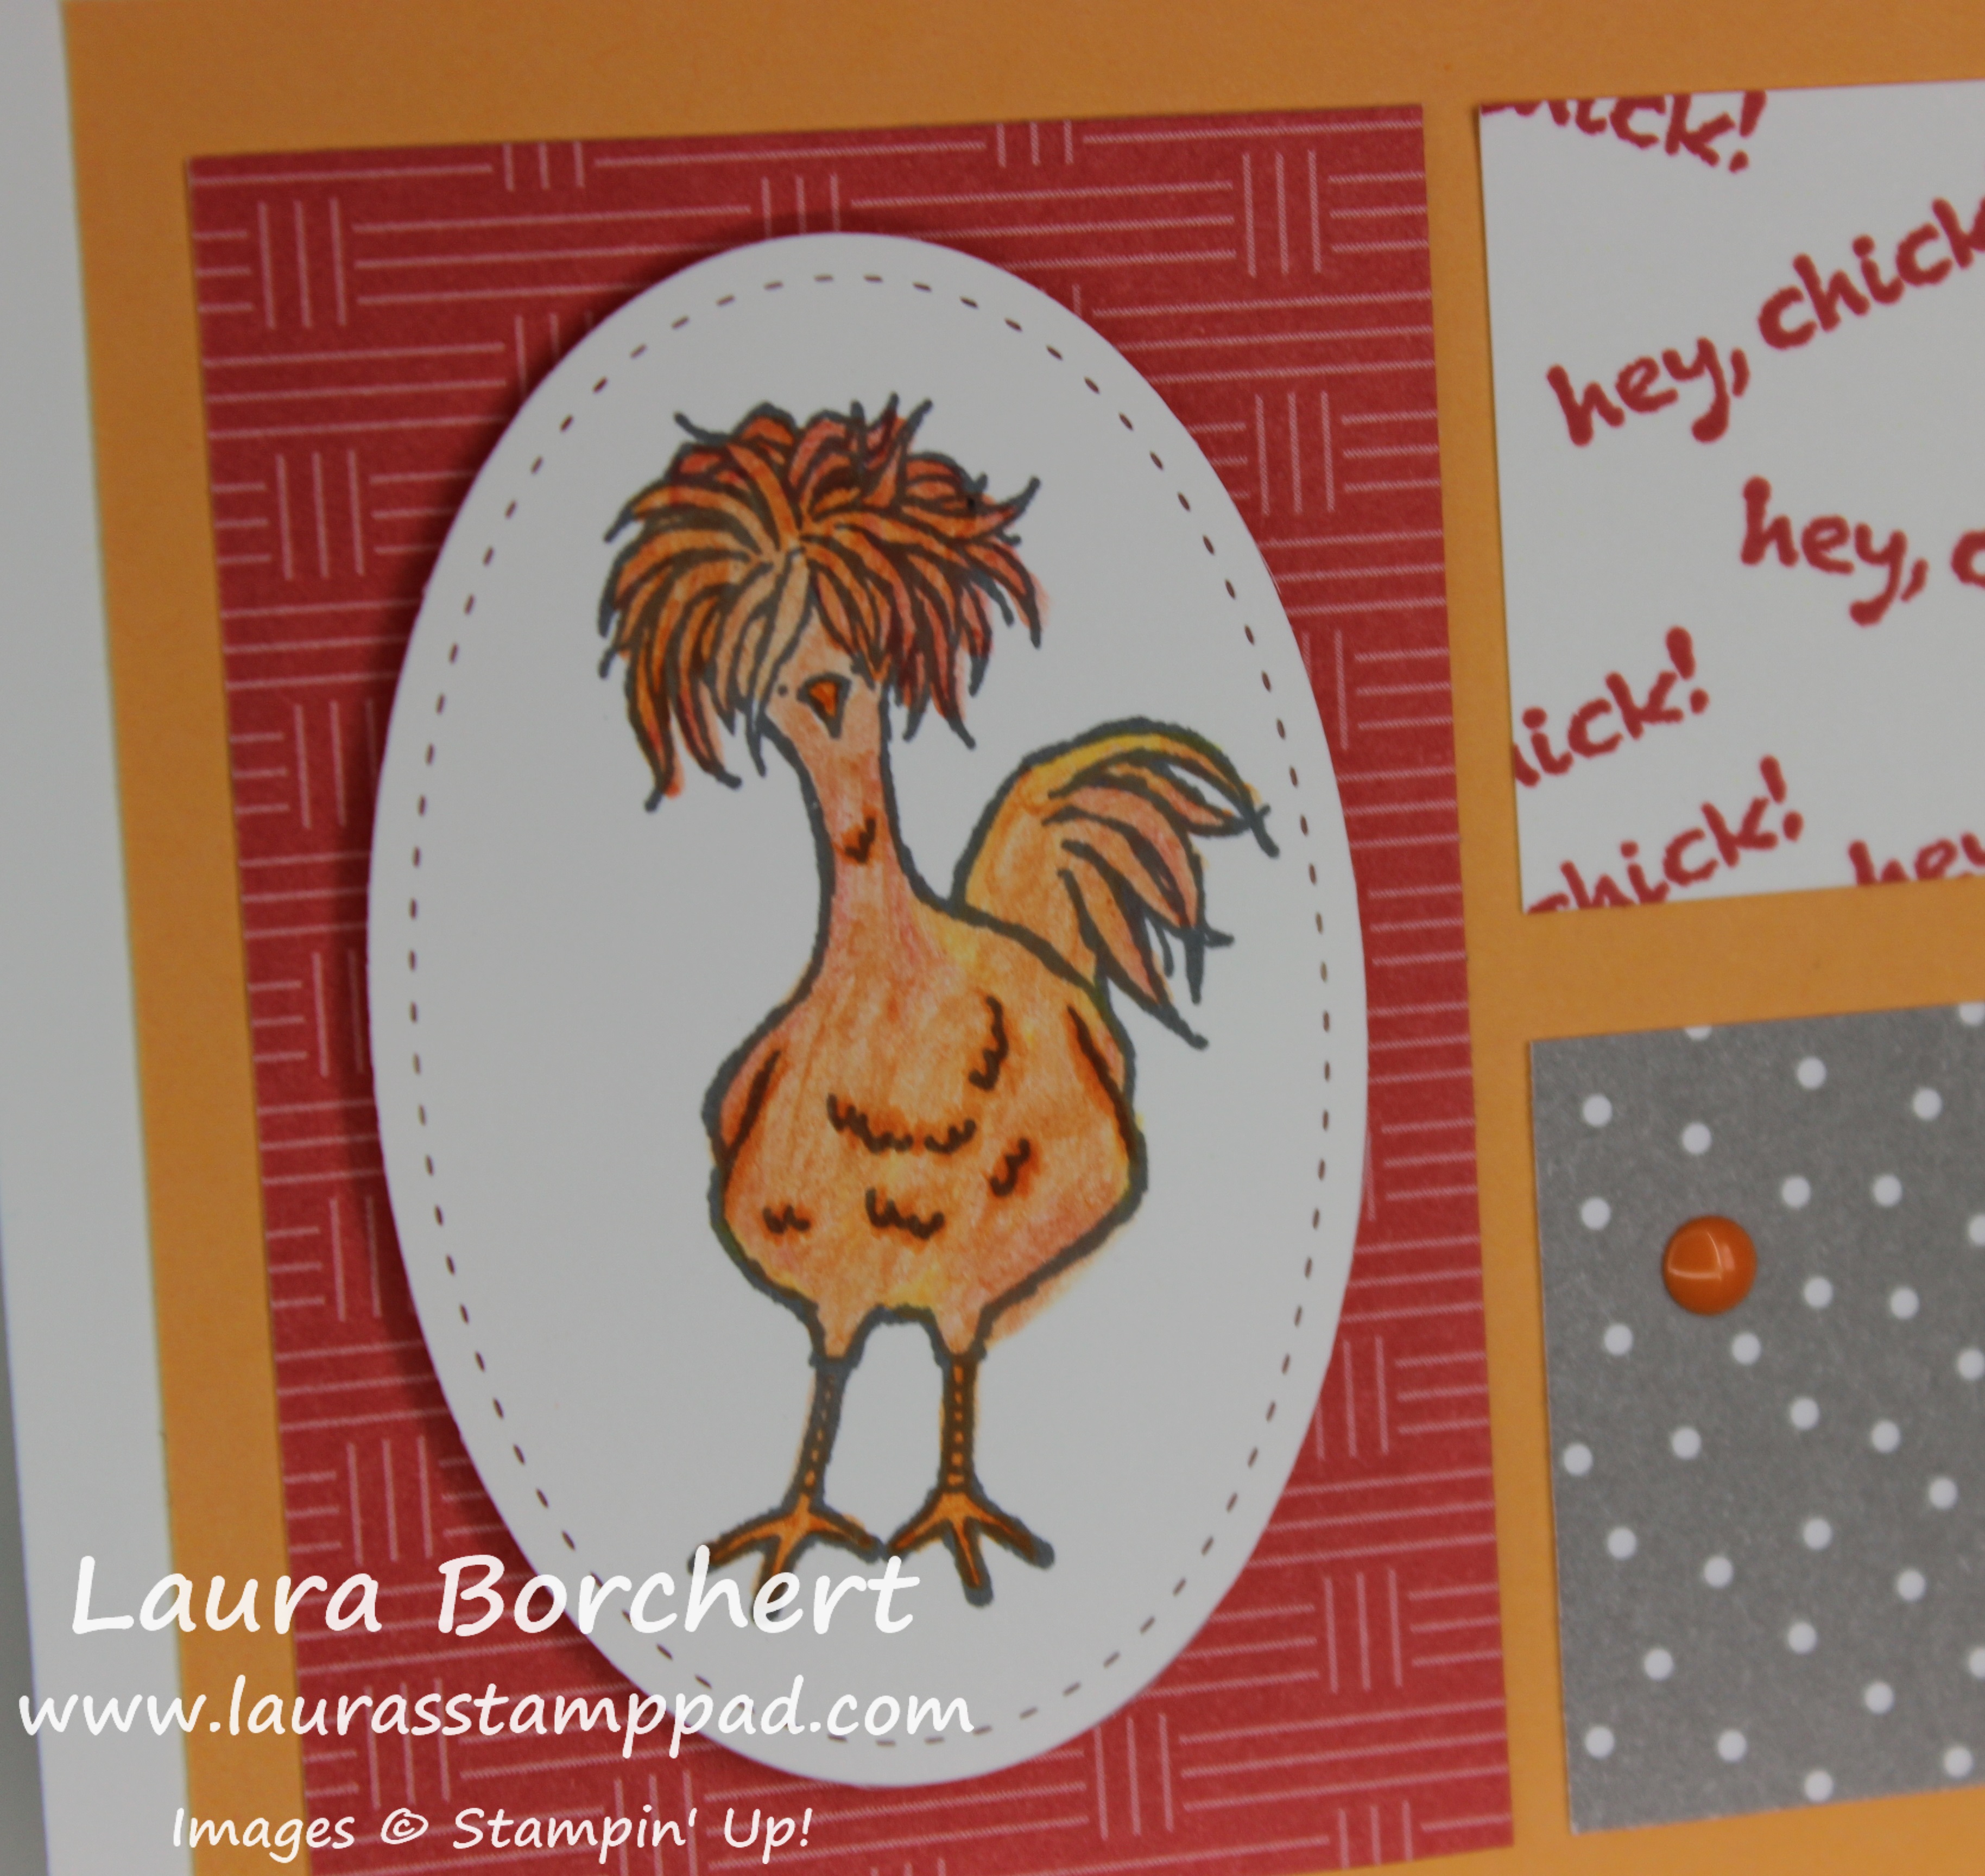
The Hey Chick Sale-A-Bration Stamp Set has been super popular….probably because of  this crazy fabulous one!!! He is my favorite of all of them! I love the greetings as well! They are just so fun and different!!!
Hey Chick, www.LaurasStampPad.com

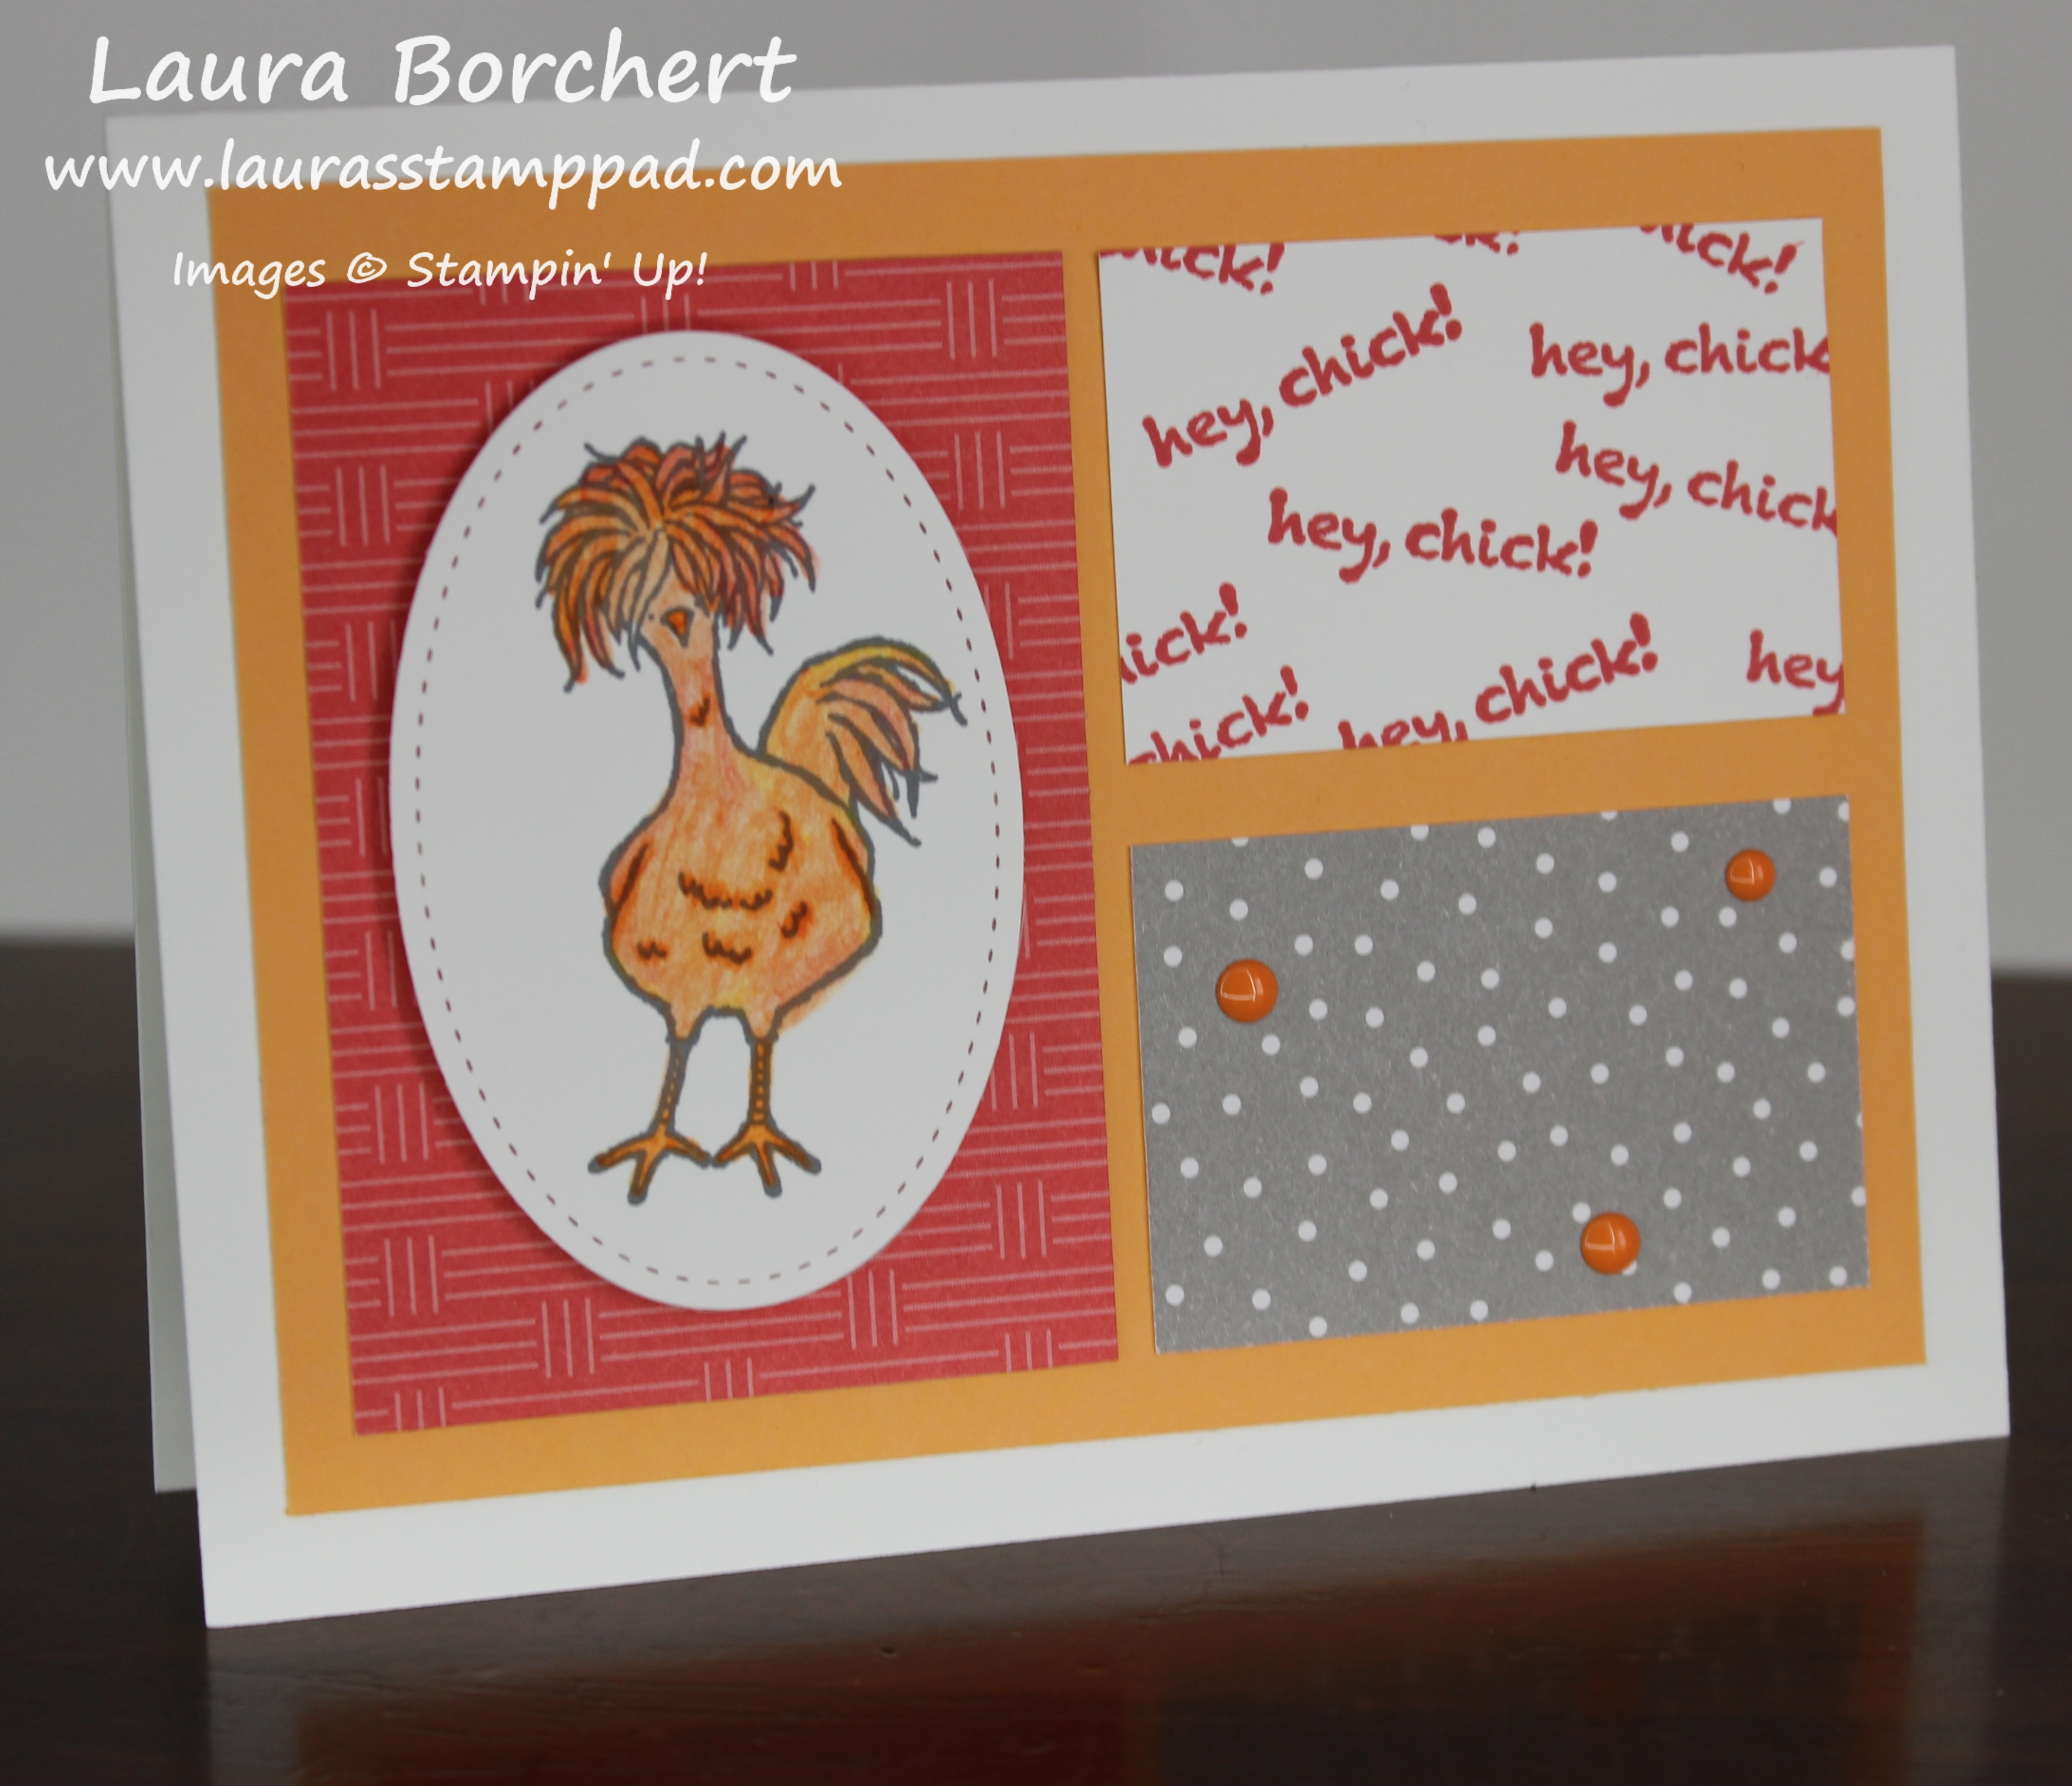
Let’s get started on this fun card!!! I started with a Whisper White card base and added a piece of Peek-A-Boo Peach measuring 3-3/4″ x 5″! Then I took a piece of Whisper White (2-1/4″ x  1-1/2″) and stamped the greeting Hey Chick all over in Watermelon Wonder. I cut out 2 pieces of the Carried Away Designer Series Paper (Sale-A-Bration item) measuring 2-1/4″ x 1-1/2″ (for below the greeting) and 2-1/4″ x 3-1/4″ for under the chick! It is easiest to line up all the pieces on the card and then pick one up, add adhesive, and place it back down. This way you know your spacing is all good!!

For the chick, I die cut one of the ovals from the Stitched Shapes Framelits. I stamped the chick from the Hey Chick Sale-A-Bration Stamp Set in Basic Gray Archival Ink. I always like to use gray over black for that softer look! Then using the Daffodil Delight, Pumpkin Pie, and Real Red Watercolor Pencils, I colored that crazy chicken! I used the Blender Pens to blend the colors together! I attached this to the card with Stampin’ Dimensionals for a little pop! To finish it off, I added a few Pumpkin Pie Enamel Shapes.

Crazy Chicken, www.LaurasStampPad.com

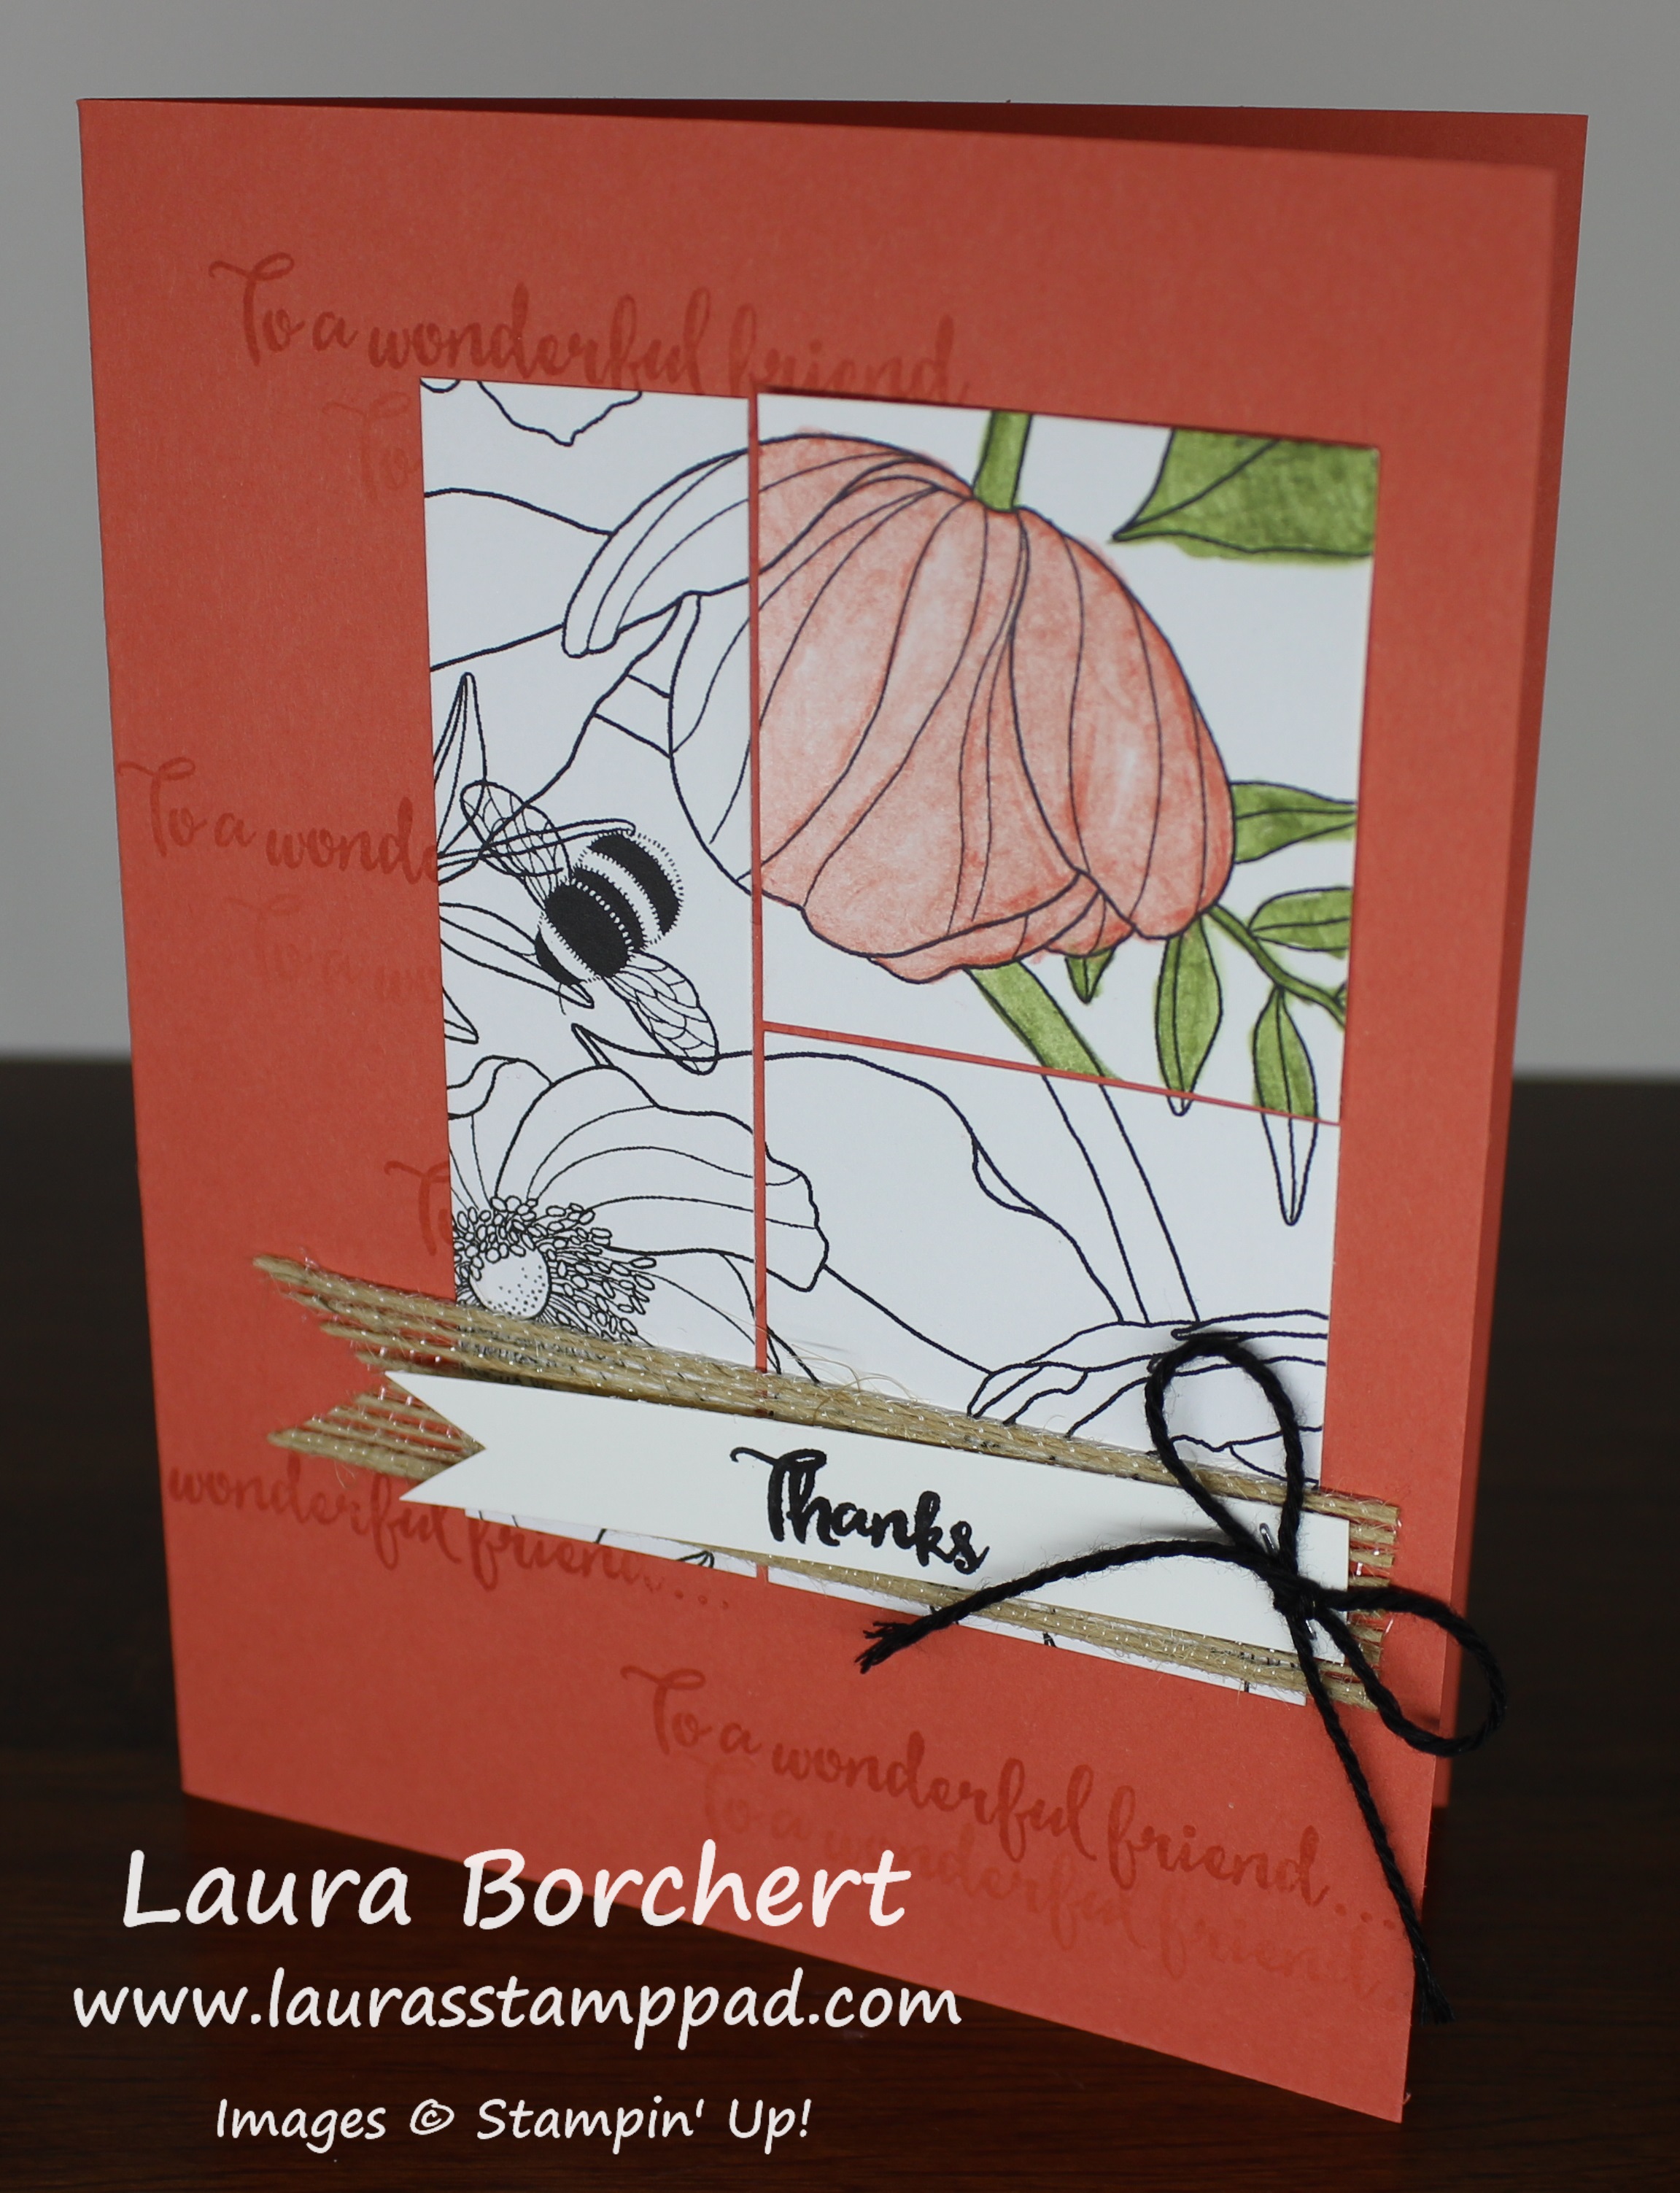
I love the coloring blocking and the use of Designer Series Paper on this card! I need to keep this style in mind for future cards too! 🙂 Do you like to reuse a certain card style with lots of different card types and stamp sets?? Let me know in the comments below!

Don’t forget that Sale-A-Bration ends on Friday, March 31st!!! Click here to see the 3 different brochures of items you can pick from! There are the originals (minus the card tin), the extras that came out in February (minus the Glimmer Paper), and the items they released last week that are in the Occasions Mini Catalog (minus the embossing folders). Items are going fast and while supplies last so don’t wait to place you order. Click here to start shopping! You will earn a free item for every $50 you spend!

Happy Stampin’

~Laura


Delicate Detail Butterflies are Perfect For Spring!!!

Posted on

Spring is here and these Delicate Detailed Butterflies are perfect for all your cards right now! I love the colors and different styles of lace!!! Let’s get started on how I created this!

Delicate Detail Butterfly, www.LaurasStampPad.com

I started with a Pear Pizzazz card base. Then I took a scrap piece of Very Vanilla (big enough for my butterfly framelit) and stamped each of the lace details from the Delicate Details Sale-A-Bration Stamp Set! You can space them super close together or farther apart. It is all up to you! I did a few more after this sample and found I liked it much better when they were close together. The colors I used are Wisteria Wonder, So Saffron, Pear Pizzazz, Pool Party, and Blushing Bride. These are all in Subtles Collection! Once I had my lace background all complete, I die cut out the butterfly with the Bold Butterfly Framelits! Using the other detailed butterfly in the set, I die cut a Pool Party butterfly!

Next, I took a piece of So Saffron cardstock (4″ x 5-1/4″) and stamped the greeting from Suite Sentiments Stamp Set from the Occasions Mini Catalog in Pear Pizzazz Ink. I wrapped some Gold Natural Trim around the cardstock and adhered it to the card base with Stampin’ Dimensionals. Finally, I added the two butterfly to the card front. For the large butterfly, I used Stampin Dimensionals and for the smaller one I used the Fine Tip Glue Pen. For just a little bit more bling, I added some Gold Dazzling Details down the center of the blue butterfly! Be sure to set this aside to allow the glitter to dry!

This card would make a great Easter Card as well! Don’t forget there is only ONE WEEK left of Sale-A-Bration and Stampin’ Up added new catalog items this week that you can redeem as your Sale-A-Bration item with every $50 order!!! So you can pick from any of these items (minus the card tin which is sold out) or these items that came out in February (minus the Glimmer Paper) or any of these catalog items!!! There are so many fabulous goodies to pick from!! Click here to start shopping and earning Laura’s Loyal Stampers Stickers!

Have a wonderful weekend and I’ll see you back here on Monday!

Happy Stampin’

~Laura


My Picks for the Stampin’ Up Starter Kit with the Sale-A-Bration Promotion!

Posted on

Today, I thought I would share my picks for the Stampin’ Up Starter Kit during the Sale-A-Bration Promotion! This was actually really hard for me to pick so I totally understand why it might be hard for you as well!! Here is what I came up with…..

My Picks for the Stampin' Up Starter Kit, www.LaurasStampPad.com

During Sale-A-Bration, you can join Stampin’ Up! (and my Fabulous Friends Team) for just $99.00 (plus tax)! You get free shipping ($10 value), $125 in any product you wish, AND 2 Stamps Sets of your choice (any dollar value, $104 value). That’s a $239 value for just $99!!! There is no obligation once you sign up. You can do as little or as much as you wish as a demonstrator – enjoy the discount yourself and never sell to others, place orders for you and your friends, or create a business. Whatever you wish you do, you can do! That’s the best part of it all! Click here to join now!

So now here are my picks for the Stampin’ Up Starter Kit for the seasoned stamper that has the basics! The stamper who has been having fun for years but decided to enjoy that discount. Maybe you just couldn’t pass up this amazing deal!

~My 2 FREE Stamp Sets: Flourishing Phrases Stamp Set and Beautiful You Stamp Set – both great sets with greetings and images! You can go with Clear like I did or pick the Wood Style!

~For the $125 in product: Lift Me Up Bundle (Stamp Set & coordinating Framelits), So In Love Bundle (Stamp Set & coordinating Framelits), Falling In Love Designer Series Paper, Very Vanilla Satin Ribbon, Metallic Enamel Shapes, & Fine Tip Glue Pen

These products total $124.25 so technically I’m letting $0.75 go so you could always change things out to get exactly $125.00 I love the bundles because you are saving 10% and who doesn’t like discounts on top of deals! I sure love a great deal!

New Stamper Starter Kit, www.LaurasStampPad.com

Now I did my picks for the Stampin’ Up! Starter Kit for the beginner stamper who is just getting started and wants it ALL!

~My 2 FREE Stamp Sets: Flourishing Phrases Stamp Set and Beautiful You Stamp Set – both great sets with greetings and images! You can go with Clear like I did or pick the Wood Style!

~For the $125 in product: Stampin’ Trimmer, Snail Adhesive, Bone Folder, Tin of Cards Stamp Set, Basic Black Archival Ink Pad, 2016-2018 In-Color In Pad Collection, 2016-2018 In-Color Cardstock Collection, Whisper White Cardstock, Clear Block D, Clear Block A

This is a little mix of paper, stamps, ink and a few accessories! You could always omit the Tin of Card for more inks or Stampin’ Scrub & Mist. That’s the cool thing! You can mix and match to what you want/need the most!

You could always go the Big Shot and some dies or even an album, Project Life Card Collections, and other memory keeping items! What would you pick out for your Starter Kit?? Let me know in the comments below! If you would like to Join Stampin’ Up and enjoy all the amazing benefits and this fabulous deal, click here for more information and remember to do it before March 31st when this offer ends!

If you would like to see all of this in action, check out my Video Tutorial below or click here! Be sure to give it a thumbs up if you liked it and don’t forget to subscribe if you are new!

Happy Stampin’

~Laura


Happy Birthday, Gorgeous!!!

Posted on

Not only does this card have beautiful flowers on it but the greeting – Happy Birthday Gorgeous is just amazing!!! I love these colors too!!! Now let’s get started!
Happy Birthday Gorgeous, www.LaurasStampPad.com

I started with a Daffodil Delight card base. Then, I layered on a piece of Melon Mambo measuring 4″ x 5-1/4″. For the focal point, I used a piece of Whisper White (3-3/4″ 5″). Using the Avant Garden Sale-A-Bration Stamp Set, I stamped the flower in Daffodil Delight Ink and Melon Mambo Ink. I stamped some of them in full strength and some stamped off. This gives that variation of color and the illusion that some are up front and others in back like a bouquet or field of flowers! I did the same with the stem and leaves in Wild Wasabi Ink. For the centers of the flowers, I used Basic Black and used the stamped off look on the lighter flowers! Another great tip is to make the images fall off the paper so that it looks like the pattern continues!

Now you can add this piece to the card front on top of the Melon Mambo layer! For the greeting, I stamped Happy Birthday Gorgeous in Basic Black from the Beautiful You Stamp Set in the Occasions Mini Catalog. I punched it out with the Decorative Label Punch and punched out another one in Melon Mambo. I cut the pink one in half and added a piece to the top and bottom of the greeting for that perfect layered look. Click here for a video tutorial. Next, I placed a piece of White Organza Ribbon folded in half on the back of the greeting and secured it with some Stampin’ Dimensionals and added it to the card front. I am loving this card!!!

Don’t forget that you can get the Avant Garden Sale-A-Bration Stamp Set for FREE with a $50 order till the end of March! Sale-A-Bration is an amazing time to stock up and enjoy getting those items on your wish list because you get to pick a free item with every $50 you spend. As a Hostess or with an order of $250 or more, you earn an additional $25 in Hostess Benefits too!!! If your wish list is long, joining Stampin’ Up if the way to go for sure. You get $229 in product for just $99.00 (plus tax, free shipping)! How amazing is that?!?!?!?! Click here for more information or reach out to me if you have any questions! There are no obligations once you join to do parties or sell to friends. You can do what you would like as a demonstrator! You have nothing to lose!

Happy Stampin’

~Laura


I Am Loving the Glimmer Paper Assortment!!!

Posted on

The Glimmer Paper Assortment is one of the NEW Sale-A-Bration items and it is by far my favorite of the 3 new ones!!! Since it comes in 6″ x 6″ squares, you really want to savor each piece! I used a simple 3/4″ strip to these cards and it’s perfect!!!
Glimmer Paper Assortment, www.LaurasStampPad.com

These cards are so simple and stunning and use lots of stuff I got for FREE!!!! How amazing is that?!?!?! I just love Sale-A-Bration!!

I took a piece of Whisper White cardstock measuring 5-1/2″ x 8-1/2″. Then I folded it in half like I would to make a regular card base. Next, I unfolded it and placed it in the Stampin’ Trimmer and took off a 1/2″ from the bottom of the card front! This allows for you to see the inside of the card which is where I adhered the strip of Glimmer Paper (3/4″ x 5-1/2″). I love that little peekaboo look! Then I stamped the Thank You greeting from the So Very Much Sale-A-Bration Stamp Set. I stamped it in the coordinating color as the glimmer paper…..except Bermuda Bay. That was a mistake on my part….I got out the ink pad but stamped it in the prior color and pressed it down. Ops! Wrong color but still looks fabulous. The colors are Bermuda Bay, Mint Macaron, and Sweet Sugarplum!

The simplicity of  the color scheme and how quickly you can make lots of these is what I love the most! To finish it off, I added a few Rhinestones for a little texture and more bling!!! I used some Bermuda Bay Enamel Shapes on the “mistake” one!

Bermuda Bay, www.LaurasStampPad.com

I just love these! You can earn the So Very Much Stamp Set and the Glimmer Paper Assortment Pack with every $50 order now through the end of the month! Remember that Sale-A-Bration ends on March 31st and these items are while supplies last! Click here to start shopping!

If you would like to see more samples using the So Very Much Stamp Set, click here and here!

Happy Stampin’

~Laura


Technique Tuesday – Rock ‘N Roll!!!

Posted on

Happy Tuesday!!! I have this fabulous Rock ‘N Roll technique to share with you today!!! It can be used with many different images and it’s super fun!!!

Rock 'N Roll, www.LaurasStampPad.com

How cool are these flowers with the dark tipped petals?!?!?! It is a super fun and cool technique that you can do with any of your favorite images! Let’s get started!

I started with a Wisteria Wonder card base and layered on a piece of Elegant Eggplant (4″ x 5-1/4″). Next I took a piece of Whisper White (3-3/4″ x 5″) to stamp these beautiful flowers on. Using the Avant Garden Sale-A-Bration Stamp Set, I took the flower and placed it on Block B. You will want to use the smallest block to you can use on your image because otherwise your rock ‘n roll will just ink up the block and not your image if it’s much larger. I inked it up in the light color – Wisteria Wonder Ink and then I took Elegant Eggplant Ink and did the Rock ‘N Roll Technique. Just roll the edges of the images around on the darker color, avoiding the middle of the image.

Check out the video below to really see how this works as I’m not so sure I’m explaining it well! 🙂 Once you have inked it up, stamp it down on the cardstock towards the top and to the left side. I actually stamped it twice to get that lighter and darker shade. Also, then I didn’t have to do this whole thing 3 times. I do find that cleaning the stamp in between is good since you can’t really Rock ‘N Roll exactly the same each time.

Rock & Roll Flowers, www.LaurasStampPad.com

After doing the 3 flowers, I stamped the stem and leaves in Cucumber Crush Ink. Some of them are stamped twice for that variation in color too! TIP: Use a mask to cover the bottom portion when you are stamping your flower stems so that they don’t go below the ribbon. Then you can cover up all of the overlaps of the stems with the ribbon! I used the Cucumber Crush Mini Striped Ribbon! I used the greeting from the Avant Garden Stamp Set and stamped it in Elegant Eggplant. Next, I added this to the card front with Stampin’ Dimensionals! To finish it off, I added little Elegant Eggplant Enamel Shapes.

If you would like to see this all in action, check out my Video Tutorial below or click here! Be sure to give it a thumbs up if you liked it and don’t forget to subscribe if you are new. I post a video every Tuesday and Thursday!

If you would like to see more samples using the Avant Garden Sale-A-Bration Stamp Set, click here, here, and here! You can get this stamp set for FREE with a $50 order till the end of the month! Don’t forget that the items are while supplies last so hurry up! You will also be earning Laura’s Loyal Stampers Stickers too!!!

Happy Stampin’

~Laura


I think I can! I think I Can!

Posted on

I think I can, www.LaurasStampPad.com

How adorable is this card?!?!?! First of all, it screams little boy but it screams so much more too! I Think I Can….I Knew You Could is perfect for a graduate, getting a job, getting a promotion, doing well in sports, for a child getting a report card, and so much more!!! It’s so adorable and simple and that’s why I love it so much!

I started with a Mint Macaron card base and layered on a piece of the Carried Away Sale-A-Bration Designer Series Paper (4″ x 5-1/4″). There are so many fun prints that it is hard to pick one! For the greeting, I die cut one of the squares from the Stitched Shapes Framelits. These have been my go-to ever since I got them! I love that little extra flare on the edge! Next, I stamped the greeting from the Designer Tee Sale-A-Bration Stamp Set. Super cute set and while it coordinates with the Custom Tee Bundle in the Occasions Mini Catalog, it’s super fun alone too! The greeting was stamped in Night of Navy Ink and added to the card front with Stampin’ Dimensionals. Finally to add a little extra flare and texture, I placed a few White Perfect Accents randomly on the card!

Have It Eat It Do It All, www.LaurasStampPad.com

I mixed it up a little and created another fabulous card. This time I used a different greeting from the same set! It is super fabulous still and fits the same square! I centered this greeting rather than off to the side. Next I added loops of the Metallic Gold Thread to the back of it! I love the added texture those simple loops create! You can see it better here!

Metallic Gold Loops, www.LaurasStampPad.com

Which one is your favorite – the White Accents or the Metallic Loops?? Let me know in the comments below!

Don’t forget there is still time to get your FREE Sale-A-Bration items with every $50 order! You can get the adorable I Think I Can set (Designer Tee) and the Carried Away Designer Series Paper!! There are lots of others to pick from as well! You can check out more samples using these products here and here!

Happy Stampin’

~Laura


Coloring Flowers to Highlight the Pattern!!!

Posted on

Coloring Flowers to Highlight, www.LaurasStampPad.com

I have really started to love coloring especially when you don’t have to color all of it! Coloring flowers to highlight the pattern like I did in this sample is just as powerful! It makes the flowers pop and the background of black and white is fabulous too! Less coloring means more time to make multiples!!! 🙂

I started with a piece of Melon Mambo for my card base. Then I cut each piece of the Inside the Lines Sale-A-Bration Designer Paper into 1-1/2″ x 1-1/2″ squares. I punched opposite corners with the Corner Rounder Punch for some added texture. Next, I colored the flowers to highlight the pattern with the Watercolor Pencils and a Blender Pen. You really don’t have to use the Blender Pens. If you like the pencil look or if you want the image to stay bold and dark (if you press hard), just color and stop there! Once all of the pieces were colored, I layered the squares onto a piece of Old Olive cardstock measuring 3-1/2″ x 3-1/2″. Next, I added this piece to a piece of Whisper White (3-3/4″ x 5″) with Stampin’ Dimensionals. I stamped the greeting at the bottom in Melon Mambo Ink from the Designer Tee Sale-A-Bration Stamp Set. Finally, this was then layered onto the Melon Mambo card base and I finished it off with some Brights Enamel Shapes (melon mambo and old olive).

If you would like to see this all in action, check out the video tutorial below or click here! Don’t forget to give it a thumbs up if you liked it and be sure to subscribe to my channel so you don’t miss out on future videos! I post every Tuesday and Thursday!

Do you like to color? Does it overwhelm you? Have you selected the Inside the Lines Designer Paper as one of your FREE Sale-A-Bration items? Let me know in the comments below!!! Also, don’t forget that as we come to the end of Sale-A-Bration, the items will run out so don’t wait till the last minute. The Card Tin is already gone!

Happy Stampin’

~Laura


Any Occasion Banners Stamp Set!!!

Posted on

Any Occasion Banners, www.LaurasStampPad.comBanners are super cute and perfect for any occasion which is why these Any Occasion Banners are amazing! The Any Occasion Sale-A-Bration Stamp Set is made up of all types of banners – different greetings, tassels, scallops, flags, and so much more! They are perfect using them as decoration or as the greeting. Let’s get started on how I created this amazing card!

~ Card Instructions ~

I started with a Smoky Slate card base and took a strip of Elegant Eggplant measuring 1-1/2″ x 5-1/2″ and placed it on the card front as a guide for the scallop border! Using the little scallop image from the Any Occasions Stamp Set, I stamped it in Elegant Eggplant Ink all down the card. It is okay if it isn’t perfectly straight because you can place the strip down over all the edges. After the border is complete, adhere the strip to the card front. Then I punched some Silver Foil Paper with the 1-3/4″ Circle Punch. I used the 2″ Circle Punch to punch the Elegant Eggplant circle. The large Whisper White circle was die cut with the Layering Circles Framelits.

Thank You Banners, www.LaurasStampPad.com

Now for stamping the banners. I laid the stamps down on the table for a second to allow them to keep their shape. Then I pressed the clear block over the top. If you place it on the clear block, it may result in it being straightened out or curved incorrectly and then it won’t stamp over the string correctly. I used Smoky Slate Ink, Basic Gray Ink, and Elegant Eggplant Ink. Just have fun with it and angle each of the banners side to side. You can add different banner greetings and decorations as you wish! I added the white circle to the card front with Stampin’ Dimensionals and the other two circles flat. I finished it off with a few Rhinestones. The card is simple and fabulous and you can mix the colors up as you wish!!!

If you would like to see this all in action, check out the video tutorial below or click here! Don’t forget to give it a thumbs up if you liked it and be sure to subscribe to my channel so you don’t miss out on future videos! I post every Tuesday and Thursday!

Which Sale-A-Bration item is your favorite?? Let me know in the comments below!

Happy Stampin’

~Laura


Inside the Lines Designer Series Paper!!!

Posted on

Inside the Lines, www.LaurasStampPad.com

When I first saw the Inside the Lines Sale-A-Bration Designer Series Paper, I thought it looked beautiful but a little intimidating! That is a lot of coloring…..and time consuming….at least for me who isn’t a big fan of coloring. I enjoy coloring a little bit but only to make 1 card or only a small amount. Then I got this idea from Stampin’ Up back in November when I attended the OnStage Event. You only have to color one small square and it looks AMAZING!!!

~Card Instructions~

I started with a Calypso Coral card base and stamped the greeting from the Avant Garden Sale-A-Bration Stamp Set in Calypso Coral Ink all over the background. I stamped a few times to get those various shades. It is super fun that you can read some and others are falling off. It is a super cool look and adds more meaning to the card!

Next, I took a piece of the Inside the Lines Designer Series Paper measuring 2-3/4″ x 3-1/2″. You will want to cut a 1″ strip from the left side (or right, it doesn’t matter either way). With the leftover piece, I cut it in half creating two 1-3/4″ squares. Now it’s time to color and you can pick whichever section you would like. I colored mine with the Watercolor Pencils and Blender Pens. I adhered the designer paper to the middle of the card and added some Basic Black Baker’s Twine to the left hand side, tied into a bow. For the greeting, I die cut the circle from the Stitched Shapes Framelits (smallest one) and stamped the greeting from the Avant Garden Stamp Set. I added the greeting to the card front with Stampin’ Dimensionals. Love it!!!

To A Wonderful Friend, www.LaurasStampPad.com

This is the card I created at the Stampin’ Up! OnStage Event. We did the greeting a little differently with some of the Burlap Ribbon and banner tips! I just decided to mix it up and go with my own take on it! Both are super fabulous and have the same concept!

Which one is your favorite??? Let me know in the comments below – stitched shape greeting or burlap banner greeting!!! Don’t forget that you can get the Inside the Lines Designer Paper for FREE through the end of March as your Sale-A-Bration item! Every $50 order, earns you a Free item from the brochure. Remember that there are 3 new items that were released at the end of February! You can check those out here! Click here to start shopping!

Happy Stampin’

~Laura