Happy Wednesday! 1 more week till Christmas. I thought since it snowed this is a good card to share with you all! Now I’m chanting, let it melt! 🙂
This is a quick card that I created with a little bit of stamping and punching. Punching out cardstock that is….I’m not a violent person. 🙂
I started with a Shaded Spruce card base. Next, I stamped the snowflakes from the Snowman Season Stamp Set in Pool Party all over a piece of Whisper White. Before laying it on the card front, I added some of the Let It Snow Designer Paper (2″ x 5-1/4″) across the lower part.
For the greeting, I stamped it from the Snowman Season Stamp Set in Real Red Ink. Then using the Timeless Label Punch, I punched it out and added Stampin’ Dimensionals on the back. Before adding it to the card front, I placed a piece of the Real Red Ruched Ribbon down and added the greeting on top. This adds a little bit of texture to the card. Since this ribbon is so wide, tying it would make a large knot of your card so using it this way makes it nice and flat.
You can check out more samples like this by clicking here and here! Also, let me know in the comments below whether you are excited that it snowed or counting down the days till Spring??
Happy Monday!!! We are one week closer to Christmas and things seem to be getting crazier. Stamping is my getaway from the chaos and relaxing time of the day! What about you?? Check out this cute silly snowman card I made!
I got this card idea from Laura Milligan and just fell in love. It’s adorable and it’s simple! Thank you, Laura!!! We, Lauras, are pretty awesome! 🙂
I started with a Whisper White card base and added a layer of Real Red (4″ x 5-1/4″). Next, I took a 3″ x 4″ piece of the Let It Snow Designer Paper (stripes) and added it to the upper left corner. Using the 2-1/4″ Circle Punch, I punched another sheet of the designer paper for this adorable snowman. He is already cute, glittered, and ready to go. I layered a Basic Black circle behind him to make it pop a little more.
For the greeting, I stamped it from the Snowman Season Stamp Set in Memento Black Ink. Then using the Banner Triple Punch, I added banner tips to the end. I actually recommend punching first and then stamping so you don’t end up cutting off your stamped greeting. The greeting was added to the card front with Stampin’ Dimensionals. I finished it off with some of the Toile Tidings Glittered Enamel Dots. It’s perfect!!!
I hope you like this little silly snowman card as much as me. While the paper is no longer available to purchase. You can create this card if you already got your hands on it over the past few months! Here are some more samples too!
Happy Monday!!! Today, I wanted to share this adorable simple card that is just perfect for any friend. We are cut out to be friends!!! Blushing (Bride) hehe Cut it out!!! 🙂
My puns aren’t funny?? I tried and cracked myself up! It doesn’t take much though! Anyway back to this cute card using the Follow Your Art Designer Series Paper!
I started with a Whisper White card base and layered on some Follow Your Art Designer Series Paper (4″ x 5-1/4″). Next, I added the greeting from the Crafting Forever Stamp Set in Calypso Coral Ink. I used the Everyday Label Punch to punch out the greeting. To give the card some texture, I added a few loops of Whisper White Baker’s Twine to the back of the greeting, securing it with Stampin’ Dimensionals.
Here is another option using that same paper pack and style of card! I did the ribbon a bit different for a fun look! The greeting for this one is from the Love What You Do Stamp Set!
These 2 cards are very similar in style but different looks with the patterns of paper and ribbon! I love when that happens!!! Which do you prefer? Let me know in the comments below!
Happy Tuesday!!! You know that means I have a fabulous technique to share with you!!! These gift card holders are simple and snowy and just perfect to spruce up any gift card!!! They are so simple to create that you will want to give gift cards to everyone this year. PS: You can give a Stampin’ Up Gift Card too! Ask me how!
Aren’t these adorable?? I got the idea for these from the amazing Terri Gaines!!! I love swapping ideas with fellow stampers. This little gift card idea was shared at the event I attended over the summer!
Decorate the front all simple & snowy as well as the side card for the perfect look! You could always write on the inside too since it is all hidden down in the sleeve!
All of the details for making these is in the Video Tutorial below but I will share the dimensions here as well. The Designer Series Paper (or Navy piece) measures 2″ x 8-1/2″ and is scored at 4-1/4″. Then the belly band measures 2-3/4″ x 5-3/8″ and is scored at 1-1/2″ from both ends. The card insert measures 2-1/8″ x 3-1/8″. The ribbon is 12″ long!
Check out the full tutorial of this simple & snowy gift card holders in the video below or click here! Be sure to give the video a thumbs up if you liked it and don’t forget to subscribe if you are new. If you would like a notification when I post a new video, be sure to click the bell right next to the subscribe!!!
Happy Wednesday!!! This card is perfect for teachers, get well, and so much more. After all, you could send it to anyone as the apple of my eye!!!
This super cute card had fun fold to it as well. The green center piece with the apple opens up and then a little red flap opens down! There are little greetings with each flap too! Thank you to Deb Snyder for the inspiration for this fabulous card!
I started with a piece of Real Red measuring 4-1/4″ x 8-1/2″ and I scored it at 5-1/2″. This creates the little flap on the bottom that folds up. Next, I took a piece of Mint Macaron measuring 9″ x 3-1/4″ and folded it in half at 4-1/2″. The front flap of this piece was then embossed with the Pinewood Planks Embossing Folder. Then I added this to the inside of the red card base. I find that Tear & Tape is best because it has a nice strong hold for a flap that is going to be pulled on a lot.
Next, I create the fun half apple and greeting using the Harvest Hellos Stamp Set and coordinating Apple Builder Punch! For the greeting, I used the Timeless Label Punch! The apple was colored with Real Red Stampin’ Blends and Soft Suede Stampin’ Blends. Be sure that this piece is positioned underneath the Mint Macaron flap.
For the front of the card, I created the apple by adding some of the Toile Tidings Designer Series Paper to a strip of Real Red cardstock. Then I stamped the apple over the top of this and punched it out. That is how you get the perfect half and half apple. The stem was done in Soft Suede and the leaf in Mint Macaron. Then to seal the overlap of paper on the apple, I added a mini strip of Mint Macaron Ribbon. The mini bow was then created with the Fork Bow Technique! This was all added to the front of the card with Stampin’ Dimensionals! So fun and fabulous!!!
If you would like to make this amazing card, check out the supplies listed below! Don’t forget that the Free Stamp Set of the Month is your choice between Day of Thanks and Perfectly Plaid! If you would like to see more samples using the Harvest Hellos Bundle, click here.
Happy Tuesday!!! It’s been a month since we closed on the house and I think FINALLY I’m starting to get back into a routine/groove. Maybe?!?!?! Either way, I have a fabulous double fold technique to share with you today that is super cute!!!
This card uses the Come to Gather Suite from the Holiday Mini Catalog. I am super loving the blues and greens this season. It’s a nice change from the typical reds, oranges, and yellows.
Since I did a full video tutorial on this double fold card, I’ll post a link to that below rather than typing out the full directions!
Also, don’t forget that the Free Stamp Set of the Month is your choice between the Day of Thanks Stamp Set and the Perfectly Plaid Stamp Set! Click here to start shopping! Stay tuned for the November Free Stamp Set of the Month!
If you would like to watch me make this fabulous card, check out the video below or click here! Be sure to give the video a thumbs up if you liked it and don’t forget to subscribe if you are new. If you would like a notification when I post a new video, be sure to click the bell right next to the subscribe!!!
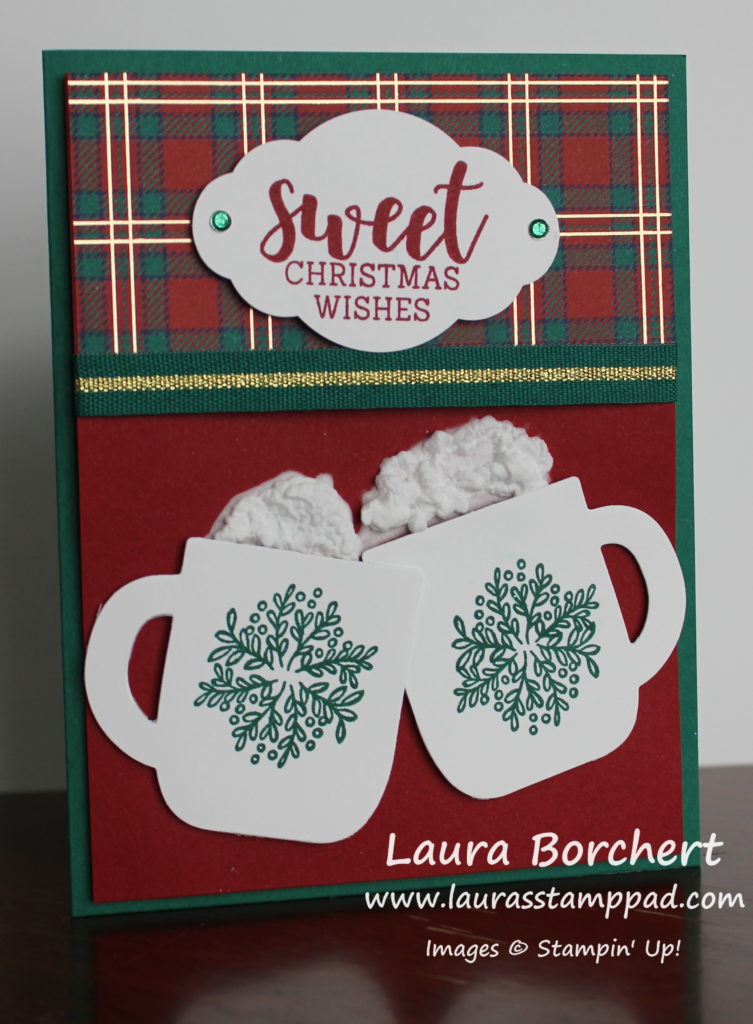
Adding Cool Whip is always necessary when having hot chocolate right?? As a kid, we always ate the cool whip and then said we were done. I don’t think any of us really liked hot chocolate but we enjoyed the cool whip!
How sweet is this card?? I just love the cute factor and that fun texture!!! So let’s get started on how I created this card!
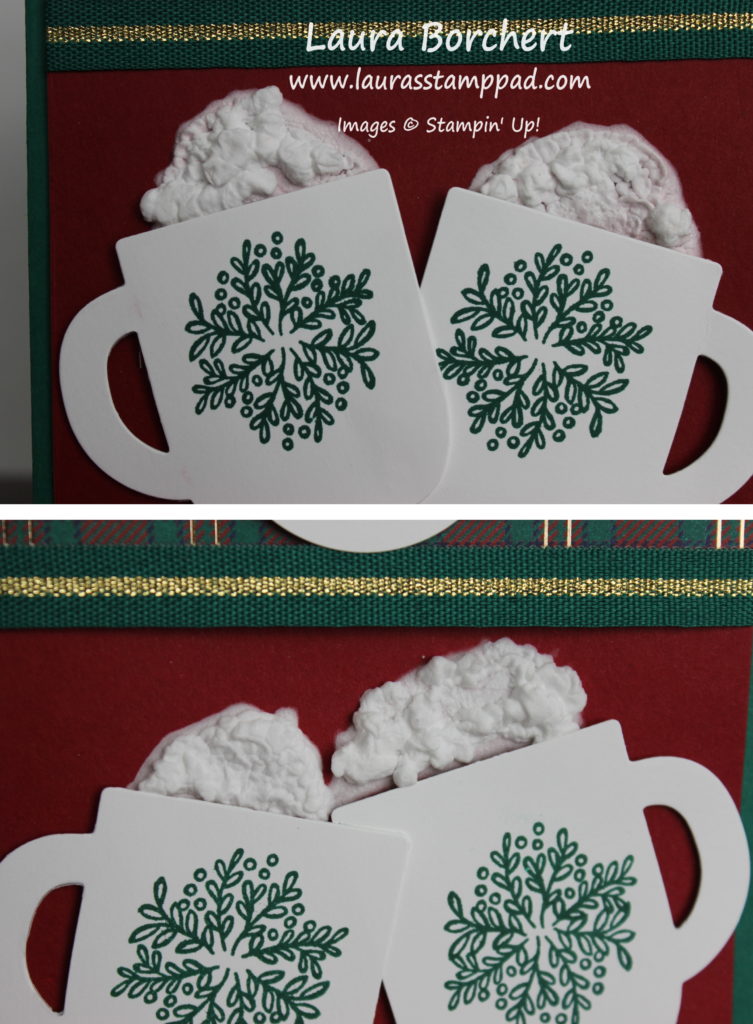
I started with a Shaded Spruce card base. Then I took a piece of Cherry Cobbler measuring 4″ x 5-1/4″. Next, I die cut the white mugs with the Cup of Cheers Dies and placed them on the card. Scoot the mugs down a bit and using a pencil, draw a line across the top of the mugs from side to side. This will be your guide for adding the Puff Paint and making sure it isn’t too wide or too high on the card. Now let’s add puff paint and set it with the Heat Tool!
TIPS FOR USING PUFF PAINT: It is very liquidy so be careful not to use too much or have it spill all over. After applying a thin layer, start heating it from the bottom of the cardstock to set it. Once you see a little shine around the edges, move to the top side to heat it. Be sure to hold it there for a decent amount of time because first it will look dry and then it will start to puff. Add more puff paint to fill in holes or increase your area. You can always add more but can’t always take it back. Also, remember that no 2 puff paints are going to look the same. It’s kind of like watercoloring!
After the Puff Paint is done, you can assemble the card. Don’t assemble first because the heat tool can melt your ribbon. I stamped the mugs with the Cup of Christmas greenery piece in Shaded Spruce Ink and then added them below the Puff Paint with Stampin’ Dimensionals! Then I added a piece (2″ x 4″) of the Perfectly Plaid Designer Paper at the top. Taking the Shaded Spruce & Gold Ribbon, I added a strip across the card where the designer paper and cardstock meet. Securing the ends on the back side with Stampin Dimensionals and then added this piece to the card front.
For the greeting, I stamped it from the Cup of Christmas Stamp Set and punched it out with the Pretty Label Punch. Then I added it to the card front with Stampin’ Dimensionals and finished it off with Holiday Rhinestones on either side!
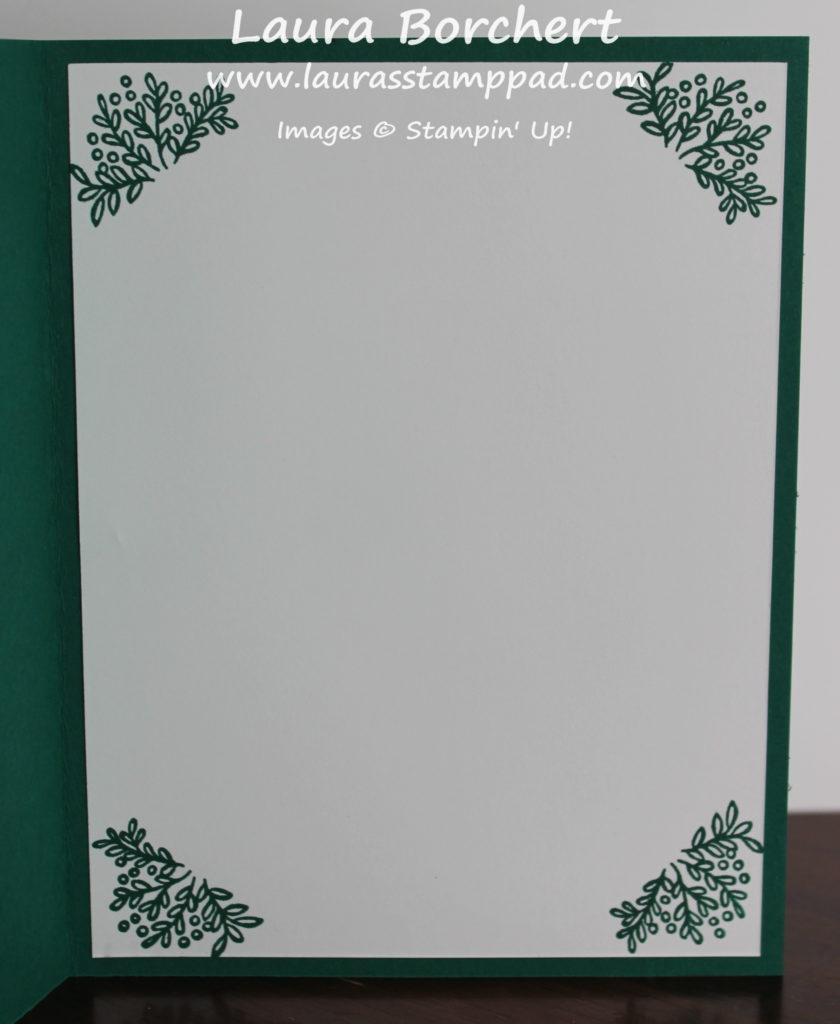
For the inside of the card, I added a piece of Whisper White measuring 4″ x 5-1/4″. Using that same greenery stamp, I stamped each corner in Shaded Spruce Ink.
If you would like to watch me adding cool whip to this fabulous card, check out the video below or click here! Be sure to give the video a thumbs up if you liked it and don’t forget to subscribe if you are new. If you would like a notification when I post a new video, be sure to click the bell right next to the subscribe!!!
In August, Stampin’ Up released a Paper Pumpkin Add-On Kit which is 24 notecards and envelopes. It’s only $10 and that is a STEAL!!! They are so beautiful!!!
Here is one design of the notecards. It is this beautiful Crumb Cake base with Pretty Peacock in the center. That amazing fall wreath has the perfect colors to match anything! I used the August Paper Pumpkin Stamp Set for the greeting and punched it out with the Classic Label Punch. It’s perfect. Another option is using a greeting from the Itty Bitty Greetings Stamp Set. The twine is from the Come to Gather Ribbon Pack and the color is perfect! Quick and simple for sure!
The other notecard in the pack is this beautiful watercolor one. Again it is Crumb Cake base with a layer of Whisper White and watercolors on top. Using Merry Merlot and the August Paper Pumpkin Stamp Set, I stamped the images. The flower image over the watercolors and the greeting onto scrap Crumb Cake. Using the Everyday Label Punch, I punched out the greeting and added it to the card front with Stampin’ Dimensionals. This look would be perfect with any greeting!
I love these quick and simple cards using the Paper Pumpkin Add-On. They look amazing but can be whipped up in no time. You can even stamp some greetings and hold assemble them as needed! That way you always have the perfect card on hand.
If you would like to make these cards, check out the supply list below. Don’t forget all order of $75 or more will earn the Beauty & Joy Stamp Set for FREE this month! Woot Woot! Start shopping now!
No, not me! My neighbor recently told us she was pregnant and of course we are super excited for them! I instantly had to make a fabulous card for them to congratulate them!
Isn’t this the cutest card ever?!?! I just love the simplicity of the women standing there with her belly bump! It’s perfect!
I started with a Rococo Rose card base. Next, I took a piece of Whisper White (3-3/4″ x 5″) and stamped the pregnant lady in the lower right corner. I used Basic Gray Ink because I like that more subtle look when I’m coloring. The image is from the Wonderful Moments Stamp Set. Using the Rococo Rose Stampin’ Blends, I colored the lady’s dress. For her skin, I used Ivory Stampin’ Blends and Bronze for her hair!
Once I was done coloring, I layered this piece onto a piece of Blushing Bride (4″ x 5-1/4″). Before adding it to the card front, I placed a piece of the Rococo Rose Scalloped Linen Ribbon on the left. I just wrapped the ends to the back side and secured it before adding it to the card base.
For the greeting, I stamped it in Rococo Rose Ink onto scrap Whisper White. Then using the Timeless Label Punch and the Everyday Label Punch to punch out the greeting and layer it together. I added the greeting to the card front with Stampin’ Dimensionals! To finish off the card, I added a few Faceted Gems!
For the inside, I used one of the images in the stamp set to decorate! Simple yet fabulous, don’t you think?!?!? If you want to great this fabulous card for someone you know who is pregnant, check out the supplies listed below!
Happy Monday!!! It’s a new week and why not start it off with something super cute! This little purple monster is just the cutest thing ever. I know it is suppose to be creepy or scary but come on….it’s adorable! Don’t you think?
The instant I saw this little monster in the Boo To You Stamp Set, I had to have it. This little monster is perfect for kid cards, Halloween, and so much more! I pictured it in purple and orange right away. After creating this card, I thought a blue and green monster would be super cute too. What are some other color combinations??
I started with a Gorgeous Grape card base. Next, I layered on a piece of the Mercury Glass Designer Acetate next to the card fold. TIP: There is a very thin plastic cover over the acetate to keep it shiny. Be sure to peel this off before adding to your project. Have no fear if you forget because I did 20 of these cards before I knew about it. It looks just as perfect! I tied some Gorgeous Grape Striped Ribbon around the card and into a knot. This helps smooth out the look between the acetate and the cardstock.
For the monster, I stamped him…or her…in Basic Gray Ink from the Boo To You Stamp Set. I like to use gray because it’s a lighter more subtle look for coloring. Using the Highland Heather and Pumpkin Pie Stampin’ Blends, I colored in the monster. Then I layered it onto Pumpkin Pie cardstock and added it to the card front with Stampin’ Dimensionals.
For the greeting, I stamped it in Gorgeous Grape from the Boo To You Stamp Set. After stamping it on Whisper White, I punched it out with the Timeless Label Punch and added it to the card front. I placed it on the right side and just trimmed off the excess. To finish it off, I added an orange rhinestone from the Holiday Rhinestones Pack! It goes perfectly!
You still have plenty of time to make some of these Purple Monster cards for Halloween or even birthdays! Click the supplies below to get everything you need! Be sure to check out other fun stuff from the Holiday Mini Catalog by clicking here!


")

 Ruched Ribbon")


 Circle Punch")


 Grosgrain Ribbon")


 Curly Ribbon")


")


 Textile Ribbon")


")
")


 Specialty Designer Series Paper")
 Striped Ribbon")


 Scalloped Linen Ribbon")


 Mini Striped Ribbon")