Celebrate the Good Stuff!!!

Posted on

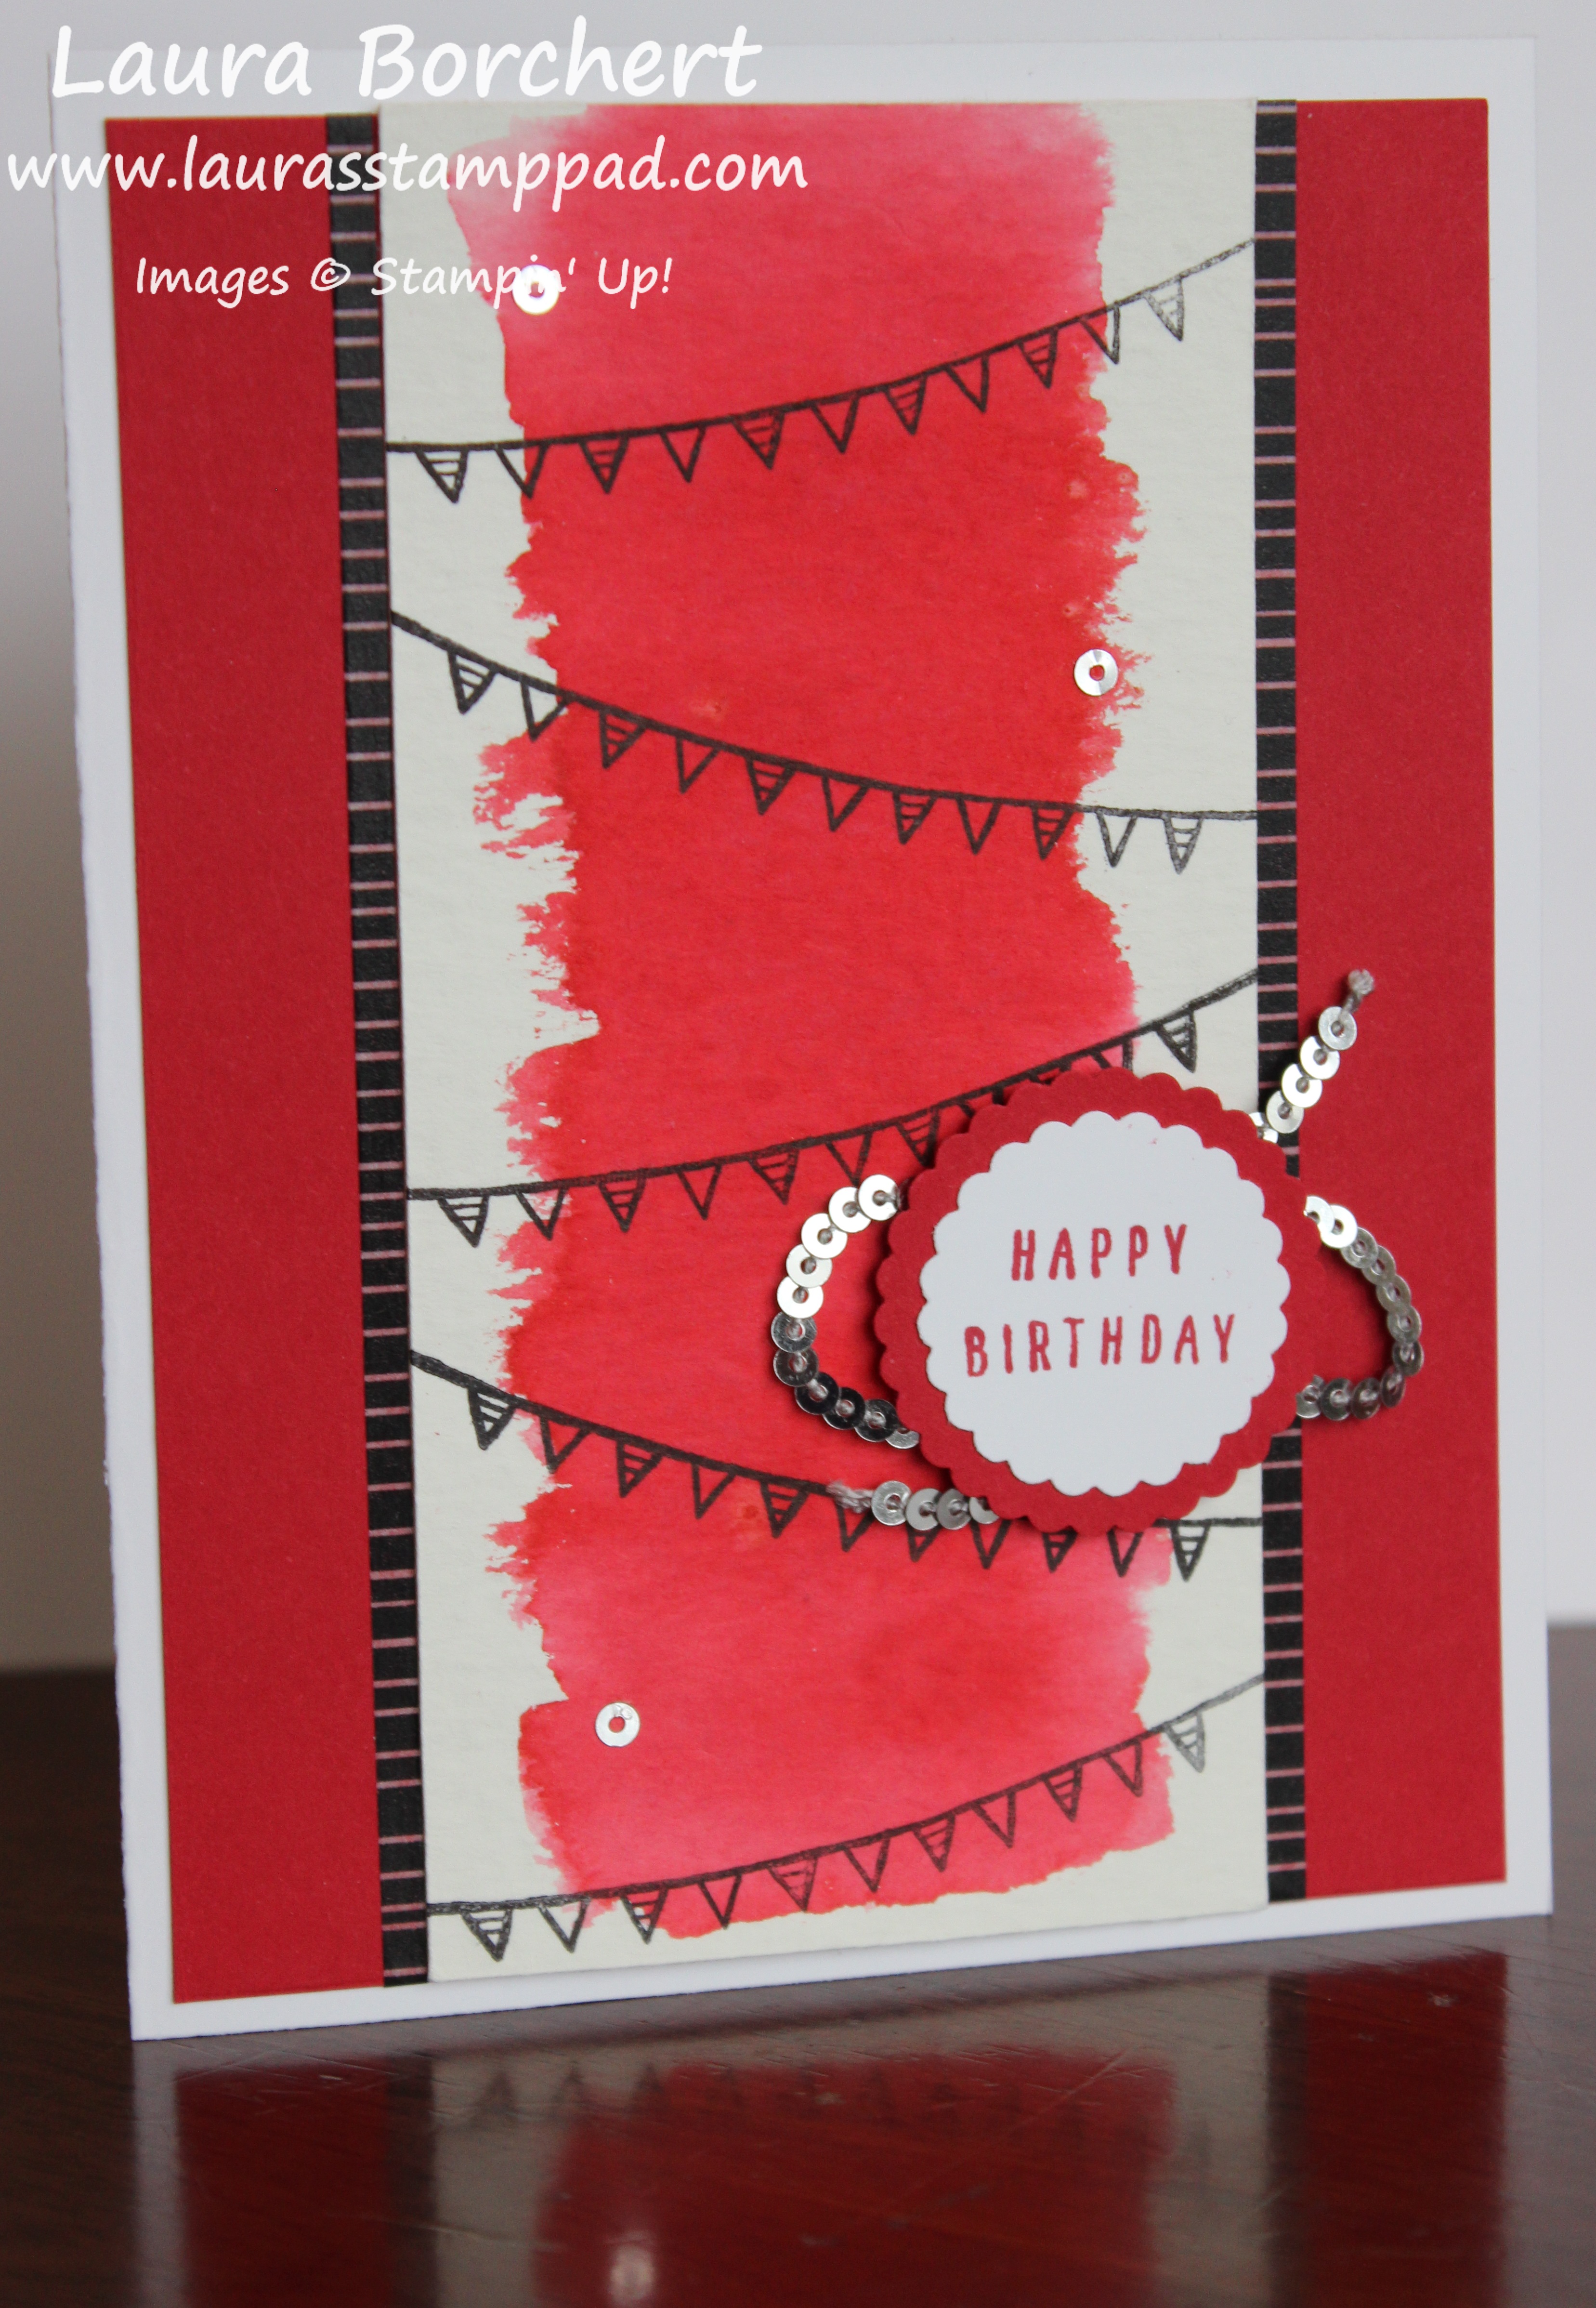
Whether it is a Birthday, Promotion, Graduation, or Personal Goal…..Celebrate the Good Stuff!!! This card is perfect for so many different occasions!

Celebrate the Good Stuff, www.LaurasStampPad.com

I am loving this color combination (Peekaboo Peach & Berry Burst) but any color combination would look fabulous for this card!!! School colors, feminine colors, masculine colors, or just whatever you have on hand!

I started with a Peekaboo Peach card base. Next, I layered on a piece of Berry Burst measuring 4″ x 5-1/4″. Then, I took a piece of Whisper White (3-3/4″ x 5″) and did all the stamping first. Using the Picture Perfect Birthday Stamp Set, I started with the noise makers! (party poppers, what do you call these?? let me know in the comments!) Starting with the base, I stamped the solid candle piece in Bermuda Bay Ink (stamped off once) and then the dots over the top in full strength. Next, I stamped the curling piece in Peekaboo Peach and then the fringe in Berry Burst. I will say that I think I could have added a little more space for the fringe so maybe I should have stamped that second instead. That’s one of those see what works best for you after trying both ways!

Party Popper, www.LaurasStampPad.com

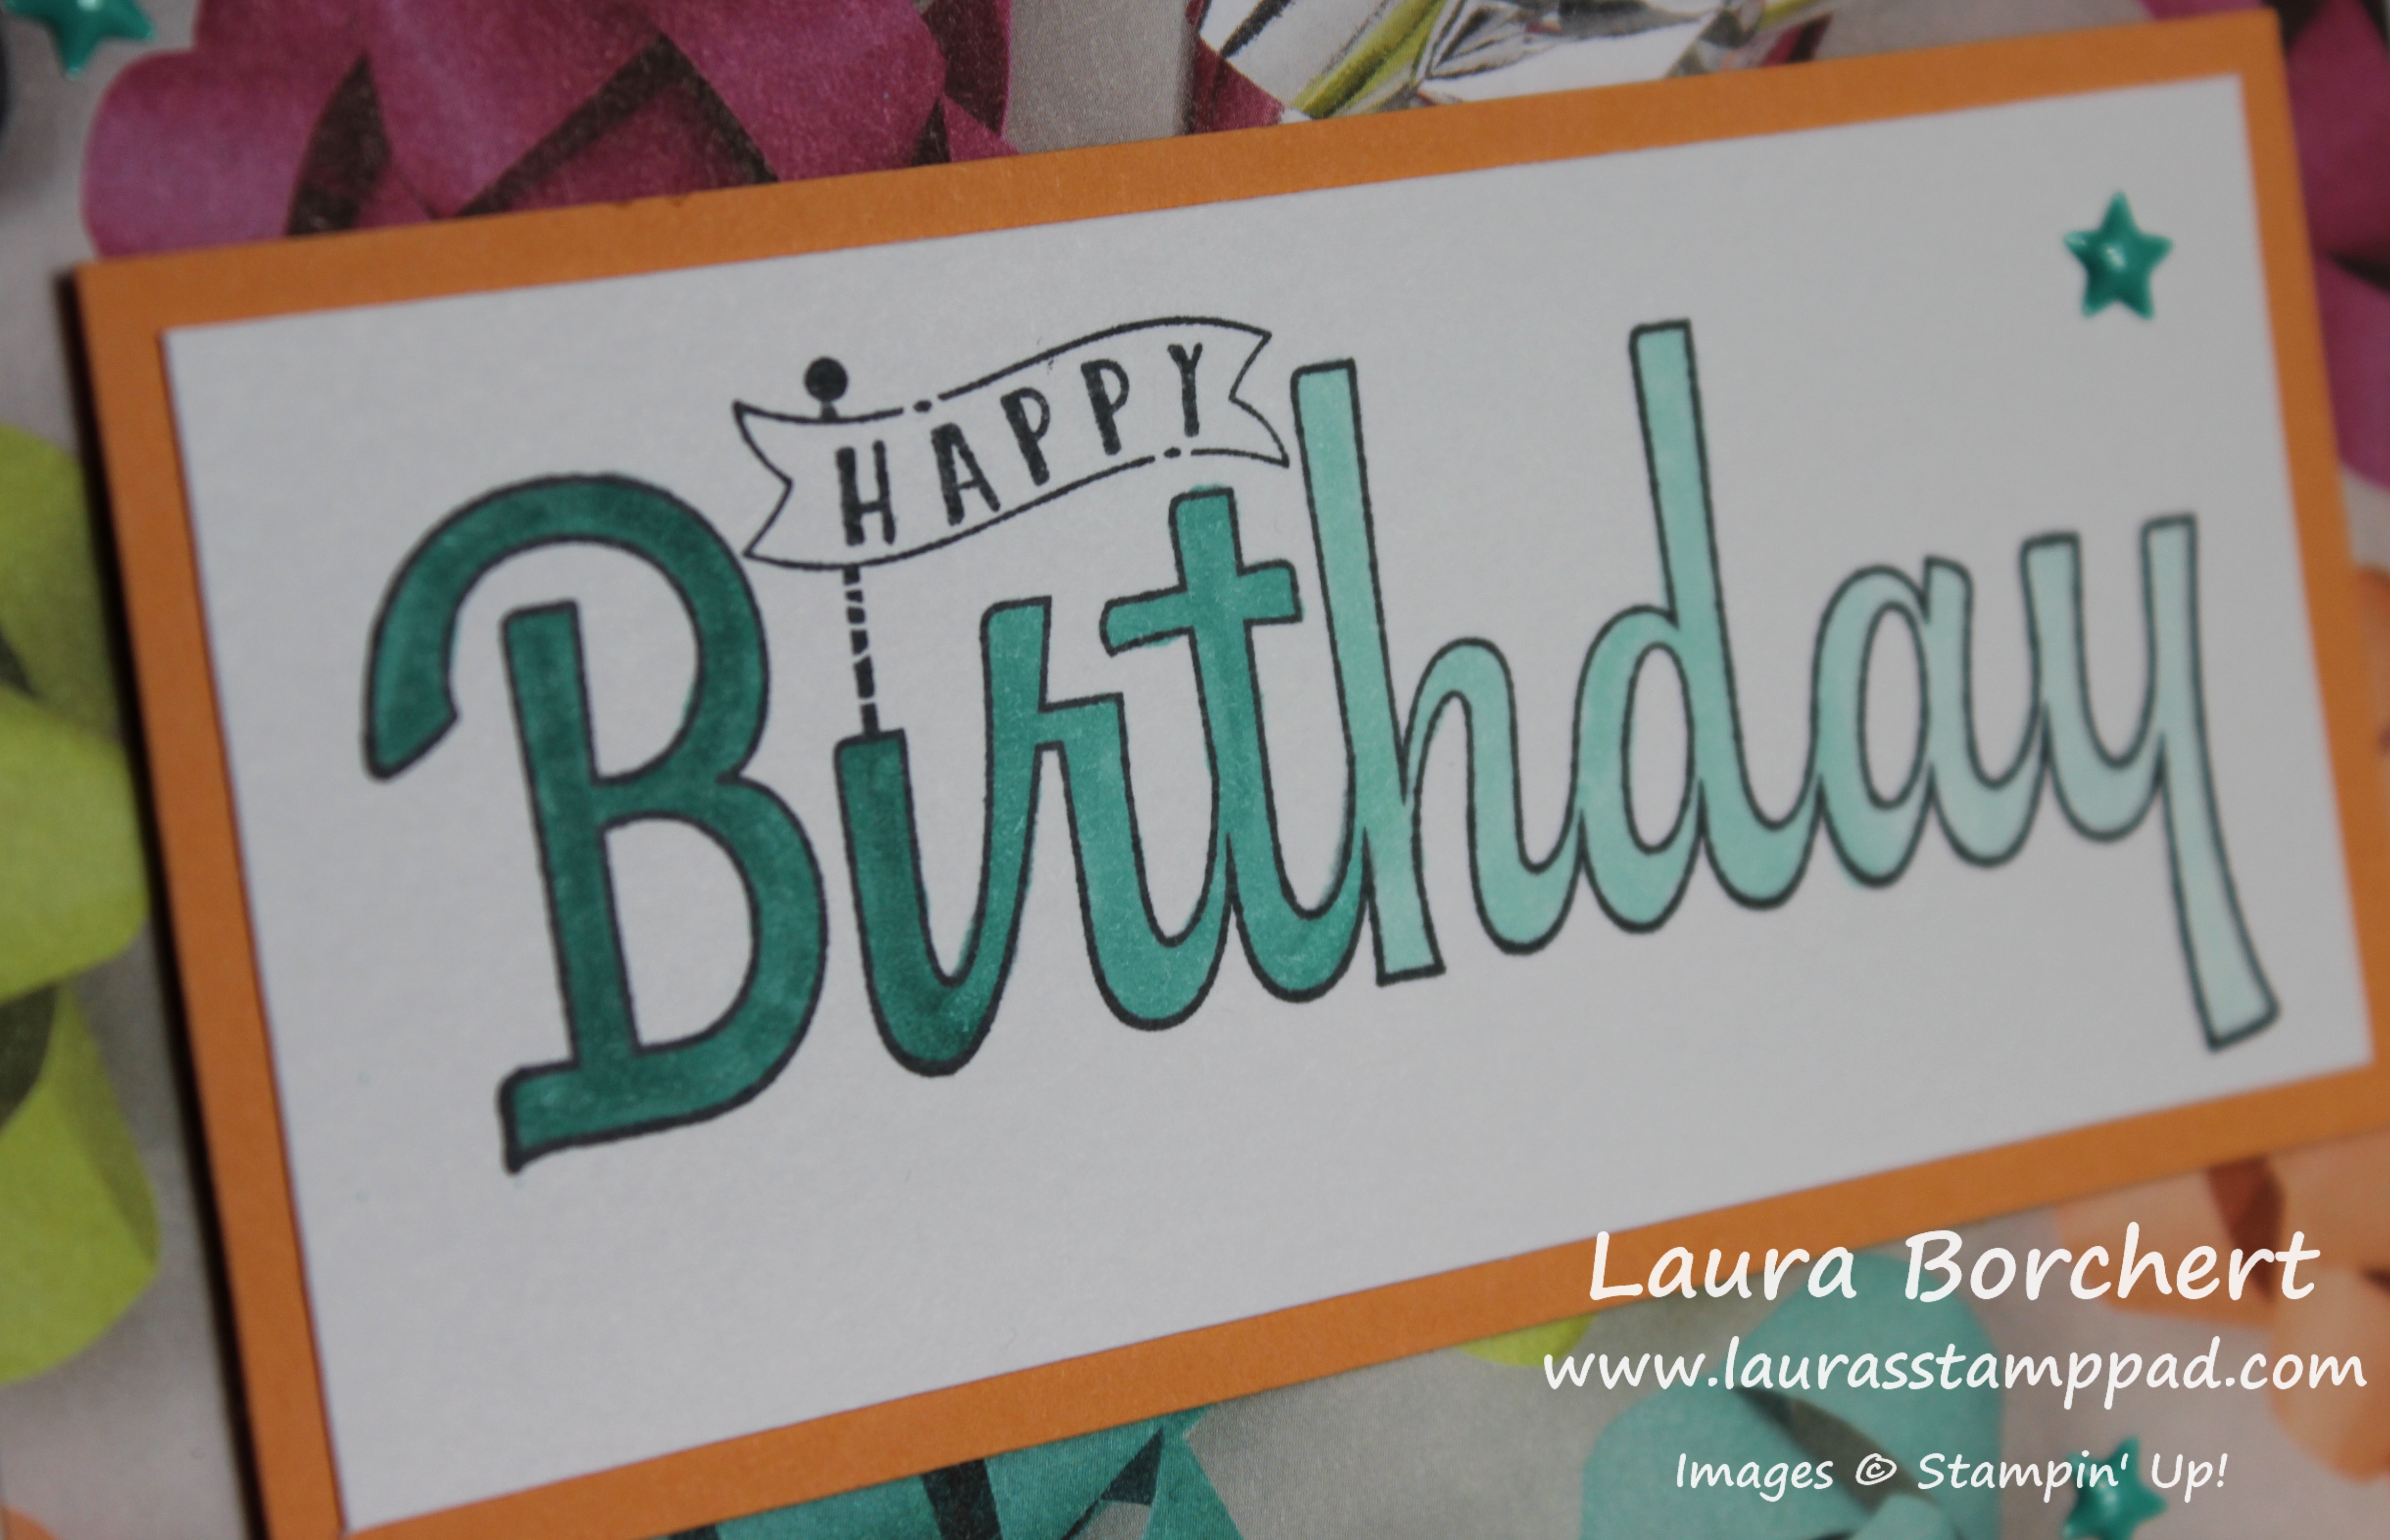
After stamping the noise makers, I filled in with the greeting and added a little decoration on the corners with the confetti. I added a strip of the Picture Perfect Party Designer Series Paper and some Peekaboo Peach Baker’s Twine for some added texture! This layer was added to the card front with Stampin’ Dimensionals for that smooth look over the ribbon!

Does anyone else think of the Kenny Chesney song when looking at that greeting? Just me? 🙂

Happy Stampin’

~Laura

Product List


Brusho Background With Banners!!!

Posted on

This card uses lots of fun new stuff from the Occasions Mini Catalog! The Brusho Background is super fun and colorful and then those perfectly placed banners with the Stamparatus!!! Love it!

Brusho Background, www.LaurasStampPad.com

I started with a Whisper White card base. Next, I took a piece of Watercolor Paper (3″ x 5-1/4″) and brushed some water over it as a base with the Aqua Painter. Then I tapped on some Brusho Crystal Colour and mixed it and brushed it side to side with the Aqua Painter. I would recommend adding just a bit of color because it is easier to add more than it is to take some off when it’s too dark. A little bit goes a long way with Brusho as well. It’s super vibrant! If you have no patience (like me), drying it with the Heat Tool really speeds things up, otherwise just set it aside to dry.

Once it is dry, I placed this piece in my Stamparatus and added the banners from the In The Trees Stamp Set. Using the Stamparatus, for that perfect swag/ I just love how the hinges of the Stamparatus make it so easy to go down the cardstock. I did one swag 3 times skipping a hinge each time and then rotated the image the other direction and stamped twice! Next, I added this to a piece of Real Red cardstock (4″ x 5-1/4″) down the center. Since it is Watercolor Paper and tends to curl, I like to use Tear And Tape for a nice strong, secure hold onto my cardstock. Using the Pick A Pattern Washi Tape pack, I added a little strip to either side of the Watercolor Paper and then added this to the card front!

Sequin Greeting, www.LaurasStampPad.com

For the greeting, I stamped it from the In The Trees Stamp Set by stamping the happy first, cleaning it, and then the birthday. Next, I punched it out with the NEW 1/8″ and 3/8″ Scallop Circle Punches. Then I laid some Silver Sequin Trim on the back in a “S” shape and secured it with Stampin’ Dimensionals. I added this piece to the card front and using the Fine Tip Glue Pen to add a few loose sequins!

If you would like to see this all in action, check out the Video Tutorial below or click here! Be sure to give the video a thumbs up if you liked it and don’t forget to subscribe if you are new. If you would like a notification when I post a new video, be sure to click the bell right next to the subscribe!!!

Stay tuned as I have played with a few other colors with this and I’ll be sure to share those soon! What color would you use?? Let me know in the comments below! Also, if you pre-ordered the Stamparatus back in November (during the first opening), you should have received an email yesterday to finalize your order. I’m so excited to start getting these things in your hands. For those in the 2nd pre-order period, yours are coming real soon!!!

Happy Stampin’

~Laura

Product List


Birthday Bows!!!

Posted on

Doesn’t these birthday bows look so real?? I am still loving the Picture Perfect Birthday Stamp Set and using it for so many different occasions!! Check out this beauty!

Birthday Bows, www.LaurasStampPad.com

This card can be created in so many different color combinations for a masculine card, feminine card, or even matching school colors for a graduation! Don’t be scared about the 2 step stamping with the bow though! I have some create tips!

I started with a Bermuda Bay card base! Next, I took a piece of Whisper White measuring 4″ x 5-1/4″. Then I stamped the bow from the Picture Perfect Birthday Stamp Set all over for a background in Peekaboo Peach Ink! A few tips that I have for the bows are to stamp the smaller dark (full strength) image first and then stamp the larger, lighter (stamped off once) image second. This helps with lining up because you can see through the stamped off image easier than the full strength one. I will say try it both ways on which one is stamped first to see what works best for you! Another tip is to place the images on your clear blocks in the same direction. I like to do it where the engraved Stampin’ Up is on the top side on both images and that helps me not have to rotate it around and around each time! Also, I think the bow looks pretty fabulous without the second stamp too so that’s an option too!

Fabulous You, www.LaurasStampPad.com

After stamping the background,  I added this piece to the card front and tied some Lemon Lime Mini Striped Ribbon around and into a knot. For the greeting, I die cut a Whisper White piece with the Stitched Shapes Framelits and a Lemon Lime Twist piece with the Layering Ovals Framelits! Then, I stamped the greeting in the center and layered them together. I added the greeting to the front of the card with Stampin’ Dimensionals! To finish it off, I added a few Bermuda Bay Enamel Shapes!!!

What color combinations would you use for this card?? I’m always up for trying new combinations and would love to hear your favorites. Let me know in the comments below!

Happy Stampin’

~Laura

Product List


Technique Tuesday – Heat Embossing with Water!!!

Posted on

Happy Tuesday!!! You all know what that means! I have a fabulous technique to share with you and today we are heat embossing with water!!! Just splatter water all over and pour the powder on top!!!

Heat Embossing with Water, www.LaurasStampPad.com

I just love this stunning gold and purple card! It’s so wonderful…..just like the greeting says!

I started with a Whisper White card base. Then I took a piece of Elegant Eggplant measuring 4″ x 5-1/4″ and dripped/splattered water all over with an Aqua Painter! A good splatter can be done by tapping/hitting the Aqua Painter on your finger for that bump that makes the water fly. See the video tutorial below for that in action….I’m not sure how else to explain that. 🙂

Once the desired amount of water is on the cardstock, I poured Gold Embossing Powder over the top and the powder sticks to all the water spots. Using the Heat Tool, I melted the powder. The larger drops are full of water and you will notice the water wiggle below the powder when the heat tool blows it around. In order to not make the splatter drip or blow, I would apply the heat a little and then move to another spot and then come back again, repeating this a few times till everything was melted. I love watching the bubbles wiggle though. It’s so magical!

Golden Splatter, www.LaurasStampPad.com

After I set the powder with the Heat Tool, I added this piece to the card front and then added decoration. I used the Cake Soirée Stamp Set and coordinating Sweet Cake Framelits Dies (Bundle & Save 10%). The cake was stamped in Elegant Eggplant Ink onto Wisteria Wonder cardstock. I used Gold Foil Paper for the cake stand and bow! When adding it to the card front, I did the cake stand flat and the cake with Stampin’ Dimensionals. Using the Fine Tip Glue Pen, I added the bow to the top.

For the greeting, I stamped it from the Cake Soirée Stamp Set in Elegant Eggplant Ink and punched either side with the Pretty Label Punch for that cut little rounded edges. Using a Sponge Dauber, I brushed a little color on all of the edges and added this to the card front with Stampin’ Dimensionals. I finished it off with some Gold Metallic Enamel Shapes on either end!!!

If you would like to see this all in action, check out the Video Tutorial below or click here! Be sure to give the video a thumbs up if you liked it and don’t forget to subscribe if you are new. If you would like a notification when I post a new video, be sure to click the bell right next to the subscribe!!!

Happy Stampin’

~Laura

Product List


Technique Tuesday – Perfect Tree Placement!!!

Posted on

Happy Tuesday!!! You all know what that means! I have a fabulous technique to share with you all today! Create the perfect tree placement from the In The Trees Stamp Set using the Stamparatus!!!

Perfect Tree Placement, www.LaurasStampPad.com

Doesn’t this scene just look so relaxing, peaceful, and Spring-like?? Oh how I am counting down the days till Spring (34 more days)!!!! Let’s get started on this beauty!

I started with a Crumb Cake card base! Next, I took a piece of Whisper White measuring 4″ x 5-1/4″ for all the stamping! I started with the trees, then the hammock, and finished with filling in with flowers and birds! All of the images were stamped in Memento Black Ink since I colored them in with the Stampin’ Blends alcohol markers! I used the Stamparatus for the perfect placement on the trees and hammock. Stampin’ Up created the amazing notched hinges so we can move the stamp over. After stamping the first tree, I moved it over 2 full spots (into the 3rd spot over) which is the perfect spacing amount for the hammock to hang between them! How simple and cool is that?!?! I love it!!!

Spring Flowers & Trees, www.LaurasStampPad.com

For the coloring on the tree, I did not color each individual leaf! Heck no do I have the patience for that. LOL I colored big spots with the dark Old Olive and then blended it all together with the light Old Olive for a little variation in color! The trunk was done in Crumb Cake and the hammock in Real Red! I colored the flowers with Old Olive and Daffodil Delight. Then I thought it needed some green grass. There is a grass stamp in the set but I went with use swiping some of the light Old Olive Marker across the bottom. The awesome thing is that there aren’t streaks like when using a marker! I loved how it turned out!

To finish off the card, I added this piece to the card front and added the greeting onto a strip of Real Red. For a little bit of texture, I tied some Linen Thread around the greeting and added it to the card front with Stampin’ Dimensionals!

If you would like to see this all in action, check out the Video Tutorial below or click here! Be sure to give the video a thumbs up if you liked it and don’t forget to subscribe if you are new. If you would like a notification when I post a new video, be sure to click the bell right next to the subscribe!!!

Happy Stampin’

~Laura

Product List


Ombre Birthday Greeting!!!

Posted on

Happy Monday!!! I hope you all had a wonderful weekend! Today, I’m sharing this simple and yet fabulous ombre birthday card!!! I just love Ombre…..check out more samples here! The Stampin’ Blend make creating an ombre look super easy too!

Ombre Birthday Greeting, www.LaurasStampPad.com

I started with a Whisper White card base and layered on a piece of the Picture Perfect Party Designer Series Paper (4″ x 5-1/4″). This paper has so many perfect patterns for this style of card – bows, cookies, donuts, confetti, and more! I love it! Now for that fabulous ombre birthday greeting!

Stampin' Blends, www.LaurasStampPad.com

I stamped the greeting from the Birthday Wishes For You Stamp Set in Memento Black Ink onto Whisper White! Then using the Bermuda Bay and Pool Party Stampin’ Blends, I colored the greeting. Starting with the “bi” using the dark Bermuda Bay marker and doing 2 letters with each color. I went from dark Bermuda Bay, light Bermuda Bay, Dark Pool Party to light Pool Party! These colors were perfect for creating that ombre look! Next, I layered this onto a piece of Peekaboo Peach and added it to the card front with Stampin’ Dimensionals. To finish off the card, I added a few  Bermuda Bay Enamel Shapes! This card is super simple and easy to change up the colors to the designer paper you have on hand or colors you prefer!

Half Ombre Birthday, www.LaurasStampPad.com

I did this ombre look using just the dark and light Bermuda Bay and creating the ombre from top to bottom. The only problem I had with this was that the middle where I had to color more to get the blending (rather than a distinct line) bled out. When going over a spot over and over, it will bleed wider on the paper and so that is how this happened. I think maybe if I did a little bit of blending on each one and allowed it to dry more in between, I might not have had this problem!

I have really fallen in love with the Stampin’ Blends and have been having lots of fun with them! Have you tried them? What are your favorite colors? Let me know in the comments below!

Happy Stampin’

~Laura

Product List


A Stepped Up Candle Card!!!

Posted on

Yesterday, I shared the candle creations that can be made with the Picture Perfect Birthday Stamp Set!!! Check that one out here! Today, I’m going to show another variation of the card and a stepped up candle card version!

Stepped Up Candle Card, www.LaurasStampPad.com

For this card, I went with more feminine colors! Also, rather than using designer paper, I added some ribbon! This is just to show how to get the same look but with whatever you have on hand!!! Also, I added wicks and a glow with Wink of Stella!

I started with a Peek-A-Boo Peach card base! Next, I took a piece of Berry Burst (4″ x 5-1/4″) and stamped the birthday greeting along the bottom in Berry Burst Ink! Again, be sure to start the greeting falling off the ends so that the greeting looks like it continues! Just above the greeting, I tied some Peek-A-Boo Peach Striped Ribbon around it. Next, I added this piece to the card front with Stampin’ Dimensionals! I used those so that it would look smooth since the ribbon is on the lower end!

Sparkling Candles, www.LaurasStampPad.com

Finally, I took a piece of Whisper White (4-3/4″ x 2-1/2″) to stamp my candles on. I used the Picture Perfect Birthday Stamp Set and Berry Burst and Peek-A-Boo Peach Ink Pads. The candles were stamped starting in the middle and working my way to the edges. Also, I did them at an angle because stamping them perfectly straight and in line would have never happened! 🙂 The flames were stamped in Crushed Curry and then I added the little star burst border along the bottom in Berry Burst!

Now for the stepped up version!!! Using a Basic Black Marker, I added little wicks to each candle. Just a simple little black mark for each candle. To finish off each flame, I went over them with the Wink of Stella Pen for some shine! I love the little bit sparkle and shine it adds! Once I finished all of the stamping, I added this piece to the card front! Just perfect!!!

Which variation do you prefer?? Yesterday’s designer series paper simple candle card or today’s ribbon stepped up with wicks and shine candle card?? Let me know in the comments below!! Also, be sure to check out the Video Tutorial showcasing all the candle fun!

Happy Stampin’

~Laura

Product List


Technique Tuesday – Candle Creations!!!

Posted on

Happy Tuesday!!! That means I have a fabulous technique to share with you today! This one is rather simple and super fun! I’m sharing some candle creations using the Picture Perfect Birthday Stamp Set from the Occasions Mini Catalog. This Suite is my favorite by far and I just can’t put it down!

Candle Creations, www.LaurasStampPad.com

This quick and simple card is perfect for a Man Card but stay tuned to the card I’m going to show tomorrow which is more feminine and changed up a little! Both of these styles of cards are great for making multiples to have on hand all year long!!!

I started with a Lemon Lime Twist card base. Next, I stamped the greeting all along the top and bottom in Bermuda Bay Ink using the Picture Perfect Birthday Stamp Set! Be sure to start stamping on the edge with the greeting hanging off some so that it looks like the greeting continues on and on! Then, I added a piece of the Picture Perfect Party Designer Series Paper (5-1/4″ x 3″) in the center.

Boy Candles, www.LaurasStampPad.com

Then I took a piece of Whisper White cardstock (2-1/2″ x 4-3/4″) and stamped the candles. There are 3 styles of candles in the set – solid, dots, and stripes. So while each candle can be stamped alone, there are also combinations that can be created. Simply stamp the solid image off once onto scrap paper and then onto your project. Then stamp the patterned candle in full strength! Be sure to check out the video tutorial below to see these fun combinations! I stamped the center candle first and then worked my way out from either side. I found that this helped me with my spacing. Another tip was that I stamped them a little angled on purpose because I knew I wouldn’t be able to get them perfectly lined up straight and even! After stamping the candles in Bermuda Bay and Lemon Lime Twist Ink, I stamped the flames in Crushed Curry Ink. Once I was finished stamping, I added this to the card front! Check back tomorrow to see a few ways I stepped up this card with some variations! You can even join my mailing list here so you don’t miss out!

If you would like to see this all in action, check out the Video Tutorial below or click here! Be sure to give the video a thumbs up if you liked it and don’t forget to subscribe if you are new. If you would like a notification when I post a new video, be sure to click the bell right next to the subscribe!!!

Happy Stampin’

~Laura

Product List


February Free Stamp Set of The Month!!!

Posted on

Happy Friday and Happy February! I’m excited because the Olympics are this month!!! Woot Woot! Let me know in the comments if you are a big Olympics fan too!!! Today, I’m sharing the February Free Stamp Set of the Month…..drum roll……

February Free Stamp Set, www.LaurasStampPad.com

The Fruit Basket Stamp Set from the Occasions Mini Catalog is the February Free Stamp Set!!! I thought this little set of fruit was just adorable and makes me think of Spring and Summer! It can’t get here fast enough! All orders placed this month (online or at one of my events) totaling $75 or more before tax and shipping will earn this set for Free! This set will come separate from your order if you place the order online! Click here to start shopping and earning!

There are lots of fabulous deals going on this month!!! Sale-A-Bration is still going on all month long which means a free item for every $50 spent! My favorites and customer favorites so far have been Heartfelt Blooms Stamp Set, Shimmer Ribbon, and Lots of Lavender Stamp Set. If you would like to see some samples using those click here, here, and here!

Don’t forget about Laura’s Loyal Stampers Stickers too for orders in increments of $40.00! I had 4 fabulous stampers earn $40 Gift Certificates in January….perfect timing for Sale-A-Bration! 🙂

I hope you all have a wonderful weekend! If you are a football fan….enjoy! If not, happy crafting while everyone else watches! I think I will be stamping a kit while having it on in the background! 🙂 See you all back here on Monday!!!

Happy Stampin’

~Laura


Lots of Lavender!!!

Posted on

Yesterday I shared a fun way to use the Lots of Lavender Sale-A-Bration Stamp Set which you can see here! Today, I’m coloring with the set!

Lots of Lavender, www.LaurasStampPad.com

I just love flowers and since this card doesn’t have a greeting on the front, it can be used for lots of occasions! What occasion would you use it for – Thinking of You, Sympathy, Birthday, Anniversary, etc?? Let me know in the comments below!

I started with a Whisper White card base. Next, I took a piece of Rich Razzleberry cardstock (4″ x 5-1/4″) and embossed the left side with the New Petal Pair Embossing Folder. That little side border of texture is super fabulous!! Before adding this piece of the front of the card, I wrapped some Organza Ribbon around it and tied it into a knot!

Flowers Sale-A-Bration, www.LaurasStampPad.com

For the focal point, I took a piece of Whisper White and stamped the lavender bouquet from the Sale-A-Bration Lot of Lavender Stamp Set. It was stamped in Memento Black Ink since I used the Stampin’ Blends to color in the flowers! I used Rich Razzleberry for the lavender, Old Olive for the greenery, and Bermuda Bay for the ribbon! After coloring the flowers, I added this to a layer of Old Olive cardstock and then added it to the card front with Stampin’ Dimensionals! This gives it some more texture and a smooth look over the ribbon and embossed portion. Adding the Metallic Enamel Shapes is optional for a little bling……or necessary if you need to cover up a boo boo. I won’t say why I added them! 😉 You can guess and let me know in the comments though!

I know I love all the flower stamps but this one is super fun because it’s FREE with Sale-A-Bration and it can be colored in or stamped for color with the other images in the set! The versatility of the set is just amazing!

Happy Stampin’

~Laura

Product List