Happy Tuesday!!! You know what that means….I have a fabulous technique to share with you today!! Check out this cute baby card that can be made for a boy, girl, or gender neutral!!! Love it!!

Simple and adorable! You could always change it to be the name of the baby as well! When I first started this card, I didn’t intend on it being a baby card but after I did the first few layers, it screamed baby girl!

Doesn’t that scream baby girl??? Come on now!
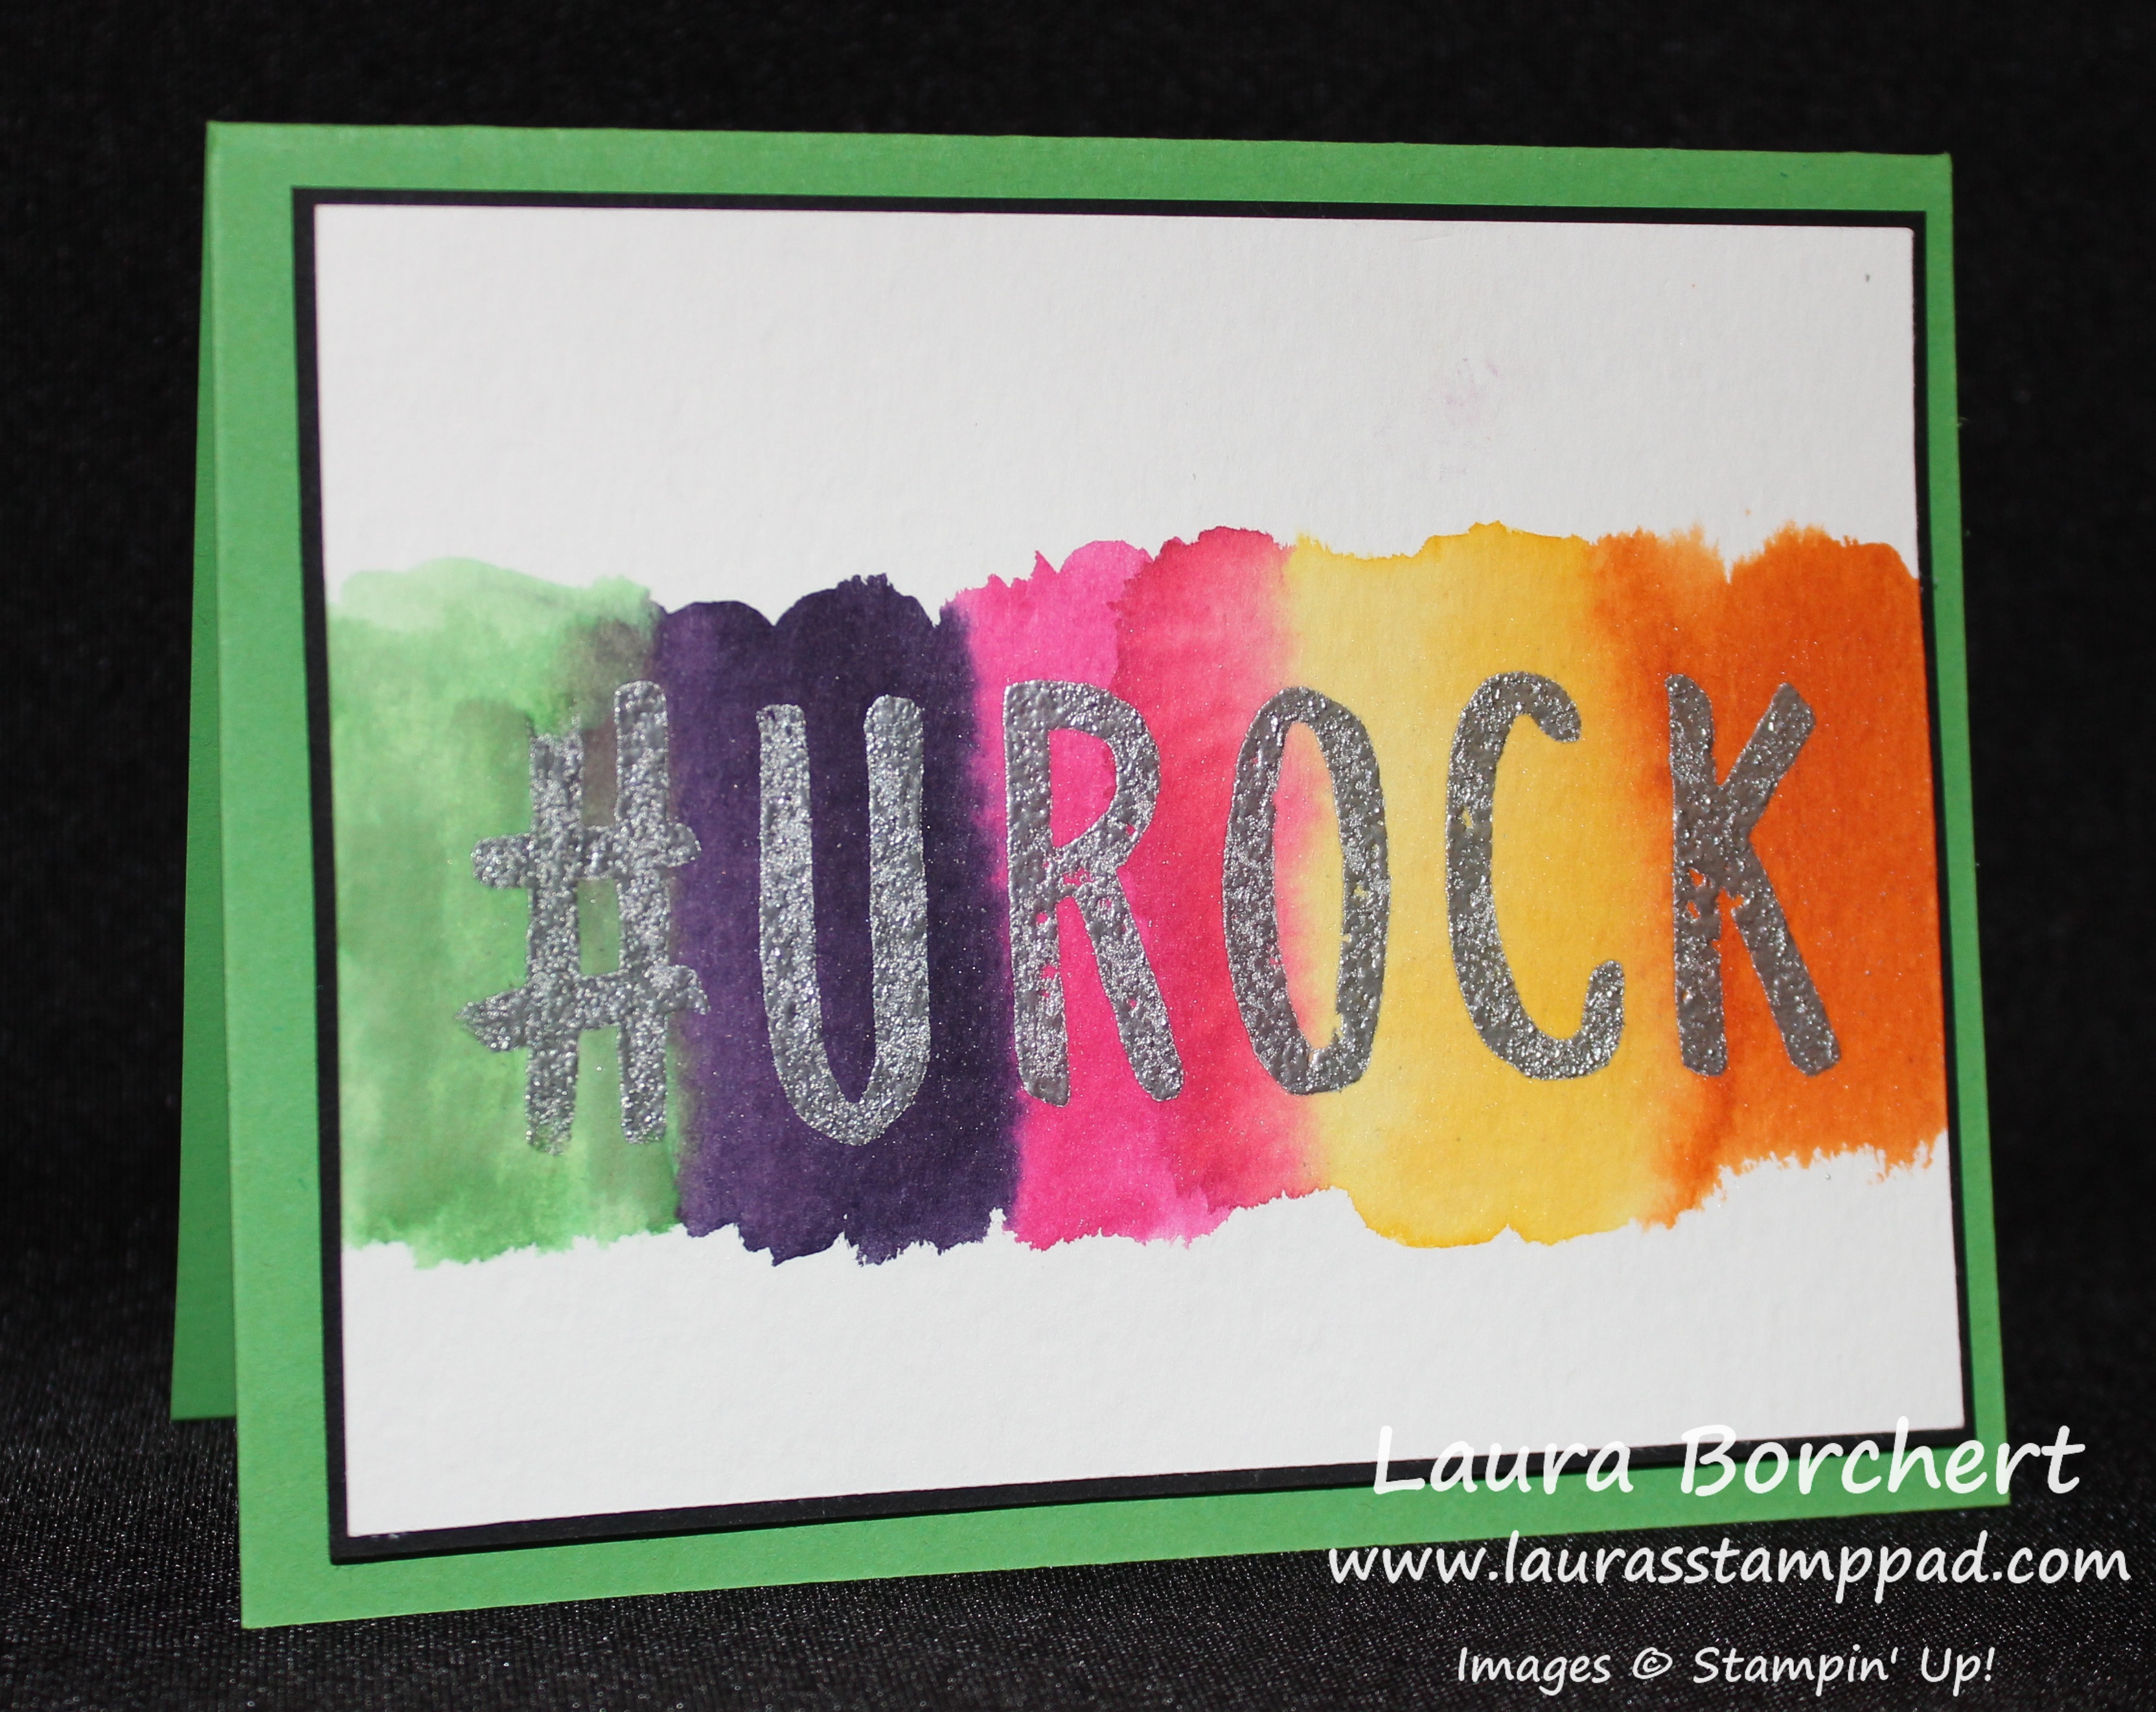
SUPPLIES NEEDED: Layered Letters Alphabet Stamp Set, VersaMark Pad, Heat Tool, White Embossing Powder, ink colors of your choice
I started with a Whisper White card base and stamped the background with the “X” from the Layered Letters Stamp Set in Blushing Bride. I stamped a few times before going back to the ink to get a variation of color. Then I took some of the Neutrals Designer Series Paper and die cut a star using the Stars Framelits. I added that to the card front as well as the strip of Blushing Bride with the banner tips. You can use the Banner Triple Punch or this trick – cut straight up in the middle and then from each corner to that center cut. I hope that makes sense. Both the star and the banner were added to the card with Snail Adhesive and not Dimensionals. Now for the letters, I took a piece of scrap white cardstock and stamped the rectangle image from the Layered Letters Alphabet Set. For the card above, I used Watermelon Wonder, Calypso Coral, and Blushing Bride (watermelon on both ends). Before cutting them out, stamp the letters in VersaMark and then add your White Embossing Powder. With your Heat Tool, you will set the powder and then you can cut out your letters. I didn’t cut them out first because it was easier to hold onto the piece of paper while using the Heat Tool. When I cut them out, I did a loose cut, not sure close and perfect around the rectangle. I added the letters to the card with Stampin’ Dimensionals! 🙂

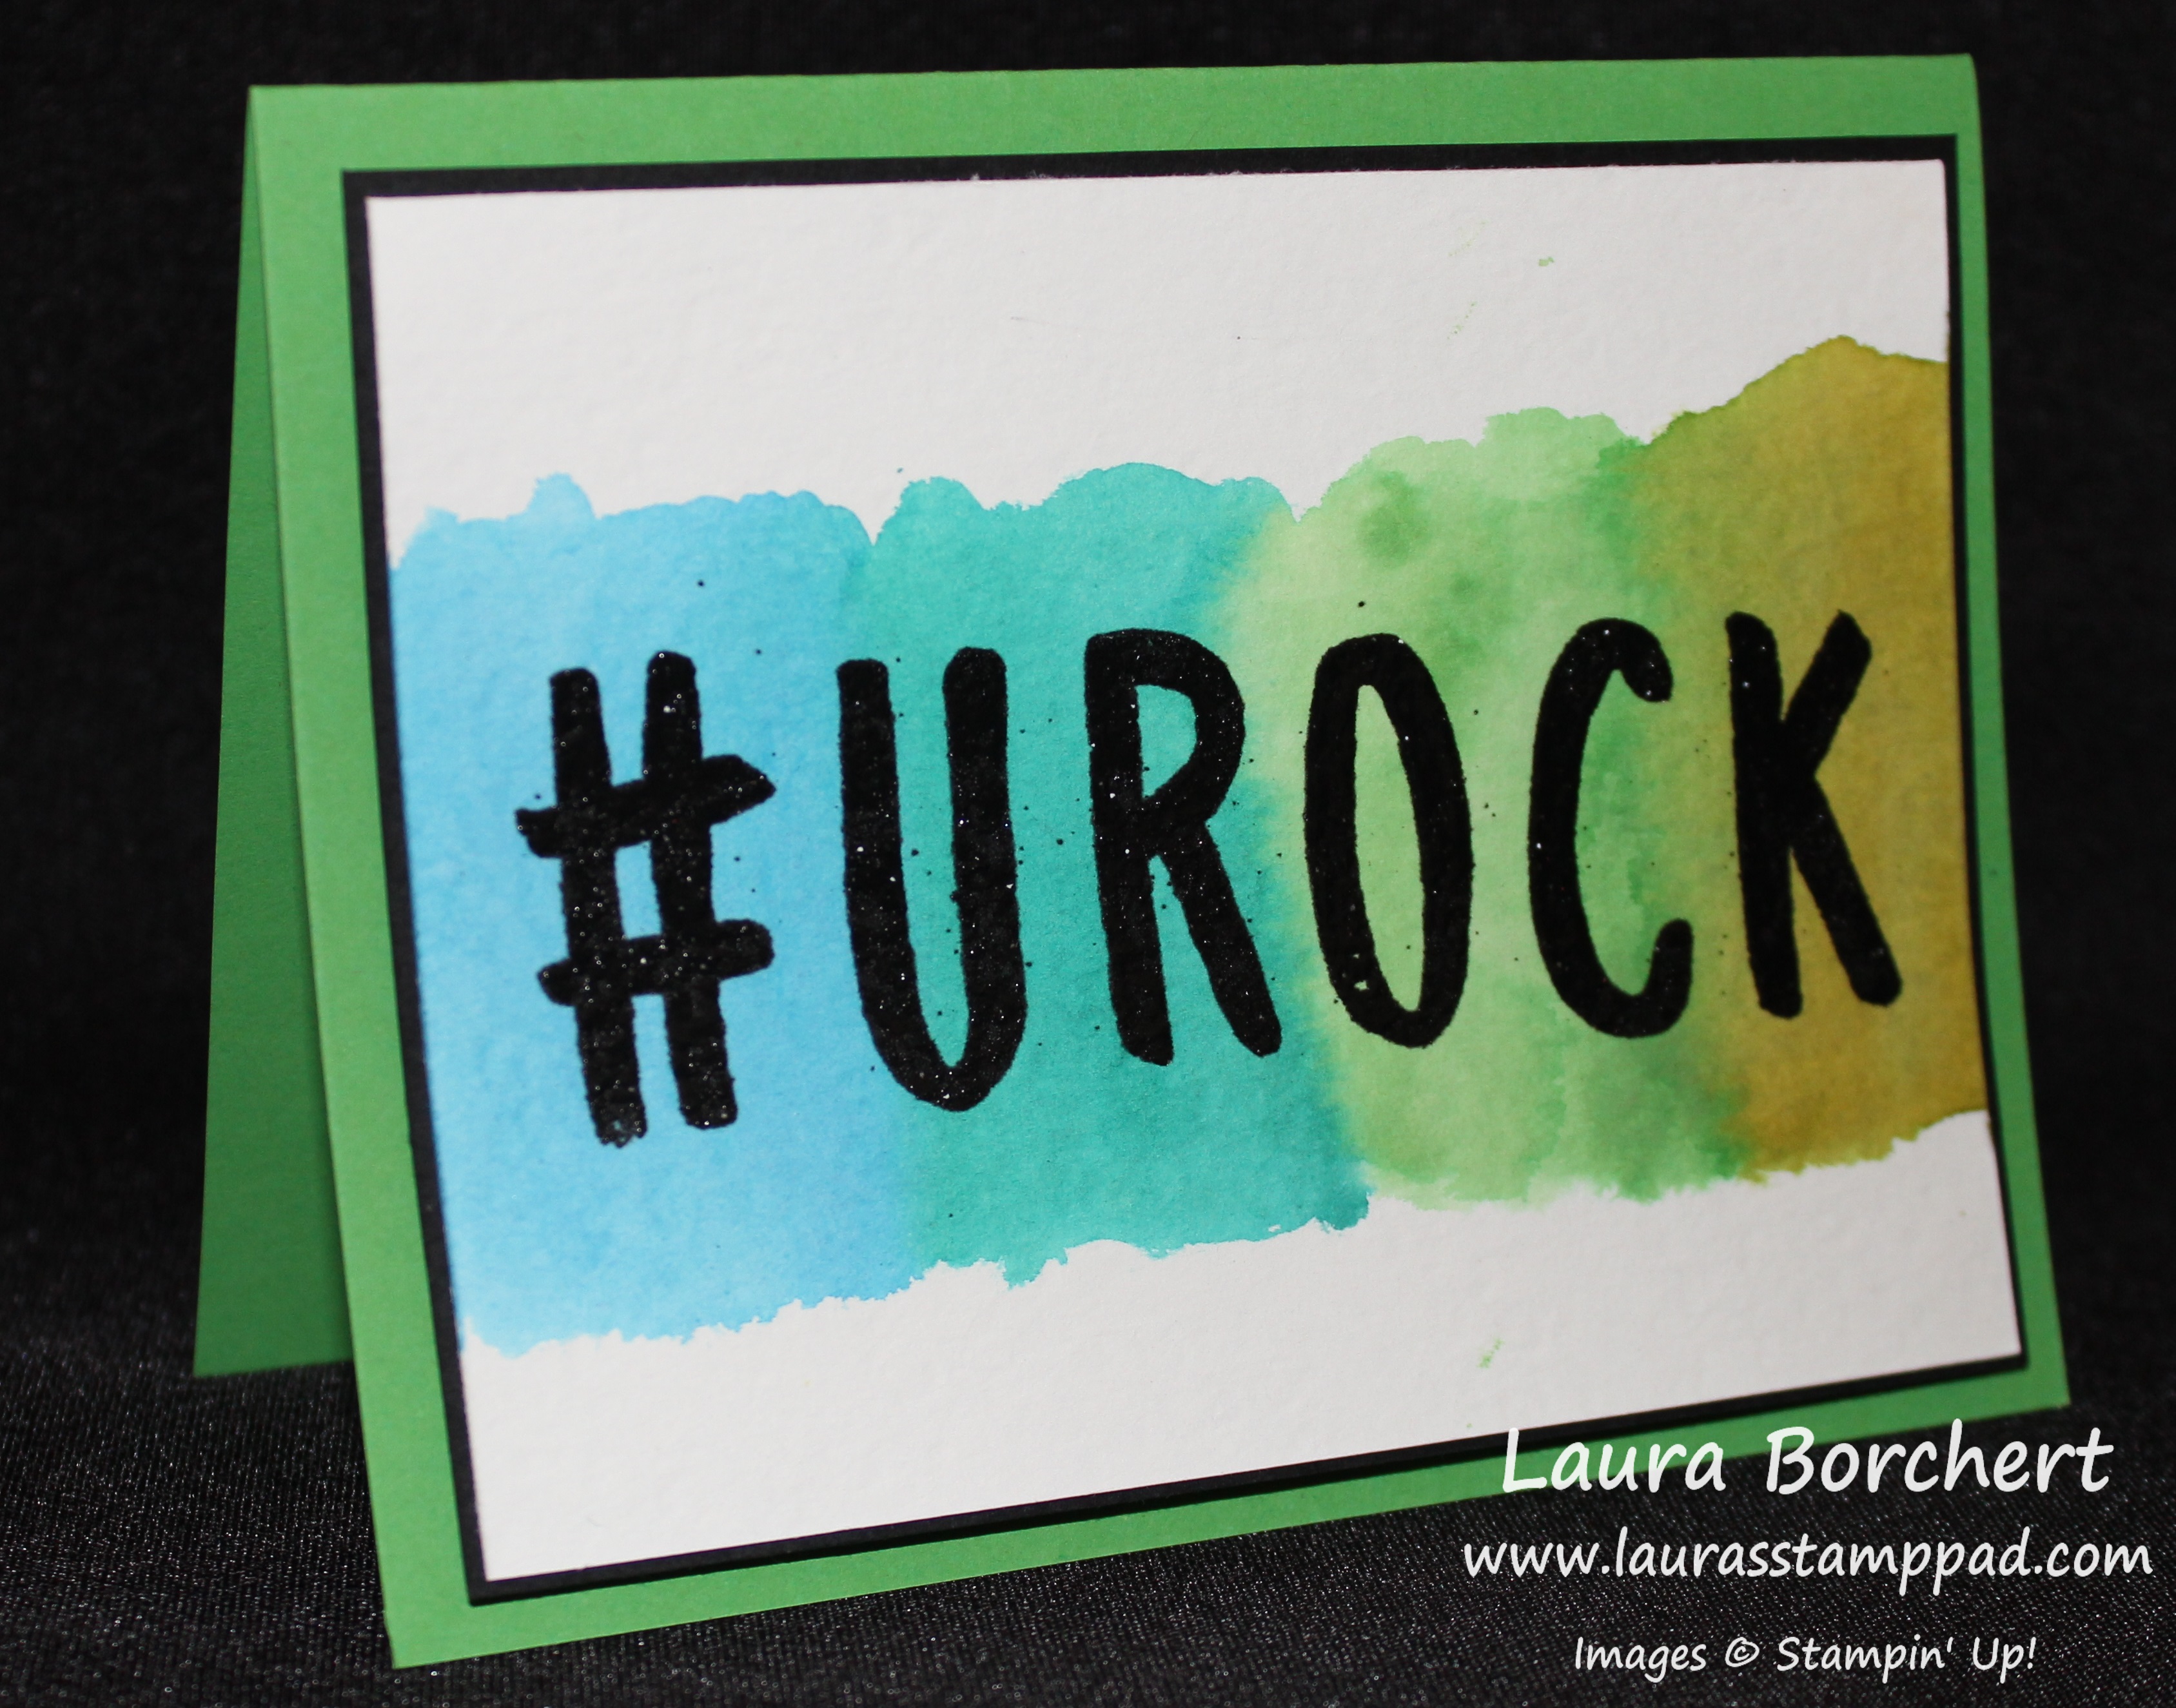
Here I made a Baby Boy card using Island Indigo, Bermuda Bay and Pool Party! Just precious!!! I had a stamper who didn’t need a baby card so she made it into a Graduation Card! There are so many different types of cards you could create with this technique!

If you would like to see this in action, you can check out the Video Tutorial below or by clicking here! Don’t forget to give it a thumbs up if you liked it and be sure to subscribe so you don’t miss the video on Thursday!
Happy Stampin’
~Laura

Be sure to check out the Retiring Items before they are gone at the end of May!