Happy Tuesday everyone!!! I have a fabulous technique to share with you today and it’s as simple as ink and clear blocks!!! You can use this technique with lots of different stamp sets and occasions! Let’s get started!!!
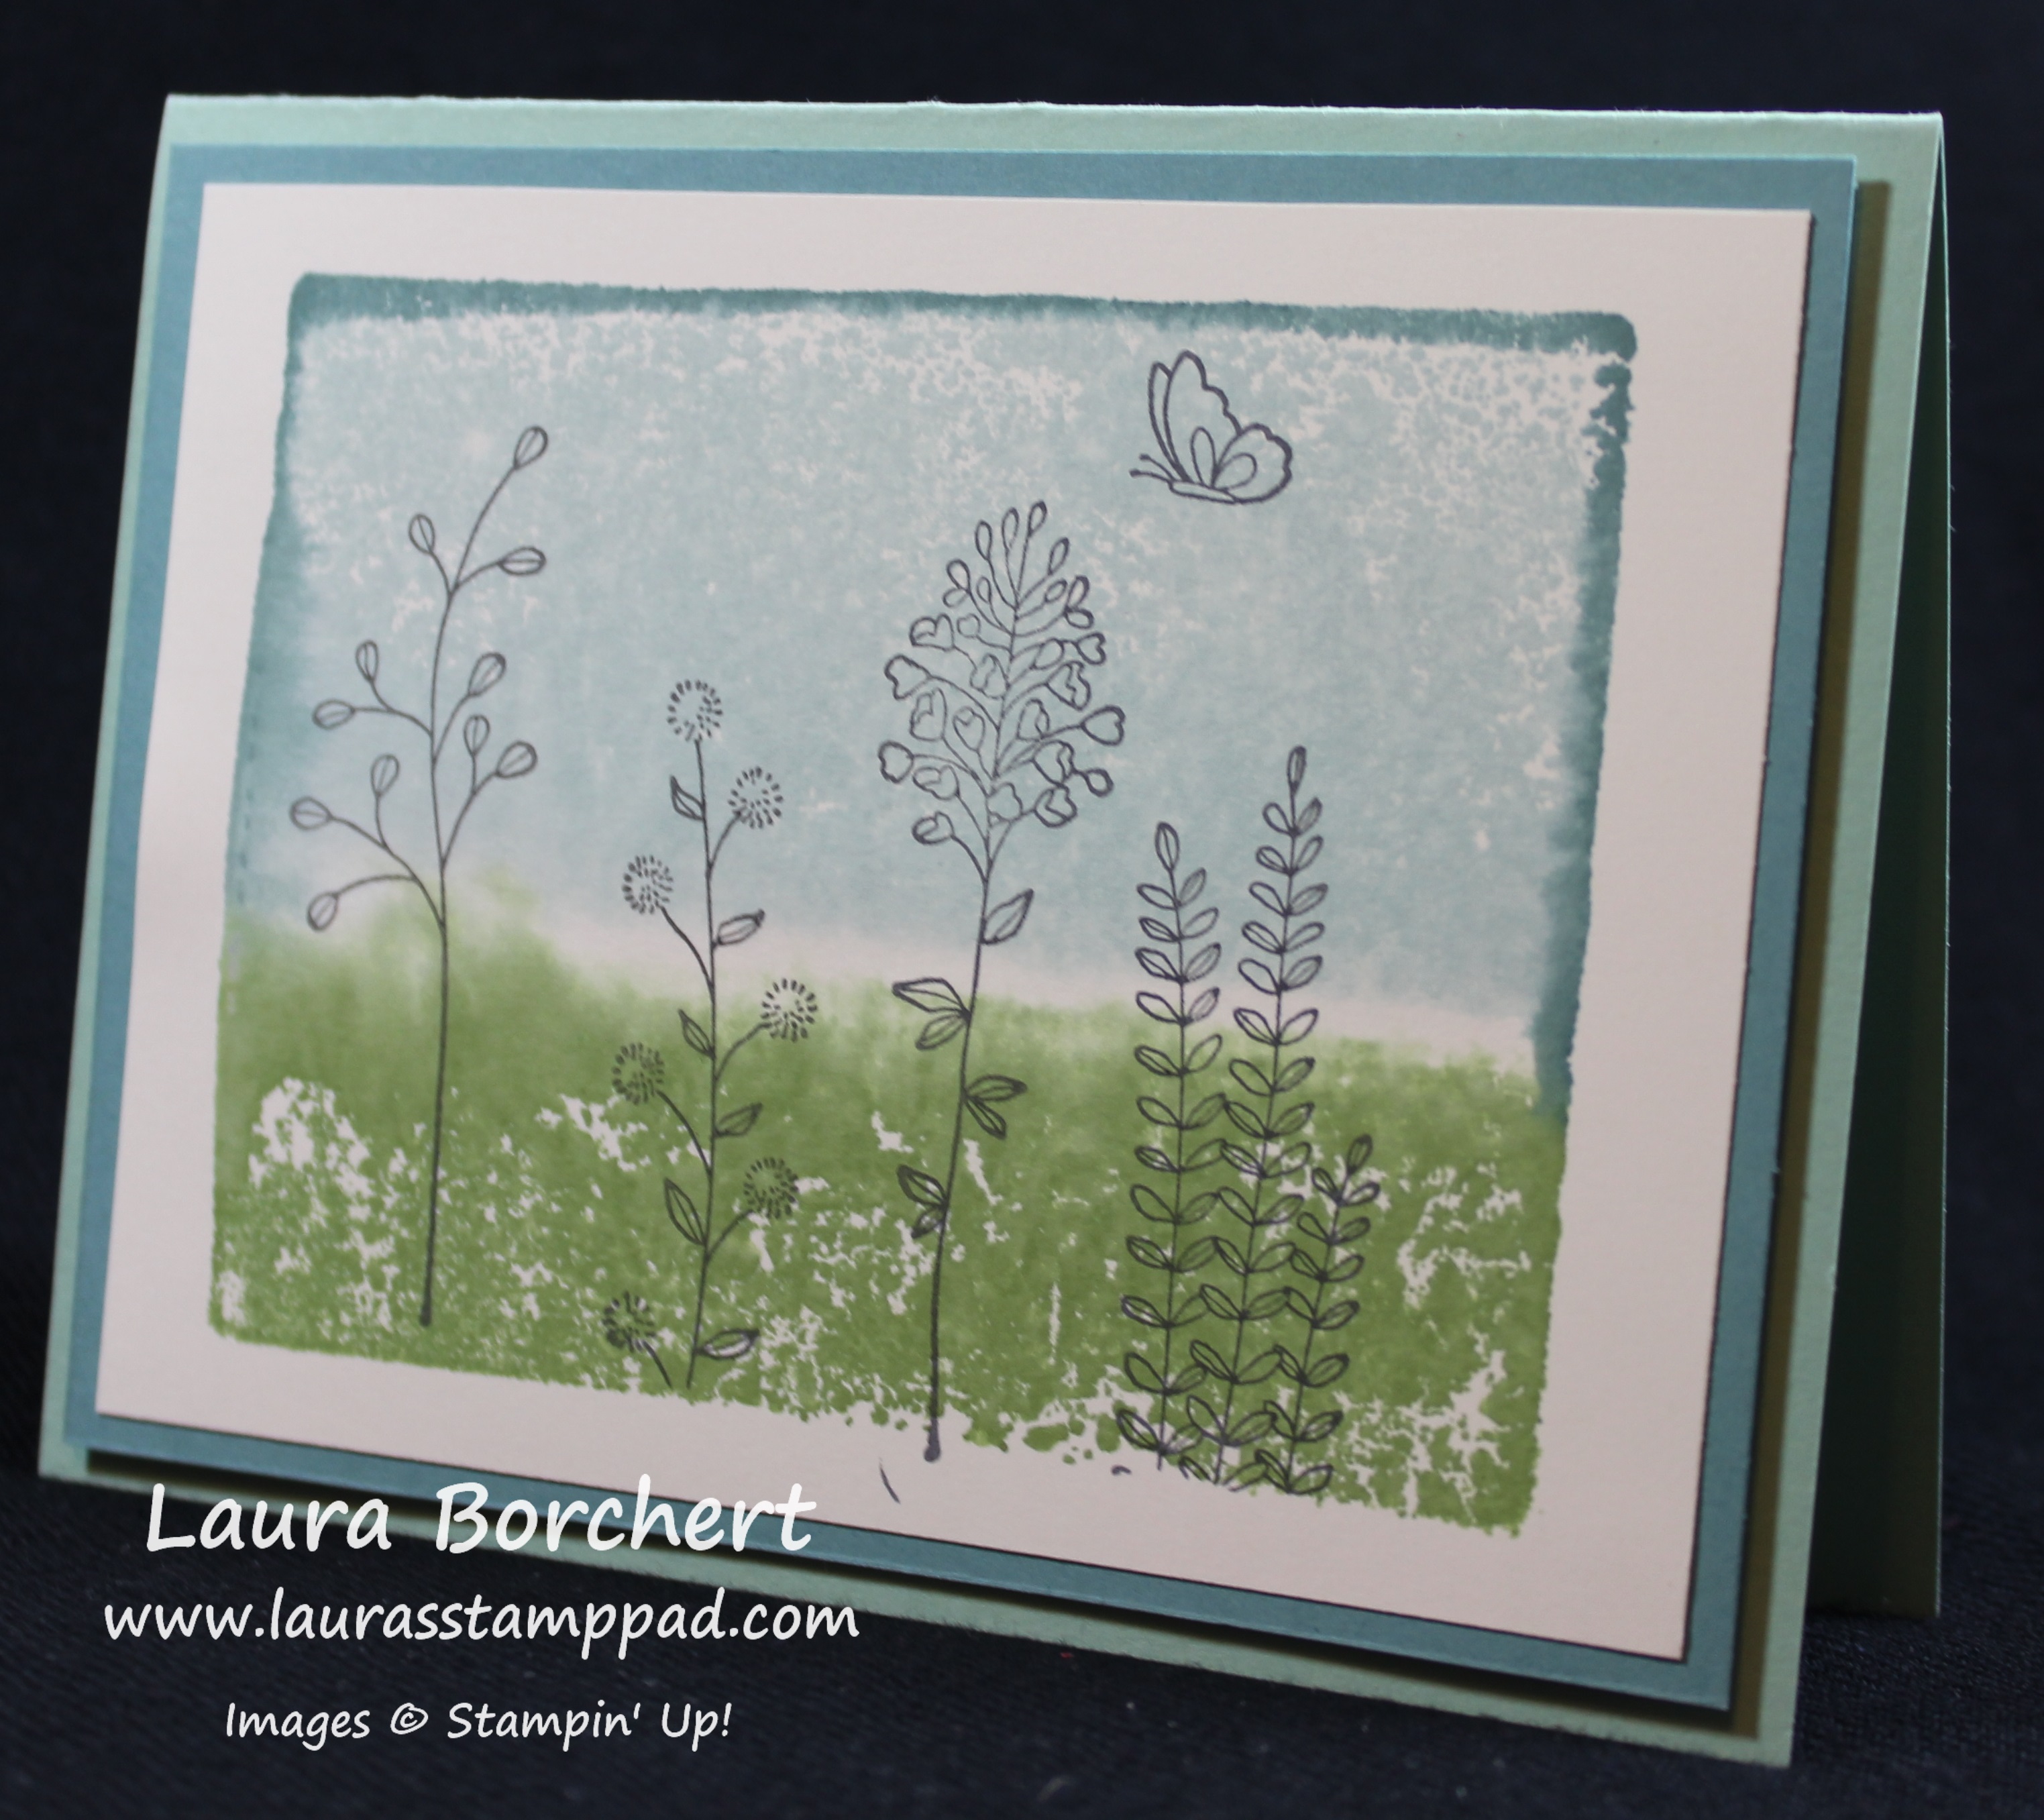
How amazing is this card? It is perfect for any occasions which is why I didn’t want to put a greeting on it. I love it! I got the idea from Rachel Palmieri. I tried to modify it a little to add my own flare and I didn’t like any of them. Rachel did it wonderfully and I went with it!!
SUPPLIES: Clear Block E, Ink Pads, Spritzer
You can really use any size of Clear Block that you wish but I went with Block E because I thought it was a great size for a scene. I pressed the Wild Wasabi Ink Pad onto the bottom 1/3 of the clear block. Then I took the Soft Sky Ink Pad and pressed it onto the top 2/3 of the clear block. You will want to get close to the green but you don’t need to touch. Then taking the Lost Lagoon Ink Pad, you will press it along the edges of the blue. Be sure that you are angling the ink pad a little and not just inking the side of the clear block. Then with a Spritzer filled with water, you will want to spritz the clear block. Don’t spritz directly at it but instead a few inches away and allow the mist to fall onto the block. Then you will flip the clear block over and stamp it onto a piece of Very Vanilla cardstock (3-3/4″ x 5″). Hold for a few seconds to allow the ink to soak in. Your paper may curl a bit because of the water and that’s okay. Once it has dried, you can stamp onto your cardstock. I stamped the flowers from the Flowering Fields Sale-A-Bration Stamp Set in Basic Gray for a softer look. I layered this piece onto Lost Lagoon measuring 4″ x 5-1/4″ and then onto a Mint Macaron card base with Stampin’ Dimensionals! I love it!!!

Here are a few tips and tricks that I wanted to share with you.
- You will want to spritz with water as it achieves the best look. I tried with no water and it looked very light and small dots.
- I tried with Alcohol in hopes it would dry faster (you all know I don’t have patience). It didn’t work. It dried too fast and the colors did fill in like they do with water.
- Be sure to flip the clear block over and hang it directly upside down while you determine the center of the cardstock or something else. You don’t want to hold the clear block on it’s side or tilted because then the colors will drip/run into each other.
If you would like to see this technique in action, check out my Video Tutorial below or by clicking here! I show all of the samples that didn’t work as well! 🙂 Be sure to give it a thumbs up if you liked it!
Happy Stampin’
~Laura