Christmas Lights With All The Colors!!!

Posted on

Happy Wednesday!!! Yesterday in class I did a poll on whether you prefer white or colored Christmas Lights. It was about 50/50. So now I’m asking all of you! Christmas lights with all the colors or just white lights??? Let me know in the comments below!

Christmas Lights With All The Colors, www.LaurasStampPad.com

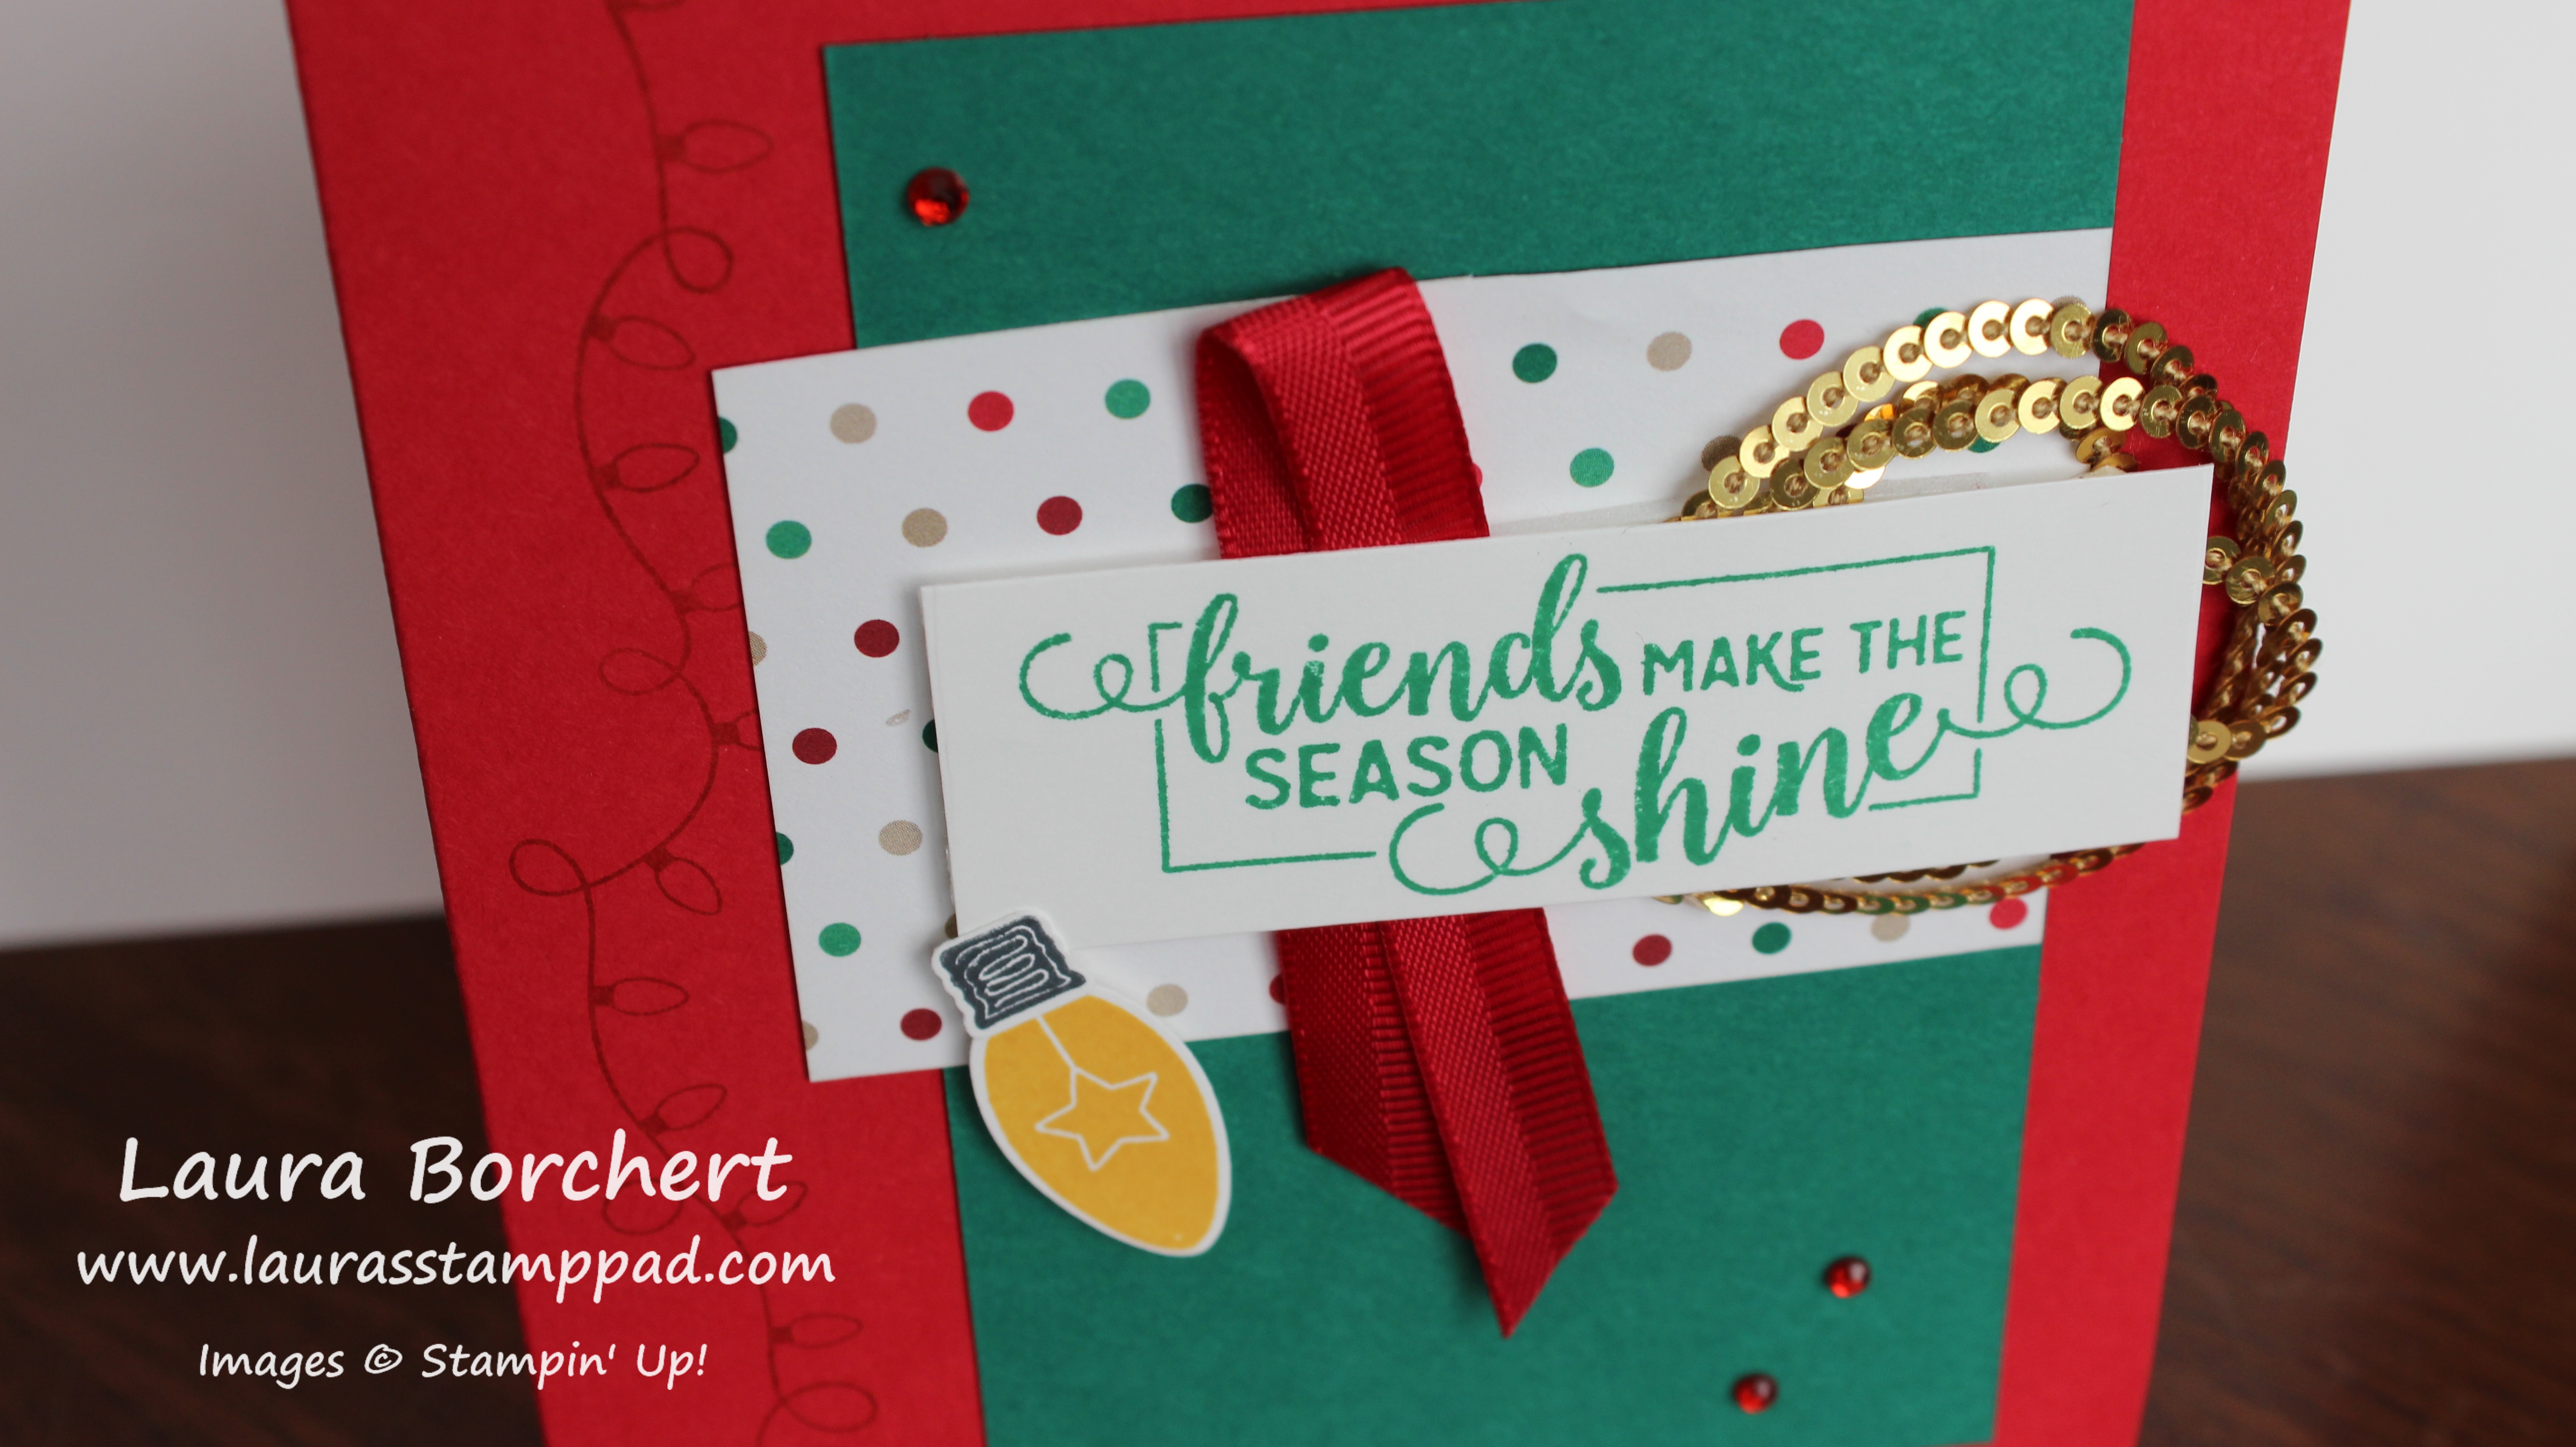
This was another fabulous card idea that I got at our Vacation Stamping School event in August! I changed it up a smidge and LOVE IT!!! There is a little technique on this card that I just wish you could see it better. Each of the lights have a bit of twinkle to them. I watercolored them with Wink of Stella! Yeah! That’s a thing. Just pick up the ink with the brush like you would an Aqua Painter and paint on the color and shimmer at once! Amazing!

I started with a Daffodil Delight card base. Next, I took a piece of Whisper White (4″ x 5-1/4″) and stamped the string of lights from the Making Christmas Bright Stamp Set. It was stamped in Stazon Black Ink since I watercolored the bulbs. Using the Wink of Stella Brush, I dabbed it into some ink and then brushed on color. A little shimmer and a little color all in one!

Christmas Wreath, www.LaurasStampPad.com

For the focal point, I added a strip of the All Is Bright Designer Series Paper. Then I punched out a 2-1/4″ Call Me Clover circle. Using the wreath image from the Making Christmas Bright Stamp Set, I stamped it in Call Me Clover Ink. To get that full look, I stamped it, inked it again and stamped a little to the left of the first one. Then I stamped again but a little lower than the first one and a little to the right from the first one. This makes the wreath look full! I added this to the card front with Stampin’ Dimensionals!

Coloring with Wink of Stella, www.LaurasStampPad.com

I stamped the greeting onto Whisper White and then punched it out with the 1-3/4″ Circle Punch and added it to the wreath. Don’t forget to stamp Bright on the inside of the card! To finish it off, I added some Red Rhinestones for holly berries and a little knot of Real Red Mixed Satin Ribbon! All the shimmer and shine!!!

Want to create this card? Check out the supply list below! Don’t forget that all orders of $75 or more will earn the Buffalo Check Stamp Set for FREE from me!

Happy Stampin’

~Laura

Product List


All My Love Designer Series Paper Reveal!!!

Posted on

The Occasions Mini Catalog is coming out on January 3rd and I’m so excited!!! I wanted to start sharing some of the goodies with you. Today, I’m sharing the All My Love Designer Series Paper!!! This paper is perfect for Valentine’s Day but there are lots of great prints for Anniversaries, Birthdays, Weddings, and more. It’s got flowers so you all know I’m in love!

All My Love Designer Series Paper, www.LaurasStampPad.com

Isn’t it so pretty??? I love all the shades of pinks and reds and everything in between! The other thing that I love about Stampin’ Up’s designer paper is that one side is usually holiday themed or a specific design but the other side is simple like stripes/dots/etc. This makes it perfect to use up all of the paper even if you don’t use it for that holiday. I will probably use some of the hearts for Valentine’s Day but then use the rest for other occasions. It’s perfect!

If you would like to see all of these sheets as a full 12″ x 12″ rather than the little swatch in the catalog, check out the video below or click here! Be sure to give the video a thumbs up if you liked it and don’t forget to subscribe if you are new. I’ll be posting more of the paper from the Occasions Mini Catalog soon!!! If you would like a notification when I post a new video, be sure to click the bell right next to the subscribe!!!

Happy Stampin’

~Laura


November 2018 Paper Pumpkin Kit – To You & Yours!!!

Posted on

The November 2018 Paper Pumpkin Kit – To You & Yours was perfect for me to have a few extra cards to send out to family and friends. I’m always thinking of someone else to send a card to or have a new customer that I want to send one to so this kit was perfect!!! Plus it came in a cute plaid box!!! Check out the unboxing of this kit here!

Dreaming of a Plaid Christmas, www.LaurasStampPad.com

The plaid theme for these cards was super adorable! I loved it. The little greenery pieces were delicate but already die cut for you! Woot Woot!

Christmas Greenery, www.LaurasStampPad.com

I actually didn’t use the ribbon for this card. Oppps I noticed it was on there after I was all done and then I thought I would just leave it off because I liked  the card. Also, I didn’t use the Mini Glue Dots from the kit, I used some Snail Adhesive. While it’s super fabulous that these kits come with adhesive, I love my Snail for a quicker project. I added a little bit of snail on the wood sticker and then pressed the greenery into it. It wasn’t a super strong hold but then I added the greeting over the top with Stampin’ Dimensionals. It was super secure then! I love it!

Plaid Christmas Wreath, www.LaurasStampPad.com

This card was super quick and simple as well. I placed the wood circle sticker down and then added 8-10 little dabs of Snail adhesive around the circle. I pressed the greenery into a circle over the adhesive. It worked perfectly. I added the little bow with a Mini Glue Dot.

November 2108 Paper Pumpkin, www.LaurasStampPad.com

The cute plaid matching envelopes makes it so cute and coordinating. I was able to whip these cards together so quickly and it was awesome. To just relax and craft my Paper Pumpkin Kit is amazing. I am really looking forward to Paper Pumpkin even more lately.

Today is the last day to get signed up for the December Paper Pumpkin Kit. Click here to get signed up! I have been told that it won’t be cards but rather a project. This intrigues me and I can’t wait to see what it is. I’ll be posting the unboxing on my YouTube Channel once it arrives. Can’t wait! Paper Pumpkin also makes the perfect little gift for someone. It comes with everything you need in the kit as well as directions!

Happy Stampin’

~Laura


December 2018 Free Stamp Set of the Month!!!

Posted on

Are you ready for it??? The December 2018 Free Stamp Set of the Month is…….

December 2018 Free Stamp Set of the Month, www.LaurasStampPad.com

I think I might be the last one to realize that Buffalo Check is HOT HOT HOT right now! I do know that there is a lot of Buffalo Check and Gingham coming in the Occasions Mini Catalog in January so I thought why not get the party started this month. The Buffalo Check Stamp Set is a background stamp that you can stamp in any color!!! You can earn this set for FREE all month long when you place an order of $75 or more (before shipping or tax) online or in person! This offer is exclusively through me. Click here to start shopping!!!

I hope you all have a wonderful weekend! I have my last stamp class of the year tomorrow and while I’ll miss all my stampers, I am excited for a little break and family time for the Holidays. Of course, I’ll still be working to finish up some projects and prepare for January too!

Happy Stampin’

~Laura


My 2019 Occasions Mini Pre-Order Haul!!!

Posted on

As a demonstrator, we get to pre-order items from catalogs before they come out! I love this because it’s like getting to know the secret before everyone else. I get to see and play with these goodies now. If you know me at all, you know I am not a fan of winter so getting to play with Spring stuff as early as possible is perfect for me. If you want to get it on this amazing secret and see the goodies early, join my Stampin’ Up Fabulous Friends Team by clicking here! Now let’s see some of these amazing products in my 2019 Occasions Mini Pre-Order Haul!!!

My 2019 Occasions Mini Pre-Order Haul, www.LaurasStampPad.com

There are so many pretty designer papers, bling, stamps and framelits! Flowers galore and apparently buffalo check/gingham is HOT HOT HOT! I think I missed that bandwagon. That is why my Free Stamp Set for orders of $75 for the month of December get the Buffalo Check Stamp Set! Just preparing for all the fun projects in 2019! I can’t wait to start playing with all these goodies and dreaming of spring!

If you would like to see all of these products as I unbox them, check out the video below or click here! Be sure to give the video a thumbs up if you liked it and don’t forget to subscribe if you are new. If you would like a notification when I post a new video, be sure to click the bell right next to the subscribe!!!

What are you most excited about??? Let me know in the comments below!

Happy Stampin’

~Laura


Year-End Closeout Sale!!!!

Posted on

Happy Wednesday! Anyone else think this week is dragging on? I sure do….but then again on Monday I felt like it was Thursday already. Stampin’ Up is spicing up the week with some fun! The Year-End Closeout Sale starts today as well as the Craft & Carry Stamparatus Bag being available now!!! Woot Woot!

Year-End Closeout, www.LaurasStampPad.com


These items are only available while supplies last or until January 2nd. Don’t wait long as some will sell out quickly. Click here to start shopping!

Craft & Carry Stamparatus Bag, www.LaurasStampPad.com


Click here to get the Craft & Carry Stamparatus Bag!!! I think this will be a HOT item so get yours today!

Don’t forget that all orders of $75 or more before tax and shipping will earn Laura’s Free Stamp Set of the Month! This month it is the Buffalo Check Stamp Set! Woot Woot!

Happy Shoppin’

~Laura


Craft & Carry Stamparatus Bag!!!

Posted on

I’m so excited to share with you all that Stampin’ Up has created a Craft & Carry Stamparatus Bag!!!! This bag is super cute and versatile!

Craft & Carry Stamparatus Bag, www.LaurasStampPad.com

First of all this bag is CUTE! I love the navy and coastal cabana colors. It is also super strong and thick canvas. This isn’t a thin bag that is going to tear or anything.  It also have lots of pockets for all kinds of things! The Stamparatus goes on one side with the velcro strap holding it in tightly and padded pocket. There is no fear that the Stamparatus will break or get damaged. The other side has 2 pockets for the accessories like extra clear plates, grid papers, and even stamps and ink. There is also an outside pocket with a magnet closure. The zipper is super strong too! You could add in some stamps, cardstock, and ink pad to take with you somewhere. After all that is what cute bags are for, right??

Stamparatus Bag Details, www.LaurasStampPad.com

Are you loving these colors and this amazing bag??? You can get one of your own starting tomorrow – December 5th! I’m telling you a day early to make sure you see this and get ready. I have a feeling these things will be HOT HOT HOT and I don’t want you to miss out or have to wait if they go on backorder!

If you would like to see me open this bag and show it off, check out the video below or click here! Be sure to give the video a thumbs up if you liked it and don’t forget to subscribe if you are new. If you would like a notification when I post a new video, be sure to click the bell right next to the subscribe!!!

Happy Stampin’

~Laura


Thumbunny Loves You!!!

Posted on

Happy Monday and HAPPY BIRTHDAY, BRAD!!! It’s my husband’s birthday today and you all know how much I love making him special cards. You can check out some of the past ones here, here, and here! Now that we have Little Claire, we had to make a card together!!! That’s where Thumbunny Loves You comes into play…

Thumbunny Loves You, www.LaurasStampPad.com

I love how it turned out even if Claire’s thumb doesn’t really look like a thumb. Rotating the thumb around while holding her on your lap and sticking her hand into ink…….not easy! I do have to say there was no crazy messes with ink so I call it a win!!

I used the Make a Difference Stamp Set for the letters and it was really easy to line up the letters and stamp them. I did not line them all up and stamp as one word on the block. Instead, I stamped 2 letters (T & u) and then lined up the 2 in between (h & m). This makes your letters match up better since the photopolymer around the letters sometimes doesn’t allow for a super close stamped letter. It really wasn’t all that hard though since they are photopolymer. If anything I wouldn’t ever suggest writing much more than this greeting as it isn’t really all that quick. The hardest part was probably finding the letters on the big sheet of stamps. 🙂 I swear some letters took me 5 minutes to find. Also, making sure I was spelling it correctly since it was stamped slowly and in pieces.

Little Thumb, Big Thumb, www.LaurasStampPad.com

After stamping our thumbs in Blushing Bride, I used a Basic Black Marker to color in some of the faces. I also used the March 2017 Paper Pumpkin Kit for the whiskers and the face on my bunny. Paper Pumpkin stamps always come in handy down the road. I have used various greetings and images from past months many time! For the ears on my bunny, I used the Christmas Bulb Builder Punch and then colored in the center with the Whisper White Watercolor Pencil. I free-handed the ears for Claire’s bunny.

Me and Me, www.LaurasStampPad.com

This is the top of the inside of the card and then I wrote on the bottom of the inside of the card! Claire really didn’t want to spread that thumb out so her hand has 4 fingers and a blob. I love it though and Brad does too!!! I’m sure these will get even more crazy as the years go on! Let’s hope I can keep coming up with more ideas!

I hope you all have a wonderful day today and leave your Birthday Wishes for Brad in the comments and I’ll read them to him tonight!

Happy Stampin’

~Laura

Product List


Turning Rhinestones into Gold Jewels!!!

Posted on

You all know how I love my bling! Rhinestones are my go to and I’m a silver girl but sometimes you need some gold. Today, I’m going to show you how turning rhinestones into gold jewels is possible too!

Turning Rhinestones into Gold Jewels, www.LaurasStampPad.com

Look how fabulous that is!!! I simply took the Daffodil Delight Dark Stampin’ Blends Marker and brushed over the Rhinestones. Now you have gold rhinestones! It’s perfect!!! Here is a card that I used both silver and gold for!

Golden Merry Christmas, www.LaurasStampPad.com

I started with a Whisper White card base and layered on a piece of Blackberry Bliss that I ran through the Big Shot with the Tufted Embossing Folder. This gives a little texture to the background. Next, I stamped the tree from the Timeless Tidings Stamp Set on a piece of Shaded Spruce cardstock. I stamped three times before going back to the ink for a variation in color. Also, I stamped up, down, up, down for a forest look. Then I added this piece to the card front.

Silver Merry Christmas, www.LaurasStampPad.com

Using some Gold Glimmer Paper and Silver Glimmer Paper, I added a little strip down the bottom of the Shaded Spruce. This is a great way to use up scrap pieces. It just needs to be long enough to stick out the ends of the greeting. The greeting was stamped in Blackberry Bliss from the Timeless Tidings Stamp Set. To finish off the card, I added some Rhinestones to the silver one and some gold Rhinestones to the gold one. I love it!!!

Happy New Year Greeting, www.LaurasStampPad.com

Here I stamped the inside of the card with the New Year greeting and a little mini forest! Super cute! Do you prefer Gold or Silver?? Let me know in the comments below! If you would like to recreate this card, click on the supply list below!

Happy Stampin’

~Laura

Product List


Froofy Shmoofer Card!!!

Posted on

My husband names this card the Froofy Shmoofer card!!! I say that works, right?? Either way it’s a great card for any occasion, even Christmas!

Froofy Shmoofer, www.LaurasStampPad.com

I started with a Soft Sea Foam card base. Next, I took a piece of Whisper White (4″ x 5-1/4″) and stamped the greenery piece from the First Frost Stamp Set. It is stamped in Tranquil Tide Ink. I started on the side and stamped it up high, flipped it over and stamped it towards the bottom and over and over. This creates a more random pattern. Then I added a little strip of the Frosted Floral Designer Series Paper across the center.

Detailed Greeting, www.LaurasStampPad.com

Using just a little bit of adhesive in the center of the designer paper, I then added a little bit of the Tranquil Tide Mini Ruffled. Don’t worry if it doesn’t seem secure because the greeting will also help hold it in place. For the greeting, I stamped it from the First Frost Stamp Set in Tranquil Tide Ink. Then I took another greenery piece form the set and stamped it over the top in Soft Sea Foam Ink. Then, I punched a few Soft Sea Foam sprigs with the Sprig Punch. I added these on opposing corners. I added the greeting to the card front with Stampin’ Dimensionals.

This card would be a perfect for a winter wedding, Christmas, or even a just because. What occasion would you use this card for?? Let me know in the comments below!

Don’t forget today is the last day for the Online Extravaganza. Get 10% off Inks and Tools!! Click here to check out the sale items!

Happy Stampin’

~Laura

Product List