Isn’t she a beauty??? I love the cover of the Occasions Mini Catalog! It is bright and colorful flowers!!!! What’s not to love!?!?! I am planning on making these flowers to have on my table as a centerpiece…..hoping Spring will come ASAP! 🙂 I can’t wait to start sharing all the goodies in this catalog! Be sure to subscribe to my blog so you don’t miss out!!! Enter your email address in the box on the top right corner to subscribe!!!!
Sale-A-Bration has begun!!! This is the happiest time to the year!!!!!! The more you stamp, the more you get! 😉
Customers: you will earn an item from the Sale-A-Bration Brochure for every $50 you spend from January 6th to March 31st! Place a order of $150 and you will earn 3 items!!!
Hostess: when your party reaches $250 or more, you earn an additional $25 in Hostess Dollars to spend on anything on your wish list! That is on top of the current Hostess Benefits!
Join the Fun: when you join the fun with Stampin’ Up during Sale-A-Bration get you to pick $125 in product for just $99. But that’s not all, you get to pick a Simply Created Project Kit from the Occasions Mini Catalog for FREE! There are 5 to pick from!!!
You can Sale-A-Brate in one or all three ways listed above! This is by far my favorite time of year. I have the most events this time of year because everyone loves free stuff! I really enjoy sharing what I love with others! Let me know if you would like to Sale-A-Brate as a Customer, Hostess, or by Joining Me!
Eeeee! I just love these cards! I love the color combination – Melon Mambo, Pear Pizzazz, and Bermuda Bay! I love the Bermuda Bay Sequins and I love that they are shaker cards! Super fun!!!! Stampin’ Up sure wows me every month with the My Paper Pumpkin kits! The month of December was even better because of this FREE GIFT in the box!
Who doesn’t love Free Gifts?!?!?! Click here to check out my video of when I opened this kit! I was excited!
Now lets get started! Here are all the goodies that came in the kit! It was really easy to assemble although I do think this kit took a little longer than 30 minutes but I was watching a show while doing it so I was moving a little slow! 🙂 I love that Stampin’ Up included this little toothpick looking tool for poking out all of the little stars. It was perfect and made that tasks super easy!
Another item that I want to point out is the Dimensionals for the back of your shaker frame. I used 2 of the short ones on the top and bottom. I used 2 of the long ones on the sides….be sure to have them touching so you don’t have any leaks on your shaker card. I would hate to have you shake it and watch it fly out and go everywhere! Although that would be like sending a card and one of those Party Poppers in one to someone! 🙂 I felt that the bottom portion needed a little bit of Dimensional or otherwise it would squish down since nothing was there. I used the border and the extras of the pieces to add some down there. You can see that in the photo below….I couldn’t use the flash because of the clear window sheets.
I still had some of the Dimensional pieces leftover in the end! I loved making these cards and while I was taking the words off their sticky paper, I thought I could use these too! So I took the negative image, cut them apart from each other and placed them on a Note Card & Envelope!
How cute are these little simple cards? As you can see the Thank You greeting was diagonal on the sheet in order to fit so I had to cut diagonally. I thought they came out super cute and oh so simple! So I got 18 cards from this My Paper Pumpkin Kit with just adding in 9 Note Cards & Envelopes. That is fabulous work for say an hours time…..and enjoying a show on TV! 🙂
I can’t wait to see what the January Kit is going to be! Don’t miss out on another month, sign up for My Paper Pumpkin by clicking here! Who doesn’t love FREE Gifts? During Sale-A-Bration which starts tomorrow, the 6th, get a 3-month Paper Pumpkin Prepaid Subscription for just $54.85. That is a $5 savings and that qualifies you for a Sale-A-Bration reward!!!! Woot Woot!!!! Pre-Paid Subscriptions make great gifts too!
It’s Friday! It’s a New Year!!!! Let’s kick it off right with some stamping!!!! First off the Weekly Deals include the Fun Flower Punch! LOVE flowers and punches are so quick and handy! This is a must have!
There are still lots of fabulous items on the Year End Close Out Sale too! Great time to get some Holiday items (Designer Series Paper, Embellishments, etc) to hold on til next year or to use in your scrapbook when you are doing holiday pages!!!! This sale ends on January 5th as well as the Holiday Mini Catalog!
Sale-A-Bration and the Occasions Mini Catalog begin next week (January 6th) and I am sooooo excited! Lots of fabulous new product and I will be showing it off on here, my Facebook, Pinterest, and YouTube! Don’t miss it!!!
I’m headed off to a Stamp Party this weekend with a fabulous group of stampers! I’m loving kicking off the New Year with STAMPING and meeting new people!!!! Have a fabulous weekend!
Welcome to 2015! Let’s make it the best year yet!!! I am looking forward to all of my events, classes, stamp parties, meeting new people, laughs and fun that will take place in 2015! Be sure to check out my Upcoming Events to see when you can stamp with me next!!! Can’t wait!!!
Today I thought I would share some more fabulous samples using the One Sheet Wonder Technique. This technique is so much fun and pretty simple! You take a piece of Whisper White cardstock (8-1/2″ x 11″) and stamp all over it. I used the Flower Shop Stamp Set and Crushed Curry, Elegant Eggplant, and Melon Mambo Ink. Then you will put the piece up into the following pieces:
Then you take each piece and make it into a card! You can follow the ways I used them or create your own! I used Melon Mambo, Crumb Cake, Elegant Eggplant, Crushed Curry, Wild Wasabi, and Whisper White cardstock for my cards. I brushed some edges with my Sponge Daubers of course! You know how I love my Sponge Daubers. The greetings I used came from the A Dozen Thoughts Stamp Set. I even stamped a few flowers from the Flower Shop Stamp Set on additional cardstock and punched them out with the coordinating Pansy Punch! I added these with Stampin’ Dimensionals and some of them have some Dazzling Details to add a little bling! 🙂 Here are the rest of the samples!
I hope you all try out this technique! You can see other samples here, here and here! If you would like to see these cards in action, check out my Video Tutorial here! I apologize for the poor lighting.
You know my love for flowers! Well Stampin’ Up must know as well because this stamp set seems to be made just for me! LOVE IT! It is called Lotus Blossom and you can earn it for FREE during Sale-A-Bration with a $50 order!! Woot Woot! Flowers & Free!
How beautiful is that??? I took this card idea straight from the catalog. I love it! This flower was done in Bermuda Bay but I had to try others colors too!!!
So much fun!!!! Be sure to check back next Wednesday and I will share how this card was created as well as have a Video Tutorial! You can also SUBSCRIBE at the top right corner of this page and then you won’t miss out on any future posts!
The Occasions Mini and Sale-A-Bration Promotion begin on January 6th!!! Also, that means that the Holiday Mini ends on the 5th!
Happy New Year’s Eve! Please be safe tonight and enjoy the celebration of the end of 2014 and let us make 2015 the best year yet!!!
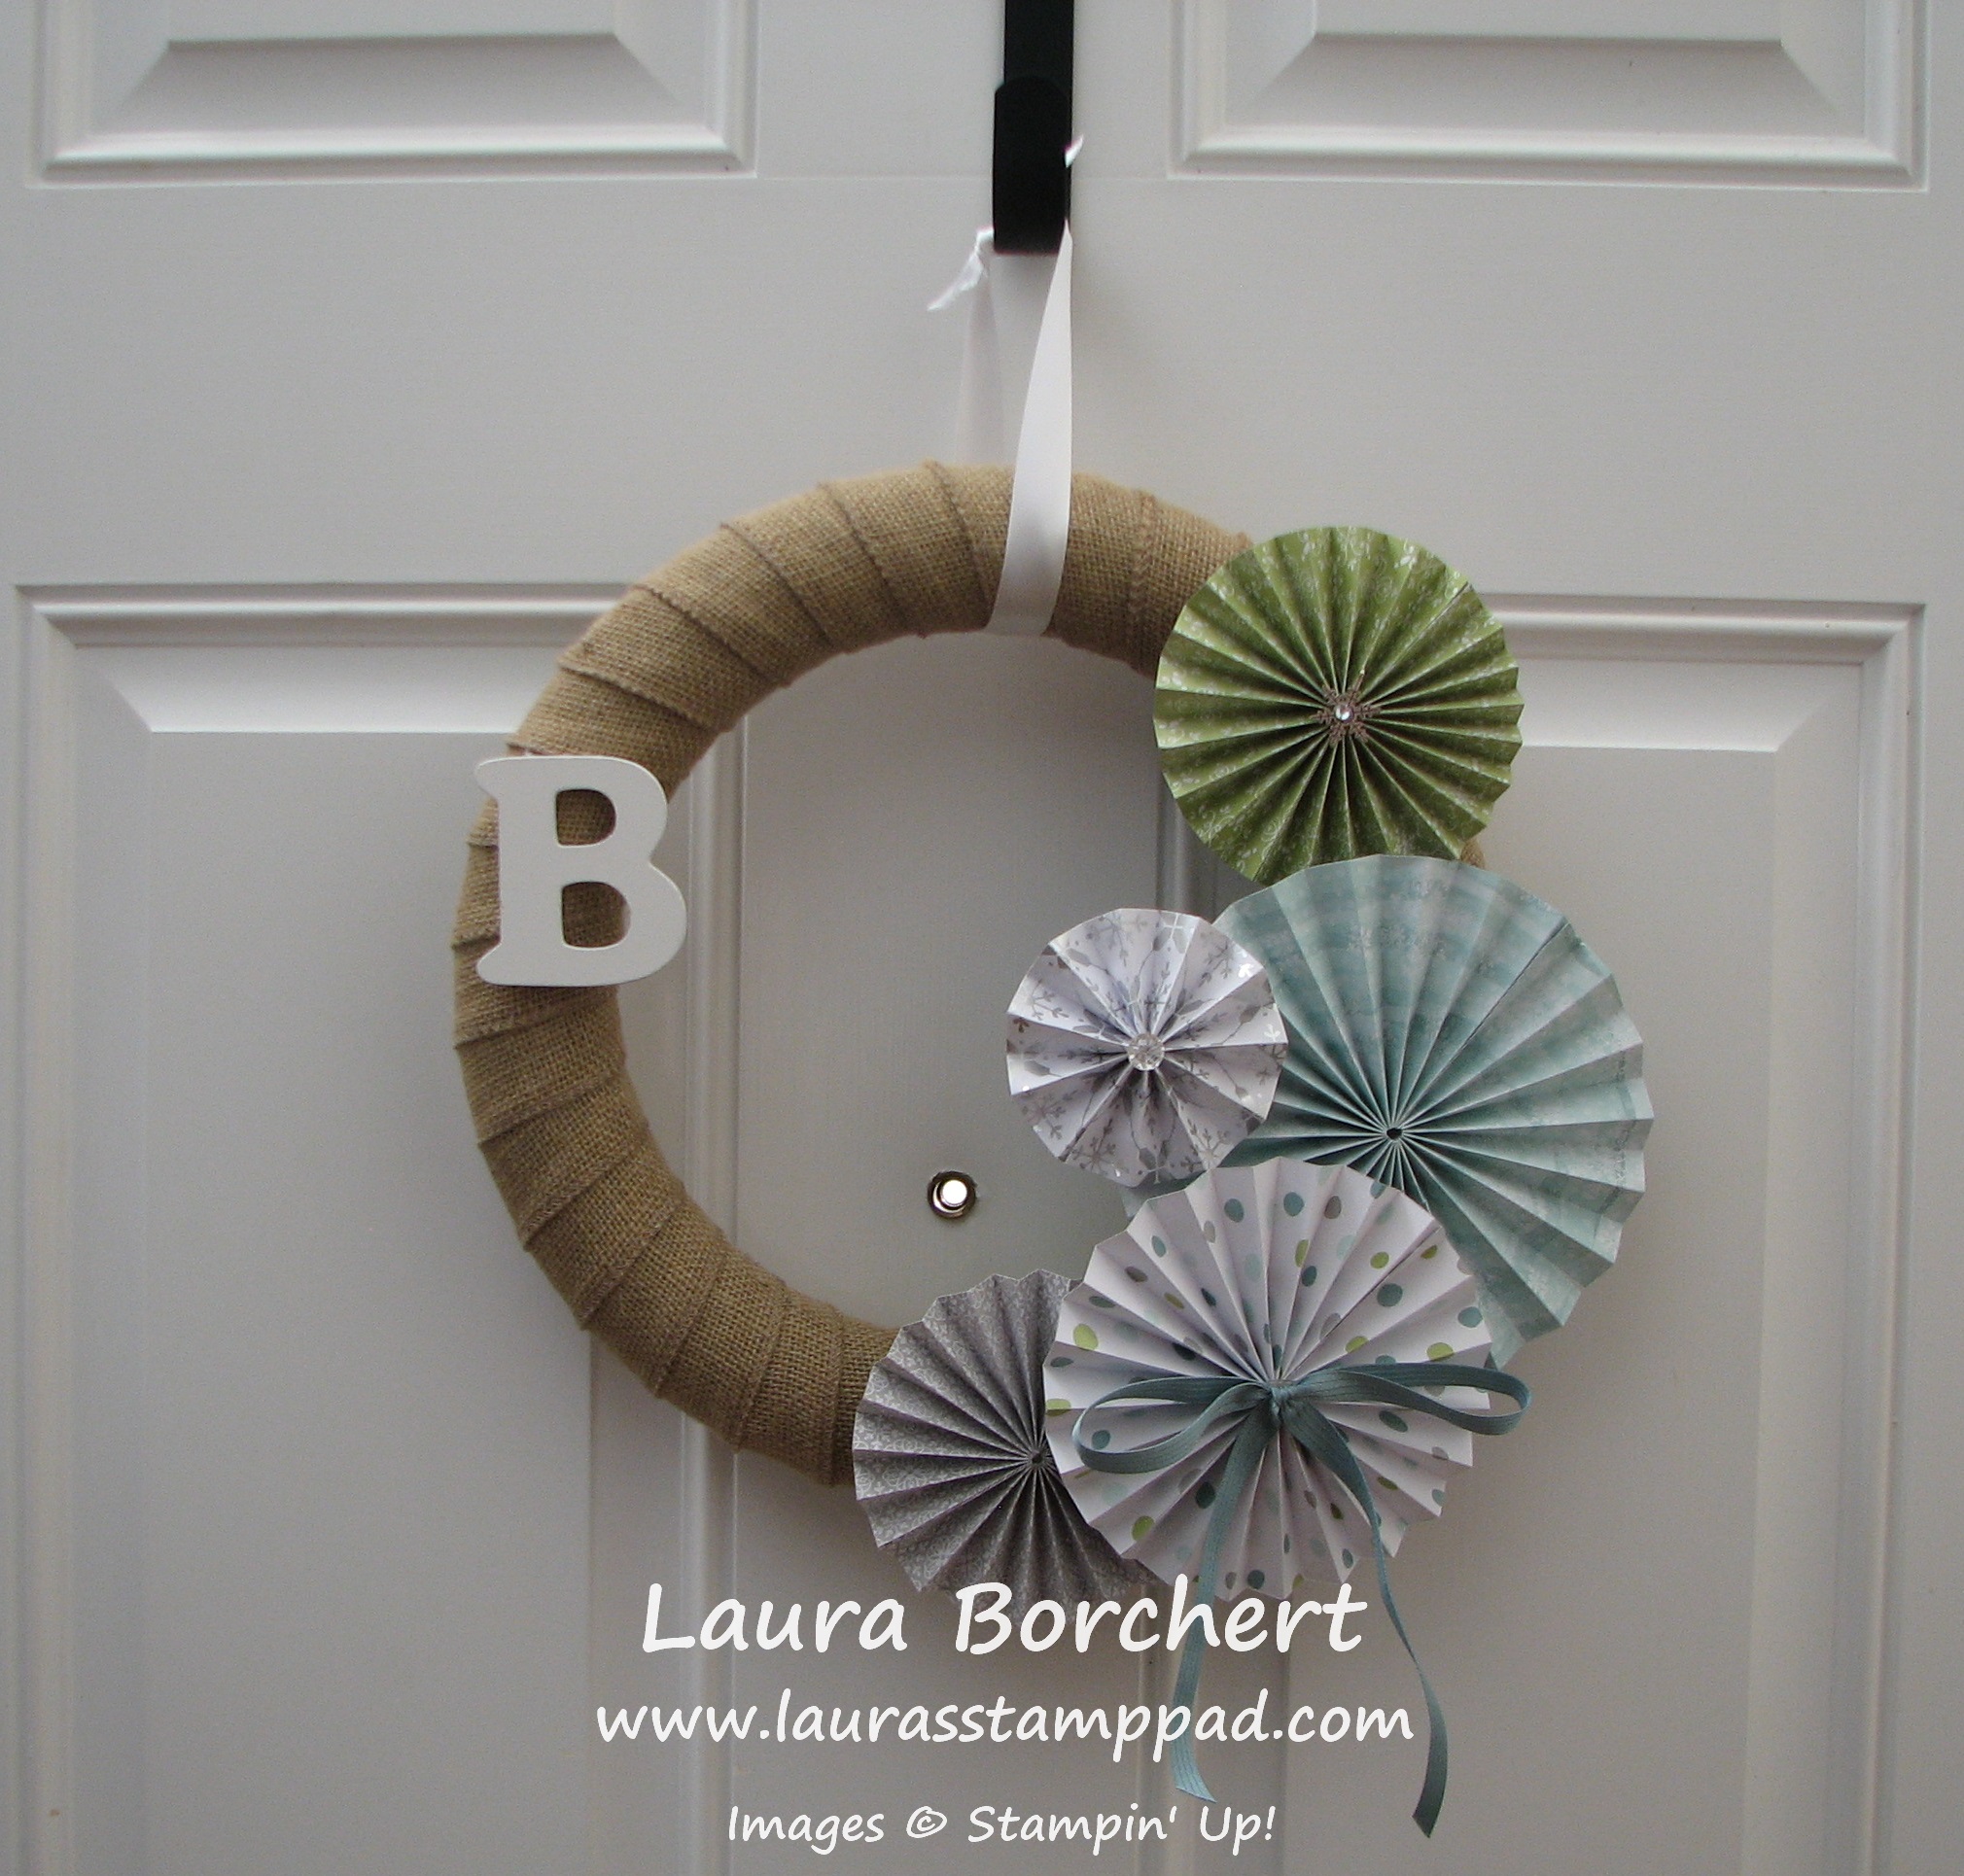
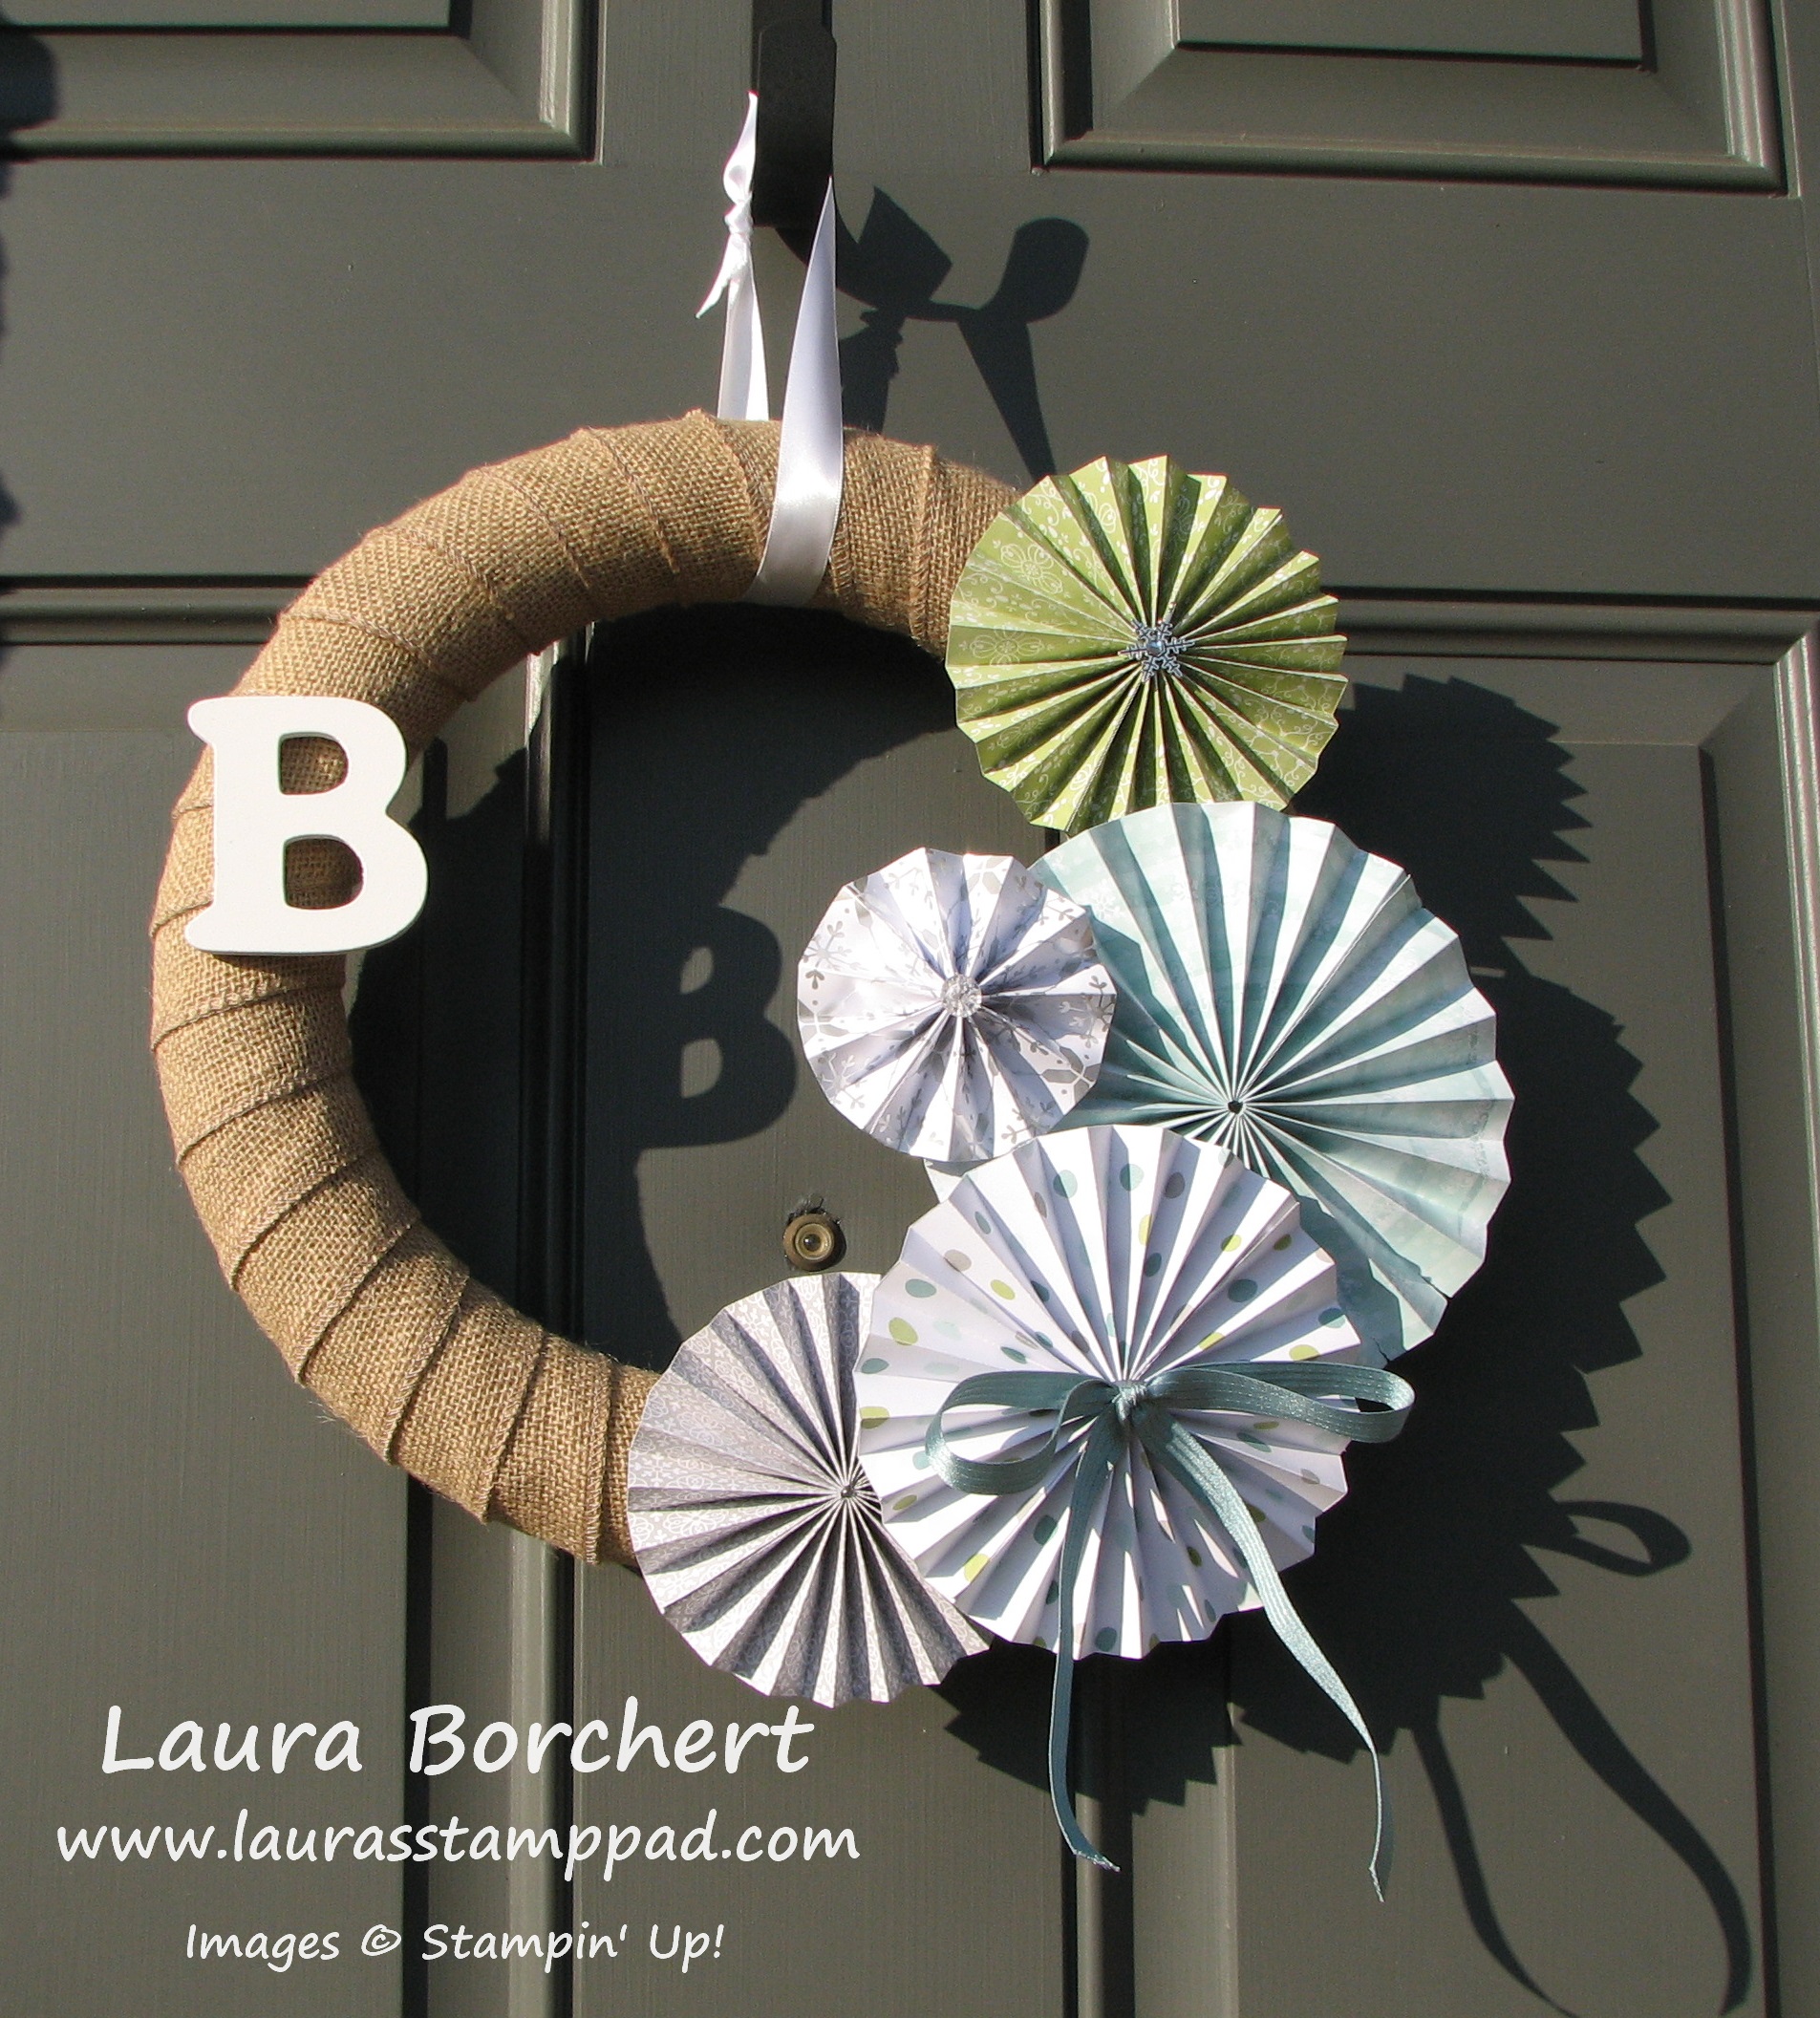
Happy Tuesday everyone!!! That means I have a fabulous technique to share with you today and that is a fabulous winter wreath!!! After my Halloween wreath, I realized I needed to come up with something for the Holidays. After some thought and time going by, I realized that a winter wreath would be better and last longer than a Christmas one. Now I can keep this one up until the end of February or so.
This is what I came up with!!!! What do you think?
I started by wrapping my foam wreath with the Burlap Ribbon! You can secure the ends with hot glue or straight pins. Be sure to go at an angle and make it just barely overlap or you won’t have enough to cover the wreath. Mine didn’t go all the way around but I covered up the missing portion with my rosettes. I did a class and some were able to cover all of it. You can always add more from another roll as well. Now it is time to make your Rosettes.
Smallest Rosette – One strip of Designer Series Paper: 1-1/2″ x 12″
2 Medium Rosettes – 2 strips of DSP for each Rosette: 2″ x 12″
Medium/Large Rosette – 2 strips of DSP: 2-1/2″ x 12″
Large Rosette – 2 strips of DSP: 3″ x 12″
Run each of the strips through your Big Shot with the Rosette Designer Die to get the folds for creating your Rosettes. Fold on the creases in a mountain/valley fold style. You can use your hot glue gun or some Sticky Strip to adhere the strips together and into a circle. To get your Rosette to stay down and not pop up, you will want to get our your Silicone Mat and put a glob of hot glue in the middle. Press your Rosette down onto the glob of glue right in the middle and hold while it cools. Once it is cool, it will pull right off and you are set. I did add a little scrap punched oval of cardstock to the back to cover up that glue spot and in case some of them still needed a little more stability. Once you are done with all of your rosettes, it is time to assemble them to your wreath. You can arrange them in the bottom right corner like I did or do 3 down there and 2 in the top left corner. You could even make lots of these rosettes and cover the entire wreath. Note: when assembling them to your wreath, place the glue on the wreath and place the rosette on top rather than putting the glue on the rosette. There were many times I would put it on the rosette and then realize that spot wasn’t even touching the wreath. 🙂 I added some Lost Lagoon Satin Stitched Ribbon, Vintage Faceted Buttons, and Snowflake Embellishments. You can always hang the wreath as is or you can add a ribbon loop. My ribbon loop was created with Whisper White Satin Ribbon. Love it!!!! Here it is on my front door!!!
Let me know if you want this wreath! I would love to see your creation! Also, do you create a wreath for Valentine’s Day or just skip to Spring? Leave me a comment down below!
The new year is approaching. Resolutions are being set! Is one of yours to keep in contact with more family and friends? What about remembering the birthday of those your love?? You may have heard this before but for those who haven’t, here you go! I have a huge family and my Grandmother always remembered everyone’s birthday. She would send cards to everyone with $5 in there. When she passed, I decided I would take that over for her (minus the $5). I have my handy dandy Birthday Calendar that Stampin’ Up came out with many years ago and that thing is a lifesaver! I send out about 5-15 cards each month. I love it! So now that Stampin’ Up has come out with another fabulous Birthday Calendar, I’m excited to share it with all of you!!!!
I love it!!! This is the Perpetual Birthday Calendar Project Kit from the Occasions Mini Catalog. I got the coordinating Perpetual Birthday Calendar Stamp Set to stamp the backgrounds and months! Everything else was included in the kit and there were lots of goodies left over as well! I love it! It also comes in a beautiful box so it is perfect for gift giving as well. Remember this calendar can be used every year because the dates aren’t calendar dates but instead just the numbers in each month! Love that!
I am planning a class with this amazing calendar coming soon! If you would like to gather your friends to make these, I would love to party with all of your friends and bring the supplies! Just let me know a date! 🙂 I’m so excited to start up my classes again! I miss my stampers!
Here is a Video showing off this fabulous calendar! Be sure to give it a thumbs up if you liked it!
Happy Friday! I hope you had a wonderful day yesterday!!! I sure did! Now this weekend, we have no plans and I am in the mood to shop….which is kind of surprising! If you wish to shop from home, don’t forget about the fabulous Weekly Deals!!!
Also, Stampin’ Up has added new items to the Clearance Rack…..some of the items are in the Holiday Mini Catalog! It is a fabulous deal so be sure to check those out by clicking here!
Enjoy your weekend and be sure to come back next week as I will be sharing some sneak peak items from the Occasions Mini Catalog and Sale-A-Bration Mini which starts on January 6th! WOOT WOOT!!!!
I love Silver and Navy together! It is so elegant and beautiful! Here I created this amazing card and it was quick and simple!!!!
I started with a Night of Navy card base and added a few strips of All is Calm Designer Washi Tape! Then I took a piece of Whisper White cardstock and stamped three of the trees from the Festival of Trees Stamp Set using my Silver Encore Ink Pad. NOTE: Allow this to dry for a bit because this ink takes a smidge longer to dry than your typical ink pad! Of course I added this piece to the card front with Stampin’ Dimensionals! Oh how I love those things! Done! Quick and Simple!!
Are you almost done or all done with your Christmas Cards? What about presents? If you still need gift ideas, you can give a Gift Certificate for Stampin’ Up through me OR one of my favorites – My Paper Pumpkin Subscriptions? Also, if you need gift packaging ideas, check out my Video Series!