Do you prefer traditional red and green for your Christmas Cards? If so, this card is perfect for you!!! Those little ornaments are just adorable! I started with a Real Red card base and stamped the ornaments from the Christmas Bliss Stamp Set along the bottom of a piece of Whisper White cardstock (4″ x 5-1/4″). Since this stamp set is a Photopolymer Set it is super easy to line up those ornaments all the way across! Then I stamped the greeting from the same set in Real Red on another piece of Whisper White. I layered that onto some Sweet Taffy Designer Series Paper and that onto some more Real Red cardstock. Before adding that last layer of Real Red, I punched the bottom of it with the Scallop Edge Punch! Scallops add such a cute factor to projects! For the final touches I added some Old Olive and Real Red Candy Dots to both sides of the greeting! Adorable!!!!!
Happy Tuesday!!! You know what that means…..I have a fabulous technique to share with you today! You know that the Clear Blocks are used with our Clear Stamp Sets. Just stick the stamp (cling side) onto the clear block and tap tap tap into the ink and then onto your paper! BUT did you know that you can tap tap tap your clear block into the ink and then stamp it on the paper???
This card is just amazing with beautiful branch image and the monochromatic color scheme! Are you wondering how I created that Pistachio Pudding square? With my Clear Block!!!!
Supplies Needed: Clear Block of you choice, Ink Pad
The supply list is short for this technique and it is really simple to do! Just tap your clear block into your ink pad color of choice. Tap Tap Tap! Then stamp the clear block onto your cardstock. Be sure to press firmly and all over the clear block to ensure better coverage. Disclaimer: This comes out different each time (kind of like watercoloring! Sometimes it comes out very bold, sometimes just an outline with a little ink in the middle, sometimes it is more solid and others it looks like there is a pattern to it. This one above came out very good! I then stamped the branch and greeting from the Thoughts & Prayers Stamp Set in Basic Black. I wrapped some Baker’s Twine around twice and tied a bow! To finish it off, I added a Pistachio Pudding butterfly that was punched with the Elegant Butterfly Punch and added a few Pearls!
You can see this one was created in Lost Lagoon and the block was a little more spotty and there is a line diagonal across the square. I am not sure how it got there but you just never know how this technique will turn out! I used some of the NEW Lost Lagoon Taffeta Ribbon on this card! I love that ribbon! To clean your clear block, you can just rub it on your Stampin’ Scrub or run it under water and use a paper towel to dry it off! Simple as that! Here is a quick Video Tutorial to show you this technique in action!
Let me know what you think of this technique in the comment below or give the video a thumbs up if you liked it!
“He did the mash! He did the monster mash! The monster mash!”
Do you have that song in your head now? 🙂 You are welcome! Today I have an adorable Monster Card to share with you!
See, isn’t it just precious? This card is great for Halloween time but you could use it any time of the year for kid’s Birthdays (or adults). I know I have a few little Monsters (nieces and nephews) who would love these little monsters! All of the monsters are from the Freaky Friends Stamp Set from the Holiday Mini Catalog! I stamped them in Old Olive, Tangerine Tango, Basic Black, and Tempting Turquoise! You could do them in any color and even add googly eyes! I love googly eyes because they are just so fun! Eeee I layered my monsters onto Basic Black Cardstock and then Tangerine Tango! My card base is Tempting Turquoise. That fabulous greeting there is from the Good Greetings Stamp Set that you can earn for FREE when you have a party of $350 or more in October! There is still time to get your set for FREE! There are 19 fabulous greetings in that! I used my Word Window Punch and Modern Label Punch for the greeting so it would POP!
How many little monsters do you know that would love a card like this? Leave me a comment down below!
Happy Friday All!!!!! So you have all seen my Frightful Wreath that I created but check out all of these creative ladies and their wreaths! After seeing all of these amazing wreaths, I actually redid mine a little! 🙂 I love love love the hanging spider in the middle of the wreath but that would have required a lot more ripping up on my wreath so I just took off my greeting and put the adorable spider in the middle! There is still time to order yours and have it up before Halloween! Click here to order it today!
Of course be sure to check out the Weekly Deals before finalizing your order!!! GLIMMER PAPER!!!!!
Today is October 10th and that means you need to SIGN UP TODAY in order to get your October My Paper Pumpkin Kit in the mail! If you haven’t seen the September Kit that has arrived, check that out here!!! I love love love My Paper Pumpkin because it is filled with SO MUCH stuff and its like a little present each month! (I will admit I didn’t care for it back when it started but LOVE it now!) So if you tried it out last year and didn’t like, I suggest trying it again because it is amazing! Click here to learn more and sign up! Also, as a My Paper Pumpkin Subscriber, you get the opportunity to purchase past kits and refill kits! Woot Woot! My Paper Pumpkin also makes a great gift option for that person who doesn’t live nearby, that hard to buy for person, that person who likes to be crafty but doesn’t have a lot of time or space. Purchase a pre-paid subscription and let them enjoy My Paper Pumpkin for a month or 2 or 3!!!
I hope you all have an amazing weekend and I will see you back again on Monday!!!
When I look at this card I see a rustic look…..am I the only one? I’m guessing because of the twine? I am not really sure. Leave me a comment down below if you agree or think I’m crazy? 🙂
Either way though I love this card and it is simple to make, especially if you are making lots and lots of them to send out to all of your friends and family! I started with a Whisper White card base and stamped the trees from the Christmas Bliss Stamp Set. It is a Photopolymer Stamp Set so you can see exactly where you are stamping and that really helped with lining up those trees. Then I took a 3″ x 5-1/4″ piece of Cherry Cobbler Cardstock and ran it through my Big Shot with the Stripes Embossing Folder. I adhered that to my card and wrapped the twine around twice before tying it into a knot. The greeting was stamped from the Christmas Bliss Stamp Set as well in Garden Green and I rounded the corners with my Corner Rounder Punch! Of course I couldn’t finish this card without some Stampin’ Dimensionals so I popped the greeting up with a few of those!
Have you started working on your Holiday Cards yet? Be sure to subscribe to my blog on the top right hand side so you don’t miss out on any more fabulous samples using this Stamp Set and others!
There is no better way to show someone you care than sending them a hand-stamped card! The Thoughts & Prayers Stamp Set has the most perfect greetings when you want to show you care but just don’t know what to say. There is also this elegant tree and a flower branch image in the set as well! This card is crumb cake with layered pieces of Very Vanilla, Chocolate Chip and a piece of the Flower Pot Designer Series Paper. I love the neutral colors with a pop of blues – very soothing and calming!!! I stamped the tree and greeting in Chocolate chip and added some Lost Lagoon Taffeta Ribbon. The Thoughts & Prayers Stamp Set has excellent greetings for the inside as well. I plan to keep this card on hand for that moment when I need to let a friend know I’m there for them! This card would also make a great man card for Birthdays and more!
Happy Tuesday!!!! You know what that means…..I have a fabulous technique for you! Have you heard of Filter Paper or seen it in the catalog and wondered how do you use that?? Well today I’m going to show you a few ways to use it!!!
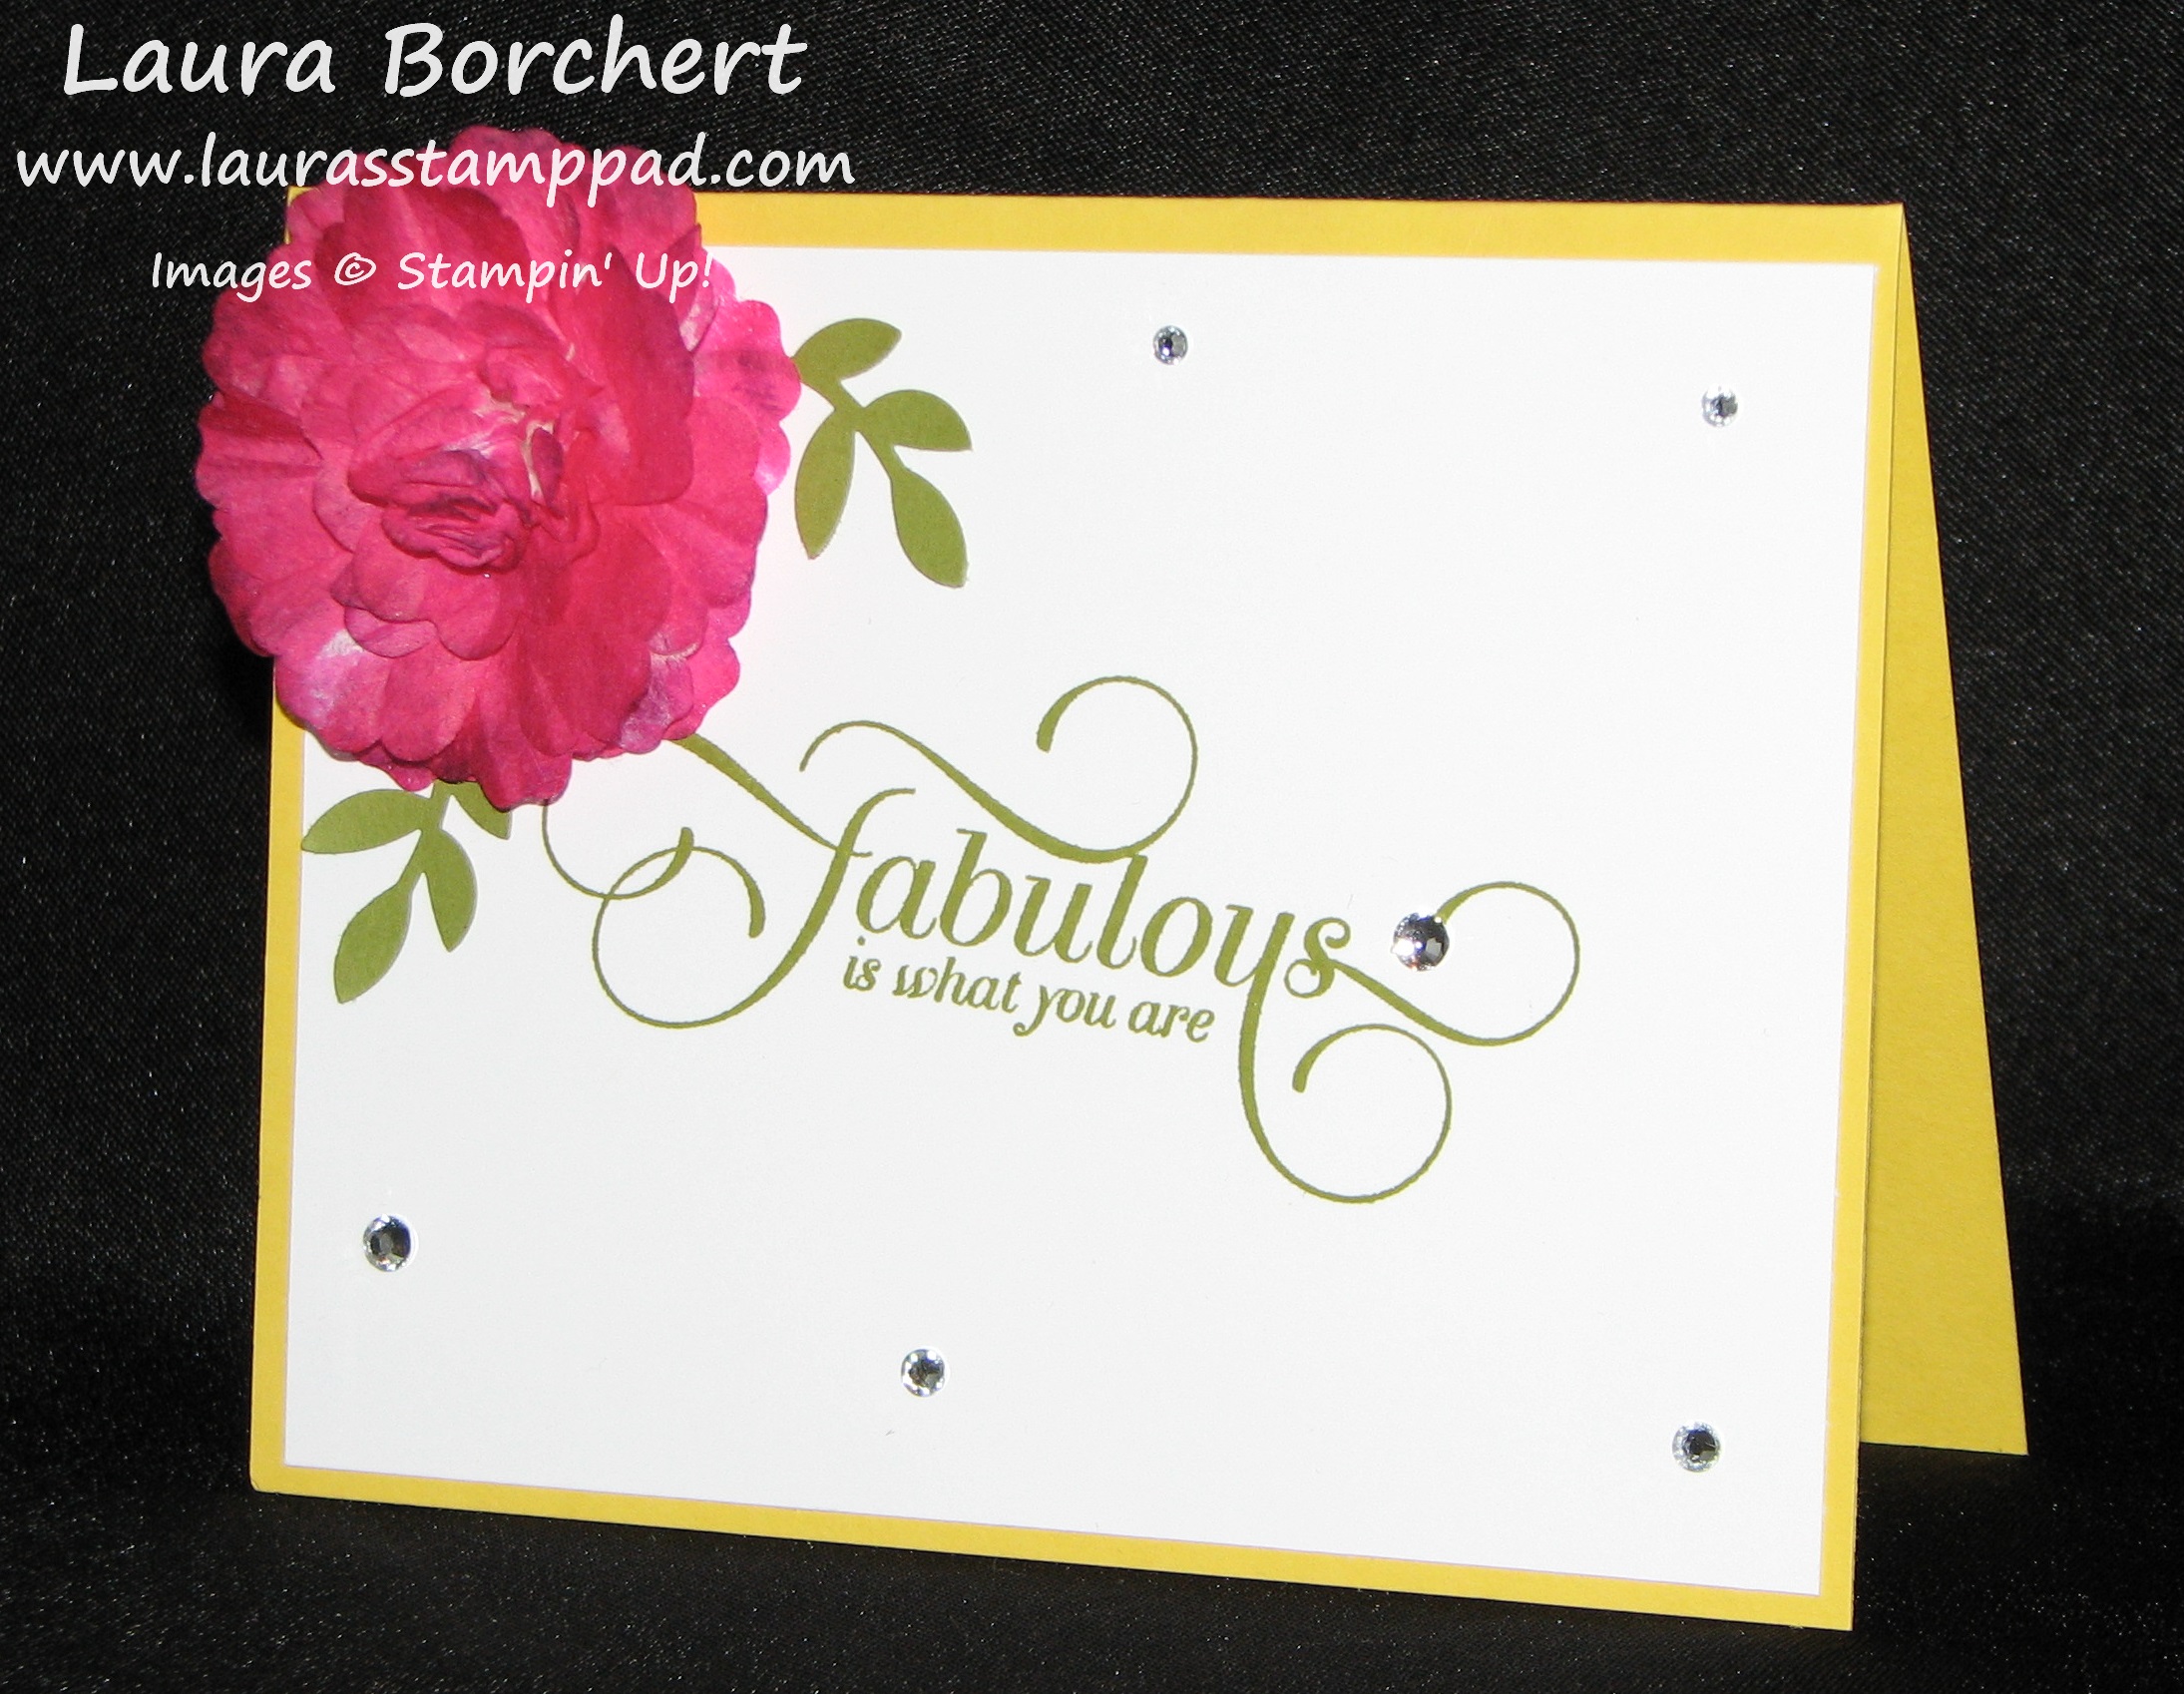
How fabulous is this card? Eee And it says Fabulous!!!!! 🙂 I love it! That amazing 3D flower was created with the Filter Paper. Let’s get started on how to create it.
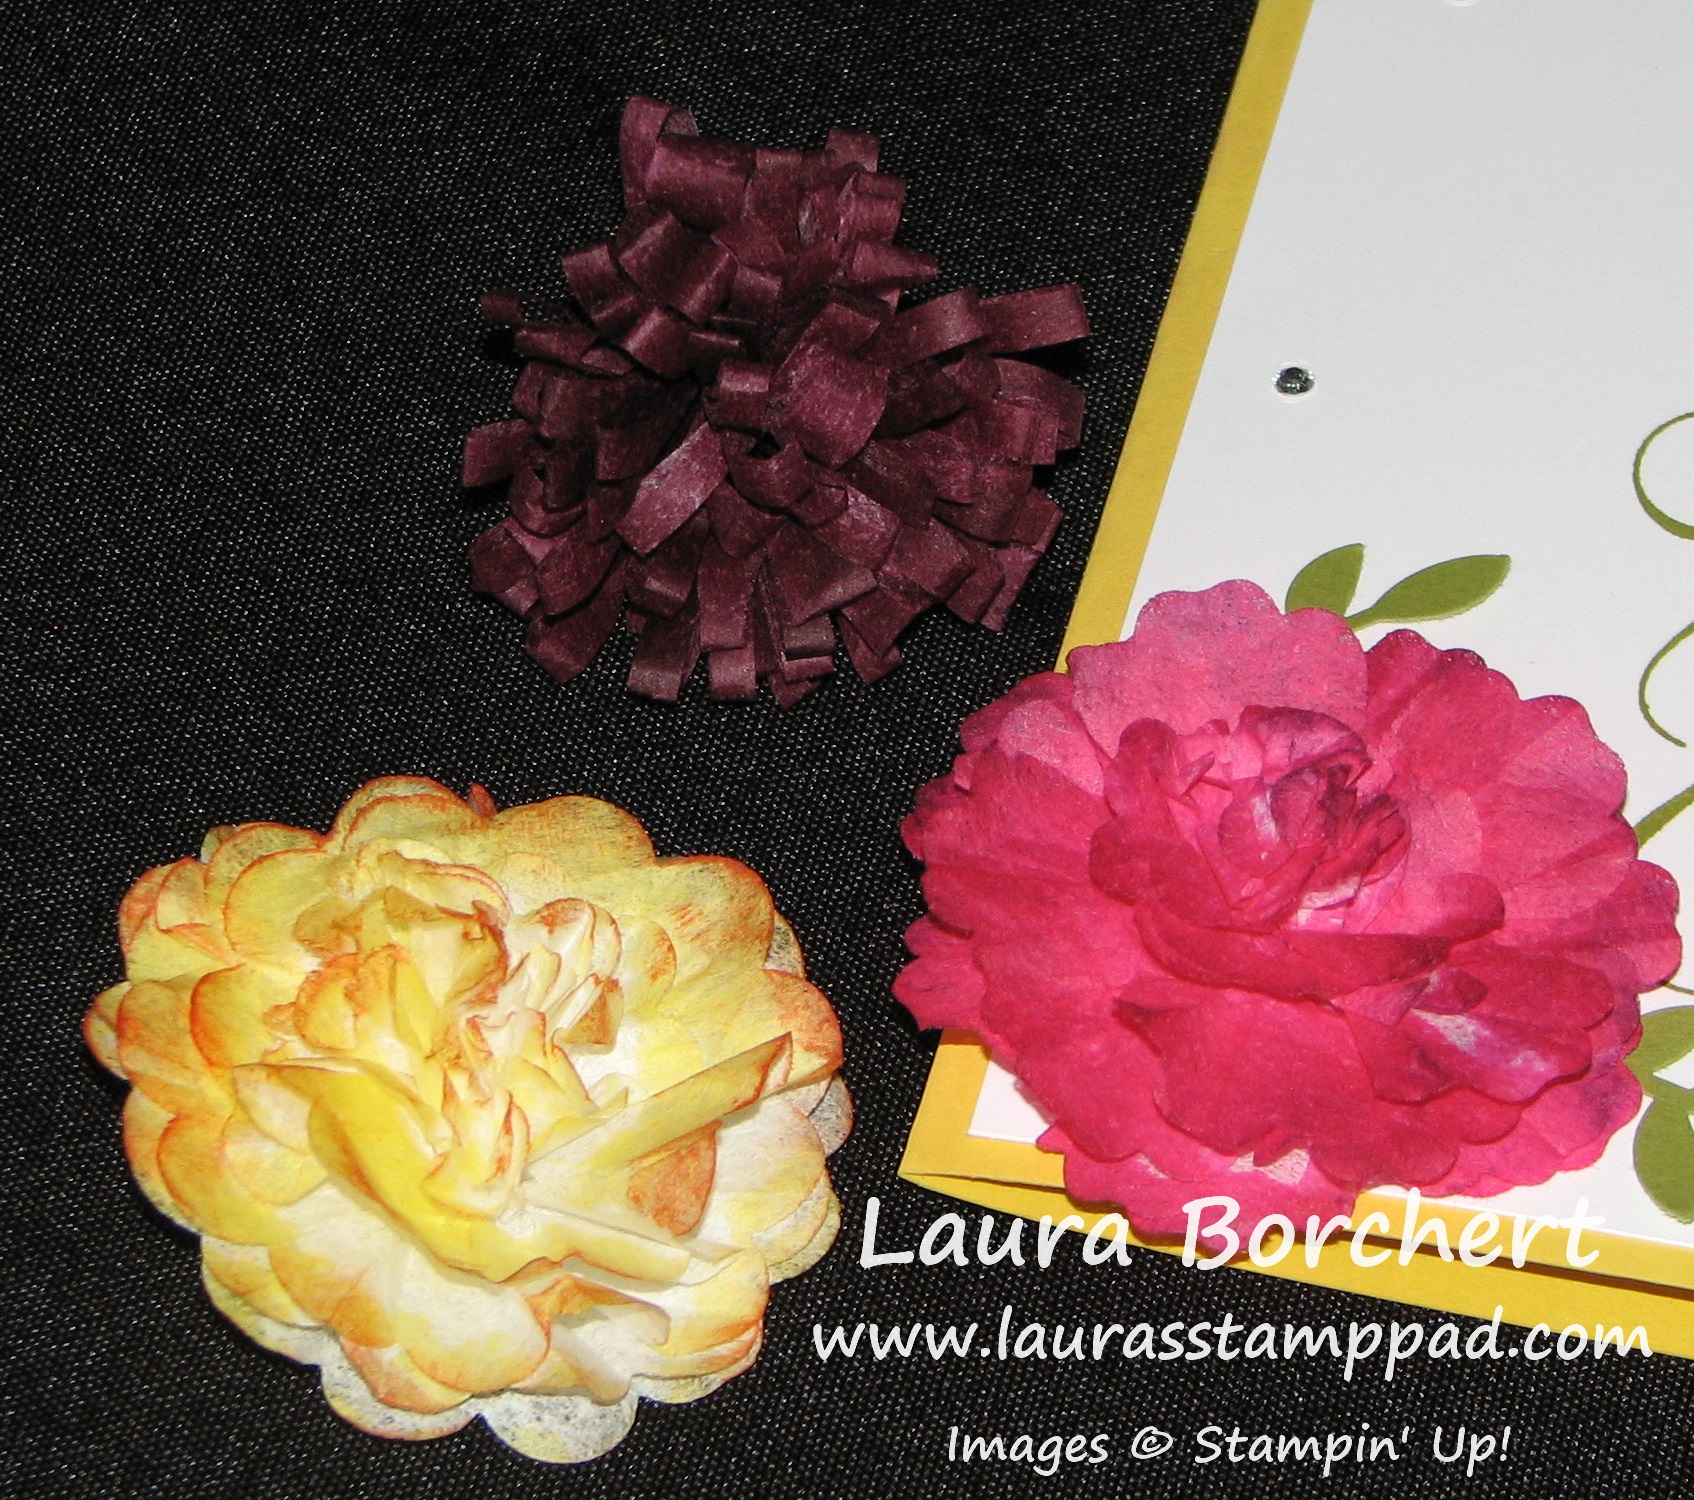
For the flower above, I punched out 4 Blossom Punch Filter Flowers and 4 Pansy Punch Flowers. TIP: When punching the Filter Paper, it helps to place a piece of scrap paper in there as well to make it more stiff and punch better! You can punch at least 4 layers and 1 layer of scrap at a time! Now you will lay all of your flowers on top of each other and you can either staple them in the center or add a Brad after punching a hole with your Handheld Punch! Now one by one pull the flowers up and scrunch to the center. You will repeat this until all flowers have been scrunched to the center. Now you can fluff it until you get the desired look. At this point, you can spritz your flower using re-inker and alcohol or water or you can leave it white and brush the edges with your Sponge Daubers. In the photo above, I spritzed the flower with Melon Mambo, let it dry and then gently touched the edges with my Elegant Eggplant Sponge Dauber to get those dark tips and color variation. I attached the flower to a card with some leaves from the Bird Builder Punch peaking out from behind and the amazing greeting if from Million & One!!!!
Another style of flower is the Rich Razzleberry flower above. For that flower, I used a Brayer to add the Rich Razzleberry Ink to my Rectangle piece of Filter Paper. I used a piece measuring 3″ x 12″. Once it was dry, I applied Sticky Strip to the long end of the Filter Paper, folded the filter paper over to meat the Sticky Strip. This creates a tube (kind of). Then with your Fringe Scissors, cut all along that loop of folded over Filter Paper. Be sure to only cut half-three quarters of the way down do you are cutting a piece off. Now you will apply another piece of sticky strip all along the bottom (below the loops). Starting at one end, you will roll the Filter Paper onto itself around and around to create this flower. Are you completely lost? I think I would be….so here is a Video Tutorial for you to watch! 🙂 I hope you are liking this videos. Be sure to give me a thumbs up if you are!!!!
Halloween is right around the corner so it is time to start working on those treat bags for your child’s classroom, trick or treaters who come to your door, to pass out at your place of business or for the little monsters in your life (that would be my nieces and nephews 🙂 ) Here are a few simple yet adorable ones that I have created!
I think the fact that it is so little just makes me so excited I could squeal!!! 🙂 This is one of the Tiny Treat Boxes from the Holiday Mini Catalog which is a 2″ square! Small enough that you don’t need to put a trunk load of treats inside but big enough for some goodies! Before assembling the box, I used my Decorative Mask (click here to see how to use this) and black ink pad to add the polka dots (using my sponge daubers of course). Be sure to set it aside to dry for a bit because I found it takes just a bit longer for the ink to soak into this material. I then used my Pumpkin Pie Chevron Ribbon to tie around it and into a knot. For the tag, I stamped the little bat from the Freaky Friends Stamp Set and the Trick or Treat from the Good Greetings Stamp Set (Hostess Exclusive)! I punched out the greeting with my Scallop Oval Punch and layered it onto a Large Oval Punch in Black cardstock. I attached it to my chevron ribbon with some Black Taffeta Ribbon! Super cute!!!
Then I have these little treat bags which are even easier to whip a few hundred…..okay maybe not that many…or maybe! I used the 4″ x 6″ Cello Bags, tied the Chevron Ribbon around to close it and made the tag. For the tag, I used my scrap pieces of 2″ wide Whisper White cardstock. Slide that piece into your Scallop Tag Topper Punch and stamp your greeting. On my longer pieces I stamped bigger images from the Freaky Friends Stamp Set (like the witch) and for the smaller pieces I stamped smaller images. I love using up scraps! I did use my Corner Rounder Punch for the bottom corners so it would match the rounded top corners that the tag topper punch creates! I used the Freaky Friends Stamp Set and Good Greetings Stamp Set! I thought I would share this photo as well!
I colored in the witch with an Old Olive face, Pumpkin Pie legs and arm, and Soft Suede broom! 🙂 heeeeheeeheee
I hope these gave you some great ideas for your Halloween Treats! You have 24 Days or less to get them done!!! 🙂
Also, don’t forget today is the last day to Stock Up and Save!!! Click here for all the details!
Happy Friday!!! I am PUMPED for this weekend because we are celebrating World Card Making Day! I can’t wait to stamp, craft, scrapbook, chat and laugh all day tomorrow in celebration! If you can’t attend or don’t live nearby, you can still celebrate with Stampin’ Up’s Stamp, Stock, and Save Sale!!!!
You can check out the entire list of items on sale here! This sale ends on Monday and don’t forget to use the Hostess Code!
The Banner Punch is my favorite!!!! Love Love Love it! Check out this amazing card that I got which uses the punch! Thank you to Rebecca for the amazing card and idea!!!
And last but not least, check out this amazing promotion the whole month of October!!!! When you sign up to be a demonstrator in the month of October, you will earn 6 months of FREE Designer Series Paper! Of course we all love Stampin’ Up’s DSP and we love it even more when it is FREE! That means that you get a fabulous discount on Stampin’ Up product, exclusive invites to Stampin’ Up Demonstrator Events, and the opportunity to earn extra income!!!! WOOT WOOT! Click here to learn more and if you have any questions at all I’m more than happy to answer them!!!
I hope you have an amazing weekend and can’t wait to stamp with everyone on World Card Making Day (tomorrow) whether near or far! 🙂
Aren’t these cards super cute? I’m telling you, I love the blues and greens this year!!!! I used a card base of Smoky Slate for both of them and layered on some Lost Lagoon. The Designer Series Paper is from the All is Calm Paper Pack. It is the same sheet of paper – one card uses one side and the other card uses the other side! Isn’t that fabulous that you can create a similar look with the same piece of paper?!?! Love it! I added on some of the New Lost Lagoon Taffeta Ribbon. For the greeting, I stamped the Merry & Bright from the Christmas Bliss Stamp Set in Pear Pizzazz and punched it out with my Decorative Label Punch! I punched a second one in Lost Lagoon, cut it in half sideways (left to right, NOT top to bottom), and then attached the top half to the top of my greeting piece and the bottom half to the bottom of my greeting piece. That is how you get that fabulous layering effect! Simple, Adorable, and Quick!!!