Happy Wednesday!!!! It’s finally March!! Time to get out the bright colors and embrace the fact that SPRING IS COMING!!! Yes, I’m very excited and so ready for Winter to end. This beautiful sending healing hugs has everything I love – pink, flowers, bling, and love!!!!

Getting a card like this is sure to brighten your day at least for a bit. I know a card can’t take away the pain of losing someone or physical pain a person might be battling. This card CAN show love, caring, and take your mind off of it for a minute or 2. There is a lot of power in a handmade card! Send one out today and see!!!
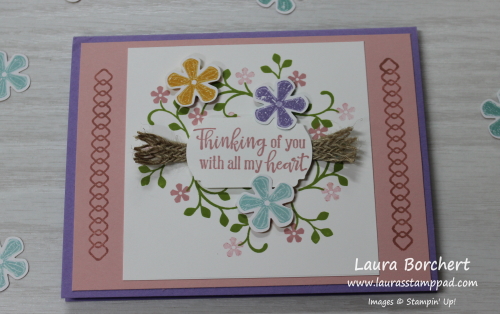
I started with a Lovely Lipstick card base. Next, I layered some Best Dressed Designer Paper (3-3/4″ x 5″) onto a piece of Petal Pink (4″ x 5-1/4″). Then I tied some of the Petal Pink Metallic Edge Ribbon around it and into a knot. Make sure you get this step in before adhering this layer to the card base.

For the greeting, I stamped it in Melon Mambo Ink onto Whisper White and punched it out with the Pretty Label Punch! The greeting is from the So Sentimental Stamp Set! I added the greeting to the card front with Stampin’ Dimensionals. This adds some texture but also gives a smooth look over that ribbon. I finished off the card with a few Champagne Rhinestones!

For the inside of the card, I added a piece of Whisper White measuring 4″ x 5-1/4″. There was a little strip of designer paper leftover so I added it to the left side. This really pulls it all together and makes it fabulous!!!
If you would like to recreate this sending healing hugs card, check out the supplies below. Also, stay tuned as I have another fabulous one coming soon!
Happy Stampin’
~Laura
Product List")


 Metallic-Edge Ribbon")
 Designer Series Paper")


 Crinkled Seam Binding Ribbon")
")


 Crinkled Seam Binding Ribbon")


")


 Braided Burlap Trim")


 Ruched Ribbon")


")
 Polka Dot Tulle Ribbon")


")


