Happy Tuesday!!! You all know what that means!!! I have a fabulous technique to share with you today. I’m coloring Embossing Paste with Sponge Daubers. This technique is super cool because you only use the amount needed of the Embossing Paste. When I colored some with Re-Inker in the past, I ended up making millions of cards because I colored too much paste!
I love how that background adds texture to the card and gives it a fun variation in color. Also, I love love love my Sponge Daubers and while I have used them in awhile, I do enjoy it!
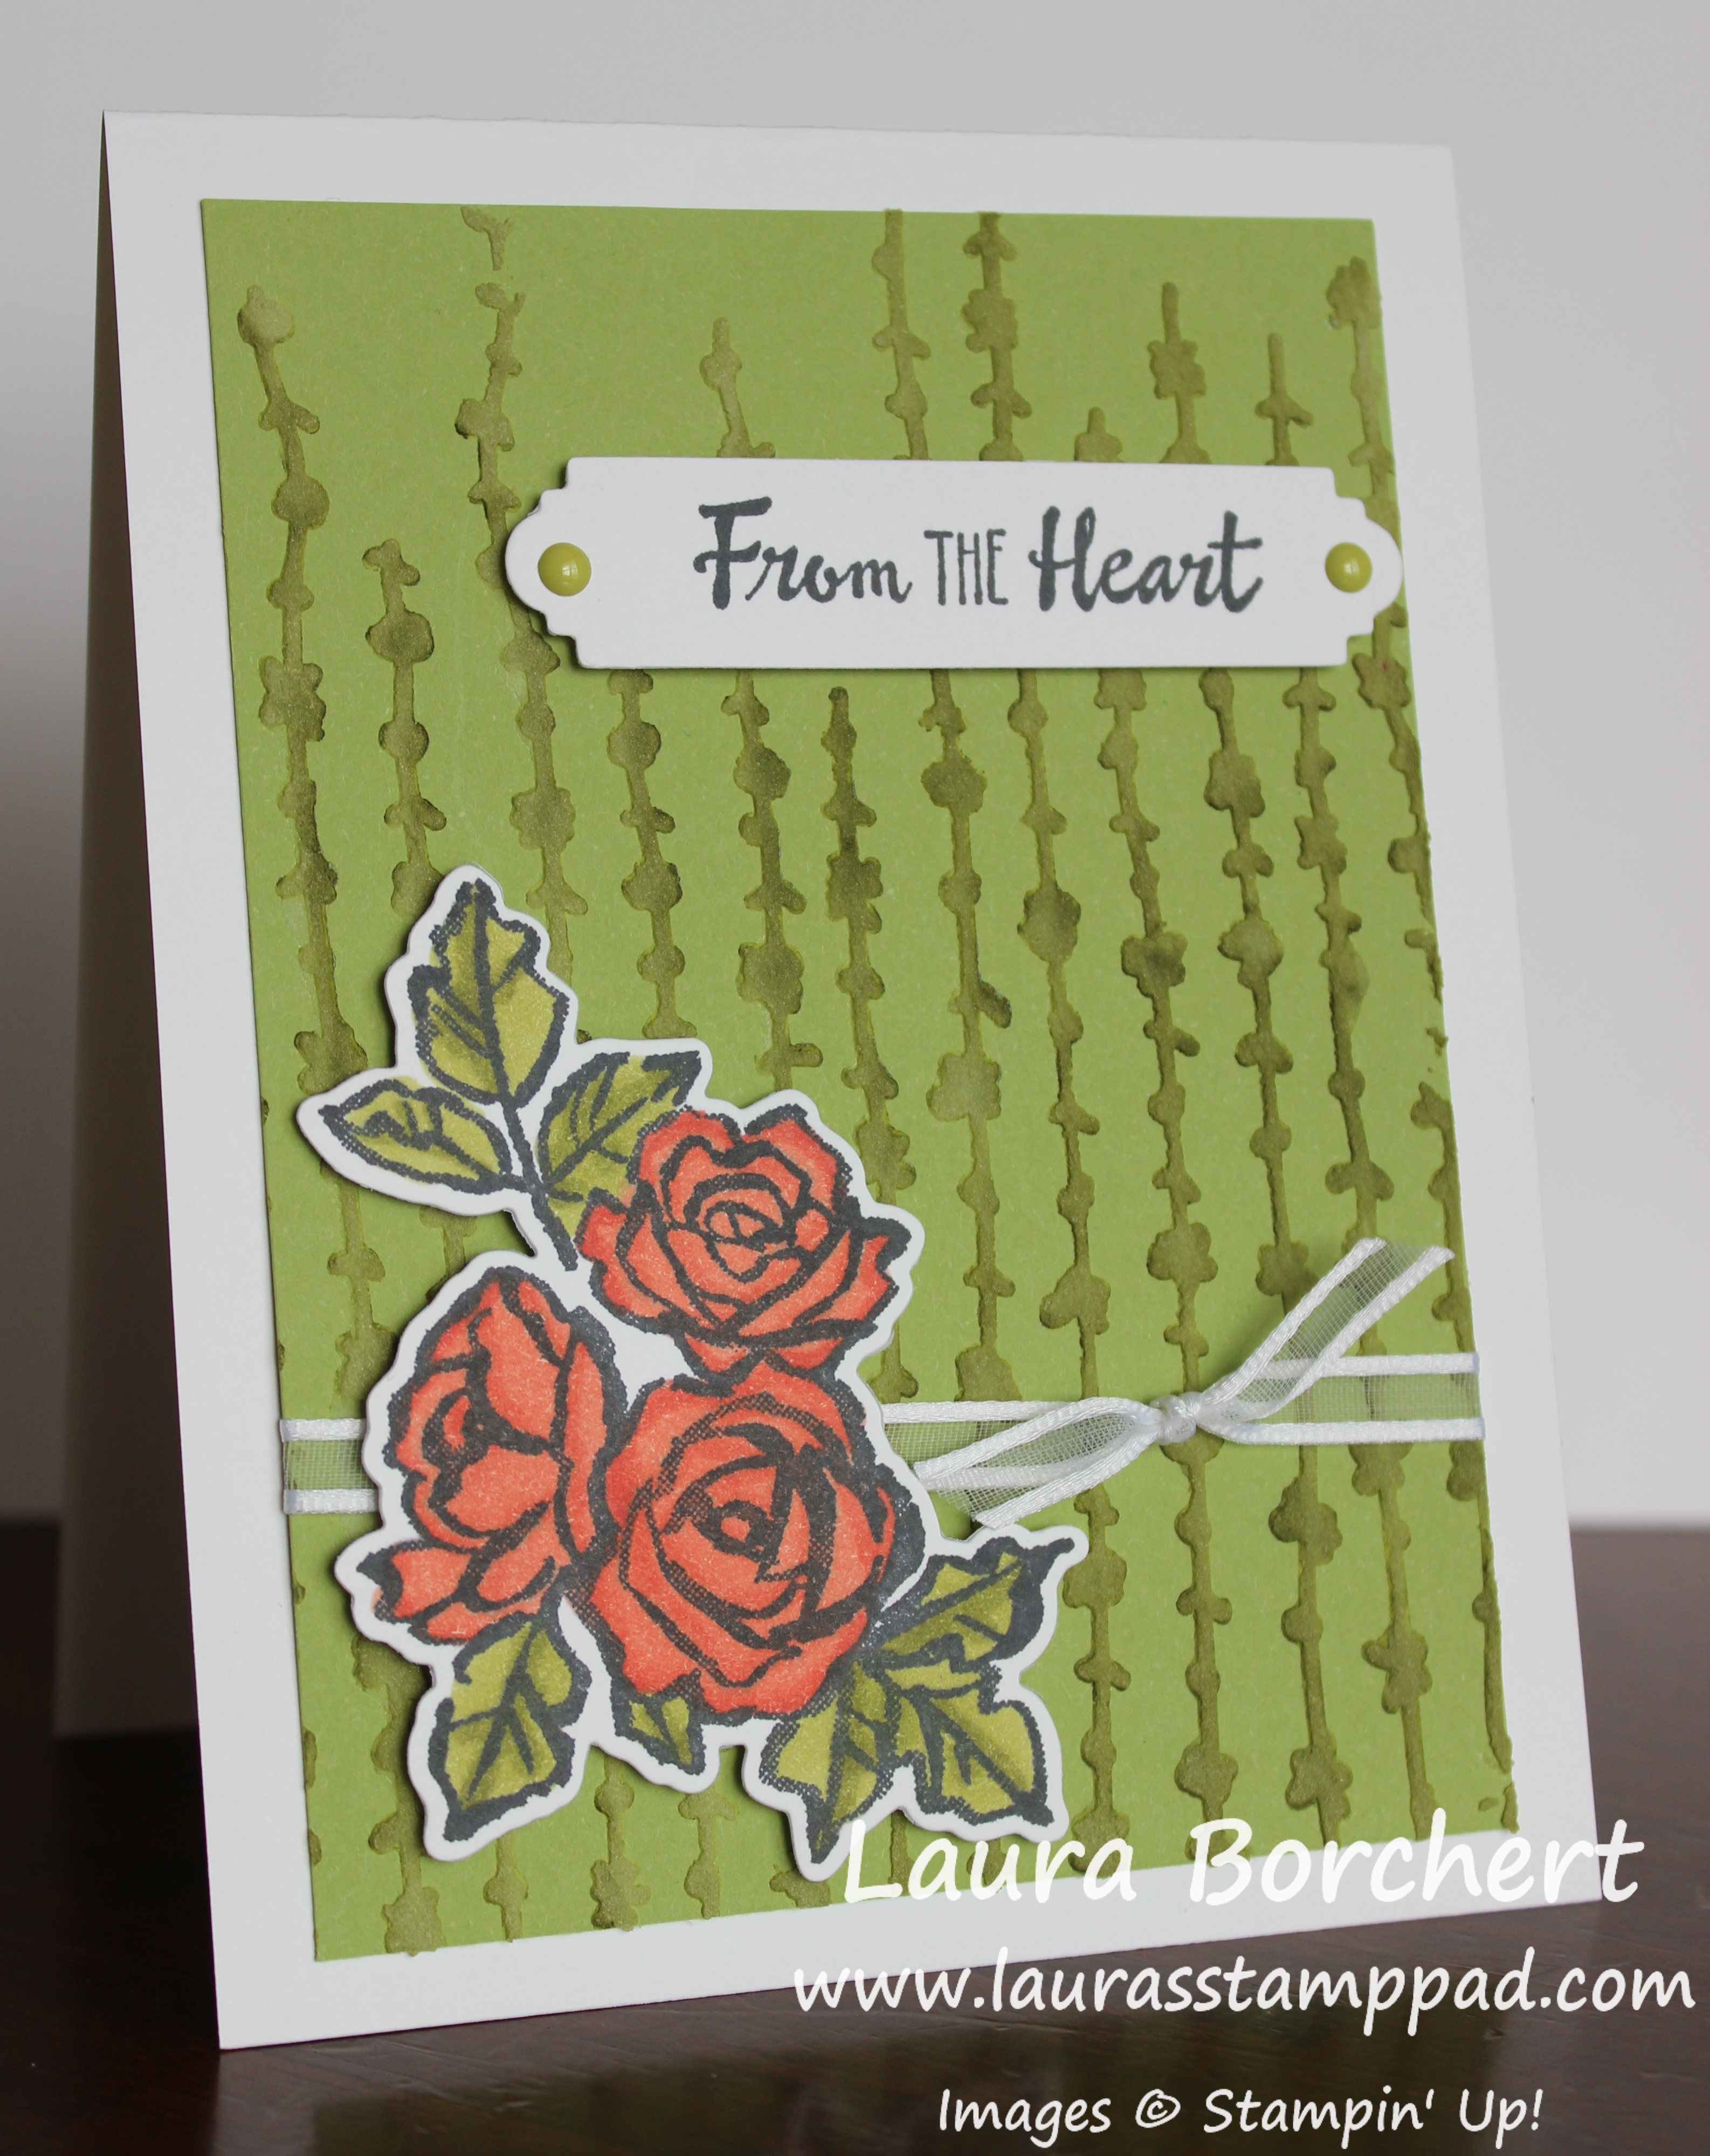
I started with a Whisper White card base measuring 4-1/4″ x 11″. Next, I took a piece of Pear Pizzazz measuring 3-3/4″ x 5″ to add the Embossing Paste to it. First, I took the Sweet Soiree Decorative Mask and added color all over by pouncing a Sponge Dauber over the top. You can always use the same color (Pear Pizzazz) or go a shade darker like Old Olive or Wild Wasabi. Mixing the colors and pouncing all over would be fabulous too. After adding color in an area big enough for the cardstock, I placed the mask over the cardstock and onto the Silicone Craft Sheet. Then I added the Embossing Paste and as it swipes across the mask it picks up the color. I love it! Peel off the mask and allow it dry!

While the Embossing Paste is drying, I worked on the floral image and greeting. Using the Petal Palette Stamp Set and coordinating Petals & More Framelits (Bundle & Save 10%), I stamped the flowers and greeting Memento Black Ink. Then I colored the flowers with the Old Olive and Calypso Coral Stampin’ Blends. After coloring, I die cut the flowers out and the greeting with the frame. Now to assemble, I added some Organza Ribbon around the card and then added it to the card base. Next, I added the flowers and greeting to the card front with Stampin’ Dimensionals. This gives the card some texture but also a nice smooth look over the Embossing Paste. To finish off the card, I added some Enamel Shapes to the greeting. I love it and it’s perfect for lots of occasions!
If you would like to see this all in action, check out the Video Tutorial below or click here! Be sure to give the video a thumbs up if you liked it and don’t forget to subscribe if you are new. If you would like a notification when I post a new video, be sure to click the bell right next to the subscribe!!!
Happy Stampin’
~Laura
Product List


