I love the name of this stamp set – Party Pants which is one of the Sale-A-Bration items that you can earn for Free with every $50 order. This promotion ends on March 31st!!! I have really enjoyed all of these fabulous Sale-A-Bration items and will be sad when it is over!!!
For this card, I started with a Cucumber Crush card base. I added some of the Silver Striped Designer Paper from the Neutrals Designer Series Paper Stack to the bottom portion of the card. I stamped the balloons from the Party Pants Stamp Set in Pacific Point onto Whisper White. I punched them out with the Balloon Bouquet Punch. I added the end of some Whisper White Baker’s Twine to the back of each balloon and attached it with a Stampin’ Dimensional. I added them to the card front and then tied the tails together with a little bit more Baker’s Twine. For the little white line/glare look on the balloons, I used the White Chalk Marker! For the greeting, I stamped Happy Birthday from the Party Pants Stamp Set. I omitted “to you” part by just coloring in the Happy Birthday portion with a marker! I punched out the greeting with the Washi Label Punch and brushed the ends with some Cucumber Crush ink on a Sponge Dauber! I added the greeting to the card with Stampin’ Dimensionals too! Love it!!!
This would make a fabulous Man Card! You could always change up the colors for a girl or to match the recipients favorite colors. What colors would you use? Let me know in the comments below!
To check out more samples using Sale-A-Bration items, click here! There are only 8 more days of Sale-A-Bration!
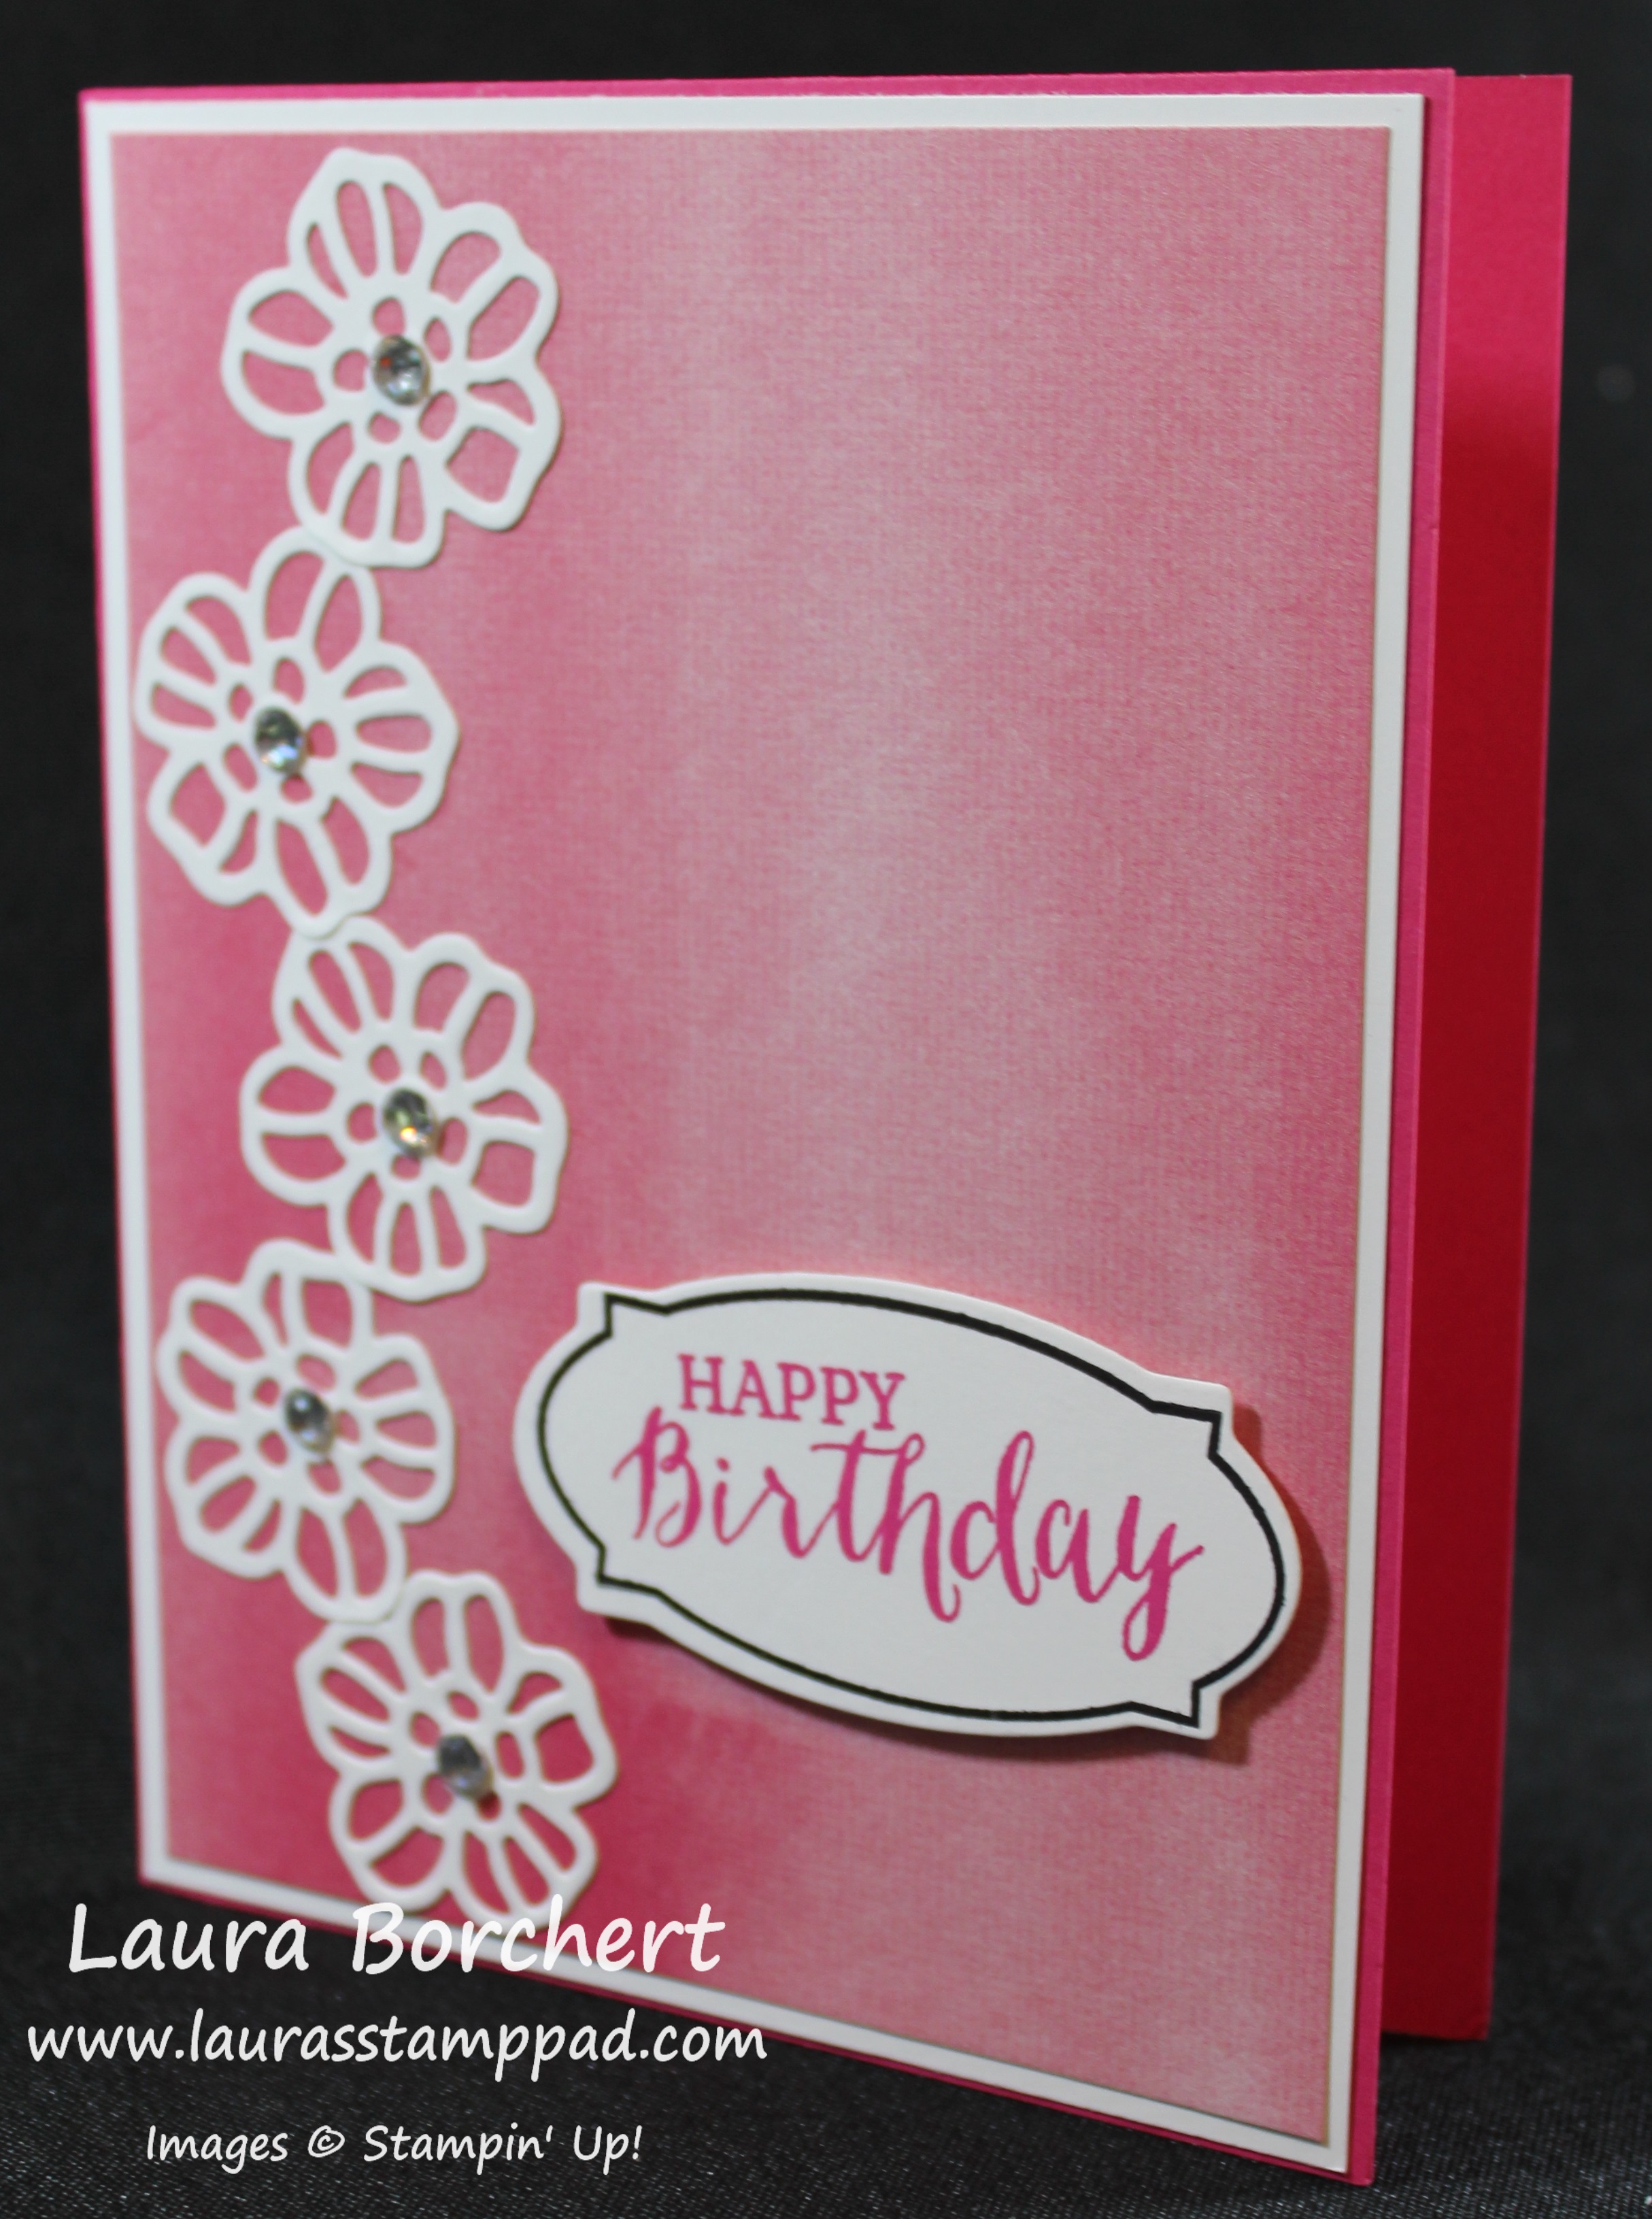
This card seems to scream fun, flirty, and Hawaiian. Is that a Hawaiian flower?? Either way I am in love with it and it’s PINK!!! I started this card off with a Melon Mambo card base. I layered a piece of Whisper White on top measuring 4-1/8″ x 5-3/8. Then I used some of the Perfectly Artistic Designer Series Paper (no longer available). You could always create some of your own paper like this with Sponge Daubers or the Watercolor Wash Stamp Set. This piece measures 4″ x 5-1/4″. I die cut the flowers from the Rose Garden Framelits. Of course, I used the Die Brush to help pop the image out of the framelits and pop all the paper out of the holes! I love that little tool! Check it out in action here! I used the Fine Tip Glue Pen to adhere the flowers to the card front and added a Rhinestone for a little bling!! For the greeting, I used the Rose Wonder Stamp Set (Bundle & Save 15%). I stamped the label in Basic Black and the greeting in Melon Mambo and then die cut it with the Rose Garden Framelits! I am in love with the Rose Wonder Bundle. The greetings, the flowers, the leaves…..I love it all!!! If you would like to see more samples, click here, here, and here!
I am LOVING the Wildflower Fields Designer Series Paper and coordinating Flowering Fields Stamp Set. Both of these items are Sale-A-Bration items that you can earn for FREE with every $50 US order. You all know I love flowers and these items are just perfect!!!
I cut the Designer Series Paper into 4-1/4″ x 5-1/2″ pieces which leaves a 1″ piece leftover. I adhered the big piece directly to the a Whisper White card base which fits perfectly. The left over 1″ piece I flipped over and created banner tips on the end. You can use your Paper Snips or the Banner Triple Punch! Then I used a small scrap piece of Whisper White cardstock and stamped the flowers from the Flowering Fields Stamp Set in Basic Black Archival Ink. I used Blender Pens to color in the flowers and then stamped the greeting from the Crazy About You Stamp Set! For the card above, I used Blackberry Bliss and Old Olive on the flowers. Also, I added a little bow of Whisper White Baker’s Twine!
For this card, I used Calypso Coral and Old Olive on the flowers. I added some Old Olive Baker’s Twine around the entire card for a little texture!
For this card I used Old Olive and Lost Lagoon for the flowers. I added some Gold Baker’s Twine in a bow around the card for a little texture and bling.
I had so much fun making these cards and I love them! It is a great way to use scraps of cardstock and all of your Designer Series Paper. If you would like to see the coloring of the flowers and cutting the Designer Series Paper, check out my Video Tutorial below or click here! Don’t forget to give it a thumbs up if you liked it!
Let me know in the comment below which one your favorite is! I think mine is the second card with the coral flowers!
Happy Tuesday everyone!!! I have a fabulous technique to share with you today and it’s as simple as ink and clear blocks!!! You can use this technique with lots of different stamp sets and occasions! Let’s get started!!!
How amazing is this card? It is perfect for any occasions which is why I didn’t want to put a greeting on it. I love it! I got the idea from Rachel Palmieri. I tried to modify it a little to add my own flare and I didn’t like any of them. Rachel did it wonderfully and I went with it!!
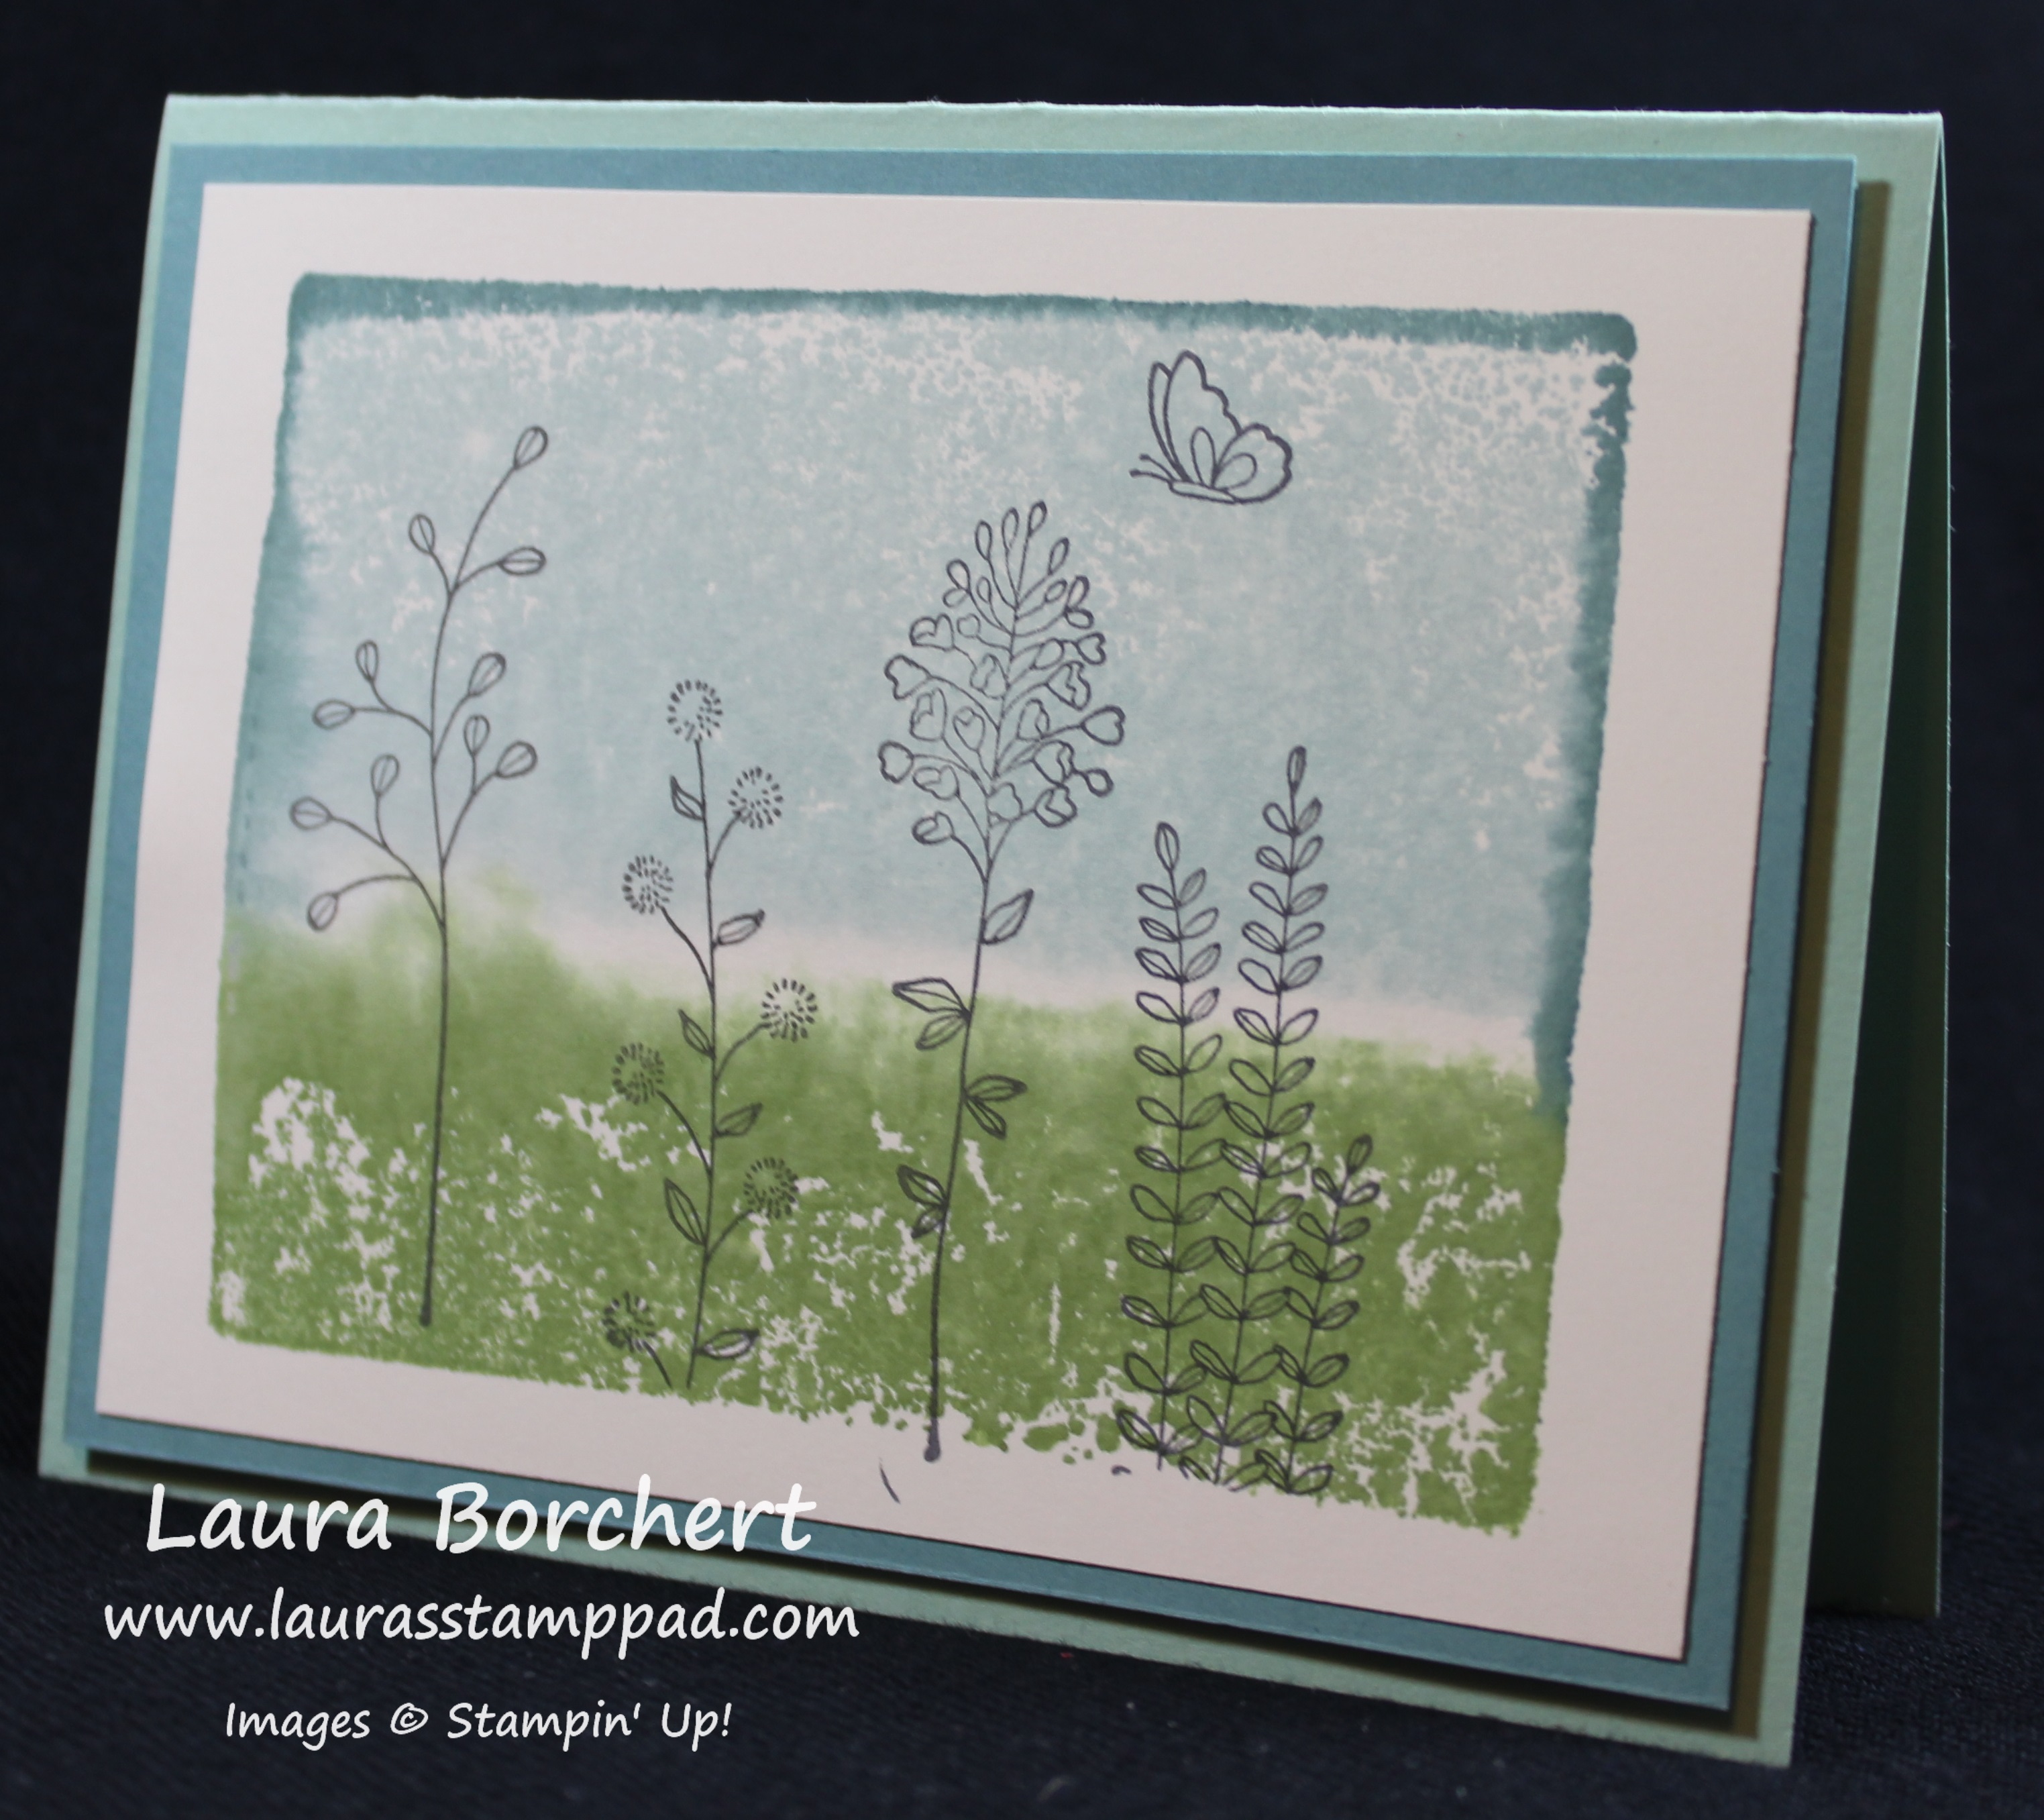
You can really use any size of Clear Block that you wish but I went with Block E because I thought it was a great size for a scene. I pressed the Wild Wasabi Ink Pad onto the bottom 1/3 of the clear block. Then I took the Soft Sky Ink Pad and pressed it onto the top 2/3 of the clear block. You will want to get close to the green but you don’t need to touch. Then taking the Lost Lagoon Ink Pad, you will press it along the edges of the blue. Be sure that you are angling the ink pad a little and not just inking the side of the clear block. Then with a Spritzer filled with water, you will want to spritz the clear block. Don’t spritz directly at it but instead a few inches away and allow the mist to fall onto the block. Then you will flip the clear block over and stamp it onto a piece of Very Vanilla cardstock (3-3/4″ x 5″). Hold for a few seconds to allow the ink to soak in. Your paper may curl a bit because of the water and that’s okay. Once it has dried, you can stamp onto your cardstock. I stamped the flowers from the Flowering Fields Sale-A-Bration Stamp Set in Basic Gray for a softer look. I layered this piece onto Lost Lagoon measuring 4″ x 5-1/4″ and then onto a Mint Macaron card base with Stampin’ Dimensionals! I love it!!!
Here are a few tips and tricks that I wanted to share with you.
You will want to spritz with water as it achieves the best look. I tried with no water and it looked very light and small dots.
I tried with Alcohol in hopes it would dry faster (you all know I don’t have patience). It didn’t work. It dried too fast and the colors did fill in like they do with water.
Be sure to flip the clear block over and hang it directly upside down while you determine the center of the cardstock or something else. You don’t want to hold the clear block on it’s side or tilted because then the colors will drip/run into each other.
If you would like to see this technique in action, check out my Video Tutorial below or by clicking here! I show all of the samples that didn’t work as well! 🙂 Be sure to give it a thumbs up if you liked it!
It is always good to have some quick and simple card ideas for this style of card! You can whip this card up in no time at all. I started with a Lost Lagoon card base. Then I layered some Wildflower Fields Designer Series Paper (3-7/8″ x 5-1/8″) from Sale-A-Bration onto a piece of Blackberry Bliss (4″ x 5-1/4″). That small bit of Blackberry Bliss is just enough to make it pop! I love it! I tied some Calypso Coral Seam Binding around this piece and then added it to the card front! For the greeting, I used the Rose Wonder Stamp Set which has some of the best greetings ever! I love that set! I punched it out with the 2″ Circle Punch and layered it onto a Blackberry Bliss 2-3/8″ Scallop Circle! I attached the greeting with Stampin’ Dimensionals!
This card style could be used for many different occasions. You could make up lots of them and leave the greeting off to stamp as you need them!
Happy Tuesday!!! You all know what that means!!!! I have a fabulous…and adorable…technique to share with you today!!! This little Easter Lamb is just precious!!! When I first saw him in the Occasions Mini Catalog, I knew I had to have him! My favorite holiday is Easter so that is perfect. Plus I thought you could omit the Easter greeting and use it for Baby, Baptism, and Children’s Birthday Cards!!! He’s just so cute!!!
See what I mean??? I love it!!! Let’s get started!
I started off by stamping the Easter Lamb Stamp in Archival Basic Black onto Whisper White cardstock. You will want to use this ink or Stazon Black Ink because these won’t run when you are coloring. Then I took the Blender Pens and little touched them into the ink to color in the scene! I used Pear Pizzazz for the grass. I used Blushing Bride for the ears and cheeks. I used Chocolate Chip for the hooves. I used Pool Party for the background. I will say it was all really easy and fun except for the background. I really struggled with that on each one because it came out different each time. You really need a light touch and be okay with random streaks. 🙂
I really like how this one turned out and I think I like the grass colors just on the sprigs and not all filled in. They are both super cute though. I layered the lamb onto Pool Party cardstock. I added Stampin’ Dimensionals to the back. I added a small piece of Whisper White Seam Binding and just added dimensionals on top to hold it in place. I placed this onto a piece of So Saffron. I did use some of the Sale-A-Bration Artistically Yours Designer Series Paper but there wasn’t enough to make multiples. I put it all onto a Whisper White card base!
If you would like to see this in action, check out the video below or click here!!! Don’t forget to give it a thumbs up if you liked it and Subscribe so you don’t miss out on future videos!
Do you send out Easter Cards? How would you use this stamp set? Let me know in the comments below!
The more I look at this card, the more I love it! This card is perfect to have on hand for those random occasions that you might not have a greeting for like Confirmation, Baptism, getting a Promotion, the Anniversary of something special. This card could also be used for the occasions we are all familiar with as well like wedding, and birthday. Everyone needs to know that they are special and mean the world to someone because it’s so very true! I feel like I need to go make 10 more of this card now! I love it!!!
I started with a Crumb Cake card base. I took a piece of the Love Blossoms Designer Series Paper measuring 3-7/8″ x 5-1/8″ and layered it onto Rose Red measuring 4″ x 5-1/4″. Sometimes that smaller little border makes the greatest look on a card. I’m don’t typically like to cut in anything besides 1/4″ and 1/2″ but every once in a while it just needs it! 🙂 I layered this onto the card front and started on the greeting. I stamped the greeting from the Botanicals For You Sale-A-Bration Stamp Set in Rose Red onto Whisper White cardstock and punched the banner tips with the Banner Triple Punch. I layered it onto a piece of Garden Green and added it to the card. I wanted a little something to pop out and add texture so I punched out some hearts with the Itty Bitty Accents Punch. I adhered the hearts with Stampin’ Dimensionals. You could always change up the accents to be stars or flowers or just a few pearls or rhinestones. It’s all up to you!
Don’t forget that your leftover pieces of the Love Blossoms Designer Series Paper can be used a for a quilt card! You can check out how to do that here! Love it!
Looking at the Flowering Fields Stamp Set, I start dreaming of all the beautiful colors of flowers I can create. Then I saw this fabulous sample from fellow stamper Rae Anne and thought it was amazing!!! It’s blues and greens and no foo foo ribbon or bling so that means it is a man card, right???
I started with a Crumb Cake card base. I added strips of cardstock in Tempting Turquoise, Pacific Point, Garden Green, and Cucumber Crush. The strips measure 4″ x 1-1/2″. Each strip is stamped with one of the images from the Flowering Fields Sale-A-Bration Stamp Set in the same ink color as the cardstock. I love the subtle outline. Then I took a piece of Crumb Cake measuring 5-1/2″ x 1/2″ and stamped a greeting from the A Dozen Thoughts Stamp Set. I added my own flare with some Candy Dots since they add a little texture and fun!
What do you think – is it masculine??? Who else thinks it would be fabulous with shades of yellow, pink, red, or orange? Let me know in the comments below!!!
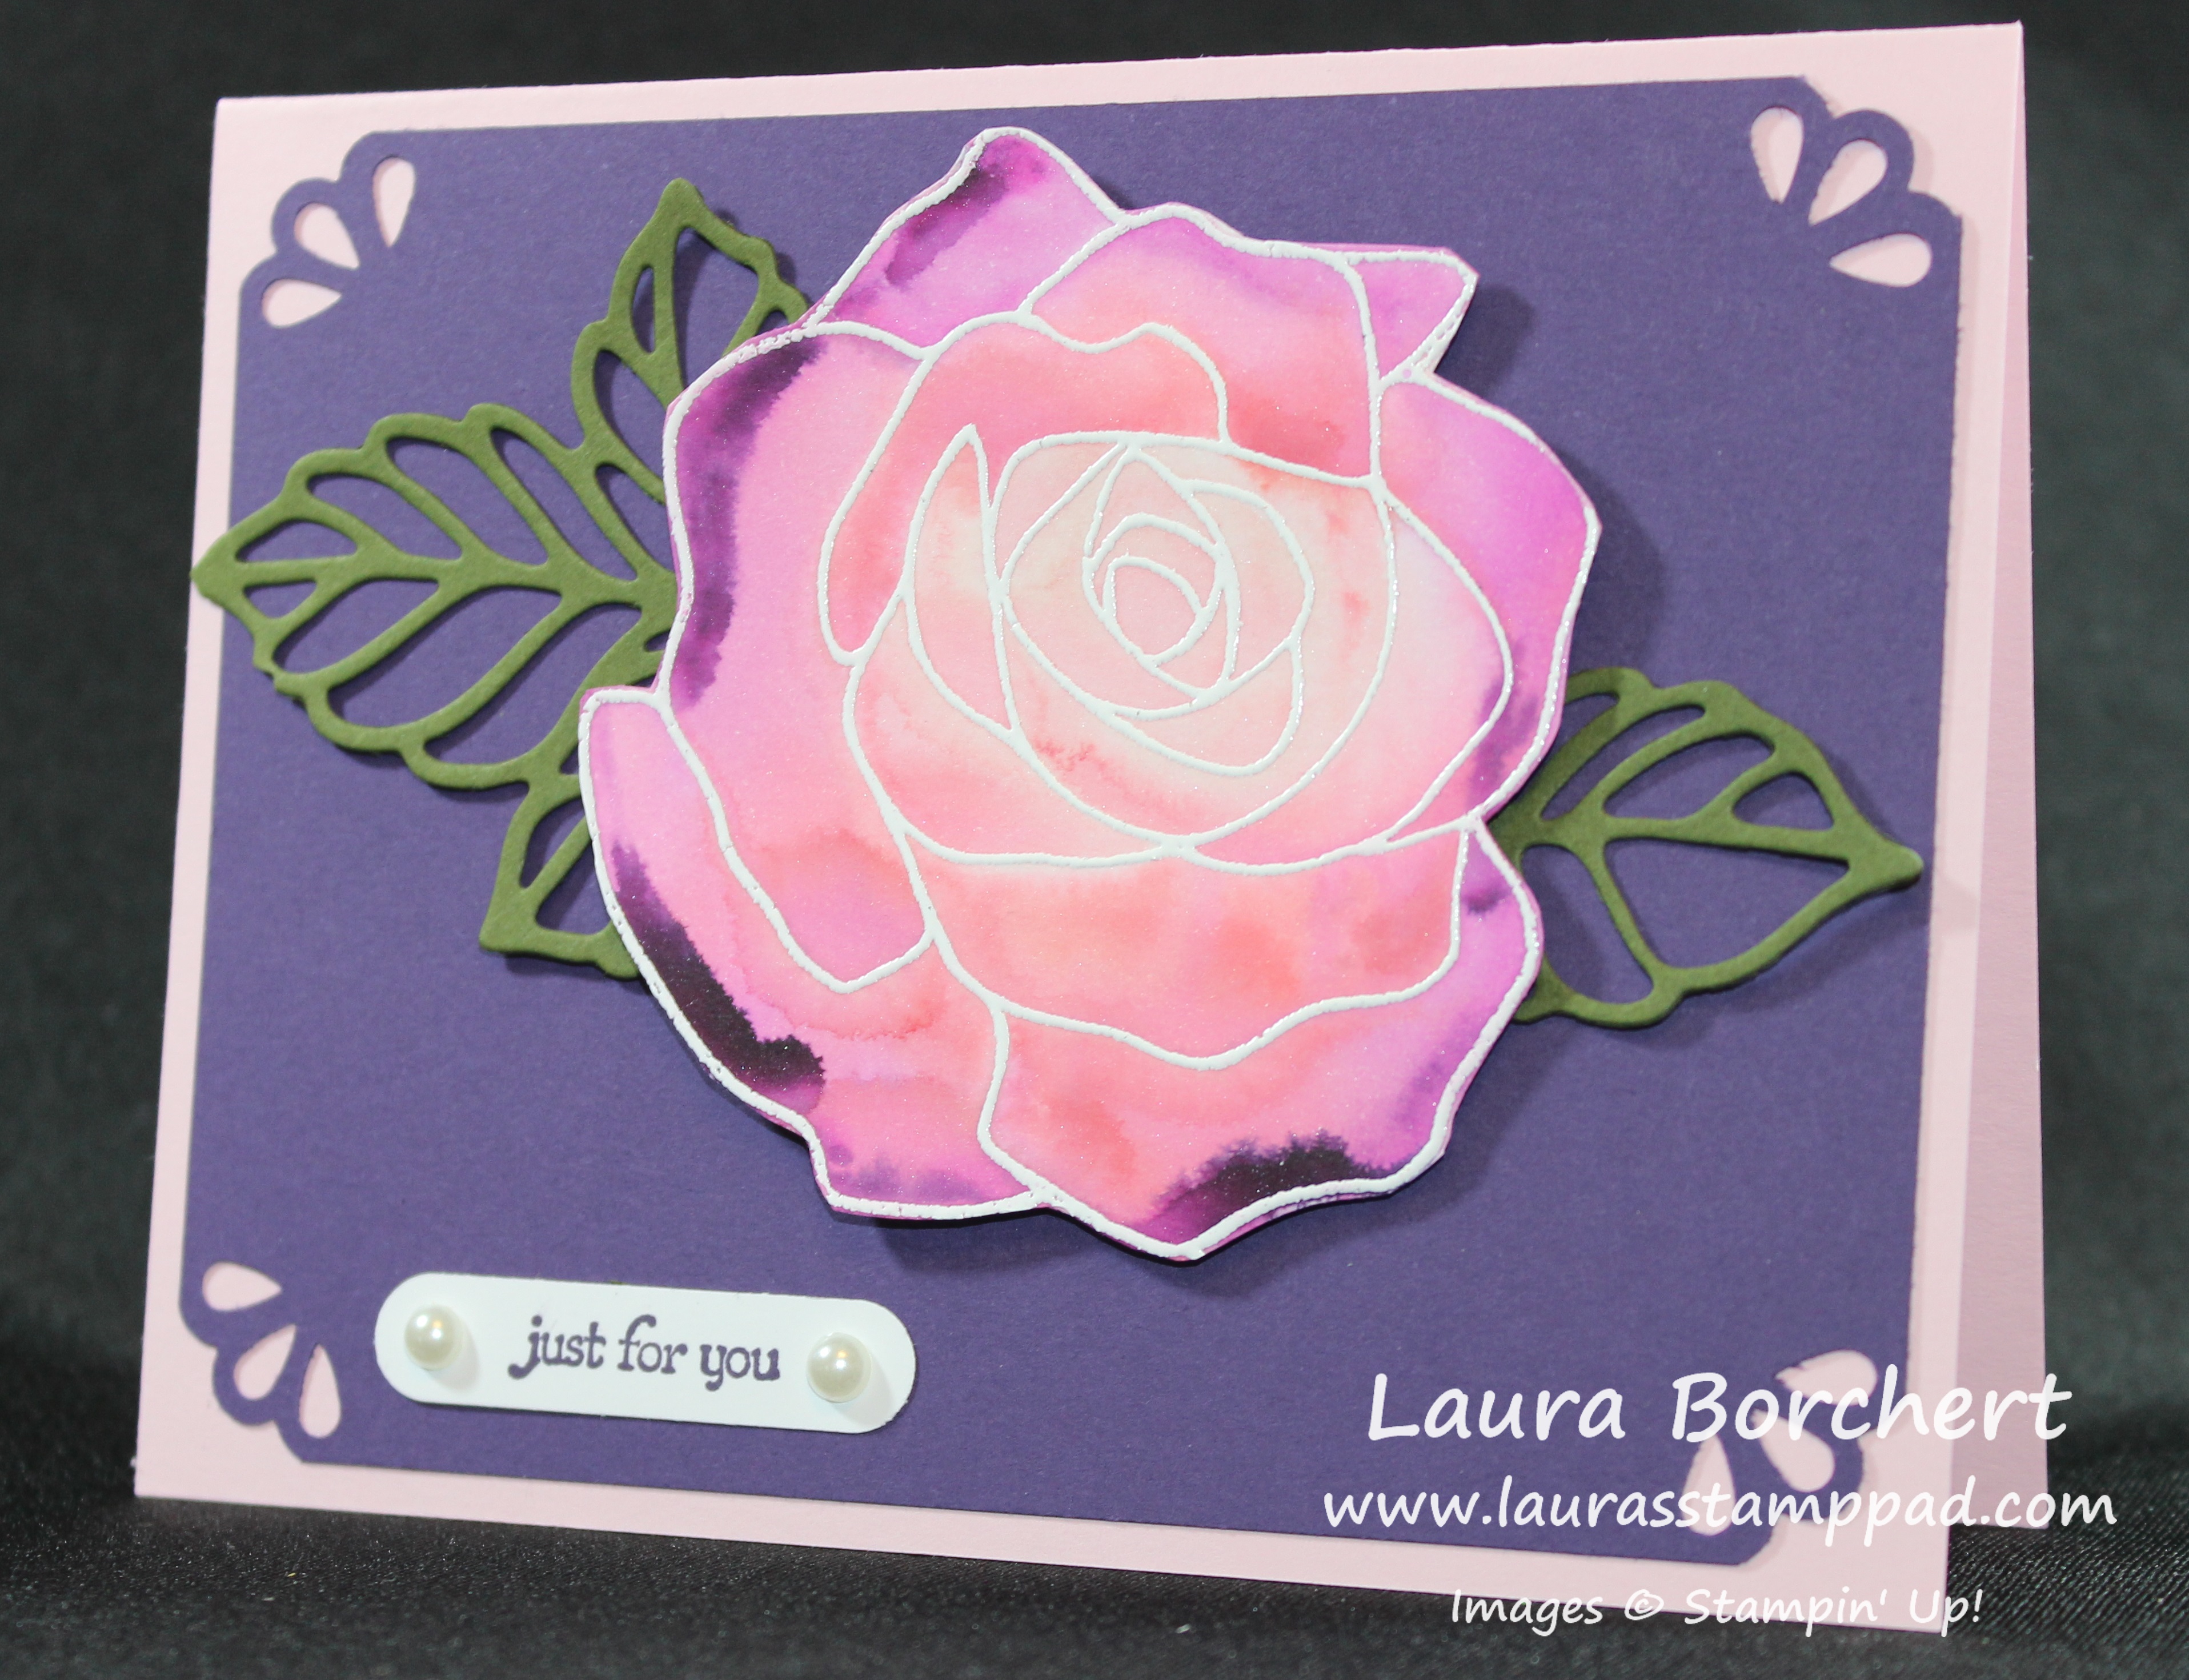
Happy Tuesday!!! I have a super fun technique to share with you today!!! It includes watercoloring so remember that each one will turn out differently and it requires some patience….but the look is AMAZING!!! Check this out!!!
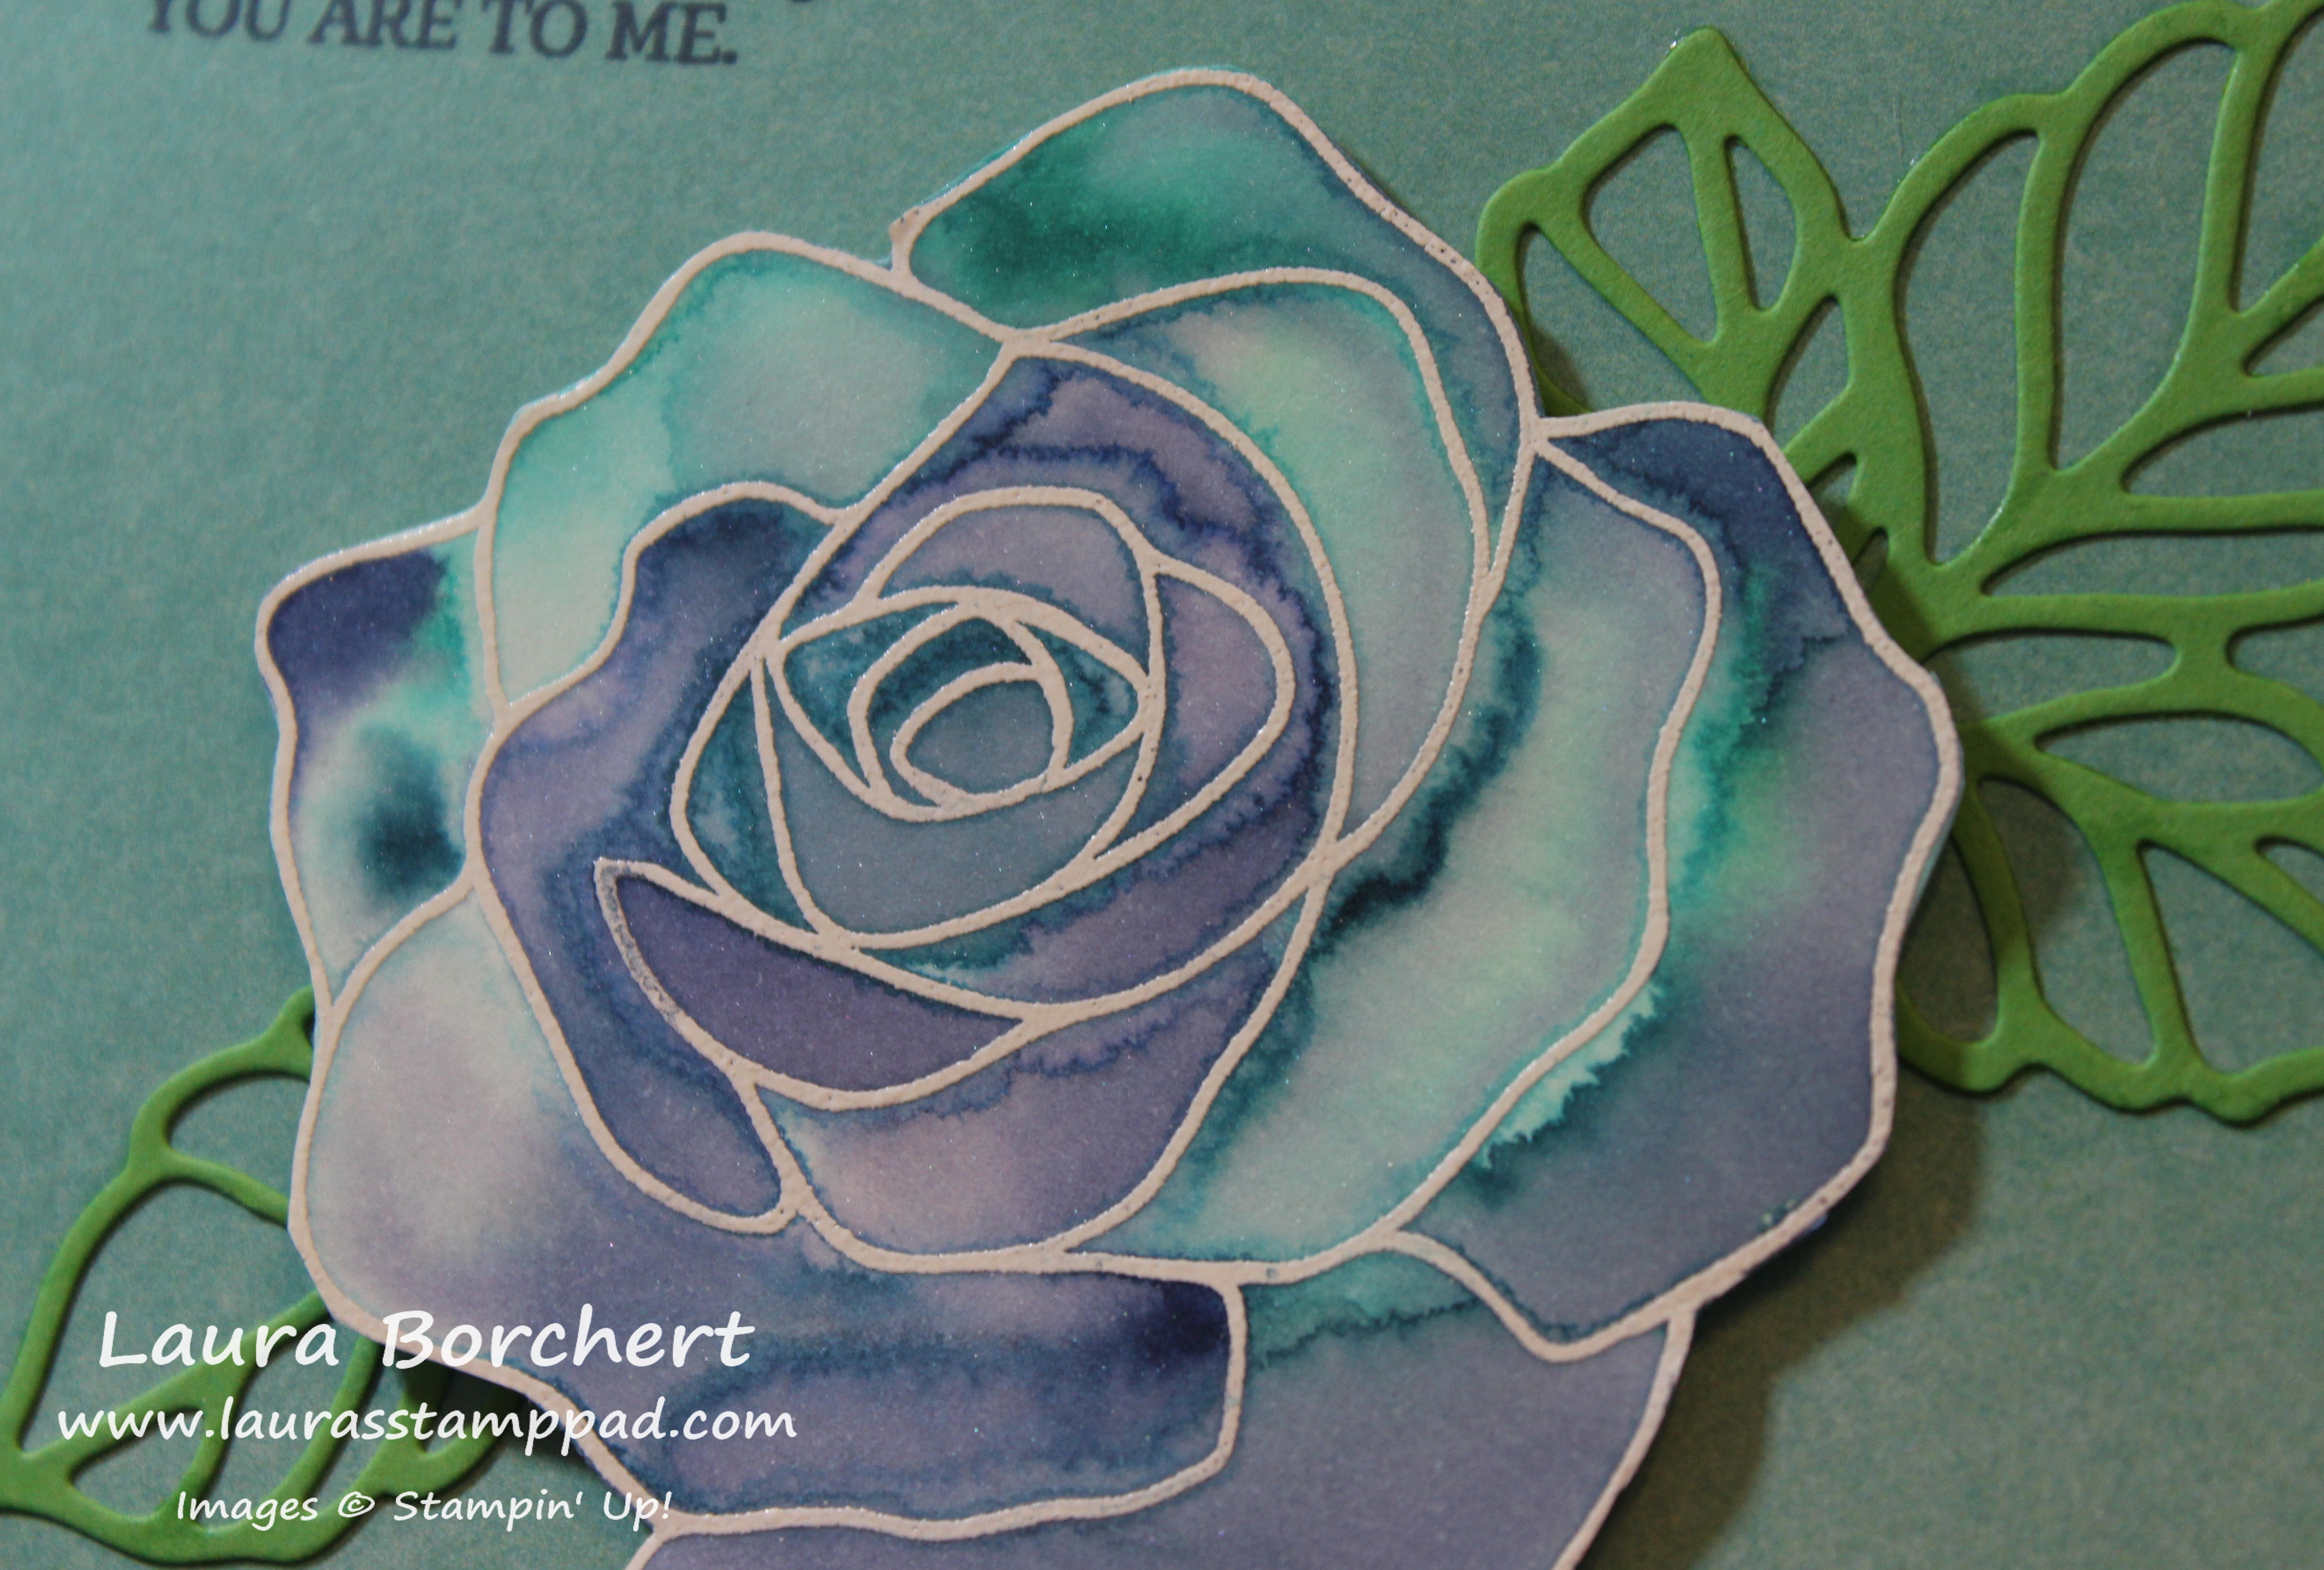
I honestly think this blue one is my favorite even though I don’t know if I have ever seen a blue rose like this. I just love it!!!
Okay so let’s get started. You will need a piece of Shimmery White cardstock for the rose. This cardstock is thicker than regular Whisper White but not as thick as Watercolor Paper so it works perfectly. It always has that beautiful shimmer which is fun! I stamped the rose from the Rose Wonder Stamp Set in VersaMark onto the cardstock. No need to worry about the leaves since you will cut them off. Then you will pour White Embossing Powder over the it and using the Heat Tool, set the powder. Now you will need to pick your colors and add a little drop of re-inker to a clear block or press the block into the ink pad to get some color. Then you are all set with your image, you will spritz the heck out of it with water. I mean like puddles on top of your image. Using an Aqua Painter, lightly touch the ink and then touch the tip of the Aqua Painter into one of the puddles on the flower. You can start with a light color on the outside or inside whichever you prefer. For the rose above, I used Bermuda Bay, Island Indigo, and Night of Navy. When you touch the color to the water, you will see it spread out all over. If it doesn’t but instead seem really dark and like it soaked into the paper, you need more water. You can either squeeze the Aqua Painter or spritz again. Add color as much as you would like. A good tip for myself is….If you think it needs a bit more, STOP! I tend to do a little more here and then there and it ends up messing up. Also, it will dry differently then it looks right now too! You can either set it aside to dry OR you can tip it a bit and allow it to dry like that. This allows the excess water to run to one side and dry darker in those spots. I prop it up on a clear block.
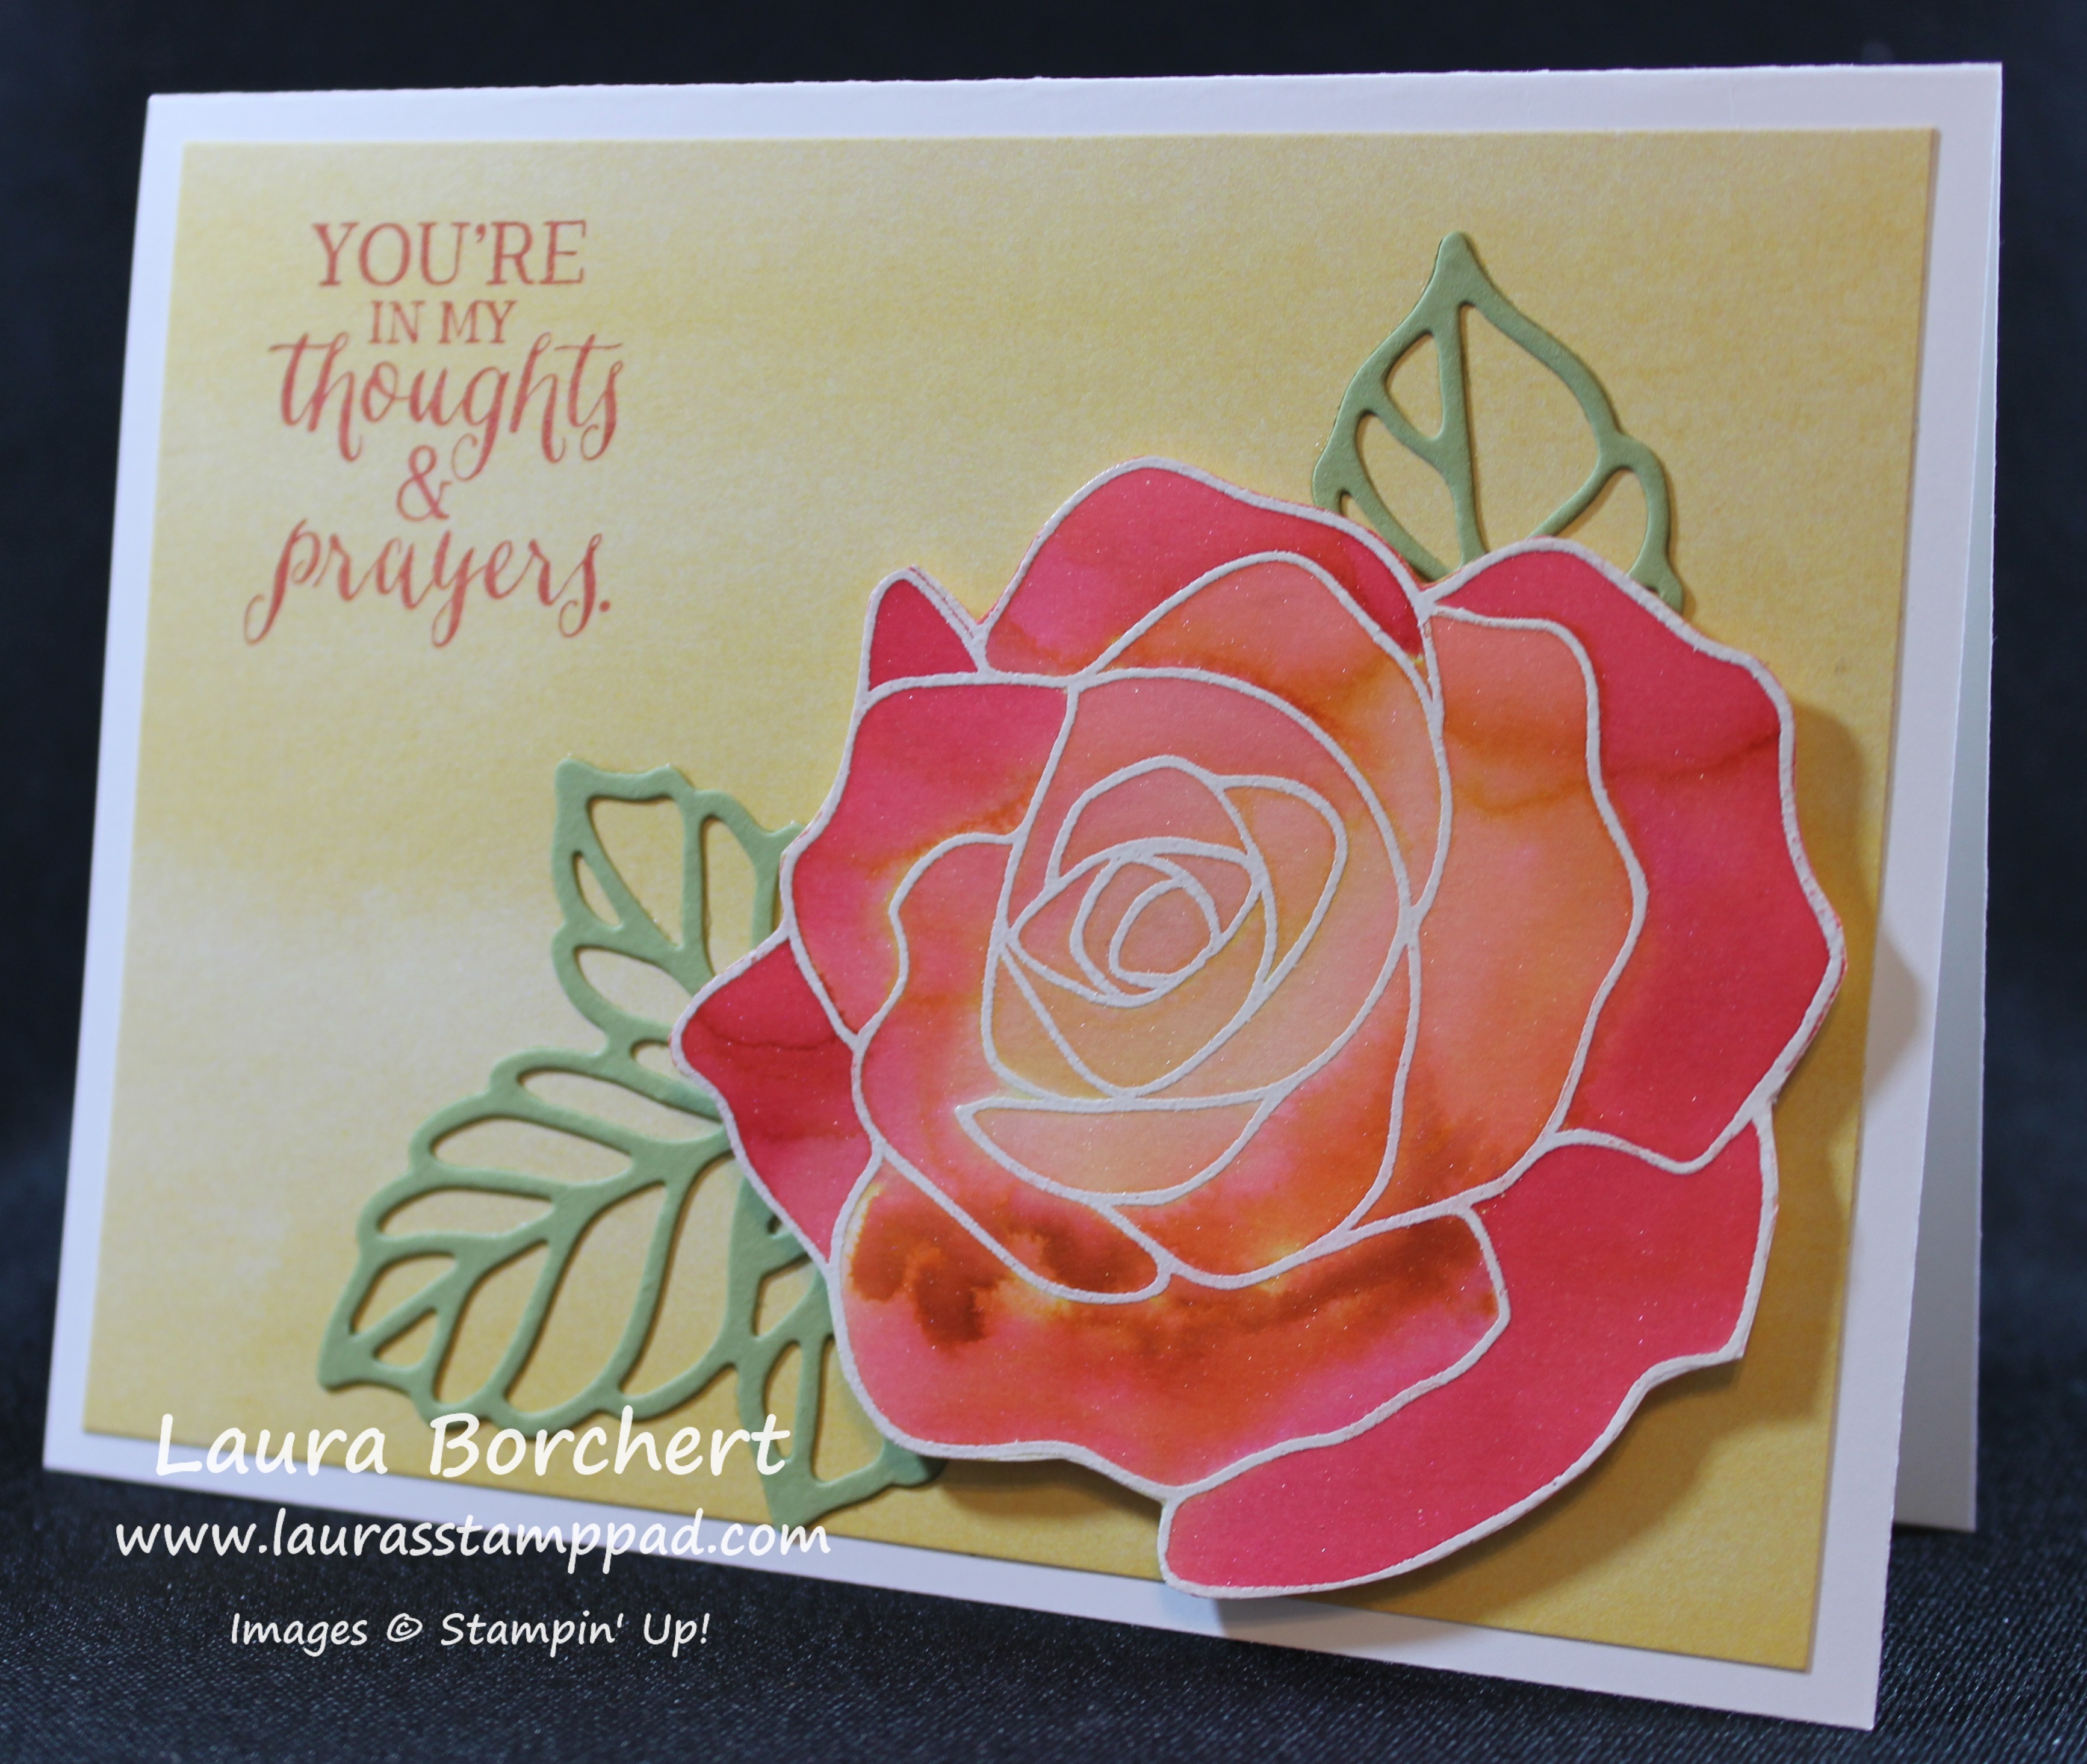
Once it is all dry, you can cut it out along the border of the embossing flower and add it to your card front. I used the Rose Garden Framelits (Bundle & Save 15%) to die cut the leaves in Cucumber Crush. I used a Whisper White card base and some of the Artistically Yours Designer Series Paper from Sale-A-Bration! I stamped the greeting from the Rose Wonder Stamp Set!
For this rose, I used Real Red, Tangerine Tango and Daffodil Delight. I love how it turned out. The leaves on this one were die cut in Pear Pizzazz!
For this one, I used Blushing Bride, Watermelon Wonder, and Elegant Eggplant. You can see those really dark purple spots….that was where I didn’t have enough water and the paper just soaked up the color strongly. I used Mossy Meadow for the leaves on this one. I also used the Curvy Corner Trio Punch as well.
If you would like to see this technique in action, check out the video tutorial below or click here. Don’t forget to give it a thumbs up if you liked it and subscribe so you don’t miss any future videos!
Which color combination is your favorite? Let me know in the comments below! The blue one is my favorite!
I just love flowers and everything you can create with them. A simple single flower, a bouquet in a vase, a full arrangement, and so much more! It is just so much fun and the color combination is endless. I used the What I Love Sale-A-Bration Stamp Set for these flowers as well as a little masking!
I took a piece of Whisper White measuring 3-3/4″ x 5″ and placed a 1-1/2″ strip of scrap paper in the center. You can add a dab of adhesive to hold it in the place if you wish. Then I stamped the flowers above and below that scrap piece of paper. Not so high that it doesn’t touch the scrap piece. You really want them close to that center line. I only used the flower outline (stamp 1) and the big solid piece (stamp 2) for these flowers. I also only used one color per flower – full ink for the outline and stamped off once for the inside. The colors I used for the big flowers were Daffodil Delight, Melon Mambo, Pumpkin Pie, and Island Indigo! The little flower that I stamped around was done in Perfect Plum and the greenery was done in Old Olive. All of these images are from the What I Love Stamp Set that you can earn through Sale-A-Bration with a $50 order. Once you are done with your flower bouquet, you can remove the mask. For the greeting, you can use the one in that set but I decided to use the greeting from the Rose Wonder Stamp Set since it was a bit bigger. The greeting was stamped in Basic Black. For the greenery on either side of the greeting, I stamped off once to get a lighter shade. I just love how clean and simple that center line is. Love it!!! I layered this piece onto Basic Black (4″ x 5-1/4″) and then using Stampin’ Dimensionals placed it on a Whisper White card base.
What colors would you use for your bouquet? Let me know in the comments below! If you would like to see this in action, check out this Video Tutorial. You can also see the other sample shown in the video here!