Spreading Holiday Joy Series!!!!

Posted on

Here is the third card in my Spreading Holiday Joy Series! You can see the others here and here!

Special Season, www.LaurasStampPad.com

I love the elegance that the Silver Ink and Ribbon adds to this card! And with the single color, it is super simple!

Supplies Needed: Smokey Slate Cardstock (2 cards per sheet), Whisper White Cardstock (4 cards per sheet), Silver Ink, Silver Ribbon, and Special Season Stamp Set

You will stamp the tree and the greeting onto the Whisper White cardstock (5-1/4″ x 4″ rectangles) in Silver Ink! You can get 4 from each piece of 8-1/2″ x 11″ sheet of cardstock. Then you will tie the Silver Ribbon around the Whisper White Cardstock and adhere to your card base! You could always modify this card style by adding some color to the tree, using Real Red and Gumball Green, or add some Dazzling Details! There are many other ways to change it up too! Feel free to add your modified idea in the comments below!

Happy Stampin’

~Laura


Spreading Holiday Joy Series!!!!

Posted on

Here is the second card in my Spreading Holiday Joy Series! You can see the first one here!

Festive Flurry, www.LaurasStampPad.com

This card uses some of my favorite colors and my favorite set this season – Festive Flurry!

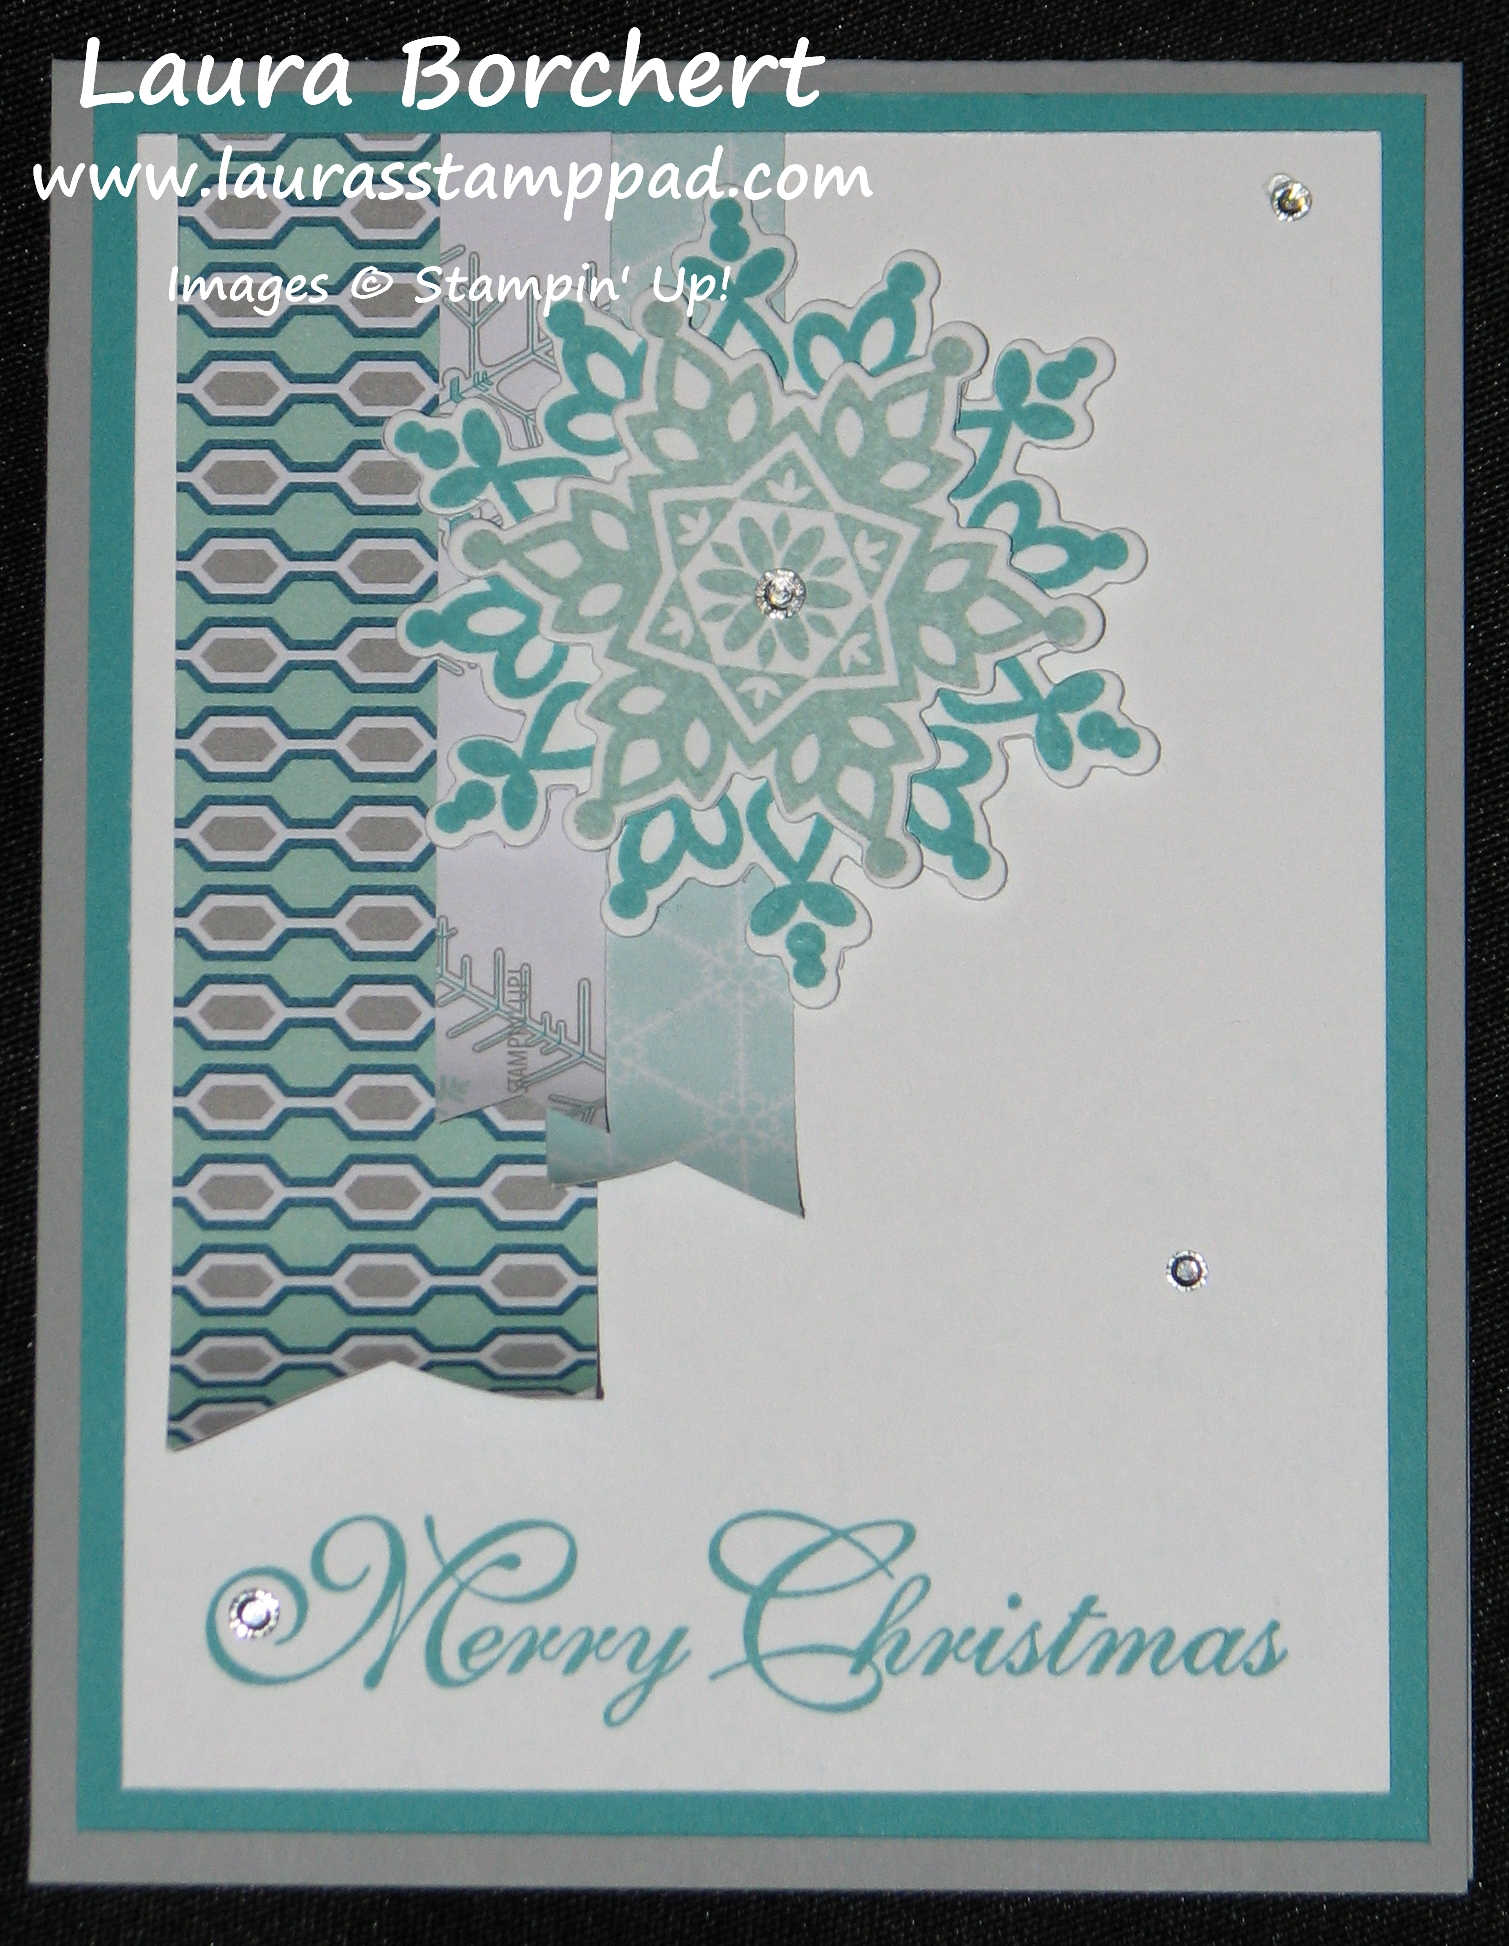
Supplies Needed: Pool Party Cardstock (2 cards per sheet), Winter Frost Designer Series Paper Stack, Whisper White Cardstock, Island Indigo Cardstock, 2-3/8″ Scallop Punch, 1-3/4″ Circle Punch, Rhinestones, Island Indigo Ink, Festive Flurry Stamp Set, and Sweet Essentials Stamp Set

My strips of the Winter Frost Designer Series Paper are all less than an inch so you can get A LOT from the Paper Stack!!! A little TIP on how to get a perfect banner each time…..on the end of the piece, make a cut in at the center, then from the corners, cut diagonal to that center cut! This will make your banner tips the same length! (I hope that made sense.) Another TIP…..the piece of white cardstock that I used for the greeting is the leftover piece from this card! On that other card, you create 5-1/4″ x 4″ rectangles and you can get 4 from each piece of 8-1/2″ x 11″ sheet of cardstock. You are left with this little strip and I used it for my greeting on this card! Gotta love using those scraps!!! You will stamp the smallest snowflake from the Festive Flurry Stamp Set onto a piece of scrap white cardstock and then punch it out with your 1-3/4″ Circle Punch, layer that onto the punched Island Indigo scallop! Add your rhinestone to the center and adhere to your card! Once your supplies are cut, this card should take about 1-1/2 minutes to 2 minutes! Be sure to check back to see the rest of the cards in the Spreading Holiday Joy Series! Also, if you would like me to send you a card, email me your address!

Happy Stampin’

~Laura

Spreading Holiday Joy Series!!!!

Posted on

I love love love getting mail especially when it in a rectangle envelope and the address is hand-written because that means its not just another bill or piece of junk mail! I love sending cards to other as well because I want them to be excited, feel loved, and it just may brighten their day!!! I know many of you send out Christmas card during this time of year so I thought I would share some of the cards that I have created for various classes or for my cards that I will be sending out! Over the next few weeks, you will be seeing lots of cards that can easily be recreated for your own cards or you can use the theme with another stamp set all year long!!! Also, if you would like me to send you a card, email me your address and I will be sure to get one in the mail to brighten your day!!! 🙂

Calm Christmas, www.LaurasStampPad.com


This card was the favorite at the Holiday Card Class I had at the Library and it is sooooo simple!

Supplies Needed: Night of Navy Cardstock (2 cards per sheet), Whisper White Cardstock (4 cards per sheet), Night of Navy Ink, Sponge Daubers, and Calm Christmas Stamp Set

You will stamp the dove and the greeting onto the Whisper White cardstock! (5-1/4″ x 4″ rectangles)! You can get 4 from each piece of 8-1/2″ x 11″ sheet of cardstock. You are left with this little strip and I used that in another card that I created so be on the lookout! Gotta love using those scraps!!! Brush the edges with your Sponge Dauber and adhere it to your Night of Navy card base! DONE! Once you cut your cardstock, it should only take about 1 minute to stamp and assemble!! I hope you enjoyed this! Be sure to subscribe to my blog by entering your email address on my blog at the top right so you don’t miss any more posts and the rest of the cards in this series!

Happy Stampin’

~Laura


Happy Thanksgiving!!!

Posted on

Thankful Banner, www.LaurasStampPad.comJust wanted to post a little greeting on my most favorite Holiday of the year! HAPPY THANKSGIVING! I am so thankful for so many things this year! I am thankful for my Family and Friends and Stampin’ Up who has allowed me share my love and creativity with so many of you! I am thankful to have meet you, crafted with you, shared stories with you, shared laughs and tears! You all are like family to me! Thank you for being you!!!!

Happy Thanksgiving!

~Laura


Loving What I Do, Sharing What I Love!!!

Posted on

Stamping, www.LaurasStampPad.com

I loved this moment – stamping with my Mom and my Niece!!!! Here we are making my Mom’s Christmas Cards! I love stamping and what could be better than stamping with those that I love! Every year, my Mom and I make her Christmas Cards. Usually we do it on Thanksgiving Day while the turkey is in the oven but all of the family will be in town this year so we thought we would do them on a different day! My Mom picked three different styles for her cards this year. We cranked out 50 cards, 3 styles, 3 people, in less than 3 hours (I did do the pre-cutting though). Stamping with others and stamping in multiples is so much easier! Here are the samples of the cards that we created!

Manger Christmas Card, www.LaurasStampPad.com

So this one was created in Night of Navy and the baby and the star are from a stamp set that was available last year – First Christmas. My Mom bought the set last year and we never got to use it! But the greeting was from my FAVORITE Holiday Set – Greetings of the Season!

Special Season, www.LauraStampPad.com

This card is so amazing and the picture doesn’t do it any justice! This card uses Smokey Slate Cardstock, Winter Frost Specialty Designer Series Paper, Silver Glimmer Paper, Silver 1/8″ Ribbon, Pearls, and the Special Season Stamp Set!

Calm Christmas, www.LaurasStampPad.com

This one was the easiest one! Super Simple and Amazing! We made the most of these (30). The card features Coastal Cabana, Island Indigo and Whisper White Cardstock! The Stamp Sets are Calm Christmas and Greetings of the Season!

I hope these cards gave you some inspiration for the Holidays and I encourage you to share what you love with your family and friends!!!

Happy Stampin’

~Laura


Technique Tuesday – Thankful Treat Bags

Posted on

It is Tuesday and so I’m sharing a fabulous technique with you!!! This week it is this adorable Treat Bag which was created from the Thankful Tablescape Simple Created Kit!

Treat Bag, www.LaurasStampPad.com

Supplied Needed: Thankful Tablescape Simply Created Kit – Napkin Pouches, small strip from the Menu Cards, piece from the Chocolate Chip Roll, piece from the Tangerine Tango strips, piece from the roll of Birch Paper, and Chalkboard Banner Tag & Sticky Strip

All you need to remember for the scoring on the bag (napkin pouch) is 2-1/2″!!!!

Score Lines for Treat Bag, www.LaurasStampPad.com

As you can see in the photo above, you will place the Napkin holder at 2-1/2″ inches on your Stampin’ Trimmer and score! Then you will do that on either sides of the main piece as well! Here is a photo showing you where the score lines are!

Score Lines for Treat Bag, www.LaurasStampPad.com

The small box (purple lines) are the original score lines on the Napkin Holder. The pink lines are the score lines that I created going 2-1/2″ out from each purple line! I hope this makes sense! Then all you do is add Sticky Strip (best adhesive for boxes) to the 2 small outside tabs and assemble your box! I stapled mine shut but you could always use adhesive or leave it open! I think took a few other pieces from the kit to create my banners and add the tag!

These boxes are perfect for a Thanksgiving Hostess Gift, goody bag to take leftovers home in, or any other type of treat bag for that special someone!

Happy Stampin’

~Laura


Thankful Simply Created Cards!

Posted on

Thankful Simply Created Kit, www.laurasstamppad.com

Thankful Tablescape Simply Created KitStampin’ Up! has this fabulous kit in the Holiday Mini Catalog that is super cute for any Thanksgiving Tablescape! But if your family is anything like mine there is so much food and chaos going on that there is no room for cute decorations! So why not think outside the box??? Check out these fabulous cards that I created with all of the supplies inside the kit (minus the card bases which are crumb cake cardstock). I was able to create over 30 cards and 10 treat bags! Come back again tomorrow to see how I created treat bags with the napkin pouches!

The card that I did above was created using half of the menu card (the yellow striped piece) and a small piece of the Designer Series Paper from the strips (the orange piece). The package comes with these amazing chalkboard pieces which I thought were totally just black cardstock. Whoa, was I wrong! It is this crazy slick, textured, plastic-like piece and it so looks and feels amazing! I used the fabulous Chalk Marker for the greeting! This is the greatest white marker I have ever used! It writes very clear and amazing! The little notches on the chalkboard piece make it easy to wrap the twine around and the kit comes with die-cut leaves!

Thankful Simply Created Kit, www.laurasstamppad.com

This card uses the the hounds-tooth printed paper (in the package to be used as food tent cards) as your background piece. You need to cut off about a 1/2″ piece which I then added to the inside for a little POP of color/decoration on the inside! The Chocolate Chip patterned piece comes from the roll of paper in the kit! That roll seems never endings! I added a little twine and another one of the die-cut leaves! The kit also comes with a roll of this birch paper which is super cool because it is textured and not actual cardstock (sort of plastic feeling too). I stamped the Magnificent Maple leaf on there in Crushed Curry and Tangerine Tango and then used my Label Framelits to cut it out! Love it! Post in the comments if you have any other outside the box ideas that you have for this fabulous kit! And be sure to come back again tomorrow for the Technique Tuesday – Treat Bag!

Happy Stampin’

~Laura


Loving Paper Snowflakes….Not a fan of real Snow!

Posted on

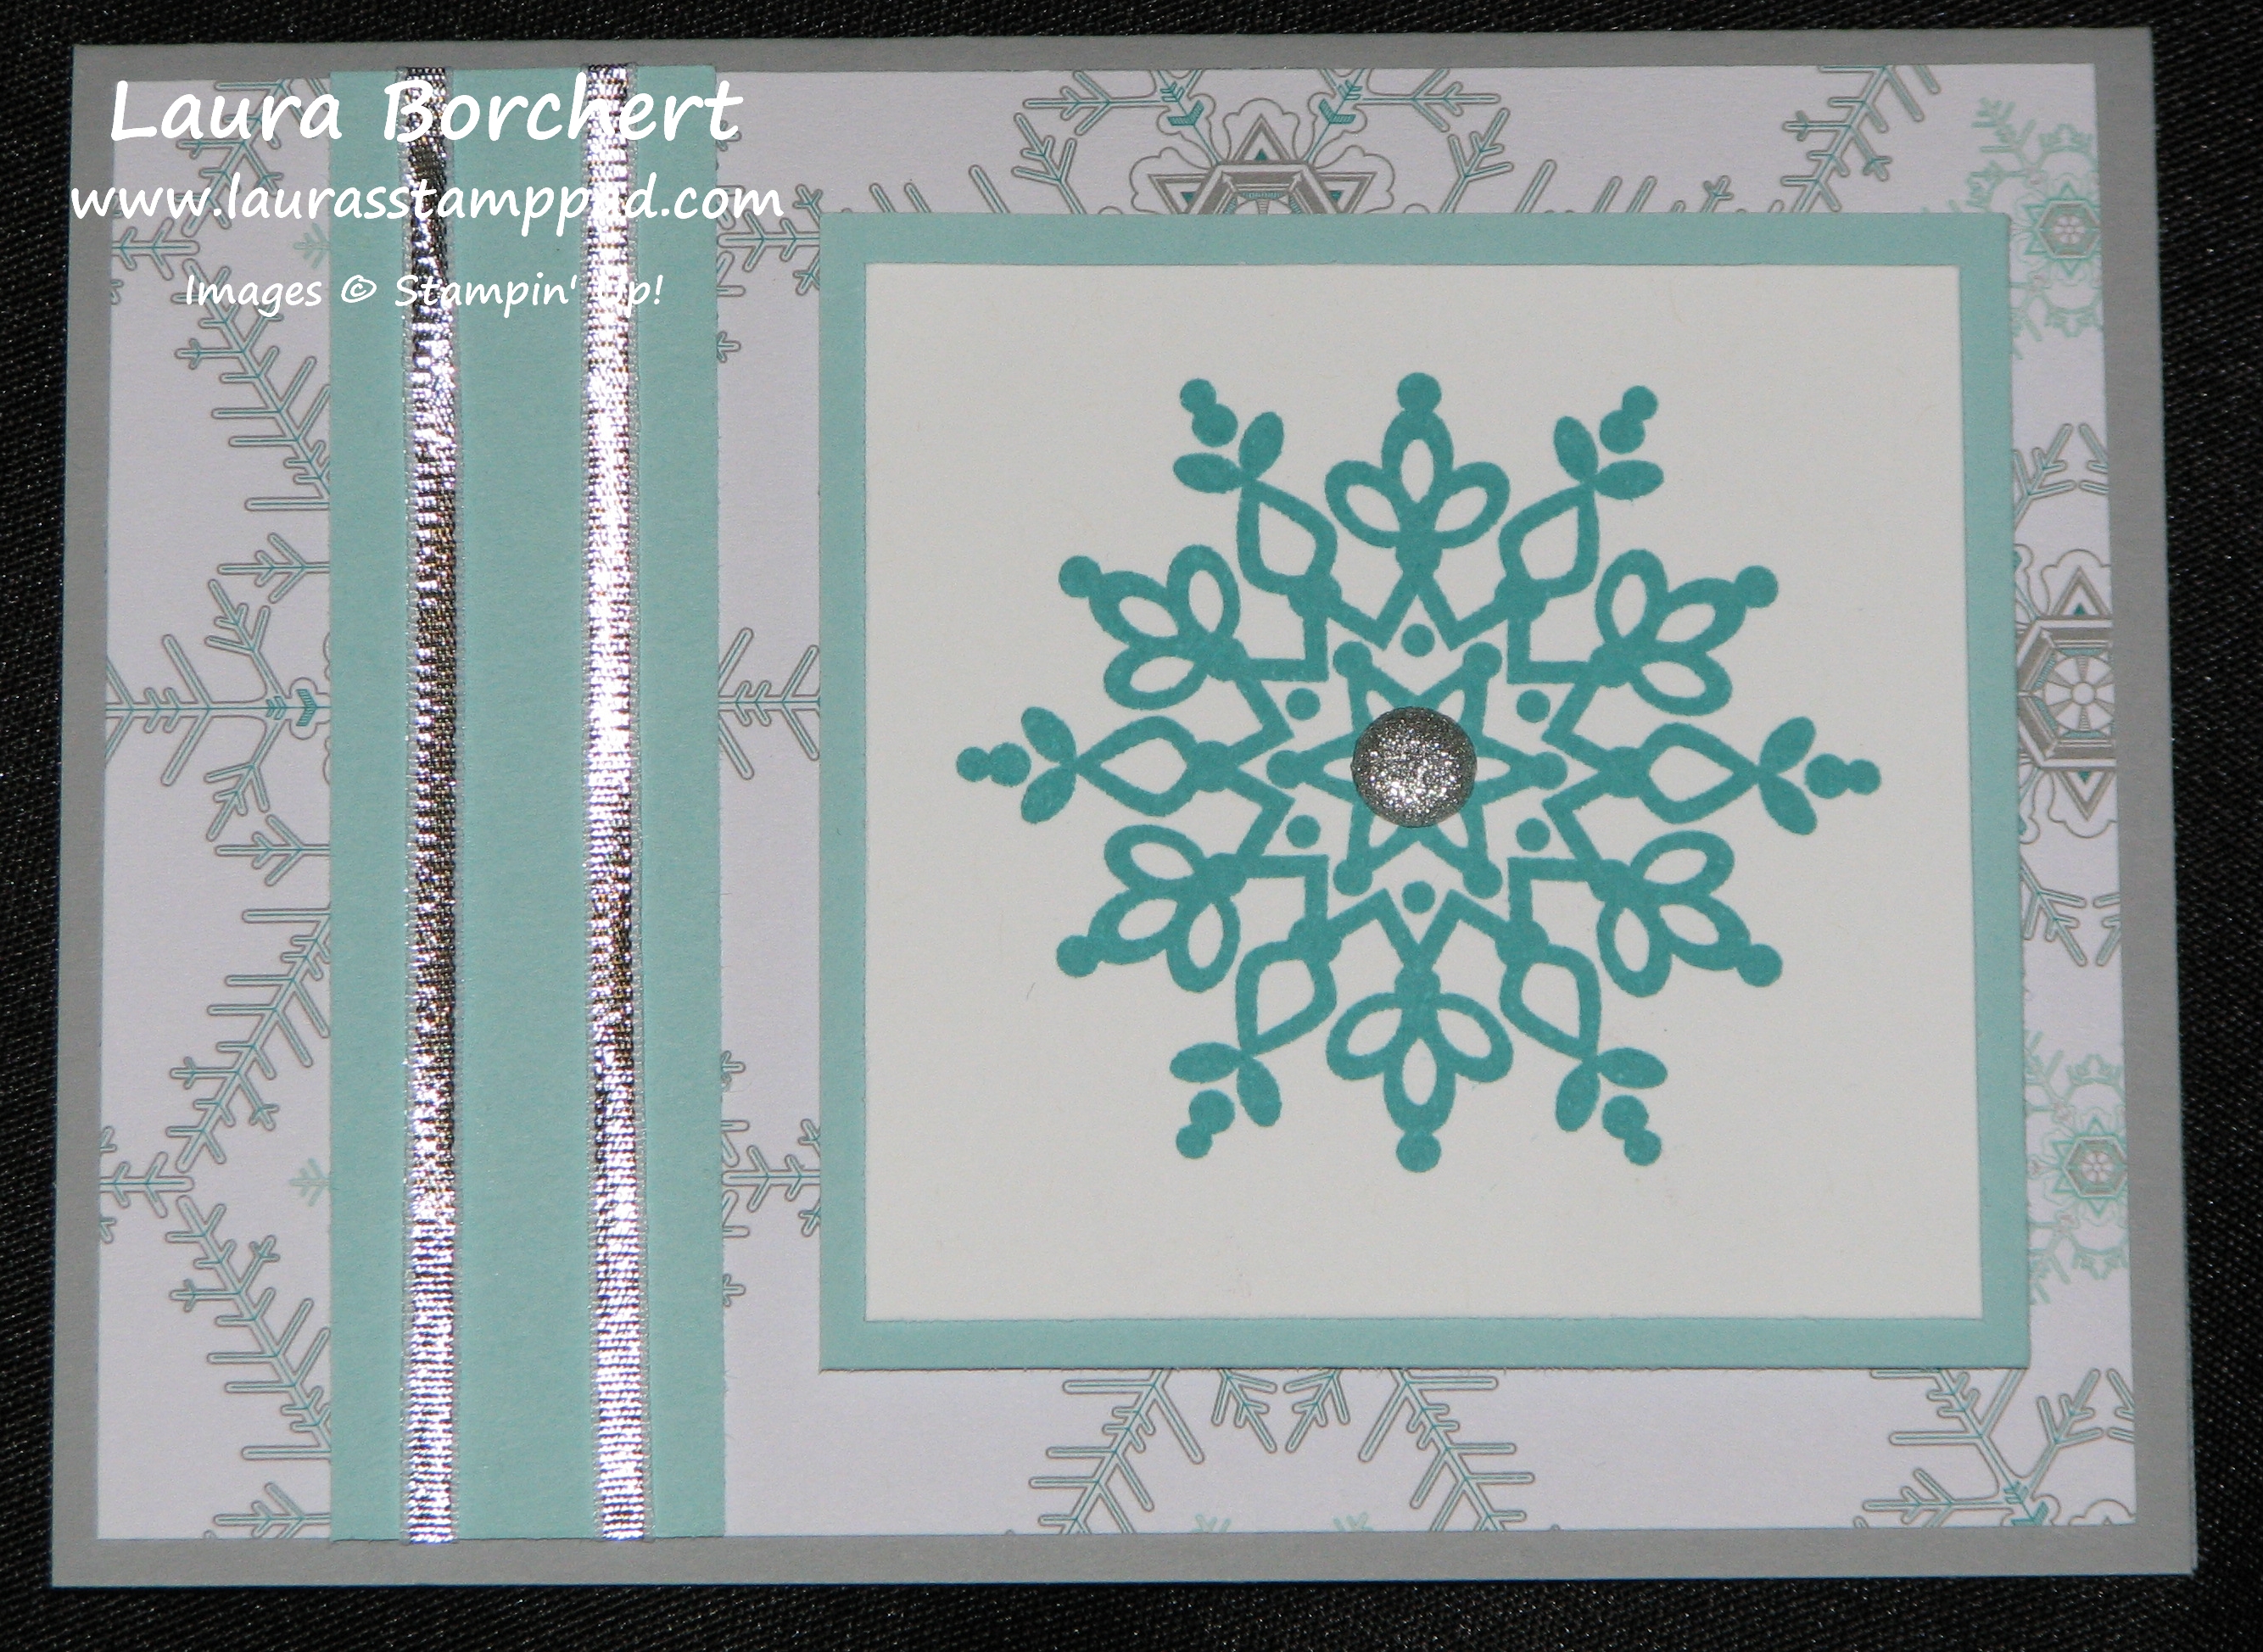
Snowflake RibbonI have been having lots of fun with the Festive Flurry Stamp Set in the Holiday Mini Catalog even though I am not a fan of snow at all. I love the matching Framelits that cut out the intricate image of each snowflake which makes a quick and simple amazing image! When you purchase the stamp set and matching Framelits, you save 15%!!! Love a good deal! Here are some samples I have recently created using this stamp set! This card on the left was created using the Winter Frost Designer Series Paper and Silver Ribbon! Oh the Silver Ribbon….it is even more amazing in person! So shiny and perfect! I’m really loving the Winter Frost Designer Series Paper too! Usually my cards are Night of Navy, Silver, Cherry Cobbler or Old Olive but this year, I’m pretty sure they will be Snowflake BannersBermuda Bay, Pool Party, and Smoky Slate! These colors are just so much fun!!! Here is another fabulous card created with the Winter Frost Designer Series Paper and Festive Flurry Stamp Set! Since banners are so in right now, I thought I would add some into one of my Holiday cards too!!! It’s a great way to showcase more patterns on the paper too!!! I love how the little rhinestones add a pop of bling and make it look like sparkly snowflakes. (Are you picturing that light snow with the sun shining on it and making it sparkle? And in my little world, I hope its melting the snow. So not a fan of snow! :))

I also wanted to share a little tip with you!!! On page 29 of the Holiday Mini Catalog 2013, you will see the Winter Frost Designer Series Paper Stack on the top of the page and Winter Frost Specialty Designer Series Paper! You might be thinking what is the difference. Well that’s what I am here for! To answer all those little crafting questions of your! The Specialty Paper Pack is 12 sheets of 12″ x 12″ paper: 2 ea. of 5 double-sided designs; 1 ea. of 2 single-sided, foil-accented designs. The Paper Stack is 48 sheets of 4-1/2″ x 6-1/2″ paper: 24 ea. of 2 double-sided designs. The Paper Stack is perfect for making cards in multiples! It is amazing because otherwise I would have to buy 5 packages of the Specialty Paper to get my 80+ Holiday Cards! Thank you Stampin’ Up for making things easier!!!!

Happy Stampin’

~Laura


Holiday Collection of Single Stamps!

Posted on

Single Stamps - HolidayStampin’ Up introduced a NEW Collection of Single Stamps just in time for the Holidays!!! I love single stamps because you can pick just the image you like and not have to worry about getting an entire set! There is a great array of stamps here for the Holidays. Some people love making tags for all of their gifts while others have tons of tags in their gift wrap box year over year. Some people love a simple card done in Silver and Night of Navy or Cherry Cobbler and Crumb Cake with an amazing greeting popped up in the middle. With these single stamps, you can create that fabulous card with just one stamp! And others love to have tons of Holiday stamps to choose from for their Holiday creations and one of these just might make that collection complete!

These Stamps are only available till January 31st and then they are gone for good! Check out this flyer – Single Stamps – Holiday for more information regarding the price and suggested Clear Block (these stamps only come in clear)!

Can’t wait to get started on my Holiday cards this year! I always start early because we all know how time flies and all of the sudden that New Years Ball is dropping AND I love sending out lots of cards!

Happy Stampin’

~Laura


NEW Holiday Mini Catalog is Here!

Posted on

Holiday Mini Image

Although I’m not ready for the Holidays just yet….after all I haven’t even celebrated my Birthday yet (pssst…August 29)! But this Holiday Mini Catalog is amazing and is making me so ready for the Holidays. I think the kits are my favorite product! There is a Halloween Kit, Thanksgiving Kit, and Christmas Kit so it will so easy to decorate and get in the spirit this year!!! Check out this post to see how you can get one of the kits for FREE! Another favorite of mine is the Festive Flurry Stamp Set and matching Framelits! Get the bundle and save 15%!!! Snowflakes are so amazing and you can use those even after the Holidays. Snowflakes can be used for Birthdays, celebrations/events, and even Thank Yous through the winter season!

Festive Flurry Framelit Bundle

If you would like a copy of the Holiday Catalog, email me your contact information and I will get one in the mail to you! If you would like to place an order, you can order online 24/7 and use the following Hostess Code: SJQZYTG6 for a chance to win the Hostess Benefits! Everyone loves FREE stuff!!!! Also, be sure to check out my Calendar of Events to see some of the Holiday Mini Catalog items used!

Happy Stampin’

~Laura