Technique Tuesday – Embossing Foil Paper!!!

Posted on

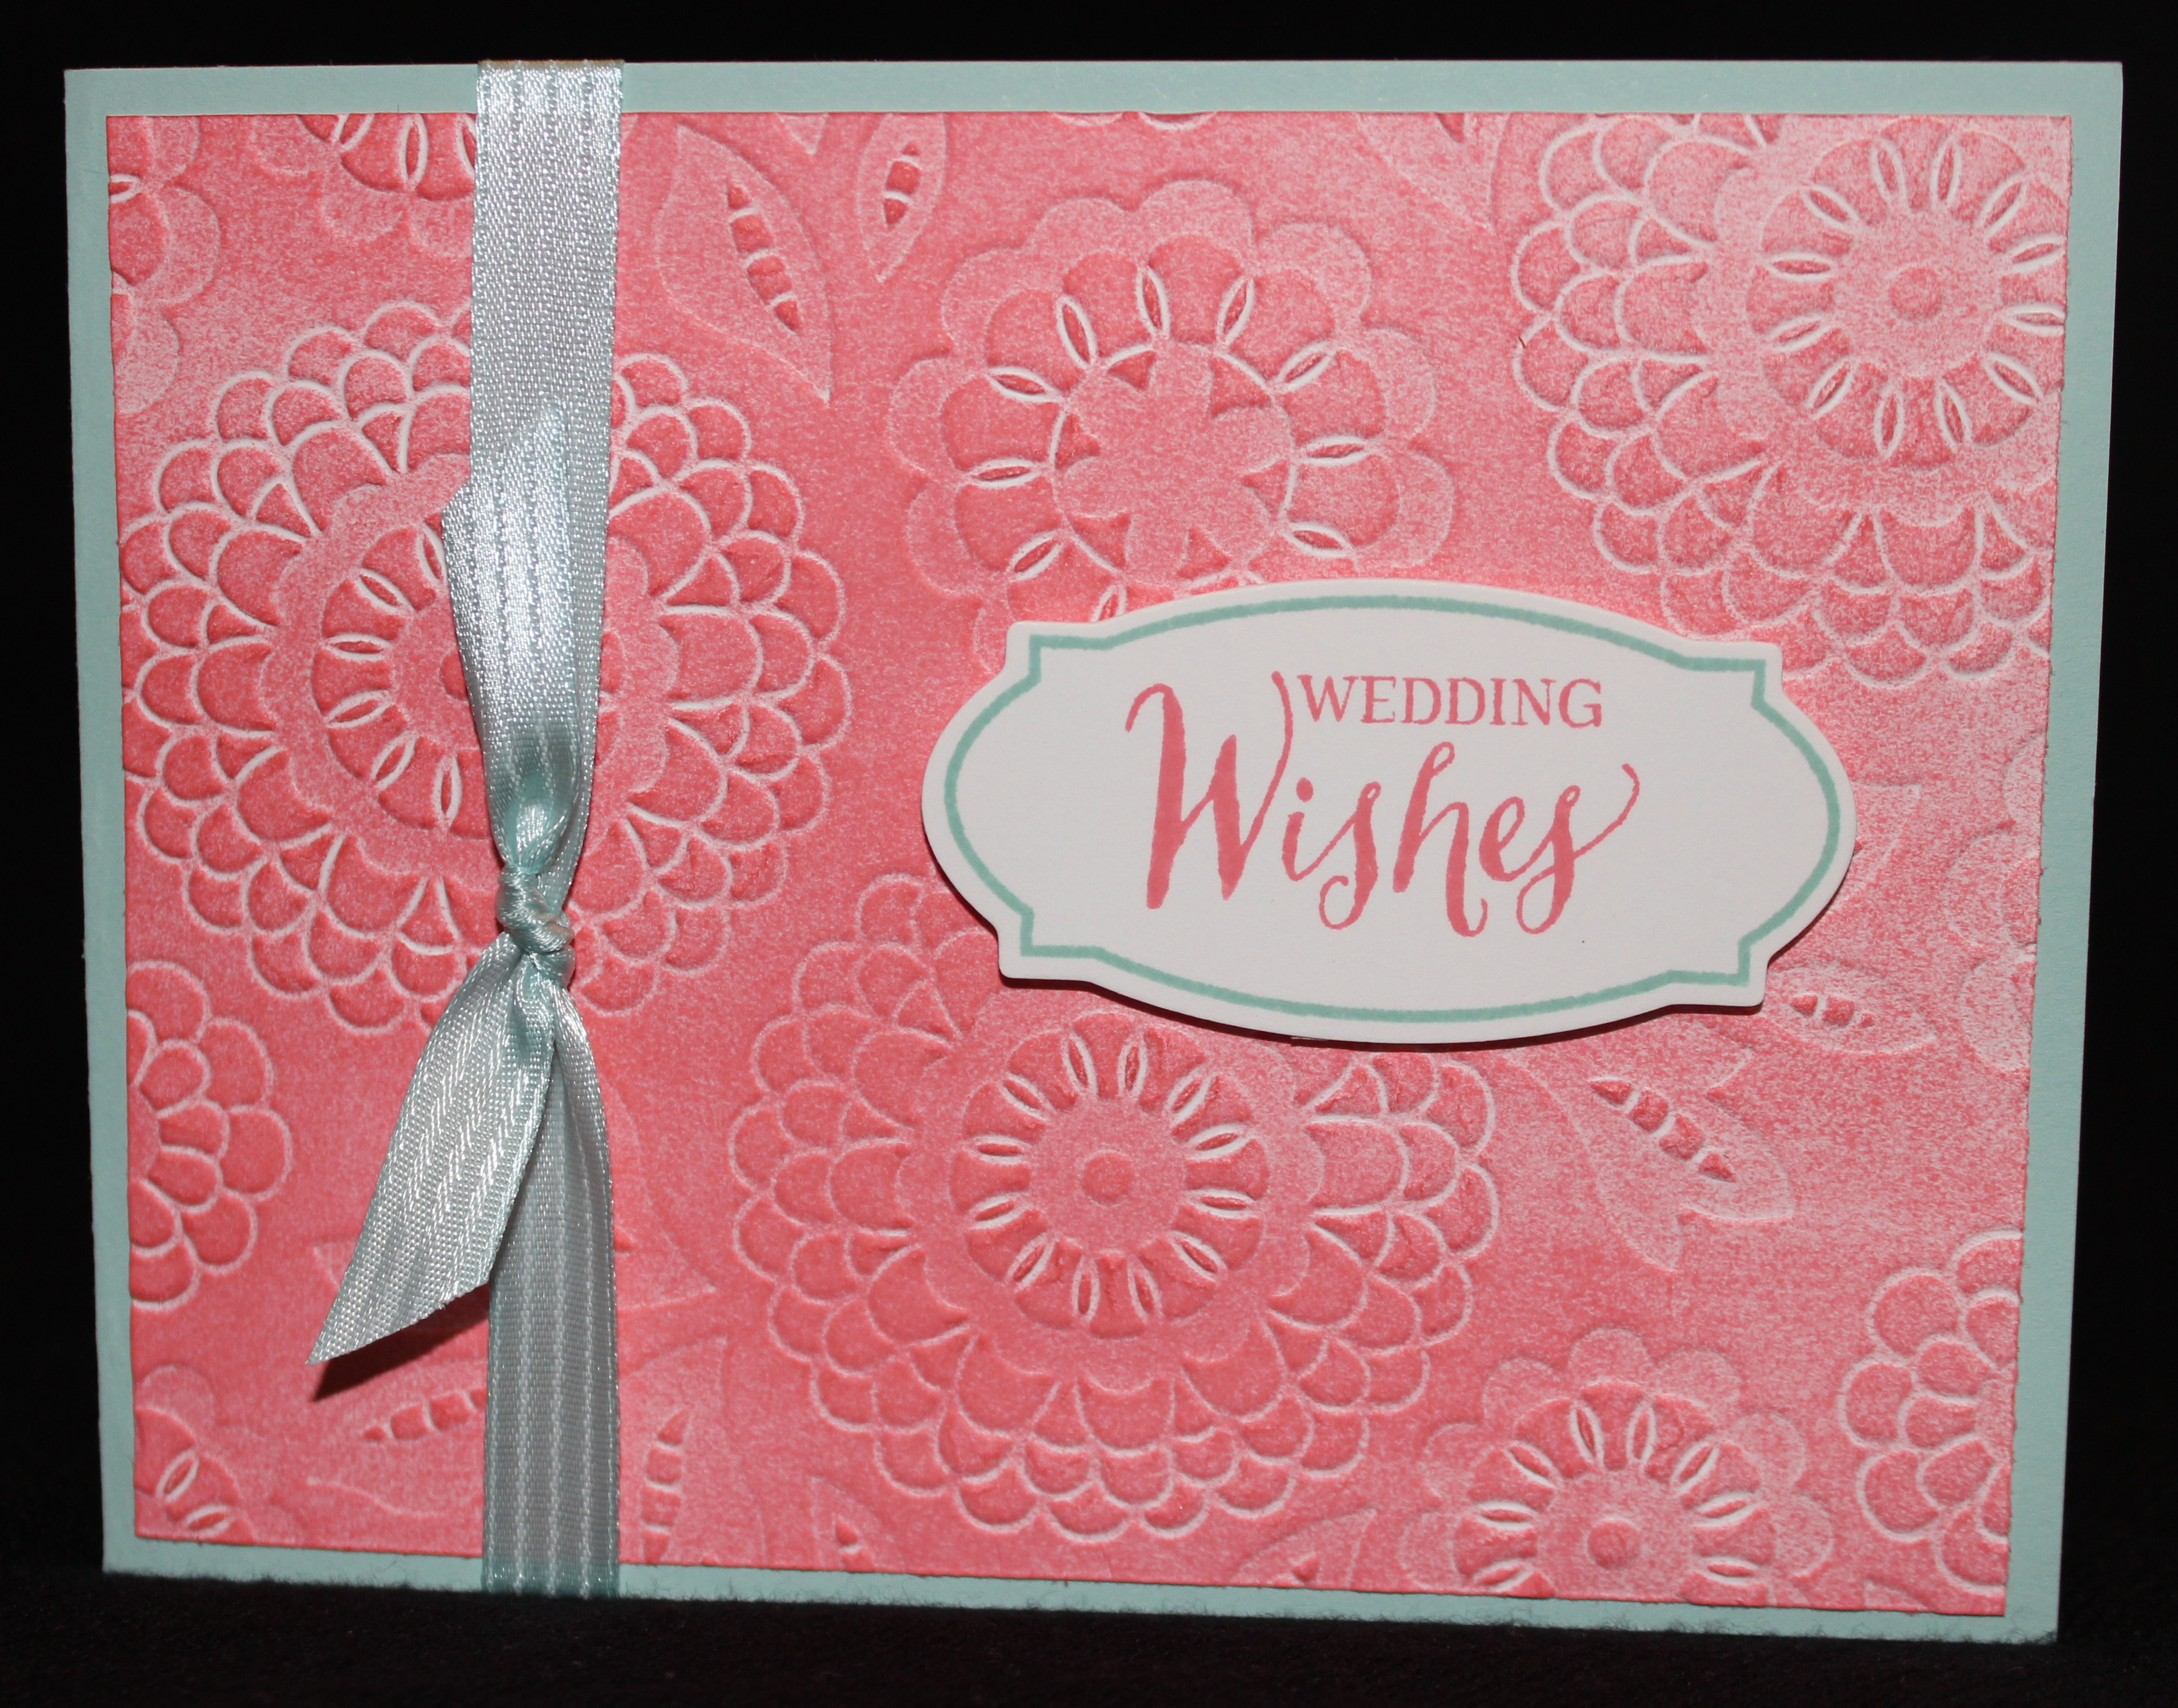
Happy Tuesday!!! You all know what that means! I have a fabulous technique to share with you today and it is super simple but has a major WOW factor! Check out this beauty – pink perfection, yummy cupcake, silver bling, and silver texture foil!!!
Wish You Happiness, www.LaurasStampPad.com

I just love this card. It makes me so happy and I just want to frame it so I can smile every time I pass by it!!! There is so much pink and bling and texture!!!

SUPPLIES NEEDED: Embossing Folder of Choice, Big Shot, Foil Paper of Choice

I took a piece of Silver Foil Paper and placed it into the Elegant Dots Embossing Folder. Be sure that the foil is faced up correctly on how you want your image. If you want it embossed the raised side should be behind the foil, if you want it debossed the raised side should be on the foil side! Run it through the Big Shot and check out the beautiful paper you just created! It is that simple. Isn’t that fabulous???

Glitter Cupcake, www.LaurasStampPad.com

This card starts with a Melon Mambo card base and I layered on a piece of Whisper White cardstock (4″ x 5-1/4″). Then I took a piece of the Pop of Pink Specialty Designer Series Paper (3-3/4″ x 5″) and adhered it to the card front. I just wanted to layer on all the pink I could! 🙂 I placed the embossed Silver Foil to the bottom 1/3  of the card. Taking a piece of Whisper White, I stamped the greeting from the Sweet Cupcakes Stamp Set in Melon Mambo and added the banner tips with the Triple Banner Punch! I added this to the right side of the card flush with the edge on top of the foil. I used Stampin’ Dimensionals to adhere the greeting because the foam goes into the bumps of the embossed image and holds very well. With some scrap white paper, I stamped the cupcake liner in Tip Top Taupe. First image was stamped off twice, second image was stamped off once, and the third image is full strength Tip Top Taupe. The icing was stamped in Melon Mambo the same way. Check out this video for more on how to stamp the cupcake! I die cut the cupcake liner and icing with the coordinating Cupcake Cutouts Framelits (Bundle & Save 10%). I added the cupcake to the card front with Stampin’ Dimensionals again to hold tight on the bumps of the embossed foil. I wanted a little more bling on this card so I added some Silver Sparkle Dazzling Details to the cupcake icing and little dots on the greeting banner!

Tuesday is also video day on my YouTube Channel – Laura’s Stamp Pad. Today I posted a sneak peak of one of the kits in the Holiday Mini Catalog that begins on September 1st! Click here to check that out!

To see more samples using the Sweet Cupcake Bundle, click here!

Happy Stampin’

~Laura


Perfectly Peach!!!

Posted on

Flourishing Phrases, www.LaurasStampPad.com

Flowers make my heart beat a bit faster and I just can’t help but smile! I know I say it all the time but it’s so true. I just love flower cards! The Flourishing Phrases Stamp Set and coordinating Flourish Thinlits (Bundle & Save 10%) are perfect because there are amazing images and the perfect greetings for any occasion!

I started with a Peekaboo Peach card base (4-1/4″ x 11″). I went with this size so I could tie the ribbon around the card and not use as much as I would if I used a 5-1/2″ wide card. I took a piece of Whisper White (4″ x 5-1/4″) and stamped the large flower from the Flourishing Phrases Stamp Set twice in Calypso Coral and once in Peekaboo Peach. Then I used the Flourish Thinlits to die cut coordinating floral images in the same colors. I used the small, medium, and large thinlits to add to the tops of the flowers. The Big Shot Die Brush and the Fine Tip Glue Pen are your best friend for these intricate dies. I also die cut a few of the single leaves and the larger leaf (I cut this into pieces to use) in Wild Wasabi cardstock. I added some of the Peekaboo Peach Ruched Ribbon around the card. I am loving that ribbon for the texture and feel of it!!! I stamped the greeting from the Flourishing Phrases Stamp Set in Wild Wasabi and punched it out with the 1″ Circle Punch. I layered it onto a 1-1/4″ Punched Wild Wasabi piece and attached it to the card with Stampin’ Dimensionals. You will want to add more than one so that it really sticks to the card and the ribbon.

Peekaboo Peach, www.LaurasStampPad.com

What color combination would you use for this card? Shades of blue? Shades of purple? Shades of Pink? Yellow and Orange? Let me know in the comments below! I love trying out new color combinations! If you would like to see more samples using this bundle, click here, here, and here!

Happy Stampin’

~Laura

Don’t forget about the Paper Pumpkin BOGO Sale for new subscribers!!! Click here to get started and be sure to enter the Promo Code: BOGO

PP_BOGO_Facebook_US, www.LaurasStampPad.com


Fun with Enamel Shapes!!!

Posted on

Enamel Shapes, www.LaurasStampPad.com

I am loving these cards…..and not just because of the yummy cupcakes! I love the bright colors, simple style and those Enamel Shapes. I made lots of these cards and of course every pack of Enamel Shapes only comes with so many in each color but you can mix and match them for every card! I love that.

I started with a Very Vanilla card base and added a strip of Playful Palette Designer Series Paper (2″ x 5-1/2″). You can get 3 of these strips from 1 sheet of the Designer Paper since this pattern comes in a 6″ x 6″ stack! I stamped the cupcake liners and icing from the Sweet Cupcake Stamp Set. I then die cut them out with the coordinating Cupcake Cutouts Framelits (Bundle & Save 10%). You can check out more about the 3-step stamping of the cupcakes here! I used Tip Top Taupe for all 3 on the liner. For the icing, I used Sweet Sugarplum stamped off, full strength Sweet Sugarplum, and then Rich Razzleberry. I added the cupcake to the card with Stampin’ Dimensionals. I stamped the greeting from the Sweet Cupcake Stamp Set in Rich Razzleberry. To finish off the cards, I added Brights Enamel Shapes and In-Color Enamel Shapes. The packs come with dots, stars, and hearts. There are only so many of each so if you are using 3 per card and making multiples, you need to mix and match. I think they all look amazing on the same style of card! Love them!

If you would like to see the Enamel Shapes up close and a fabulous way to store them, check out my Video Tutorial below or click here! Don’t forget to give it a thumbs up if you liked it and be sure to subscribe if you are new!

Do you have a fabulous tip on organizing your craft room? I would love to hear about it. Let me know in the comments below!

Happy Stampin’

~Laura

Don’t forget about the Paper Pumpkin BOGO Sale for new subscribers!!! Click here to get started and be sure to enter the Promo Code: BOGO

PP_BOGO_Facebook_US, www.LaurasStampPad.com


Technique Tuesday – Jar of Love!!!

Posted on

Happy Tuesday, everyone!!! Today I have a simple technique for you! I will be showing you how to create a beautiful bouquet of flowers with the Jar of Love Stamp Set and coordinating Everyday Jar Framelits (Bundle & Save 10%). Check this out!!!

Bouquet of Flowers, www.LaurasStampPad.com

You all know how much I love flowers and this bouquet is just stunning. I love that the flowers are 2-step stamping to really give detail and color variation to the flowers. There are 2 flowers that stamp together and die-cut together so that makes it super quick to make lots of flowers in little time! Love it!!!

The Jar of Love Stamp Set has so many amazing images to use for every occasion of card – flowers, fish, twigs, lightening bugs, water, and more. There are 3 sizes of jars, a lid, and a handle and tons of greetings. I stamped the jar and greeting in Basic Black onto Whisper White. Then I took the 1/16″ Handheld Punch and punched little holes on either side of the jar rim. I looped some Linen Thread through the holes and tied it into a bow. There is a bow image you can stamp but I wanted a little more texture on my jar. Then I took some scrap white paper and started stamping tons of flowers. The little flowers come in a double stamp so you are actually stamped 2 flowers at the same time. I stamped the solid image in Perfect Plum and the details in the middle in Elegant Eggplant. Then I die cut them out with the coordinating Everyday Jar Framelits which are also a double framelit. I stamped the 5 petal flower in Peekaboo Peach and die cut them out with the coordinating framelit. Now it is time to assemble. I stamped the larger flower in Flirty Flamingo, stamped off once for the base and full strength for the detailed image and black for 4 little lines (pollen). I added some greenery as well in Cucumber Crush. You will want to fill in with flowers and greenery around the entire area so that it looks like there are flowers underneath the ones popped up. I added Stampin’ Dimensionals to the die cut flowers to pop them up and give some dimension to the bouquet. I rounded the right 2 edges of the Whisper White with the Corner Rounder Punch. I used a Pool Party card base and added one of the Delicate White Doilies to the front. Then I added the flower bouquet to the left hand side of the card. To finish it of, I added a few Enamel Shapes for a little pop of color and texture to balance out the card!

If you would like to see more on the Jar of Love Bundle and how to stamp the flowers, check out the Video Tutorial below or click here. Be sure to give it a thumbs up if you liked and don’t forget to subscribe if you are new!

I hope you enjoy flowers as much as I do. I have a few more beautiful samples to share so stay tuned! 🙂

Happy Stampin’

~Laura

Don’t forget about the Paper Pumpkin BOGO Sale for new subscribers!!! Click here to get started and be sure to enter the Promo Code: BOGO

PP_BOGO_Facebook_US, www.LaurasStampPad.com


Cupcake Creations!!!

Posted on

Icing on my Cupcake, www.LaurasStampPad.com

I love cupcakes sooooo much! They are my favorite dessert by far! I love plain ones, ones without icing, and ones that had icing and cookie crumbles and goody on top! I love them all!! When I saw the Sweet Cupcake Stamp Set, I was in love. The details of the liner and the icing make it so real. The coordinating Cupcake Cutouts Framleits (Bundle & Save 10%) cut out the images so perfectly! I love it all!!!!

I started with a Whisper White card base and added a piece of Pop of Pink Designer Series Paper to the front! The simple black and white polka dots gives texture but doesn’t take away the focus of the colorful cupcakes!!! Then I tied some of the Melon Mambo Stitched Ribbon around the top and into a bow! Now it is time for cupcake creations! I suggest pulling out all of those white scraps you have and just start playing with different color combinations. The Sweet Cupcake Stamp Set is actually a 3-step stamping set where the icing and liner are 3 different images all layered on top of each other!

Colorful Cupcakes, www.LaurasStampPad.com

You can use 3 different ink colors or just 1 or 2. I found that 1 or 2 ink pads were my favorite. If you use 1 ink pad, you will ink up image 1, stamp off twice and then onto your white cardstock. Take image 2, stamp off once, and then onto the first image. Take image 3 (the smallest one), ink it up and stamp if onto the others full strength. This goes for both the liner and the icing. Here are a few I played with.Cupcake Liners, www.LaurasStampPad.com

I preferred a more tan/brown liner but you could always go with a color as well!

Cupcake Icing, www.LaurasStampPad.com

Lemon Icing, www.LaurasStampPad.com

Ombre Icing, www.LaurasStampPad.com

Once you have your cupcakes complete, you can die cut them with the Cupcake Cutout Framelits. I added the cupcakes to the card front with Stampin’ Dimensionals….of course! 🙂 I used the framelits for the banner as well. The banner framelit cuts out the banner and creates little score lines for it to pop out like the sample above. I stamped the greeting from the Sweet Cupcake Stamp Set in Bermuda Bay Ink and added it to the card with Stampin’ Dimensionals. To finish it off, I added a little Enamel Shape!

If you would like to see this all in action, check out the Video Tutorial below or click here. Don’t forget to give it a thumbs up if you liked it and be sure to subscribe if you are new! I post every Tuesday and Thursday!

Happy Stampin’

~Laura


Amazing Decorative Border!!!

Posted on

Decorative Border, www.LaurasStampPad.com

The Flourishing Phrases Stamp Set and coordinating Flourish Thinlits (Bundle & Save 10%) is super fun. You all know how much I have loved the Rose Wonder Bundle and this one is just as amazing. It has greetings, images and fun extras that are perfect for so many different types of cards!!! Check out some of the other samples using the Flourish Set here and here. Check out samples using the Rose Wonder Bundle here, here, and here!

For this card, I started with an Elegant Eggplant card base and I layered on a piece of Crushed Curry measuring 4-1/8″ x 5-3/8″. Then I took a piece of Whisper White (4″ x 5-1/4″) and started to decorate it. I loved the border from the Flourish Thinlits and just had to play with it. I die cut it in Elegant Eggplant and it popped out of the thinlit super simple with the Big Shot Die Brush. I love that tool so much! I added the borders to the Whisper White cardstock with the Fine Tip Glue Pen. I didn’t outline the entire piece but just the ends and a few of the intersections in the middle. Then I stamped the greetings in Crushed Curry in the upper left corner and lower right corner from the Flourishing Phrases Stamp Set. I love how this set as coordinating greeting to be used on the outside and inside of the card or use them both on the front like on this card! Then I die cut a few of the flowers in Elegant Eggplant and Crushed Curry and added those to the card. To finish it off, I placed Enamel Shapes in the middle of the flowers. I really love how this turned out and yellow and purple isn’t always a color combination I use a lot!

Have you played with the Flourish Bundle yet? Flowers, flourish, and borders….what more do you want? 🙂 I’ll be posting a few more samples I have created soon so stay tuned and be sure to subscribe so you will get a notification each time I post!!! Subscribe by adding your email address in the upper right corner of the page!

Happy Stampin’

~Laura


Sponge Brayer Over Everything!!!

Posted on

Emboss Coloring, www.LaurasStampPad.com

Once you start playing with your Sponge Brayer, you won’t be able to put it down!!! You can see more ways I used a Sponge Brayer here and here!!! It’s just so much fun and super easy! The Sponge Brayer comes with 2 handles and 4 sponges. You can rinse out the sponges when you are done and allow them to dry and use another color. How fabulous is that?

In these samples, I simply used the Sponge Brayer to add color to the cardstock that was ran through the Big Shot in an Embossing Folder. Simple, fun and such different looks with every folder you use!!

Lovely Lace, www.LaurasStampPad.com

For this card, I took a piece of Whisper White (4″ x 5-1/4″) and ran it through the Big Shot in the Lovely Lace Embossing Folder. Then I took a Sponge Brayer and Flirty Flamingo Ink and rolled over the cardstock over and over until the I got the color I liked it. You don’t want to press super hard, but just a light roll back and forth! I added this to a Pool Party card base and tied some Pool Party Satin Stitched Ribbon around it. For the greeting, I used the Rose Wonder Stamp Set and die cut it with the coordinating Rose Garden Framelit. I added the greeting to the card with Stampin’ Dimensionals!

Elegant Dots, www.LaurasStampPad.com

For this card, I took a piece of Whisper White (4″ x 5-1/4″) and ran it through the Big Shot in the Elegant Dots Embossing Folder. Then I took a Sponge Brayer and Night of Navy Ink and rolled over the cardstock. Be sure to roll in both directions – side to side & up and down! I added this to a Melon Mambo card base and tied some Melon Mambo Stitched Ribbon around it. The ribbon is criss-crossed on the inside of the card. For the greeting, I used the Rose Wonder Stamp Set again and die cut it with the coordinating Rose Garden Framelit. I added the greeting to the card with Stampin’ Dimensionals because I find that they work best on a bumpy surface like this one!!!

lucky stars, www.LaurasStampPad.com

For this card, I actually ran the Sponge Brayer over the de-bossed side…..the side where the stars pop down and not up! I love this rustic/cowboy look that came out of it. I layered it onto Cherry Cobbler (4-1/8″ x 5-3/8″) and then onto a Crumb Cake card base. For the greeting, I used the Tin of Cards Stamp Set and Decorative Label Punch to cut it out. I added a few pieces of the New Burlap Ribbon on the back of the greeting! I love how this card turned out!!!

To see this in action, check out the Video Tutorial below or click here. Don’t forget to give it a thumbs up if you liked it and be sure to subscribe if you are new!!! Let me know in the comments below which card is your favorite!!! I love the stars but I also love the Elegant Dots because of the color combination.

Happy Stampin’

~Laura


Just a Note…

Posted on

Just a Note, www.LaurasStampPad.com

Happy Monday and Happy Birthday Month to me!!! I love celebrating all month long. Today I wanted to share this stunning monochromatic beauty with you! The greeting makes this card perfect for sending to a friend or family member just to say hello!! I love it!!!

I started with a Whisper White card base and layered Night of Navy measuring 4″ x 5-1/4″. Then I took a piece of Whisper White measuring 3-3/4″ x 5″ and added some of the Floral Boutique Designer Washi Tape to the top and bottom. Now that the washi tape is in place I know where I can stamp my greeting which is from the Flourishing Phrases Stamp Set. I stamped it in Night of Navy. I die cut the flourish image from the coordinating Flourish Thinlits (Bundle & Save 10%) in Night of Navy cardstock. The Fine Tip Glue Pen is perfect for adding glue to the back of the intricate details of the flourish image! I then placed that onto the card front and you are all done!!! I will say that I placed the flourish onto the cardstock before I did the Washi Tape and you can see I went a little too high with the flourish image. I thought for sure I allowed enough space which is why I suggest putting the Washi Tape down first! 🙂 I’m here to make mistakes for all of you and help you do it the right way!

Do you like monochromatic cards? Let me know in the comments below what your favorite color is to use with Whisper White!

Want to see more samples with the Flourishing Bundle, check them out here and here!

Happy Stampin’

~Laura


Swirly Flowers!!!

Posted on

Swirly Flowers, www.LaurasStampPad.com

The Swirly Bird Stamp Set and coordinating Swirly Scribbles Thinlits (Bundle & Save 10%) can even make FLOWERS!!! You know my love for flowers is strong and while this set doesn’t look like a floral set, IT IS!!!! I love all the different things you can create. You can check out some other samples here, here and here!

I started with a Flirty Flamingo card base! Then I took a piece of Whisper White cardstock (4″ x 5-1/4″) and stamped the largest swirl from the Swirly Bird Stamp Set in the left corner in Flirty Flamingo. Then I took the solid circle stamp and stamped off once in Flirty Flamingo and then stamped it on the card. I took the medium swirly image and stamped full strength Flirty Flamingo over the circle to create the flower! I stamped the little 6 petal flower in Crushed Curry and the small swirly in Perfect Plum. Using the small and large leaf, I stamped near the flowers. With the leaves, I also stamped twice a few times for a variation in color. I love how you can get lots of different colors from one ink pad just by stamping off. I made sure to leave the upper right corner empty so that I could put my greeting there and it would pop some more! Also, remember that when creating a background be sure to fall off the edges of your paper so that it looks like the pattern continues on and on rather than stamping just in the middle. For the greeting, I used the Rose Wonder Stamp Set. I stamped the border and greeting in Perfect Plum onto Flirty Flamingo. Then I used the coordinating Rose Garden Thinlits to die cut the label. I took some of the Silver Metallic Thread and wrapped it around my 4 fingers about 8-12 times. Then you will slide the loops off your fingers and gather them into an “8”, twist in the middle, and then lay them on the back of the greeting. Place Stampin’ Dimensionals over the top of the thread to hold it in place and then add to your card! I really found that the twisting helps to make the loops flare out more (even though the sample above doesn’t look very flared). I am really starting to LOVE the thread/twine/ribbon loops behind a greeting or focal image. It can be tricky but the more you do it, the easier it gets! I love the texture and bling it adds to a project!!! Do you like the look? Let me know in the comments below!

Happy Stampin’

~Laura

Click here to start shopping and earning Bonus Bucks!!!

Bonus Days


Flourishing Phrases!!!

Posted on

Marriage is a Journey, www.LaurasStampPad.com

The Flourishing Phrases Stamp Set and coordinating Flourish Thinlits (Bundle & Save 10%) caught my attention right away because of the detailed flourish image, the flowers, and the AMAZING greetings. It is only of those fabulous sets like the Rose Wonder Stamp Set and coordinating Rose Garden Thinlits with great images and greetings. You can check out some of those samples here, here and here! There are endless ways to use that bundle as well and this new one!

For this card, I started with a Bermuda Bay card base and then I layered a piece of Basic Black (4″ x 5-1/4″). Then I took a piece of Whisper White (3-3/4″ x 5″) and stamped the Watercolor Wash Stamp Set on the background in Bermuda Bay. You can always use an Aqua Painter to create the same look but I wanted a really dark solid image so I went with the stamp! I stamped the greeting from the Flourishing Phrases Stamp Set in the left corner in Basic Black (with the coordinating greeting….Good Thing You Get To Bring Your Best Friend Along…on the inside)!

Marriage Advice, www.LaurasStampPad.com

I wrapped some of the Black Metallic Thread around the cardstock a few times and tied it into a knot. Then I added this piece to the card front. I die cut the flourish image out in Basic Black with the Big Shot and Precision Base Plate. The Big Shot Die Brush makes it super easy to pop the cardstock out of the die and to pop out all of the little pieces. I used the Fine Tip Glue Pen to adhere this piece to the card and I finished it off with Rhinestones on each of the dots. I love the Black and White with a POP of color. You could really use this pattern for any occasion! I love it!!!

To see more of the Flourishing Phrases Bundle and samples, check out this reveal video here or click below. Be sure to give it a thumbs up if you liked it and don’t forget to subscribe if you are new! Let me know in the comments below which card is your favorite!

Happy Stampin’

~Laura

Bonus Days

Click here to start shopping and earning your Bonus Bucks!!! If you purchase the Flourishing Bundle, you will earn $5.00 to spend in August on anything you wish!