Amazing Decorative Border!!!

Posted on

Decorative Border, www.LaurasStampPad.com

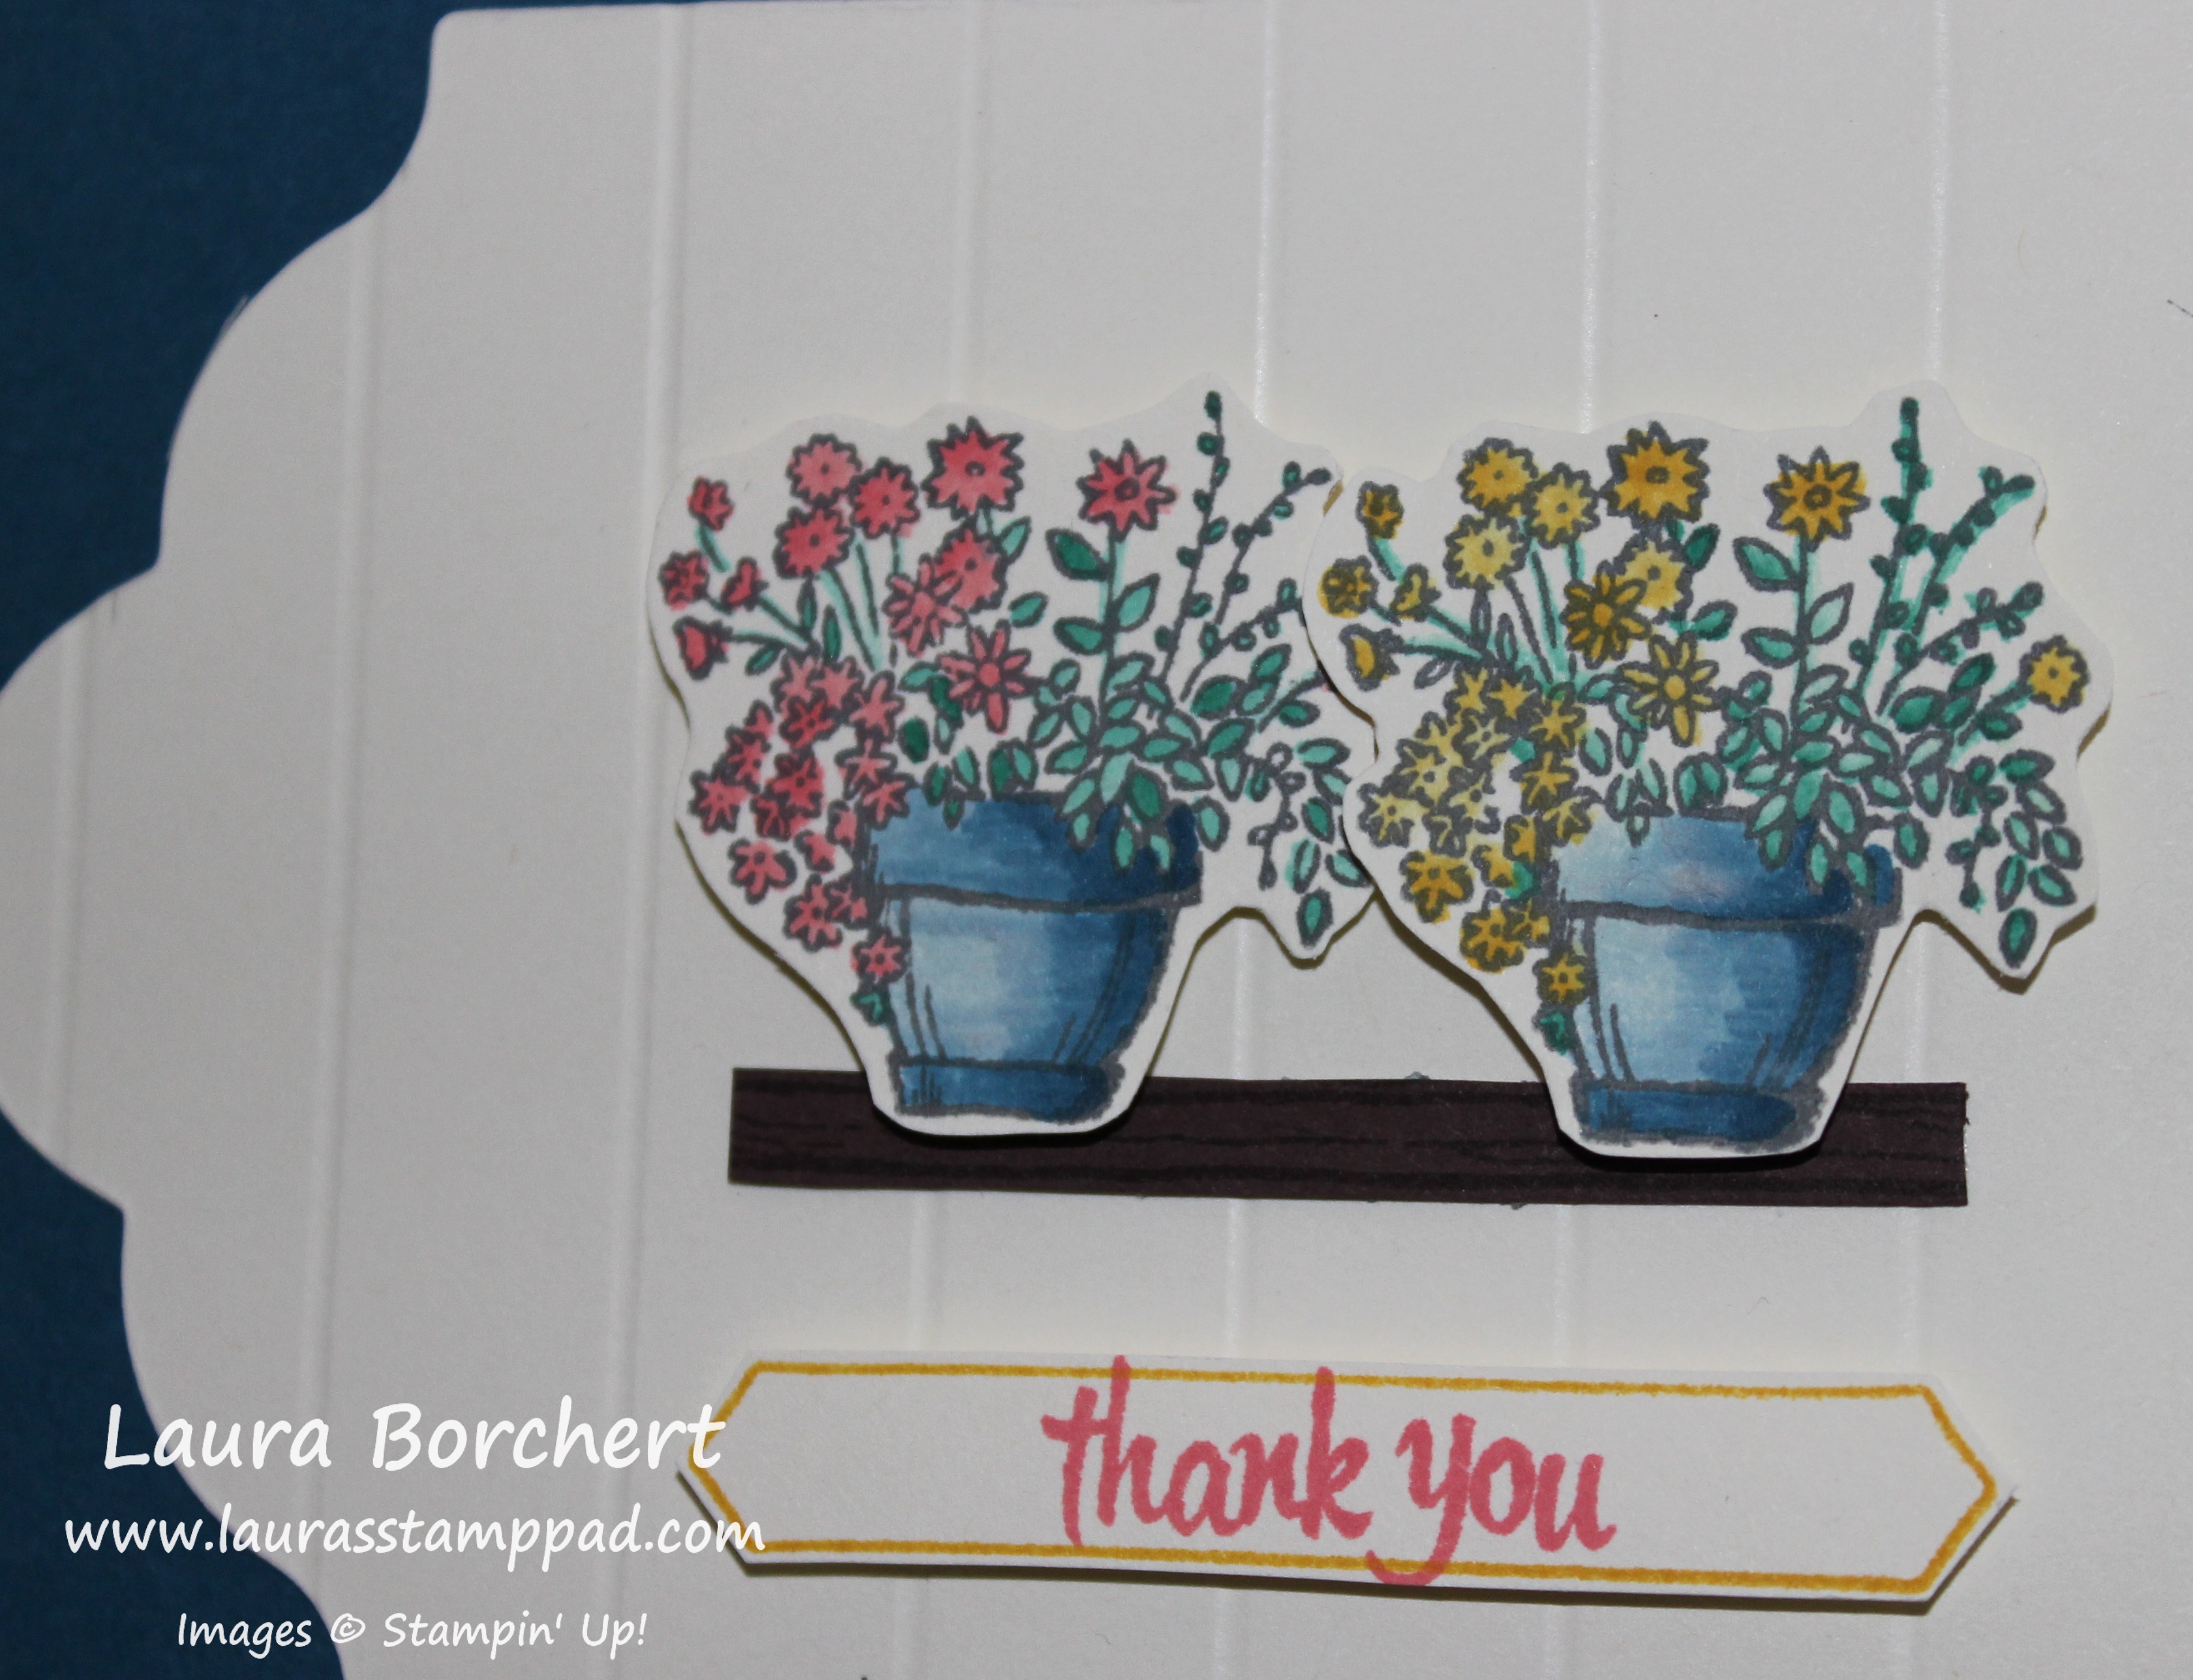
The Flourishing Phrases Stamp Set and coordinating Flourish Thinlits (Bundle & Save 10%) is super fun. You all know how much I have loved the Rose Wonder Bundle and this one is just as amazing. It has greetings, images and fun extras that are perfect for so many different types of cards!!! Check out some of the other samples using the Flourish Set here and here. Check out samples using the Rose Wonder Bundle here, here, and here!

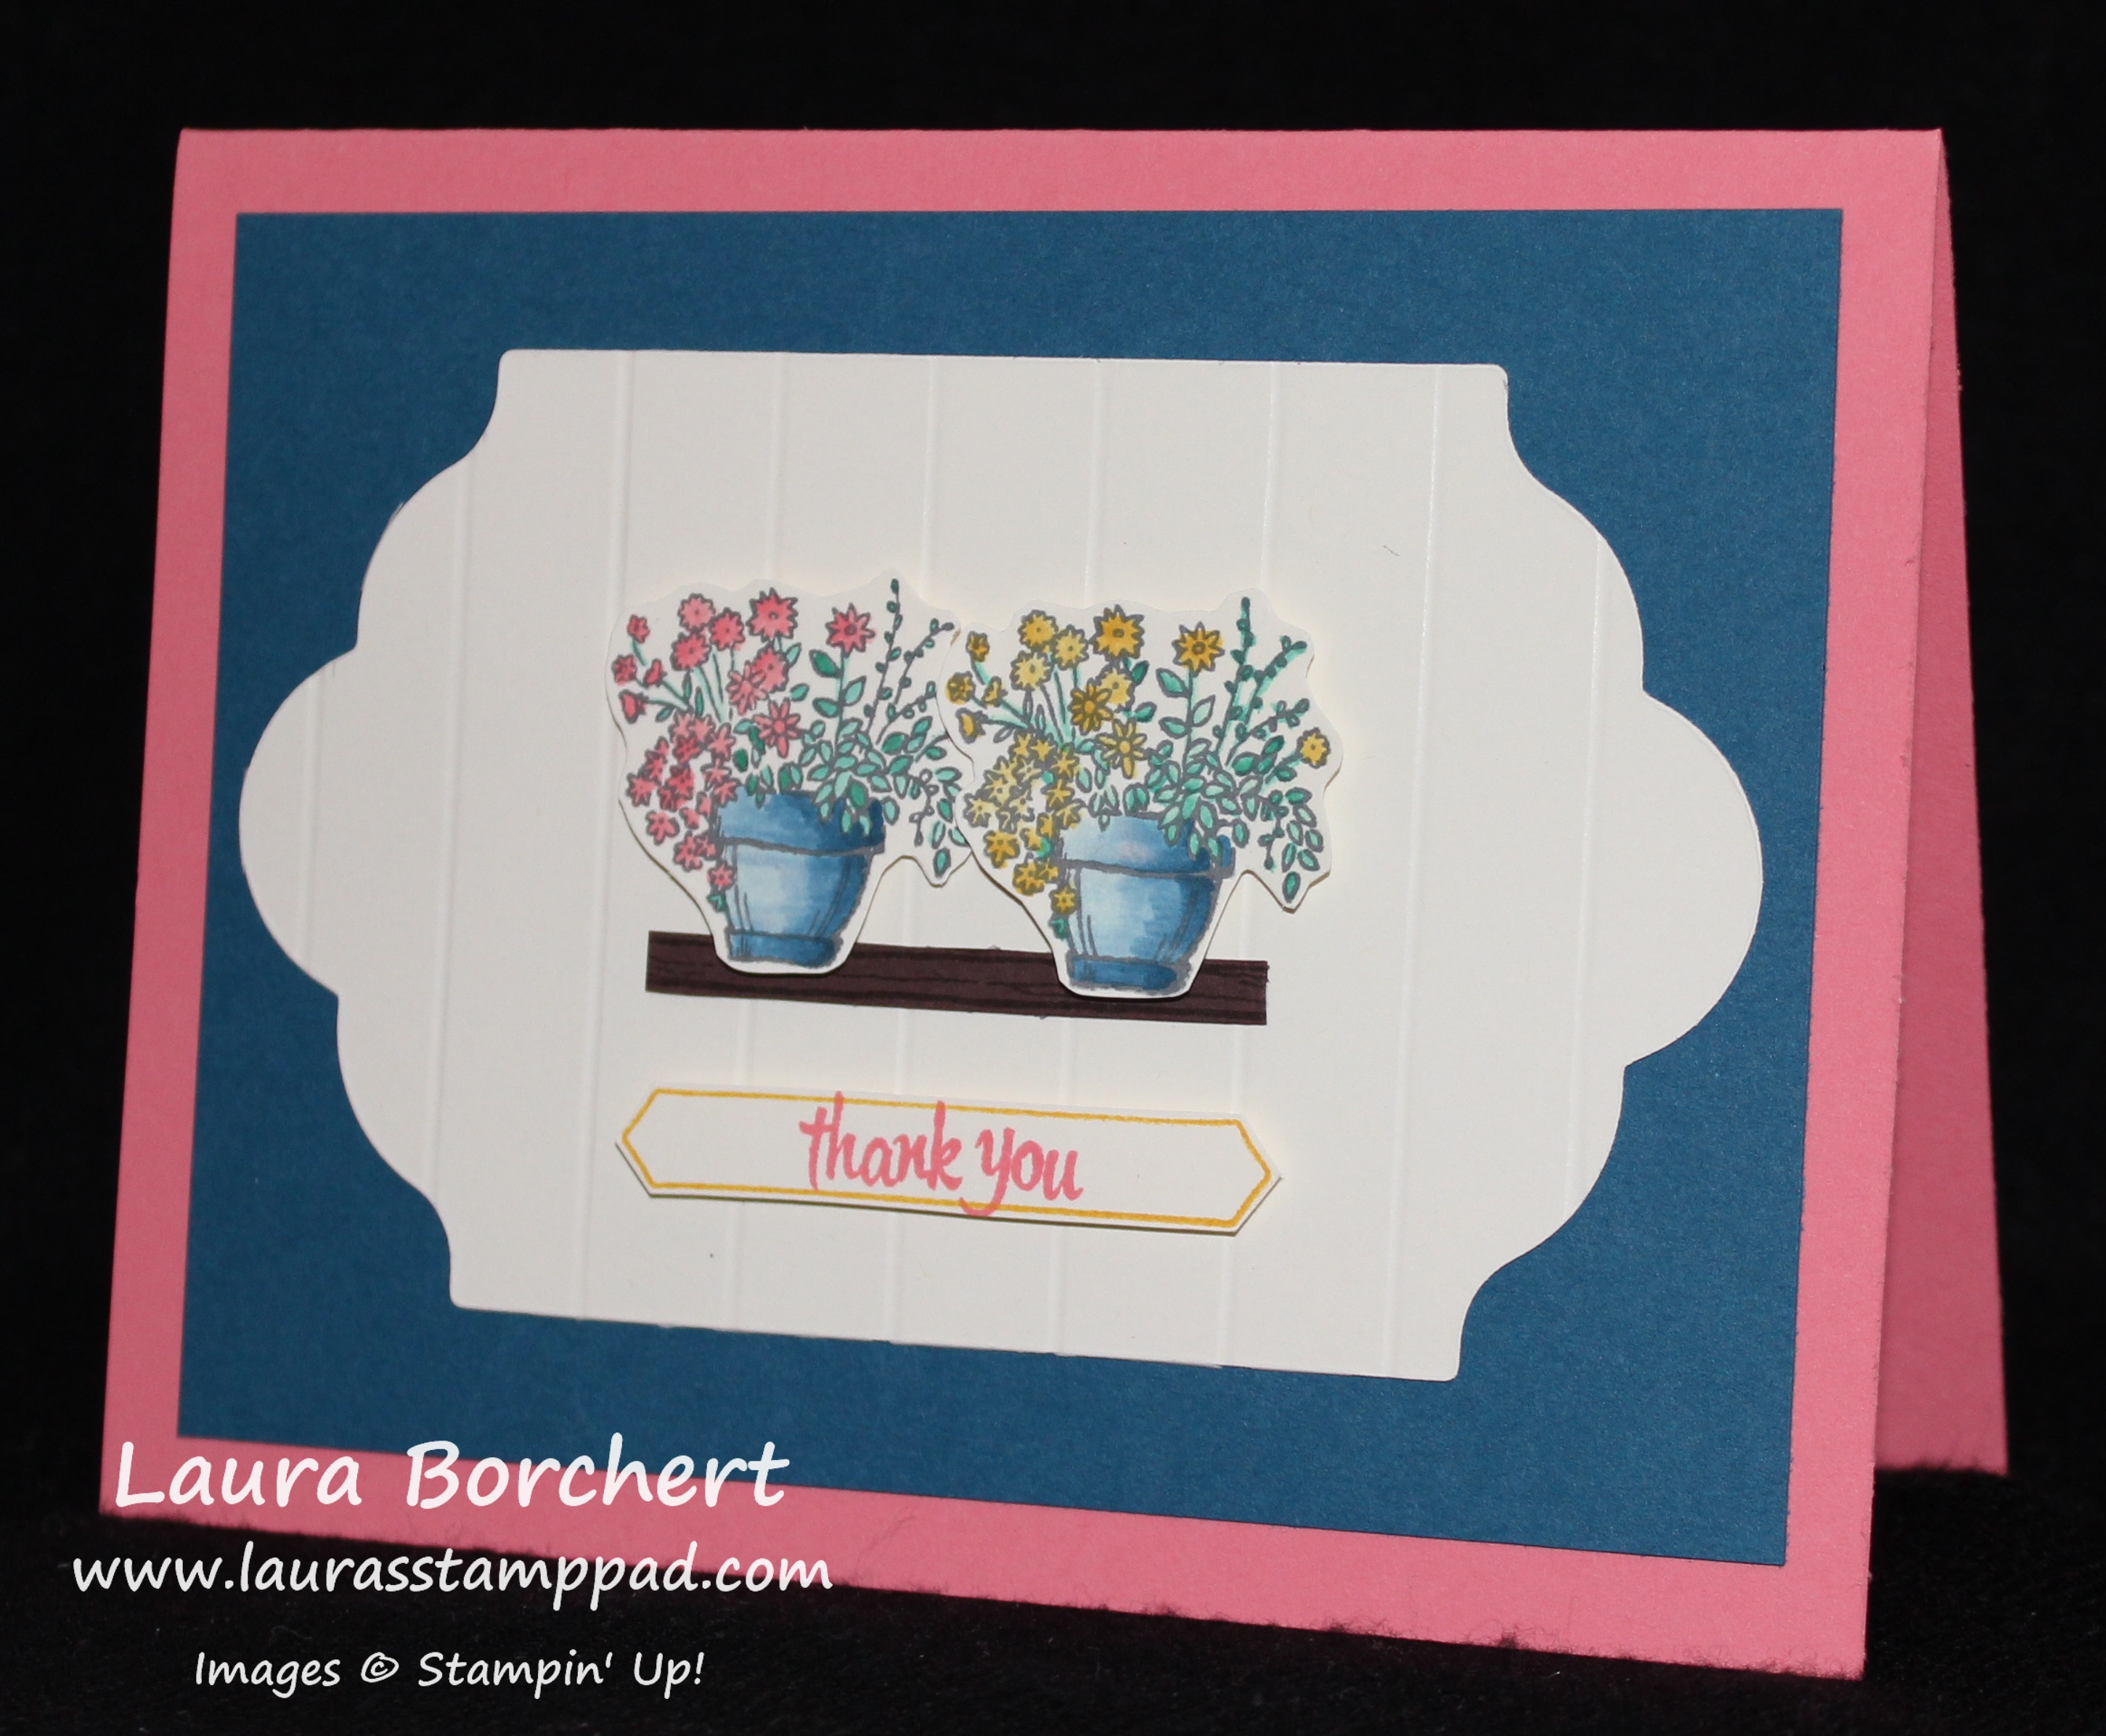
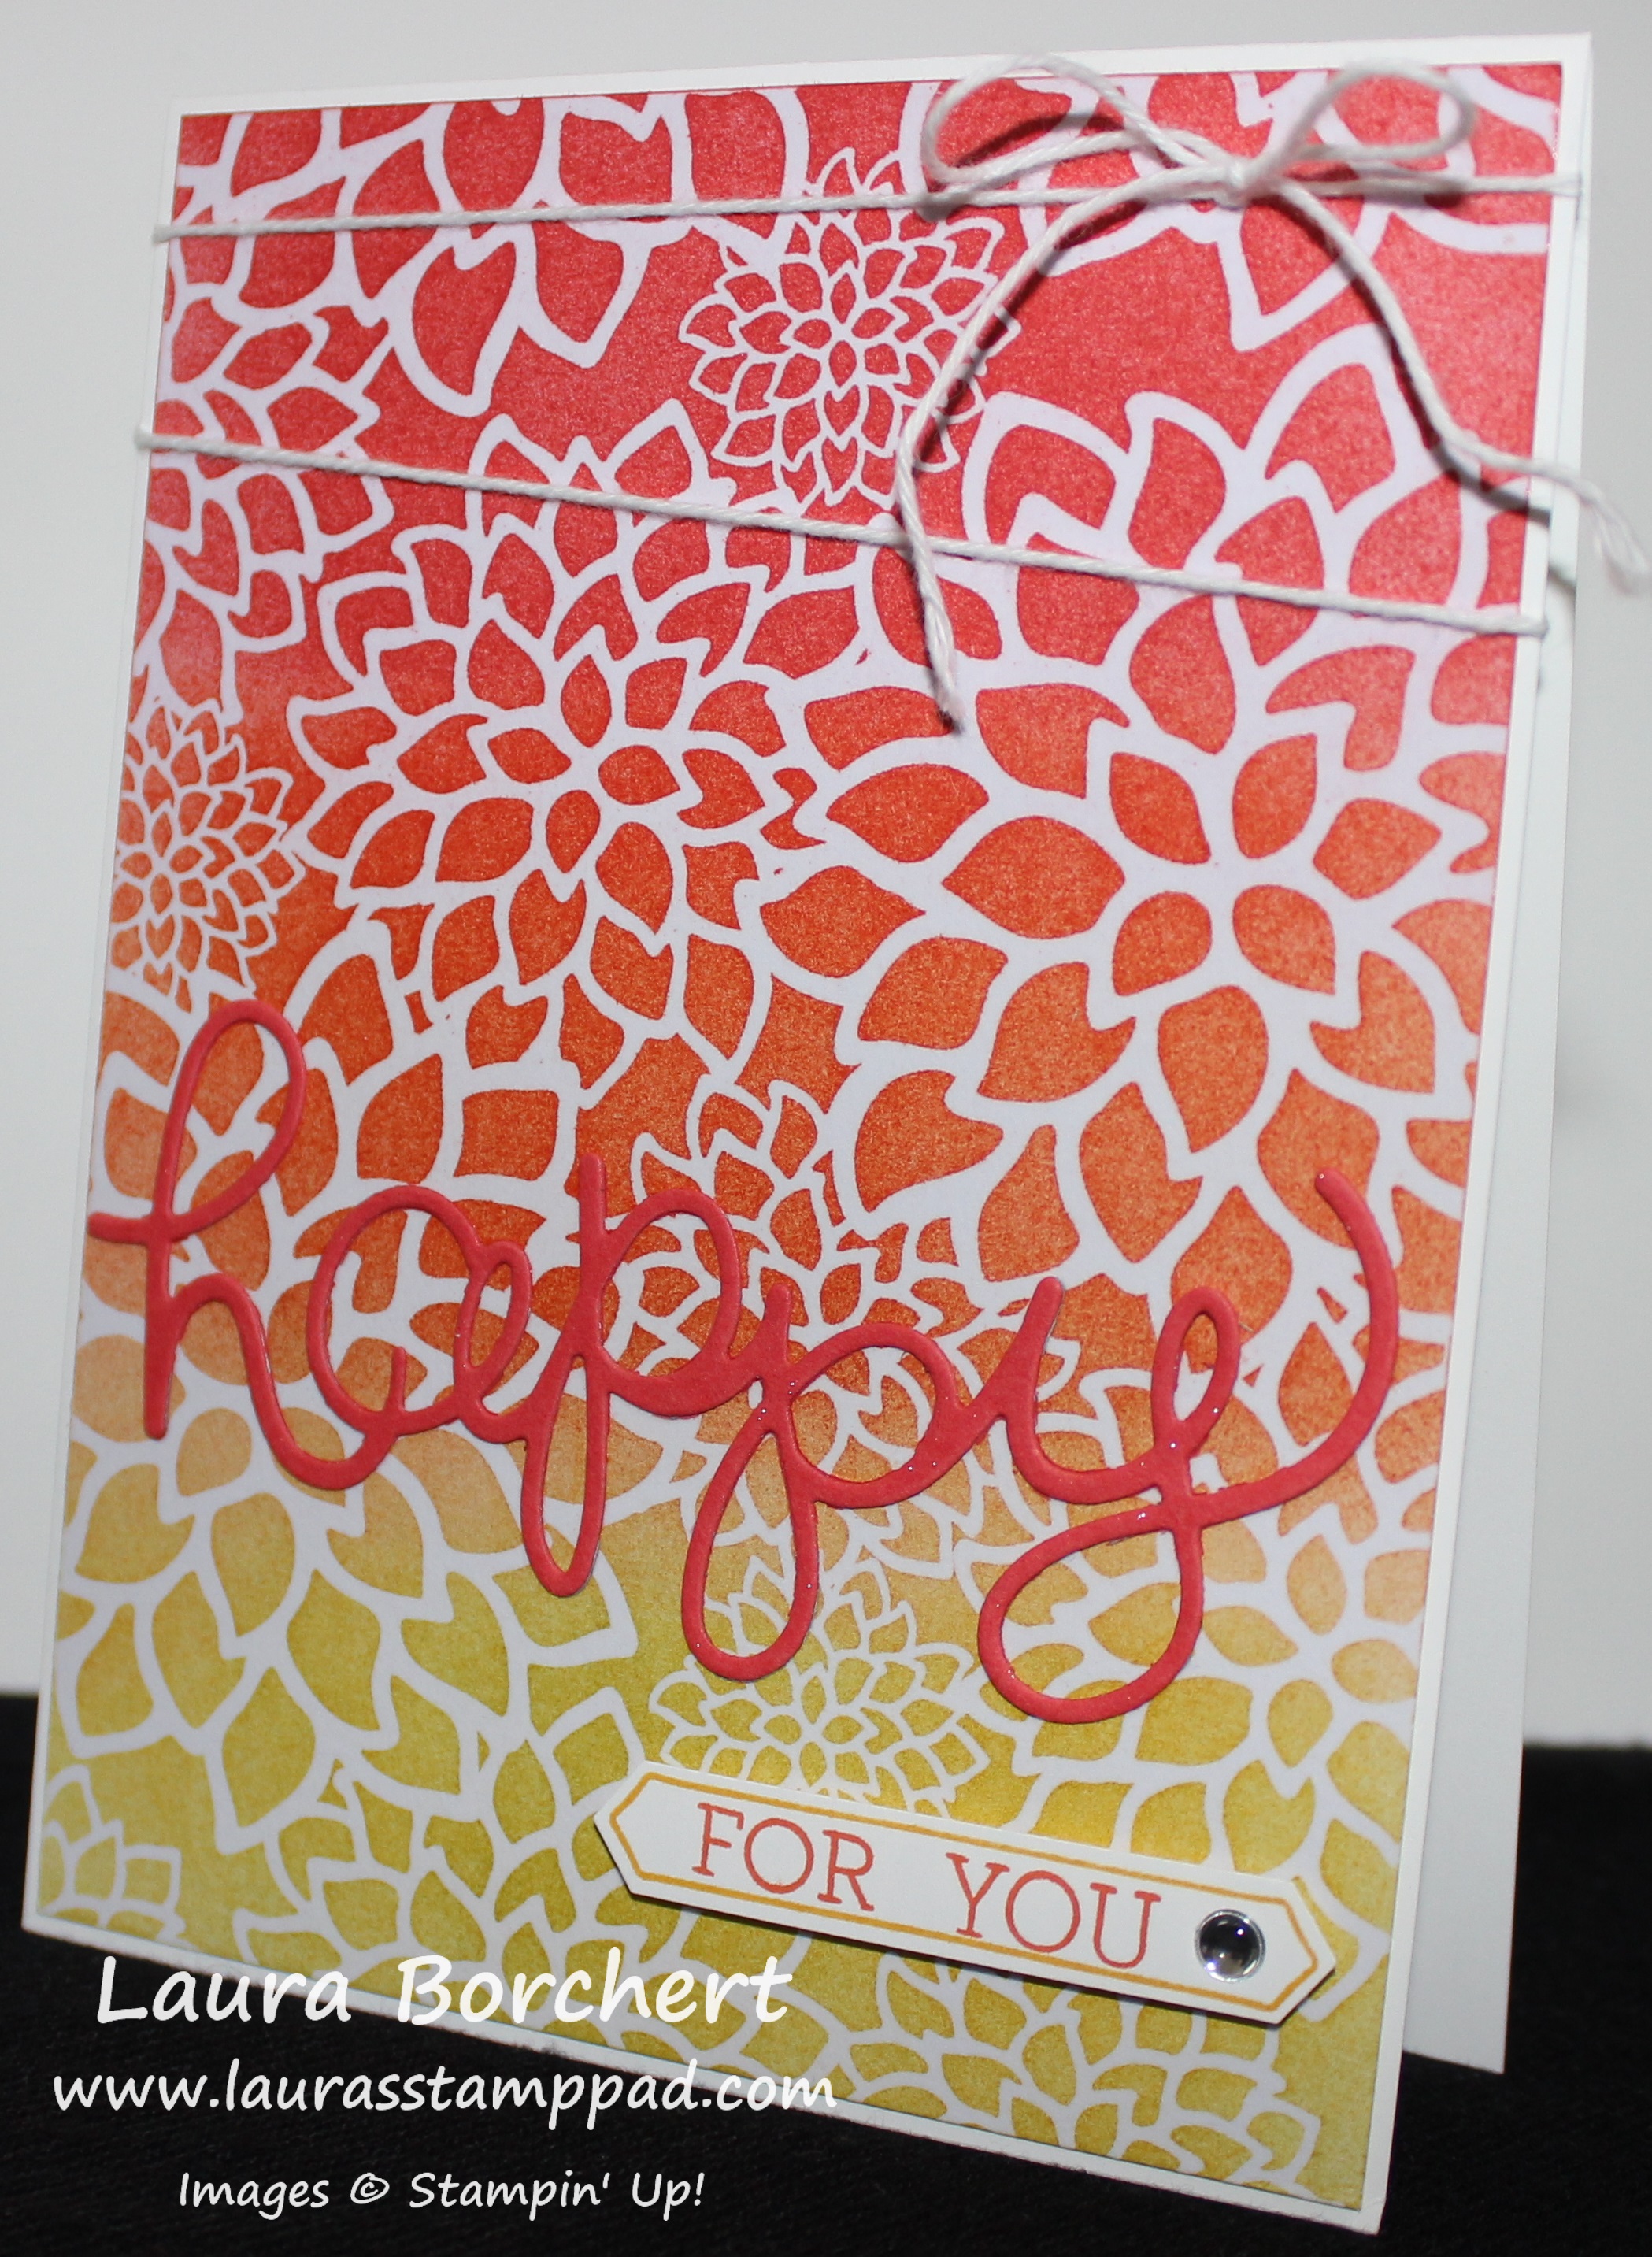
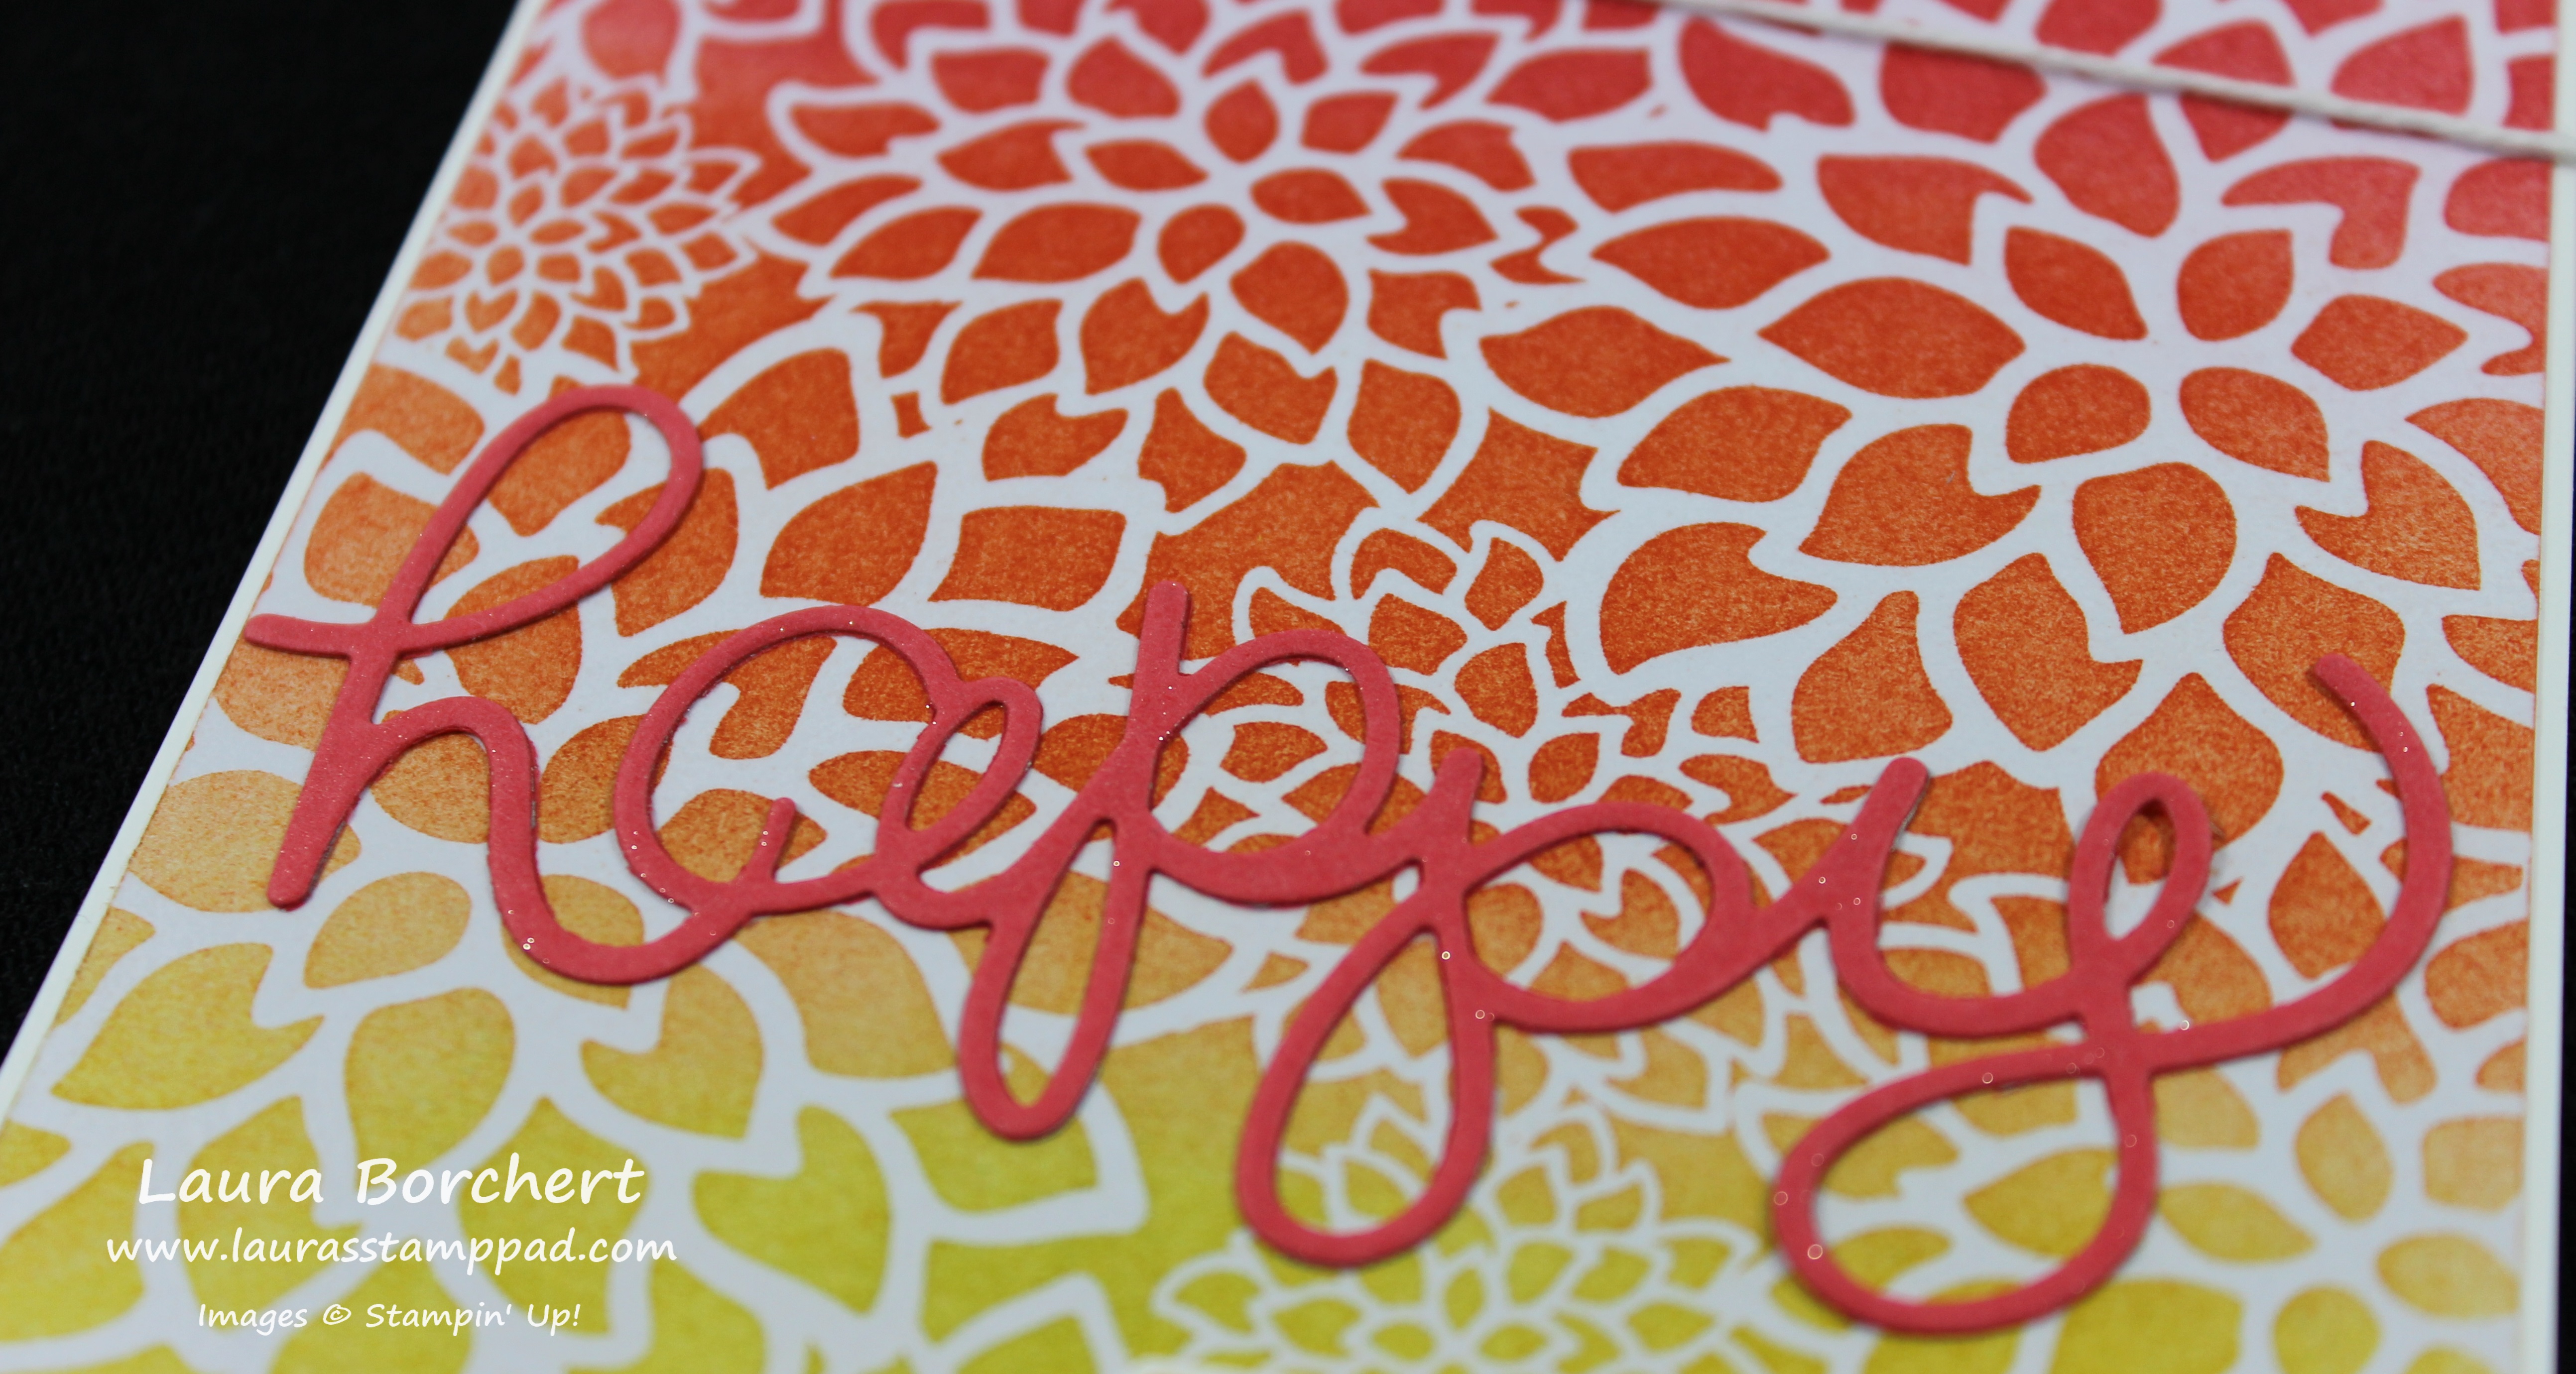
For this card, I started with an Elegant Eggplant card base and I layered on a piece of Crushed Curry measuring 4-1/8″ x 5-3/8″. Then I took a piece of Whisper White (4″ x 5-1/4″) and started to decorate it. I loved the border from the Flourish Thinlits and just had to play with it. I die cut it in Elegant Eggplant and it popped out of the thinlit super simple with the Big Shot Die Brush. I love that tool so much! I added the borders to the Whisper White cardstock with the Fine Tip Glue Pen. I didn’t outline the entire piece but just the ends and a few of the intersections in the middle. Then I stamped the greetings in Crushed Curry in the upper left corner and lower right corner from the Flourishing Phrases Stamp Set. I love how this set as coordinating greeting to be used on the outside and inside of the card or use them both on the front like on this card! Then I die cut a few of the flowers in Elegant Eggplant and Crushed Curry and added those to the card. To finish it off, I placed Enamel Shapes in the middle of the flowers. I really love how this turned out and yellow and purple isn’t always a color combination I use a lot!

Have you played with the Flourish Bundle yet? Flowers, flourish, and borders….what more do you want? 🙂 I’ll be posting a few more samples I have created soon so stay tuned and be sure to subscribe so you will get a notification each time I post!!! Subscribe by adding your email address in the upper right corner of the page!

Happy Stampin’

~Laura


Sponge Brayer Over Everything!!!

Posted on

Emboss Coloring, www.LaurasStampPad.com

Once you start playing with your Sponge Brayer, you won’t be able to put it down!!! You can see more ways I used a Sponge Brayer here and here!!! It’s just so much fun and super easy! The Sponge Brayer comes with 2 handles and 4 sponges. You can rinse out the sponges when you are done and allow them to dry and use another color. How fabulous is that?

In these samples, I simply used the Sponge Brayer to add color to the cardstock that was ran through the Big Shot in an Embossing Folder. Simple, fun and such different looks with every folder you use!!

Lovely Lace, www.LaurasStampPad.com

For this card, I took a piece of Whisper White (4″ x 5-1/4″) and ran it through the Big Shot in the Lovely Lace Embossing Folder. Then I took a Sponge Brayer and Flirty Flamingo Ink and rolled over the cardstock over and over until the I got the color I liked it. You don’t want to press super hard, but just a light roll back and forth! I added this to a Pool Party card base and tied some Pool Party Satin Stitched Ribbon around it. For the greeting, I used the Rose Wonder Stamp Set and die cut it with the coordinating Rose Garden Framelit. I added the greeting to the card with Stampin’ Dimensionals!

Elegant Dots, www.LaurasStampPad.com

For this card, I took a piece of Whisper White (4″ x 5-1/4″) and ran it through the Big Shot in the Elegant Dots Embossing Folder. Then I took a Sponge Brayer and Night of Navy Ink and rolled over the cardstock. Be sure to roll in both directions – side to side & up and down! I added this to a Melon Mambo card base and tied some Melon Mambo Stitched Ribbon around it. The ribbon is criss-crossed on the inside of the card. For the greeting, I used the Rose Wonder Stamp Set again and die cut it with the coordinating Rose Garden Framelit. I added the greeting to the card with Stampin’ Dimensionals because I find that they work best on a bumpy surface like this one!!!

lucky stars, www.LaurasStampPad.com

For this card, I actually ran the Sponge Brayer over the de-bossed side…..the side where the stars pop down and not up! I love this rustic/cowboy look that came out of it. I layered it onto Cherry Cobbler (4-1/8″ x 5-3/8″) and then onto a Crumb Cake card base. For the greeting, I used the Tin of Cards Stamp Set and Decorative Label Punch to cut it out. I added a few pieces of the New Burlap Ribbon on the back of the greeting! I love how this card turned out!!!

To see this in action, check out the Video Tutorial below or click here. Don’t forget to give it a thumbs up if you liked it and be sure to subscribe if you are new!!! Let me know in the comments below which card is your favorite!!! I love the stars but I also love the Elegant Dots because of the color combination.

Happy Stampin’

~Laura


Just a Note…

Posted on

Just a Note, www.LaurasStampPad.com

Happy Monday and Happy Birthday Month to me!!! I love celebrating all month long. Today I wanted to share this stunning monochromatic beauty with you! The greeting makes this card perfect for sending to a friend or family member just to say hello!! I love it!!!

I started with a Whisper White card base and layered Night of Navy measuring 4″ x 5-1/4″. Then I took a piece of Whisper White measuring 3-3/4″ x 5″ and added some of the Floral Boutique Designer Washi Tape to the top and bottom. Now that the washi tape is in place I know where I can stamp my greeting which is from the Flourishing Phrases Stamp Set. I stamped it in Night of Navy. I die cut the flourish image from the coordinating Flourish Thinlits (Bundle & Save 10%) in Night of Navy cardstock. The Fine Tip Glue Pen is perfect for adding glue to the back of the intricate details of the flourish image! I then placed that onto the card front and you are all done!!! I will say that I placed the flourish onto the cardstock before I did the Washi Tape and you can see I went a little too high with the flourish image. I thought for sure I allowed enough space which is why I suggest putting the Washi Tape down first! 🙂 I’m here to make mistakes for all of you and help you do it the right way!

Do you like monochromatic cards? Let me know in the comments below what your favorite color is to use with Whisper White!

Want to see more samples with the Flourishing Bundle, check them out here and here!

Happy Stampin’

~Laura


Floral Affection!!!

Posted on

Floral Affection, www.LaurasStampPad.com

I have been having lots of fun with the Affectionately Yours Suite! The papers are beautiful, the stamp set greetings are perfect for generic cards, and the embossing folders are detailed! This card is fairly simple but has lots of details and texture to still give it that WOW look!!!

I started with a Mint Macaron card base and layered on a piece of the Affectionately Yours Designer Series Paper (4″ x 5-1/4″). I tied some of the Mint Macaron Sheer Linen Ribbon around the top of the card and into a knot. Then I took a piece of Crumb Cake cardstock (4″ x 2-1/2″) and ran it through the Big Shot in the Floral Affection Embossing Folder. These little folders are perfect for a great accent piece on your project! I added this piece to the card front. Then for the greeting, I used a scrap piece of Whisper White and stamped the greeting from the Love & Affection Stamp Set. I punched the banner tips on either end of the greeting with the Triple Banner Punch and attached it to the card with Stampin’ Dimensionals. To finish off the card, I added some Dapper Denim Enamel Dots to either side of the greeting! I love all of the textures and the colors!!!

You all know how much I love my flowers. You can check all the flower creations I have made by clicking here. Let me know your favorite stamp image – textures? backgrounds? greetings? flowers? in the comments below!!!

Happy Stampin’

~Laura


Swirly Flowers!!!

Posted on

Swirly Flowers, www.LaurasStampPad.com

The Swirly Bird Stamp Set and coordinating Swirly Scribbles Thinlits (Bundle & Save 10%) can even make FLOWERS!!! You know my love for flowers is strong and while this set doesn’t look like a floral set, IT IS!!!! I love all the different things you can create. You can check out some other samples here, here and here!

I started with a Flirty Flamingo card base! Then I took a piece of Whisper White cardstock (4″ x 5-1/4″) and stamped the largest swirl from the Swirly Bird Stamp Set in the left corner in Flirty Flamingo. Then I took the solid circle stamp and stamped off once in Flirty Flamingo and then stamped it on the card. I took the medium swirly image and stamped full strength Flirty Flamingo over the circle to create the flower! I stamped the little 6 petal flower in Crushed Curry and the small swirly in Perfect Plum. Using the small and large leaf, I stamped near the flowers. With the leaves, I also stamped twice a few times for a variation in color. I love how you can get lots of different colors from one ink pad just by stamping off. I made sure to leave the upper right corner empty so that I could put my greeting there and it would pop some more! Also, remember that when creating a background be sure to fall off the edges of your paper so that it looks like the pattern continues on and on rather than stamping just in the middle. For the greeting, I used the Rose Wonder Stamp Set. I stamped the border and greeting in Perfect Plum onto Flirty Flamingo. Then I used the coordinating Rose Garden Thinlits to die cut the label. I took some of the Silver Metallic Thread and wrapped it around my 4 fingers about 8-12 times. Then you will slide the loops off your fingers and gather them into an “8”, twist in the middle, and then lay them on the back of the greeting. Place Stampin’ Dimensionals over the top of the thread to hold it in place and then add to your card! I really found that the twisting helps to make the loops flare out more (even though the sample above doesn’t look very flared). I am really starting to LOVE the thread/twine/ribbon loops behind a greeting or focal image. It can be tricky but the more you do it, the easier it gets! I love the texture and bling it adds to a project!!! Do you like the look? Let me know in the comments below!

Happy Stampin’

~Laura

Click here to start shopping and earning Bonus Bucks!!!

Bonus Days


Flourishing Phrases!!!

Posted on

Marriage is a Journey, www.LaurasStampPad.com

The Flourishing Phrases Stamp Set and coordinating Flourish Thinlits (Bundle & Save 10%) caught my attention right away because of the detailed flourish image, the flowers, and the AMAZING greetings. It is only of those fabulous sets like the Rose Wonder Stamp Set and coordinating Rose Garden Thinlits with great images and greetings. You can check out some of those samples here, here and here! There are endless ways to use that bundle as well and this new one!

For this card, I started with a Bermuda Bay card base and then I layered a piece of Basic Black (4″ x 5-1/4″). Then I took a piece of Whisper White (3-3/4″ x 5″) and stamped the Watercolor Wash Stamp Set on the background in Bermuda Bay. You can always use an Aqua Painter to create the same look but I wanted a really dark solid image so I went with the stamp! I stamped the greeting from the Flourishing Phrases Stamp Set in the left corner in Basic Black (with the coordinating greeting….Good Thing You Get To Bring Your Best Friend Along…on the inside)!

Marriage Advice, www.LaurasStampPad.com

I wrapped some of the Black Metallic Thread around the cardstock a few times and tied it into a knot. Then I added this piece to the card front. I die cut the flourish image out in Basic Black with the Big Shot and Precision Base Plate. The Big Shot Die Brush makes it super easy to pop the cardstock out of the die and to pop out all of the little pieces. I used the Fine Tip Glue Pen to adhere this piece to the card and I finished it off with Rhinestones on each of the dots. I love the Black and White with a POP of color. You could really use this pattern for any occasion! I love it!!!

To see more of the Flourishing Phrases Bundle and samples, check out this reveal video here or click below. Be sure to give it a thumbs up if you liked it and don’t forget to subscribe if you are new! Let me know in the comments below which card is your favorite!

Happy Stampin’

~Laura

Bonus Days

Click here to start shopping and earning your Bonus Bucks!!! If you purchase the Flourishing Bundle, you will earn $5.00 to spend in August on anything you wish!


Flower Pots on a Shelf!!!

Posted on

Flowers on a Shelf, www.LaurasStampPad.com

This card is just stunning – the coloring, pink, flowers, and that cool texture of the wall! Doesn’t the background look like wall paneling? I sure do and love the added texture! So let’s get started on this beautiful card!

I started with a Flirty Flamingo card base and added a piece of Dapper Denim measuring 5″ x 3-3/4″. Then I took a piece of scrap Very Vanilla and stamped the flower pots from the Sitting Here Stamp Set in Basic Gray Archival Ink. I used this ink so that it wouldn’t bleed when I watercolored the image and because I wanted a lighter shade than black. I used an Aqua Painter to color using Dapper Denim for the pots, Emerald Envy for the greenery and Flirty Flamingo and Crushed Curry for the flowers. If you would like to see a Video Tutorial on coloring with Aqua Painters, check this out! Set the flowers aside to dry before cutting them out. While they are drying, you can die cut the background with the Lots of Labels Framelits. To add the lines for a panel look, I placed it in the Stampin’ Trimmer and scored every 1/2″ inch. You could also use a straight edge and a Bone Folder. I added this to the card front!

Flower Pots, www.LaurasStampPad.com

For the shelf, I took a scrap piece of Chocolate Chip cardstock and stamped the bottom of the swing from the Sitting Here Stamp Set in Chocolate Chip. Then I cut off that bottom piece of the swing below the cushion. This gives the shelf some texture and wood look! I added the shelf to the “wall” and then I added the potted flowers with Stampin’ Dimensionals. For the greeting, I used the Thoughtful Banners Stamp Set. I stamped the border in Crushed Curry and the greeting in Flirty Flamingo. I punched it out with the Classic Label Punch. I added the greeting the to the card with Stampin’ Dimensionals! Love it!!!!

Do you love flower cards as much as me too? Do you like watercoloring? Let me know in the comments below if I’m all alone here or if you all love it too!!!

Happy Stampin’

~Laura

Bonus Days

Bonus Days are here!! For every $50 you spend, you will earn $5 to use from August 2nd – 31st!!! Click here to start shopping!!!


Technique Tuesday – Using a Sponge Brayer!!!

Posted on

Happy Tuesday!!! I hope you are all having an amazing week! I have a fabulous technique to share with you today!!! I am showing you how to use the New Sponge Brayer on the Irresistibly Floral Designer Series Paper so you can get this fabulous look!!!Happy For You, www.LaurasStampPad.com

I am having so much fun with the Irresistibly Floral Designer Paper because it has FLOWERS and there are so many different fun ways to add color. I love it!!!

SUPPLIES NEEDED: Irresistibly Floral Designer Series Paper, Sponge Brayer, Ink Colors of Choice

I started with a piece of the floral image from the Irresistibly Floral Designer Series Paper measuring 4-1/8″ x 5-3/8″. I didn’t want much of a border on my card front, just the beautiful flowers! I started with the lightest color – Daffodil Delight and rolled the Sponge Brayer over the ink pad. The sponge won’t pick up the ink like your are mopping up color, it will just be ever so slightly colored. Then I rolled it over the end of the Designer Paper – back and forth. The color will start to appear and you can continue until you have the desired shade. You will want to go about 1/3 of the way across the paper. Using a paper towel, you will want to wipe off any excess ink as it tends to sit on top of the embossed image. Then I changed out the sponge to a new one and did the same with Tangerine Tango. You will want to go over the top of the yellow a bit on that overlap portion so that it doesn’t look like stripes but instead like it fades into the next color. Wipe off the excess ink with the paper towel and then change out the sponge and finish off the Designer Paper with Watermelon Wonder. Be sure to go over that Tangerine Tango just a bit so your colors fade into each other! Wipe off the excess ink and you are all done!!! You can wash out your sponges with water and just keep squeezing them until they run clean and allow them to dry.

HAPPY, www.LaurasStampPad.com

To finish off the card, I added this piece to a Whisper White card base and tied some Whisper White Baker’s Twine around the top of the card. For the greeting, I die cut the Happy from the Hello You Thinlits. I brushed some Wink of Stella over the top for a little shimmer and added it to the card front with the Fine Tip Glue Pen! If I would have planned this card out a little better, I would have put the yellow on the top of the card and placed the greeting up there so it popped some more. I already had it adhered to the card so I just went with it! I stamped the Crushed Curry border from the Thoughtful Banner Stamp Set and added the greeting from the Crazy About You Stamp Set (it coordinates with the Hello You Thinlits). I punched out the greeting with the Classic Label Punch and added it to my card with Stampin’ Dimensionals. I added a little Metallic Enamel Shape for a little more bling! This card is so bright and cheery and could be used for any occasion!

If you would like to see this in action, check out the Video Tutorial below or click here. Don’t forget to give it a thumbs up if you liked it and be sure to subscribe if you are new. I post every Tuesday and Thursday!

Happy Stampin’

~Laura


How to Create a Bird’s Nest!!!

Posted on

Bird's Nest, www.LaurasStampPad.com

I love this card for the colors, the amazing greeting, and that sweet bird’s nest!!! It’s the perfect card for any occasion or just a note to send to a friend to brighten their day and let them know you care! Love!

For this card, I started with a Marina Mist card base and layered on a piece of the Neutrals Designer Series Paper measuring 4″ x 5-1/4″. I used the Crumb Cake color. Then I took a piece of Whisper White (3-1/4″ x 4-1/2″) and stamped the greeting in Marina Mist Ink from the Layering Love Stamp Set. Then I got started on the bird’s nest. I die cut the swirly wreath with leaves from the Swirly Scribbles Thinlits Set in Chocolate Chip cardstock. I cut it in half and then used a few of the pieces I cut off to round out the top of the nest from both sides adhering with the Fine Tip Glue Pen.

Birdie in a Nest, www.LaurasStampPad.com

I took a scrap piece of Crumb Cake and placed it behind the next and trimmed off the excess. Now that you have your little nest, it’s time for the birdie and eggs. I actually stamped them on scrap paper and fussy cut them out but you could always stamp them directly to your card and then place the nest on top. Both of these images are in the Swirly Bird Stamp Set and I did the bird in Marina Mist and the eggs in Crumb Cake. Don’t forget that you can Bundle & Save 10% when you purchase the Swirly Bird Stamp Set and Swirly Scribbles Thinlits together! I just love how you can let your creativity flow to make something fabulous like this!

Today on my YouTube Channel, I’m talking about the Precision Base Plate and my thoughts on the product! I did use it for die cutting the next above! Check out the video below or click here! Don’t forget to give it a thumbs up if you liked it and don’t forget to subscribe if you are new. Let me know in the comments below if there is another Stampin’ Up! product you would like to see me review!

Bonus Days

Bonus Days start TODAY!!! For every $50 you spend, you will earn $5 to use from August 2nd – 31st!!! Click here to start shopping!!!

Happy Stampin’

~Laura


Technique Tuesday – Irresistibly Floral Fun!!!

Posted on

Happy Tuesday!!! You know what that means! I have a fabulous technique to share with you today! The many different ways to emboss resist (the easy way)! The Irresistibly Floral Designer Series Paper is 12″ x 12″ white paper that is embossed in clear with a design – flowers, stripes, dots, and more! It is stunning paper and you can add color to use and really make the images POP!!!

Blue.Green Stripes, www.LaurasStampPad.com

How fabulous is this card??? It would have been perfect for Father’s Day! It’s just screams Man Card!!! Love it!!!

SUPPLIES NEEDED: Irresistibly Floral Designer Paper, Sponge Daubers, Ink of Choice

I cut a piece of the stripes Irresistibly Floral Designer Series Paper into a 4″ x 5-1/4″ piece. For this one, I used Sponge Daubers to color the stripes. I felt like I had more control and the sponge dauber is about the width I wanted in color! I started in the middle and worked my way to the sides. I just went up and down with the dauber adding as much color as I wanted. Once I was done with each color, I wiped off the excess ink with a paper towel! You can do a rainbow of colors or pick any amount of colors you wish! I used Emerald Envy and Dapper Denim. Then I added this piece to a Emerald Envy card base and wrapped some of the Whisper White Thick Baker’s Twine around the card. It really gives this card a nautical look, doesn’t it? For the greeting, I die cut a label from the Lots of Labels Framelits with the Big Shot. I stamped the greeting from the Tin of Cards Stamp Set and added a few of the Stars from the In-Color Enamel Shapes Pack. I added the greeting piece to the card with Stampin’ Dimensionals. It is a big bumpy over the ribbon so you will for sure want to use Dimensionals or you can always place the greeting below the ribbon!

You can always change up the colors or even add color in other ways like with Markers, Stamping, Spritzers, and Sponge Brayers. There are endless possibilities.

If you would like to see all of the paper in the Irresistibly Floral pack and the different ways to color it, check out the video tutorial below or click here. Don’t forget to give it a thumbs up if you liked it and be sure to subscribe if you are new. I post every Tuesday and Thursday!

Happy Stampin’

~Laura