Frenzy Friday!!!

Posted on

Happy Friday Everyone!!!! The weekend is near! Will you be stamping this weekend? Traveling? Having a Party? Relaxing? I will be doing a little of everything! I am Traveling to the next town over for a Stamp Party on Saturday and then Relaxing on Sunday!!! Wooohooo I hit them all! To kick off the weekend, I thought I would share this week’s Weekly Deals and a NEW Stamp Set that just came out!!!!

Weekly Deals 3.11.2014, www.LaurasStampPad.com

So many amazing Big Shot items this week!!!! LOVE THEM! The Dress Form Pop’ N Cuts…amazing! So perfect for girls of any age! And the Circle #2 and 3″ Circle are must-haves because after all we can use our Paper Trimmer for Squares but we need a Die for the Circles!!!! And Embossing Folders are the most amazing thing ever! I love how a little crank through the Big Shot can give so much design and texture to your project! You can check out some samples using embossing folders here and here! I recently love using the Argyle Embossing Folder with my Foil Sheets for a Diamond-Plate look! More on that coming soon! Umm…hello Man Cards! Right? I think diamond plate and man cards go together! Purchase it today and by the time it arrives, I will have that sample on here!! 🙂

WAIT! That’s not all!!! A new Stamp Set came out this week too!!!! Sweetie Pie and Sweetie Pie Frames Photopolymer Stamp Sets are here!!! How cute are these little faces! You can add them to the frames for a picture perfect card or stamp them and put them on popsicle sticks for puppets OR add it to Dress Up Framelits (and pop-up die which is on sale this week) for the cutest project ever!!!! And they are just $13.95 each!!! Now that’s a steal!

Happy Shoppin’

~Laura


Burlap & Blooms Wreath Kit!!!

Posted on

Burlap Wreath, www.LaurasStampPad.comWhen I first looked through the Occasions Mini Catalog, my eyes caught this amazing Burlap and Blooms Wreath Kit and I knew I had to have that for my front door wreath! It is fabulous! The kits comes with all of the flower to assemble, the burlap, the twine, the buttons, and directions! All you need is a hot glue gun! I actually comes with a thick cardboard ring for you to use but I just used the foam wreath that I have used a million times and just redecorate it! Here is another photo of the wreath that a customer of mine did and she used the cardboard wreath that comes with the kit!

Burlap Wreath, www.LaurasStampPad.com

I love how she mixed the colors of the spikey flowers….the ones that are loops of paper wrapped around each other.  So many ways you can make it different from the original and SO SPRING-Y!!!! I love it. I also went to deliver an order at a customer’s house and what was on the front door…..THIS WREATH! She had completed her’s and it was look absolutely amazing on her front door. There is still time to get your kit and make this amazing wreath….after all here in IL, Spring is still not officially here with a mix of 70 degree weather and snow this week.

Happy Hot Gluing!!!

~Laura


More Cards in a Box!!!

Posted on

Yesterday I shared with you how to make these amazing Cards In A Box!!! Today I thought I would share with you some of the different Cards In A Box that my Stamp Club attendees created! These ladies are sooooo talented and I love their different styles!! If you are interested in joining Stamp Club, you can check out more information here!

Card In A Box Samples, www.LaurasStampPad.com

Card In A Box Samples, www.LaurasStampPad.com

I hope you enjoyed all of these samples! Post in the comments below of other ideas besides flowers that you think would be great for Cards In A Box!!

Happy Stampin’

~Laura


Technique Tuesday – Card in a Box!!!

Posted on

Happy Tuesday!!!! This is sooooo amazing! Don’t you love flowers? Don’t you love having flowers on your desk, workspace, or table? Wouldn’t you love to keep it around longer than a week and no watering needed? This card in a box is PERFECT for you then!!!!

Card in a Box, www.LaurasStampPad.com

This card went to my Best Friend to brighten her day after taking her Nursing Boards Exam!!!! I do kind of think it is a LOT of Strawberry Slush but it is amazing!!!! AND it still fits into a regular sized Medium Envelope!!!! I love that part!

Here is how to make this fabulous Card In A Box!!!!

1. Start with a piece of cardstock measuring 9″ x 5-1/2″ and you will score on the short side at 2-3/4″ and on long side score at 2-1/8″, 4-1/4″, 6-3/8″, and 8-1/2″!

2. You will then cut all of the score line on the top side to make your flaps for the box. Cut all the way down to the 2-3/4” score line. When you get to the end with the little strip you will cut that off!

Box Card Template, www.LaurasStampPad.com

3. Using sticky strip, apply it to the little flap that you have on the bottom portion and fold over the opposite end to adhere to your sticky strip.

4. For your inserts to hold all of pieces in your box, you will need two 3-1/8” by ¾” piece of cardstock and then you will score at ¾” from either end. Fold the scores lines opposite to create a Z pattern and then attach those inside your box, close to the top.

5. Now it is time to decorate. For the panels of your box, you will need 2” x 2-5/8” rectangles. For the back piece you will need 2” x 5-3/8” rectangle.

You can decorate with so many different items – balloons and birthday cake, other flowers, butterflies, and flowers….all I can think of is flowers. HELP ME! Put in the comments below what you would decorate your Card In A Box. I need ideas!!!! Check back tomorrow for more ideas that were made by my fellow stampers….but they are all flowers!

Happy Stampin’

~Laura


Kaleidoscope Kraziness!

Posted on

Happy Monday! I am going a little krazy today because it will be 70 degrees and sunny today and I couldn’t be happier (well I could if I knew we weren’t getting snow in 2 days, welcome to IL)!! But today I am showing you this fabulous card I made with the Kaleidoscope Designer Series Paper!!!

Perfect Pennants, www.LaurasStampPad.com

I love this paper for the colors – Strawberry Slush, Crushed Curry, Bermuda Bay, Basic Gray, and Basic Black! Love me some pink!!! This card was ripped and layered and tagged and stamped! I think I hit quite a few techniques in this one! I also used the Perfect Pennants Stamp Set which I love because the greetings are different and super fun and the images are amazing. There is this striped banner image, a polka dot banner image, heart, and star! LOVE! For the top of the tag, I used my Scallop Tag Topper Punch and then added a little Strawberry Slush Ruffled Ribbon. Instead of tying the ruffed ribbon, I just looped it through and then tied a little bit of Baker’s Twine around the ends to hold it in place! I really like the look of it and then you don’t have a bulky knot on your card! Win Win! I hope you enjoyed this card and it doesn’t make your eyes go krazy! 😉

Happy Stampin’

~Laura


Fabulous Friday!!!!

Posted on

Happy Friday!!! The weekend is almost here!!! In celebration, I wanted to share with you these amazing Weekly Deals!!!

Weekly Deals 3.4.14, www.LaurasStampPad.com

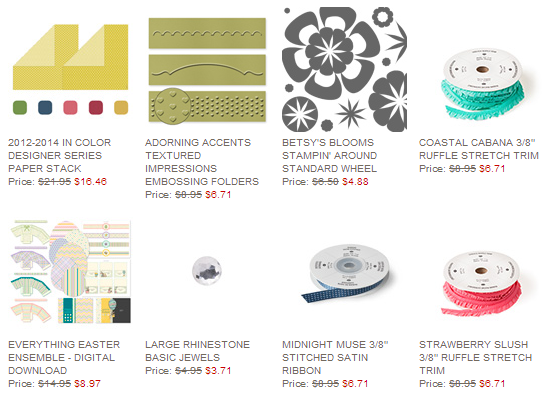
By far my favorite item this week is the RUFFLED RIBBON!!!! It is amazing, cute, ruffly, stretchy (yeah stretchy) and so much fun to use on projects!!!! AND it’s in Strawberry Slush (PINK) and Coastal Cabana!!!! There is a TON of ribbon on this spool (10 yards to be exact) and it is stretchy so you can use less and pull tight! Here and here and here are a few samples I have created with this ribbon!!!! There are a million other samples here on my blog so you can type in Ruffled Ribbon on the search bar and see more!

Large Rhinestones…..need I say more. BLING! Nothing better than a little bling on every project! Also, I love the Adorning Accents Texture Impressions Embossing Folders! Three folders in this set and each one offers a whole new look! Check out this amazing card which will be posted in more detail next week so consider this a sneak peak! 😉

I hope you enjoyed these samples and take advantage of these awesome deals! Be sure to order by Monday Night when these deals are over!!! Have a fabulous weekend and Happy Stampin’

~Laura


Perfect Pennants!!!!

Posted on

Perfect Pennants, www.LaurasStampPad.comI love the greetings in the the Perfect Pennants Stamp Set AND there is a heart and star which makes it even better! Here are a few samples I created using the Perfect Pennants Stamp Set and matching Banner Framelits (Bundle it and save 15%!!!) I used Marina Mist, Wisteria Wonder, and Pistachio Pudding – perfect pastel color combination!!! Of course, I used my Sponge Daubers to add a little color to the edge of my whisper white cardstock!!! LOVE IT! I couldn’t decide which stamps to use for this card so that is why I made two – one with hearts and one with stars. And then came the greeting tag….add ribbon, add some polka dots, keep it simple. So many options!!! That is what I love about stamping and paper crafting!!! For more samples using this stamp set, click here! Post in the comments below which one you like best!!!

Happy Stampin’

~Laura


Watercolor Wonder Designer Series Paper!!!

Posted on

The Watercolor Wonder Designer Series Paper is my FAVORITE paper right now! I have been using it on millions of cards (okay maybe not millions but close…see check out this one and more are coming!)

Watercolor Wonder DSP, www.LaurasStampPad.com

I think the 2 patterns that I love the most are this one with the coral and yellow flowers and the other one in the same pattern but in indigo and green! LOVE!!! And this card was super simple, I cut a piece of the Designer Series Paper to 4″ x 5-1/4″ to layer onto my card base and then I punched out my butterflies with the Elegant Butterfly Punch and Bitty Butterfly Punch! Of course I attached those to my card with Stampin’ Dimensionals (LOVE)!!! I then added a little Calypso Coral Baker’s Twine and my greeting! I stamped the greeting from the Perfect Pennants Stamp Set onto Whisper White and then used the matching Banner Framelits to cut it out! The cool thing is you can get these two items as a bundle and save 15%! Woot Woot! I hope you liked this card and be on the lookout for more cards using the Watercolor Wonder Designer Series Paper!!

Happy Stampin’

~Laura


Technique Tuesday – Flip Flap Fold Card

Posted on

Happy Tuesday!!! That means I have a fabulous technique for you and this one is super easy but has a BIG WOW factor!!!

Flip Flap Birthday Card, www.LaurasStampPad.com

This card fits in a regular Medium Envelope which is awesome! And the top flap flips open for you to write your greeting on the inside!!! Here is how it was made:

Supplies Needed: Cardstock, 2-1/2″ Circle Punch, 1-3/4″ Circle Punch, 2-3/8″ Scallop Circle Punch, Embossing Folder, Scallop Border Punch, and Stampin’ Dimensional

Your card base is 4-1/4” x 10-7/8” (by cutting the end off a little bit your card won’t bow) and you will score at 2-1/2” and 6-3/4”. Then on the small flap end, you will use any border punch to add a little decorative edge. Then you will take your 2-1/2” Circle Punch and push it all the way in with the 2-1/2” score line centered in the punch. This creates the peek-a-boo part of your card. For your decoration part, you will use your 1-3/4″ Circle Punch and 2-3/8″ Scallop Circle Punch. Be sure to only put adhesive on the bottom half of your layered decoration so you don’t have any sticky showing. I used the Bring On The Cake Stamp Set and Birthday Basics Designer Series Paper! You will then want to add a little decoration on the bottom portion of the card front. I created little balloons (click here to learn how to make the balloons) and attached them with Stampin’ Dimensionals, so that your flap will have something to slide under and hold closed.

Flip Flap Birthday Card, www.LaurasStampPad.com

 I hope you enjoyed this technique and try it out yourself!!! Leave me a comment on what you think!

Happy Stampin’

~Laura


Lovely Layers!!!

Posted on

Thinking of You Card, www.LaurasStampPad.com

Oh how I love this card and how amazing the layers look! Have you always wondered how people were achieving this look and how the flower/images line up so perfectly? Well I’m going to share a little tip with you and it’s really easy! You need the following pieces of cardstock:

~Card Base (5-1/2″ x 8-1/2″)
~Whisper White layer (this can be any size from 5-1/4″ x 4″ or smaller like mine above)
~Another rectangle in your Card Base color, smaller than your prior Whisper White piece (mine above is 3″ x 2″)
~Whisper White layer (1/4″ smaller than the rectangle above, mine is 2-3/4″ x 1-3/4″)

Now you will lay your small white piece onto the center or your larger white piece and stamp over both of them! Don’t worry if you don’t get a perfect image stamped around the area where the 2 layers match up because it will be covered when you layer in all of your pieces. Now layer your white stamped pieces onto your card base and matching rectangle. You could even do this with 3 layers of stamped images. There are so many possibilities! The Stamp Set I used here was Mixed Bunch!

Layer Card Steps, www.LaurasStampPad.com

I hope you try out this fabulous little trick! Send me your photos or comment below! I love hearing from you!

Happy Stampin’

~Laura